7 Oven Cleaning Tips to Remove Baked-On Grease Safely
Keeping your oven clean can make everyday cooking more pleasant, but removing old grease and baked-on food isn’t always easy. Spilled sauces, roasting juices, and cooking oils can leave stubborn marks on the oven walls, racks, and glass door.
These oven cleaning tips will help you tackle common kitchen messes using practical techniques that are appropriate for different types of ovens.
The most important rule is to check your appliance’s cleaning instructions before using any product or cleaning cycle. Some ovens have special interior coatings, self-cleaning systems, or steam-cleaning features that require particular care.
Whether you’re dealing with light splashes or stubborn baked-on grease, these seven methods will help you choose a safer approach without relying on harsh scrubbing or risky chemical mixtures.
Why Oven Grease Can Be Difficult to Remove
When food spills inside a hot oven, moisture gradually evaporates while grease, sugars, and other residues remain on the surface.
With repeated heating, those residues can become increasingly difficult to wipe away.
Grease may also collect around oven-door glass, removable racks, and corners that are easy to overlook.
The longer a spill remains, especially after repeated cooking sessions, the more effort it may take to remove.
However, stubborn residue doesn’t always require a stronger chemical cleaner. Often, the best approach is to soften the dirt first and then remove it using a cleaning method approved for your oven.
Before You Start: Essential Oven Cleaning Safety
Before trying any cleaning method:
- Turn the oven off and allow it to cool completely.
- Check your oven’s user manual for approved cleaning products.
- Keep children and pets away from the cleaning area.
- Use suitable gloves when recommended.
- Provide adequate ventilation when using cleaning products.
- Never mix household cleaning chemicals.
- Avoid spraying liquids into heating elements, electrical openings, gas burners, fans, or controls.
- Do not scrape delicate surfaces with sharp metal tools.
- Never force open an oven door locked during a cleaning cycle.
Important: The safest cleaning technique depends on whether you have a manual-clean, self-cleaning, steam-cleaning, or specially coated oven.
1. Remove Loose Crumbs and Fresh Grease First
Before tackling stubborn stains, remove loose food particles and surface grease.
This is one of the simplest ways to make the rest of the cleaning process easier.
How to Do It
Make sure the oven is completely cool.
Remove loose crumbs using a soft cloth, dry paper towel, or other method permitted by the appliance manufacturer.
Pay particular attention to the bottom corners and accessible edges.
If there is fresh grease on an approved interior surface, wipe it away gently with a damp cloth.
Avoid rubbing loose particles across the oven glass because gritty debris may scratch the surface.
Why This Helps
Removing loose debris prevents it from mixing with cleaning products and spreading across other surfaces.
It also allows you to identify which stains need further attention.
Practical tip: Cleaning small spills after the oven cools is often easier than allowing them to bake onto the surface repeatedly.
2. Use Warm Water and Mild Dish Soap for Light Grease
For many manual-clean oven surfaces, warm water and mild dish soap can help remove everyday cooking grease.
This is often a sensible starting point before considering stronger cleaning products.
How to Do It
Check your oven manual to confirm that mild soapy water is appropriate for the interior finish.
Fill a small bowl with warm water and add a little dish soap.
Dip a soft cloth or non-scratch sponge into the water.
Wring out excess liquid so it is damp rather than dripping.
Wipe the approved interior surfaces gently.
For more persistent grease, allow the soapy moisture to remain on the affected area briefly before wiping again.
Remove any soap residue with a separate cloth dampened with clean water.
Dry the surfaces with a soft cloth.
Why This Works
Dish soap contains cleaning agents that help loosen and lift oily residue.
Warm water can also help soften certain deposits.
The combination is useful for routine grease removal without aggressive scraping.
Important: Do not allow water to run into ventilation openings, electrical components, or parts of the oven that the manufacturer says must remain dry.
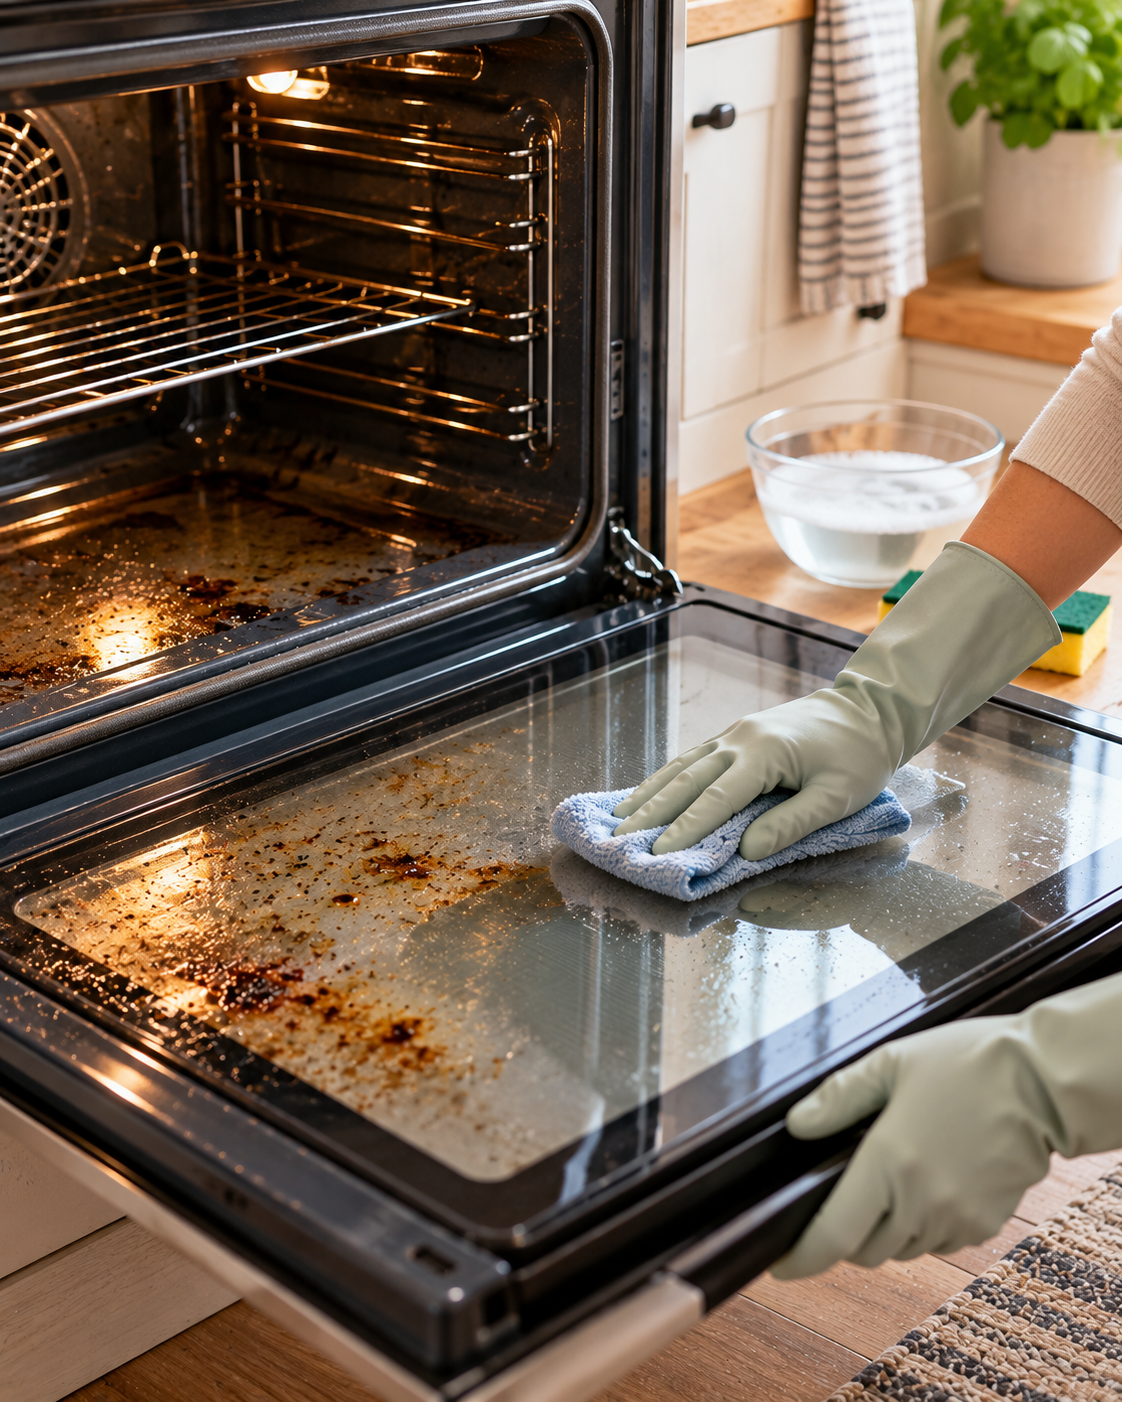
3. Soften Grease on the Oven Glass Instead of Scrubbing Hard
The glass oven door is one of the most visible places where grease accumulates.
Repeated heating can leave a brown film or individual baked-on splashes.
Harsh scrubbing may scratch the glass or damage surrounding surfaces.
How to Do It
Make sure the glass is cool.
Dampen a soft cloth or paper towel with mild soapy water.
Place it over the greasy area for approximately 10 minutes, provided your manufacturer’s instructions allow this method.
Remove the cloth.
Gently wipe the softened residue using a non-scratch sponge.
Repeat if necessary.
Finish by wiping with clean water and drying the glass.
Why This Helps
Allowing moisture to remain in contact with the residue gives it time to soften.
That can reduce the amount of scrubbing needed.
What About Grease Between the Glass Panels?
Do not pour cleaning liquids into door seams or ventilation openings.
Avoid dismantling the oven door unless the manufacturer provides a safe, specific procedure.
If dirt is trapped between glass panels, consult the appliance manual or a qualified service professional.
4. Clean Oven Racks Separately
Oven racks collect grease, crumbs, and baked-on drips.
Cleaning them separately often makes it easier to reach the oven’s interior.
How to Do It
Wait until the oven and racks are completely cool.
Remove the racks according to the manufacturer’s instructions.
If soaking is permitted, place the racks in a sink or suitable large container containing warm, soapy water.
Allow the residue to soften.
Use a soft brush, cloth, or approved non-scratch sponge to remove the loosened dirt.
Rinse thoroughly and dry before reinstalling.
Check the Rack Design
Some specialty racks contain sliding mechanisms or ball bearings.
These may require different cleaning methods.
Do not soak or lubricate those mechanisms unless the manufacturer specifically recommends it.
Also, do not assume every rack is suitable for a self-clean cycle.
Practical tip: Cleaning the racks while the oven interior is being wiped saves time and helps prevent dirty racks from transferring residue back onto clean surfaces.
5. Try a Mild Baking Soda Paste Only If Your Oven Allows It
Baking soda is often mentioned as a household cleaning ingredient.
It can provide gentle abrasive action, which may help loosen certain stubborn deposits.
However, it is not suitable for every oven surface.
Some manufacturers specifically prohibit abrasive substances or unapproved homemade cleaners on certain interior finishes.
When It May Be Appropriate
Consider a mild baking soda paste only if your oven’s cleaning instructions permit it on the surface you want to treat.
Avoid using it on catalytic liners, self-cleaning coatings, heating components, door seals, or other restricted areas.
How to Use It Carefully
On a manufacturer-approved surface, mix a small amount of baking soda with enough water to form a soft paste.
Test a small, inconspicuous area first.
Apply gently to the affected spot using a soft cloth.
Allow a short contact period, following any applicable manufacturer guidance.
Remove the paste carefully with a damp, non-scratch cloth.
Rinse away all residue and dry the surface.
Don’t Mix Baking Soda with Random Chemicals
Combining baking soda with vinegar causes bubbling, but the reaction does not automatically produce a more effective oven cleaner.
There is no need to mix several cleaning products together.
Practical tip: If the manufacturer doesn’t recommend baking soda for your oven, skip this method and use an approved alternative.
6. Use the Built-In Steam-Clean Function for Light Residue
Some modern ovens include a steam-cleaning feature.
This function uses a controlled amount of water and a lower-temperature cleaning cycle to soften light food residue.
It is generally intended for routine maintenance rather than extremely heavy, baked-on grease.
How to Use Steam Cleaning Safely
First, verify that your oven actually has a steam-clean function.
Check the user manual for the required amount of water and any instructions about removing racks or accessories.
Make sure the oven is at the temperature specified by the manufacturer before starting.
Follow the appliance’s instructions to begin the cleaning cycle.
Do not open the door while hot steam or water presents a burn risk.
After the cycle finishes and the oven reaches a safe temperature, wipe away the softened residue with a suitable cloth.
Remove remaining water as directed.
Avoid Adding Cleaning Products
Manufacturers such as Whirlpool specifically advise against adding oven cleaners or other additives to their steam-cleaning function.
Use only the materials and amount of water specified in your manual.
Why Steam Cleaning Helps
Moisture and controlled heat can soften light soil, making it easier to remove with a cloth.
However, steam cleaning isn’t guaranteed to remove heavily carbonized residue.
Practical tip: Use this feature for smaller spills before they become repeatedly baked onto the oven surfaces.
7. Choose an Approved Deep-Cleaning Method for Stubborn Grease
When the oven contains heavy, baked-on grease, ordinary wiping may not be enough.
At this stage, the correct method depends on your oven’s design.
Option A: Use a Built-In Self-Clean Cycle
If your oven has a manufacturer-approved self-cleaning cycle, follow its instructions carefully.
Self-cleaning ovens use very high temperatures to break down certain food residues.
Before starting, manufacturers commonly require users to remove excess grease and loose debris.
Depending on the model, you may also need to remove oven racks and accessories.
Keep the area ventilated according to the manufacturer’s advice, and keep children and pets away.
Birds are especially sensitive to fumes from self-cleaning ovens; follow the manufacturer’s precautions to keep them safely away from exposure.
Do not force open the locked door.
Wait until the cleaning cycle is complete and the oven has cooled before wiping out any remaining ash.
Option B: Use an Oven Cleaner Approved for Manual-Clean Ovens
If your oven does not have a self-cleaning function, an oven cleaner specifically approved for that appliance may be appropriate.
Before using one, check both the oven manual and the product label.
Some oven cleaners are highly caustic and can cause serious skin or eye burns.
Follow every safety instruction, including protective equipment, ventilation, application areas, contact time, and residue removal.
Never use an oven cleaner on a self-cleaning oven when the manufacturer prohibits it.
Why This Method Matters
Heavy deposits sometimes require a more specialized cleaning process.
Using the method designed for your specific oven is safer than trying increasingly strong homemade chemical combinations.
Important: Never run a self-cleaning cycle with a chemical oven cleaner inside unless the manufacturer explicitly authorizes that combination.
Why These Oven Cleaning Tips Work
The seven methods above rely on several straightforward cleaning principles.
Soap Helps Lift Grease
Mild dish soap can help loosen oily deposits so they can be removed with water and a cloth.
Moisture Softens Residue
Allowing an approved surface to remain damp briefly can soften certain dried food splashes.
This reduces the need for forceful scrubbing.
Gentle Tools Protect Surfaces
Soft cloths and non-scratch sponges can clean many surfaces without the damage associated with aggressive abrasives.
Steam Can Help with Light Soil
A manufacturer’s steam-cleaning cycle uses controlled moisture and heat to soften residue.
Its effectiveness depends on the type and age of the stain.
Self-Cleaning Cycles Handle Certain Heavy Deposits
Approved self-cleaning systems use very high temperatures to break down baked-on food residues.
They require specific safety precautions and are not interchangeable with ordinary cleaning methods.
Common Oven Cleaning Mistakes to Avoid
Cleaning While the Oven Is Hot
Touching hot surfaces can cause burns.
Better approach: Allow the oven to cool completely before manual cleaning.
Using Steel Wool on Delicate Surfaces
Abrasive pads may scratch glass or damage interior finishes.
Better approach: Use manufacturer-approved tools.
Mixing Household Cleaning Chemicals
Combining bleach with other cleaners, including ammonia or acidic products such as vinegar, can release dangerous gases.
Better approach: Never mix cleaning products. Use one suitable product according to its label.
Spraying Cleaner into Heating Elements or Vents
Liquid can enter areas that are not designed for direct cleaning.
Better approach: Apply products only to approved surfaces and keep electrical openings, burners, sensors, and seals protected.
Using a Commercial Oven Cleaner in an Incompatible Oven
Certain products can damage self-cleaning surfaces or special coatings.
Better approach: Check the manual before applying any chemical.
Ignoring Heavy Grease Before Self-Cleaning
Excess grease may produce smoke during a high-temperature cleaning cycle.
Better approach: Remove excess soil as instructed before running the cycle.
Forgetting to Remove Cleaning Residue
Residue left inside the oven may cause unpleasant odors or other problems during later cooking.
Better approach: Follow the product’s rinsing and residue-removal instructions, then allow the oven to dry properly.
Practical Examples: Which Cleaning Method Should You Choose?
Example 1: A Few Fresh Grease Splashes
If the oven is a manual-clean model and the interior coating permits mild soap, allow the oven to cool and wipe the splashes with a damp, soapy cloth.
This is usually easier than waiting until the grease has been heated repeatedly.
Example 2: Brown Stains on the Glass Door
Use the approved damp-cloth method to soften the spots.
Avoid harsh scraping and keep liquids away from door openings.
Example 3: Greasy Oven Racks
Remove and soak the racks only if their design and manufacturer instructions permit it.
Use a suitable brush or sponge, then rinse and dry.
Example 4: Light Residue in an Oven with Steam Clean
Follow the built-in steam-clean procedure, using the exact water quantity specified for your model.
Example 5: Thick, Baked-On Grease
Consult the oven’s manual to choose between an approved self-clean cycle and a suitable manual-cleaning product.
Do not combine the two methods.
How Often Should You Clean Your Oven?
There is no universal cleaning schedule that suits every household.
How often you need to clean depends on how frequently you cook, the foods you prepare, and the amount of grease or spills produced.
For practical maintenance:
- After noticeable spills: Wipe the affected area once the oven is cool and the manual permits it.
- During routine kitchen cleaning: Check the glass door, racks, and accessible corners.
- When residue begins building up: Use the cleaning method recommended for your oven.
- Before heavy buildup develops: Address repeated greasy deposits rather than waiting for them to become more difficult to remove.
Regular light cleaning can reduce the need for intensive scrubbing.
Oven Cleaning and Kitchen Safety
Cleaning the oven is part of maintaining a more manageable cooking environment.
However, cleaning does not always mean disinfecting.
For ordinary cooking grease, the goal is to remove food residue and oily deposits using an appropriate cleaning method.
There is no general need to apply household bleach inside an oven.
The CDC warns against mixing bleach with other cleaning products because dangerous vapors can be released.
For broader kitchen hygiene advice, read our 4 Simple Steps to Food Safety: Clean, Separate, Cook, and Chill.
Frequently Asked Questions
What Is the Best Way to Remove Grease from an Oven?
The best method depends on the oven model and the condition of the residue. Start with an approved mild cleaning method and follow the manufacturer’s instructions for stubborn deposits.
Can I Clean My Oven with Dish Soap?
Mild dish soap and warm water are appropriate for many manual-clean surfaces, but always check the oven’s manual first.
Can Baking Soda Damage an Oven?
Baking soda can be abrasive and may be unsuitable for certain coatings. Use it only where the manufacturer permits.
Can I Use Vinegar and Baking Soda Together?
There is generally no need to combine them. Their bubbling reaction does not guarantee better grease removal. Never combine random household cleaning chemicals.
Is Steam Cleaning Better Than Self-Cleaning?
Neither is universally better. Steam cleaning is generally designed for lighter soil, while self-cleaning uses much higher temperatures to address certain heavier deposits.
Use the feature intended for your oven and cleaning needs.
Can I Use Commercial Oven Cleaner in a Self-Cleaning Oven?
Some manufacturers prohibit commercial oven cleaners inside self-cleaning ovens because they can damage the interior surfaces. Follow the instructions for your exact model.
How Do I Clean Oven Glass Without Scratching It?
Use a soft cloth and an approved mild cleaner. Softening the residue first can reduce the need for vigorous scrubbing.
Can I Clean Between the Oven Door Glass Panels?
Do not pour cleaning liquid into the door or disassemble it without specific manufacturer instructions. Contact an appropriate service professional if necessary.
Should I Remove the Oven Racks Before Cleaning?
For manual cleaning, removing racks can improve access. For steam-clean and self-clean cycles, follow the model’s specific instructions because rack requirements vary.
Why Does My Oven Smoke After Cleaning?
Possible causes include remaining grease, cleaning-product residue, or another oven-related problem.
Turn the oven off and allow it to cool if smoke occurs unexpectedly. Check the manual and seek qualified service assistance when necessary.
How Can I Keep My Oven Cleaner for Longer?
Remove accessible spills after the oven has cooled, follow appropriate cleaning instructions, and avoid allowing grease to accumulate over repeated cooking sessions.
Final Thoughts
Removing baked-on grease doesn’t have to mean using harsh chemicals or scrubbing your oven aggressively.
These seven oven cleaning tips provide practical ways to handle different cleaning situations, from light surface grease to stubborn deposits.
Start by checking your oven’s manual, use gentle cleaning methods where appropriate, and reserve specialized cleaning cycles or products for situations where the manufacturer recommends them.
Most importantly, never mix household cleaning chemicals or use products that are incompatible with your oven.
With regular maintenance and the correct cleaning method, you can keep your oven easier to clean and better prepared for everyday cooking.