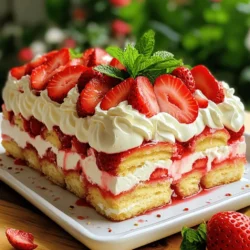
Strawberry Shortcake Icebox Cake
Indulge in the creamy delight of Berry Bliss Strawberry Shortcake Icebox Cake! This no-bake dessert is a perfect blend of fresh strawberries, rich whipped cream, and fluffy shortcake biscuits. With just a few simple ingredients and effortless steps, you’ll create a refreshing treat that's perfect for any occasion. Ready to impress your friends and family?