![- Chicken and Marinade Ingredients - 2 boneless, skinless chicken breasts - 1 cup buttermilk (or milk mixed with 1 tablespoon of vinegar) - Seasoning and Coating Ingredients - 1 cup all-purpose flour - 1 teaspoon garlic powder - 1 teaspoon onion powder - ½ teaspoon paprika - ½ teaspoon baking powder - Salt and pepper to taste - Vegetable oil for frying - Toppings and Optional Add-Ons - 4 burger buns, lightly toasted - 4 slices of sharp cheddar cheese - Fresh lettuce leaves - Ripe tomato slices - Mayonnaise (optional for added creaminess) - 2 tablespoons fresh parsley, finely chopped (for garnish) When I make this crispy garlic chicken sandwich, I always start with the best ingredients. The chicken is key. I love using boneless, skinless chicken breasts. They soak up flavor well. For the marinade, buttermilk is my go-to. It keeps the chicken juicy and tender. Next, I prepare the coating. The mix of all-purpose flour, garlic powder, and onion powder adds a nice kick. Paprika gives it a lovely color. Don't forget the baking powder. It helps the coating puff up and get crispy. Salt and pepper are must-haves for taste. For toppings, I choose sharp cheddar cheese for its bold flavor. Fresh lettuce and ripe tomato slices add crunch and freshness. I often add mayonnaise for creaminess, but you can skip it if you want. Finally, a sprinkle of fresh parsley gives a touch of color. These simple ingredients come together to create a delicious sandwich. You can find the full recipe to guide you through every step. Start by marinating the chicken breasts. Place them in a bowl and cover with buttermilk. Make sure the chicken is fully submerged. Let it sit for at least 30 minutes. For more flavor, refrigerate it for up to 2 hours. This step makes the chicken juicy and tender. Next, prepare the flour coating. In a mixing bowl, combine all-purpose flour, garlic powder, onion powder, paprika, baking powder, and a sprinkle of salt and pepper. Mix everything well. This coating will give the chicken a crispy texture. Now it’s time to cook the chicken. In a large skillet, pour vegetable oil until it is about ½ inch deep. Heat the oil over medium-high until it shimmers. Carefully add the coated chicken breasts to the hot oil. Fry them for about 4-5 minutes on each side. They should turn a golden brown and be fully cooked (check for 165°F internal temperature). Once done, place the chicken on a plate lined with paper towels. This step absorbs any extra oil. Now, assemble the sandwich. Take a toasted burger bun. If you like, spread mayonnaise on the bottom half. Add one crispy chicken breast on top. Next, place a slice of cheddar cheese. Then, add a handful of fresh lettuce leaves and some tomato slices. This layering adds flavor and texture to your sandwich. For the final touch, sprinkle chopped fresh parsley on top. This adds color and a burst of flavor. You can also serve each sandwich with crispy potato wedges or French fries. A small bowl of extra mayonnaise or garlic aioli makes a great dip. Enjoy your crispy garlic chicken sandwich with these simple steps! For a full recipe, check [Full Recipe]. - Oil Temperature and Cooking Time: Heat your vegetable oil to about 350°F. This is key for a crispy crust. If the oil is too cool, the chicken will absorb too much oil and turn soggy. Fry each chicken piece for 4-5 minutes on each side. Look for a golden brown color. Always check that the chicken reaches an internal temperature of 165°F to ensure it is fully cooked. - Recommended Additions or Seasoning Variations: To boost flavor, you can add spices to your flour mix. Try cayenne for heat, or Italian herbs for a twist. You could also swap garlic powder for fresh minced garlic. If you like tang, add a splash of hot sauce to the buttermilk. This gives your chicken a fun kick and deeper flavor. - Pairing Ideas for a Complete Meal: Serve your crispy chicken sandwich with sides like crispy potato wedges or a fresh salad. A crunch from the fries balances the soft bun. For drinks, iced tea or lemonade complements the meal well. You can also add a small bowl of garlic aioli for dipping. This enhances the meal and adds more flavor. Check out the Full Recipe for more ideas. {{image_4}} Want to spice things up? Add heat to your sandwich! You can mix cayenne pepper or hot sauce into your flour coating. Just a little can give your chicken a nice kick. If you love heat, try adding sliced jalapeños or a spicy aioli on top of your sandwich. This adds flavor and excitement. If you want a healthier meal, consider air-frying or baking the chicken. Instead of frying, coat your chicken with the flour mixture and spray it lightly with oil. Set your air fryer to 375°F and cook for about 15-20 minutes. This method gives you a crispy finish without all the oil. Baking is another option. Preheat your oven to 400°F and bake the chicken on a lined tray for 20-25 minutes. Are you a veggie lover? Try adding grilled onions, roasted peppers, or avocado slices. These toppings give your sandwich freshness and flavor. You can also switch the cheese. Instead of cheddar, use pepper jack for some extra spice or a creamy goat cheese for a unique taste. Top your sandwich with fresh herbs like basil or cilantro for even more flavor. To keep your crispy garlic chicken sandwich fresh, store it properly. First, let the sandwich cool down to room temperature. Then, wrap it tightly in plastic wrap or aluminum foil. You can also place it in an airtight container. This helps keep out air and moisture. Store the sandwich in the fridge for up to three days. This way, it stays tasty and safe to eat. When you are ready to enjoy your leftovers, reheating is key. To keep the chicken crispy, avoid the microwave. Instead, use the oven or an air fryer. Preheat your oven to 375°F. Place the sandwich on a baking sheet. Heat it for about 10-15 minutes until warm. If using an air fryer, set it to 350°F and heat for 5-7 minutes. This method keeps the chicken crunchy and delicious. Freezing your crispy garlic chicken sandwich is a great idea for later. Start by wrapping the whole sandwich in plastic wrap. Then, place it in a freezer-safe bag. You can freeze it for up to three months. When you're ready to eat, take it out the night before. Let it thaw in the fridge. After thawing, reheat it using the methods above for the best results. This way, you can enjoy a tasty meal anytime! To make this sandwich gluten-free, you can swap the all-purpose flour. Use a gluten-free flour blend instead. It works just as well for coating the chicken. Ensure that your burger buns are also gluten-free. Many brands sell tasty gluten-free buns today. Yes, you can use other meats. Chicken thighs add more flavor and stay juicy. Turkey works too, but it may need a longer cooking time. If you prefer plant-based options, try using eggplant or tofu. Just ensure they are cut into similar sizes for even cooking. Many sides pair well with this sandwich. A fresh green salad adds crunch and color. Crispy potato wedges or French fries are always a hit. You could also serve pickles or coleslaw for a tangy twist. These sides balance the sandwich's rich flavors. For the crispiest coating, follow these tips: - Dry the chicken: Pat the chicken dry before coating. - Hot oil: Ensure your oil is hot enough, around 350°F, before frying. - Double coating: For extra crunch, dip the chicken back in the buttermilk and then the flour again. - Rest after frying: Let the fried chicken rest on paper towels. This helps keep it crispy. For the full recipe, check out the Crispy Garlic Chicken Sandwich. This blog post covered everything you need for a great chicken sandwich. We discussed the key ingredients, marinating tips, and detailed cooking steps. I shared tips to perfect frying and suggested tasty variations. You now know how to store leftovers and reheat them for the best taste. Remember, cooking should be fun. Try different toppings and flavorings. With these tips, you'll impress family and friends with your crispy garlic chicken sandwich! Enjoy every bite.](https://dailydishcraft.com/wp-content/uploads/2025/06/8a0e5459-3163-492d-8f81-f5f082a6ab8a-768x768.webp)
Are you craving a sandwich that’s both crispy and full of flavor? Look no further! My Crispy Garlic Chicken Sandwich recipe is tasty and easy to make at home. With just a few simple ingredients and steps, you’ll create a dish that impresses everyone. Dive in to learn how to craft your perfect sandwich and explore tasty variations. Your taste buds will thank you!
Ingredients
List of Ingredients
– Chicken and Marinade Ingredients
– 2 boneless, skinless chicken breasts
– 1 cup buttermilk (or milk mixed with 1 tablespoon of vinegar)
– Seasoning and Coating Ingredients
– 1 cup all-purpose flour
– 1 teaspoon garlic powder
– 1 teaspoon onion powder
– ½ teaspoon paprika
– ½ teaspoon baking powder
– Salt and pepper to taste
– Vegetable oil for frying
– Toppings and Optional Add-Ons
– 4 burger buns, lightly toasted
– 4 slices of sharp cheddar cheese
– Fresh lettuce leaves
– Ripe tomato slices
– Mayonnaise (optional for added creaminess)
– 2 tablespoons fresh parsley, finely chopped (for garnish)
When I make this crispy garlic chicken sandwich, I always start with the best ingredients. The chicken is key. I love using boneless, skinless chicken breasts. They soak up flavor well. For the marinade, buttermilk is my go-to. It keeps the chicken juicy and tender.
Next, I prepare the coating. The mix of all-purpose flour, garlic powder, and onion powder adds a nice kick. Paprika gives it a lovely color. Don’t forget the baking powder. It helps the coating puff up and get crispy. Salt and pepper are must-haves for taste.
For toppings, I choose sharp cheddar cheese for its bold flavor. Fresh lettuce and ripe tomato slices add crunch and freshness. I often add mayonnaise for creaminess, but you can skip it if you want. Finally, a sprinkle of fresh parsley gives a touch of color.
These simple ingredients come together to create a delicious sandwich.
Step-by-Step Instructions
Marinating the Chicken
Start by marinating the chicken breasts. Place them in a bowl and cover with buttermilk. Make sure the chicken is fully submerged. Let it sit for at least 30 minutes. For more flavor, refrigerate it for up to 2 hours. This step makes the chicken juicy and tender.
Preparing the Coating
Next, prepare the flour coating. In a mixing bowl, combine all-purpose flour, garlic powder, onion powder, paprika, baking powder, and a sprinkle of salt and pepper. Mix everything well. This coating will give the chicken a crispy texture.
Cooking the Chicken
Now it’s time to cook the chicken. In a large skillet, pour vegetable oil until it is about ½ inch deep. Heat the oil over medium-high until it shimmers. Carefully add the coated chicken breasts to the hot oil. Fry them for about 4-5 minutes on each side. They should turn a golden brown and be fully cooked (check for 165°F internal temperature). Once done, place the chicken on a plate lined with paper towels. This step absorbs any extra oil.
Assembling the Sandwich
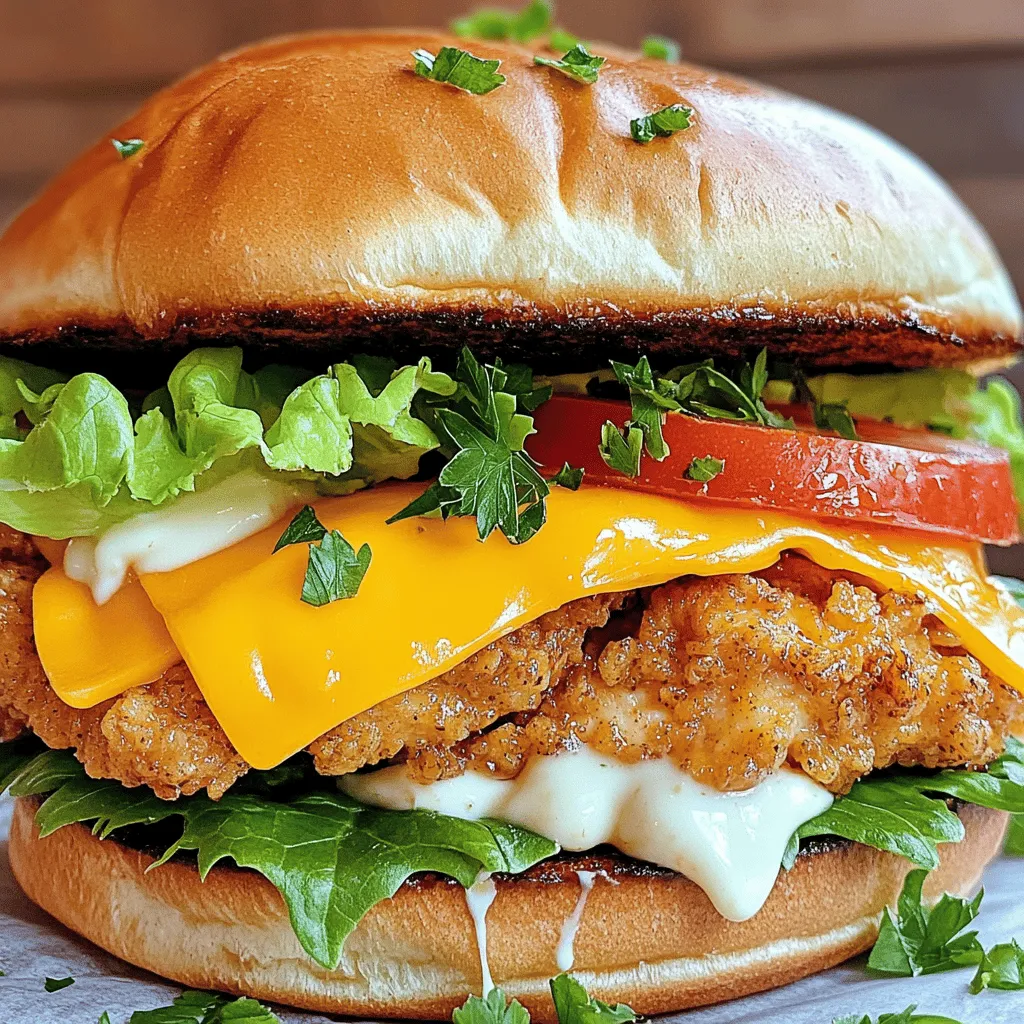
Now, assemble the sandwich. Take a toasted burger bun. If you like, spread mayonnaise on the bottom half. Add one crispy chicken breast on top. Next, place a slice of cheddar cheese. Then, add a handful of fresh lettuce leaves and some tomato slices. This layering adds flavor and texture to your sandwich.
Garnishing
For the final touch, sprinkle chopped fresh parsley on top. This adds color and a burst of flavor. You can also serve each sandwich with crispy potato wedges or French fries. A small bowl of extra mayonnaise or garlic aioli makes a great dip. Enjoy your crispy garlic chicken sandwich with these simple steps!
Tips & Tricks
Perfecting the Frying Technique
– Oil Temperature and Cooking Time: Heat your vegetable oil to about 350°F. This is key for a crispy crust. If the oil is too cool, the chicken will absorb too much oil and turn soggy. Fry each chicken piece for 4-5 minutes on each side. Look for a golden brown color. Always check that the chicken reaches an internal temperature of 165°F to ensure it is fully cooked.
Enhancing Flavor
– Recommended Additions or Seasoning Variations: To boost flavor, you can add spices to your flour mix. Try cayenne for heat, or Italian herbs for a twist. You could also swap garlic powder for fresh minced garlic. If you like tang, add a splash of hot sauce to the buttermilk. This gives your chicken a fun kick and deeper flavor.
Serving Suggestions
– Pairing Ideas for a Complete Meal: Serve your crispy chicken sandwich with sides like crispy potato wedges or a fresh salad. A crunch from the fries balances the soft bun. For drinks, iced tea or lemonade complements the meal well. You can also add a small bowl of garlic aioli for dipping. This enhances the meal and adds more flavor.
Variations
Spicy Garlic Chicken Sandwich
Want to spice things up? Add heat to your sandwich! You can mix cayenne pepper or hot sauce into your flour coating. Just a little can give your chicken a nice kick. If you love heat, try adding sliced jalapeños or a spicy aioli on top of your sandwich. This adds flavor and excitement.
Healthier Options
If you want a healthier meal, consider air-frying or baking the chicken. Instead of frying, coat your chicken with the flour mixture and spray it lightly with oil. Set your air fryer to 375°F and cook for about 15-20 minutes. This method gives you a crispy finish without all the oil. Baking is another option. Preheat your oven to 400°F and bake the chicken on a lined tray for 20-25 minutes.
Alternative Toppings
Are you a veggie lover? Try adding grilled onions, roasted peppers, or avocado slices. These toppings give your sandwich freshness and flavor. You can also switch the cheese. Instead of cheddar, use pepper jack for some extra spice or a creamy goat cheese for a unique taste. Top your sandwich with fresh herbs like basil or cilantro for even more flavor.
Storage Info
Storing Leftovers
To keep your crispy garlic chicken sandwich fresh, store it properly. First, let the sandwich cool down to room temperature. Then, wrap it tightly in plastic wrap or aluminum foil. You can also place it in an airtight container. This helps keep out air and moisture. Store the sandwich in the fridge for up to three days. This way, it stays tasty and safe to eat.
Reheating Methods
When you are ready to enjoy your leftovers, reheating is key. To keep the chicken crispy, avoid the microwave. Instead, use the oven or an air fryer. Preheat your oven to 375°F. Place the sandwich on a baking sheet. Heat it for about 10-15 minutes until warm. If using an air fryer, set it to 350°F and heat for 5-7 minutes. This method keeps the chicken crunchy and delicious.
Freezing for Future Meals
Freezing your crispy garlic chicken sandwich is a great idea for later. Start by wrapping the whole sandwich in plastic wrap. Then, place it in a freezer-safe bag. You can freeze it for up to three months. When you’re ready to eat, take it out the night before. Let it thaw in the fridge. After thawing, reheat it using the methods above for the best results. This way, you can enjoy a tasty meal anytime!
FAQs
How can I make the chicken sandwich gluten-free?
To make this sandwich gluten-free, you can swap the all-purpose flour. Use a gluten-free flour blend instead. It works just as well for coating the chicken. Ensure that your burger buns are also gluten-free. Many brands sell tasty gluten-free buns today.
Can I use a different type of meat for this recipe?
Yes, you can use other meats. Chicken thighs add more flavor and stay juicy. Turkey works too, but it may need a longer cooking time. If you prefer plant-based options, try using eggplant or tofu. Just ensure they are cut into similar sizes for even cooking.
What sides go well with a Crispy Garlic Chicken Sandwich?
Many sides pair well with this sandwich. A fresh green salad adds crunch and color. Crispy potato wedges or French fries are always a hit. You could also serve pickles or coleslaw for a tangy twist. These sides balance the sandwich’s rich flavors.
How do I achieve the crispiest coating?
For the crispiest coating, follow these tips:
– Dry the chicken: Pat the chicken dry before coating.
– Hot oil: Ensure your oil is hot enough, around 350°F, before frying.
– Double coating: For extra crunch, dip the chicken back in the buttermilk and then the flour again.
– Rest after frying: Let the fried chicken rest on paper towels. This helps keep it crispy.
This blog post covered everything you need for a great chicken sandwich. We discussed the key ingredients, marinating tips, and detailed cooking steps. I shared tips to perfect frying and suggested tasty variations. You now know how to store leftovers and reheat them for the best taste.
Remember, cooking should be fun. Try different toppings and flavorings. With these tips, you’ll impress family and friends with your crispy garlic chicken sandwich! Enjoy every bite.
![- Chicken and Marinade Ingredients - 2 boneless, skinless chicken breasts - 1 cup buttermilk (or milk mixed with 1 tablespoon of vinegar) - Seasoning and Coating Ingredients - 1 cup all-purpose flour - 1 teaspoon garlic powder - 1 teaspoon onion powder - ½ teaspoon paprika - ½ teaspoon baking powder - Salt and pepper to taste - Vegetable oil for frying - Toppings and Optional Add-Ons - 4 burger buns, lightly toasted - 4 slices of sharp cheddar cheese - Fresh lettuce leaves - Ripe tomato slices - Mayonnaise (optional for added creaminess) - 2 tablespoons fresh parsley, finely chopped (for garnish) When I make this crispy garlic chicken sandwich, I always start with the best ingredients. The chicken is key. I love using boneless, skinless chicken breasts. They soak up flavor well. For the marinade, buttermilk is my go-to. It keeps the chicken juicy and tender. Next, I prepare the coating. The mix of all-purpose flour, garlic powder, and onion powder adds a nice kick. Paprika gives it a lovely color. Don't forget the baking powder. It helps the coating puff up and get crispy. Salt and pepper are must-haves for taste. For toppings, I choose sharp cheddar cheese for its bold flavor. Fresh lettuce and ripe tomato slices add crunch and freshness. I often add mayonnaise for creaminess, but you can skip it if you want. Finally, a sprinkle of fresh parsley gives a touch of color. These simple ingredients come together to create a delicious sandwich. You can find the full recipe to guide you through every step. Start by marinating the chicken breasts. Place them in a bowl and cover with buttermilk. Make sure the chicken is fully submerged. Let it sit for at least 30 minutes. For more flavor, refrigerate it for up to 2 hours. This step makes the chicken juicy and tender. Next, prepare the flour coating. In a mixing bowl, combine all-purpose flour, garlic powder, onion powder, paprika, baking powder, and a sprinkle of salt and pepper. Mix everything well. This coating will give the chicken a crispy texture. Now it’s time to cook the chicken. In a large skillet, pour vegetable oil until it is about ½ inch deep. Heat the oil over medium-high until it shimmers. Carefully add the coated chicken breasts to the hot oil. Fry them for about 4-5 minutes on each side. They should turn a golden brown and be fully cooked (check for 165°F internal temperature). Once done, place the chicken on a plate lined with paper towels. This step absorbs any extra oil. Now, assemble the sandwich. Take a toasted burger bun. If you like, spread mayonnaise on the bottom half. Add one crispy chicken breast on top. Next, place a slice of cheddar cheese. Then, add a handful of fresh lettuce leaves and some tomato slices. This layering adds flavor and texture to your sandwich. For the final touch, sprinkle chopped fresh parsley on top. This adds color and a burst of flavor. You can also serve each sandwich with crispy potato wedges or French fries. A small bowl of extra mayonnaise or garlic aioli makes a great dip. Enjoy your crispy garlic chicken sandwich with these simple steps! For a full recipe, check [Full Recipe]. - Oil Temperature and Cooking Time: Heat your vegetable oil to about 350°F. This is key for a crispy crust. If the oil is too cool, the chicken will absorb too much oil and turn soggy. Fry each chicken piece for 4-5 minutes on each side. Look for a golden brown color. Always check that the chicken reaches an internal temperature of 165°F to ensure it is fully cooked. - Recommended Additions or Seasoning Variations: To boost flavor, you can add spices to your flour mix. Try cayenne for heat, or Italian herbs for a twist. You could also swap garlic powder for fresh minced garlic. If you like tang, add a splash of hot sauce to the buttermilk. This gives your chicken a fun kick and deeper flavor. - Pairing Ideas for a Complete Meal: Serve your crispy chicken sandwich with sides like crispy potato wedges or a fresh salad. A crunch from the fries balances the soft bun. For drinks, iced tea or lemonade complements the meal well. You can also add a small bowl of garlic aioli for dipping. This enhances the meal and adds more flavor. Check out the Full Recipe for more ideas. {{image_4}} Want to spice things up? Add heat to your sandwich! You can mix cayenne pepper or hot sauce into your flour coating. Just a little can give your chicken a nice kick. If you love heat, try adding sliced jalapeños or a spicy aioli on top of your sandwich. This adds flavor and excitement. If you want a healthier meal, consider air-frying or baking the chicken. Instead of frying, coat your chicken with the flour mixture and spray it lightly with oil. Set your air fryer to 375°F and cook for about 15-20 minutes. This method gives you a crispy finish without all the oil. Baking is another option. Preheat your oven to 400°F and bake the chicken on a lined tray for 20-25 minutes. Are you a veggie lover? Try adding grilled onions, roasted peppers, or avocado slices. These toppings give your sandwich freshness and flavor. You can also switch the cheese. Instead of cheddar, use pepper jack for some extra spice or a creamy goat cheese for a unique taste. Top your sandwich with fresh herbs like basil or cilantro for even more flavor. To keep your crispy garlic chicken sandwich fresh, store it properly. First, let the sandwich cool down to room temperature. Then, wrap it tightly in plastic wrap or aluminum foil. You can also place it in an airtight container. This helps keep out air and moisture. Store the sandwich in the fridge for up to three days. This way, it stays tasty and safe to eat. When you are ready to enjoy your leftovers, reheating is key. To keep the chicken crispy, avoid the microwave. Instead, use the oven or an air fryer. Preheat your oven to 375°F. Place the sandwich on a baking sheet. Heat it for about 10-15 minutes until warm. If using an air fryer, set it to 350°F and heat for 5-7 minutes. This method keeps the chicken crunchy and delicious. Freezing your crispy garlic chicken sandwich is a great idea for later. Start by wrapping the whole sandwich in plastic wrap. Then, place it in a freezer-safe bag. You can freeze it for up to three months. When you're ready to eat, take it out the night before. Let it thaw in the fridge. After thawing, reheat it using the methods above for the best results. This way, you can enjoy a tasty meal anytime! To make this sandwich gluten-free, you can swap the all-purpose flour. Use a gluten-free flour blend instead. It works just as well for coating the chicken. Ensure that your burger buns are also gluten-free. Many brands sell tasty gluten-free buns today. Yes, you can use other meats. Chicken thighs add more flavor and stay juicy. Turkey works too, but it may need a longer cooking time. If you prefer plant-based options, try using eggplant or tofu. Just ensure they are cut into similar sizes for even cooking. Many sides pair well with this sandwich. A fresh green salad adds crunch and color. Crispy potato wedges or French fries are always a hit. You could also serve pickles or coleslaw for a tangy twist. These sides balance the sandwich's rich flavors. For the crispiest coating, follow these tips: - Dry the chicken: Pat the chicken dry before coating. - Hot oil: Ensure your oil is hot enough, around 350°F, before frying. - Double coating: For extra crunch, dip the chicken back in the buttermilk and then the flour again. - Rest after frying: Let the fried chicken rest on paper towels. This helps keep it crispy. For the full recipe, check out the Crispy Garlic Chicken Sandwich. This blog post covered everything you need for a great chicken sandwich. We discussed the key ingredients, marinating tips, and detailed cooking steps. I shared tips to perfect frying and suggested tasty variations. You now know how to store leftovers and reheat them for the best taste. Remember, cooking should be fun. Try different toppings and flavorings. With these tips, you'll impress family and friends with your crispy garlic chicken sandwich! Enjoy every bite.](https://dailydishcraft.com/wp-content/uploads/2025/06/8a0e5459-3163-492d-8f81-f5f082a6ab8a-250x250.webp)
