Skip to content
DisclaimerTerms Of UseGDPR PolicyCookie Policy

dailydishcraft

  • Home
  • Drinks
  • Appetizers
  • Dinner
  • Dessert
  • About
  • Contact
  • Privacy Policy
DisclaimerTerms Of UseGDPR PolicyCookie Policy

NO-ING-IMG

- 4 boneless, skinless chicken breasts - 1 cup fresh spinach, finely chopped - 1 cup canned artichoke hearts, drained and coarsely chopped - 1 cup cream cheese, softened to room temperature - 1/2 cup grated Parmesan cheese - 1/2 teaspoon garlic powder - 1/4 teaspoon onion powder - Salt and pepper, to taste - 2 tablespoons olive oil - 1/2 cup shredded mozzarella cheese - Fresh parsley, chopped, for garnish In this tasty dish, you will need simple yet flavorful ingredients. Start with boneless, skinless chicken breasts for a tender and juicy base. Fresh spinach gives a bright color and a burst of nutrition, while canned artichoke hearts bring a unique taste and texture. You'll use cream cheese to create a rich and creamy sauce. Grated Parmesan cheese adds a salty flavor that enhances the overall dish. Seasoning with garlic powder and onion powder boosts the taste. Don't forget salt and pepper to make all the flavors pop. Use olive oil to help sear the chicken, adding a lovely crispness. To finish, shredded mozzarella cheese melts beautifully on top, creating a delicious layer. For the final touch, fresh parsley adds color and brightness, while lemon wedges give a zesty kick when served. 1. Preheat your oven to 375°F (190°C). This helps the chicken cook evenly. 2. Season both sides of the chicken breasts with garlic powder, onion powder, salt, and pepper. Use just enough seasoning to enhance the flavor. 3. Heat olive oil in a large, oven-safe skillet over medium heat. Add the seasoned chicken breasts to the skillet. 4. Sear the chicken for about 5-7 minutes on each side. You want a nice golden-brown crust. The chicken is done when it reaches an internal temperature of 165°F (74°C). Once cooked, set the chicken on a plate. 1. In the same skillet, toss in the chopped spinach and artichoke hearts. Sauté them for about 2-3 minutes. Stir occasionally until the spinach wilts. 2. Lower the heat and add the softened cream cheese and grated Parmesan cheese. Stir the mixture until the cheeses melt and combine into a creamy sauce. 1. Place the seared chicken breasts back into the skillet. Spoon the creamy spinach-artichoke mixture over each piece. Make sure every chicken breast is fully covered. 2. Sprinkle shredded mozzarella cheese evenly on top. This will create a delicious cheesy layer. 3. Transfer the skillet to the preheated oven. Bake for 15-20 minutes. The mozzarella should be bubbly and golden when done. 4. Let the dish sit for a few minutes after baking. Garnish with freshly chopped parsley before serving. This adds a nice touch of color and flavor. - Best practices for searing chicken: Searing chicken is key for flavor. Start with a hot skillet. Use enough olive oil to coat the bottom. Place the chicken in the pan without crowding. This helps get a nice brown crust. Cook for 5-7 minutes per side. Check the internal temperature. It should reach 165°F (74°C) for safe eating. - Tips for melting cheese smoothly: To melt cheese smoothly, start with cream cheese at room temperature. This helps it mix easily. Stir in grated Parmesan over low heat. This ensures it melts without clumping. When adding mozzarella, do it last and mix gently for a creamy texture. - Presentation ideas: Serve this dish right from the skillet for a cozy feel. If you prefer, plate each chicken breast with a scoop of the spinach-artichoke mix. Add a drizzle of olive oil on top. Lemon wedges make a lovely touch. - Delicious pairings or side dishes: This chicken pairs well with rice, pasta, or a fresh salad. Roasted vegetables also make a great side. They add color and nutrition to your meal. - Alternatives for cheese and seasonings: If you need a dairy-free option, try cashew cream instead of cream cheese. Nutritional yeast can replace Parmesan for a cheesy flavor. Use fresh herbs instead of garlic and onion powder for a bright taste. - Variations for dietary preferences: For a low-carb option, swap chicken for zucchini noodles or cauliflower. You can use grilled tofu for a vegetarian version. Feel free to add more veggies like bell peppers or mushrooms for extra nutrition and flavor. {{image_4}} You can switch up the protein in this dish for variety. Instead of chicken, try using pork chops. They cook well and absorb flavors nicely. You can also use turkey cutlets for a leaner option. They pair well with the creamy sauce. For a vegetarian twist, tofu or mushrooms work great. Tofu takes on the flavors of the sauce nicely. Use firm tofu, cut into cubes. Sauté it until golden before adding the spinach and artichokes. Mushrooms, like portobello or cremini, also shine in this dish. Slice them thick and sauté until soft. They’ll add a rich and earthy taste to the creamy mix. Feel free to toss in extra veggies for color and nutrition. Bell peppers, zucchini, or broccoli add crunch and flavor. Chop them small and sauté with the spinach. You can enhance the dish with spices and herbs too. A pinch of red pepper flakes can add a nice kick. Fresh basil or thyme can give it a garden-fresh taste. Just sprinkle them in while you cook the spinach and artichokes. Experiment with flavors to make this dish your own! To store leftovers, let the dish cool to room temperature. Place it in an airtight container. This helps keep it fresh. Store it in the fridge for up to three days. When you want to enjoy it again, reheat it in the oven or microwave. For best results, heat it until hot throughout. This usually takes about 10-15 minutes at 350°F (175°C) in the oven. You can freeze this dish for a longer shelf life. To freeze, let the dish cool first. Then, transfer it to a freezer-safe container. Make sure to seal it tightly to avoid freezer burn. This dish can last up to three months in the freezer. When you are ready to eat it, thaw it in the fridge overnight. Reheat it in the oven for a nice texture. Be aware that freezing may change the creaminess. The cheese might not melt as smoothly as fresh. However, it will still taste great! How do I know when the chicken is cooked through? You can check if the chicken is done by using a meat thermometer. The inside should reach 165°F (74°C). If you don’t have a thermometer, cut into the thickest part of the chicken. It should be white, not pink. Can I make this recipe in advance? Yes, you can make this dish ahead of time. Prepare the chicken and sauce, then store them in the fridge. When ready to eat, bake it as directed. This makes meal prep easy and keeps your weeknight dinners simple. What are the calories per serving? Each serving of One-Pan Spinach Artichoke Chicken has about 400 calories. This can vary based on the amount of cheese used and any added ingredients. Is this dish healthy? Yes, this dish can be healthy. It has lean protein from chicken and nutrients from spinach and artichokes. You can make it even healthier by using low-fat cheese or adding more veggies. What type of skillet is best? A large, oven-safe skillet is best for this dish. Cast iron or stainless steel skillets work well. They heat evenly and go from stovetop to oven easily. Essential kitchen tools for this recipe You will need: - A meat thermometer - A spatula for stirring - A sharp knife for cutting - A cutting board for prep - Measuring cups for ingredients These tools help you cook efficiently and safely. This recipe for One-Pan Spinach Artichoke Chicken is easy and tasty. You learned about essential ingredients, step-by-step cooking, and helpful tips. You can also explore variations and storage methods. This dish suits many dietary needs. Enjoy experimenting with flavors and ingredients to find your perfect version. Your cooking will impress family and friends. Keep this recipe handy for quick meals throughout the week.

One-Pan Spinach Artichoke Chicken Flavorful Delight

Are you ready to enjoy an easy, tasty meal? This One-Pan Spinach Artichoke Chicken is packed with flavor and requires

- 1 cup unsalted butter - 2 cups granulated sugar - 4 large eggs - 1 teaspoon vanilla extract - 1 cup all-purpose flour - 1 cup unsweetened cocoa powder - 1/2 teaspoon baking powder - 1/4 teaspoon salt The base of these brownies is simple yet rich. You start with unsalted butter for a smooth texture. Granulated sugar adds sweetness and helps create a shiny surface. The eggs bring moisture and act as a binder. Vanilla extract adds a warm flavor that complements the chocolate. All-purpose flour gives structure. Unsweetened cocoa powder is where the chocolate flavor shines. Baking powder makes them rise, while salt enhances the other flavors. - 1 cup sweetened shredded coconut - 1 cup chopped almonds - 1/2 cup chocolate chips (optional for topping) Next, we add some fun! Sweetened shredded coconut gives that classic Almond Joy taste. It adds chewiness and sweetness. Chopped almonds add crunch and a nutty flavor. You can sprinkle chocolate chips on top if you want extra chocolatey goodness. This mix of flavors and textures makes these brownies truly special. - Preheat your oven to 350°F (175°C). - Grease a 9x13-inch baking pan or line it with parchment paper. - In a medium saucepan, melt 1 cup of unsalted butter over low heat. - Once melted, remove from heat and stir in 2 cups of granulated sugar. - Let the butter-sugar mix cool slightly. - Add 4 large eggs, one at a time, mixing well after each. - Stir in 1 teaspoon of vanilla extract until well combined. - In another bowl, whisk together 1 cup of all-purpose flour, 1 cup of cocoa powder, 1/2 teaspoon of baking powder, and 1/4 teaspoon of salt. - Gradually fold the dry mix into the wet mix until just combined. - Carefully fold in 1 cup of sweetened shredded coconut and 1 cup of chopped almonds. - Make sure they are evenly mixed into the batter. - Pour the batter into the prepared pan, smoothing the top with a spatula. - Bake in the preheated oven for 25-30 minutes. - Check for doneness by inserting a toothpick in the center. - It’s done when the toothpick shows a few moist crumbs, not wet batter. - Remove from the oven and let cool in the pan for 15 minutes. - Transfer the brownies to a wire rack to cool completely. To get the best fudgy texture, you must avoid overmixing the batter. Mix just until you see no dry flour. This keeps the brownies soft and chewy. When baking, check for doneness at 25 minutes. Insert a toothpick into the center. If it comes out with a few moist crumbs, they are ready. If it has wet batter, give them a few more minutes. Make your brownies shine by dusting them with powdered sugar. You can also add a dollop of whipped cream on top. For an extra touch, sprinkle more shredded coconut on the side. These small details make the dessert look special. Pair these brownies with a scoop of vanilla ice cream for a classic treat. The cold ice cream complements the rich chocolate flavor perfectly. {{image_4}} You can change up the nuts in your brownies. Try using walnuts or pecans instead of almonds. Both add a different flavor and texture. You can also swap the chocolate. Use dark, milk, or even white chocolate for a new twist. Each type brings its unique taste to the brownies. Need a gluten-free version? Use gluten-free flour instead of all-purpose flour. This swap keeps the texture while making it safe for those with gluten issues. For vegan brownies, replace the eggs with flaxseed meal or applesauce. Use vegan butter instead of regular butter. These changes keep the rich taste while meeting dietary needs. To keep your Almond Joy Coconut Brownies fresh, store them properly. First, let the brownies cool completely. Then, place them in an airtight container. This helps keep moisture in and prevents them from drying out. You can also use plastic wrap to cover them tightly. If you want to store brownies in the fridge, you can. They will stay fresh for up to a week. Just remember to wrap them well to avoid any fridge odors. For long-term storage, freezing is a great option. Cut the brownies into squares. Wrap each square tightly in plastic wrap. Place them in a freezer bag or container. Make sure you label them with the date. They can last for up to three months in the freezer. When you're ready to enjoy, thaw them in the fridge or at room temperature. At room temperature, your brownies can last for about 3 to 4 days. Keep them in a cool, dry place. If the weather is warm or humid, store them in the fridge. Look for signs of spoilage before eating. The brownies may become hard or dry. If you see mold or an off smell, it’s best to toss them. Always trust your senses. Fresh brownies are soft and moist, and they smell amazing. Enjoy your treats while they are still at their best! Can I use other types of candy bars in this recipe? Yes, you can! You can swap Almond Joy with other candy bars like Snickers or Milky Way. Just remember to adjust the nuts or coconut if needed. This can add new flavors and fun textures to your brownies. How can I make these brownies more chocolatey? To make your brownies more chocolatey, use dark cocoa powder instead of regular cocoa. You can also add more chocolate chips to the batter or top the brownies with melted chocolate after baking. This will give every bite a rich chocolate boost. What’s the best way to cut brownies for clean edges? For clean edges, use a sharp knife. First, let the brownies cool completely. Then, dip the knife in warm water and wipe it dry before each cut. This method helps prevent sticking and gives you nice, neat squares. - Approximate calories per brownie: 250 calories - Breakdown of common allergens: - Gluten: Contains all-purpose flour - Nuts: Contains almonds These Almond Joy Coconut Brownies are a delightful treat. You learned about key ingredients, easy steps, and helpful tips for success. Remember to fold in your coconut and nuts gently for the best texture. Consider adding different nuts or chocolate types for your own twist. Store these brownies properly to keep them fresh and tasty. With this guide, you can make a dessert that everyone enjoys. Now, go bake these brownies and satisfy your sweet tooth!

Almond Joy Coconut Brownies Delightful and Easy Treat

Are you ready to indulge in a treat that combines chocolate, coconut, and almonds? These Almond Joy Coconut Brownies are

To make Coconut Mango Chia Pudding, you need a few key items. Here’s what you’ll need: - 1 cup coconut milk (canned or carton) - 1/4 cup chia seeds - 2 tablespoons maple syrup (or honey) - 1 ripe mango, diced into small cubes - 1/2 teaspoon pure vanilla extract - A pinch of salt These ingredients come together to create a creamy and sweet treat. The coconut milk gives the pudding a rich flavor. Chia seeds add texture and nutrition. You can make your Coconut Mango Chia Pudding even better with some fun extras. Here are a few ideas: - Fresh mint leaves for garnish - Extra mango pieces for topping - A sprinkle of shredded coconut - A dash of cinnamon for flavor These add-ins can make your dessert look pretty and taste even better. Feel free to get creative! Each ingredient in this pudding brings health benefits. Here’s a quick look: - Coconut milk: High in healthy fats, it keeps you full and satisfied. - Chia seeds: Packed with fiber and omega-3 fatty acids, they are great for digestion. - Maple syrup: A natural sweetener, it has antioxidants and can provide energy. - Mango: Full of vitamins A and C, it supports your immune system. This pudding is not just tasty; it’s also good for you! Enjoying this treat can be a smart choice for your health. {{ingredient_image_2}} First, grab a medium mixing bowl. Pour in 1 cup of coconut milk. Add 1/4 cup of chia seeds to the bowl. Then, mix in 2 tablespoons of maple syrup for sweetness. If you prefer honey, that works too! Next, add 1/2 teaspoon of pure vanilla extract. Finally, sprinkle in a pinch of salt. Use a whisk to combine everything well. Make sure the chia seeds spread evenly throughout the mix. After mixing, let the mixture sit for about 10 minutes. This helps the chia seeds soak up the coconut milk. After 10 minutes, whisk it again to break up any clusters. Now, you have a smooth mix! Cover the bowl with plastic wrap or pour it into jars. Place it in the refrigerator for 2 to 4 hours. For the best results, chill overnight. This gives the pudding a thick, creamy texture. When your pudding is ready, check its thickness. If it's too thick, stir in a bit more coconut milk. Now, it’s time to assemble! Take your serving cups or bowls. Start by adding a layer of chia pudding in each cup. Then, add a layer of diced mango on top. Repeat this pattern until you use all the pudding and mango. Finish with a top layer of mango for a bright look. If you want, garnish with fresh mint leaves for a nice touch. Enjoy your beautiful and tasty treat! To get the right texture, start with the right ratio. Use 1/4 cup chia seeds to every cup of liquid. This ensures a thick, creamy pudding. After mixing the ingredients, let the mixture rest for about 10 minutes. Whisk again to break any lumps. If it is too thick after chilling, add more coconut milk. This will help you achieve your perfect creaminess. You can easily make swaps to meet your diet needs. If you want a nut-free option, coconut milk works great. For a vegan sweetener, use maple syrup. If you prefer honey, it is a good choice too. For those who are gluten-free, all ingredients are safe. You can enjoy this pudding even with dietary restrictions. To make your pudding look stunning, layer it in clear cups. Start with a layer of chia pudding, then add mango. Repeat this until you reach the top. Finish with a layer of mango for color. Add fresh mint leaves on top for a pop of green. This will impress your guests and make the dish more exciting to eat. Pro Tips Use Ripe Mangoes: The sweetness and flavor of your chia pudding will greatly improve if you use ripe mangoes. Look for mangoes that yield slightly to pressure and have a vibrant color. Experiment with Sweeteners: While maple syrup adds a lovely flavor, feel free to experiment with other sweeteners such as agave nectar or coconut sugar to suit your taste preferences. Chill Overnight: For the best texture and flavor, allow the chia pudding to chill overnight. This gives the chia seeds ample time to absorb the liquid and create a creamy pudding. Garnish Creatively: Elevate your presentation by garnishing with not just mint leaves but also toasted coconut flakes or a sprinkle of lime zest for a zesty twist. {{image_4}} You can switch up the mango for other fruits. Berries like strawberries or blueberries work great. Pineapple adds a fun tropical twist. Try diced kiwi for a tart flavor. You can even use bananas or peaches. Each fruit brings its own sweetness and taste. Vanilla is tasty, but you can explore other flavors too. Almond extract gives a nice nutty touch. Try adding a bit of lime juice for a zesty kick. Cinnamon can add warmth, while cardamom gives a unique spice. You can even mix in a bit of cocoa powder for a chocolatey treat. If you want to change the sweetness, there are options. Agave nectar is a great vegan choice. Coconut sugar adds a rich flavor. Stevia or monk fruit sweetener is low-calorie and works well. Just remember to adjust the amount since some are sweeter than others. Store your coconut mango chia pudding in airtight containers. This keeps it fresh and tasty. If you have jars, they work great for this. Make sure to keep the pudding in the fridge for the best flavor and texture. Coconut mango chia pudding lasts about 4 to 5 days in the fridge. After that, the texture may change. I suggest eating it within this time for the best taste. If you notice any odd smells or colors, it’s best to throw it away. You don’t need to heat chia pudding. It’s best cold and refreshing. Just grab it from the fridge and enjoy. If you want it a bit creamier, stir in some coconut milk before serving. This makes it smooth and delightful. Yes, you can use almond milk. It will change the flavor. Coconut milk gives a rich and creamy taste. Almond milk is lighter and nutty. You may need to adjust the sweetness since almond milk is less sweet than coconut milk. Chia pudding is very healthy. Chia seeds are packed with fiber, protein, and omega-3 fatty acids. They help keep you full and support digestion. Coconut milk provides healthy fats. This pudding is a great option for breakfast or dessert. To make it vegan, use maple syrup instead of honey. Maple syrup is a great natural sweetener. Ensure the coconut milk you choose is dairy-free. The rest of the recipe is already vegan-friendly. Yes, you can make this pudding ahead of time. It tastes even better after chilling overnight. Store it in the fridge for up to four days. Just stir it before serving to refresh the texture. Coconut mango chia pudding is simple and fun to make. We discussed the main ingredients, how to prepare and chill them, and tips for great results. You can swap ingredients to fit your diet. Store your pudding properly to keep it fresh. This dish is not only tasty but also healthy. Explore different fruits and flavors for new twists. Try making it ahead of time for an easy snack. Enjoy your creation and share it with others!

Coconut Mango Chia Pudding Quick and Tasty Delight

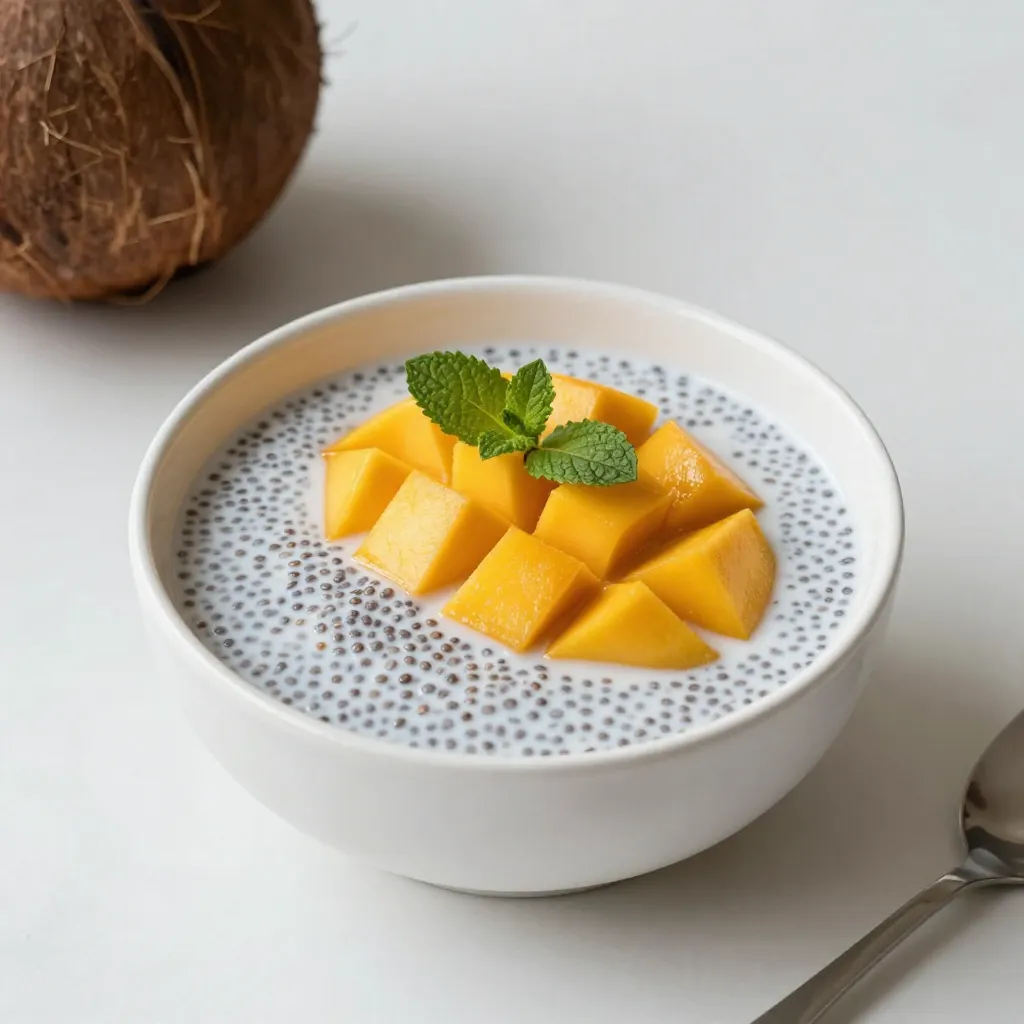
Craving a sweet treat that’s both healthy and quick? Let me introduce you to Coconut Mango Chia Pudding! This simple

To make chocolate cottage cheese pudding, gather these key items: - 1 cup cottage cheese - 1/4 cup unsweetened cocoa powder - 1/4 cup honey or maple syrup - 1/2 teaspoon pure vanilla extract - 1/4 teaspoon sea salt - 1/2 cup milk (choose dairy or a non-dairy alternative) These ingredients create a rich and creamy base. The cottage cheese gives body, while cocoa powder adds chocolate flavor. Honey or maple syrup sweetens the pudding naturally. The vanilla extract enhances the taste, and sea salt balances the sweetness. You can make your pudding even better with these extras: - 2 tablespoons mini chocolate chips (optional for garnish) - Fresh berries (like raspberries or strawberries) - Sliced bananas Using toppings adds color and texture to your dessert. Fresh fruits bring brightness and a hint of tartness. Mini chocolate chips create a fun crunch. If you need to swap ingredients, here are some ideas: - Use Greek yogurt instead of cottage cheese for a tangy twist. - Try agave nectar or stevia in place of honey or maple syrup for lower sugar. - Almond milk or oat milk can replace cow's milk for a dairy-free option. These substitutions maintain the pudding's flavor and texture while catering to your dietary needs. Feel free to mix and match until you find what you love! First, gather your ingredients. You will need cottage cheese, cocoa powder, honey or maple syrup, vanilla, and sea salt. Place the cottage cheese in a blender. Add the cocoa powder, honey, vanilla, and sea salt. This mix is the heart of your pudding. The cottage cheese adds protein. The cocoa gives a rich chocolate flavor. Next, pour in the milk. You can use dairy or a non-dairy option. Blend on high speed. Keep blending until your mixture is smooth and creamy. Stop the blender sometimes. Scrape down the sides to mix everything well. After blending, taste your pudding. If it needs more sweetness, add a bit more honey or maple syrup. Now, spoon the pudding into bowls or dessert cups. If you like, fold in some mini chocolate chips for extra texture. Cover each bowl with plastic wrap or a lid. Place them in the fridge for at least 30 minutes. This step helps the flavors mix and the pudding set. Just before serving, top with fresh berries or banana slices. You can also add more mini chocolate chips for a fun touch. Enjoy your rich and creamy treat! To make your chocolate cottage cheese pudding creamy, start with fresh cottage cheese. Blend it well with cocoa powder, honey, vanilla, and salt. Gradually add milk while blending. This helps create a smooth texture. If your pudding is still grainy, blend it a bit longer. Scraping the sides of the blender ensures all ingredients mix well. This step is key to achieving that rich and creamy feel. Taste your pudding after blending. If you want it sweeter, add more honey or maple syrup. You can also try different flavors. For a hint of spice, mix in a pinch of cinnamon or a splash of coffee. These tweaks let you customize the taste. Remember, balance is important. You want the chocolate flavor to shine through without being too sweet. Presentation makes your pudding even more fun to eat. Use small cups or bowls to serve. Top each serving with fresh berries or banana slices. This adds color and freshness. A few mini chocolate chips on top give a nice touch. You could even drizzle some extra honey for shine. A beautiful presentation makes everyone excited to dig in! {{image_4}} You can make this pudding even more fun by adding new flavors. If you like mint, try adding a few drops of mint extract. It will give your pudding a fresh taste. For a coffee twist, add a teaspoon of espresso powder. This adds a rich, bold flavor that pairs well with chocolate. Taste your pudding after blending. You can adjust the flavor to your liking by adding more of your chosen extract. If you want a healthier version, you can cut down on sugar. Use a sugar-free sweetener instead of honey or maple syrup. This keeps the taste great without all the sugar. For a dairy-free option, swap the cottage cheese for a dairy-free alternative. Silken tofu works well and keeps it creamy. You can also use almond or coconut milk instead of regular milk. These options help make the pudding lighter while still being delicious. Toppings can take your pudding to the next level. Fresh berries, like raspberries or strawberries, add a tasty, fruity burst. Sliced bananas bring a nice sweetness that works well with chocolate. You can also sprinkle some nuts for a crunchy texture. Try adding a dollop of whipped cream for a creamy finish. Mini chocolate chips are a fun touch, too. Mix and match your toppings to find your favorite combination! To keep your chocolate cottage cheese pudding fresh, store it in the fridge. Use airtight containers to prevent it from absorbing other smells. Cover the bowls tightly with plastic wrap or lids. This helps maintain its creamy texture and rich flavor. When stored properly, this pudding lasts about 3 to 5 days in the fridge. Always check for any changes in smell or texture before eating. If you see any signs of spoilage, toss it out to stay safe. You can freeze chocolate cottage cheese pudding for longer storage. Portion it into freezer-safe containers. Leave some space at the top, as it will expand when frozen. It can last up to 2 months in the freezer. When ready to eat, thaw it overnight in the fridge. Stir it well before serving to restore its creamy texture. Yes, you can use other sweeteners. Try agave nectar or stevia. Each sweetener gives a unique flavor. Adjust the amount based on your taste. Start with less, then add more if needed. This way, you can find your perfect sweetness. Many toppings work well with this pudding. Here are some ideas: - Fresh berries like raspberries or strawberries - Sliced bananas - Mini chocolate chips - A dollop of whipped cream - Chopped nuts for a crunchy texture These toppings add flavor and make your pudding look great. Get creative and mix your favorites! Yes, this recipe is perfect for meal prep. You can make it ahead of time. Just store it in the fridge. The pudding stays fresh for about three days. This makes it easy to grab a sweet snack or dessert later. This recipe for Chocolate Cottage Cheese Pudding is simple and fun. We covered the main ingredients and how to blend them well. You also learned tips to make it creamy and sweet, with ideas for flavors and toppings. Take this pudding and customize it to your taste. It’s perfect for any occasion. Enjoy your dessert with family and friends or as a tasty treat for yourself. With easy storage tips, you can keep it fresh, too. Dive in, and make this delicious pudding your own!

Chocolate Cottage Cheese Pudding Rich and Creamy Treat

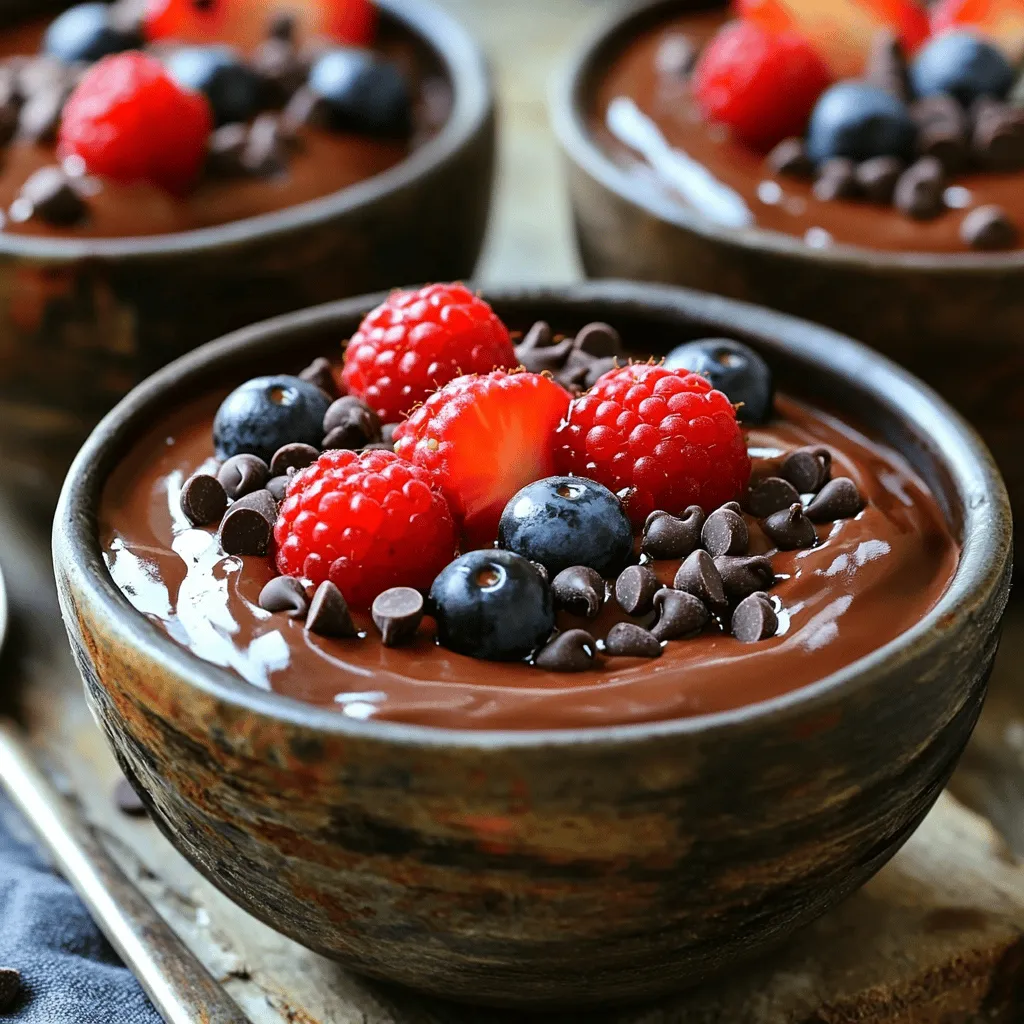
Ready to indulge in a rich and creamy dessert without the guilt? Chocolate Cottage Cheese Pudding is your new go-to

To create Roasted Garlic Parmesan Veggies, you need the following ingredients: - 2 cups broccoli florets - 2 cups cauliflower florets - 1 cup baby carrots, halved - 1 cup bell peppers, sliced - 1/2 cup freshly grated Parmesan cheese - 6 cloves of garlic, finely minced - 1/4 cup extra virgin olive oil - 1 teaspoon dried oregano - 1 teaspoon freshly ground black pepper - 1 teaspoon sea salt - Fresh parsley, chopped (optional for garnish) These ingredients combine to form a dish full of flavor and texture. Broccoli and cauliflower give a nice crunch. The baby carrots add sweetness, while bell peppers bring color and taste. Garlic provides a rich and warm flavor. Parmesan cheese melts beautifully, adding a savory finish. Olive oil helps everything roast well. The oregano, salt, and pepper enhance the overall taste. Feel free to adjust the veggies based on your preferences. You can mix in zucchini, asparagus, or even Brussels sprouts for variety. Enjoy the process of preparing this dish as much as the taste! Set your oven to 425°F (220°C). This hot temperature helps the veggies roast well. In a large mixing bowl, combine: - 2 cups broccoli florets - 2 cups cauliflower florets - 1 cup baby carrots, halved - 1 cup sliced bell peppers Gently toss these vegetables together. Make sure they mix evenly. This helps them roast better. In a small bowl, whisk together: - 6 cloves of finely minced garlic - 1/4 cup extra virgin olive oil - 1 teaspoon dried oregano - 1 teaspoon sea salt - 1 teaspoon freshly ground black pepper Mix until it blends nicely. This garlic mixture adds great flavor to your veggies. Drizzle the garlic mixture over the mixed vegetables. Toss them thoroughly so every piece is coated. Line a baking sheet with parchment paper. Spread the vegetables in a single layer. This lets them roast evenly. Place the baking sheet in your preheated oven. Roast for 20 minutes. This helps develop flavors and gives a nice crisp. After 20 minutes, take the baking sheet out. Sprinkle 1/2 cup of freshly grated Parmesan cheese over the veggies. Put the baking sheet back in the oven. Roast for another 10-15 minutes. You want the veggies fork-tender and the cheese golden and bubbly. Once done, take them out. You can garnish with chopped parsley for a fresh look. Enjoy your delicious roasted garlic Parmesan veggies! To roast veggies evenly, space them well. Leave some room between each piece. Crowding the baking sheet makes them steam instead of roast. Aim for a single layer of vegetables. This helps them cook nicely. Want to boost flavor? Try adding fresh herbs like thyme or rosemary. You can also mix in some red pepper flakes for heat. Lemon zest adds a bright touch too. Experiment with different spices to make it your own! To get crispy veggies, ensure they are well coated but not soggy. Use just enough oil to coat each piece lightly. Flip the veggies halfway through cooking for even crispness. If you want more crunch, roast them a little longer. {{image_4}} You can switch up the veggies based on what is fresh. In spring, use asparagus or snap peas. Summer is great for zucchini and cherry tomatoes. Fall brings butternut squash and Brussels sprouts. In winter, root veggies like sweet potatoes and parsnips shine. Mixing seasonal veggies adds fun and new flavors. If you want to change the cheese, try different options. Feta cheese gives a salty bite. Cheddar offers a sharp taste. Goat cheese adds creaminess. You can also use nutritional yeast for a cheesy flavor without dairy. Experimenting with cheese keeps the dish exciting. To make this dish vegan, skip the cheese. Use a vegan cheese alternative or simply leave it out. Add extra spices or herbs for flavor. A sprinkle of lemon juice brightens the dish. This way, you enjoy delicious veggies without dairy. To store your leftover roasted garlic Parmesan veggies, let them cool first. Place them in an airtight container. They will stay fresh for up to three days in the fridge. Make sure to keep them away from strong-smelling foods to avoid odor transfer. Reheating these veggies is simple. You can use an oven or a microwave. For the oven, preheat to 350°F (175°C). Spread the veggies on a baking sheet and heat for 10-15 minutes. This keeps them crispy. If you use a microwave, heat in 30-second intervals until warm, but this may make them a bit soft. To freeze your roasted veggies, let them cool completely. Place them in a freezer-safe bag or container. Remove as much air as possible. They can freeze well for up to three months. To defrost, move them to the fridge overnight before reheating. You can also heat them directly from frozen, but the texture might change. Roasted vegetables last about 3 to 5 days in the fridge. Store them in an airtight container. For best taste, eat them within this time. Check for any signs of spoilage before eating. If they look or smell off, it's best to toss them. Yes, you can use frozen vegetables, but fresh ones taste better. Frozen veggies often lose texture during cooking. If you use frozen, don’t thaw them first. This will help keep them crisp. Adjust roasting time to ensure they cook through. These veggies pair well with many dishes. Try serving them with grilled chicken or fish. They also complement pasta or quinoa nicely. For a simple meal, serve them over rice. Add a light salad for a balanced plate. Absolutely! You can add red pepper flakes for heat. Start with a small amount and taste as you go. If you want more, increase it slowly. You can also mix in some chopped jalapeños for a fresh kick. Roasting vegetables is simple and fun. You learned the perfect mix of veggies, cheese, and spices. Follow the steps to get tasty, crunchy results every time. Remember to try new herbs, or substitute cheeses for variety. Storing leftovers is easy, and you can even freeze them. You now have the tools to enjoy delicious roasted garlic Parmesan veggies. Embrace your creativity in the kitchen. Enjoy this healthy dish with friends and family!

Roasted Garlic Parmesan Veggies Flavorful and Simple Dish

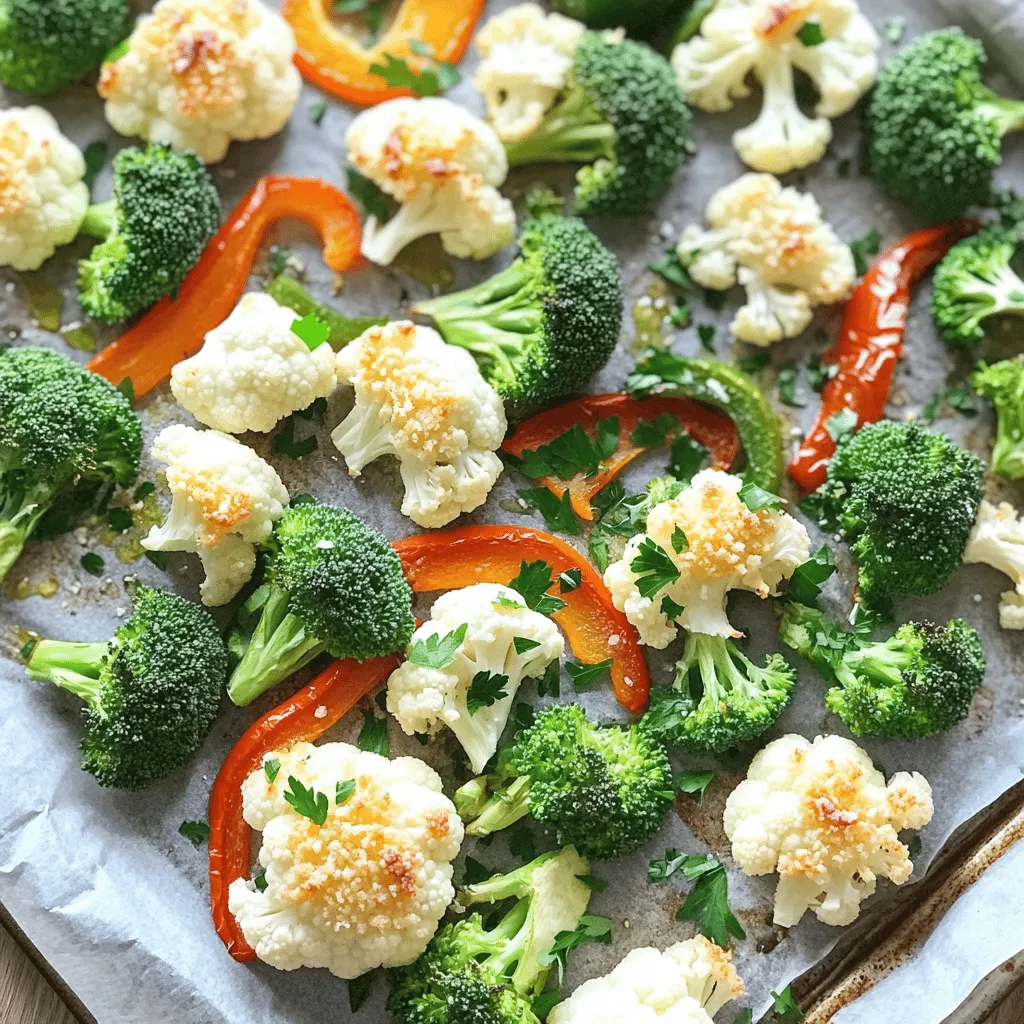
Are you ready to elevate your veggie game? Roasted Garlic Parmesan Veggies bring tons of flavor with just a few

- 1 can (15 oz) chickpeas, drained and rinsed - 2 tablespoons extra virgin olive oil - 1 teaspoon smoked paprika - 1 teaspoon garlic powder - 1/2 teaspoon cayenne pepper - 1/2 teaspoon ground cumin - Salt to taste - Fresh parsley, finely chopped (optional) When I make spicy roasted chickpeas, I love starting with a can of chickpeas. They are easy and quick to use. Rinse them well to get rid of any canning liquid. This makes them clean and ready for seasoning. I also use extra virgin olive oil. It adds a rich flavor and helps the spices stick. The spices are where the magic happens. Smoked paprika gives a warm, rich taste. Garlic powder adds depth and pairs well with the spices. If you like heat, cayenne pepper is your friend. You can adjust it to make your snack as spicy as you want. Ground cumin adds warmth and earthiness. Salt is key for bringing all the flavors together. For a fresh touch, sprinkle some chopped parsley on top. It not only looks great but adds a burst of flavor. These ingredients come together to create a crispy, flavorful snack that you won't be able to resist. {{ingredient_image_2}} - Preheat your oven to 400°F (200°C). - Line a baking sheet with parchment paper. - Open a can of chickpeas and drain them in a colander. - Rinse the chickpeas well under cold water. - Pat the chickpeas dry with a kitchen towel. - In a large bowl, mix the dried chickpeas with olive oil and spices. - Use a spatula or your hands to toss them until they are well-coated. - Spread the seasoned chickpeas in a single layer on the baking sheet. - Roast the chickpeas for 25 to 30 minutes, shaking the pan halfway through. - Once roasted, let the chickpeas cool slightly. - If you want, add fresh chopped parsley on top before serving. To get your chickpeas crispy, start by drying them well. Remove all moisture with a towel. If they are wet, they won’t get that nice crunch. Next, spread them out on the baking sheet. Give them room to breathe! Overcrowding the pan makes them steam instead of roast. You can change the spice level to suit your taste. If you want more heat, add extra cayenne. If you prefer less spice, cut back on it. You can also try using different spices. Add some curry powder or chili powder for a new twist. Fresh herbs like rosemary or oregano can give a great flavor boost too. When it’s time to serve, think about how you present your chickpeas. Use a fun bowl or platter to make them look appealing. You can also pair them with dips. A spicy yogurt dip adds a nice touch. This makes your snack even more flavorful and fun! Pro Tips Dry Chickpeas Thoroughly: Ensuring your chickpeas are completely dry before roasting is crucial for achieving that perfect crunch. Customize Your Spice Blend: Feel free to experiment with different spices, such as curry powder or chili powder, to create a flavor that suits your palate. Adjust Cooking Time: Keep an eye on the chickpeas as they roast; thicker or larger chickpeas may require a bit more time for optimal crispiness. Store Properly: To maintain their crunch, store leftover chickpeas in an airtight container at room temperature for up to a week. {{image_4}} You can change the flavor of your spicy roasted chickpeas easily. Here are some fun ideas: - Different Spices: Add curry powder for a warm, earthy taste. Chili powder brings heat and depth. You can mix and match to find what you like best. - Experimenting with Herbs: Fresh herbs can change the dish. Try rosemary for a piney flavor or oregano for a hint of Mediterranean. Fresh herbs brighten up the roasted chickpeas. Many people have different dietary needs. Here are some ways to adapt the recipe: - Low-Sodium Version: Skip the added salt. Use a salt-free seasoning blend for flavor without the extra sodium. - Gluten-Free: This recipe is naturally gluten-free. You can enjoy it without worry if you avoid gluten. Spicy roasted chickpeas are versatile. Here are ways to enjoy them: - Serving Options: They make a great snack. Serve them with salads or soups for added crunch. Enjoy them as a vegan snack at any time. - In Grain Bowls or Wraps: Add them to grain bowls for protein. They also fit well in wraps, adding texture and flavor. Store your spicy roasted chickpeas in an airtight container. This keeps them fresh and crunchy. Make sure the lid seals well. Avoid using a loose bag or jar. Room temperature works best for storage. These tasty snacks will stay fresh for 3 to 5 days. After that, they may lose their crunch. For the best flavor and texture, consume them within this time frame. If you want to enjoy them later, you can re-crisp your chickpeas. Use an oven or an air fryer. Preheat the oven to 350°F (175°C). Spread the chickpeas on a baking sheet. Heat for about 5 to 10 minutes. This will bring back their crunch. Enjoy them as a snack any time! To make chickpeas crispy, start by drying them well. Use a clean towel to pat them dry after rinsing. The less moisture, the better! Spread them out on the baking sheet in a single layer. Avoid crowding the pan. This helps them roast evenly and get that nice crunch. Yes, you can! If you use dried chickpeas, you'll need to cook them first. Soak them overnight in water. After soaking, boil them until tender. Drain and cool them before roasting. This step helps you achieve a great texture. You can try other legumes like black beans or lentils. Roasted edamame also makes a tasty snack. If you want something different, try nuts like almonds or cashews. They roast well and give you a crunchy bite. To lower the spice level, use less cayenne pepper. You can also swap it for sweet paprika. If you want some warmth without too much heat, add more smoked paprika or garlic powder. Taste the mixture before roasting to find your perfect balance. Yes, Spicy Roasted Chickpeas are healthy! They are high in protein and fiber. This makes them great for a snack. Plus, they use olive oil, which is good for your heart. Enjoy them guilt-free, knowing they're both tasty and nutritious! Roasting chickpeas is simple and fun. You need just a few main ingredients and spices. Following the steps ensures crispy treats every time. Remember to dry the chickpeas and not overcrowd your baking sheet. Feel free to play with flavors and herbs. These snacks fit well with many meals or stand alone as a treat. Store them right to keep that crunch. Have fun making these delicious, healthy bites!

Spicy Roasted Chickpeas Crispy and Flavorful Snack

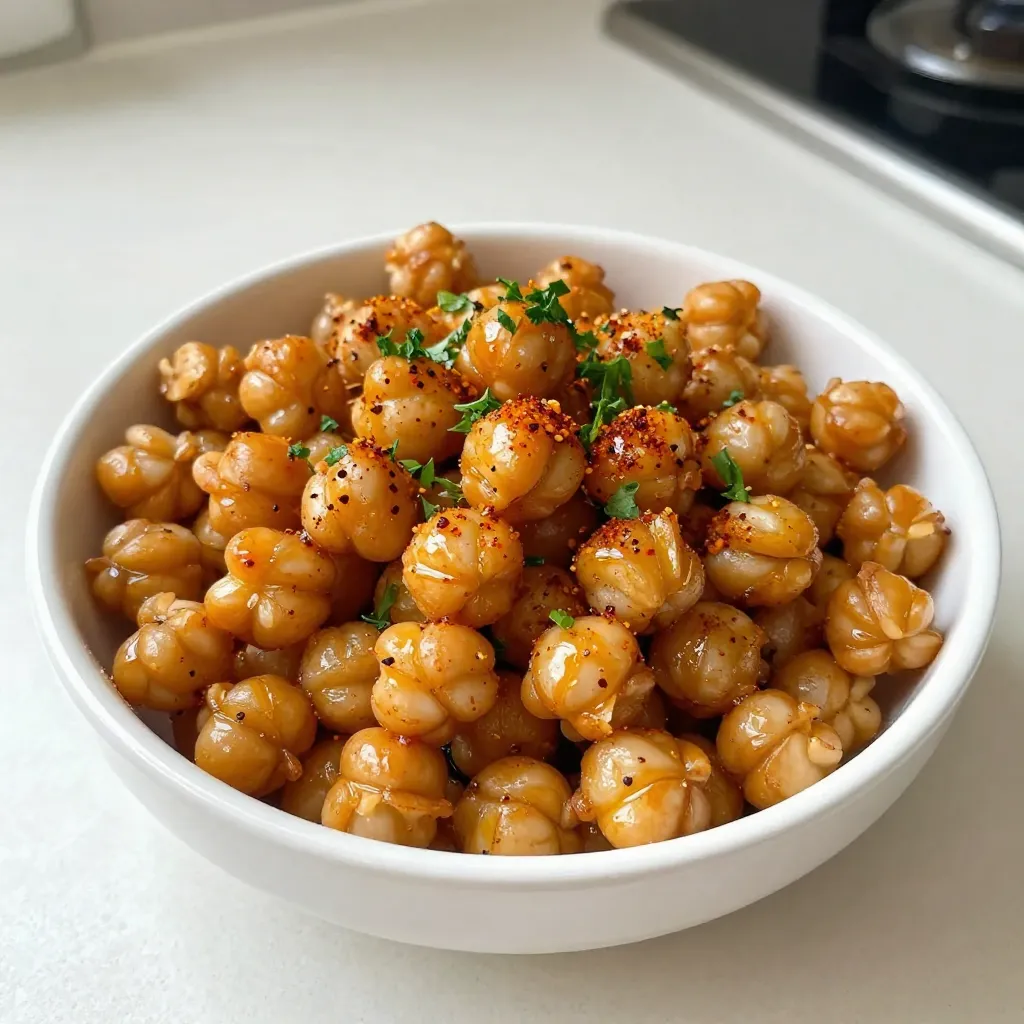
Ready to spice up your snacking? Spicy Roasted Chickpeas are the perfect crispy treat that satisfies your crunch cravings while

To make Almond Joy Energy Balls, gather these ingredients: - 1 cup pitted dates - 1 cup creamy almond butter - 1 cup unsweetened shredded coconut - 1/2 cup raw almonds, roughly chopped - 1/4 cup unsweetened cocoa powder - 1 tsp pure vanilla extract - A pinch of fine sea salt If you like your energy balls sweeter, consider adding: - 2 tablespoons honey - 2 tablespoons maple syrup These options let you tweak the flavor just how you like it. You can swap some ingredients to fit your taste: - Use peanut butter instead of almond butter for a different flavor. - Try other nuts like walnuts or pecans in place of almonds. - Replace shredded coconut with oat flakes if you prefer. These swaps keep the recipe fun and adjustable! {{ingredient_image_2}} Start by gathering your ingredients. You need pitted dates and creamy almond butter. Place them in a high-powered food processor. Pulse them until smooth. Scrape the sides down with a spatula. This ensures a creamy blend without lumps. Now, add unsweetened shredded coconut, chopped almonds, cocoa powder, vanilla extract, and salt. If you want it sweeter, drizzle in honey or maple syrup. Blend the mix again until it forms a sticky dough. If it’s too crumbly, add a bit of water or more almond butter. Blend until it holds together well. Use a tablespoon to scoop out the mixture. Roll each scoop into a ball with your hands. Make sure they are all about the same size. Place the rolled balls on a parchment-lined baking sheet. Make sure they’re not touching. Finally, refrigerate them for about 30 minutes. This helps them firm up before you enjoy them. When you blend the energy balls, use a high-powered food processor. Start with the pitted dates and creamy almond butter. Pulse until smooth. Stop to scrape the sides often. This makes sure everything mixes well. If your blend is too thick, add a bit of almond butter. You want your mixture to be sticky but not too wet. If it crumbles, add one tablespoon of water. You can also add more almond butter if needed. This helps the mixture hold together better. Roll the mixture into balls once it's smooth and sticky. To present your energy balls nicely, use a decorative bowl. You can sprinkle extra shredded coconut or crushed almonds on top. This makes them look more inviting. For freshness, store any leftovers in an airtight container in the fridge. Pro Tips Perfectly Sticky Dough: If your mixture is too dry, add a tablespoon of water or extra almond butter until it reaches a sticky consistency that holds together well. Chill for Firmness: Refrigerating the energy balls for 30 minutes not only helps them firm up but also enhances the flavors, making them even more delicious. Customize Your Sweetness: Adjust the sweetness of your energy balls by adding honey or maple syrup according to your taste preference. Flavor Variations: Experiment with different mix-ins like dried fruits or seeds to create unique flavor profiles and add nutritional benefits. {{image_4}} You can easily change the taste of your Almond Joy Energy Balls. Adding spices gives a nice twist. Try adding a pinch of cinnamon or nutmeg for warmth. For a tropical vibe, add a bit of lime zest. This zest brightens up the flavors. You can even mix in some espresso powder. This will give a rich coffee taste to the balls. Adjust the spices to fit your mood or season. If you want to switch things up, try different nut butters. Cashew butter works great and has a creamy texture. Sunflower seed butter is a good choice too. It adds a nutty flavor without any nuts. You can also use peanut butter for a classic taste. Each nut butter offers a unique flavor, so feel free to experiment. Boost the nutrition of your energy balls with add-ins. Adding protein powder can help you stay full longer. A scoop of your favorite protein powder blends well without changing the taste. Chia seeds are another great option. They add fiber and omega-3s. You can also toss in some ground flaxseed for added health benefits. Mix and match these add-ins to fit your dietary needs. Store your Almond Joy Energy Balls in an airtight container. This keeps them fresh and tasty. Place a piece of parchment paper between layers to prevent sticking. Always keep them in the fridge for best results. These energy balls stay fresh for up to one week in the fridge. If you notice any change in smell or texture, toss them out. For longer freshness, check the expiration date on your ingredients before making the recipe. You can freeze these energy balls for up to three months. To freeze, place them on a baking sheet first. After they harden, transfer them to a freezer-safe bag. Remember to label the bag with the date. When ready to eat, thaw them in the fridge overnight. Yes, you can use dried fruit. Options like figs or apricots work well. Just remember, dried fruit may make the balls sweeter. Adjust the other sweeteners if needed. Dates add a nice texture and natural sweetness that is hard to beat. Yes, these energy balls are gluten-free. All the ingredients are gluten-free, making them safe for those with gluten allergies. Always check labels to confirm that they meet your dietary needs. Almond Joy Energy Balls keep well in the fridge for about a week. Store them in an airtight container to keep them fresh. You can also freeze them for up to three months. Just let them thaw in the fridge before you enjoy them. This blog post covered how to make tasty Almond Joy Energy Balls. We explored the key ingredients, step-by-step instructions, and useful tips. You can also try fun variations for different flavors and nutrients. In conclusion, making these energy balls is easy and fun. Enjoy the process and share with others. Feel free to personalize your balls with your favorite add-ins. With great storage tips, you'll keep them fresh longer. Try it out and enjoy your healthy snack!

Almond Joy Energy Balls Simple and Tasty Recipe

Are you ready to satisfy your sweet tooth with a healthy twist? Let me introduce you to Almond Joy Energy

- 1 pound ground chicken or turkey - 1/2 cup panko breadcrumbs - 1/4 cup green onions, finely chopped - 1 teaspoon fresh ginger, grated - 1 tablespoon garlic, minced I use ground chicken or turkey for these meatballs. They stay moist and tasty. Panko breadcrumbs help create a light, crispy texture. They soak up flavors but don't make the meatballs dense. Green onions add a fresh taste. Ginger gives a warm, zesty kick. Garlic boosts the flavor with its savory notes. - 1/4 cup low-sodium soy sauce - 2 tablespoons honey or agave syrup - 1 tablespoon sesame oil - 1 tablespoon rice vinegar I prefer low-sodium soy sauce for a healthier option. It keeps the dish from being too salty. Honey or agave syrup sweetens the sauce. You can choose either based on your taste. Sesame oil adds a nutty flavor that enhances the dish. Rice vinegar gives a tangy zest, balancing out the sweetness. - 1 cup cooked jasmine rice (or brown rice) - 1 cup steamed broccoli florets - Sesame seeds for garnish - Extra green onions, thinly sliced, for garnish I love serving teriyaki meatballs over cooked jasmine rice. It soaks up all that delicious sauce. Brown rice is a great choice for added fiber. Steamed broccoli adds a nice crunch and bright color. Finish with sesame seeds for a nutty touch and sliced green onions for extra freshness. {{ingredient_image_2}} Start by preheating your oven to 400°F (200°C). This step helps the meatballs cook evenly. While the oven warms up, take a baking sheet and line it with parchment paper. This paper keeps the meatballs from sticking and makes cleanup easy. In a large mixing bowl, combine 1 pound of ground chicken or turkey with 1/2 cup of panko breadcrumbs. Add in 1/4 cup of finely chopped green onions, 1 teaspoon of grated ginger, and 1 tablespoon of minced garlic. Pour in 1 tablespoon of low-sodium soy sauce. Using your hands, mix everything well. You want all the flavors to blend. A good mix keeps your meatballs tasty and moist. Now it’s time to shape the meatballs. With your hands, form the mixture into balls, each about 1.5 inches wide. Place them on the baking sheet, leaving space between each one. This space helps them cook evenly. Bake the meatballs in the preheated oven for 15 to 20 minutes. They should turn golden brown and reach an internal temperature of 165°F (75°C). While the meatballs bake, prepare the teriyaki sauce. In a small saucepan over medium heat, combine the remaining soy sauce, 2 tablespoons of honey (or agave syrup), 1 tablespoon of sesame oil, and 1 tablespoon of rice vinegar. Stir the mixture until smooth. Bring it to a gentle simmer and let it cook for 3 to 5 minutes, stirring often. The sauce will thicken slightly, making it perfect for coating the meatballs. Once the meatballs are done, place them in a large bowl. Pour the sauce over them and gently toss. This ensures every meatball gets a tasty coating. To keep your meatballs moist, use ground chicken or turkey. This meat is lean but still juicy. Add panko breadcrumbs to help bind the mixture and hold in moisture. Mix the meat with breadcrumbs, green onions, ginger, and garlic well. This ensures that every bite is flavorful. Cooking times can vary by oven. If your oven runs hot, check the meatballs a bit early. Aim for a golden brown color and an internal temperature of 165°F. This is the perfect point for cooking meatballs. To thicken your sauce, let it simmer longer. This helps reduce the liquid and makes it stick better to the meatballs. You can also mix a little cornstarch with water for a quick thickening trick. For flavor variations, try adding red pepper flakes for heat or sesame seeds for crunch. You can even stir in pineapple juice for a fruity twist. These options can make your teriyaki sauce unique. When serving, choose colorful bowls to make the dish pop. Layer the rice at the bottom, then add meatballs and broccoli on top. Sprinkle sesame seeds and green onions for garnish. For sides, crispy edamame or a simple cucumber salad work well. You can also offer a wedge of lime or lemon. A squeeze of citrus can brighten the dish and enhance the flavors. Pro Tips Use Fresh Ingredients: Always opt for fresh ginger and green onions for the best flavor in your meatballs and sauce. Perfect Meatball Texture: If your mixture feels too wet, add a bit more panko breadcrumbs to help hold the meatballs together. Adjust the Sweetness: Depending on your taste, you can adjust the amount of honey or agave syrup in the teriyaki sauce for a sweeter or more savory flavor. Meal Prep Friendly: These meatballs can be made ahead of time and frozen. Just reheat them in the oven or microwave when you're ready to serve! {{image_4}} You can easily switch the meat in your teriyaki meatballs. Use ground beef or pork for a different flavor. For a plant-based option, try crumbled tofu or lentils. These choices can still give you tasty meatballs. Each protein type brings its own unique taste. Rice is a great base for your bowls, but you can mix it up. Try quinoa for a nutty taste. Cauliflower rice is a low-carb choice. Both options add nice texture and flavor. You can also use brown rice for a healthy twist. Each type of rice will change the dish's feel. Toppings can really make your bowl shine. Add sliced radishes for crunch. Shredded carrots give a sweet bite. You could also use avocado slices for creaminess. Fresh herbs like cilantro or basil can brighten your dish. These extras not only taste great but also look beautiful! To keep your teriyaki meatball bowls fresh, store leftovers in the fridge. Use an airtight container. This helps keep the meatballs and rice moist. They can last up to three days in the fridge. Make sure to let them cool before sealing. This prevents condensation, which can make food soggy. If you want to freeze meatballs, do it in two parts. Freeze meatballs and sauce separately. Let meatballs cool completely before freezing. Place them in a freezer bag. Squeeze out as much air as you can. For the sauce, pour it into a container. Label both bags with the date. They can last for up to three months in the freezer. When it's time to eat, reheat meatballs in the oven. Preheat the oven to 350°F (175°C). Place meatballs on a baking sheet for even heating. Bake for about 15 minutes. For the sauce, warm it in a small saucepan over low heat. Stir often to keep it from burning. This method makes sure your meatballs stay juicy and the sauce stays flavorful. Yes, you can use many types of meat for these meatballs. Ground beef or pork works well. You can also use plant-based proteins, like lentils or chickpeas, for a veggie option. The key is to keep the texture right. Adjust the cooking time if you use different meats. These meatball bowls pair well with several sides. Try steamed veggies like carrots or snap peas. You can also serve a light salad or pickled cucumbers for a fresh taste. For drinks, green tea or sparkling water works nicely. These options balance the rich flavors of the teriyaki sauce. To check if your meatballs are done, use a meat thermometer. They should reach 165°F (75°C). If you don’t have one, cut a meatball in half. The inside should be no longer pink. The juices should run clear. This ensures your meatballs are safe and tasty! In this article, we explored how to make delicious teriyaki meatballs. We covered the key ingredients, like ground meat and flavorful sauces. I shared steps for mixing, baking, and serving these tasty meatballs. We also discussed helpful tips for perfecting your dish, along with variations and storage methods. Finally, I gave answers to common questions. Remember, with each effort, you can create a meal that delights everyone. Enjoy making teriyaki meatballs and experimenting in the kitchen!

Teriyaki Meatball Bowls Flavor-Loaded Easy Recipe

Are you ready to whip up a meal the whole family will love? My Teriyaki Meatball Bowls are packed with

The main ingredients for the blueberry streusel muffins are simple and easy to find. Here’s what you need: - 2 cups all-purpose flour - 1 cup granulated sugar - 1 tablespoon baking powder - ½ teaspoon baking soda - ½ teaspoon salt - ¾ cup unsalted butter, melted - 2 large eggs - 1 teaspoon vanilla extract - 1 cup buttermilk (or milk mixed with 1 tablespoon vinegar) - 2 cups fresh blueberries (or frozen blueberries, thawed and drained) These ingredients work together to create a soft and flavorful muffin packed with juicy blueberries. The streusel topping adds a crunchy texture. You will need: - ½ cup all-purpose flour - ½ cup brown sugar, packed - ¼ cup rolled oats - ¼ cup cold unsalted butter, cubed - 1 teaspoon ground cinnamon This topping makes the muffins even more delightful and gives them a bakery-style finish. When making these muffins, use high-quality ingredients for the best taste. Fresh blueberries provide the best flavor and texture. If you choose frozen, make sure they are thawed and drained well to avoid excess moisture. Select unsalted butter for a balanced flavor. Using real vanilla extract enhances the overall taste. Good quality flour helps the muffins rise well and keeps them soft. Always measure your ingredients carefully to ensure great results. First, heat your oven to 375°F (190°C). This step is key for a great bake. Take your muffin tin and line it with paper liners. If you don’t have those, grease each cup lightly with butter or oil. This will help your muffins pop out easily. Grab a large mixing bowl. Whisk together the following dry ingredients: - 2 cups all-purpose flour - 1 cup granulated sugar - 1 tablespoon baking powder - ½ teaspoon baking soda - ½ teaspoon salt Make sure there are no lumps. This mix is the base for your muffins. In a medium bowl, mix your wet ingredients. Use these: - ¾ cup melted unsalted butter - 2 large eggs - 1 teaspoon vanilla extract - 1 cup buttermilk Stir until the mixture is smooth. This will add richness and flavor. Now, slowly pour the wet mix into the dry ingredients. Use a spatula or wooden spoon to stir gently. Stop mixing when you see no dry flour. Gently fold in the 2 cups of blueberries. Be careful not to break them! In a small bowl, mix these ingredients: - ½ cup all-purpose flour - ½ cup packed brown sugar - ¼ cup rolled oats - 1 teaspoon ground cinnamon Add in ¼ cup of cold cubed butter. Use your fingers or a pastry cutter to mix until it looks like coarse crumbs. This topping will give your muffins a nice crunch. Fill each muffin cup about two-thirds full with batter. This allows room for rising. Then, sprinkle the streusel topping generously over each muffin. Bake for 18-22 minutes. They’re done when the tops are golden and a toothpick comes out clean. After baking, take the muffins out of the oven. Let them cool in the pan for about 5 minutes. Next, move them to a wire rack to cool completely. Enjoy the lovely aroma as they cool! Mix the wet and dry ingredients just until they come together. Overmixing will lead to tough muffins. A few lumps are okay. Gently fold in the blueberries. This keeps them whole and adds bursts of flavor. Choose firm, plump blueberries. Look for a deep blue color with a silvery bloom. Wash them gently before use, and dry them with a towel. If using frozen berries, thaw and drain them well. This step prevents excess moisture in your batter. Keep your butter cold while making the streusel. Use a pastry cutter or your fingers to blend the butter into the dry mix. The mixture should look like coarse crumbs. This texture creates a great crunch on top of your muffins. {{image_4}} You can easily adjust this recipe to fit your needs. If you want to make it gluten-free, swap the all-purpose flour for a gluten-free blend. Use almond flour or oat flour for a nutty taste. If you need a dairy-free option, replace buttermilk with almond milk and use coconut oil instead of butter. For a lower sugar choice, use a sugar substitute like monk fruit sweetener. These swaps keep the muffins tasty and enjoyable for everyone. Feel free to get creative with flavor! You can add a teaspoon of lemon zest for a fresh zing. Chopped nuts, like walnuts or pecans, add crunch and depth. For a chocolate twist, mix in a half-cup of chocolate chips. If you're feeling adventurous, try a mix of spices, like nutmeg or ginger, to warm up the flavor profile. These additions let you customize each batch to your liking. Muffins are versatile! In summer, use fresh raspberries or strawberries instead of blueberries. In fall, try diced apples or pears with cinnamon. For winter, consider cranberries or even citrus like orange zest. Each fruit brings its unique flavor and texture. These seasonal swaps not only change the taste but also keep your muffins exciting all year round. To keep your Blueberry Streusel Muffins fresh, store them in an airtight container. This helps keep them moist and tasty. If you have leftover muffins, let them cool completely first. Then, place them in the container. Do not stack them too high to avoid squishing. You can also use a zip-top bag for extra protection. Freezing is a great option for longer storage. Wrap each muffin tightly in plastic wrap. Then place the wrapped muffins in a freezer bag. Label the bag with the date to keep track. These muffins can last up to three months in the freezer. When you're ready to enjoy them, just take out what you need. To reheat your muffins, use the microwave or oven. For the microwave, place one muffin on a plate and heat for about 15-20 seconds. If you want a crispy top, use the oven. Preheat it to 350°F (175°C). Heat the muffins for about 5-10 minutes. Enjoy them warm for the best flavor! Yes, you can use frozen blueberries in this recipe. Just thaw and drain them before adding. This will help keep the muffins from becoming too wet. Frozen berries work well and still taste great! To make these muffins dairy-free, swap buttermilk with a dairy-free milk. Use soy, almond, or oat milk with a splash of vinegar. This mix will mimic buttermilk and keep the muffins moist and fluffy. If you don’t have buttermilk, you can make a quick substitute. Mix one cup of milk with one tablespoon of vinegar. Let it sit for five minutes. This will create a similar tangy flavor and texture. These muffins stay fresh for about three days at room temperature. Store them in an airtight container. For longer storage, put them in the fridge, where they can last up to a week. Absolutely! You can double the recipe easily. Just make sure you have enough muffin tins and space in your oven. Enjoy making more muffins to share with friends or family! In this blog post, we covered all you need for perfect muffins. We discussed main ingredients and their quality, step-by-step instructions, and tips to avoid mistakes. We also explored fun variations and best storage practices. Remember, fresh ingredients and careful mixing lead to great results. Experiment with flavors and enjoy your baking. Perfect muffins await you!

Blueberry Streusel Muffins Bakery Fresh and Tasty Delight

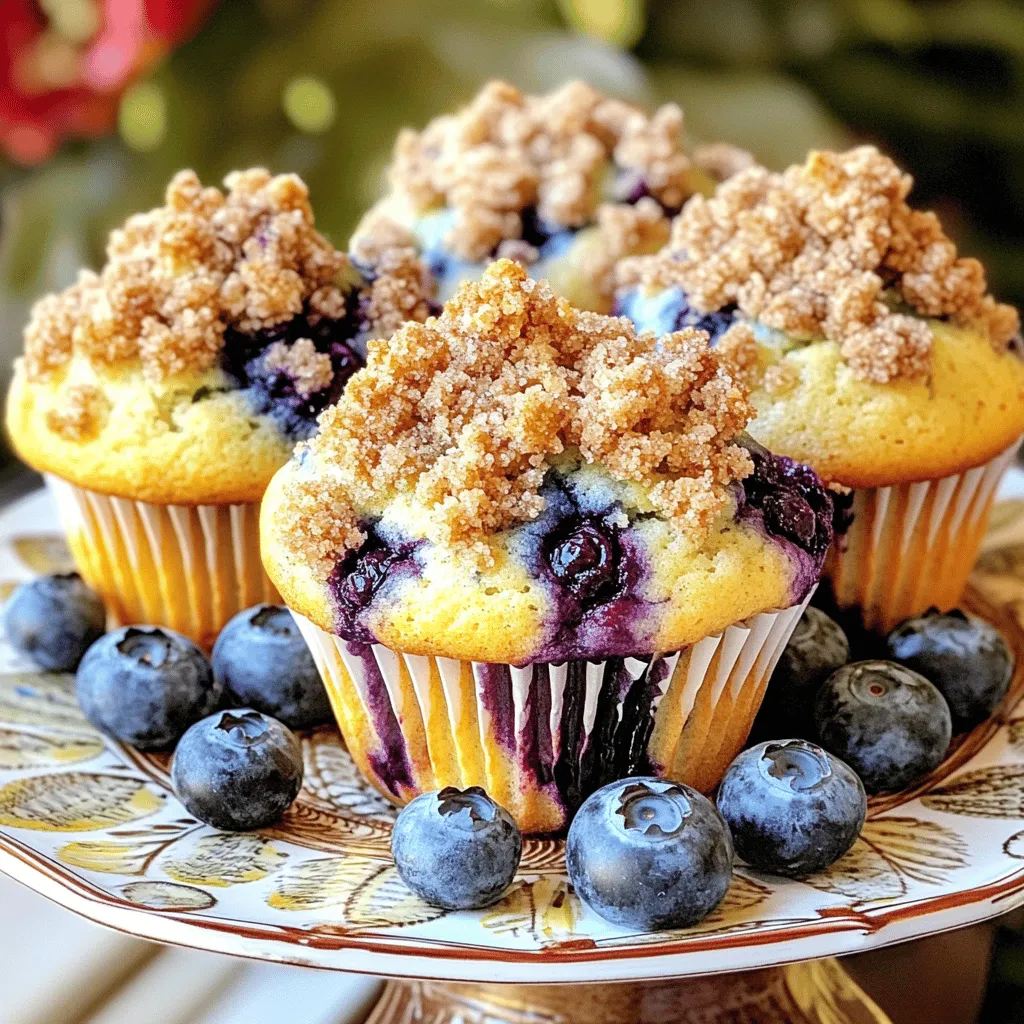
Get ready to indulge in a treat that bursts with flavor! My Blueberry Streusel Muffins are the perfect blend of

To make slow cooker cinnamon apple oats, gather these key items: - 2 cups rolled oats - 4 cups almond milk (or any milk of your choice) - 2 medium apples, peeled, cored, and diced - 1/2 cup brown sugar or pure maple syrup - 1 teaspoon ground cinnamon - 1/4 teaspoon ground nutmeg - 1/4 teaspoon salt - 1 teaspoon pure vanilla extract These ingredients blend well together. The oats soak up the milk and flavors. Apples add a fresh taste and nice texture. The cinnamon and nutmeg provide warmth and spice. You can make your oats even better with these tasty toppings: - Chopped nuts (like walnuts or pecans) - Dried fruits (such as cranberries or raisins) - Additional fresh apple slices These toppings add crunch or sweetness. They also make your dish look nice. Feel free to mix and match based on what you like. If you have dietary needs, try these swaps: - Use gluten-free oats for a gluten-free option. - Substitute almond milk with coconut, soy, or oat milk. - For a sugar-free option, replace brown sugar with a sugar-free sweetener. These changes keep the dish safe and yummy. You can enjoy this meal while meeting your dietary needs. In your slow cooker, add the rolled oats and almond milk. Next, peel, core, and dice the apples. Toss the diced apples into the slow cooker. Sprinkle in brown sugar or pure maple syrup. Add in ground cinnamon, ground nutmeg, and salt. Use a spatula to stir everything well. Make sure all the oats soak up the milk and mix evenly. Once your mixture is ready, secure the lid on the slow cooker. Set it to cook on low heat for 6 to 8 hours. The oats will simmer gently. Check them after about 6 hours. You want the oats soft and creamy. They should absorb most of the liquid during cooking. When the cooking time ends, remove the lid and stir in pure vanilla extract. This adds a lovely flavor. If the oats seem too thick, add a splash of milk. Now, it is time to serve! Scoop the warm oats into bowls. You can add toppings like chopped nuts, dried fruits, or fresh apple slices. Enjoy your delicious breakfast! To get the best texture, use rolled oats. They cook evenly and stay soft. I like to mix the oats with almond milk and diced apples. Stir well so every oat gets soaked. Cook on low for 6 to 8 hours. Check the oats near the end. They should be creamy and not too dry. If they seem thick, add more milk slowly. To boost flavor, add spices like nutmeg and cinnamon. These spices make the oats warm and cozy. For sweetness, brown sugar or maple syrup works well. You can also add a splash of vanilla extract at the end. This will make the dish taste even better. Consider mixing in chopped nuts or dried fruits for extra flavor and texture. For a pretty look, serve the oats in clear jars. Layer the oats with toppings like nuts or fresh apple slices. This adds color and makes it fun to eat. A drizzle of honey or syrup on top makes it more appealing. It also adds shine and sweetness. Enjoy your creative breakfast! {{image_4}} You can change the flavor with other fruits. Try adding bananas or pears for a twist. Berries like blueberries or strawberries can also add a sweet touch. Just chop the fruit and mix it in with the oats. You can even use frozen fruits if fresh ones are not available. They will add color and taste. If you need a nut-free option, skip the nuts completely. You can use seeds like pumpkin or sunflower seeds instead. These seeds add crunch and nutrition without any nuts. For a creamier texture, try adding a dollop of yogurt on top after cooking. This keeps the meal nut-free while still tasting great. To make this recipe vegan, just use plant-based milk like almond or oat milk. For a gluten-free version, make sure to choose certified gluten-free oats. You can also replace brown sugar with maple syrup to keep it vegan. These changes make the dish friendly for all diets, while still being delicious and filling. After enjoying your cinnamon apple oats, store any leftovers in a tight container. Place them in the fridge. They will stay fresh for about 3 to 5 days. To keep the oats from drying out, consider adding a little splash of milk before sealing the container. This keeps them creamy and tasty. If you want to save some for later, freezing works great. Use a freezer-safe container or bag. Make sure to leave some space for the oats to expand. They can last up to 3 months in the freezer. When you're ready, just thaw them overnight in the fridge. Reheating your cinnamon apple oats is easy. You can use a microwave or a stovetop. If using the microwave, heat for 1 to 2 minutes. Stir halfway for even heating. If using the stovetop, place the oats in a pot with a splash of milk. Heat over low heat, stirring until warm. Enjoy them like they are fresh from the slow cooker! Yes, you can use steel-cut oats. They will take longer to cook. I recommend cooking them for 8 to 10 hours on low heat. Steel-cut oats give a chewier texture. If you like a heartier bite, they are a great choice. To make this recipe sugar-free, skip the brown sugar or maple syrup. Use ripe bananas for natural sweetness instead. You can also add a touch of unsweetened applesauce. This keeps the flavor without added sugar. I love adding chopped nuts like walnuts or pecans. They add a nice crunch. Dried fruits, like cranberries or raisins, bring extra sweetness. Fresh apple slices add brightness. You can also drizzle honey or maple syrup on top for sweetness. This blog post covered everything about making cinnamon apple oats. We discussed key ingredients, cooking steps, and tips for perfect oats. You learned about tasty variations and how to store your oats. These insights will help you make comforting meals that fit your needs. Remember, cooking can be fun and adaptable. Enjoy experimenting with flavors and textures. Cinnamon apple oats can be yours in many delicious forms. Dive in and make it your own!

Slow Cooker Cinnamon Apple Oats Simple and Tasty Meal

If you love warm, comforting breakfasts, you’ll enjoy these Slow Cooker Cinnamon Apple Oats. This simple recipe combines sweet apples

Older posts
Newer posts
← Previous Page1 … Page8 Page9 Page10 … Page86 Next →

dsad

© 2026 dailydishcraft • Built with GeneratePress

Our Policies

  • Copyright Policy
  • Cookie Policy
  • GDPR Policy
  • Privacy Policy
  • Disclaimer
  • Terms Of Use

More Information

  • Home
  • About
  • Contact
  • Appetizers
  • Dessert
  • Dinner
  • Drinks
©2026, dailydishcraft About Back To Top