Skip to content
DisclaimerTerms Of UseGDPR PolicyCookie Policy

dailydishcraft

  • Home
  • Drinks
  • Appetizers
  • Dinner
  • Dessert
  • About
  • Contact
  • Privacy Policy
DisclaimerTerms Of UseGDPR PolicyCookie Policy

NO-ING-IMG

To make Bakery-Style Chocolate Pumpkin Muffins, you'll need some tasty ingredients. Here is the list of what you need: - 1 cup canned pumpkin puree - 1/2 cup granulated sugar - 1/2 cup packed brown sugar - 1/2 cup vegetable oil - 2 large eggs - 1 teaspoon vanilla extract - 1 1/2 cups all-purpose flour - 1/2 cup unsweetened cocoa powder - 1 teaspoon baking soda - 1 teaspoon baking powder - 1/2 teaspoon salt - 1 teaspoon ground cinnamon - 1/2 teaspoon ground nutmeg - 1/2 cup chocolate chips (milk or dark) - Optional: Pumpkin seeds for topping Canned pumpkin puree adds moisture and flavor. The sugars help sweeten and give a nice caramel note. Vegetable oil keeps the muffins soft, while eggs bind everything together. The dry ingredients include flour for structure, cocoa powder for that rich chocolate taste, and baking soda and baking powder to help them rise. The spices, like cinnamon and nutmeg, add warmth and depth. Chocolate chips are a must for those gooey bites of chocolate goodness. You can add pumpkin seeds on top for some crunch. With these ingredients, you're set to create delicious muffins that taste like a bakery treat. Enjoy baking your chocolate pumpkin muffins! 1. Preheat your oven to 350°F (175°C). This step helps the muffins bake evenly. 2. Prepare your muffin pan. Use cupcake liners or lightly grease it for easy muffin removal. 3. In a large bowl, mix the wet ingredients. Combine 1 cup of pumpkin puree, 1/2 cup of granulated sugar, 1/2 cup of brown sugar, 1/2 cup of vegetable oil, 2 large eggs, and 1 teaspoon of vanilla extract. Whisk until smooth. 4. In another bowl, sift together the dry ingredients. Use 1 1/2 cups of all-purpose flour, 1/2 cup of cocoa powder, 1 teaspoon of baking soda, 1 teaspoon of baking powder, 1/2 teaspoon of salt, 1 teaspoon of ground cinnamon, and 1/2 teaspoon of ground nutmeg. Sifting removes lumps and adds air. 1. Slowly add the dry mixture to the wet mixture. Stir gently until just combined. It's okay if some lumps remain. 2. Carefully fold in 1/2 cup of chocolate chips. This ensures even distribution for a chocolaty flavor in every bite. 3. Spoon the batter into the muffin pan. Fill each cup about three-quarters full. This allows space for rising. If you want, sprinkle some pumpkin seeds on top for crunch. 4. Place the muffin pan in the oven. Bake for 18 to 20 minutes. Check for doneness by inserting a toothpick in the center. It should come out clean or with a few moist crumbs. 5. After baking, let the muffins cool in the pan for about 5 minutes. Then, transfer them to a wire rack to cool completely. This helps them stay fluffy and avoid sogginess. - Ensuring moisture and fluffiness To keep your muffins moist, use canned pumpkin puree. This adds natural moisture. Also, don't over-mix the batter. Over-mixing can lead to tough muffins. Stir just until combined. A few lumps are okay. - Proper mixing techniques When mixing wet and dry ingredients, fold them together gently. Use a spatula or wooden spoon. This helps maintain air in the mix. Air makes your muffins rise and stay fluffy. - Presentation tips Serve muffins warm for the best taste. You can dust them with powdered sugar or drizzle melted chocolate on top. For a fun touch, add pumpkin seeds. They add crunch and look great. - Pairing with beverages Chocolate pumpkin muffins go well with coffee or tea. A warm drink enhances the cozy feel. You can also serve them with a glass of milk for a classic treat. - Recommended muffin pan types Use a non-stick muffin pan for easy removal. Silicone pans are also great. They help muffins pop out easily. If using metal pans, line them with cupcake liners. - Tools for effective mixing A large mixing bowl is key for combining your ingredients. Use a whisk for wet ingredients. A sifter helps aerate dry ingredients. Having these tools ensures a smooth batter and great muffins. {{image_4}} You can switch up the sugar in this recipe. Try using coconut sugar for a hint of caramel flavor. You can also use brown sugar alone for a richer taste. If you want a bit of crunch, use raw sugar instead. For those who need gluten-free options, almond flour works well. You can also use a gluten-free blend. Just remember, different flours may change the texture a little. Want to spice things up? Add a pinch of ginger or allspice for a warm kick. A splash of orange extract can also brighten the flavors. Mix-ins can take your muffins to the next level. Try adding chopped nuts like walnuts or pecans for crunch. Dried cranberries or raisins will add sweetness and chewiness. Make these muffins fit any holiday. For Thanksgiving, add chopped pecans and a sprinkle of nutmeg. For Christmas, include peppermint extract or mini candy canes. In spring, swap out some pumpkin for mashed bananas. This will lighten the flavor and make it fruity. Use seasonal spices to match the time of year, and have fun with it! To keep your chocolate pumpkin muffins fresh, store them in an airtight container. This prevents moisture loss and keeps them soft. You can use a resealable plastic bag as well. Place a piece of parchment paper between the muffins to avoid sticking. - Best methods for keeping muffins fresh: - Store at room temperature for up to 3 days. - For longer shelf life, refrigerate them for up to a week. - Recommended storage containers: - Use glass or plastic containers with tight lids. - A muffin keeper is ideal for this purpose. If you want to save some muffins for later, freezing is a great option. Muffins freeze well and can last for about three months in the freezer. - How to freeze muffins for longer shelf life: - Let the muffins cool completely. - Wrap each muffin in plastic wrap, then place them in a freezer bag. - Thawing and reheating tips: - To thaw, leave muffins in the fridge overnight. - For a warm treat, microwave them for about 15-20 seconds. Enjoy them warm! Yes, you can use fresh pumpkin. Just roast it and blend it until smooth. This gives a fresh taste. Make sure to drain any extra water to avoid soggy muffins. Check them after 18 minutes. Insert a toothpick into the center. If it comes out clean or with a few moist crumbs, they are ready. This ensures a soft and moist texture. If your muffins are dry, check your oven temperature. Make sure it’s correct. You can also add a bit more oil next time. This helps keep the muffins moist. You can prepare the batter a day early. Just store it in the fridge. Bake the muffins when you are ready. This keeps them fresh and tasty. We covered the key ingredients for tasty muffins, from pumpkin puree to spices. I shared step-by-step instructions to guide you through mixing and baking. Helpful tips for serving and storing muffins will keep them fresh. You can also customize flavors and ingredients for any season. Remember, with a few tricks, your muffins can shine. Enjoy baking and sharing these delicious treats with friends and family!

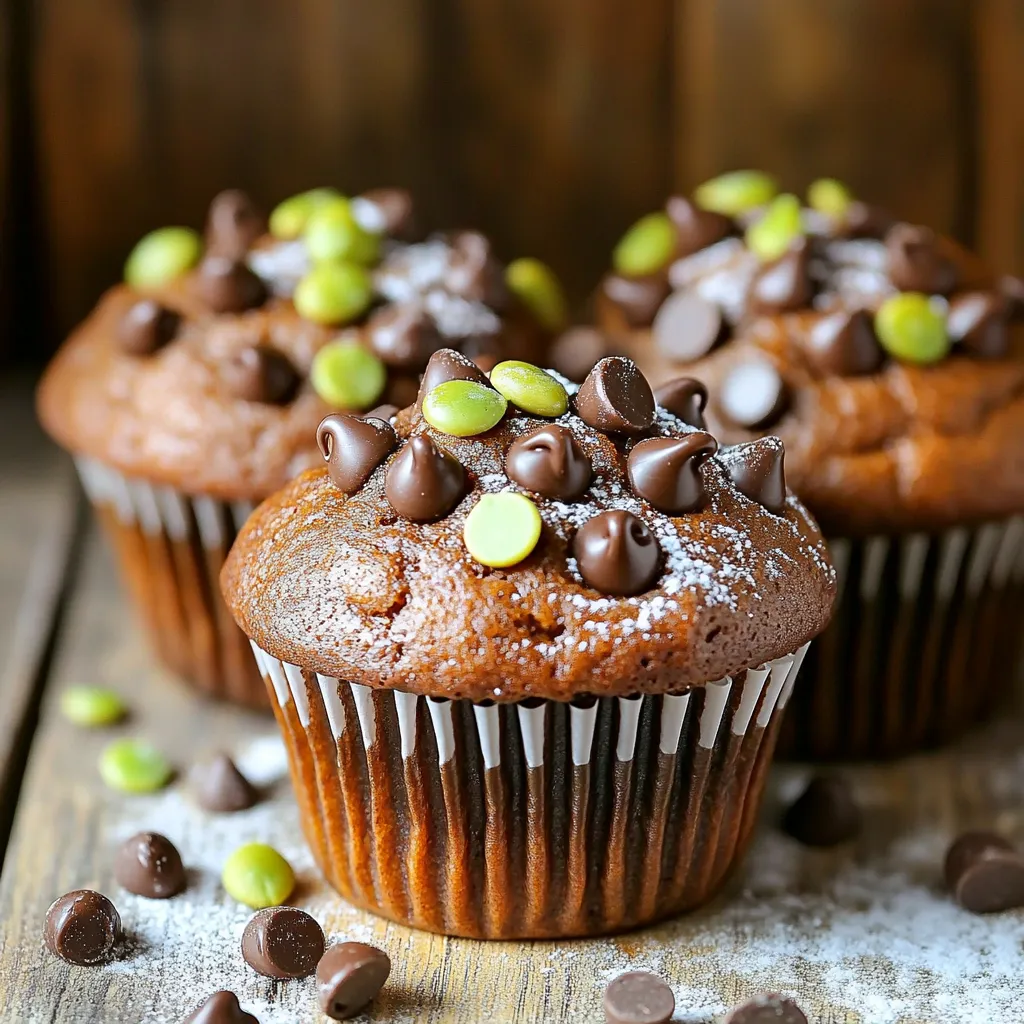
Bakery-Style Chocolate Pumpkin Muffins Delightful Treat

If you crave a sweet treat that combines the cozy flavors of fall with rich chocolate, you’ve come to the

To make this delicious Triple Chocolate Zucchini Bread, you'll need a few simple ingredients. Here’s the list: - 1 medium zucchini, grated (about 1 cup) - 1 cup granulated sugar - 1/2 cup packed brown sugar - 1/2 cup vegetable oil - 2 large eggs - 1 teaspoon pure vanilla extract - 1 1/2 cups all-purpose flour - 1/2 cup unsweetened cocoa powder - 1 teaspoon baking soda - 1/2 teaspoon baking powder - 1/2 teaspoon salt - 1 cup semi-sweet chocolate chips - 1/2 cup white chocolate chips - 1/2 cup dark chocolate chunks Each ingredient plays a key role in making the bread rich and moist. The zucchini adds moisture and texture, while the sugars give the bread its sweetness. The variety of chocolate chips makes each bite a chocolate lover's dream. Using both cocoa powder and chocolate chips helps to deepen the chocolate flavor. This combination ensures that your bread is not just tasty but also has a delightful texture. Make sure to prepare all your ingredients before starting. This way, you can mix them smoothly and create the best bread possible. {{ingredient_image_2}} - Preheat the oven to 350°F (175°C). - Grease a 9x5 inch loaf pan with cooking spray or butter. You can also line it with parchment paper. This makes it easy to remove the bread later. - In a large bowl, mix the grated zucchini, granulated sugar, brown sugar, vegetable oil, eggs, and vanilla extract. You want to stir until the mixture is smooth and well blended. - In another bowl, whisk together your flour, cocoa powder, baking soda, baking powder, and salt. Make sure these dry ingredients are mixed well. - Gradually add the dry mix to the wet zucchini mix. Stir gently until just combined. A few lumps are okay; do not overmix. - Carefully fold in the semi-sweet chocolate chips, white chocolate chips, and dark chocolate chunks. Make sure they spread evenly in the batter. - Now, pour the batter into your greased or lined loaf pan. Use a spatula to smooth the top. - Place the pan in the oven and bake for 50-60 minutes. To check if it's done, insert a toothpick into the center. It should come out clean or with a few moist crumbs. - Once baked, let the zucchini bread cool in the pan for about 10 minutes. After that, transfer it to a wire rack to cool completely. This allows the air to circulate and helps it cool evenly. To keep your zucchini bread light and moist, avoid overmixing. Once you add the dry mix to the wet mix, stir just until blended. A few lumps are okay. This way, you prevent tough bread. Melting chocolate can be tricky. Use a microwave or a double boiler. If using a microwave, heat in short bursts of 15 seconds. Stir in between until smooth. This helps you mix chocolate easily into your batter without burning it. Serve your Triple Chocolate Zucchini Bread warm for the best taste. Slice it and arrange it on a wooden board. Dust with powdered sugar for a nice look. You can also pair it with a scoop of vanilla ice cream. This adds a creamy contrast to the rich chocolate flavor. Pro Tips Grate Zucchini Properly: Make sure to use a box grater for even shreds, and if your zucchini is particularly watery, squeeze out excess moisture using a clean kitchen towel before adding it to the batter. Mix with Care: When combining wet and dry ingredients, stir until just combined to avoid a tough texture. A few lumps are okay; overmixing can lead to dense bread. Customize Your Chocolate: Feel free to mix and match your favorite types of chocolate chips or chunks. Adding a sprinkle of sea salt on top before baking can enhance the chocolate flavor. Cool Completely: Allow the bread to cool in the pan for 10 minutes before transferring it to a wire rack. This helps maintain its shape and prevents sogginess. {{image_4}} To make this bread gluten-free, you can swap out the all-purpose flour. Use a gluten-free flour blend that works for baking. Look for one that contains xanthan gum, as this helps with texture. You can also try almond flour or oat flour, but results may vary. Adjust the liquid if needed since some flours absorb moisture differently. You can easily make this bread vegan. Replace the eggs with flax eggs. To make a flax egg, mix 1 tablespoon of ground flaxseed with 2.5 tablespoons of water. Let it sit for five minutes until it thickens. For the dairy, use plant-based milk like almond or oat milk. You can also use vegan chocolate chips for a fully plant-based treat. Want to enhance the flavor? Add nuts like walnuts or pecans for crunch. Chop them coarsely and fold them into the batter. Dried fruits like raisins or cranberries can also add a sweet twist. Aim for about half a cup of either, mixing them in just before baking. This adds texture and depth to your delicious bread. To keep your Triple Chocolate Zucchini Bread fresh, use an airtight container. This method helps seal in moisture and flavor. You can also wrap the bread tightly in plastic wrap before placing it in the container. Store it at room temperature for up to three days. If you want to keep it longer, consider freezing it. Freezing zucchini bread is easy. First, let it cool completely after baking. Next, wrap the bread tightly in plastic wrap. Then, place it in a freezer-safe bag or container. This method prevents freezer burn. You can freeze the bread for up to three months. When you want to enjoy it, just thaw it overnight in the fridge. To reheat your zucchini bread, I recommend slicing it first. This way, it warms evenly. You can use a toaster or oven set to 350°F (175°C). Heat for about 10-15 minutes, or until warm. For a special touch, add a pat of butter on top before reheating. This makes each slice even more delicious! Yes, you can use frozen zucchini. Thaw it first and drain excess water. Fresh zucchini has a better texture, but frozen works in a pinch. Just remember, fresh zucchini gives a lighter loaf. Besides the toothpick test, look for a few signs. The top should be firm and slightly cracked. The edges may pull away from the pan. When you tap the top, it should sound hollow. Dense bread often comes from too much flour or overmixing. Make sure to measure flour correctly. Use a spoon to scoop flour into the measuring cup. Mix just until combined for a lighter texture. Yes, you can reduce sugar. Try cutting it by a third. Add a splash of vanilla for extra flavor. You can also use unsweetened applesauce to keep moisture and sweetness. This blog post guided you through making delicious Triple Chocolate Zucchini Bread. You learned about each ingredient, step-by-step mixing, and baking techniques. We also covered tips to prevent overmixing, variations for dietary needs, and storage tips to keep your bread fresh. In the end, this recipe is flexible and fun. You can easily add your own twist! Enjoy creating this treat that everyone will love. Share it, savor it, and make it your own!

Triple Chocolate Zucchini Bread Irresistible and Moist

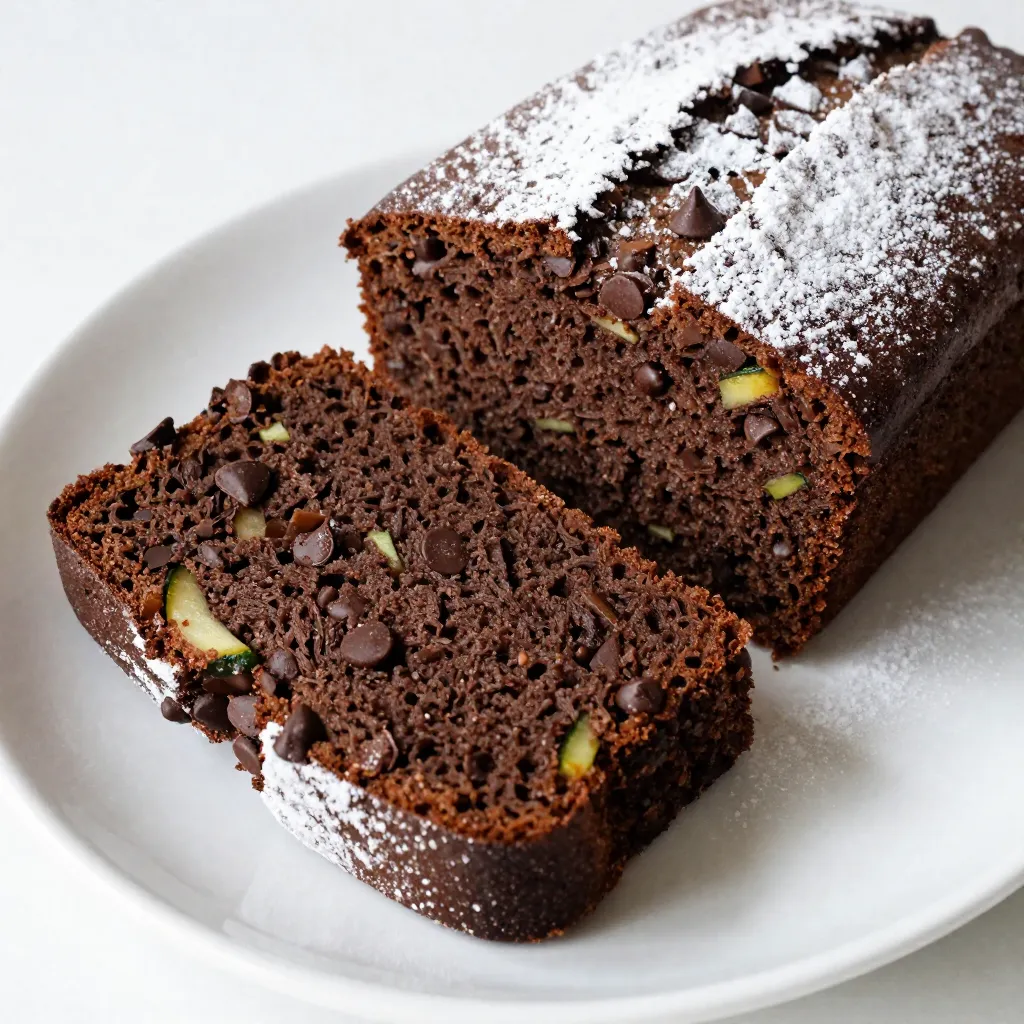
Are you ready to bake something that’s both delicious and packed with veggies? Let me introduce you to Triple Chocolate

- 2 cups all-purpose flour - 1 cup granulated sugar - 1/2 cup packed brown sugar - 1 teaspoon baking powder - 1/2 teaspoon baking soda - 1/2 teaspoon salt - 2 teaspoons pumpkin pie spice - 1/2 cup unsalted butter, softened to room temperature - 1 cup canned pumpkin puree - 1/4 cup brewed coffee, cooled to room temperature - 2 large eggs, at room temperature - 1 teaspoon pure vanilla extract - 1/2 cup chopped walnuts or pecans - 1/3 cup powdered sugar (for glaze) - 1 tablespoon milk (for glaze) Gathering the right ingredients is key. Start with the dry ingredients. All-purpose flour gives the cake structure. The mix of granulated and brown sugar adds sweetness and flavor. Baking powder and baking soda help the cake rise. Salt and pumpkin pie spice bring balance and warmth. Next, focus on the wet ingredients. Softened butter makes the cake rich. Canned pumpkin puree adds moisture and flavor. Brewed coffee enhances the cake's taste. Eggs bind everything together, while vanilla extract adds a lovely aroma. If you want some crunch, consider the optional add-ins. Chopped walnuts or pecans give texture and flavor. A simple glaze of powdered sugar and milk can add sweetness to the top. This mix of ingredients creates a cake that’s not only tasty but also a joy to bake and share. First, preheat your oven to 350°F (175°C). This step is key for even baking. Next, grease a 9x13 inch baking pan. You can use butter or non-stick spray. This helps the cake come out easily after baking. In a large mixing bowl, gather your dry ingredients. Combine 2 cups of all-purpose flour, 1 cup of granulated sugar, and 1/2 cup of packed brown sugar. Add 1 teaspoon of baking powder, 1/2 teaspoon of baking soda, 1/2 teaspoon of salt, and 2 teaspoons of pumpkin pie spice. Whisk these together until they blend well. Make sure there are no lumps. In another bowl, beat 1/2 cup of softened unsalted butter until creamy. Then add in 1 cup of canned pumpkin puree, 1/4 cup of cooled brewed coffee, 2 large eggs, and 1 teaspoon of pure vanilla extract. Mix these wet ingredients on medium speed until smooth. Now, it's time to combine the two mixtures. Gradually add the dry ingredients into the wet ingredients. Stir gently with a spatula or wooden spoon. Be careful not to overmix; a few small flour streaks are okay. If you want, fold in 1/2 cup of chopped walnuts or pecans for added crunch. Pour the batter into the greased baking pan. Spread it out evenly with a spatula. Bake the cake in the preheated oven for 30-35 minutes. To check if it is done, insert a toothpick into the center. It should come out clean or with a few moist crumbs. While the cake bakes, prepare the glaze. In a small bowl, whisk together 1/3 cup of powdered sugar and 1 tablespoon of milk until smooth. If it’s too thick, add more milk a little at a time until you reach the right consistency. Once the cake cools for 10 minutes, transfer it to a wire rack. Drizzle the glaze over the top of the cooled cake for a sweet finish. To get a great texture, avoid overmixing. Mix until just combined. If you see a few flour streaks, that’s okay. Overmixing makes the cake tough. Checking for doneness is easy. Insert a toothpick into the center. If it comes out clean or with a few moist crumbs, your cake is ready! Using high-quality coffee makes a big difference. Choose a coffee you enjoy drinking. It adds depth to the flavor. You can also boost the spices. Try adding a pinch of nutmeg or cinnamon. These will make your cake even more delightful. Serve your cake on a decorative stand. It makes the cake look fancy. For a finishing touch, add whipped cream on top. A light dusting of pumpkin pie spice also looks great. These little details will impress your guests! {{image_4}} You can play with flavors in the Pumpkin Spice Latte Coffee Cake. Adding chocolate chips gives it a sweet twist. The chocolate pairs well with pumpkin spice. It makes each bite rich and delightful. You can also use different nuts. Walnuts add a nice crunch, but pecans work just as well. They bring a buttery flavor that blends perfectly with the cake. If you need gluten-free options, use gluten-free flour instead of all-purpose flour. Make sure to check the ratio on the package. For a vegan cake, you can swap out eggs and butter. Use flax eggs or applesauce for moisture. Coconut oil is a great butter substitute, too. These swaps keep the cake moist and tasty. You can add cranberries or dried fruit for a fun twist. They add a tartness that balances the sweet pumpkin. You can also try different spice blends. Mixing in nutmeg or ginger can create unique flavors. These changes make your cake stand out during fall or any season. You can store leftover cake at room temperature or in the fridge. If you keep it at room temperature, place it in an airtight container. This keeps the cake moist and fresh. If you want it to last longer, put it in the fridge. Just remember, cold air can dry it out. To freeze the cake, let it cool completely first. Wrap it tightly in plastic wrap. Then, place it in a freezer bag. Make sure to squeeze out as much air as you can. This helps to prevent freezer burn. When you're ready to eat it, take it out and thaw it in the fridge overnight. This cake can last for about three days at room temperature. In the fridge, it stays good for about a week. If you freeze it, you can keep it for up to three months. Just remember to check for any signs of spoilage before enjoying it! You can tell your cake is done by checking a few signs: - The edges pull away from the pan slightly. - The top looks firm and is a nice golden brown. - Insert a toothpick into the center. If it comes out clean or with a few moist crumbs, your cake is ready. This toothpick test is a simple way to check without cutting into your cake. Yes, you can use fresh pumpkin! - Fresh pumpkin has a lighter flavor and a different texture than canned. - To prepare fresh pumpkin, peel, seed, and cut it into chunks. - Boil or roast these chunks until soft, then mash them. Let the fresh puree cool before adding it to your batter. This swap can make your cake taste even fresher. Absolutely! - You can bake this cake a day in advance. - Allow it to cool completely, then cover it tightly. - Store it at room temperature for one day or in the fridge for up to three days. When you’re ready to serve, warm it in the oven. This way, you'll enjoy it fresh and warm. There are many fun ways to serve your cake! - Serve it warm with a dollop of whipped cream. - Pair it with a cup of coffee or tea for a cozy treat. - You can also sprinkle some extra pumpkin pie spice on top for added flavor. Each of these ideas enhances the cake's delightful taste. Yes, this recipe can be adapted for various diets. - For gluten-free options, use a gluten-free flour blend. - To make it vegan, substitute eggs with flax eggs and use vegan butter. These small changes let more people enjoy your delicious cake. This cake recipe combines rich flavors and simple steps. You learned about the key ingredients, mixing methods, and baking tips. Use quality coffee for depth and add nuts for crunch. I shared ways to adapt this treat for special diets and seasonal flavors. Remember to store any leftovers properly for perfect freshness. Enjoy making this delicious Pumpkin Spice Latte Coffee Cake! It’s a great way to treat yourself or share with others.

Pumpkin Spice Latte Coffee Cake Irresistible Delight

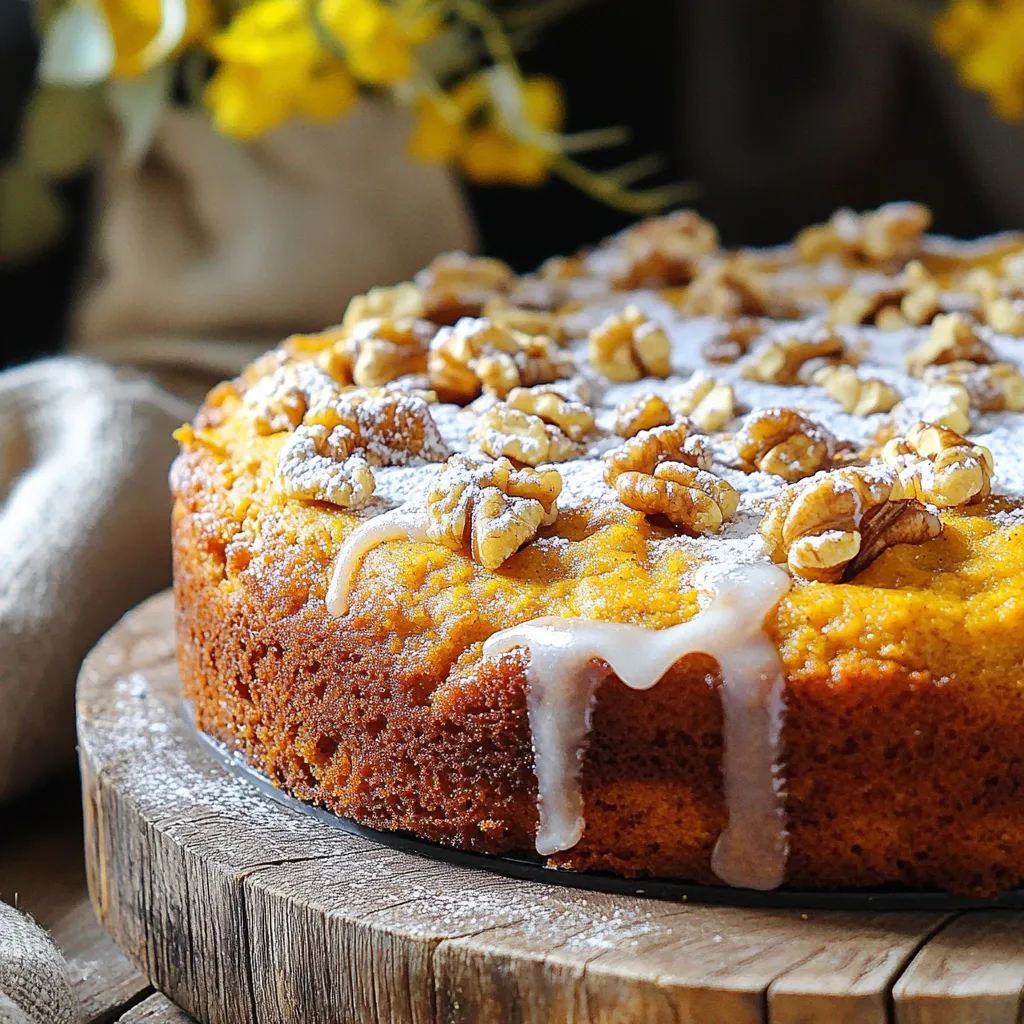
If you love the warm flavors of fall, this Pumpkin Spice Latte Coffee Cake is your new go-to treat. Imagine

For these delightful pecan pie muffins, you'll need a mix of flours and sugars. Here’s a quick list: - 1 cup all-purpose flour - 1 cup whole wheat flour - 1 cup packed brown sugar - 1/2 cup granulated sugar - 1 tablespoon baking powder - 1/2 teaspoon baking soda - 1/2 teaspoon salt These dry ingredients create a great base. The all-purpose flour gives structure, while whole wheat flour adds flavor and nutrition. Brown sugar brings sweetness and moisture. Baking powder and baking soda help the muffins rise. Now, let’s focus on the wet ingredients. You’ll use: - 2 large eggs - 1 cup buttermilk (or milk with vinegar) - 1/2 cup unsalted butter, melted and slightly cooled - 1 teaspoon pure vanilla extract - 1/4 cup pure maple syrup The eggs bind everything together. Buttermilk adds richness and a slight tang. Melted butter gives a soft texture. Vanilla and maple syrup add lovely flavors that pair perfectly with pecans. For a special touch, consider adding: - 1 cup pecans, roughly chopped - 1/2 cup mini chocolate chips (optional) Pecans add crunch and a nutty taste. Mini chocolate chips bring a bit of sweetness and fun. You can skip the chocolate if you want to keep it classic. Start by preheating your oven to 350°F (175°C). This step helps your muffins bake evenly. Prepare your muffin tin by lining it with paper liners. If you don’t have liners, lightly grease each cup with cooking spray or butter. This ensures easy removal after baking. In a large bowl, combine the all-purpose flour, whole wheat flour, brown sugar, granulated sugar, baking powder, baking soda, and salt. Use a whisk to mix these dry ingredients well. This helps distribute the baking powder and soda, ensuring your muffins rise perfectly. In another bowl, crack the eggs and beat them lightly. Then add the buttermilk, melted butter, vanilla extract, and maple syrup. Mix these wet ingredients until smooth. Make sure the melted butter is cool to avoid cooking the eggs. This is key for a good batter. Now, pour the wet mixture into the bowl with the dry ingredients. Use a spatula to stir gently until just combined. Be careful not to overmix! The batter should look slightly lumpy. This keeps your muffins fluffy and light. Fold in the chopped pecans and mini chocolate chips if you want extra flavor. Use a scoop or spoon to fill each muffin cup about three-quarters full. Bake in the preheated oven for 18 to 20 minutes. To check if they are done, insert a toothpick into a muffin. If it comes out clean or with a few moist crumbs, they are ready! After baking, allow the muffins to cool in the tin for about 5 minutes. Then, transfer them to a wire rack to cool completely. For serving, dust the muffins with powdered sugar. You can also add a whole pecan on top for a nice touch. A small jug of maple syrup on the side makes it even better! Enjoy this sweet treat any time of day. To get the best texture in your pecan pie muffins, follow these tips: - Use room temperature eggs for better mixing. - Don't overmix the batter; stir until just combined. - Keep the batter slightly lumpy to ensure fluffiness. - Let the melted butter cool before adding to the eggs. These steps help create muffins that are soft yet firm. You want that perfect balance, where each bite is airy but holds together well. To keep your muffins fresh and tasty: - Store them in an airtight container at room temperature. - They stay good for about 2-3 days. - If you want to keep them longer, freeze them. When you freeze, wrap each muffin in plastic wrap. Place them in a freezer bag. They can last up to 3 months in the freezer. To enjoy, thaw them at room temperature or warm them in the oven. Make your muffins look as good as they taste: - Serve them warm for the best flavor. - Lightly dust with powdered sugar for a sweet touch. - Top each muffin with a whole pecan for charm. - Offer maple syrup in a small jug for drizzling. These simple touches make your muffins shine. They not only taste great but also look amazing on your table. {{image_4}} You can change up your pecan pie muffins with fun add-ins. Try different nuts, like walnuts or almonds. These nuts bring unique tastes and textures. You can also add fruits like dried cranberries or chopped apples. They add sweetness and moisture. For a twist, mix in coconut flakes. This makes your muffins even more special. Want to make these muffins healthier? Swap some ingredients for better options. Use whole wheat flour instead of all-purpose flour for more fiber. You can replace brown sugar with coconut sugar. This keeps them sweet but lowers the glycemic index. Also, use Greek yogurt in place of buttermilk for a protein boost. These changes keep the muffins tasty while adding health benefits. Boost the flavor of your muffins with spices and extracts. A pinch of cinnamon adds warmth and depth. You can also include nutmeg for a cozy touch. If you're a fan of vanilla, try using almond extract for extra flavor. It gives a nice twist to the classic taste. These small changes can elevate your muffins from good to amazing! You can find pecan pie muffins at local bakeries. Look for shops that focus on fresh, homemade treats. They often use quality ingredients, which makes their muffins special. Ask for recommendations from friends or check online reviews. Many online stores sell pecan pie muffins. Websites like Goldbelly offer baked goods from famous bakeries. You can browse a wide range of flavors and pick your favorites. Another good option is local bakeries that ship their goods. Check their websites for shipping details. Farmer's markets are great spots to find unique muffins. Local artisans often sell baked goods made from fresh, local ingredients. You can ask the vendors about their muffins. Many shops offer samples, so you can taste before you buy. Enjoy supporting local businesses while treating yourself! Yes, you can make these muffins gluten-free. Use a gluten-free flour blend instead of all-purpose flour and whole wheat flour. Make sure the blend contains xanthan gum for the best texture. Store leftover muffins in an airtight container. This keeps them fresh and moist. You can place parchment paper between layers to prevent sticking. Yes, you can freeze pecan pie muffins. Wrap each muffin in plastic wrap and place them in a freezer bag. They can last up to three months in the freezer. Serve these muffins warm with a sprinkle of powdered sugar on top. You can also add a drizzle of maple syrup or a dollop of whipped cream for extra flavor. Pecan pie muffins last about 3-5 days at room temperature. If kept in the fridge, they can last up to a week. For longer storage, freeze them as mentioned above. In this article, we covered all you need to know about pecan pie muffins. We explored the best dry and wet ingredients and optional flavors. I shared step-by-step instructions and tips for perfect texture and storage. You can even try tasty variations with nuts or fruits. Plus, I highlighted where to buy these delicious muffins. Baking can be fun. Enjoy making your pecan pie muffins and share them with others!

Pecan Pie Muffins Bakery Style Irresistible Delight

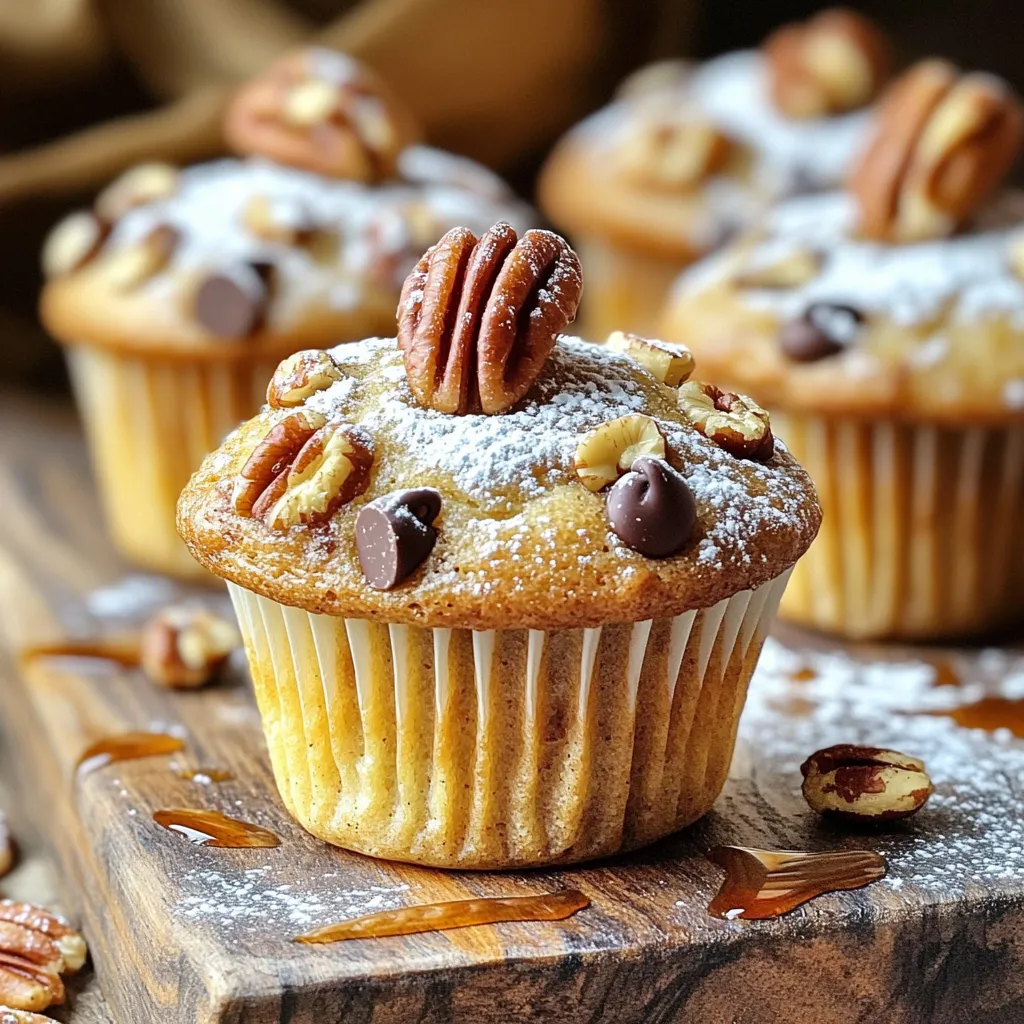
If you love the sweet, nutty flavor of pecan pie, you’re in for a treat! In this blog post, I’ll

To make Pesto Mozzarella Stuffed Chicken, you'll need to gather a few key items. Here’s what you should have on hand: - 4 boneless, skinless chicken breasts - 1 cup fresh mozzarella cheese, shredded - 1/2 cup basil pesto (store-bought or homemade) - 1/4 cup sun-dried tomatoes, finely chopped - 1/2 teaspoon garlic powder - 1/2 teaspoon salt - 1/4 teaspoon black pepper - 2 tablespoons olive oil - Fresh basil leaves for garnish These ingredients come together to create a tasty and juicy dish. The chicken is the star of the show, while the pesto and mozzarella add rich flavor. The sun-dried tomatoes give a nice texture and tang. When choosing your chicken, look for breasts that are plump and even in size. Fresh mozzarella melts beautifully, and using high-quality pesto can elevate your dish. Keep these items ready, and you will have a delicious meal in no time! {{ingredient_image_2}} 1. Preheating the oven: Start by preheating your oven to 375°F (190°C). This step is key because it helps the chicken cook evenly. 2. Creating pockets in the chicken breasts: Take a sharp knife and gently slice each chicken breast. Cut horizontally about three-quarters of the way through. Be careful not to cut all the way through. This pocket will hold the tasty filling. 1. Combining mozzarella cheese, pesto, and sun-dried tomatoes: In a medium bowl, mix the shredded mozzarella cheese, basil pesto, and finely chopped sun-dried tomatoes. Stir until it’s well blended. The mix should look creamy and delicious. 1. Seasoning, stuffing, and cooking methods: Sprinkle the inside of each chicken pocket with garlic powder, salt, and black pepper. This adds great flavor. Next, spoon the creamy filling into each pocket. Pack it tightly, so it does not fall out while cooking. 2. Searing and baking times: In a large, oven-safe skillet, heat the olive oil over medium-high heat. When the oil is hot, add the stuffed chicken breasts. Sear each side for 3-4 minutes until golden brown. After searing, transfer the skillet to the oven. Bake for 20-25 minutes. Use a meat thermometer to check if it reaches 165°F (75°C). This ensures it's cooked through. Achieving the perfect sear To get that nice golden-brown crust, heat your skillet before adding the chicken. Use medium-high heat and let the olive oil shimmer. Place the chicken in the pan without crowding it. This helps the chicken sear, not steam. Cook each side for 3-4 minutes. You want it to look inviting! Checking for doneness To ensure your chicken is cooked, use a meat thermometer. The chicken should reach an internal temperature of 165°F (75°C). If you don’t have a thermometer, cut into the chicken. The juices should run clear, not pink. This checks if it’s safe to eat and still juicy. Additional spices or herbs Feel free to add extra flavor! Try adding some Italian seasoning, red pepper flakes, or fresh thyme with your pesto. These spices give your dish more depth. You can also toss in some garlic or onion powder to enhance the taste. Serving suggestions Serve your pesto mozzarella stuffed chicken on a bed of colorful roasted veggies or sautéed spinach. Drizzle some extra pesto on top for a burst of flavor. Fresh basil leaves also make a lovely garnish. These touches make your dish pop and look great! Pro Tips Choose the Right Chicken: Opt for organic, free-range chicken breasts for enhanced flavor and juiciness. Experiment with Fillings: Feel free to customize the filling by adding ingredients like spinach, artichokes, or different cheeses for variety. Use a Meat Thermometer: To ensure perfectly cooked chicken, use a meat thermometer to check that the internal temperature reaches 165°F (75°C). Let It Rest: Resting the chicken after cooking allows the juices to redistribute, keeping the meat moist and flavorful. {{image_4}} You can make this dish even more fun by switching up some ingredients. Try different cheeses like provolone or goat cheese. They bring new flavors and textures. You could also use ricotta for a creamier filling. For sauces, swap basil pesto for sun-dried tomato pesto. This change adds a rich, tangy taste. You can also use homemade pesto if you want a fresh touch. Feel free to add vegetables, too. Spinach or roasted red peppers work great. They add color and nutrients. Just be sure to chop them finely so they fit in the chicken pockets. You have options for cooking this chicken. Grilling gives it a nice smoky flavor. Preheat your grill to medium heat, then grill the stuffed chicken breasts for about 6-8 minutes per side. Baking is easy and keeps the chicken juicy. Just follow the recipe’s instructions for searing and baking. If you want a hands-off method, use slow cooking. Place the stuffed chicken in a slow cooker with a bit of broth. Cook on low for 6-7 hours. This makes the chicken really tender and flavorful. Try these variations to make the dish your own! To keep your Pesto Mozzarella Stuffed Chicken fresh, use these tips: - Refrigeration: Place leftovers in an airtight container. This keeps moisture in and air out. Store in the fridge for up to three days. - Freezing: If you have more chicken than you can eat, freezing is a great option. Wrap each stuffed chicken breast tightly in plastic wrap, then place in a freezer bag. This helps prevent freezer burn. You can freeze them for up to three months. When you're ready to enjoy leftovers, follow these methods: - Oven: Preheat your oven to 350°F (175°C). Place the chicken in an oven-safe dish, cover with foil, and heat for about 20 minutes. This keeps the chicken moist. - Microwave: If you're in a hurry, use the microwave. Place the chicken on a microwave-safe plate and cover it with a damp paper towel. Heat in short bursts of 1-2 minutes until warmed through. This method may not keep the chicken as juicy, but it’s quick. - Skillet: You can also reheat in a skillet. Heat a little olive oil over medium heat, then add the chicken. Cook for about 5 minutes per side, or until warmed through. You can pair this dish with many sides. Here are some great options: - Sautéed spinach: Lightly cooked with garlic for a fresh taste. - Roasted vegetables: Colorful veggies like bell peppers and zucchini add crunch. - Garlic bread: A crispy side that complements the flavors well. - Rice or quinoa: These grains soak up any extra sauce and round out the meal. Yes, you can prepare this dish in advance. 1. Stuff the chicken: Follow the steps to season and fill it. 2. Refrigerate: Cover the stuffed chicken and store it in the fridge for up to 24 hours. 3. Cook when ready: Just remember to bring it to room temperature before cooking for the best results. To check if your chicken is done, use a meat thermometer. - Temperature: The thickest part of the chicken should reach 165°F (75°C). - Juices: If you cut into it, the juices should run clear, not pink. Let it rest for a few minutes after cooking. This keeps the juices inside and makes it juicy. This blog post covered all you need for tasty pesto mozzarella stuffed chicken. We looked at key ingredients, like chicken breasts, mozzarella, and sun-dried tomatoes. I shared easy steps for preparation, filling, and cooking. You found tips for better flavor and storage advice. Finally, I answered common questions to help you succeed. Enjoy this fun and simple dish any night of the week! It’s a great way to impress your family and friends while keeping dinner exciting.

Pesto Mozzarella Stuffed Chicken Juicy and Simple Recipe

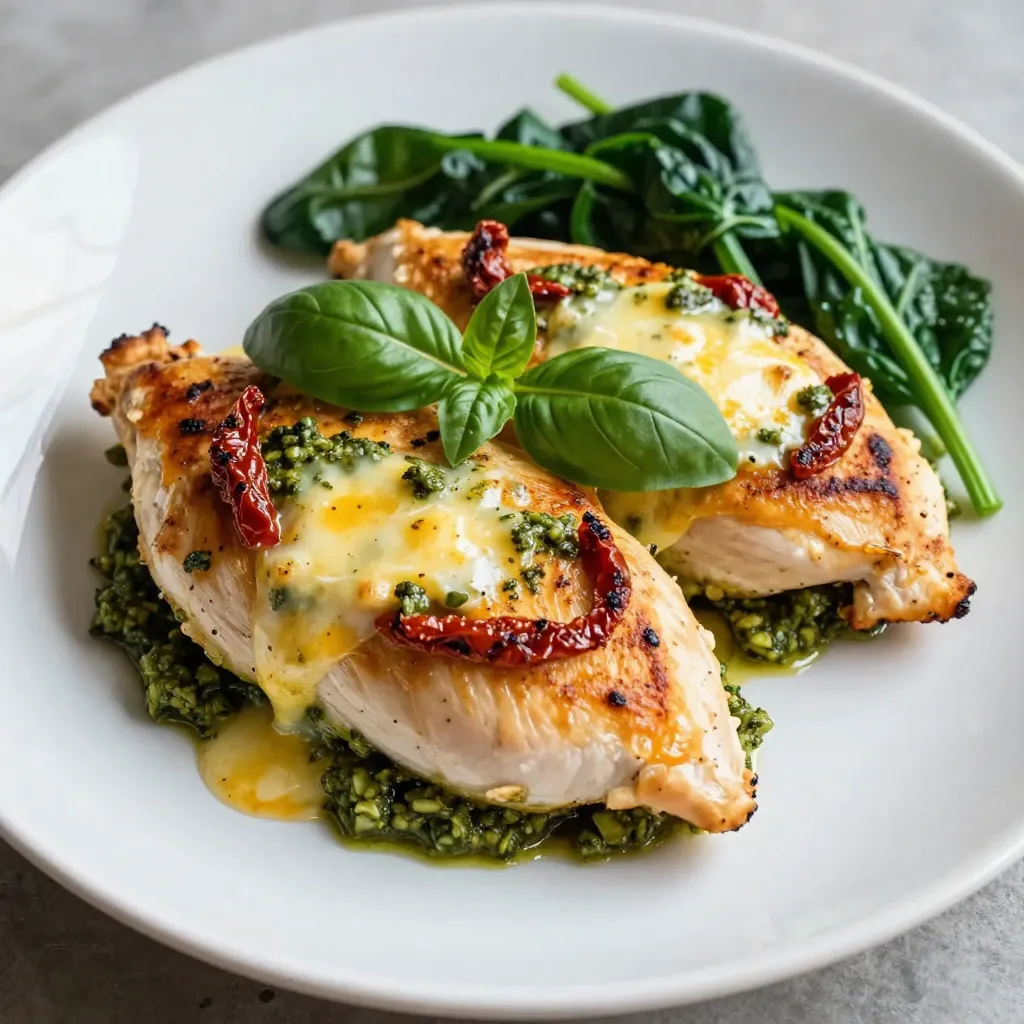
Are you ready to elevate your dinner game? This Pesto Mozzarella Stuffed Chicken is juicy, packed with flavor, and simple

- 2 large apples (variety suggestions: Fuji, Honeycrisp) - 1 tablespoon ground cinnamon - 2 tablespoons granulated sugar (alternatives: coconut sugar) - A pinch of salt - Cooking spray or olive oil spray For this recipe, you’ll need two large apples. I love using Fuji or Honeycrisp varieties. They offer a perfect blend of sweetness and crunch. The apples should be fresh, as this enhances the flavor. Next, gather your spices. You’ll need one tablespoon of ground cinnamon. This spice gives the chips a warm, cozy flavor. Pair that with two tablespoons of granulated sugar. If you want a healthier option, you can swap it for coconut sugar. It adds a nice caramel touch without the extra calories. Don’t forget a pinch of salt! This small amount balances the sweetness and brings the flavors together. Lastly, get some cooking spray or olive oil spray. This helps the cinnamon sugar stick and ensures a crispy finish. With these ingredients, you’re ready to make a tasty snack that is easy and fun! Start by washing the apples well under running water. This removes dirt and wax. Use a sharp knife or a mandoline slicer to cut the apples into thin circles. Aim for slices that are about 1/8 inch thick. This thickness helps them crisp up nicely. Remember to remove any seeds from the slices. In a small bowl, mix the ground cinnamon, granulated sugar, and a pinch of salt. Stir these ingredients well to blend the flavors. A good mix ensures the taste is even on every chip. This step adds a sweet and warm flavor to your apple chips. Place the apple slices into a large mixing bowl. Lightly spray them with cooking spray or olive oil. Do not soak them; just a light coat will do. Next, sprinkle the cinnamon sugar mix on top. Toss the slices gently until they are evenly coated. This helps every bite taste great. Preheating the air fryer is important. Set it to 350°F (175°C) and let it run for about 3-5 minutes. This step helps the apple chips cook evenly. When the air fryer is hot, your chips will crisp up better. Lay the coated apple slices in a single layer in the air fryer basket. Make sure they do not overlap. If you have many slices, you may need to fry them in batches. This way, they all cook well. Air fry the slices for about 10-15 minutes. Check on them every 5 minutes to avoid burning. Look for a nice golden brown color on the chips. After cooking, carefully take the apple chips out of the air fryer. Place them on a wire rack to cool for a few minutes. This cooling time helps them become even crispier. You can enjoy these apple chips as a snack. They also make a tasty topping for yogurt or salads! Pick apples that taste great and are crisp. Fuji and Honeycrisp are my favorites. They have a sweet flavor and hold up well in the air fryer. You can also try Granny Smith for a tart twist. Always choose firm apples to ensure a nice crunch. Cooking times can change based on your air fryer. For most models, set it to 10-15 minutes. Check every 5 minutes to avoid burning. You want the chips to turn golden brown and crispy. If they look dry and crunchy, they are done. Adjust the time if you notice they need more or less cooking. You can add spices to change the taste. Try nutmeg or allspice for warmth. For a spicy kick, a bit of cayenne pepper adds heat. You can also mix in coconut sugar or brown sugar for a richer flavor. Adjust the cinnamon sugar mix based on what you enjoy most. {{image_4}} You can add nutmeg or allspice to your cinnamon mix. These spices bring warmth and depth. A pinch of nutmeg adds a nutty flavor. Allspice gives a hint of clove and pepper. Both options make your apple chips unique and special. If you like spice, consider adding cayenne pepper. This gives a sweet and spicy kick that wakes up your taste buds. You can use low-sugar options like monk fruit sweetener or stevia. These natural sweeteners keep your apple chips sweet without too many calories. If you want to cut fat, try using less oil. A light spray of cooking spray works well. You could even skip the oil for a lower-fat version. Just make sure the apple slices are well-coated with the cinnamon mix. These apple chips are great on their own, but you can get creative! Try pairing them with yogurt or nut butter for a tasty dip. They also work well in salads, adding a sweet crunch. You can sprinkle them over ice cream for a fun dessert twist. The options are endless! To keep your apple chips crispy, store them in an airtight container. Use a glass jar or a plastic bag with a seal. Make sure they are completely cool before sealing. If you have a silica gel packet, toss it in the container to absorb moisture. To regain crispness, reheat apple chips in the air fryer. Set the temperature to 350°F (175°C). Heat them for about 3-5 minutes. Keep an eye on them to avoid burning. This method helps bring back that delightful crunch. Apple chips can last about one week when stored properly. Signs of spoilage include a soft texture or a stale smell. If they lose their crunch or taste off, it’s best to toss them. Keeping an eye on these signs will help you enjoy your snack at its best. Yes, you can use many apple types. I suggest Fuji or Honeycrisp apples. They are sweet and crisp, perfect for snacks. You can also try Granny Smith for a tart flavor. Just choose apples that are firm. To make the chips crispier, slice the apples thinner. Aim for 1/8 inch thick. Make sure to space them out in the air fryer. If they overlap, they won’t cook evenly. Also, try cooking them a bit longer, but watch closely to avoid burning. Yes, you can double the recipe. Just remember to cook in batches. The air fryer works best when it’s not overcrowded. This way, each chip gets enough hot air to crisp up nicely. If your apple chips burn, check your cooking time. They should cook for 10-15 minutes. Make sure to check every 5 minutes. If they burn, reduce the time next time. You can also lower the temperature a bit. Yes, these apple chips are gluten-free. All the ingredients are naturally gluten-free. This makes them a great snack for everyone, even those with gluten sensitivities. Enjoy them without worry! In this article, we discussed how to make delicious apple chips in an air fryer. We covered the ingredients, step-by-step instructions, and tips for success. I shared ideas for variations and storage to keep your chips fresh. With the right apples and spices, you can enjoy a tasty snack. Try these methods to find your favorite flavor. Happy cooking!

Irresistible Air Fryer Cinnamon Sugar Apple Chips

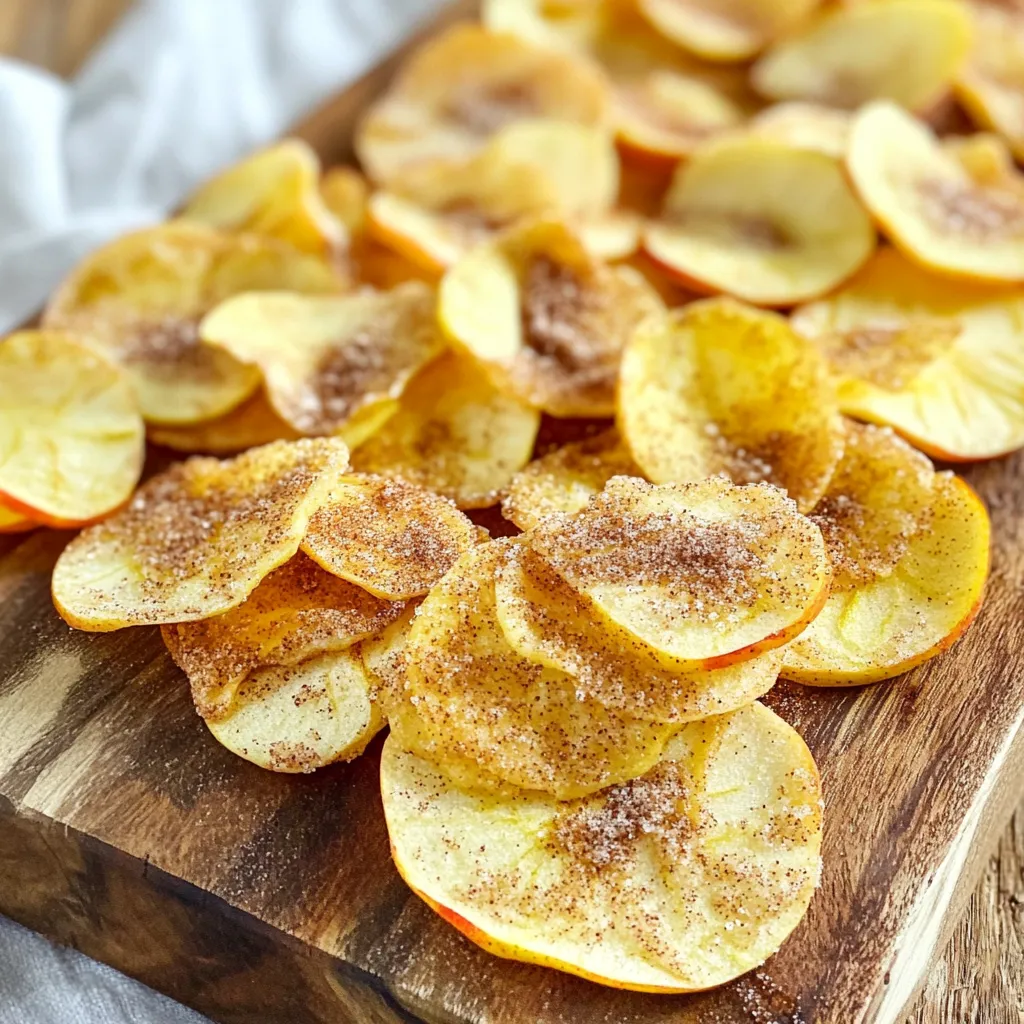
Craving a tasty snack that’s both healthy and easy to make? Look no further! Air Fryer Cinnamon Sugar Apple Chips

- 12 oz egg noodles - 1 lb assorted mushrooms (cremini, shiitake, and button) - 1 medium onion, finely chopped - 3 cloves garlic, minced - 1 cup vegetable broth - 1 cup sour cream - 2 tablespoons soy sauce (or tamari for gluten-free) - 1 teaspoon dried thyme - 1 teaspoon smoked paprika - Salt and pepper to taste - 2 tablespoons olive oil - Fresh parsley, chopped for garnishing To make a great Mushroom Stroganoff with egg noodles, you need fresh ingredients. Start with egg noodles, as they give the dish a nice texture. Use a mix of mushrooms like cremini, shiitake, and button. This variety adds depth to the flavor. Next, you will need a medium onion and garlic for a rich base. The sweetness of the onion and the aroma of garlic are key to a tasty dish. Vegetable broth adds moisture and flavor. Sour cream gives the dish its creamy texture that everyone loves. Don't forget soy sauce or tamari! It adds a nice umami flavor. Thyme and smoked paprika are important for seasoning. Finally, have salt and pepper ready to taste. A drizzle of olive oil helps sauté the vegetables and keeps things from sticking. For garnish, fresh parsley adds color and a fresh taste. Gather these ingredients, and you are ready to create a delicious meal! First, take your slow cooker and lightly grease it with olive oil. This helps keep the food from sticking. Use a paper towel to spread the oil evenly. Next, heat 2 tablespoons of olive oil in a skillet over medium heat. Once it gets warm, add 1 medium onion, finely chopped. Sauté the onion for about 3-4 minutes until it turns clear. Then, stir in 3 cloves of minced garlic and cook for another minute. This will make your kitchen smell amazing! Now, add 1 pound of assorted mushrooms, sliced. I like to use cremini, shiitake, and button mushrooms. Cook these for 5-7 minutes. Stir them often until they are soft and have let out their juices. Season with salt and pepper to bring out their flavor. Carefully transfer the mushroom and onion mix to the slow cooker. Pour in 1 cup of vegetable broth and add 2 tablespoons of soy sauce. Then, sprinkle in 1 teaspoon of dried thyme and 1 teaspoon of smoked paprika. Mix everything well so the flavors blend. Cover the slow cooker with its lid. Set it to cook on low for 4 hours or on high for 2 hours. You want the mushrooms to be fully cooked and the flavors to mix nicely. About 15 minutes before you plan to serve, bring a pot of salted water to boil. Add 12 ounces of egg noodles and cook them according to package instructions until they are just right. Drain the noodles and set them aside. Once the mushroom mix is done cooking, stir in 1 cup of sour cream. Mix it until the sauce is creamy. Taste the sauce and adjust the seasoning with salt and pepper if needed. Finally, add the drained egg noodles to the slow cooker. Toss them gently with the mushroom sauce until they are well coated. Let it sit on low heat for 5 more minutes to warm everything together. Serve the stroganoff in bowls, and sprinkle some fresh parsley on top for a nice touch. Enjoy your Mushroom Stroganoff Egg Noodles Slow Cooker Delight! To make your mushroom stroganoff even tastier, try adding extra seasonings. Here are some ideas: - A splash of Worcestershire sauce adds depth. - Fresh herbs like thyme or parsley brighten flavors. - A pinch of nutmeg gives warmth. - Red pepper flakes add a bit of heat. These simple additions can change your dish's flavor profile. Experiment and find what you love! To ensure your stroganoff sauce stays creamy, add sour cream at the right time. Here are some tips: - Wait until the mushrooms finish cooking. - Stir sour cream in gently to avoid lumps. - For extra creaminess, use full-fat sour cream. - If you want a tangy twist, add a squeeze of lemon juice. These steps help create a smooth and rich sauce you’ll enjoy. No one wants their meal to stick to the slow cooker. Here’s how to grease it well: - Use a paper towel to spread olive oil evenly. - Focus on the bottom and sides of the cooker. - Consider using a non-stick spray for ease. - Avoid using too much oil, which can make your dish greasy. Following these tips will help your stroganoff slide right out when it’s ready to serve. Enjoy every bite! {{image_4}} You can easily make this dish gluten-free. Just switch to gluten-free egg noodles. Many brands offer this option. Also, use tamari instead of regular soy sauce. Tamari gives a rich taste without gluten. This way, you can enjoy the same great flavor and texture. If you want a vegan option, replace the sour cream with cashew cream or coconut cream. These work well and keep the dish creamy. You can also skip the sour cream altogether and add more vegetable broth. This keeps the stroganoff light while still tasty. Some people like to use nutritional yeast for a cheesy flavor. Don't hesitate to mix in more vegetables. Spinach or kale adds color and nutrients. Bell peppers can add a sweet crunch. If you want extra protein, try adding lentils or chickpeas. They blend well and make the meal hearty. You can also sprinkle in some fresh herbs like thyme or dill for a fresh twist. To store leftovers, let the stroganoff cool down. Place it in an airtight container. I recommend using glass containers if you can. This keeps the food fresh for up to three days in the fridge. When you want to eat it again, just take it out, and you’re ready to reheat. If you want to freeze mushroom stroganoff, it’s best to do so without the egg noodles. Noodles can become mushy when thawed. Instead, freeze the sauce in a freezer-safe container. It can last up to three months in the freezer. When you’re ready to eat, let it thaw in the fridge overnight. To reheat, gently warm the stroganoff on the stove over low heat. Stir often to avoid burning. You can add a splash of vegetable broth or water to keep it creamy. If you prefer the microwave, use a microwave-safe bowl. Heat in short bursts, stirring in between. This keeps the texture nice and smooth. Yes, you can make this dish ahead. Just cook the stroganoff, let it cool, then store it in an airtight container. It stays fresh for about three days in the fridge. If you want to keep it longer, freeze it. It will last for up to three months. To reheat, warm it on the stove or in the microwave until hot. I love using a mix of mushrooms for great flavor. Cremini and shiitake mushrooms add depth. Button mushrooms are mild and easy to find. You can also try portobello for a meatier taste. Each type brings its own twist to the dish. The mix makes the stroganoff rich and tasty. Absolutely! While egg noodles are classic, you can use other pasta types. Fettuccine or tagliatelle work well too. If you want a gluten-free option, use rice noodles or gluten-free pasta. Cooking times might vary, so check the package. Just aim for al dente to keep the texture nice. Yes, mushroom stroganoff is perfect for meal prep. It keeps well in the fridge, and the flavors deepen over time. Portion it in containers for easy meals. Just cook the noodles when you're ready to eat them. This way, they stay fresh and don’t get soggy. This blog post covered a simple and tasty mushroom stroganoff recipe. You learned the key ingredients, step-by-step instructions, and helpful tips. Storing, freezing, and reheating are also easy. Consider your options for gluten-free or vegetarian meals. Adapting recipes enhances their flavor and nutrition. Enjoy your cooking journey, and share this dish with friends and family! It’s a perfect meal for any occasion.

Mushroom Stroganoff Egg Noodles Slow Cooker Delight

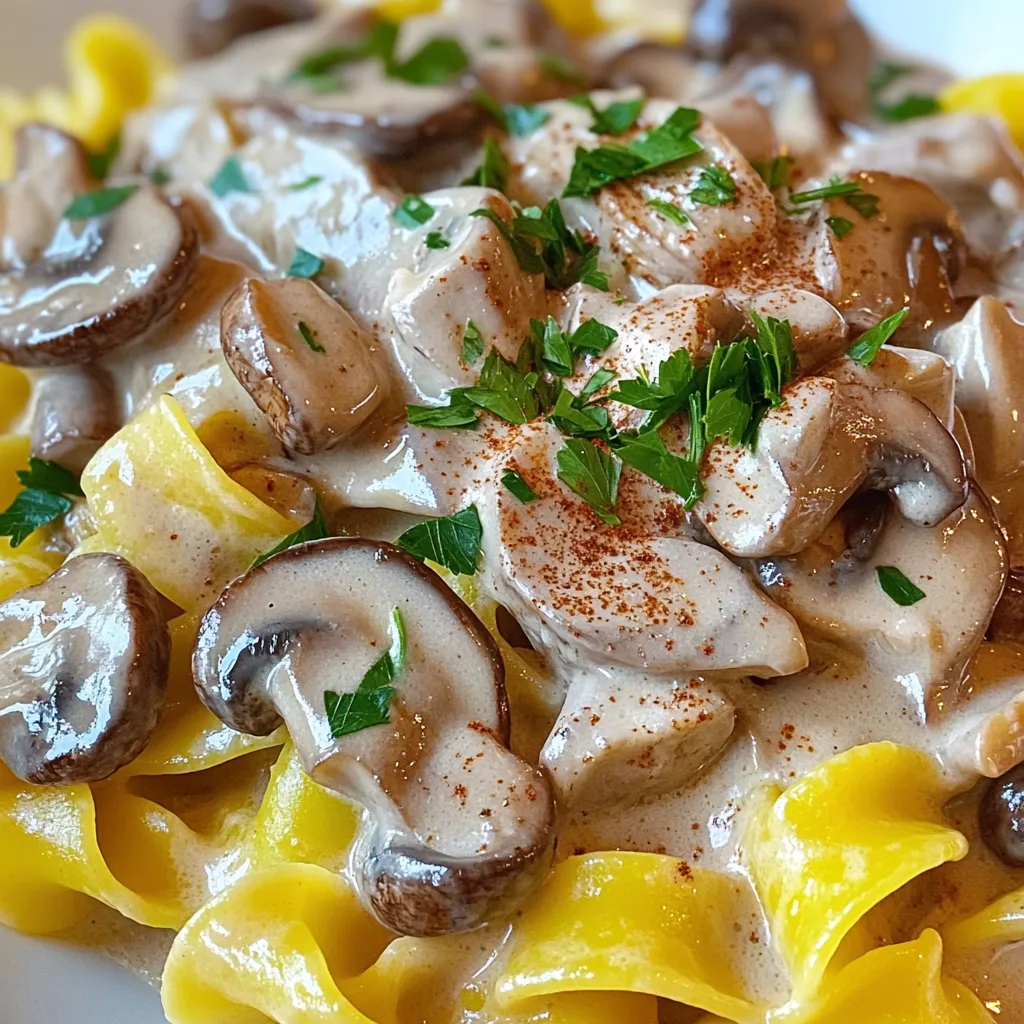
Are you craving a creamy, savory meal that practically cooks itself? Look no further! In this blog post, I’ll show

- 2 cups all-purpose flour - 1/2 cup packed brown sugar - 1 tablespoon baking powder - 1/2 teaspoon baking soda - 1/4 teaspoon salt - 1/2 cup unsalted butter, cold and cut into cubes - 1/2 cup heavy cream - 1/4 cup pure maple syrup - 1 large egg - 1 teaspoon vanilla extract - 1/2 cup chopped pecans (optional) - Extra brown sugar for topping You may want to try different sweeteners instead of brown sugar. Honey or coconut sugar can work well. For gluten-free options, use a blend of gluten-free flour and xanthan gum. If you need dairy-free choices, almond milk or coconut cream can replace heavy cream and butter. - Preheat your oven to 400°F (200°C). - Prepare the baking sheet with parchment paper. Start by setting your oven to the right temperature. This step ensures that your scones bake evenly. Lining your baking sheet with parchment paper helps prevent sticking. It's a simple but key part of making great scones. - Combine dry ingredients in a bowl. - Incorporate cold butter with dry mixture. In a large bowl, mix the all-purpose flour, brown sugar, baking powder, baking soda, and salt. Whisk these dry ingredients well. Next, take your cold butter and add it to the flour mix. Use your fingers or a pastry cutter to blend the butter. Aim for a crumbly texture with no big pieces of butter left. - Whisk together wet ingredients in a separate bowl. - Gently merge wet and dry mixtures. In another bowl, whisk the heavy cream, maple syrup, egg, and vanilla extract until smooth. This mixture adds moisture and sweetness. Now, pour it into your dry ingredients. Stir gently until the dough forms, being careful not to mix too much. If you want nuts, fold them in now. - Knead the dough lightly. - Cut into desired shapes and place on baking sheet. Turn the dough onto a floured surface. Knead it lightly just a few times. Then, pat it into a rectangle about 1 inch thick. Use a knife or a cookie cutter to cut the dough into triangles or circles. Place the cut scones on the baking sheet, leaving space for them to rise. - Sprinkle with brown sugar. - Bake and monitor for desired golden color. Before baking, sprinkle some brown sugar on top of each scone. This will give them a lovely, sweet crust. Bake your scones in the preheated oven for 15-18 minutes. Keep an eye on them. They should be golden brown on the edges when done. - Transfer to wire rack. - Allow to cool slightly before serving. Once they are baked, move the scones to a wire rack. Let them cool for a few minutes. This cooling step helps them set. Enjoy these scones warm for the best taste! To get the best scones, start with cold butter. Cold butter helps create flaky layers. When you mix it with flour, it forms pockets of steam. This steam makes your scones rise and stay light. Cut the butter into small cubes before adding it to the flour. Be careful not to over-knead the dough. Knead it just a few times, no more than five. Too much kneading makes the scones tough. You want them soft and tender. You can boost the flavor of your scones with spices. Try adding a pinch of cinnamon or nutmeg. These spices add warmth and depth. You can also use flavored maple syrup. A vanilla or bourbon-infused syrup adds a fun twist. Serve your scones on a rustic wooden board. This adds charm and warmth to your table. You can drizzle extra maple syrup on top for a sweet touch. Clotted cream is a great addition too. It makes each bite richer and more indulgent. Try arranging your scones in a circle for a beautiful display. This makes for a lovely treat at any gathering. {{image_4}} If you prefer not to use nuts, just leave out the chopped pecans. Your scones will still be rich and tasty. This option is great for those with nut allergies. You can also add a bit more flour to keep the texture balanced. Want to add some fruity flavor? You can mix in dried fruits like cranberries or blueberries. These fruits give a sweet burst in every bite. Just fold them into the dough before shaping the scones. Use about a half cup of dried fruit for the best results. For a vegan scone, swap out the butter and cream. Use plant-based butter and a non-dairy cream. Almond milk or coconut cream works well. You can also replace the egg with a flax egg. Just mix one tablespoon of ground flaxseed with three tablespoons of water and let it sit for a few minutes before adding. This makes your scones vegan-friendly and just as delicious! To keep your scones fresh, use an airtight container. Place them gently inside. This helps prevent them from drying out. You can store them at room temperature for up to three days. If you want to keep them longer, consider freezing. You can freeze scones in two ways: unbaked or baked. For unbaked scones, shape them and place them on a baking sheet. Freeze them until hard, then transfer to a bag. This way, you can bake fresh scones anytime! If you freeze baked scones, let them cool first. Wrap each one in plastic wrap and place them in a freezer bag. They last up to three months. To reheat scones, I recommend the oven. Preheat it to 350°F (175°C). Place the scones on a baking sheet and warm them for about 10 minutes. This keeps them soft and tasty. You can also use a microwave, but they may get a bit chewy. Enjoy your scones warm for the best flavor! You can tell when scones are done by checking their color. Look for golden-brown edges. The top should also be slightly firm to the touch. If you see a nice caramel color, they are ready. They usually take around 15 to 18 minutes in the oven. Yes, you can make the scone dough ahead of time. To do this, prepare the dough as instructed. After shaping the scones, place them on a baking sheet. Cover them tightly with plastic wrap and store in the fridge for up to 24 hours. When ready to bake, just sprinkle with brown sugar and bake as normal. You can easily adjust the sweetness of your scones. If you want them less sweet, reduce the brown sugar or maple syrup by a tablespoon. If you like them sweeter, add a bit more of either ingredient. Taste the dough before baking to find your perfect balance. This guide covered the key ingredients and steps for making delightful scones. You learned how to mix, shape, and bake them to perfection. Remember to use cold butter for the best texture. Feel free to get creative with flavors and variations. Store leftovers properly or freeze them for later. Enjoy your freshly baked scones with your favorite toppings. Simple tweaks can make a big difference in taste. Happy baking!

Bakery-Style Brown Sugar Maple Scones Simple Recipe

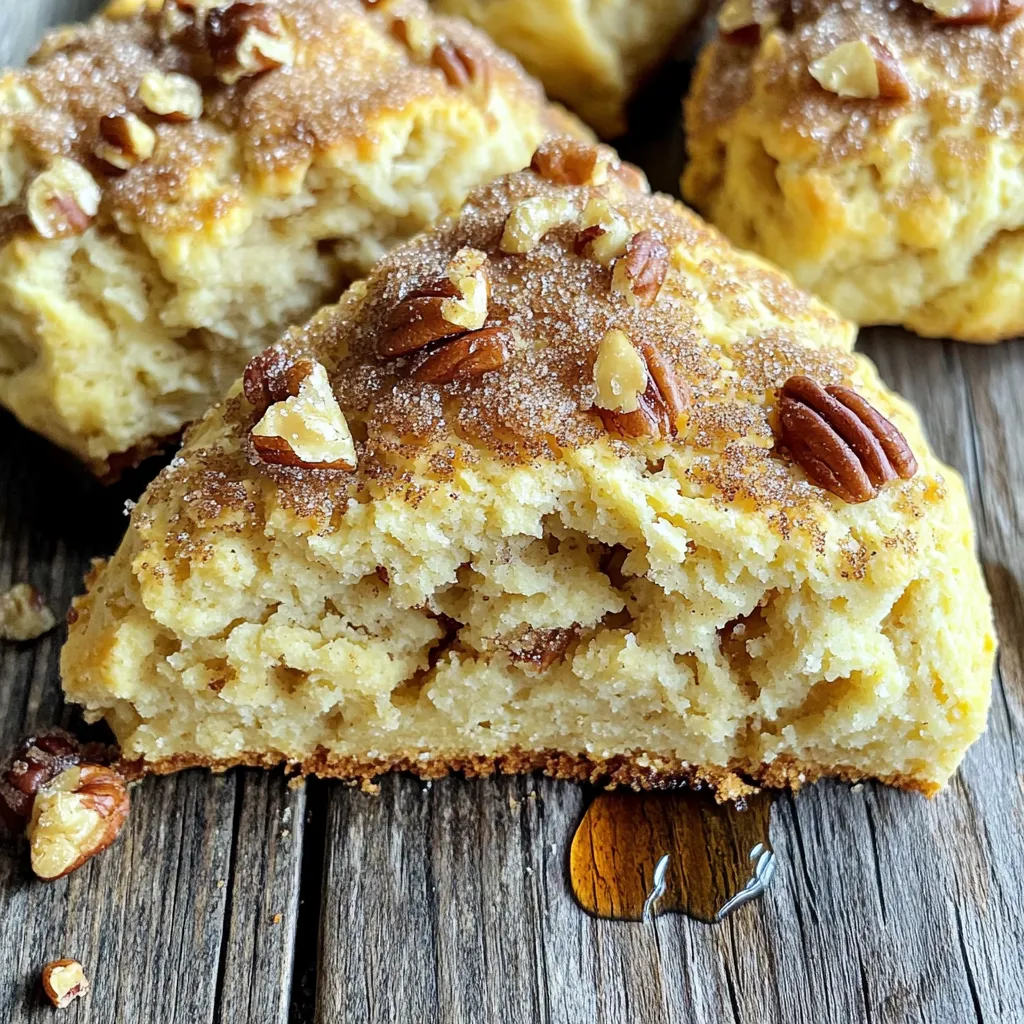
Are you ready to bake a treat that brings the bakery to your kitchen? My Bakery-Style Brown Sugar Maple Scones

- 2 cups shredded cooked chicken - 1 cup BBQ sauce - 4 flatbreads or naan breads - 1 cup shredded mozzarella cheese - 1/2 cup red onion, thinly sliced - 1/2 cup corn - 1/4 cup fresh cilantro, chopped - 1 teaspoon garlic powder - Salt and pepper to taste - Olive oil for drizzling Gather these ingredients before you start. Using shredded cooked chicken makes this dish quick and easy. The BBQ sauce gives a sweet and smoky flavor. Flatbreads or naan serve as a perfect base for all the toppings. Mozzarella cheese melts beautifully and adds richness. For toppings, thinly sliced red onion adds crunch and sharpness. Corn brings a sweet touch that pairs well with the BBQ sauce. Fresh cilantro adds brightness and aroma. Seasoning is key! Garlic powder adds depth to the chicken. Don't forget salt and pepper to enhance all the flavors. A drizzle of olive oil not only helps with cooking but also adds richness. These ingredients come together to create a tasty family meal. The flavors and textures will please everyone at the table. Enjoy the process of assembling your flatbreads with these fresh and vibrant ingredients! Start by preheating your oven to 425°F (220°C). This high heat helps the flatbreads cook evenly and get crispy. A hot oven creates the perfect setting for melting cheese and browning your toppings. For best results, place your oven rack in the center. This helps ensure the heat surrounds the flatbreads evenly. In a large bowl, combine the shredded chicken with 1 cup of your favorite BBQ sauce. Add 1 teaspoon of garlic powder for extra flavor. Mix well until every piece of chicken gets coated with sauce. Season with salt and pepper to taste. This step is key. Well-seasoned chicken makes your flatbreads tasty and satisfying. Take a large sheet pan and line it with parchment paper. Lay out 4 flatbreads or naan breads in a single layer, making sure they do not overlap. Spoon the BBQ chicken mixture over each flatbread, spreading it evenly. Then, sprinkle 1 cup of shredded mozzarella cheese on top. Add 1/2 cup of thinly sliced red onions and 1/2 cup of corn for color and crunch. Drizzle a small amount of olive oil over everything to enhance flavor. Finally, place the pan in the preheated oven and bake for 10-12 minutes. Look for melted cheese and golden edges. How to choose the right BBQ sauce Select a BBQ sauce that you love. Each sauce has a unique taste. Some are sweet, while others are spicy. Try a sauce with balanced flavors. This helps your flatbreads shine. Balancing toppings for best results Use toppings that complement your BBQ sauce. Red onions add crunch, and corn brings a sweet taste. Fresh cilantro adds brightness. Aim for a mix of textures and flavors to create a tasty dish. Avoiding soggy flatbreads To keep your flatbreads crispy, don’t overload them. Use just enough BBQ chicken and toppings. Drizzle a little olive oil before baking. This adds flavor and helps with texture. Adjusting cook time based on oven performance Oven temperatures can vary. Start with the suggested time of 10-12 minutes. Check if the cheese is bubbly and the edges are golden. You may need to bake a bit longer or shorter based on your oven. Pairing ideas for sides Serve your flatbreads with fresh salads or veggies. A simple green salad or coleslaw works well. These sides add freshness and crunch, making your meal more balanced. Presentation tips for gatherings Cut flatbreads into squares or wedges. Arrange them on a nice platter. Garnish with extra cilantro for a pop of color. This makes your dish look inviting and ready to share with friends or family. {{image_4}} You can change the protein in your flatbreads. If you want something other than chicken, try pulled pork or beef. These meats pair well with BBQ sauce. For a lighter option, use turkey. If you want a vegetarian or vegan dish, use roasted veggies. Grilled zucchini, bell peppers, and mushrooms create a tasty mix. You can also use chickpeas or lentils for protein. They are filling and add nice texture. Switching up your BBQ sauce can make a big difference. Try a spicy sauce for heat. A sweet sauce adds a nice contrast to the savory chicken. You might also like a smoky sauce for depth of flavor. Toppings can also change the dish. Add sliced jalapeños for spice. Pineapple gives a sweet and tangy twist. You can also add avocado for creaminess. Each topping creates a new experience. Flatbreads are great, but you can use other breads too. Pita bread works well and adds a fun texture. You can also use tortillas for a different shape. If you need gluten-free options, look for gluten-free flatbreads. Cauliflower crusts are popular and healthy. They give a unique flavor and are often lower in carbs. Explore these options to create your perfect flatbread! To keep your flatbreads fresh, wrap them tightly in plastic wrap. You can also use an airtight container. This helps prevent moisture loss. Store them in the fridge. The flatbreads will stay good for up to three days. After that, they may lose flavor and texture. For the best results, use an oven to reheat your flatbreads. Preheat the oven to 350°F (175°C). Place the flatbreads on a baking sheet and warm them for about 10 minutes. This keeps them crispy. If you use a microwave, place a paper towel under the flatbreads. Heat them for 30 seconds at a time. This method may make them a bit soggy, so be aware. Yes, you can freeze BBQ chicken flatbreads! Wrap each flatbread in plastic wrap and then in foil. This helps keep them fresh for about two months. When you want to eat them, thaw the flatbreads in the fridge overnight. For the best taste, reheat them in the oven as mentioned before. This way, you keep that nice crispy texture. Bake the flatbreads for 10 to 12 minutes at 425°F (220°C). This time helps the cheese melt and bubble nicely. Keep an eye on them to avoid burning. You want golden edges and melted cheese. Yes, you can make the chicken mix ahead of time. Combine the shredded chicken, BBQ sauce, and garlic powder. Store it in the fridge for up to two days. This makes assembly quick and easy when you are ready to bake. If you don’t have flatbreads, try naan or pita bread. You can also use tortilla wraps for a different twist. For gluten-free options, consider using cauliflower crusts or gluten-free wraps. All these bases work well with the BBQ chicken mix. This blog post covered tasty BBQ chicken flatbreads from start to finish. You learned about the key ingredients, seasoning, and how to bake to perfection. We explored various toppings and cooking tips for the best flavor. Also, I shared ways to vary your dish and store leftovers. Enjoy experimenting with your flatbreads. Use your favorite ingredients and make it your own. Cooking should be fun and creative!

Sheet-Pan BBQ Chicken Flatbreads Tasty Family Meal

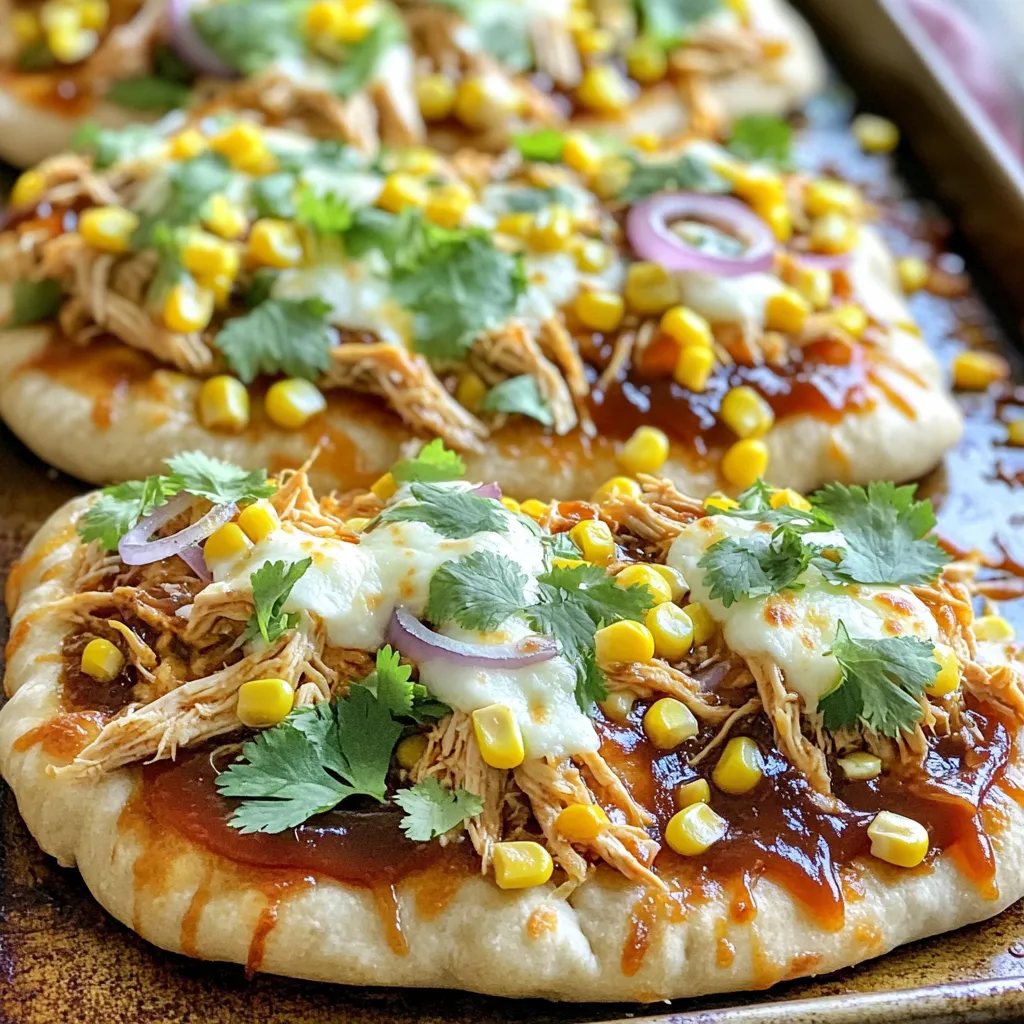
Looking for a quick and tasty family meal? Try my Sheet-Pan BBQ Chicken Flatbreads! This easy recipe combines shredded chicken,

For the perfect creamy garlic mashed potatoes, you will need the following fresh ingredients: - 3 pounds Yukon Gold potatoes, peeled and chopped into even-sized pieces - 4 cloves garlic, finely minced - 1 cup chicken or vegetable broth - 1 cup heavy cream or half-and-half - 4 tablespoons unsalted butter, at room temperature - Salt and freshly ground black pepper to taste - Fresh chives, finely chopped (for garnish) These ingredients come together to create a dish that is rich and comforting. Yukon Gold potatoes give a buttery flavor, while the garlic adds a nice kick. The broth keeps the potatoes moist during cooking. Heavy cream or half-and-half ensures a smooth and creamy texture. Don't forget the unsalted butter for richness! Seasoning with salt and pepper brings all the flavors together. Finally, fresh chives add a pop of color and flavor when you serve. Start by peeling and chopping 3 pounds of Yukon Gold potatoes. Make sure they are all even-sized pieces. This helps them cook evenly. Next, finely mince 4 cloves of garlic. Place the potatoes in the slow cooker. Spread them out evenly. Sprinkle the minced garlic on top of the potatoes. Pour 1 cup of chicken or vegetable broth over the potato and garlic mix. Ensure the potatoes are mostly submerged. If needed, add a bit more broth to cover them. Now secure the lid on the slow cooker. Set it to cook on low for 6-8 hours or on high for 3-4 hours. The potatoes are done when a fork easily pierces them and they feel tender. Once the cooking time is complete, check the potatoes. If there’s too much liquid, drain some broth. Add 1 cup of heavy cream and 4 tablespoons of unsalted butter to the cooked potatoes. Use a potato masher or an electric hand mixer to mash the potatoes until smooth. For a creamier texture, add more cream as needed. Season with salt and freshly ground black pepper to taste. Mix well. Spoon the mashed potatoes into a serving dish and top with freshly chopped chives for a pop of color. To make your mashed potatoes perfectly creamy, start with Yukon Gold potatoes. These potatoes have a buttery flavor and soft texture. Peel and chop them into even pieces. This step helps them cook evenly in the slow cooker. When your potatoes are cooked, drain any excess liquid. This keeps your potatoes from being too watery. Then, add heavy cream and butter. Mash everything together until smooth. If you want them even creamier, add more cream slowly. Garlic is key in this recipe, so don’t skip it. Use fresh garlic cloves for the best taste. You can also add sour cream for a tangy twist. For a richer flavor, stir in some grated cheese. Parmesan or cheddar work great. Fresh herbs like chives or parsley boost the flavor and add color. Sprinkle them on top before serving. This makes your dish look beautiful and taste even better. One common mistake is not cutting the potatoes evenly. This can lead to uneven cooking. Always check the potatoes with a fork. If they are not soft, they need more time. Another mistake is adding too much liquid. Be careful when pouring in the broth. You want the potatoes to be moist but not soupy. Lastly, don’t forget to taste your mashed potatoes! Adjust the seasoning with salt and pepper before serving. This step is crucial for a well-balanced flavor. {{image_4}} Cheese adds a rich taste to mashed potatoes. You can use sharp cheddar, creamy gouda, or tangy goat cheese. Just stir in the cheese after mashing the potatoes. Start with one cup and adjust to your taste. The cheese melts in, making the dish even creamier. It also adds a nice depth of flavor that pairs well with garlic. While Yukon Gold potatoes are my favorite, you can try other types. Russet potatoes give a fluffier texture. Red potatoes add a nice color and creaminess. You can mix different kinds too! Just keep the amounts about the same for even cooking. Each type brings a unique taste and texture, so feel free to experiment. Herbs can change the whole vibe of your mashed potatoes. Try adding fresh rosemary or thyme for an earthy touch. Basil gives a fresh, bright flavor. Chop the herbs finely and mix them in before serving. You can even infuse the broth with herbs while cooking. This adds a subtle flavor that makes the dish special. To store leftover mashed potatoes, let them cool first. Place them in an airtight container. Ensure the lid is tight to keep out air. Store them in the fridge for up to 3 days. If you see any discoloration, it’s best to toss them out. When you want to reheat your mashed potatoes, the stove works well. Place them in a pot over low heat. Stir often to avoid burning. Add a splash of cream or broth if they seem dry. You can also use the microwave. Heat in short bursts, stirring in between. This helps them heat evenly. You can freeze mashed potatoes for later. Use freezer-safe bags or containers. Make sure to label them with the date. They will last in the freezer for up to 2 months. To thaw, move them to the fridge overnight. Reheat as mentioned above. This way, they stay creamy and delicious. Cook the potatoes on low for 6-8 hours. This slow cooking helps them become very tender. If you are in a hurry, use high for 3-4 hours. Just make sure they are fork-tender before mashing. The longer cooking time allows flavors to blend and enhances creaminess. Yes, you can swap heavy cream for low-fat options. Try half-and-half or milk for a lighter dish. Keep in mind that these alternatives may change the texture a bit. Using low-fat butter can also help. However, for the best flavor, I recommend using full-fat ingredients when possible. Creamy garlic mashed potatoes pair well with many dishes. They go great with meats like roast chicken or grilled steak. You can also serve them with veggies, like steamed green beans or roasted Brussels sprouts. For a cozy meal, enjoy them with a hearty stew or meatloaf. The creamy texture makes them a perfect comfort food side. This blog post covered how to make creamy garlic mashed potatoes. You learned about key ingredients, step-by-step cooking, and tips for the perfect texture. We explored tasty variations, like adding cheese or herbs, and how to store leftovers. In closing, follow these steps, and you will impress everyone at your next meal. You now have all the tools to create a creamy dish full of flavor. Enjoy your cooking journey!

Slow Cooker Creamy Garlic Mashed Potatoes Delight

Get ready to elevate your dinner with my Slow Cooker Creamy Garlic Mashed Potatoes Delight! This dish transforms simple ingredients

Older posts
Newer posts
← Previous Page1 … Page5 Page6 Page7 … Page86 Next →

dsad

© 2026 dailydishcraft • Built with GeneratePress

Our Policies

  • Copyright Policy
  • Cookie Policy
  • GDPR Policy
  • Privacy Policy
  • Disclaimer
  • Terms Of Use

More Information

  • Home
  • About
  • Contact
  • Appetizers
  • Dessert
  • Dinner
  • Drinks
©2026, dailydishcraft About Back To Top