Skip to content
DisclaimerTerms Of UseGDPR PolicyCookie Policy

dailydishcraft

  • Home
  • Drinks
  • Appetizers
  • Dinner
  • Dessert
  • About
  • Contact
  • Privacy Policy
DisclaimerTerms Of UseGDPR PolicyCookie Policy

NO-ING-IMG

- 4 salmon fillets (about 6 ounces each) - 3 tablespoons low-sodium soy sauce - 2 tablespoons honey or pure maple syrup - 1 tablespoon fresh ginger, finely grated - 2 cloves garlic, minced - 1 tablespoon sesame oil - 1 tablespoon rice vinegar - 1 tablespoon green onions, finely chopped (for garnish) - Sesame seeds (for garnish) - Salt and pepper, to taste For this recipe, you need four salmon fillets. Each fillet should weigh around six ounces. You can find these fillets fresh or frozen at your local grocery store. Next, gather your marinade ingredients. You will use low-sodium soy sauce for flavor. Honey or pure maple syrup adds sweetness to balance the soy sauce's saltiness. Fresh ginger gives a nice zing, while minced garlic adds depth. You will also need sesame oil and rice vinegar. These two ingredients add a rich taste and slight tang. Lastly, for garnish, chop some green onions and sprinkle sesame seeds. These not only look pretty but also add a nice crunch. Make sure you have salt and pepper on hand to season the salmon before baking. With these ingredients, you are set to create a delicious dish that is both simple and packed with flavor! {{ingredient_image_2}} First, you need to make the marinade. In a medium bowl, combine: - 3 tablespoons low-sodium soy sauce - 2 tablespoons honey or pure maple syrup - 1 tablespoon fresh ginger, finely grated - 2 cloves garlic, minced - 1 tablespoon sesame oil - 1 tablespoon rice vinegar Whisk these ingredients together well. This mixture is full of flavor. Next, pour the marinade over your 4 salmon fillets. Make sure each piece is coated nicely. Cover the dish with plastic wrap and put it in the fridge for 30 minutes. This helps the flavors soak into the salmon. For the best taste, marinate for the full 30 minutes. While your salmon marinates, preheat your oven to 400°F (200°C). This step is important for even cooking. Now, take a baking sheet and line it with parchment paper. It makes cleanup easy and keeps the salmon from sticking. Place the marinated salmon on the sheet, skin side down. Bake the salmon for 15 to 18 minutes. The cooking time may change based on how thick your fillets are. Look for the salmon to be opaque and flake easily with a fork. This means it’s done. While the salmon bakes, it’s time to make the glaze. Take the reserved marinade you set aside. Pour it into a small saucepan. Heat it on medium heat and bring it to a simmer. Stir it occasionally as it cooks. Let it simmer for about 5 to 7 minutes until it thickens. Once the salmon is baked, remove it from the oven. Drizzle the thickened glaze over each fillet. This adds a burst of flavor. To bake salmon well, set your oven to 400°F (200°C). Use a baking sheet lined with parchment paper. This helps with easy cleanup. Place the salmon skin side down for even cooking. Bake for 15-18 minutes. The time can change based on how thick your fillets are. To check if it's done, look for opaque flesh that flakes with a fork. Fresh ingredients bring out the best flavors in your dish. Use fresh ginger instead of dried for a zesty kick. Fresh garlic works wonders too. Marinating is key. Let the salmon sit in the marinade for at least 30 minutes. This allows the flavors to soak in deeply. For even better results, marinate it longer if you have time. For a beautiful dish, serve your salmon on a bed of fluffy jasmine rice. You can also add colorful steamed veggies on the side. Drizzle some extra glaze around the plate. It adds color and charm. For garnishing, sprinkle chopped green onions and sesame seeds on top. This gives your dish a lovely finish. Pro Tips Marinade Time: Allowing the salmon to marinate for a full 30 minutes enhances the flavor, but if you're short on time, even 15 minutes can provide a decent taste boost. Oven Temperature: Ensure your oven is fully preheated before baking the salmon. This helps in cooking it evenly and achieving a perfect flaky texture. Garnish for Flavor: Don't skip the garnishing! The green onions and sesame seeds not only add a delightful crunch but also brighten up the dish visually. Serving Suggestions: Pair the glazed salmon with a side of steamed broccoli or sautéed spinach for a healthy and colorful meal. Jasmine rice complements the flavors beautifully. {{image_4}} You can switch the protein in this recipe. Chicken works well with the ginger soy glaze. Simply adjust the cooking time. Tofu is another great option for a vegetarian meal. Use firm tofu and press it to remove excess water. You can also change the sweetener. Instead of honey, try pure maple syrup. It adds a unique taste while keeping that sweet touch. Coconut sugar is another choice for a hint of caramel flavor. You can grill or bake your salmon. Grilling gives a nice char and smoky flavor. Just make sure your grill is hot. Place the fish skin side down and grill for about 6-8 minutes per side. Baking is easier for a weeknight meal. Preheat your oven to 400°F (200°C). Lay your salmon on a lined baking sheet. Bake for 15-18 minutes, depending on thickness. If you want a different texture, try broiling. Broiling gives a nice crust on top. Place your salmon under the broiler for about 10 minutes. Watch closely so it doesn’t burn. Add spices or herbs to change the flavor. A pinch of chili flakes gives some heat. Fresh cilantro or basil can add a fresh twist. You can also use citrus zest, like lime or orange, for brightness. Incorporate local ingredients to make the dish unique. If you have fresh herbs or veggies from your garden, use them. This not only adds flavor but also makes your meal personal. To keep your leftover salmon fresh, place it in an airtight container. Make sure the salmon cools down to room temperature. After that, seal it tightly and store it in the fridge. The salmon will stay good for about three days. If you want to keep it longer, you can freeze it. Wrap each fillet in plastic wrap, then place it in a freezer bag. It will last for up to three months in the freezer. When it comes to storing the marinade, you can keep any leftover marinade in the fridge too. Pour it into a clean container and cover it tightly. It will stay fresh for about a week. If you want to use it later, make sure to bring it to a boil before using it again. To reheat your salmon, the oven is the best choice. Preheat it to 350°F (175°C). Place your salmon on a baking sheet and cover it with foil to prevent it from drying out. Heat for about 10-15 minutes. This method keeps the salmon moist and tasty. You can also use the microwave, but be careful. Place the salmon on a microwave-safe plate and cover it with a damp paper towel. Heat it in short bursts of 30 seconds. Check often to avoid overcooking. This way, you keep the flavor and texture intact. If you have a stove, you can reheat the salmon in a pan. Use low heat and add a splash of water or broth. Cover the pan, and let it steam for a few minutes. This method also helps to keep it moist and delicious. You can pair Ginger Soy Glazed Salmon with many tasty sides. Here are some great ideas: - Steamed jasmine rice - Roasted vegetables like broccoli or asparagus - Garlic sautéed spinach - Quinoa for a healthy option - A fresh salad with a light dressing These sides add flavor and color to your meal. They also balance the rich taste of the salmon. Yes, you can prep this dish ahead. Here are some tips: - Marinate the salmon up to one day in advance. - Store the marinated salmon in the fridge until you are ready to cook. - You can also make the glaze ahead. Just heat it up before serving. This way, you save time on busy nights. Check for these signs to know if your salmon is done: - It should turn opaque and lose its shiny look. - It should flake easily with a fork. - The thickest part should reach 145°F (63°C). These signs show that your salmon is ready to eat. Enjoy your flavorful meal! This post covered how to make Ginger Soy Glazed Salmon from start to finish. We discussed the ingredients, marinating steps, baking tips, and even how to enhance flavors. Remember, using fresh ingredients and proper marinating time makes a big difference. I hope you feel ready to try this recipe. With a few simple steps, you can impress anyone with your cooking. Enjoy your delicious and healthy meal!

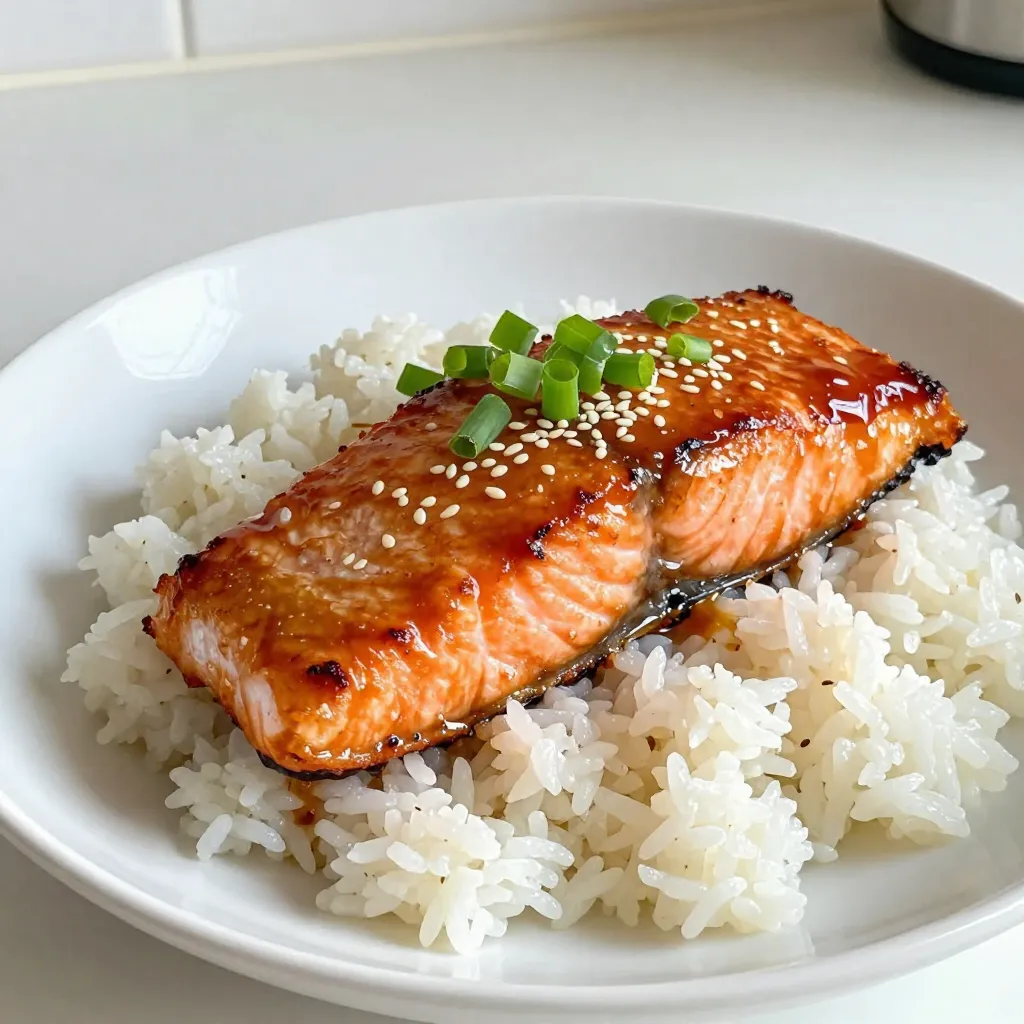
Ginger Soy Glazed Salmon Easy and Flavorful Recipe

Looking for a quick and tasty dinner? You’ve found it! This Ginger Soy Glazed Salmon recipe is easy and packed

To make Spicy Thai Peanut Noodles, you need these simple ingredients: - 8 oz rice noodles - 1/2 cup creamy peanut butter - 3 tablespoons soy sauce - 2 tablespoons fresh lime juice - 2 tablespoons honey or maple syrup - 1 tablespoon sesame oil - 1-2 teaspoons sriracha (adjust to your spice level) - 1 cup shredded carrots - 1 red bell pepper, thinly sliced - 1 cup cucumber, julienned - 3 green onions, chopped - 1/4 cup fresh cilantro, chopped - Crushed peanuts for garnish You can easily swap some ingredients if needed. Here are some ideas: - Use whole wheat or egg noodles instead of rice noodles. - Almond butter can replace peanut butter for a different flavor. - If you prefer no honey, agave syrup works well too. - For a gluten-free option, choose tamari instead of soy sauce. - You can skip sriracha if you like milder flavors or use another hot sauce. Fresh ingredients add bright flavors and textures. I recommend using fresh veggies like carrots, bell peppers, and cucumbers. They provide crunch and color. Packaged ingredients can save time, especially with shredded carrots. Just check for added sugars or preservatives. In the end, fresh ingredients often give your dish a vibrant taste. However, packaged items can work in a pinch. Choose what fits your schedule and taste! {{ingredient_image_2}} To start, bring a large pot of water to a boil. Add the rice noodles. Cook them for about 6-8 minutes. Check the package for exact timing. Once they are done, drain the noodles in a colander. Rinse them under cold running water. This stops the cooking process and keeps them from sticking. Place the cooled noodles in a large bowl and set them aside. In a medium bowl, combine the creamy peanut butter, soy sauce, fresh lime juice, and honey or maple syrup. Whisk these together until the mix is smooth. Then, add the sesame oil and sriracha. Adjust the spice by adding more sriracha if you like it hotter. Taste the sauce. It should have a nice balance of salty, sweet, and spicy flavors. Now, add the shredded carrots, sliced red bell pepper, and julienned cucumber to the bowl with the noodles. Pour the peanut sauce over the noodle mix. Gently toss everything together until all the noodles and veggies are coated in sauce. For a fresh touch, sprinkle in the chopped green onions and cilantro. Toss lightly again. Serve the noodles in bowls. Top with crushed peanuts for crunch and flavor. Enjoy your delicious meal! If you want more heat, add more sriracha. Start with one teaspoon. Taste the sauce, then add more if you like. For less heat, use less sriracha. You can also swap it for sweet chili sauce. This will still give you flavor without too much spice. For a great look, serve your noodles in deep bowls. Add a sprinkle of crushed peanuts on top. This adds crunch and color. Place a lime wedge on the side for fresh juice. Whole cilantro leaves can also brighten the dish. These small touches make your meal stand out. One mistake is overcooking the noodles. Follow the package time carefully. Rinse them well after cooking to stop the heat. Another mistake is not tasting the sauce. Always taste and adjust flavors before mixing. Lastly, don’t skip the fresh herbs. They add flavor and freshness to your dish. Pro Tips Perfecting the Noodles: Make sure to rinse the cooked rice noodles under cold water to stop the cooking process. This will prevent them from becoming mushy and help them maintain their texture. Balancing Flavors: Taste your peanut sauce before mixing it with the noodles. Adjust the sweetness or spiciness to your preference by adding more honey or sriracha, ensuring a balanced flavor profile. Freshness Matters: Use fresh vegetables for the best crunch and flavor. You can also add other vegetables like bell peppers or snap peas for added color and texture. Serving Suggestions: Serve the noodles chilled or at room temperature for a refreshing meal. This dish also makes a great side for grilled meats or can be served with extra lime wedges for added zest. {{image_4}} You can easily make these noodles vegetarian or vegan. Use plant-based honey or maple syrup to keep it vegan. Make sure your soy sauce is gluten-free if needed. For a heartier option, add tofu or tempeh. Both soak up flavor well and add protein. Feeling hungry? You can add more protein to your dish. Grilled chicken, shrimp, or beef work great. Just cook them separately and mix them in. For a meat-free option, try chickpeas or edamame. They add texture and flavor to your meal. Seasonal veggies can give your dish a fresh twist. In spring, use snap peas or asparagus. They add crunch and color. In summer, cherry tomatoes and zucchini are great choices. For fall, try roasted butternut squash or kale. These veggies make every bowl unique and fun! I love keeping leftovers from my Spicy Thai Peanut Noodles. They stay tasty in the fridge. To store, place the noodles in an airtight container. Make sure they cool completely first. They last for about 3 to 4 days. If you have extra sauce, store it separately. This helps keep the noodles from getting soggy. Reheating these noodles is simple. You can use a microwave or a pan on the stove. If using the microwave, place the noodles in a bowl with a splash of water. Cover and heat for 1-2 minutes. Stir halfway through. If using a pan, add a little oil over low heat. Toss the noodles for 5-7 minutes until warm. Always check the temperature before serving. You can freeze these noodles for later. Start by placing them in a freezer-safe container. Make sure to separate the sauce and veggies. They freeze well for up to 2 months. When ready to eat, thaw in the fridge overnight. Reheat as mentioned above. This way, you can enjoy a quick meal anytime! Yes, you can make Spicy Thai Peanut Noodles ahead of time. Prepare the noodles and sauce in advance. Store them separately in airtight containers. When ready to eat, combine them and toss with fresh veggies. This dish tastes great after sitting in the fridge for a few hours. Just remember to add fresh herbs just before serving for the best flavor. If you can't find rice noodles, don't worry! You can use other types of noodles. Try using whole wheat spaghetti or even zucchini noodles for a low-carb option. Each type will give a different texture but will still soak up that tasty peanut sauce. Just cook them according to the package instructions and follow the same steps to mix with the sauce. The spice level in these noodles is quite adjustable. You start with 1-2 teaspoons of sriracha. If you want it spicier, just add more. Taste as you go, so you find the heat that suits you. If you prefer milder noodles, reduce the sriracha. You can also add a little more peanut butter to balance the heat. Enjoy tailoring it to your taste! In this blog post, we explored how to make Spicy Thai Peanut Noodles. We covered the key ingredients, plus substitutions for fresh or packaged options. The step-by-step cooking guide ensures a tasty dish every time. Consider adjusting spice levels to fit your taste. Use our tips to avoid common mistakes. Remember, these noodles can adapt for vegetarians or those wanting more protein. With proper storage, you can enjoy leftovers later. Now, you have the tools to make a great meal that fits your needs and taste. Enjoy!

Spicy Thai Peanut Noodles Quick and Flavorful Meal

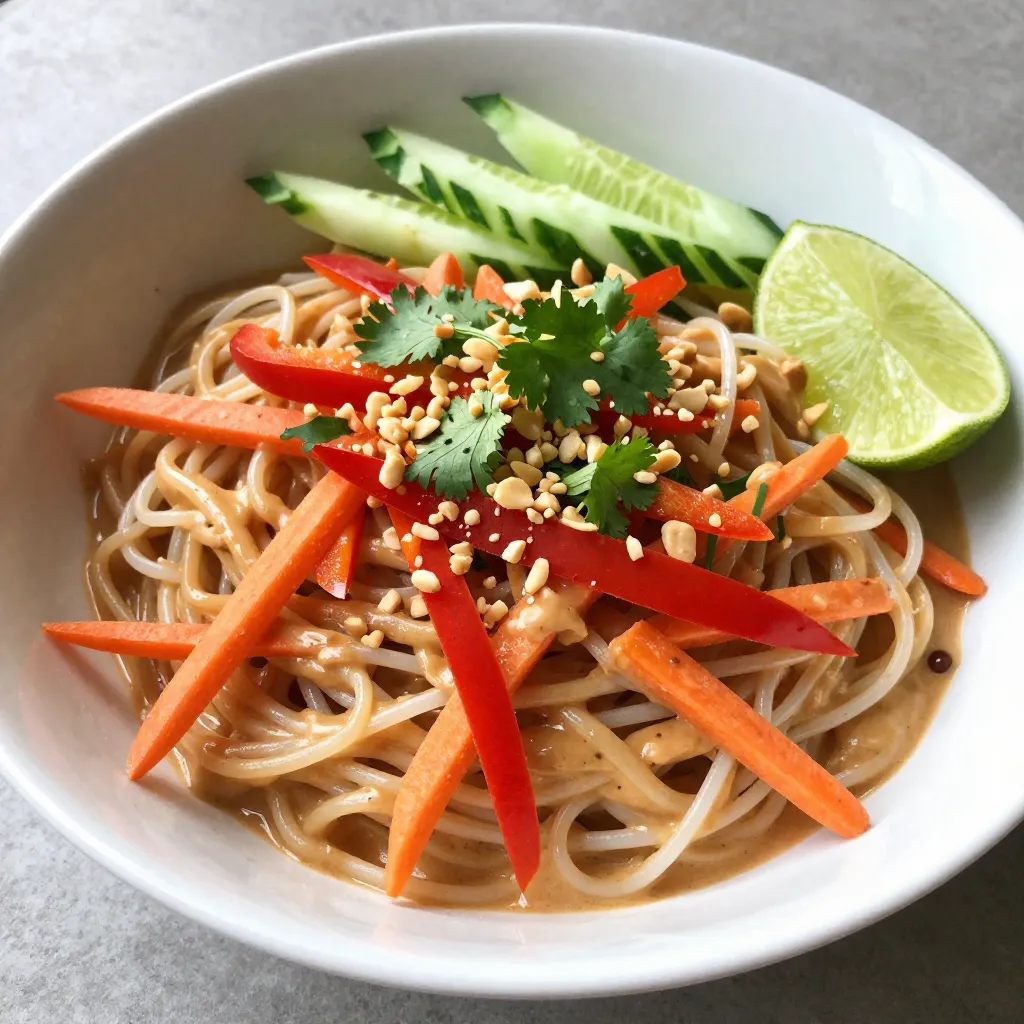
Looking for a quick and tasty meal? Spicy Thai Peanut Noodles will hit the spot! In this guide, I’ll show

- 1 ½ cups all-purpose flour - 1 teaspoon baking powder - 1 teaspoon baking soda - ½ teaspoon salt - 2 tablespoons pumpkin spice blend - ½ cup unsalted butter, softened - 1 cup granulated sugar - 2 large eggs - 1 cup canned pumpkin puree - ½ cup strong brewed coffee, cooled to room temperature - 1 teaspoon vanilla extract - ½ cup buttermilk - 1 cup unsalted butter, softened - 4 cups powdered sugar - ½ teaspoon vanilla extract - 2 tablespoons brewed coffee, cooled - 1 tablespoon pumpkin spice blend - A pinch of salt Gathering fresh, quality ingredients makes a big difference in taste. For the dry mix, use all-purpose flour for a soft texture. Baking powder and baking soda help the cupcakes rise. Always add salt to enhance the natural flavors. A good pumpkin spice blend is key; it adds that cozy autumn taste. For the wet mix, soften the butter to cream easily with the sugar. Granulated sugar brings sweetness and helps create a fluffy texture. Eggs provide structure and moisture. Canned pumpkin puree keeps the cupcakes moist and adds flavor. Strong brewed coffee is a must; it amps up the pumpkin spice latte vibe. Don't forget vanilla extract for extra depth. Buttermilk adds a tender crumb, making the cupcakes delightfully soft. For the frosting, start with softened butter. It helps create a smooth, creamy base. Powdered sugar adds sweetness and helps with texture. The brewed coffee and pumpkin spice blend in the frosting echo the flavors from the cupcakes. A pinch of salt balances the sweetness perfectly. With these ingredients ready, you're one step closer to baking tasty pumpkin spice latte cupcakes! {{ingredient_image_2}} - Preheat your oven to 350°F (175°C). - Prepare a 12-cup cupcake tin with festive paper liners. - In a medium bowl, combine 1 ½ cups of all-purpose flour, 1 teaspoon baking powder, 1 teaspoon baking soda, ½ teaspoon salt, and 2 tablespoons pumpkin spice blend. - Whisk these dry ingredients well to ensure even distribution. - In a large mixing bowl, beat ½ cup softened butter and 1 cup granulated sugar together until light and fluffy. - This should take about 3-5 minutes. - Gradually add in 2 large eggs, mixing thoroughly after each one. - Pour in 1 cup canned pumpkin puree, ½ cup cooled coffee, and 1 teaspoon vanilla extract. - Mix everything until it is well combined. - Slowly add the dry mixture to the wet mix, alternating with ½ cup buttermilk. - Start and finish with the dry ingredients. - Gently mix to avoid overmixing. - Use a scoop or spoon to fill each cupcake liner about ¾ full with batter. - Bake in the preheated oven for 18-20 minutes. - To check for doneness, insert a toothpick into the center; it should come out clean. - In another bowl, beat 1 cup softened butter until creamy. - Gradually mix in 4 cups powdered sugar on low speed. - Add ½ teaspoon vanilla extract, 2 tablespoons cooled coffee, 1 tablespoon pumpkin spice blend, and a pinch of salt. - Beat until fluffy and well-combined. Now you have all the steps to make these delightful cupcakes! Enjoy the process and the wonderful smells wafting through your kitchen. To check if your cupcakes are done, use a toothpick. Insert the toothpick into the center of a cupcake. If it comes out clean, your cupcakes are ready. If the toothpick has batter on it, bake for a few more minutes. Ovens can vary. If your oven runs hot or cold, you might need to adjust the baking time. Start checking for doneness at 15 minutes for smaller ovens, and at 20 minutes for larger ones. This helps ensure perfect cupcakes every time. Using piping bags can help you frost cupcakes beautifully. Fill the bag with frosting and twist the top to seal it. Squeeze gently to create swirls or peaks. Practice makes perfect, so don't worry if your first try isn't great! For perfect frosting, mix until fluffy. The frosting should hold its shape but still be spreadable. If it’s too thick, add a little coffee or milk. If it’s too thin, add more powdered sugar until you reach the right consistency. Make your cupcakes pop by sprinkling extra pumpkin spice on top. This adds a nice touch and emphasizes that fall flavor. You can also add a few coffee beans for a chic look. When serving, arrange the cupcakes on a rustic wooden platter. This adds a cozy feel to your dessert table. A beautiful presentation can make your treats even more inviting to guests! Pro Tips Storage Tip: Once frosted, store your cupcakes in an airtight container at room temperature for up to 2 days, or refrigerate for up to a week to maintain freshness. Flavor Boost: For a richer flavor, use freshly brewed espresso instead of regular coffee in both the cupcake batter and frosting. Texture Trick: Ensure your butter is softened to room temperature for the frosting to achieve the perfect creamy consistency without any lumps. Garnish Game: Elevate your presentation by adding caramel drizzle on top of the frosting or placing a dollop of whipped cream before serving for a latte-style finish. {{image_4}} To make these cupcakes vegan, you can easily swap out eggs. Use flaxseed meal or applesauce in place of eggs. For each egg, mix 1 tablespoon of flaxseed meal with 2.5 tablespoons of water. Let it sit for a few minutes to thicken. Applesauce works as a great substitute too; use 1/4 cup for each egg. Next, you need plant-based butter. It works just like regular butter, giving that rich flavor. Use non-dairy milk, such as almond or oat milk, instead of buttermilk. This will keep the cupcakes moist and tasty. If you need gluten-free cupcakes, choose a good gluten-free flour blend. Look for blends that include rice flour, tapioca flour, and potato starch. These give the best texture. When baking gluten-free, be careful with mixing. Gluten-free flour can dry out the batter, so blend just until combined. Adding a bit more liquid can help keep the cupcakes moist. Want to switch up the flavor? You can add more spices! Try using cinnamon, nutmeg, or ginger for a warm kick. Each spice can change the taste in a fun way. If you love chocolate, mix in chocolate chips or cocoa powder. For a caramel twist, drizzle caramel sauce on top. These small changes can create a whole new cupcake experience. To keep your pumpkin spice latte cupcakes fresh, store them at room temperature. Place them in an airtight container. This will help them stay moist for up to three days. If it’s warm in your kitchen, you might want to refrigerate them. In the fridge, they can last about a week. Just make sure to seal them well so they don’t dry out. You can freeze your baked cupcakes for later. Start by letting them cool completely. Then, wrap each cupcake in plastic wrap. Place them in a freezer-safe bag or container. They will stay fresh for up to three months. When you want to enjoy them, thaw them in the fridge overnight. For the best taste and texture, let them sit at room temperature for about 30 minutes before serving. To keep your cupcakes moist, use the right ingredient ratios. Use enough butter and eggs, as these add moisture and richness. Mixing is key! Cream the butter and sugar well to incorporate air. This helps the cupcakes rise and stay soft. When you add dry and wet ingredients, mix gently. Overmixing can make them tough. Lastly, avoid baking too long; check them at 18 minutes. Yes, you can use homemade pumpkin puree! It offers a fresh taste. However, it can be watery if not prepared well. To make it right, cook the pumpkin until soft. Then, mash and drain excess liquid. Canned pumpkin is more consistent. It saves time and is ready to use. If you want a richer flavor, go homemade, but both work well. Pumpkin spice latte cupcakes last about 3 days at room temperature. Store them in an airtight container to keep them fresh. If you want them to last longer, refrigerate them. They can stay good for about a week in the fridge. For longer storage, freeze them! Wrap each cupcake in plastic wrap, then place them in a freezer bag. Thaw them at room temperature before serving. This guide covered all the steps to make perfect pumpkin spice latte cupcakes. You learned about the right dry and wet ingredients, plus how to mix and bake them. We also shared tips for frosting, storing, and even variations to fit your taste. Remember, experimenting with flavors can lead to delightful surprises. Don't hesitate to try new ideas or methods. Enjoy sharing these cupcakes with friends and family! They’ll love them as much as you do.

Pumpkin Spice Latte Cupcakes Irresistible Fall Treat

Fall is here, and what better way to celebrate than with Pumpkin Spice Latte Cupcakes? These delightful treats combine the

To make Salted Caramel Pretzel Bark, gather these simple ingredients: - 2 cups mini pretzels - 1 cup semi-sweet chocolate chips - 1 cup caramel sauce (store-bought or homemade) - 1 teaspoon sea salt - 1/2 cup crushed nuts (optional, such as pecans or almonds) You can make your bark even better with some fun add-ins. Consider these options: - Dried fruit like cranberries or cherries for a fruity twist. - Sprinkles for a festive touch. - Sea salt caramel bits for a flavor boost. If you need to swap some ingredients, here are some ideas: - Use dark chocolate chips instead of semi-sweet for a richer taste. - Try different types of pretzels, like sticks or rods, if you can't find mini ones. - Use a nut butter instead of crushed nuts if you want a nutty flavor without the crunch. These ingredients help create the sweet and salty mix that makes this treat special. Enjoy the process of making your bark, and have fun experimenting with flavors! {{ingredient_image_2}} Start by preheating your oven to 350°F (175°C). This heat will help toast the pretzels. Line a baking sheet with parchment paper. This will make it easy to lift the bark off later. Spread 2 cups of mini pretzels on the lined baking sheet. Make sure they are in a single layer. This helps them toast evenly. Bake the pretzels for about 5-7 minutes. Keep an eye on them as they should be golden and smell nice. Once done, take them out and let them cool for a few minutes. Next, grab a small saucepan and pour in 1 cup of caramel sauce. Heat it over medium-low heat. Stir often until it's smooth and easy to pour. If the caramel is too thick, add a splash of water or cream. Once ready, drizzle the warm caramel over the toasted pretzels. Make sure each pretzel gets coated in that sweet goodness. Now, take a microwave-safe bowl and add 1 cup of semi-sweet chocolate chips. Microwave the chips in 30-second bursts. Stir after each burst until the chocolate is melted and smooth. This step creates a lovely chocolate layer. Use a spoon or piping bag to drizzle the melted chocolate over the caramel-covered pretzels. If you want, sprinkle 1/2 cup of crushed nuts over the bark. This adds extra crunch and flavor. Finish by sprinkling 1 teaspoon of sea salt over the chocolate and caramel. This touch of salt makes the sweet flavors pop. Let the bark cool at room temperature until the chocolate sets. For a quicker method, place it in the fridge for about 30 minutes. Once set, break the bark into pieces and enjoy this delightful treat! To get the best texture for your salted caramel pretzel bark, follow these steps. Start by using mini pretzels. Their small size allows for more even coverage. Toasting the pretzels for 5-7 minutes enhances their crunch. Make sure they cool before adding the caramel and chocolate. This keeps everything from getting soggy. Drizzle the chocolate in thin lines for a beautiful look. Let the bark cool completely, either at room temperature or in the fridge. This ensures a nice, firm bite. If you have leftover bark, store it properly to keep it fresh. Place it in an airtight container. You can layer the pieces with parchment paper to avoid sticking. Keep it in a cool, dry place. This helps maintain its crispness. The bark can last up to a week, but it’s so good, it might not last that long! Avoid these common mistakes for perfect bark. First, don’t overcrowd the pretzels on the baking sheet. This can lead to uneven baking. Second, use warm caramel. If it’s too cold, it won’t coat the pretzels well. Lastly, don’t skip the sea salt. It adds a great contrast to the sweet caramel and chocolate. Pro Tips Use Fresh Caramel: For the best flavor, opt for fresh, homemade caramel if you have the time. It will elevate the taste of your bark significantly! Experiment with Chocolate: Try using different types of chocolate, such as dark or white chocolate, to customize the flavor profile of your pretzel bark. Chill for Quick Setting: If you're in a hurry, placing the bark in the refrigerator will help it set faster without compromising texture. Mix Up Your Nuts: Feel free to mix different types of nuts for added texture and flavor. Almonds, pecans, or even walnuts can make great additions! {{image_4}} You can switch up the chocolate in your bark. Use white chocolate or dark chocolate for different tastes. White chocolate gives a creamy touch, while dark chocolate adds a rich flavor. Both options blend well with the salty pretzels and sweet caramel. Just melt and drizzle as you would with semi-sweet chocolate. If you're avoiding nuts, just skip them! The pretzel bark still tastes amazing without nuts. You can add extra pretzels or even crushed cookies for crunch. This keeps the treat safe for those with nut allergies. Get creative for the holidays! For Halloween, add orange and black sprinkles. In December, use festive colors or even peppermint bits for a fresh taste. This can make your salted caramel pretzel bark a fun treat for any occasion. Just change the toppings to fit the season, and you’ll have a hit dessert every time. To keep your salted caramel pretzel bark fresh, store it in an airtight container. This helps to prevent moisture from ruining the crisp texture. You can use wax paper or parchment paper between layers to avoid sticking. Keep the container in a cool, dry place, away from direct sunlight. When stored properly, the bark can last up to two weeks. However, it tastes best within the first week. After that, the pretzels may lose some crunch. If you want to enjoy the bark longer, freezing is a great option. To freeze the bark, first, let it cool completely. Cut it into pieces and wrap each piece in plastic wrap. Place the wrapped pieces in a freezer-safe bag or container. This way, you can enjoy a piece whenever you crave something sweet. The bark can stay frozen for up to three months. When ready to eat, simply thaw at room temperature for about 30 minutes. Enjoy! Yes, you can use homemade caramel sauce. Making your own caramel adds a personal touch. Just follow a simple caramel recipe, and you will have a rich flavor. Cook sugar until it melts and turns golden. Add butter and cream for that creamy texture. Allow it to cool before drizzling over pretzels. Mini pretzels are the best choice for this bark. Their small size makes them easy to coat. They also add a great crunch. You can also use regular pretzels or chocolate-covered ones for a twist. Just ensure they are firm enough to hold the toppings. To make this bark gluten-free, choose gluten-free pretzels. Many brands offer gluten-free options that taste just as good. Always check the label to ensure no gluten is present. The rest of the ingredients, like chocolate and caramel, are usually gluten-free. Yes, feel free to add other toppings! Crushed nuts like pecans or almonds work great. You can also use sprinkles, coconut flakes, or even candies. Get creative! Each topping adds a unique flavor and crunch to your bark. Just make sure not to overdo it, so every bite remains balanced. This blog post covered the tasty journey of making pretzel bark. We looked at the right ingredients, step-by-step instructions, and some handy tips to avoid mistakes. We also explored flavorful variations, storage advice, and answered common questions. Making pretzel bark is fun and easy. With this guide, you can create a treat that impresses everyone. Enjoy experimenting and sharing your delicious results!

Salted Caramel Pretzel Bark Irresistible Sweet Treat

Are you ready to indulge in a sweet and salty masterpiece? In this blog post, I’ll show you how to

- 1/2 cup unsalted butter, melted - 1 cup granulated sugar - 2 large eggs - 1 teaspoon vanilla extract - 1/3 cup unsweetened cocoa powder - 1/2 cup all-purpose flour - 1/4 teaspoon salt - 1/4 teaspoon baking powder - 1 cup fresh raspberries - 8 oz cream cheese, softened - 1/4 cup granulated sugar - 1 large egg - 1 teaspoon vanilla extract - 1/2 cup fresh raspberries (for swirls) I love using fresh ingredients for my Raspberry Cheesecake Brownies. The butter gives the brownie base a rich taste. Granulated sugar adds sweetness, making each bite delightful. Eggs help bind everything together and make the brownies fluffy. I always add a touch of vanilla extract. It enhances the flavors and makes the dessert smell amazing. Unsweetened cocoa powder is key for that deep chocolate flavor. Flour gives structure, while salt balances the sweetness. Baking powder helps the brownies rise. For the cheesecake layer, softened cream cheese is a must. It makes the layer creamy and smooth. I mix in more granulated sugar to sweeten it, then add an egg for richness. Another splash of vanilla extract brings everything together. The fresh raspberries add a burst of flavor and color. Using fresh raspberries throughout makes these brownies shine. You can see the swirls and specks of red, making each square look pretty. They taste great, too! This mix of flavors and textures makes Raspberry Cheesecake Brownies a real treat. {{ingredient_image_2}} - Preheat the oven to 350°F (175°C). - Grease or line an 8x8-inch baking pan with parchment paper. - Combine melted butter and sugar until smooth. - Add eggs and vanilla, mixing thoroughly. - Sift cocoa powder, flour, salt, and baking powder into the mixture. - Gently fold the dry ingredients into the wet mixture. - Pour half of the brownie batter into the pan. - Prepare and layer the cheesecake mixture. - Add raspberries and remaining brownie batter, then swirl. - Bake for 30-35 minutes and check doneness with a toothpick. - Allow to cool in the pan and refrigerate for at least 2 hours before slicing. When you make Raspberry Cheesecake Brownies, each step is key. The brownie base needs to be rich and fudgy. Mixing the butter and sugar well is important for that smooth texture. When you add eggs and vanilla, make sure they blend in fully. This adds moisture and flavor. Sifting the dry ingredients helps avoid lumps. Folding them gently into the wet ingredients ensures you don’t lose that fudgy texture. Overmixing can lead to dry brownies, so be careful! Assembling the layers is where the fun begins. Pour half of the batter into the pan first. This creates a solid base. Next, the cheesecake layer adds creaminess. Spoon it over the brownie base, but don’t mix too much. You want nice, pretty swirls. Adding fresh raspberries brings a tart flavor that balances the sweetness. After pouring the rest of the brownie batter, swirl again. It’s a visual treat! Baking time is crucial. I check around 30 minutes. A toothpick should come out with a few moist crumbs, not wet batter. When they are done, let them cool in the pan before chilling in the fridge. This helps them set up nicely. Then, you can slice them into perfect squares. Enjoy your delicious treat! - Avoid overmixing to keep brownies fudgy. Overmixing can lead to dry brownies. - Make sure your butter and eggs are at room temperature. This helps create a smooth batter. - Dust with powdered sugar for a pretty touch. It adds sweetness and style. - Serve with a scoop of vanilla ice cream. The creaminess pairs well with the tartness. - Add a pinch of sea salt for a gourmet touch. It brings out the sweet flavor. - Incorporate lemon zest in the cheesecake for a citrusy twist. This adds freshness and brightness. Pro Tips Use Room Temperature Ingredients: Ensure your cream cheese and eggs are at room temperature before mixing. This helps create a smoother cheesecake layer without lumps. Don’t Overmix the Batter: When combining the dry ingredients with the wet, mix just until combined. Overmixing can lead to dense brownies instead of the desired fudgy texture. Choose Ripe Raspberries: For the best flavor, select fresh, ripe raspberries. They should be plump and slightly fragrant, adding sweetness to the brownies. Cool Before Cutting: Allow the brownies to chill in the refrigerator for at least 2 hours before cutting. This helps them set properly and makes slicing easier. {{image_4}} You can make a vegan version of these brownies. Use egg replacers like flax eggs or applesauce. Swap the cream cheese for dairy-free cream cheese. This way, you still enjoy the creamy cheesecake layer without dairy. If you need gluten-free options, almond flour works well in place of all-purpose flour. Just remember, almond flour may change the texture a bit. Feel free to play with the flavors! Instead of raspberries, you can try blueberries or strawberries. Both will add a fun twist. You can also experiment with different chocolate types in the brownie base. Dark chocolate gives a rich taste, while milk chocolate adds sweetness. When serving, cut brownies into larger squares for a big treat. For a fun party, mini squares are a hit too! Present the brownies on a dessert platter. Add toppings like whipped cream or extra berries for a lovely look. Dust some powdered sugar on top for an elegant finish. - Refrigerate brownies for optimal freshness. - Store in an airtight container. Keeping your Raspberry Cheesecake Brownies in the fridge helps them stay moist and tasty. An airtight container keeps air out, so they won’t dry out. You can enjoy them for days! - Wrap brownies tightly in plastic wrap. - Place them in a freezer bag for extra protection. To freeze, wrap each brownie well in plastic wrap. Then, put them in a freezer bag. This method keeps them fresh for later. When you want one, just thaw it in the fridge overnight. Raspberry Cheesecake Brownies last up to one week in the fridge. In the freezer, they can stay good for up to three months. Just remember to check for any freezer burn if they sit too long. Enjoy your sweet treats! Yes, you can use frozen raspberries. They may change the texture a bit. Frozen berries can make the brownies more wet. Fresh raspberries hold their shape better and add a nice tart flavor. If you use frozen, let them thaw and drain excess juice first. Check the brownies at 30 minutes. Use a toothpick in the center. It should come out with a few moist crumbs, not wet batter. The top will look set and slightly puffed. If it jiggles too much, bake for a few more minutes. Yes, you can prepare the brownie base ahead. Mix it and store it in the fridge for one day. Just make sure to cover it tightly. When you are ready, spread it in the pan and add the cheesecake layer. Avoid overmixing the batter. This can make brownies tough. Mix just until all ingredients blend. Also, make sure your oven is preheated. An oven that is not hot enough can lead to uneven baking. Keep an eye on the baking time for the best results. To add more chocolate flavor, try adding chocolate chips. You can also use dark cocoa powder instead of regular. This gives a deeper chocolate taste. Another option is to drizzle melted chocolate over the top before serving. Enjoy the rich flavor! These Raspberry Cheesecake Brownies combine rich flavors and a fun texture. We began by mixing the brownie base and cheesecake layer, adding bright raspberries for a tasty twist. With the right baking and cooling time, you’ll enjoy a treat everyone loves. Remember to store them well to keep them fresh. Have fun trying different flavors or dietary tweaks. By following this guide, you can make a delicious dessert that impresses any crowd. Enjoy baking!

Raspberry Cheesecake Brownies Irresistible Sweet Treat

Indulging in Raspberry Cheesecake Brownies is a treat you won’t want to miss! With a rich, fudgy brownie base and

- 4 large russet potatoes - 1 tablespoon olive oil - Salt, to taste - 1 cup shredded cheddar cheese - 1 cup shredded Monterey Jack cheese - 1/2 cup cooked black beans, drained and rinsed - 1/2 cup corn kernels (fresh, frozen, or canned) - 1/2 cup diced tomatoes (fresh or canned) - 1/4 cup sliced jalapeños (fresh or pickled) - 1/4 cup sour cream - 1/4 cup guacamole - 2 tablespoons chopped fresh cilantro - 1 teaspoon taco seasoning You can add more fun to your loaded nacho potato skins! Here are some great ideas: - Sliced green onions for a fresh bite - Crumbled bacon for extra crunch - A sprinkle of smoked paprika for a smoky flavor - Drizzle of hot sauce if you like heat Loaded nacho potato skins are tasty and filling. Here’s a quick look: - Calories: About 350 per serving (2 halves) - Protein: 15 grams - Carbohydrates: 45 grams - Fat: 15 grams - Fiber: 7 grams This dish packs a punch with protein and fiber, making it a great snack or meal! {{ingredient_image_2}} 1. Preheat the Oven: Set your oven to 400°F (200°C). This ensures a nice bake. 2. Prepare the Potatoes: Wash and scrub the potatoes well. Pat them dry with a towel. Use a fork to prick holes in each potato. This helps steam escape while baking. 3. Bake the Potatoes: Rub each potato with olive oil. Sprinkle salt over them. Place the potatoes directly on the oven rack or a baking sheet. Bake for 45-60 minutes until they feel soft when pierced with a fork. 4. Cool and Slice: Take the baked potatoes out and let them cool for 5-10 minutes. Slice each potato in half lengthwise. Scoop out the insides, leaving about 1/4 inch of potato on the skin. 5. Prepare the Filling: In a bowl, mix the scooped potato with cheddar cheese, Monterey Jack cheese, black beans, corn, diced tomatoes, jalapeños, and taco seasoning. Blend everything well. 6. Refill the Potato Skins: Spoon the filling back into each potato skin. Make sure they are heaping and filled nicely. 7. Bake Again: Place the stuffed skins on a baking sheet. Return them to the oven for another 15-20 minutes. Bake until the cheese is melted and bubbly, and the skins are crispy. 8. Serve Warm: Once done, take the loaded potato skins out of the oven. Let them cool a bit. Top each skin with a dollop of sour cream and guacamole. Sprinkle chopped cilantro for a fresh look. 9. Presentation Tips: Use a bright serving platter for your potato skins. Add extra cilantro and jalapeño slices for color. A side of salsa makes a great dip! To get the best potato skins, start with fresh russet potatoes. Choose large ones for more filling. Wash them well to remove dirt. Prick the potatoes with a fork before baking. This lets steam escape and helps them cook evenly. After baking, let them cool a bit. This makes slicing easier and safer. Always scoop out enough flesh, leaving a sturdy skin. For melty cheese, mix both cheddar and Monterey Jack. These cheeses melt well together. Spread the filling evenly in each potato skin. Make sure to fill them generously. Bake them at 400°F for 15-20 minutes. Keep an eye on them. The cheese should bubble and look golden. If you want extra melty cheese, broil them for a minute at the end. Just watch closely to avoid burning. Topping your potato skins is where the fun begins! Use sour cream and guacamole for rich flavor. Fresh cilantro adds a bright touch. For spice lovers, add jalapeños or hot sauce. You can also try corn and black beans for extra texture. Don't forget diced tomatoes for freshness. Mix and match toppings to suit your taste. The goal is to make each bite exciting and full of flavor. Pro Tips Choose the Right Potatoes: For the best texture, opt for large russet potatoes, as they have a fluffy interior that holds up well when baked and filled. Extra Crispy Skins: For even crispier potato skins, brush the insides with a little melted butter after scooping out the flesh before refilling them. Customize Your Toppings: Feel free to get creative with toppings! Add ingredients like bacon bits, green onions, or different types of cheese for a unique twist. Make Ahead: You can prepare the potato skins and filling in advance, then assemble and bake them just before serving for a quick and easy appetizer. {{image_4}} You can mix up the cheese choices for your loaded nacho potato skins. Instead of cheddar and Monterey Jack, try using pepper jack for a spicy kick. You might also consider using mozzarella for a gooey texture. Goat cheese adds a tangy flavor that works well too. Just remember, the cheese should melt well and blend with the other flavors. If you want to change the protein in your loaded nacho potato skins, there are many options. Ground beef or turkey can give a hearty feel. Shredded rotisserie chicken works great if you're short on time. You can also use pulled pork for a smoky taste. For a plant-based option, try lentils or chickpeas. These choices add protein without sacrificing flavor. Making these potato skins vegetarian or vegan is easy. For a vegetarian twist, simply skip the meat and load up on veggies. You can use bell peppers, mushrooms, or zucchini. If you want to make it vegan, swap the cheese for a dairy-free option made from nuts. You can also use coconut yogurt instead of sour cream. These alternatives keep the dish tasty and satisfying while meeting dietary needs. To keep your loaded nacho potato skins fresh, store them in an airtight container. You can place them in the fridge for up to 3 days. Make sure they are fully cooled before storing. This helps prevent sogginess and keeps the flavors intact. When you're ready to enjoy your potato skins again, preheat your oven to 350°F (175°C). Place the skins on a baking sheet and bake for about 10-15 minutes. This method warms them up while making the cheese melty and the skins crisp. Avoid using the microwave, as it can make them soggy. If you want to save some for later, you can freeze the potato skins. Allow them to cool completely, then wrap each one tightly in plastic wrap. Place the wrapped skins in a freezer bag. They can last for up to 2 months in the freezer. When you're ready to eat, thaw them overnight in the fridge and reheat as mentioned above. Yes, you can make these potato skins ahead of time. Prepare the potato skins and filling earlier in the day. After filling the skins, cover them with plastic wrap. Store them in the fridge until you are ready to bake. When you want to serve them, just bake as directed. This way, you save time and serve a hot dish. You can use different potatoes if you don't have russet potatoes. Yukon Gold potatoes work great too. They have a creamy texture and taste nice. If you want a smaller option, try baby potatoes. Just cut them in half and scoop out the flesh. This gives you a fun bite-sized treat. Yes, loaded nacho potato skins are gluten-free. The ingredients in this recipe do not contain gluten. Check your cheese and toppings to be sure they are also gluten-free. Using certified gluten-free products is a good idea to avoid any issues. Enjoy your tasty creation worry-free! This article covered how to make loaded nacho potato skins. We went over key ingredients, optional toppings, and their nutritional value. I shared step-by-step instructions for preparing and baking, along with serving ideas. You learned tips for achieving perfect cheese and topping combinations. We explored fun variations, storage methods, and answered common questions. Enjoy creating your own tasty snacks! With a little practice, you’ll master these potato skins and impress everyone.

Loaded Nacho Potato Skins Delicious and Easy Recipe

Are you ready to dive into a fun and tasty treat? Loaded nacho potato skins combine crispy, golden potato skins

- Firm Tofu and Its Texture For this dish, I use 14 oz of firm tofu. Firm tofu holds its shape well during cooking. This gives a nice bite to each piece. Press the tofu to remove excess water. This step helps the tofu become crispy when you fry it. - Fresh Vegetables for Stir-Fry I love to use colorful veggies in this stir-fry. You need: - 1 red bell pepper, sliced - 1 green bell pepper, sliced - 1 cup broccoli florets - 1 cup sugar snap peas - 3 green onions, chopped (plus extra for garnish) Fresh vegetables add flavor and crunch. They also make the dish look great on the plate. - Essential Seasonings and Sauces The right seasonings make all the difference! You will need: - 2 tablespoons cornstarch (for crispy tofu) - 2 tablespoons vegetable oil (for frying) - 2 garlic cloves, minced - 1-inch piece fresh ginger, grated - ½ cup teriyaki sauce - Sesame seeds for garnish These ingredients add depth to the dish. The teriyaki sauce is sweet and salty. It ties all the flavors together. {{ingredient_image_2}} Start by draining and pressing the tofu. This removes excess water. Next, cut the tofu into bite-sized cubes. Place them in a large bowl. Sprinkle cornstarch over the tofu cubes. Toss gently until all pieces are coated. This coating helps the tofu become crispy when cooked. Heat 1 tablespoon of vegetable oil in a large non-stick skillet or wok. Use medium-high heat for the best results. Once the oil is hot, add the coated tofu. Don’t overcrowd the pan; this helps with even cooking. Fry the tofu for 8 to 10 minutes. Turn occasionally until all sides are golden brown and crispy. When done, transfer the tofu to a plate lined with paper towels. This will absorb any extra oil. Without cleaning the skillet, add the remaining tablespoon of oil. Introduce sliced red and green bell peppers, broccoli florets, and sugar snap peas. Stir-fry these veggies for 5 to 7 minutes. Toss them often to keep them tender-crisp and bright. Once the veggies are ready, add minced garlic and grated ginger. Stir-fry for 1 to 2 minutes. You will notice a wonderful aroma as the garlic and ginger cook. Lower the heat to medium. Carefully add the crispy tofu back into the skillet. Pour the teriyaki sauce over the tofu and veggies. Gently toss everything to coat well. This step ensures every bite is full of flavor. Cook for an additional 2 to 3 minutes. This allows the sauce to heat and thicken slightly. Once done, turn off the heat. You are now ready to enjoy a delicious teriyaki tofu stir-fry! Pressing Tofu: Why It Matters Pressing tofu is key for the best stir-fry. It removes excess water. This helps the tofu absorb flavor and become crispy. Use a tofu press or wrap it in a clean towel. Place something heavy on top for about 30 minutes. Achieving the Best Texture For a great texture, cut the pressed tofu into 1-inch cubes. This size helps it cook evenly. Coat the tofu in cornstarch before frying. This creates a crispy outer layer. Make sure each piece is covered well. Keeping Vegetables Vibrant and Crisp To keep your veggies bright, cut them into uniform pieces. This ensures they cook at the same rate. Stir-fry on high heat for quick cooking. Avoid overcooking; you want them tender-crisp. Managing Heat: Tips for Even Cooking Use a large skillet or wok for even cooking. Heat your oil until it shimmers. This means it's hot enough for a good sear. Don't overcrowd the pan; this can lower the heat. Cook in batches if needed. Quick Comparison of Options Store-bought teriyaki sauce is quick and easy. Look for one with no added sugars or preservatives. Homemade sauce gives you control over flavors. It's often fresher and can be tailored to your taste. How to Make Homemade Teriyaki Sauce To make teriyaki sauce at home, mix ½ cup soy sauce, ¼ cup mirin, and 2 tablespoons sugar in a pot. Heat until sugar dissolves, then add minced garlic and ginger. Simmer for a few minutes to blend flavors. This sauce is perfect for your stir-fry. Pro Tips Press Tofu Thoroughly: Ensure the tofu is well-pressed to remove excess moisture, which helps achieve that desired crispy texture when frying. Use High Heat: Cooking on medium-high heat allows for quicker cooking, which helps maintain the vegetables' vibrant colors and crunch. Add Sauce at the Right Time: Pour the teriyaki sauce towards the end of cooking to prevent burning and to allow it to coat the tofu and vegetables evenly. Customize Your Veggies: Feel free to swap or add your favorite vegetables like carrots or snap peas to make this stir-fry your own! {{image_4}} For those who want something different, you have options. If you eat meat, consider chicken or beef. They pair well with teriyaki sauce. Cut them into bite-sized pieces, just like the tofu. For plant-based choices, tempeh and seitan are great. Tempeh has a nutty flavor and works well. Seitan is chewy and absorbs flavors nicely. These swaps give you a tasty twist. You can change the veggies based on what's fresh. Seasonal vegetables keep your stir-fry exciting. Try carrots, zucchini, or snap peas. Each adds a unique crunch and taste. Fresh herbs can also enhance your dish. Basil or cilantro can add brightness. Just sprinkle them on before serving for a fresh touch. If you need gluten-free choices, there are easy swaps. Use tamari instead of soy sauce. Tamari is a gluten-free soy sauce that tastes great. Look for a gluten-free teriyaki sauce too. Many brands offer this option. Check the label to make sure it’s safe for your diet. These swaps keep the dish delicious and suitable for everyone. - Best Storage Practices: Let the stir-fry cool before storing. This helps keep the tofu firm. Place it in the fridge within two hours of cooking. - Container Recommendations: Use an airtight container. Glass or BPA-free plastic works best. This keeps the stir-fry fresh and tasty. - Methods for Keeping the Tofu Crispy: Use an oven or air fryer. Reheat at 350°F (175°C) for about 10 minutes. This makes the tofu crispy again. - Safe Reheating Options to Retain Flavor: Avoid the microwave if possible. It can make the tofu soggy. If you use it, heat on low power for a short time. Add a splash of water to keep it moist. To make teriyaki sauce, mix soy sauce, sake, and sugar in a bowl. Add minced garlic and ginger for flavor. Simmer the mix on low heat until it thickens. This easy sauce adds sweet and salty notes to your stir-fry. Yes, you can use frozen vegetables. They are convenient and save time. Just make sure to cook them a bit longer than fresh ones. This helps remove excess moisture and keeps the dish flavorful. - Rice - Quinoa - Noodles - Steamed veggies - Salad Serving these sides makes your meal balanced and tasty. Rice or quinoa soaks up the sauce well, adding more flavor. Leftover teriyaki tofu lasts about 3 to 4 days in the fridge. Store it in an airtight container to keep it fresh. Reheat it gently to maintain its texture and flavor. In this blog post, I shared how to make a delicious teriyaki tofu stir-fry. We covered key ingredients like firm tofu, fresh veggies, and essential sauces. I detailed step-by-step instructions to prep, cook, and combine these elements for tasty results. I also included helpful tips for perfecting your dish and variations to suit your taste. Now you're ready to create a delightful meal. Embrace your inner cook and enjoy every bite!

Teriyaki Tofu Stir-Fry Simple and Flavorful Recipe

Are you ready to elevate your weeknight dinners? This Teriyaki Tofu Stir-Fry is quick, simple, and bursting with flavor! In

- 1 cup strawberries, quartered - 1 cup blueberries - 1 cup pineapple, diced into small cubes - 1 cup kiwi, peeled and sliced into rounds - 1 cup ripe mango, peeled and diced - 3 tablespoons honey - 2 tablespoons freshly squeezed lime juice - 1 tablespoon fresh mint, finely chopped For this Honey Lime Fruit Salad, gather fresh fruit for the best taste. Strawberries bring sweetness, while blueberries add a pop of color. Pineapple offers a tropical twist, and kiwi gives a tangy bite. Ripe mango adds smoothness and flavor. The dressing is simple but key. Honey sweetens the mix, and lime juice adds a zesty kick. This combination makes the fruits shine. I sometimes add fresh mint as a garnish. It gives a fresh scent and a nice look. This salad is not just tasty; it’s also vibrant and fun to eat. {{ingredient_image_2}} To start, wash the strawberries and blueberries under cold water. This removes any dirt. Then, take the strawberries and cut them into quarters. Place them in a large bowl. Next, peel the pineapple and chop it into small, bite-sized pieces. Make sure the pieces are even so they mix well. For the kiwi, slice it into rounds. Finally, peel the mango and cut it into small dice. All these fruits will create a bright mix. In the bowl with the strawberries, add the blueberries, diced pineapple, kiwi slices, and mango pieces. Gently mix the fruits together. You want a colorful medley that looks appealing and fun. Now, it’s time for the dressing. In a small bowl, whisk together the honey and freshly squeezed lime juice. Mix until it’s smooth. This zesty dressing will add a sweet kick to your salad. Once mixed, pour the honey-lime dressing over the combined fruits. Make sure to drizzle evenly across the salad for the best flavor. Carefully toss the fruit salad with a large spoon. Be gentle so you don’t mash the fruit pieces. You want all the fruit to be coated with the dressing. If you want to add extra flavor, sprinkle some finely chopped mint leaves over the salad. Toss it again lightly to mix in the mint. Place the salad in the fridge for about 15 to 30 minutes. Chilling helps the flavors blend and makes the salad more refreshing. Serve it in a clear bowl to show off the vibrant colors. Enjoy! Choosing ripe fruits is key for a great salad. Look for strawberries that are bright red. Blueberries should be plump and firm. Pineapples need a sweet smell and slight give when pressed. For kiwis, choose ones that feel slightly soft. Mangoes should be slightly soft too, with a sweet fragrance. Adjusting honey and lime is easy. Start with three tablespoons of honey. If you like it sweeter, add more honey. For a tangy kick, add more lime juice. You can taste and tweak until it’s just right. Serving your salad in a clear bowl makes it pop. You can see all the bright colors. It looks fresh and inviting. To make it even prettier, use mint leaves as a garnish. Just sprinkle a few on top. This adds a nice green touch and a fresh aroma. Chill your salad for about 15 to 30 minutes. This makes the flavors blend well. The fruit will also become extra refreshing. A quick chill can enhance both flavor and texture. You’ll love how much better it tastes after a short rest in the fridge! Pro Tips Choose Ripe Fruits: Select fruits that are at their peak ripeness for the best flavor and texture. Look for vibrant colors and a slight give when gently pressed. Experiment with Add-Ins: Feel free to customize your fruit salad by adding other fruits like grapes, oranges, or even pomegranate seeds for extra texture and flavor. Make Ahead: You can prepare the fruit salad a few hours in advance. Just keep it chilled and add the dressing right before serving to ensure freshness. Adjust Sweetness: If you prefer a sweeter dressing, add more honey to taste. For a tangier flavor, increase the lime juice. Adjust according to your personal preference! {{image_4}} You can use many fruits to make this salad even more fun. Seasonal fruits work great. Think about adding peaches, cherries, or melons. These fruits bring their own sweet twist. If you can't find a fruit, feel free to swap it out. For example, if you're out of kiwi, use oranges or grapes. Your fruit salad will still taste amazing. Want to switch up the dressing? Agave nectar is a perfect choice. It has a similar sweetness and works well with lime. If you want a creamy twist, try adding yogurt. This will make the salad richer. Just mix yogurt with lime for a nice flavor. To give your salad a kick, add a pinch of cayenne. It adds warmth without being too hot. Zest from lime or lemon gives a bright note. Just a little zest can change the flavor. Mix these spices in with the honey-lime dressing for a fun surprise. To keep your Honey Lime Fruit Salad fresh, store it in the fridge. Use an airtight container to prevent moisture loss and keep the flavors intact. The salad stays fresh for about 2 to 3 days. After that, the fruits may start to lose their crispness. Freezing this fruit salad is not ideal due to the texture changes in the fruits. If you need to freeze it, separate the fruits first. You can freeze individual fruits like mango or strawberries. They can last up to 6 months in the freezer. Use them in smoothies or desserts once thawed. Check your fruit salad for signs of spoilage. Look for mushy or brown fruits. A sour smell also means it’s time to throw it out. Always trust your senses. If it looks or smells off, it’s better to be safe and discard it. Yes, you can prepare the salad up to 4 hours in advance. Just keep it in the fridge. For the best taste, serve it fresh. Chilling helps the flavors mix well. However, if you wait too long, the fruits may get mushy. I recommend making it within 2 hours of serving. This way, you keep the fruits crunchy and vibrant. When choosing honey, go for raw or local honey. Raw honey retains more nutrients and has a rich flavor. Local honey often supports local bees and can help with allergies. If you prefer a milder taste, choose clover honey. Each honey type brings its unique flavor, so pick one that excites your taste buds. To make the salad sweeter, simply add more honey. If you like it tangy, squeeze in extra lime juice. You can also taste as you mix. This lets you find the right balance for your palate. Don’t be afraid to experiment! Add more lime or honey until it tastes just right for you. You can mix in other fruits like oranges, grapes, or peaches. Seasonal fruits are a great choice too. If you want to try something new, add pomegranate seeds for crunch. Each fruit adds its flavor and color. This way, you create a fun and colorful salad that everyone will love! You now have all the tools to create a delicious Honey Lime Fruit Salad. Remember the key steps: pick fresh fruit, mix well, and add your dressing. If you want to get creative, try different fruits or dressings. Chilling the salad makes the flavors pop. Store any leftovers properly to keep them fresh. Enjoy making this healthy treat for yourself and others. It’s a fun way to enjoy the season's best fruits!

Honey Lime Fruit Salad Zesty and Fresh Delight

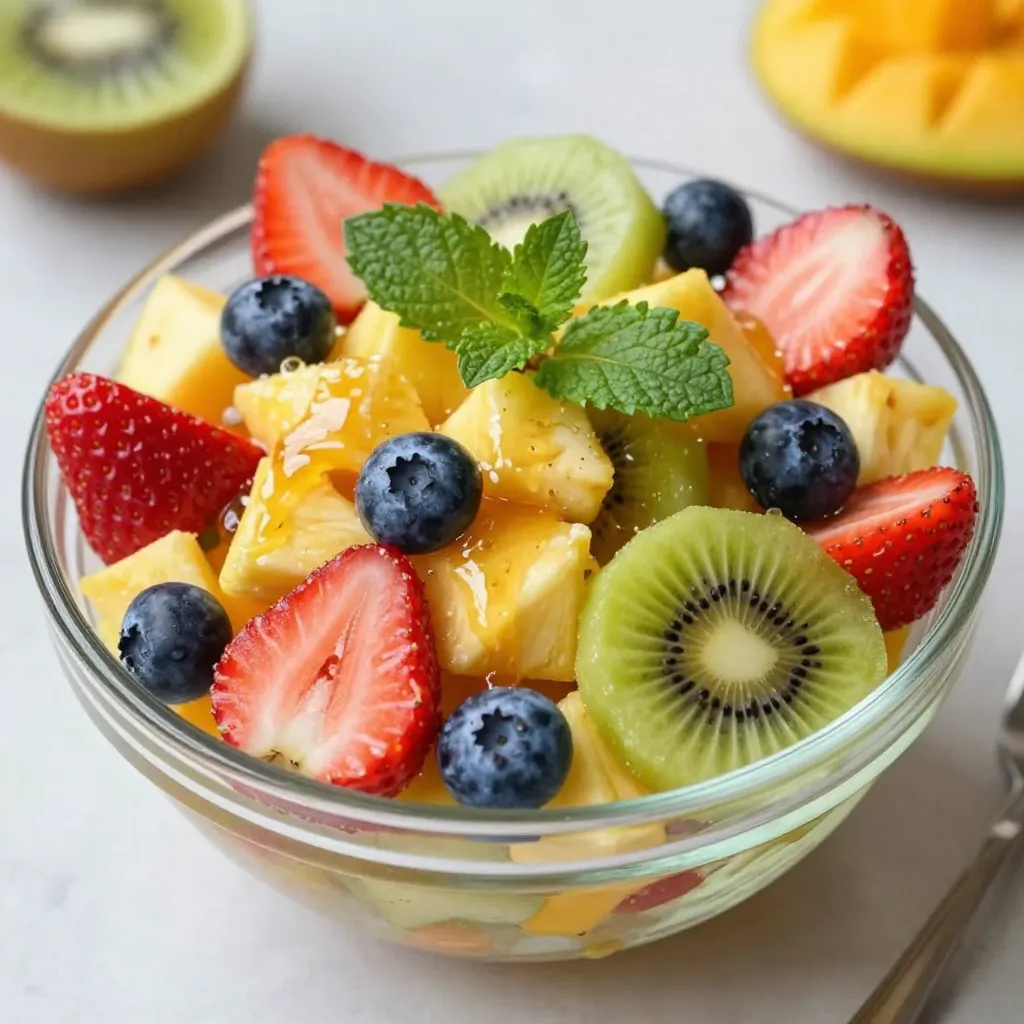
Looking for a vibrant, tasty dish that brightens your day? Try my Honey Lime Fruit Salad! Packed with fresh strawberries,

- 1 package (18 oz) Oreo cookies - 1/2 cup unsalted butter, melted - 1 package (8 oz) cream cheese, softened - 1 cup powdered sugar - 1 cup whipped topping (like Cool Whip) - 2 cups milk - 1 package (3.9 oz) instant chocolate pudding mix - Gummy worms (for garnish) - Edible soil or crushed graham crackers (for topping) If you have allergies or need swaps, here are some ideas: - Use gluten-free Oreos for a gluten-free option. - Swap cream cheese with non-dairy cream cheese if needed. - Instead of Cool Whip, you can use homemade whipped cream. - You can replace the chocolate pudding mix with vanilla for a twist. Want to make your pudding cups even more fun? Try these: - Add a splash of vanilla extract to the cream cheese mix. - Mix in some peanut butter for a rich taste. - Add mini chocolate chips for extra texture and sweetness. - Use crushed nuts or sprinkles to add crunch and color. These ingredients and options make your Oreo Dirt Pudding Cups fun and flexible. You can create a treat that matches your taste and needs. Enjoy crafting this simple dessert! {{ingredient_image_2}} To start, you need to crush the Oreo cookies. You can use a food processor for this. Just pulse until they turn into fine crumbs. If you don’t have a food processor, grab a zip-top bag. Place the cookies inside and seal it. Use a rolling pin to crush them into crumbs. This method is fun and hands-on. Next, you will make the cream cheese base. In a medium bowl, mix the crushed Oreos with melted butter. Stir until it looks like wet sand. Set aside one cup of this mixture for later. In a large bowl, beat the softened cream cheese with an electric mixer. Add powdered sugar slowly. Mix until smooth and creamy. This step gives your dessert a sweet base. Now it's time to layer the pudding cups. Start with your serving cups. Add a layer of the Oreo crust at the bottom. Then, spoon in a layer of the chocolate pudding mixture. Repeat these layers until the cups are full. End with a layer of pudding on top. Finally, sprinkle the reserved Oreo crust on each cup. For extra fun, add crushed graham crackers on top. Place gummy worms sticking out for a dirt effect. Your Oreo Dirt Pudding Cups will look amazing and taste even better! Crushing Oreos is easy and fun! You can use two main methods: - Food Processor: Just add cookies and pulse until you get fine crumbs. - Zip-Top Bag and Rolling Pin: Place Oreos in a bag and roll over them. This is great for kids! Both methods work well, but I love the hands-on approach. It makes the process feel more special. The key to a creamy texture is all in the mixing. Start with softened cream cheese. If it is too cold, it won't blend well. Here’s how to get it right: - Beat Cream Cheese: Use an electric mixer to whip it until smooth. - Add Powdered Sugar Gradually: This helps avoid lumps. Mix on low speed to keep it fluffy. - Fold in Whipped Topping: Gently fold it in. Over-mixing can make it dense. This careful mixing gives you a light, creamy filling that pairs perfectly with the Oreo crust. Make your Oreo Dirt Pudding Cups look as good as they taste! Here are some fun ideas: - Clear Glasses: Use clear cups to show off those tasty layers. - Playful Toppings: Add gummy worms on top for a fun touch. - Edible Soil: Sprinkle crushed graham crackers for a realistic dirt look. These simple tweaks will wow your friends and family, making dessert even more exciting! Pro Tips Crushing Oreos: For a finer texture, try using a food processor. If you prefer a more hands-on approach, use a rolling pin on a zip-top bag for a fun activity! Chill Time: Allow the assembled cups to chill for at least 2 hours. This helps the layers set properly, enhancing both flavor and texture. Layering Technique: When layering, press each layer down gently. This ensures the layers stay distinct and beautiful when served. Garnish Wisely: Use different toppings like crushed graham crackers or edible soil to create visual interest and a variety of textures! {{image_4}} You can easily switch up the flavor of your Oreo Dirt Pudding Cups. For a peanut butter twist, mix in half a cup of peanut butter into the cream cheese mixture. This adds a rich, nutty taste. If you prefer mint, use mint-flavored Oreo cookies. You can also add a drop of mint extract to the pudding or cream cheese mix for a refreshing zing. If you want to make a gluten-free version, use gluten-free Oreo cookies. These cookies have a similar taste and texture, so you won’t miss out. Make sure to check other ingredients, like the pudding mix and whipped topping, to ensure they are also gluten-free. Kids love to get creative, so let them help with the toppings! You can add colorful sprinkles for fun. Mini chocolate chips can add a crunch, too. You can even use gummy insects instead of gummy worms for a spooky twist. These fun additions can make the dessert even more exciting for young ones. To keep your Oreo Dirt Pudding Cups fresh, place them in the fridge. Use an airtight container or cover each cup with plastic wrap. This method helps maintain their creamy texture and flavor. If you have extra pudding mix, store it in a separate container. Oreo Dirt Pudding Cups last about 3 to 5 days in the fridge. After this time, the layers may lose their texture. Always check for any signs of spoilage before serving. If they look or smell off, it’s best to toss them. You can freeze Oreo Dirt Pudding Cups, but some textures may change. To freeze, cover them tightly with plastic wrap or foil. They will stay good for about 2 months. When ready to eat, thaw them overnight in the fridge. Avoid refreezing after thawing to keep the best taste. Yes, you can make Oreo Dirt Pudding Cups ahead of time. I recommend making them a day before. This lets the flavors blend well. Just keep them covered in the fridge until serving. They will taste even better after chilling overnight! If you don’t have Cool Whip, you can use whipped cream. Just whip heavy cream until soft peaks form. You can also use store-bought whipped cream. Another option is to make your own by mixing cream cheese with a little milk and sugar. Chill the pudding cups for at least 2 hours. This helps the layers set nicely. If you can wait longer, it’s even better. Chilling makes the dessert rich and creamy, enhancing the taste and texture. Enjoy your delicious treat! Oreo Dirt Pudding Cups are a fun and tasty treat. We covered the essential ingredients, including tasty substitutions and add-ins. I shared easy, step-by-step instructions for creating the cups, from crushing Oreos to layering the pudding. You learned useful tips for texture and presentation, along with delicious flavor variations. Don't forget how to store leftovers properly. Overall, these cups are perfect for gatherings or just a fun dessert. Enjoy making them your way!

Oreo Dirt Pudding Cups Delightful and Simple Treat

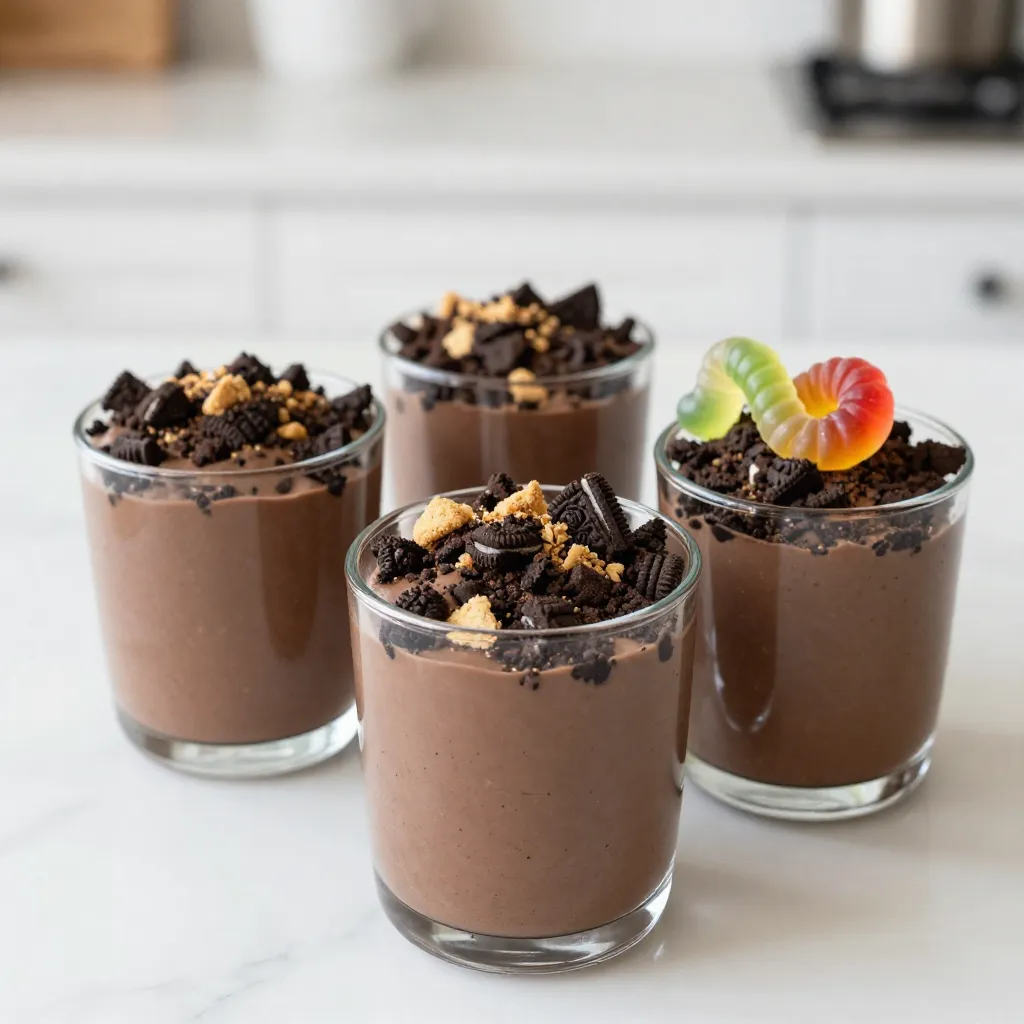
If you’re looking for a fun and easy dessert, Oreo Dirt Pudding Cups are the answer! This tasty treat mixes

For this tasty beef barbacoa, you need some key ingredients: - 2 pounds beef chuck roast, cut into roughly 2-inch chunks - 1 tablespoon olive oil - 1 large onion, quartered - 4 cloves garlic, minced - 1 cup beef broth - 1/4 cup apple cider vinegar - 2 bay leaves These ingredients form the base of your dish. The beef chuck roast gives great flavor, while the onion and garlic add depth. To make the beef barbacoa truly special, you need some spices: - 2 teaspoons ground cumin - 1 teaspoon dried oregano - 1 teaspoon smoked paprika - 1 teaspoon chipotle powder (adjust based on desired spice level) - Salt and pepper to taste These spices work together to bring warmth and a hint of smokiness to your dish. The chipotle powder adds a nice kick, so adjust it to your spice level. Once your barbacoa is ready, dressing it up makes it even better. Consider these garnishes: - Fresh cilantro, chopped - Lime wedges - Corn tortillas Serving the beef in warm corn tortillas adds a nice touch. The fresh cilantro and lime juice brighten the flavors and make each bite pop. You can also add diced onions or fresh salsa for an extra burst of flavor. Enjoy your delicious creation! {{ingredient_image_2}} Start by cutting the beef chuck roast into 2-inch chunks. This size helps it cook evenly. Set your Instant Pot to sauté mode and add the olive oil. Wait until the oil shimmers. Then, add the beef chunks in batches. Make sure not to crowd the pot. Sear the beef until brown on all sides. This step takes about 5 to 7 minutes per batch. Once browned, remove the beef and place it on a plate. In the same pot, add the quartered onion. Sauté it for about 3 minutes, stirring occasionally. You want the onion to turn translucent. Next, add the minced garlic and sauté for another minute. The garlic should smell fragrant. This step builds a strong flavor base for your barbacoa. Now, it’s time to add spices. Sprinkle ground cumin, dried oregano, smoked paprika, and chipotle powder into the pot. Stir continuously for 30 seconds. This helps toast the spices. Then, deglaze the pot. Pour in the beef broth and apple cider vinegar. Use a wooden spoon to scrape up any tasty bits stuck to the bottom. This adds depth to your dish. Return the seared beef to the pot and add the bay leaves. Close the lid securely. Set your Instant Pot to cook on high pressure for 65 minutes. After cooking, let it release pressure naturally for about 20 minutes. Carefully switch to quick release to let out any remaining steam. Open the lid and discard the bay leaves. Shred the beef in the pot using two forks. Mix it with the juices for better flavor. Lastly, taste the beef and season with salt and pepper. This ensures that every bite is delicious. Searing the beef adds rich flavor. To get the best results, use a hot pot. Heat the olive oil until it shimmers. Then, add the beef in small batches. This prevents steaming and ensures browning. Sear each batch for about 5 to 7 minutes. Look for a nice brown crust on all sides. After searing, remove the beef and set it aside. This step builds a strong base for your dish. Seasoning makes or breaks a dish. You can adjust the spices to fit your taste. If you like heat, add more chipotle powder. For a milder flavor, cut back on it. Remember, you can always add, but you can’t take away. Taste after shredding the beef and adjust with salt and pepper. Fresh cilantro adds brightness and a pop of flavor as a garnish. Texture is key for great beef barbacoa. The Instant Pot does this well. Cook the beef on high pressure for 65 minutes. This makes it tender and easy to shred. After cooking, let it rest for 20 minutes before quick releasing the steam. Shredding the beef in its juices keeps it moist and flavorful. Mix it well to absorb all the goodness. Enjoy your tender, juicy barbacoa! Pro Tips Choose the Right Cut: For the best flavor and tenderness, use beef chuck roast as it has the right amount of fat and collagen that breaks down during cooking. Adjust the Spice Level: Feel free to modify the amount of chipotle powder based on your spice tolerance. Start with less and add more if desired. Let it Rest: After shredding, let the beef rest in the juices for a few minutes to absorb more flavor before serving. Garnish Generously: Fresh cilantro and lime juice really enhance the flavor of the barbacoa, so don’t skimp on the garnishes! {{image_4}} You can swap the beef chuck roast for other cuts. Try brisket or skirt steak. Both bring different textures and flavors. Brisket has a rich taste, while skirt steak is more lean. Each cut gives a unique twist to your barbacoa. If you want a vegetarian version, use jackfruit or mushrooms. Jackfruit mimics beef well and absorbs flavors nicely. For a vegan option, try using lentils or chickpeas. Both are hearty and packed with protein. They soak up the spices and create a filling dish. Adjust the spices to match your taste. If you love heat, add more chipotle powder. For a milder taste, reduce the amount. You can also play with herbs. Try adding fresh thyme or rosemary for a different touch. Don't be afraid to experiment; this recipe is very flexible! After making your Instant Pot Beef Barbacoa, cool it to room temperature. Use airtight containers for storage. This keeps the beef juicy and fresh. Store in the fridge for up to 4 days. If you notice any moisture, use paper towels to absorb it before sealing. To reheat, place the beef in a pot over low heat. Add a splash of beef broth to keep it moist. Stir occasionally until hot. You can also use the microwave. Place the beef in a microwave-safe dish and cover it with a lid or plastic wrap. Heat for 1-2 minutes, stirring halfway through. Check the beef to ensure it’s warmed evenly. For longer storage, freeze your beef barbacoa. Portion it into freezer bags or containers. Remove any excess air to prevent freezer burn. It can last up to 3 months in the freezer. To thaw, place it in the fridge overnight. Reheat it the next day, and enjoy your meal again! Yes, you can use frozen beef. However, it will take longer to cook. If you use frozen beef, add about 15 minutes to the cooking time. Make sure to check the beef for doneness before shredding. Beef barbacoa pairs well with many sides. Try serving it in warm corn tortillas. You can also add fresh cilantro and lime. Other great options include rice, beans, or a fresh salad. For a fun twist, serve it as a taco bar with toppings like diced onions, salsa, or avocado. To adjust spice, you can add more or less chipotle powder. If you want it milder, use less. You can also add sweet ingredients like a bit of sugar or honey to balance heat. For more spice, try adding jalapeños or a pinch of cayenne pepper. Always taste as you go! In this article, we covered how to make Instant Pot beef barbacoa. We talked about the main ingredients, spices, and options for serving. You learned step-by-step instructions, tips for best results, and how to store leftovers. To sum it up, making beef barbacoa is simple and fun. You can customize it to fit your tastes. Enjoy this delicious dish with your favorite sides!

Instant Pot Beef Barbacoa Flavorful and Simple Recipe

Are you ready to transform your dinner table with a burst of flavor? My Instant Pot Beef Barbacoa recipe is

Older posts
Page1 Page2 … Page86 Next →

dsad

© 2026 dailydishcraft • Built with GeneratePress

Our Policies

  • Copyright Policy
  • Cookie Policy
  • GDPR Policy
  • Privacy Policy
  • Disclaimer
  • Terms Of Use

More Information

  • Home
  • About
  • Contact
  • Appetizers
  • Dessert
  • Dinner
  • Drinks
©2026, dailydishcraft About Back To Top