If you're ready to sprinkle some magic onto your holiday treats, you've come to the right place! In this post, I’ll share my delightful and simple recipe for snowflake sugar cookies. These cookies are perfect for a winter celebration and easy to make with kids. With just a few ingredients and creative decorating techniques, you'll be the star of any cookie exchange. Let’s dive into the sweet world of snowflakes!
Why I Love This Recipe
- Deliciously Sweet: These snowflake sugar cookies are perfectly sweet, making them a delightful treat for any occasion.
- Festively Fun: The snowflake shape and optional decorations add a festive flair that's perfect for holiday gatherings.
- Easy to Make: This simple recipe is great for baking with kids or for anyone new to cookie-making.
- Customizable: You can easily swap out extracts or toppings to make these cookies your own!
Ingredients
Dry Ingredients
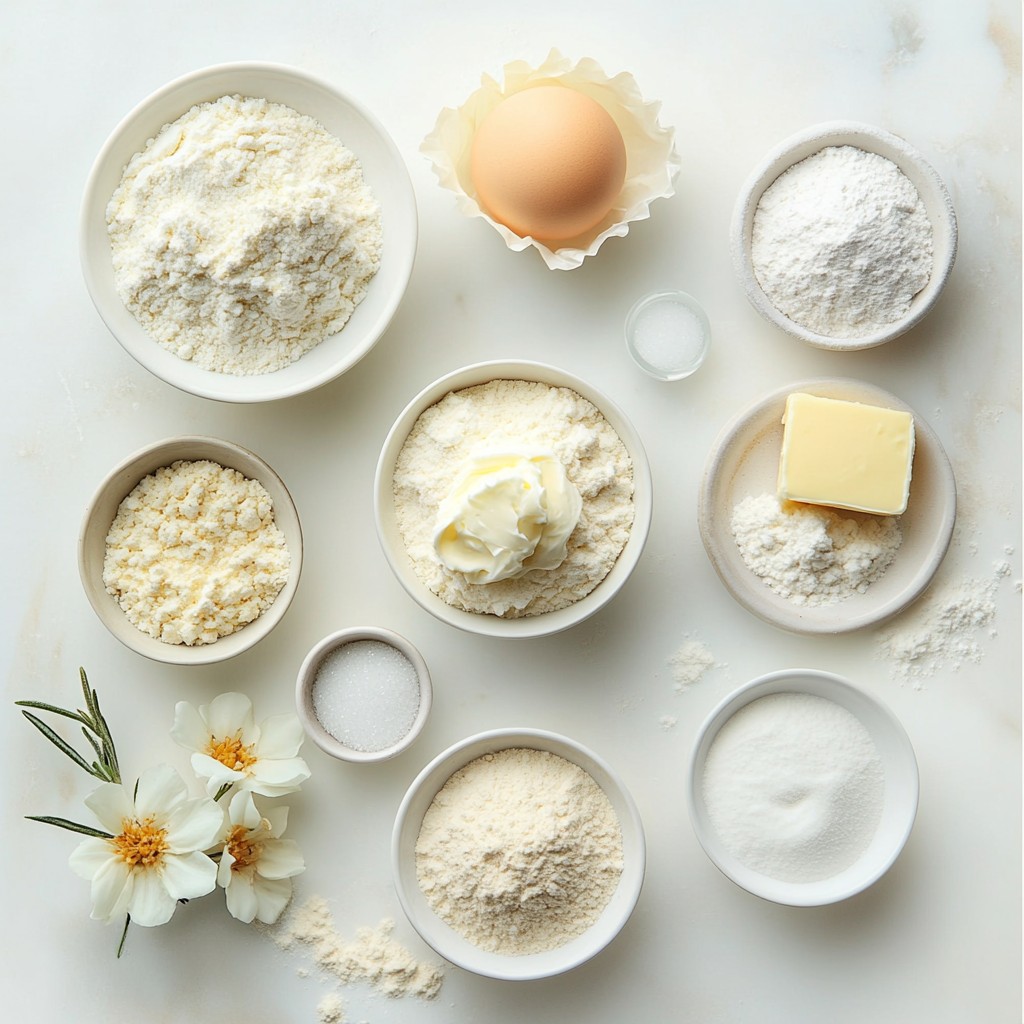
To start, we need the dry ingredients. Here’s what you will need:
- 2 ¾ cups all-purpose flour
- 1 teaspoon baking powder
- ½ teaspoon baking soda
- ¼ teaspoon salt
These dry ingredients work together to give the cookies their structure and rise. The flour is the base for our snowflake sugar cookies. Baking powder and baking soda help them puff up, while salt enhances the flavor.
Wet Ingredients
Next, let’s look at the wet ingredients. Gather the following:
- 1 cup unsalted butter, softened
- 1 ½ cups granulated sugar
- 1 large egg
- 1 teaspoon vanilla extract
- 1 teaspoon almond extract
The butter adds richness and creaminess. Granulated sugar gives sweetness and helps the cookies spread. The egg binds everything together. Vanilla and almond extracts add lovely flavors, making each bite delightful.
Decoration Supplies
Finally, think about how you want to decorate your cookies. You’ll need:
- Royal icing
- Edible glitter or colorful sprinkles (optional)
Royal icing allows you to create beautiful designs. Edible glitter and sprinkles add fun and festivity. These decorations make your cookies sparkle like fresh snow!
Step-by-Step Instructions
Preparation
- Preheat your oven to 350°F (175°C).
- Line your cookie sheets with parchment paper. This keeps cookies from sticking.
- In a medium bowl, mix 2 ¾ cups of flour, 1 teaspoon of baking powder, ½ teaspoon of baking soda, and ¼ teaspoon of salt. Use a whisk to combine them well. Set this bowl aside for later.
Mixing the Dough
- In a large bowl, beat 1 cup of softened butter with 1 ½ cups of sugar. Use a hand mixer or stand mixer for this.
- Mix for about 3-4 minutes until it looks light and fluffy.
- Crack 1 large egg into the bowl. Add 1 teaspoon of vanilla extract and 1 teaspoon of almond extract.
- Beat everything until smooth and well mixed.
Chilling and Rolling
- Slowly add the dry flour mixture to the wet ingredients. Mix on low speed until combined.
- Divide the dough into two equal discs. Wrap each disc tightly in plastic wrap.
- Chill the dough in the refrigerator for about 30 minutes. This makes it easier to roll out later.
- Take one disc from the fridge and put it on a floured surface. Roll the dough to about ¼ inch thick.
- Use a snowflake-shaped cookie cutter to cut out cookies and place them on your prepared sheets.
Baking Procedure
- Bake your cookies in the oven for 8-10 minutes. They should be set at the edges and slightly golden.
- After baking, let the cookies cool on the sheet for 5 minutes.
- Transfer them to a wire rack to cool completely.
Once cooled, decorate with icing and add edible glitter or sprinkles for a festive touch!
Tips & Tricks
Achieving the Perfect Cookie
To get the right cookie, start with perfect dough. The dough should be soft but not sticky. When mixing, stop as soon as everything is combined. Overmixing makes the cookies tough.
Chill the dough for about 30 minutes. This helps the cookies hold their shape. When you roll it out, use flour on your surface. This keeps the dough from sticking. Aim for a thickness of about ¼ inch for best results.
Decorating Techniques
For icing, use a piping bag or a simple squeeze bottle. This gives you more control. Start with the edges and fill in the center. If you want a smooth finish, use a toothpick to spread the icing.
You can add edible glitter or colorful sprinkles. This makes your cookies sparkle like snow. Just sprinkle them on before the icing dries.
Presentation Ideas
To serve your cookies, use a bright platter. Arrange the cookies in a fun way. You can make a winter scene by adding faux snow made from coconut flakes. This makes your cookies look like a treat from a winter wonderland.
Pro Tips
- Chill the Dough: Chilling the dough for at least 30 minutes makes it easier to roll out and helps the cookies maintain their shape during baking.
- Don’t Overmix: When combining the dry and wet ingredients, mix until just combined to prevent tough cookies.
- Perfect Baking Time: Keep an eye on your cookies while baking; they should be slightly golden around the edges. Remove them from the oven even if they look a bit soft in the center.
- Decorating with Icing: For a smooth finish, use a piping bag for icing. Allow the first layer to dry before adding additional decorations for a layered effect.
Variations
Flavor Additions
You can easily add flavor to your snowflake sugar cookies. Try using spices like nutmeg or cinnamon. Just add about half a teaspoon of either spice to the dry ingredients. This small change gives the cookies a warm, cozy taste. You can also use different extracts. Swap out almond extract for peppermint for a festive twist.
Alternative Shapes
While snowflakes are beautiful, you can use other cookie cutters, too. Try stars, Christmas trees, or hearts for different designs. This way, you can make cookies for any occasion. You can even mix and match shapes for a fun cookie platter. Just remember, the baking time may change based on the size of the cookies.
Dietary Adaptations
If you need gluten-free cookies, use gluten-free flour. Look for a blend that works well for cookies. For vegan options, swap the butter for vegan butter and the egg for a flax egg. A flax egg is made by mixing one tablespoon of ground flaxseed with three tablespoons of water. Let it sit for a few minutes to thicken. These changes help make your snowflake cookies fit different diets while still tasting great.
Storage Info
Short-Term Storage
To keep your snowflake sugar cookies fresh at room temperature, place them in an airtight container. Use wax paper between layers to prevent sticking. They will stay tasty for about a week. Make sure to store them in a cool, dry spot away from sunlight.
Long-Term Storage
If you want to save cookies for later, freezing is a great option. First, let the cookies cool completely. Then, wrap each cookie tightly in plastic wrap. Place them in a freezer bag or container. They can last up to three months in the freezer. When you're ready to enjoy them, thaw them at room temperature.
Keeping Icing Fresh
To keep your icing fresh, store it in an airtight container. Make sure to cover the icing with plastic wrap directly on the surface. This prevents it from drying out. You can keep it in the fridge for about a week. Before using, stir it well to restore the smooth texture.
FAQs
How long do snowflake sugar cookies last?
Snowflake sugar cookies last about one week at room temperature. To keep them fresh, store them in an airtight container. If you want them to last longer, you can freeze them. In the freezer, these cookies can last up to three months. Just make sure to wrap them well to avoid freezer burn.
Can I make the dough in advance?
Yes, you can make the dough in advance. This is a great time-saver! Prepare the dough and wrap it tightly in plastic wrap. Store it in the refrigerator for up to three days. If you want to store it longer, freeze the dough for up to three months. Just remember to let it thaw in the fridge before rolling it out.
How can I make royal icing?
To make royal icing, you will need:
- 2 egg whites
- 4 cups powdered sugar
- 1 teaspoon lemon juice
Start by beating the egg whites until they are frothy. Gradually add the powdered sugar while mixing. Add lemon juice to help with the shine. Mix until the icing is thick and can hold its shape. You can add water to thin it out if needed.
What are some tips for cookie decorating with kids?
Decorating cookies with kids is so much fun! Here are some tips:
- Set up a decorating station with all supplies ready.
- Use small bowls for icing and sprinkles.
- Let kids use their creativity! No need for perfection.
- Keep extra paper towels handy for spills.
- Have fun and enjoy the process together!
You learned about making delicious snowflake sugar cookies today. We covered key ingredients, step-by-step instructions, tips for success, tasty variations, and storage methods.
Baking cookies is fun and rewarding. Using this guide means you can create your own treat masterpiece. Don't forget to get creative with flavors and shapes. Enjoy your cookie-making journey!