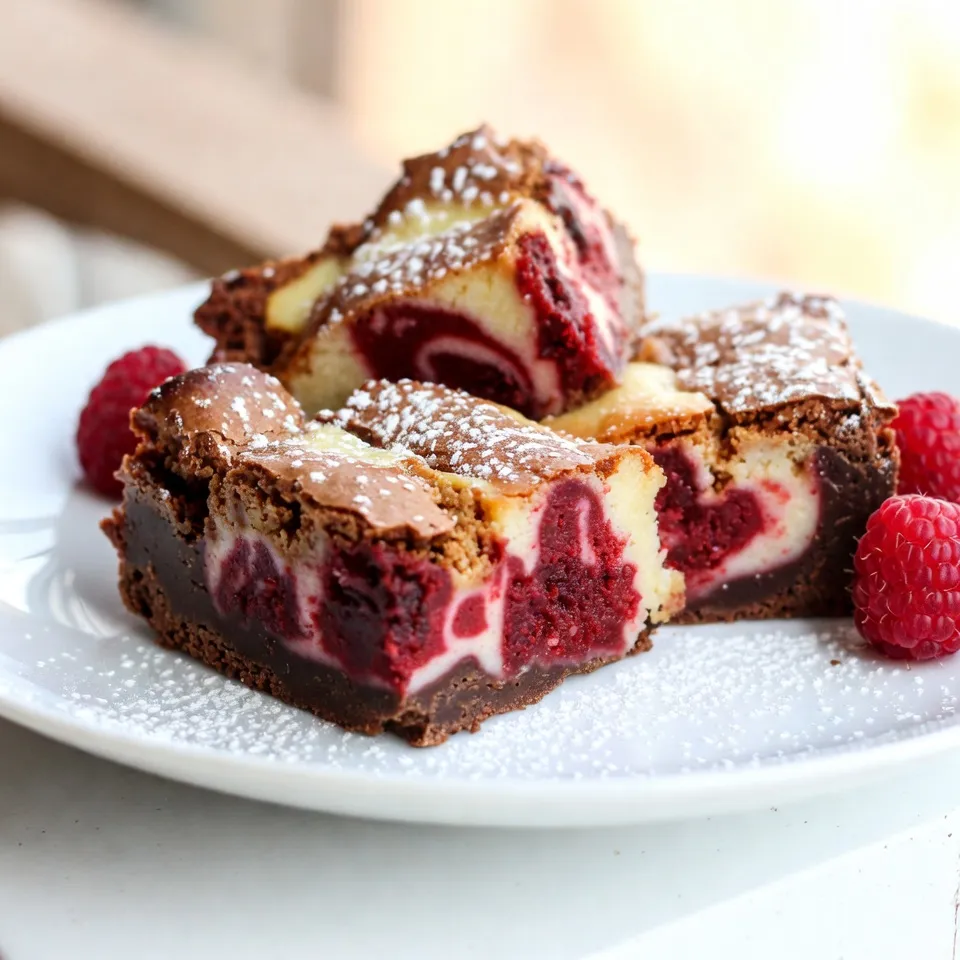
Are you ready to indulge in a sweet treat that looks as good as it tastes? My Red Velvet Cheesecake Brownies are the perfect blend of rich chocolate and creamy cheesecake flavor. These colorful, decadent brownies are not just a dessert; they are a showstopper for any occasion. Let’s dive into the ingredients and steps to create this irresistible delight that will have everyone asking for seconds!
Why I Love This Recipe
- Decadent Flavor: The combination of rich chocolate and creamy cheesecake creates an irresistible dessert experience.
- Stunning Appearance: The vibrant red color paired with the creamy white layer makes these brownies visually striking, perfect for any occasion.
- Easy to Make: This recipe is straightforward, allowing even novice bakers to achieve impressive results without stress.
- Perfect for Sharing: These brownies are ideal for parties or gatherings, bringing joy to everyone who gets a taste!
Ingredients
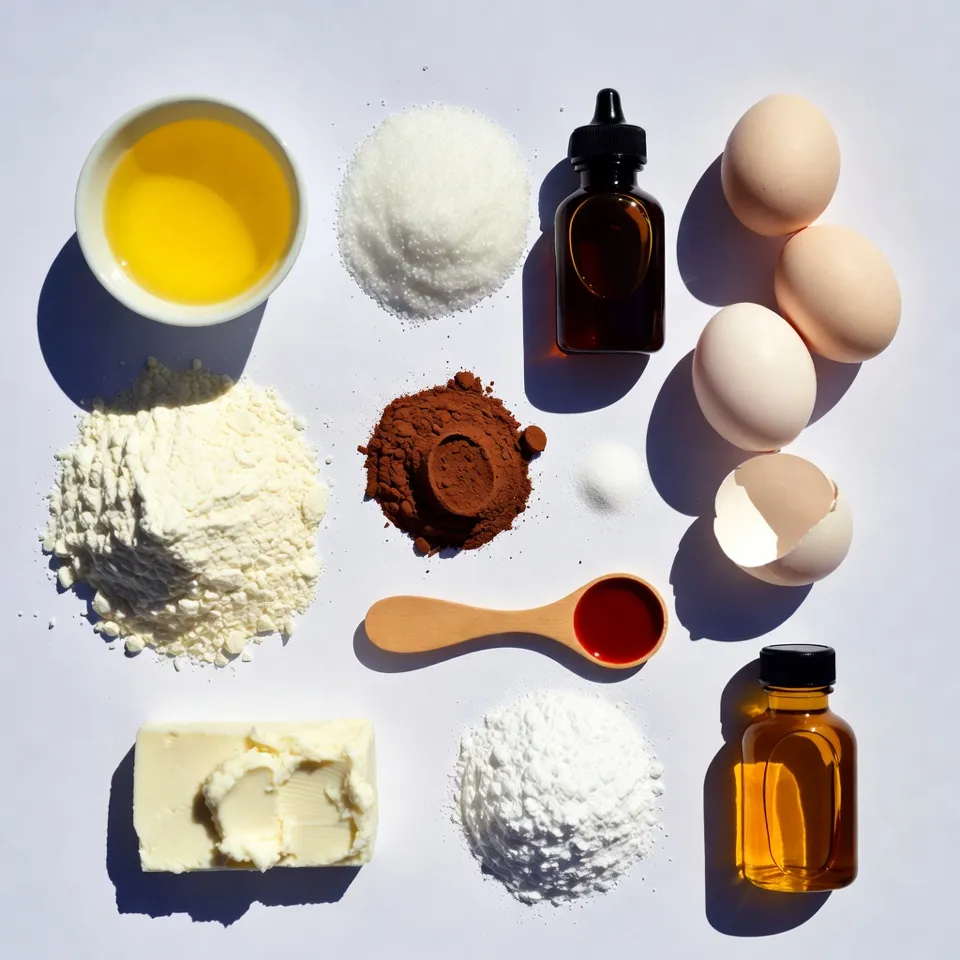
List of Main Ingredients
– 1 cup unsalted butter, melted
– 1 ½ cups granulated sugar
– 1 teaspoon vanilla extract
– 4 large eggs
– 1 ¾ cups all-purpose flour
– ¼ cup unsweetened cocoa powder
– 1 teaspoon baking powder
– ½ teaspoon salt
– 1 tablespoon red food coloring
– 8 oz cream cheese, softened to room temperature
– ½ cup powdered sugar
– 1 teaspoon vanilla extract (for cheesecake layer)
When I make red velvet cheesecake brownies, I love using fresh and high-quality ingredients. The unsalted butter gives the brownies a rich flavor. The granulated sugar balances the cocoa’s bitterness. Vanilla extract adds warmth. Eggs keep the brownies fluffy and moist.
All-purpose flour provides structure. Unsweetened cocoa powder gives a deep chocolate taste. Baking powder helps them rise. A pinch of salt boosts flavor. Red food coloring gives them that iconic look!
For the creamy cheesecake layer, I use softened cream cheese and powdered sugar. This mix adds a delightful tang. I also add more vanilla to this layer for extra flavor.
Optional Garnishes
– Fresh raspberries
– Whipped cream
– Powdered sugar for dusting
For a fun touch, I love to add fresh raspberries on top. Their tart flavor pairs well with the sweet brownies. A dollop of whipped cream adds creaminess. Dusting with powdered sugar makes the dish look fancy. These garnishes make the brownies even more tempting!
Step-by-Step Instructions
Preheating and Preparing the Baking Pan
– Preheat oven to 350°F (175°C).
– Grease a 9×13 inch baking pan with butter or non-stick spray.
Mixing the Batter
– In a large bowl, combine melted butter and granulated sugar.
– Add 1 teaspoon of vanilla extract and mix until smooth.
– Crack in 4 large eggs, mixing well after each one.
– In a separate bowl, sift together flour, cocoa powder, baking powder, and salt.
– Gradually add the dry mix to the wet mix, stirring gently.
– Add 1 tablespoon of red food coloring and mix until vibrant.
Preparing the Cheesecake Layer
– In a clean bowl, beat 8 oz of cream cheese until smooth.
– Gradually mix in ½ cup powdered sugar and 1 teaspoon vanilla extract.
– Carefully spread this cheesecake mixture over the brownie batter in the pan.
Final Assembly and Baking
– Pour the remaining brownie batter over the cheesecake layer.
– Use a knife to gently swirl the layers for a marbled effect.
– Bake for 30-35 minutes. Check doneness with a toothpick; it should have a few moist crumbs.
Cooling the Brownies
– Let the brownies cool in the pan for about 15 minutes.
– Transfer them to a wire rack to cool completely before cutting into squares.
Tips & Tricks
Achieving the Perfect Texture
To get light and fluffy brownies, mixing is key. Start by blending the wet ingredients well. This helps air mix in, giving you that nice lift. Once you add the dry ingredients, stir gently. Overmixing can make brownies dense and heavy. Just mix until you see no dry flour.
Storage Tips
Storing brownies correctly keeps them fresh. Let them cool completely before storage. Place brownies in an airtight container. They stay good for up to a week at room temperature. You can also refrigerate them for longer shelf life, about two weeks.
Presentation Ideas
For a great look, serve brownies on a nice plate. Dust with powdered sugar for a sweet touch. Add fresh raspberries for color. You can also serve them with whipped cream on the side. This makes a simple dessert feel fancy and fun!
Pro Tips
- Use Room Temperature Ingredients: Ensure that your eggs and cream cheese are at room temperature before mixing. This helps create a smoother batter and cheesecake layer.
- Don’t Overmix the Batter: When combining wet and dry ingredients, mix until just combined. Overmixing can lead to dense brownies.
- Perfect Swirl Technique: Use a knife or skewer to create a gentle swirl between the brownie and cheesecake layers. This will enhance the visual appeal and flavor.
- Cool Completely Before Cutting: Allow the brownies to cool completely on a wire rack before cutting. This helps them set up nicely and prevents them from falling apart.
Variations
Flavor Adjustments
You can make these brownies even more fun. Try adding nuts or chocolate chips. Chopped walnuts or pecans add a nice crunch. Chocolate chips can make the brownies extra chocolatey. Just fold them into the batter before baking.
You can also explore alternative flavorings. For a twist, use almond extract instead of vanilla. This adds a sweet, nutty touch. You could even mix in some mint extract for a fresh flavor.
Dietary Substitutions
If you need gluten-free options, you can use gluten-free flour. It works well in this recipe. Just replace the all-purpose flour with a gluten-free blend. Your brownies will still taste great.
For vegan alternatives, swap the eggs with flaxseed meal or applesauce. Use dairy-free cream cheese for the cheesecake layer. These changes keep the brownies delicious and friendly for everyone.
Different Serving Styles
You can serve these brownies in fun ways. Mini brownie bites are perfect for parties. Use a small scoop to create bite-sized treats. They are easy to share and look cute on a platter.
Layered dessert cups make a lovely presentation. Create layers of brownie and cheesecake in clear cups. Top with whipped cream and berries for a colorful treat. This style turns a simple brownie into an eye-catching dessert!
FAQs
What Makes Red Velvet Brownies Different from Regular Brownies?
Red velvet brownies stand out due to their unique flavor and color. They have a light cocoa taste and a slight tang from the cream cheese. The vibrant red color makes them visually striking. Regular brownies often taste richer and darker since they use more cocoa. The red velvet version feels festive, perfect for special occasions.
Can I Make These Brownies Ahead of Time?
You can make these brownies ahead of time. Bake them and let them cool completely. Then, store them in an airtight container. They stay fresh for about three days at room temperature. For longer storage, you can freeze them. Just wrap them tightly in plastic wrap and foil. Thaw them in the fridge when you’re ready to enjoy.
How Do I Know When the Brownies Are Done Baking?
To check if your brownies are done, use a toothpick. Insert it into the center of the brownies. If it comes out with a few moist crumbs, they are perfect. If the toothpick is wet, bake them a little longer. Keep an eye on them, as overbaking can lead to dry brownies.
Schema-Friendly Information
Prep Time and Cook Time
The prep time for these red velvet cheesecake brownies is just 15 minutes. You will then bake them for 30 to 35 minutes. This makes the total time about 1 hour from start to finish.
Serving Size
This recipe serves about 12 to 16 squares. You can cut them smaller for bite-sized treats or larger for a big dessert.
Nutritional Information
Each brownie square has around 250 calories. The exact numbers can change based on the size of your squares and any toppings you add.
This blog post covered how to make delicious red velvet brownies. You learned about the key ingredients, simple steps, and helpful tips. I shared ideas for flavor variations and ways to serve.
Baking these brownies can be fun and rewarding. You can impress others with your skill. Try your own twists and enjoy the process. Happy bakin