If you're craving a delicious treat that requires zero baking, you'll love this Oreo Icebox Cake! This easy and delightful recipe combines creamy layers, crunchy Oreos, and rich chocolate syrup. Perfect for warm days or any gathering, it’s a dessert that everyone will enjoy. Join me as we explore how to make this no-bake wonder that will impress your friends and family—all with just a few simple ingredients. Let's dive in!
Why I Love This Recipe
- Decadent Flavor: This cake combines the rich taste of Oreos with a creamy filling, making each bite a delightful experience.
- Easy Preparation: With minimal baking and simple layering, this recipe is perfect for bakers of all skill levels.
- Make-Ahead Dessert: It requires chilling time, allowing you to prepare it in advance for gatherings or family meals.
- Customizable: You can easily adapt this recipe by adding different toppings or flavors to suit your preferences.
Ingredients
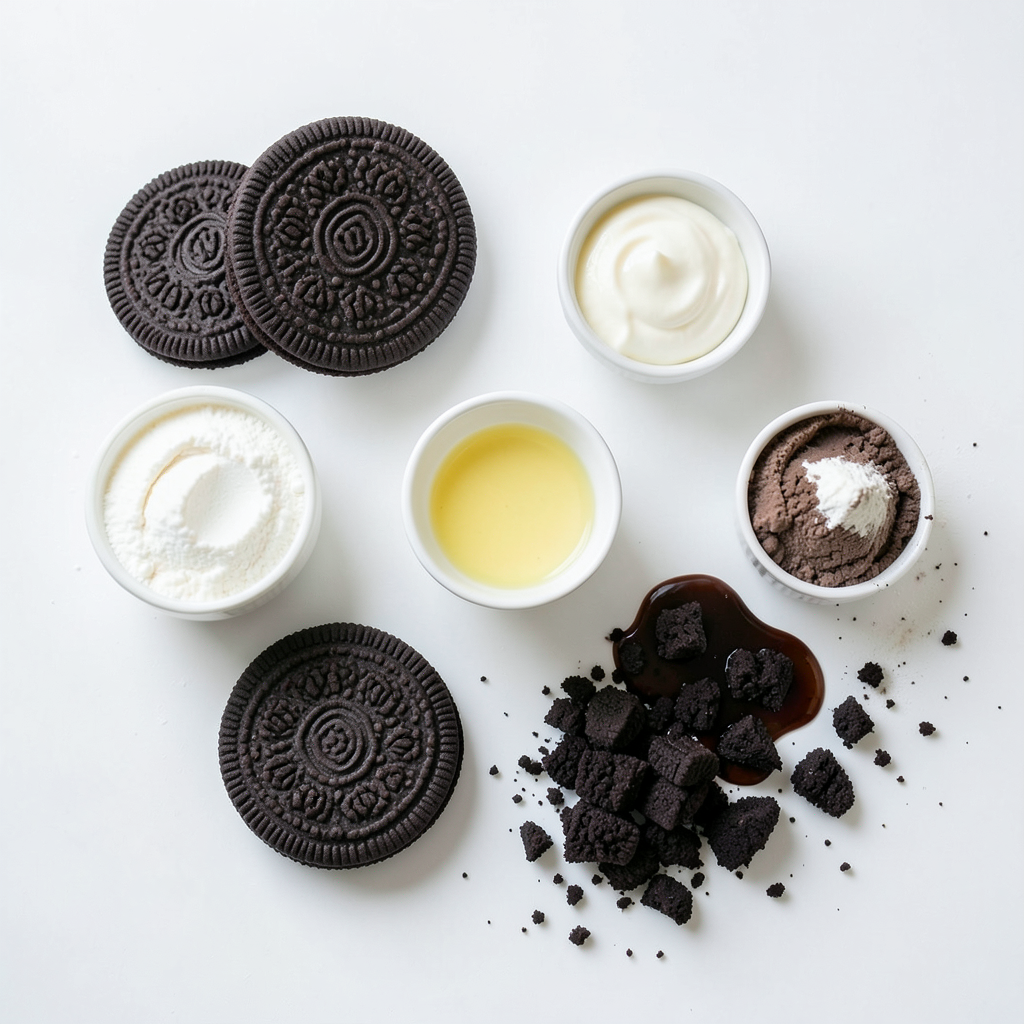
To create this delicious Oreo Icebox Cake, you will need the following ingredients:
- 2 packages of Oreo cookies (approximately 36 cookies)
- 2 cups heavy cream
- 1 cup powdered sugar
- 1 teaspoon vanilla extract
- 1 cup cream cheese, softened to room temperature
- 1/2 cup chocolate syrup
- 1/4 cup crushed Oreo cookies for garnish
Each ingredient plays a key role in making the cake creamy and rich. The Oreo cookies provide a crunchy base and a tasty flavor. The heavy cream and cream cheese create a smooth filling. The powdered sugar adds sweetness, while the chocolate syrup gives it a fun twist. Finally, the crushed Oreos on top make the cake look appealing.
This list is simple and can be found at most grocery stores. It’s easy to gather everything you need to whip up this no-bake dessert. Enjoy the process of making it as much as you will enjoy eating it!
Step-by-Step Instructions
Preparing the Whipped Cream
First, gather your ingredients. In a medium bowl, add the heavy cream, powdered sugar, and vanilla extract. Next, mix them together with a hand or stand mixer. Beat the mixture on medium speed until soft peaks form. This means the cream should hold a shape but still be smooth. Once you reach this stage, set the whipped cream aside gently to keep it fluffy.
Making the Cream Cheese Mixture
In a separate bowl, take your softened cream cheese. Beat it until it’s smooth and creamy. This step is crucial for a great texture. After that, fold in the whipped cream you made earlier. Use a spatula and mix gently. You want to keep the air in the cream for a light filling.
Assembling the Oreo Icebox Cake
Now, it’s time to bring it all together! Take a 9x13 inch baking dish. Start by placing a single layer of whole Oreo cookies at the bottom. Make sure they fit snugly side by side. Then, spread half of your cream cheese and whipped cream mixture over the Oreos. Use a spatula to smooth it out evenly.
Next, drizzle half of the chocolate syrup over the cream layer. Let it soak in a bit for extra flavor. Now, repeat the layering. Add another layer of Oreos, then the remaining cream mixture, and drizzle the rest of the chocolate syrup on top. Finally, sprinkle crushed Oreo cookies over the top layer for a fun finish.
Cover the dish tightly with plastic wrap. Place it in the refrigerator for at least 4 hours or overnight. This chilling time helps the cake set and deepens the flavors. Enjoy your delicious Oreo Icebox Cake!
Tips & Tricks
Ensuring the Right Texture
To make your Oreo Icebox Cake perfect, focus on texture. First, beat the heavy cream until soft peaks form. This means the cream should hold its shape but still be smooth and fluffy. Stop mixing as soon as you see these peaks. Overbeating can make the cream too stiff.
Next, when you fold the whipped cream into the cream cheese, use a gentle touch. Slide your spatula down the side of the bowl, then lift it up and over. This helps keep the air in the mixture, making it light and fluffy. Do not stir hard or fast; be gentle to keep the mixture airy.
Presentation Tips
Serving this cake is fun and easy! When it's time to slice, use a sharp knife. Cut the chilled cake into squares for neat pieces. This makes it look appealing on your plate.
For a fancy finish, drizzle some extra chocolate syrup on each slice. Add a sprinkle of crushed Oreo cookies on top for a sweet crunch. This not only looks great but also adds more flavor. Enjoy your cool dessert straight from the fridge for the best taste!
Pro Tips
- Chill Your Tools: Before whipping the cream, chill your mixing bowl and beaters in the refrigerator for about 10-15 minutes. This helps the cream whip up faster and achieve a better volume.
- Layer Carefully: When layering the cake, ensure that each layer is even. Use a spatula to spread the cream mixture smoothly, and press down gently on the Oreo layers to avoid any gaps.
- Overnight Refrigeration: For the best flavor and texture, allow the cake to chill overnight. This gives the layers time to meld together, creating a more cohesive dessert.
- Serving Style: For a decorative touch, serve the cake with a dollop of whipped cream and a drizzle of chocolate syrup on each slice. This enhances both the presentation and the flavor!
Variations
Vegan Oreo Icebox Cake
To make a vegan version of this cake, you can substitute heavy cream and cream cheese. Use coconut cream for the heavy cream. Chill a can of coconut milk overnight and scoop out the solid cream. For the cream cheese, opt for a vegan cream cheese available in stores. Both of these swaps work well in creating a creamy texture. You still get that rich flavor while keeping it plant-based!
Gluten-Free Options
If you or your guests need a gluten-free dessert, swap regular Oreo cookies for gluten-free ones. Many brands offer gluten-free Oreos that taste just as good. Make sure to check the packaging to ensure they meet your dietary needs. This way, everyone can enjoy this tasty treat without worry.
Flavor Enhancements
You can easily boost the flavor of your Oreo Icebox Cake. Try adding a teaspoon of mint extract for a refreshing twist. You can also mix in some coffee or almond extract for extra depth. For toppings, consider adding fresh berries or a drizzle of caramel sauce. These enhancements will give your cake a unique flair that everyone will love!
Storage Info
How to Store Oreo Icebox Cake
To keep your Oreo icebox cake fresh, store it in the fridge. Use plastic wrap or a lid to cover it tightly. This prevents the cake from drying out or absorbing other odors in the fridge. Make sure to keep it chilled until you are ready to serve.
Freezing Instructions
If you have leftovers, you can freeze the cake. First, cut it into squares for easy servings. Wrap each piece tightly in plastic wrap. Then, place them in an airtight container or a freezer bag. This helps protect the cake from freezer burn. When ready to enjoy, let it thaw in the fridge overnight.
Shelf Life
The cake stays good in the fridge for about 3 to 5 days. If stored properly, you can enjoy it for a few days after making it. If you freeze it, it can last up to 2 months. Just remember to check for any changes in texture or taste before serving.
FAQs
Can I make Oreo Icebox Cake ahead of time?
Yes, you can make Oreo Icebox Cake ahead of time. This dessert tastes even better the next day. It needs time to chill and set in the fridge. I recommend making it at least four hours before serving. For best results, prepare it the night before.
What can I substitute for cream cheese?
You can use Greek yogurt or mascarpone cheese instead of cream cheese. Both options keep the creamy texture. If you want a dairy-free option, try using cashew cream. Blending soaked cashews with a little lemon juice makes a great substitute.
Does this dessert need to be refrigerated?
Yes, this dessert must be refrigerated. It helps the layers set and blend the flavors. Make sure to cover it well with plastic wrap. This will keep it fresh and prevent other odors from getting in.
Can I use flavored Oreos for this recipe?
Absolutely! Using flavored Oreos can add a fun twist to your cake. Try mint, peanut butter, or birthday cake Oreos for a new taste. Just keep the other ingredients the same for the best results.
This Oreo icebox cake is a fun and tasty dessert. We made it with simple ingredients and clear steps. You can layer Oreo cookies, whipped cream, and cream cheese to create a delicious treat. Remember, you can also try vegan or gluten-free options for variety.
Keep it in the fridge for freshness, and enjoy every bite! Now you can impress friends and family with this easy no-bake dessert. Make it your own by adding your favorite flavors!