Craving a dessert that impresses without the fuss? Look no further! Mini Crème Brûlée Cheesecakes are your answer. They blend creamy cheesecake with a crunchy, caramelized top, perfect for parties or a sweet treat at home. In this recipe, I’ll guide you through the simple steps and essential ingredients needed to make these delightful bites. Get ready to indulge in a rich flavor explosion—that’s easy enough for anyone to master!
Ingredients
Essential Ingredients for Mini Crème Brûlée Cheesecakes
– 1 cup graham cracker crumbs
– 3 tablespoons unsalted butter, melted
– 12 oz cream cheese, softened
– 1/2 cup sour cream
– 2 large eggs
The main ingredients are simple. The graham cracker crumbs give a nice base. The cream cheese makes it creamy and rich. Sour cream adds a touch of tang. Eggs help the cheesecake set just right.
Additional Ingredients
– Granulated sugar for crust and caramelizing
– 1 teaspoon vanilla extract
– 1/4 cup heavy cream
Sugar sweetens both the crust and the top. The vanilla extract adds a warm flavor. Heavy cream helps make the cheesecake smooth and luscious.
Optional Garnishes
– Fresh berries
– Mint leaves
Fresh berries add color and flavor. Mint leaves can freshen the taste. You can use these to make your dessert even more appealing.
Step-by-Step Instructions
Prepping the Oven and Muffin Tin
– Preheat the oven to 325°F (160°C).
– Line a muffin tin with cupcake liners.
Making the Crust
First, I mix the graham cracker crumbs, melted butter, and sugar. Use a medium bowl for this. Stir until everything comes together. Press about 1 tablespoon of this mixture into each cupcake liner. This forms the crust. Now, bake the crust in the oven for 8 minutes. After baking, let it cool completely.
Preparing the Cheesecake Batter
In a large bowl, beat the softened cream cheese until smooth. I like to use a hand mixer for this. Next, I add sour cream, sugar, and vanilla extract. Mix until everything blends well. Now, add the eggs one at a time. Make sure to mix until each egg is fully combined. Finally, fold in the heavy cream until the batter is smooth.
Baking the Cheesecakes
Carefully pour the cheesecake batter into each cupcake liner. Fill them about three-quarters full. Place the muffin tin back in the oven. Bake for 20-25 minutes. The centers should set but still jiggle a bit. After baking, remove from the oven and let them cool at room temperature. For best results, chill them in the fridge for at least 4 hours or overnight.
Cooling and Caramelizing
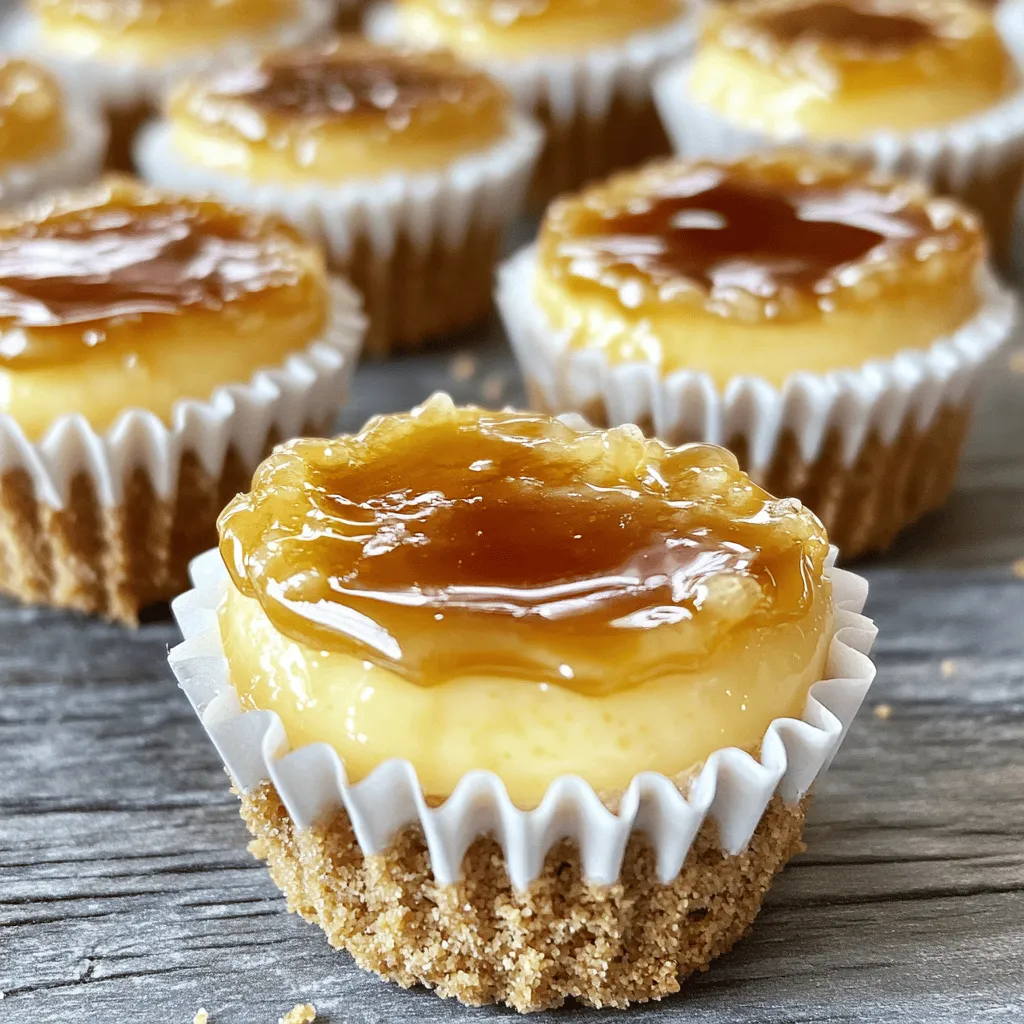
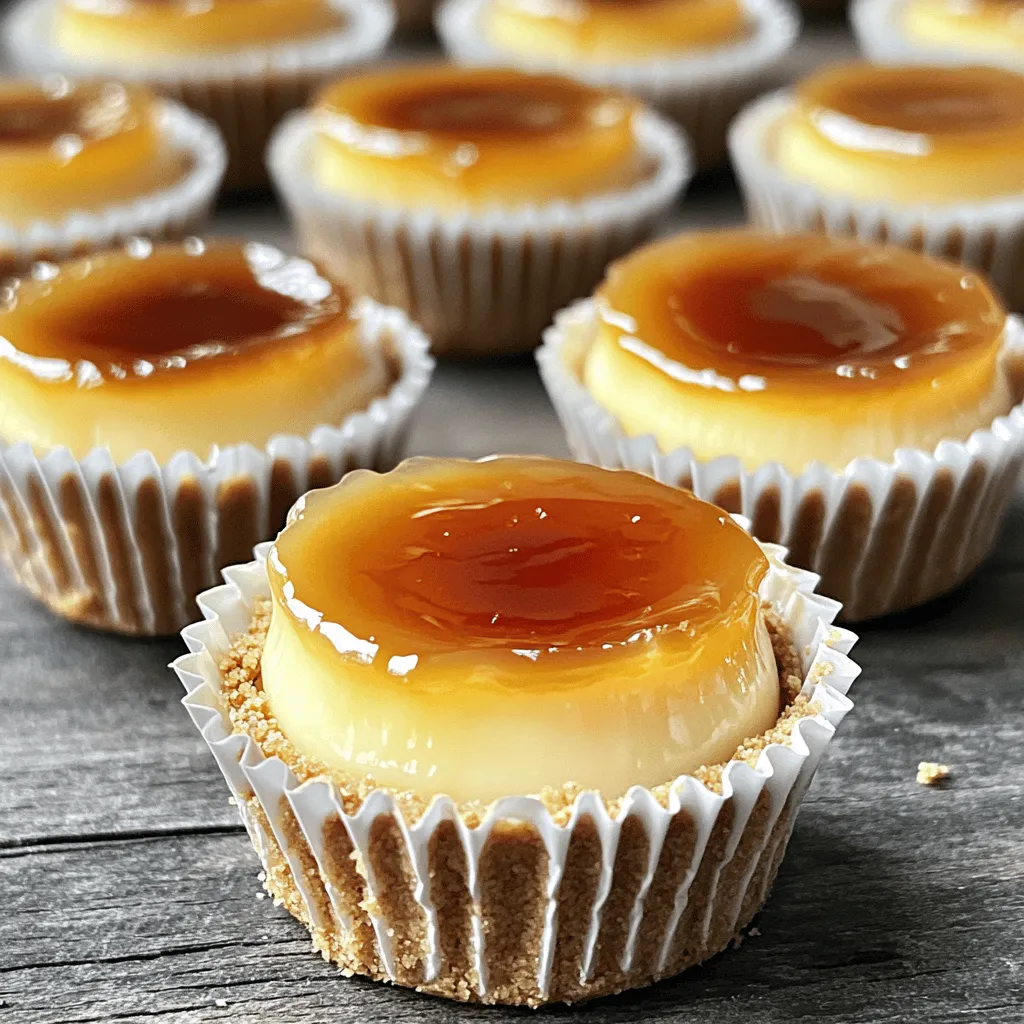
Once they are chilled, it’s time to caramelize the topping. Sprinkle about 1 teaspoon of sugar on each cheesecake. Use a kitchen torch to caramelize the sugar until it turns golden. If you don’t have a torch, you can broil them in the oven. Watch closely to prevent burning. Let the caramelized topping cool for a few minutes before serving. Enjoy your mini crème brûlée cheesecakes!
Tips & Tricks
Perfecting Your Cheesecakes
To get the best texture in your mini crème brûlée cheesecakes, focus on the cream cheese. Ensure it is at room temperature. This helps it blend smoothly without lumps. Beat the cream cheese until it is creamy and light. This step is crucial for a rich taste.
For a smooth batter, mix your ingredients in stages. Start with the cream cheese, then add sour cream and sugar. Mix until well combined. Add eggs one at a time. This method keeps the batter light and fluffy. Finally, fold in the heavy cream gently. This adds richness without losing air.
Common Mistakes to Avoid
One common mistake is overmixing the batter. Mixing too much can cause the cheesecakes to crack. Mix just until combined for the best results.
Pay attention to baking time and temperature. Bake at 325°F (160°C) for 20-25 minutes. The centers should be set but still jiggle slightly. This is a sign they are done. If you bake them too long, they will become dry.
Equipment Suggestions
Having the right tools makes a big difference. Use a hand mixer or stand mixer for easy mixing. This helps achieve a smooth batter without effort.
You will also need a kitchen torch for caramelizing the sugar on top. If you don’t have one, a broiler works too. Just watch it closely to avoid burning. Having these tools ready will make your baking experience smooth and fun.
Variations
Flavor Variations
You can add fun flavors to your mini crème brûlée cheesecakes. A great way is by adding citrus zest. Lemon or orange zest brings a fresh twist. It brightens up the rich creaminess.
You can also experiment with chocolate or berry options. For chocolate, add melted chocolate to the batter. If you prefer berries, fold in some fresh or frozen berries. Both will give your cheesecakes a unique taste.
Dietary Substitutions
If you need gluten-free options, use almond flour instead of graham cracker crumbs. This substitution keeps the crust tasty and crunchy.
For a dairy-free version, swap the cream cheese and sour cream with coconut cream. This change still provides a creamy texture and rich flavor.
Serving Suggestions
To make your cheesecakes even more delightful, pair them with sauces or sorbets. A berry sauce adds a sweet and tangy contrast. A scoop of lemon sorbet gives a refreshing touch.
For presentation, serve your mini cheesecakes on a pretty platter. Garnish with fresh berries or a sprig of mint. This makes your dessert look extra special.
Storage Info
How to Store Mini Crème Brûlée Cheesecakes
To keep your mini crème brûlée cheesecakes fresh, store them in the refrigerator. Place them in an airtight container. This helps keep out moisture and odors. You can enjoy them for up to five days after baking. If you want them to last longer, consider freezing some.
Freezing Instructions
If you have leftovers, freezing is a great option. Wrap each cheesecake tightly in plastic wrap. Then, place them in a freezer-safe bag. This keeps them safe from freezer burn. You can freeze them for up to three months. When you are ready to enjoy one, take it out and let it thaw in the fridge overnight. This keeps the texture nice and creamy.
Best Containers for Storage
Use airtight containers for the best storage. This prevents air from getting in. If you want to save space, you can wrap individual servings. Use plastic wrap to cover each cheesecake well. This way, you can grab one easily when you want a tasty treat.
FAQs
Can I make these cheesecakes ahead of time?
Yes, you can prepare these mini cheesecakes in advance. You can make them up to two days ahead. Just store them in the fridge after cooling. This way, they will set well and be ready for your guests. If you want to caramelize the tops, do this just before serving. This keeps the sugar crisp and delicious.
How do I know when the mini cheesecakes are done baking?
Look for a slight jiggle in the center. The edges should be firm while the middle remains soft. This means they are done. If they look too wobbly, give them a few more minutes. You can also check with a toothpick; it should come out mostly clean.
What can I use instead of a kitchen torch?
If you don’t have a kitchen torch, you can use your oven’s broiler. Just sprinkle sugar on top and place them under the broiler for a minute or two. Keep a close eye to avoid burning. Another option is using a stovetop to heat a metal pan and gently melt the sugar on top. These methods work well to achieve that crispy topping.
Mini crème brûlée cheesecakes are a treat you can easily make at home. We covered essential ingredients like cream cheese and graham crackers, along with handy steps to bake and cool them perfectly. I shared tips to avoid common mistakes and suggested fun variations to personalize your cheesecakes. Remember, these desserts can be stored and even frozen. Enjoy creating these delicious bites for any occasion! You’ll impress your friends and family with your baking skills.