Frozen Yogurt Granola Cups Delightful Healthy Snack

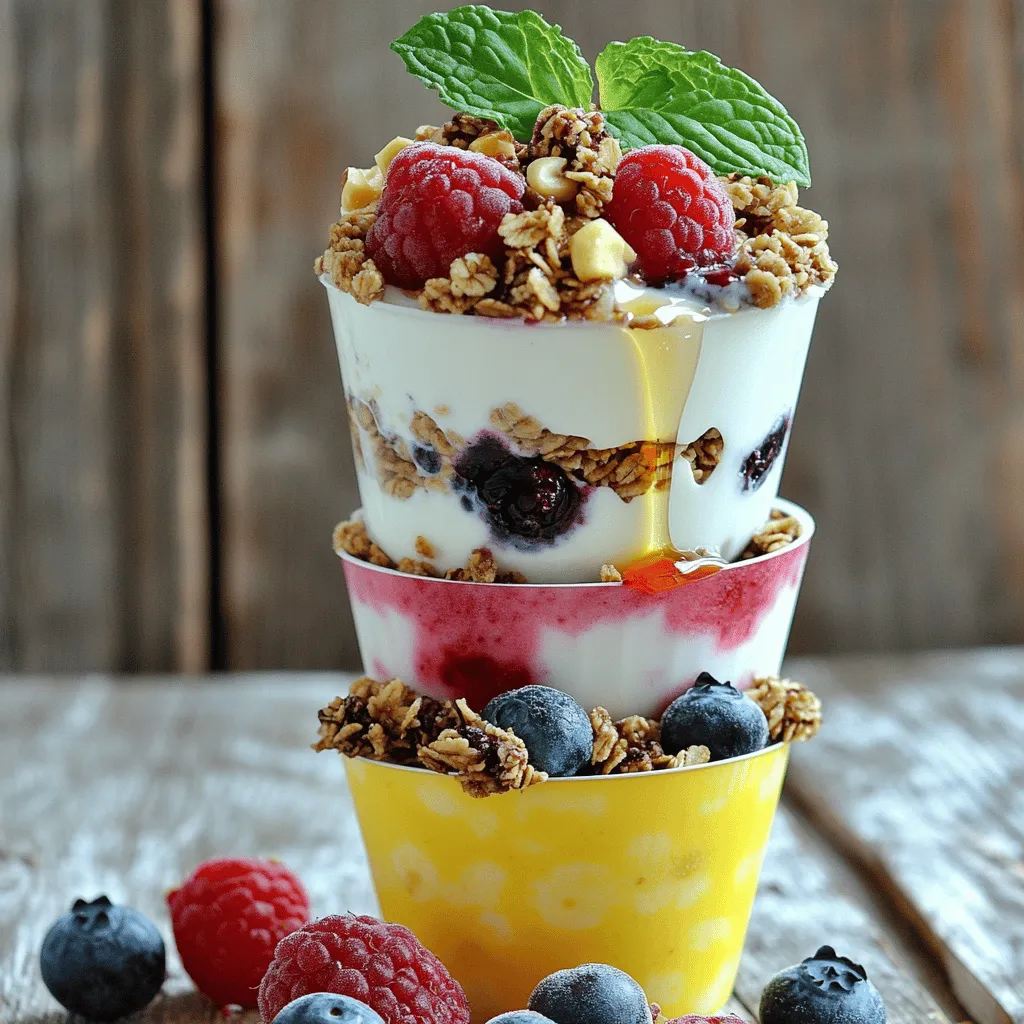
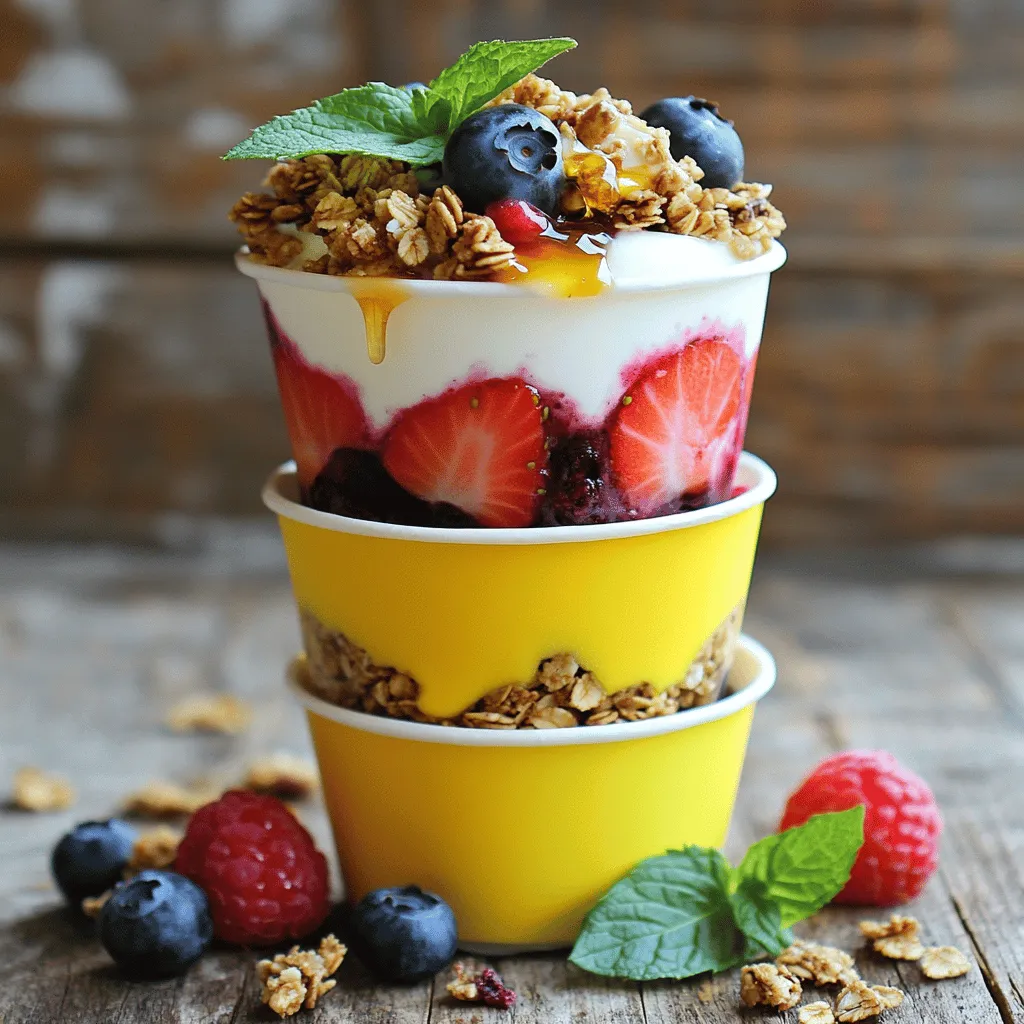
Looking for a fun and healthy snack? Frozen Yogurt Granola Cups bring joy and nutrition together! With creamy yogurt, crunchy granola, and sweet berries, they are the perfect treat for any time. In this article, I’ll share simple steps to make them, along with tips and variations to suit your taste. Let’s dive into these delightful cups and get your taste buds excited!

Ingredients

To create your Frozen Yogurt Granola Cups, gather the following simple ingredients:

– 2 cups Greek yogurt (plain or flavored)

– 1 cup granola (preferably complementary flavor)

– 1 cup mixed berries (strawberries, blueberries, raspberries)

– 2 tablespoons honey or maple syrup

– 1 teaspoon vanilla extract

– 1/4 cup chopped nuts (almonds, walnuts, pecans)

– Fresh mint leaves for garnish (optional)

Using Greek yogurt gives the cups a creamy texture and a protein boost. Choose a granola that you enjoy, as it adds crunch and flavor. Mixed berries bring natural sweetness and color. Honey or maple syrup adds sweetness, while vanilla extract enhances the taste. Chopped nuts add an extra crunch. If you like, you can top your cups with fresh mint for a nice touch. This recipe is versatile, allowing you to tailor it to your taste. For the full recipe, check out the detailed instructions.

Step-by-Step Instructions

Preparing the Yogurt Base

– Combine Greek yogurt, honey, and vanilla in a bowl.

– Whisk until smooth and creamy.

To start, grab a medium mixing bowl. Add 2 cups of Greek yogurt, 2 tablespoons of honey, and 1 teaspoon of vanilla extract. Whisk these ingredients together until they blend into a creamy mix. This step is key. A smooth base helps to create a lovely texture later on.

Assembling the Cups

– Line the muffin tin with cupcake liners.

– Layer yogurt, granola, berries, and yogurt again.

Next, take a standard muffin tin and line each cup with cupcake liners. This makes it easier to take the cups out after freezing. Now, scoop about 1 tablespoon of the yogurt mix into each cup. Spread it evenly using the back of your spoon.

Now comes the fun part! Sprinkle 1 tablespoon of granola over the yogurt. Press it down gently so it sticks. Next, add a layer of mixed berries. You can use whole berries or slice them if they are large. Finally, top with another tablespoon of yogurt to cover the berries completely.

Freezing and Serving

– Freeze for a minimum of 4 hours.

– Serve with optional garnishes.

Now, carefully place the muffin tin in the freezer. Let the cups freeze for at least 4 hours or until they are solid. When ready to serve, remove the cups from the muffin tin. Peel away the cupcake liners gently.

For a finishing touch, you can add fresh mint leaves on top. This adds a nice color and a hint of freshness. Enjoy your Frozen Yogurt Granola Cups as a delightful snack or dessert! You can find the Full Recipe to guide you through each step.

Tips & Tricks

How to Achieve Creamy Texture

To get that creamy texture, whisk your yogurt well. This step is key. If you skip it, your yogurt might be lumpy. Use Greek yogurt for a richer taste. It has more protein and a thicker consistency than regular yogurt. Choose plain or a favorite flavor to match your style.

Enhancing Flavor

You can add fun flavors to your yogurt. Try mixing in fresh fruit or a splash of juice. A little honey or maple syrup can sweeten it up. For granola, pick one with nuts or dried fruit. This choice adds great taste and texture to your cups.

Presentation Ideas

Make your cups look great on a platter. Arrange them neatly in rows. For a fun touch, drizzle honey on top or sprinkle more berries. Fresh mint leaves make a nice garnish too. They add color and a fresh scent. Enjoy serving this healthy snack at parties or family gatherings!

Variations

Flavor Combinations

You can have fun mixing yogurt flavors. Try strawberry, vanilla, or chocolate for a twist. Each flavor brings a new taste to the cups. The granola you choose also matters. Sweet granola pairs well with fruit flavors. Nutty granola adds depth to plain yogurt. Experiment with different flavors to find your favorite combo.

Dietary Substitutions

If you’re dairy-free, use coconut yogurt or almond yogurt instead of Greek yogurt. These options taste great and still give you a creamy base. You can also swap out sweeteners. Use agave syrup or stevia instead of honey or maple syrup. This change can lower the sugar content while keeping the sweetness.

Seasonal Variations

Adding seasonal fruits can make your cups even more special. In summer, mix in peaches or mangoes for a tropical vibe. In fall, try diced apples or pears for a cozy feel. You can also add spices like cinnamon or nutmeg. These spices enhance the flavor and add warmth to the cups. With these variations, every batch can be unique and delightful.

Storage Info

Best Practices for Freezing

You can store Frozen Yogurt Granola Cups in the freezer for up to three months. To keep them fresh, wrap each cup in plastic wrap or place them in an airtight container. This helps avoid freezer burn, which can ruin the taste. Always label your container with the date, so you know when to use them.

Thawing Tips

Before serving, take the cups out of the freezer. Let them sit at room temperature for about 10 to 15 minutes. This allows them to soften a bit, making them easier to eat. If you prefer, you can also place them in the fridge for a few hours. After thawing, keep any leftovers in the refrigerator. They should stay fresh for up to two days.

Reusing Leftovers

Don’t let leftover ingredients go to waste! You can use any remaining yogurt in smoothies for a creamy texture. Mix in fruits or greens for a healthy drink. If you have extra granola, sprinkle it on oatmeal or yogurt for a crunchy touch. You can also layer leftovers in parfaits with fruits and nuts for a tasty treat.

FAQs

How long do Frozen Yogurt Granola Cups last in the freezer?

Frozen Yogurt Granola Cups can last in the freezer for about 2 to 3 months. For the best taste, eat them within this time frame. The cups may lose some texture after this period. Always store them in an airtight container to keep them fresh.

Can I customize the ingredients?

Yes, you can customize these cups easily. Use your favorite yogurt flavor to start. You can swap out granola for nuts or seeds. If you prefer, add different fruits like bananas or peaches. You can even change the sweetener to fit your taste.

What are the health benefits of this recipe?

These cups are packed with good nutrition. Each serving has protein from Greek yogurt. This helps you feel full longer. The granola offers fiber, which is great for digestion. The mixed berries add vitamins and antioxidants to your snack. With these cups, you enjoy a healthy treat without guilt.

Can I make these ahead of time?

Yes, you can make these cups ahead of time. They are perfect for meal prep. Just assemble and freeze them for later. This way, you always have a tasty snack on hand. You can make them for parties or quick treats.

To wrap up, this blog post shows how to make delicious Frozen Yogurt Granola Cups. You need Greek yogurt, granola, berries, and a few more ingredients. Follow the simple steps to prepare, layer, and freeze them for a tasty treat.

These cups are perfect for snacks or parties, and you can customize them to suit your taste. Remember to store them correctly and enjoy their health benefits. Now, grab your ingredients and start crafting these cool delights today!

To create your Frozen Yogurt Granola Cups, gather the following simple ingredients: - 2 cups Greek yogurt (plain or flavored) - 1 cup granola (preferably complementary flavor) - 1 cup mixed berries (strawberries, blueberries, raspberries) - 2 tablespoons honey or maple syrup - 1 teaspoon vanilla extract - 1/4 cup chopped nuts (almonds, walnuts, pecans) - Fresh mint leaves for garnish (optional) Using Greek yogurt gives the cups a creamy texture and a protein boost. Choose a granola that you enjoy, as it adds crunch and flavor. Mixed berries bring natural sweetness and color. Honey or maple syrup adds sweetness, while vanilla extract enhances the taste. Chopped nuts add an extra crunch. If you like, you can top your cups with fresh mint for a nice touch. This recipe is versatile, allowing you to tailor it to your taste. For the full recipe, check out the detailed instructions. - Combine Greek yogurt, honey, and vanilla in a bowl. - Whisk until smooth and creamy. To start, grab a medium mixing bowl. Add 2 cups of Greek yogurt, 2 tablespoons of honey, and 1 teaspoon of vanilla extract. Whisk these ingredients together until they blend into a creamy mix. This step is key. A smooth base helps to create a lovely texture later on. - Line the muffin tin with cupcake liners. - Layer yogurt, granola, berries, and yogurt again. Next, take a standard muffin tin and line each cup with cupcake liners. This makes it easier to take the cups out after freezing. Now, scoop about 1 tablespoon of the yogurt mix into each cup. Spread it evenly using the back of your spoon. Now comes the fun part! Sprinkle 1 tablespoon of granola over the yogurt. Press it down gently so it sticks. Next, add a layer of mixed berries. You can use whole berries or slice them if they are large. Finally, top with another tablespoon of yogurt to cover the berries completely. - Freeze for a minimum of 4 hours. - Serve with optional garnishes. Now, carefully place the muffin tin in the freezer. Let the cups freeze for at least 4 hours or until they are solid. When ready to serve, remove the cups from the muffin tin. Peel away the cupcake liners gently. For a finishing touch, you can add fresh mint leaves on top. This adds a nice color and a hint of freshness. Enjoy your Frozen Yogurt Granola Cups as a delightful snack or dessert! You can find the Full Recipe to guide you through each step. To get that creamy texture, whisk your yogurt well. This step is key. If you skip it, your yogurt might be lumpy. Use Greek yogurt for a richer taste. It has more protein and a thicker consistency than regular yogurt. Choose plain or a favorite flavor to match your style. You can add fun flavors to your yogurt. Try mixing in fresh fruit or a splash of juice. A little honey or maple syrup can sweeten it up. For granola, pick one with nuts or dried fruit. This choice adds great taste and texture to your cups. Make your cups look great on a platter. Arrange them neatly in rows. For a fun touch, drizzle honey on top or sprinkle more berries. Fresh mint leaves make a nice garnish too. They add color and a fresh scent. Enjoy serving this healthy snack at parties or family gatherings! {{image_4}} You can have fun mixing yogurt flavors. Try strawberry, vanilla, or chocolate for a twist. Each flavor brings a new taste to the cups. The granola you choose also matters. Sweet granola pairs well with fruit flavors. Nutty granola adds depth to plain yogurt. Experiment with different flavors to find your favorite combo. If you're dairy-free, use coconut yogurt or almond yogurt instead of Greek yogurt. These options taste great and still give you a creamy base. You can also swap out sweeteners. Use agave syrup or stevia instead of honey or maple syrup. This change can lower the sugar content while keeping the sweetness. Adding seasonal fruits can make your cups even more special. In summer, mix in peaches or mangoes for a tropical vibe. In fall, try diced apples or pears for a cozy feel. You can also add spices like cinnamon or nutmeg. These spices enhance the flavor and add warmth to the cups. With these variations, every batch can be unique and delightful. You can store Frozen Yogurt Granola Cups in the freezer for up to three months. To keep them fresh, wrap each cup in plastic wrap or place them in an airtight container. This helps avoid freezer burn, which can ruin the taste. Always label your container with the date, so you know when to use them. Before serving, take the cups out of the freezer. Let them sit at room temperature for about 10 to 15 minutes. This allows them to soften a bit, making them easier to eat. If you prefer, you can also place them in the fridge for a few hours. After thawing, keep any leftovers in the refrigerator. They should stay fresh for up to two days. Don't let leftover ingredients go to waste! You can use any remaining yogurt in smoothies for a creamy texture. Mix in fruits or greens for a healthy drink. If you have extra granola, sprinkle it on oatmeal or yogurt for a crunchy touch. You can also layer leftovers in parfaits with fruits and nuts for a tasty treat. Frozen Yogurt Granola Cups can last in the freezer for about 2 to 3 months. For the best taste, eat them within this time frame. The cups may lose some texture after this period. Always store them in an airtight container to keep them fresh. Yes, you can customize these cups easily. Use your favorite yogurt flavor to start. You can swap out granola for nuts or seeds. If you prefer, add different fruits like bananas or peaches. You can even change the sweetener to fit your taste. These cups are packed with good nutrition. Each serving has protein from Greek yogurt. This helps you feel full longer. The granola offers fiber, which is great for digestion. The mixed berries add vitamins and antioxidants to your snack. With these cups, you enjoy a healthy treat without guilt. Yes, you can make these cups ahead of time. They are perfect for meal prep. Just assemble and freeze them for later. This way, you always have a tasty snack on hand. You can make them for parties or quick treats. To wrap up, this blog post shows how to make delicious Frozen Yogurt Granola Cups. You need Greek yogurt, granola, berries, and a few more ingredients. Follow the simple steps to prepare, layer, and freeze them for a tasty treat. These cups are perfect for snacks or parties, and you can customize them to suit your taste. Remember to store them correctly and enjoy their health benefits. Now, grab your ingredients and start crafting these cool delights today!

Frozen Yogurt Granola Cups

Indulge in a delightful and healthy treat with these Frozen Yogurt Granola Cups! Perfect for summer snacking or a quick breakfast, they are easy to make with just Greek yogurt, granola, and your favorite berries. Layered with crunchy nuts and sweetened to perfection, these cups are not only delicious but also packed with nutrients. Click through to discover the full recipe and elevate your snack game today!

Ingredients
  

2 cups Greek yogurt (choose either plain or your favorite flavored variety)

1 cup granola (select a flavor that complements your yogurt)

1 cup mixed berries (such as strawberries, blueberries, and raspberries)

2 tablespoons honey or maple syrup (to sweeten)

1 teaspoon vanilla extract (for added flavor)

1/4 cup chopped nuts (options include almonds, walnuts, or pecans)

Fresh mint leaves for garnish (optional, for a fresh touch)

Instructions
 

Combine the Base: In a medium mixing bowl, add the Greek yogurt, honey (or maple syrup), and vanilla extract. Use a whisk or spatula to stir the ingredients together until the mixture is smooth and creamy.

    Prepare the Muffin Tin: Take a standard muffin tin and line each cup with cupcake liners to facilitate easy removal after freezing.

      Layer the Yogurt: Spoon approximately 1 tablespoon of the yogurt mixture into the bottom of each cupcake liner. Use the back of the spoon to spread it evenly across the base.

        Add the Granola Layer: Sprinkle about 1 tablespoon of granola over the yogurt layer in each cup. Lightly press down on the granola to ensure that it adheres well to the yogurt.

          Incorporate the Berries: Add a layer of mixed berries on top of the granola in each cup. You can use whole berries or slice larger strawberries for smaller pieces, depending on your preference.

            Top with Yogurt Again: Spoon another tablespoon of the yogurt mixture over the berries in each cup to completely cover them.

              Finish with Nuts: Evenly distribute the chopped nuts over the top of the yogurt layer in each cup for an extra crunch and flavorful texture.

                Freeze the Cups: Once all the cups are assembled, carefully place the muffin tin in the freezer. Allow the cups to freeze for at least 4 hours, or until they are completely firm.

                  Serve and Enjoy: To serve, gently remove the cups from the muffin tin and peel away the cupcake liners. If desired, garnish each cup with fresh mint leaves for a refreshing finish.

                    - Prep Time: 15 minutes

                      - Total Time: 4 hours 15 minutes

                        - Servings: 12

                          - Presentation Tips: Arrange the cups on a platter, and consider drizzling a little extra honey or a sprinkle of additional berries over the top for an appealing presentation. Enjoy this delightful treat on a warm day!

                            Leave a Comment

                            Recipe Rating