Are you ready to impress your family and friends with a dessert that’s easy and oh-so-delicious? This Decadent Chocolate Lava Cake brings a rich, molten center that will have everyone swooning. In just a few simple steps, you can create a treat that’s perfect for any occasion. Let’s dive into the ingredients and get started on making this irresistible dessert right in your kitchen!
Ingredients
To make a chocolate lava cake, you need a few simple ingredients. Here is the list:
– 1 cup semi-sweet chocolate chips
– ½ cup unsalted butter
– 2 large eggs
– 2 large egg yolks
– ½ cup granulated sugar
– 1 teaspoon pure vanilla extract
– ¼ cup all-purpose flour
– A pinch of salt
– Cocoa powder for dusting
– Optional toppings
Each ingredient plays a key role. The semi-sweet chocolate chips give the cake its rich flavor. The butter keeps it moist and adds a silky texture. The eggs and yolks help the cake rise and create that gooey center.
When you mix the sugar and vanilla, it adds sweetness and aroma. The flour is crucial for structure, while the salt enhances all the flavors. Dusting the ramekins with cocoa powder prevents sticking and adds a touch of chocolate.
Optional toppings like vanilla ice cream or whipped cream can enhance your dessert. They provide a cool contrast to the warm, molten cake.
Step-by-Step Instructions
Preheat and Prepare Ramekins
Start by preheating your oven to 425°F (220°C). I like to use four ramekins for this recipe. First, coat the insides with a thin layer of butter. This helps the cake slide out easily. Next, lightly dust each ramekin with cocoa powder. This step adds flavor and prevents sticking.
Melting the Chocolate and Butter
For the melting part, grab a microwave-safe bowl. Add 1 cup of semi-sweet chocolate chips and ½ cup of unsalted butter. Microwave the mix in 30-second bursts. Stir after each round until smooth. Be careful, as the bowl can get hot. Let it cool a bit before using.
Mixing the Batter
In a separate bowl, whisk together two large eggs, two large egg yolks, and ½ cup of granulated sugar. Keep mixing until it’s light and fluffy. Add 1 teaspoon of pure vanilla extract and mix well. Now, pour in the warm chocolate mix, whisking as you go. This helps create a smooth batter.
Next, sift in ¼ cup of all-purpose flour and a pinch of salt. Use a spatula to fold it all together. Be gentle! Over-mixing can change the texture of your cake.
Baking the Cake
Evenly divide the batter among the prepared ramekins, filling them about ¾ full. This gives the cakes room to rise. Place the ramekins on a baking sheet to catch spills. Bake them for 12–14 minutes. You should see set edges but a jiggly center. That’s the sweet spot!
Serving the Dessert
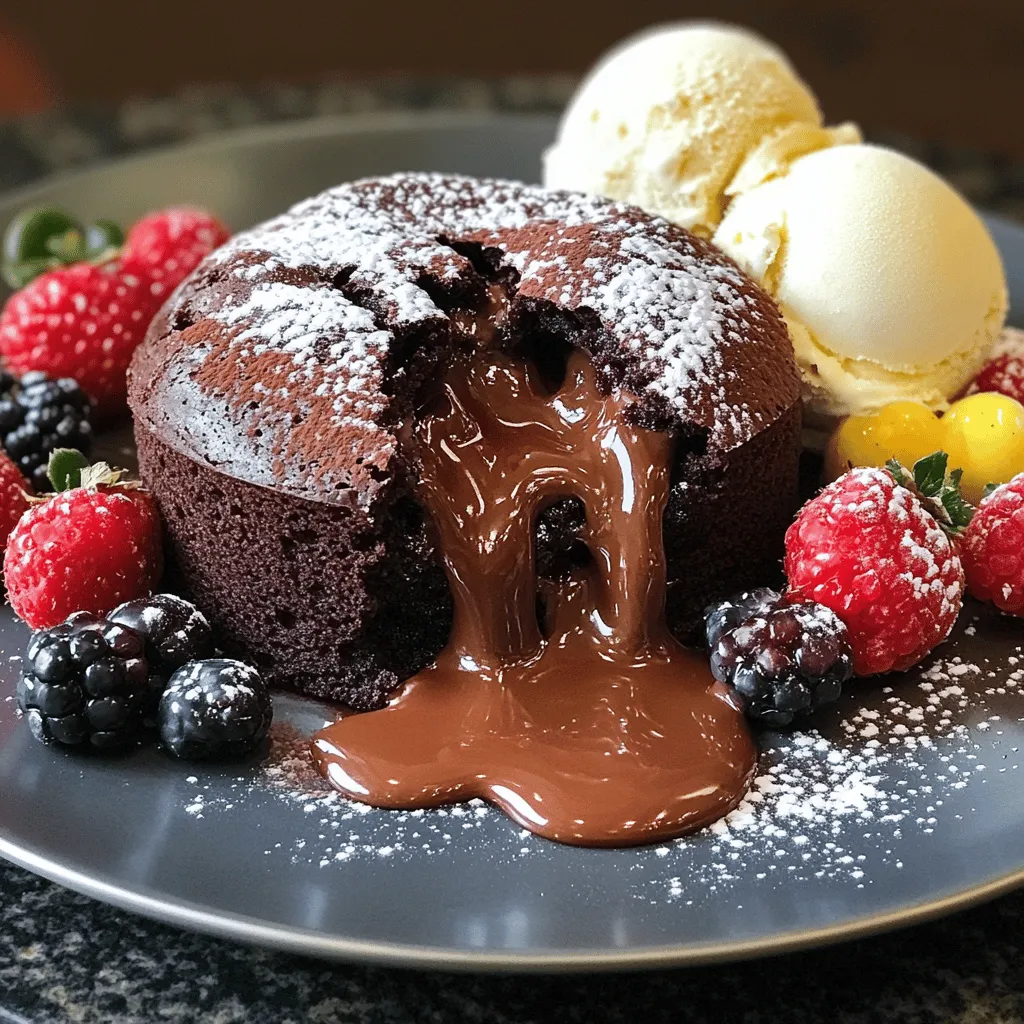
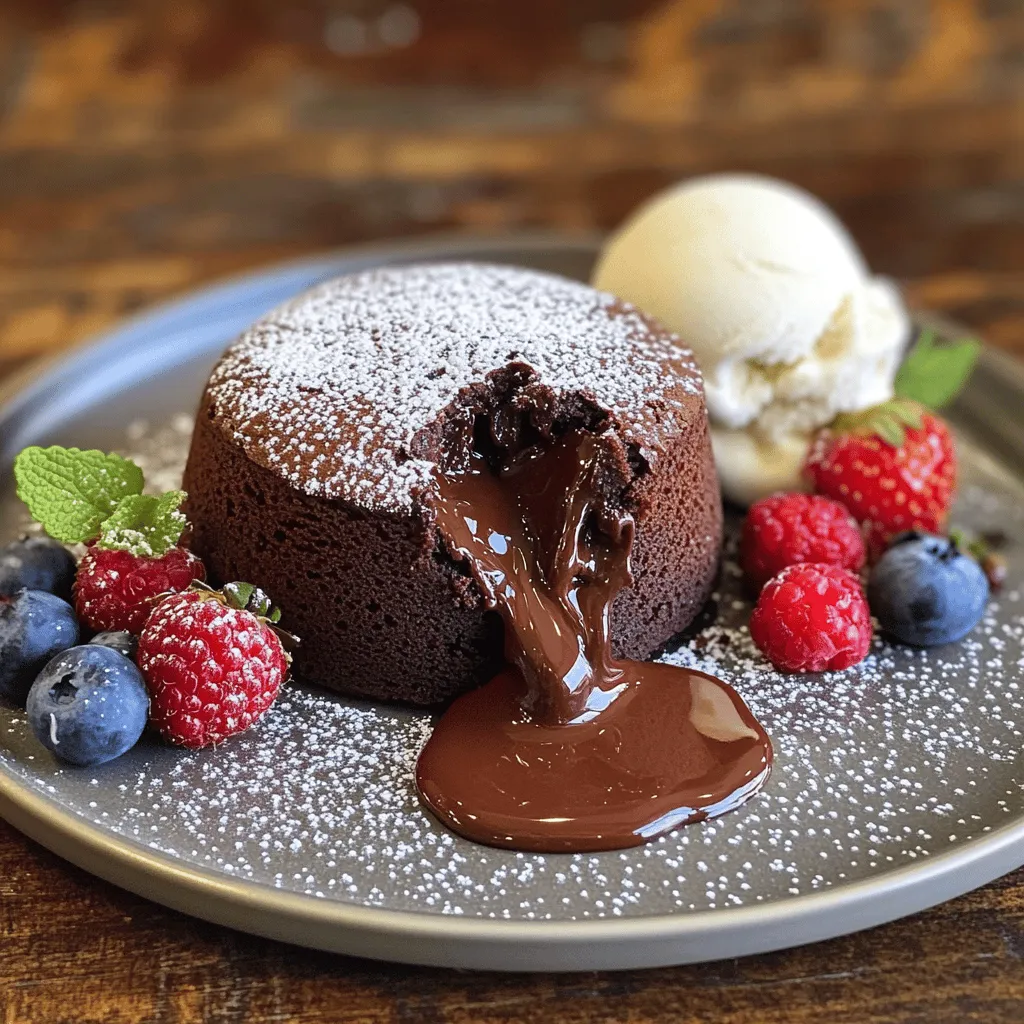
After baking, take the ramekins out and cool them for about 1 minute. Use a knife to run along the edges. This helps loosen the cake. Now, flip each ramekin onto a plate. Lift it off gently to reveal that gooey, molten center! Serve right away for the best experience. You can add a scoop of vanilla ice cream or a dollop of whipped cream for extra delight.
Tips & Tricks
Achieving the Perfect Molten Center
To get the perfect molten center, timing is key. Bake your cakes for 12 to 14 minutes. Check after 12 minutes. The edges should be firm, while the center jiggles. If you bake too long, the center will cook through. Each oven is different, so watch closely. Use an oven thermometer to ensure your oven is at the right temp.
What to Avoid
Avoid over-mixing your batter. This makes the cake dense and tough. Gently fold in the flour. Another mistake is not preparing the ramekins well. If you skip the butter and cocoa powder, your cakes can stick. Also, do not open the oven door while baking. This can lower the temperature and ruin the cake.
Presentation Tips
For a stunning finish, dust your cakes with powdered sugar. Add fresh berries on the side for color. A sprig of mint also adds a nice touch. Serve your cakes warm with a scoop of vanilla ice cream or whipped cream. This makes for a beautiful and delicious dessert. Want the full details?
Variations
Flavor Variations
You can make your chocolate lava cake even better with a few simple tweaks. Try adding orange zest for a bright taste. A hint of peppermint oil gives it a fresh twist. You can also mix in espresso powder. It enhances the chocolate flavor and adds depth.
Dietary Modifications
If you need a gluten-free option, use a gluten-free flour blend. This works well and keeps the cake soft. For a dairy-free version, swap butter for coconut oil and use dairy-free chocolate. Both options give you a rich flavor without the dairy.
Alternative Serving Suggestions
Serve your lava cake with a drizzle of warm chocolate sauce. It adds extra richness. You can also pair it with different ice cream flavors. Vanilla is classic, but try mint or coffee for something new. Explore toppings like fresh berries or nuts for added crunch.
Storage Info
Storing Leftovers
To keep your chocolate lava cake fresh, store leftovers in the fridge. Place each cooled ramekin in an airtight container. This helps maintain the cake’s texture. You can store it for up to 2 days. If you want to keep it longer, freeze the cake. Wrap each ramekin tightly in plastic wrap and then foil. This way, it stays fresh for up to 3 months.
Reheating Instructions
To enjoy your chocolate lava cake again, you’ll want to reheat it properly. The best method is to use the oven. Preheat your oven to 350°F (175°C). Remove the ramekin from the fridge or freezer. Cover it with foil to keep the heat in. Bake for about 10-12 minutes if it’s cold. If frozen, it may take 15-20 minutes. Check if the center is warm and gooey. Enjoy it with a scoop of ice cream for the best experience!
FAQs
Can I make chocolate lava cake in advance?
Yes, you can prepare the batter ahead of time. Store it in the fridge for up to 24 hours. Just remember to bring it to room temperature before baking. You can also bake the cakes in advance. Let them cool, then cover and store them in the fridge. When ready to serve, reheat them in the oven for a few minutes.
What can I do if my lava cake didn’t ooze?
If your cake did not ooze, it likely baked too long. The center needs to stay soft. Next time, reduce the baking time by one or two minutes. Check the cakes at the 10-minute mark. Also, ensure you used the correct oven temperature. An oven thermometer can help with this.
How do I know when the cake is done?
Look for firm edges and a soft center. The top should look set, but the middle should still jiggle slightly. If the edges are firm, that’s a good sign. You want the center to remain gooey for the perfect lava effect. Practice makes perfect, so don’t worry if it takes a few tries!
Can I use different types of chocolate?
Yes, you can use dark or milk chocolate. Each type gives a unique flavor. Dark chocolate will make the cake richer and less sweet. Milk chocolate offers a sweeter taste. Feel free to mix in flavored chocolates, like orange or mint. These changes can create fun new flavors. Enjoy experimenting with what you like best!
You now know how to make a perfect chocolate lava cake from scratch. We discussed the key ingredients, step-by-step instructions, and tips to achieve that gooey center. I also shared variations and storage tips, so you can enjoy this treat anytime. With simple tweaks, you can make it your own, whether you prefer a different flavor or have dietary needs. The joy of baking brings everyone together, so have fun with it! Enjoy every bite of your delicious creation.