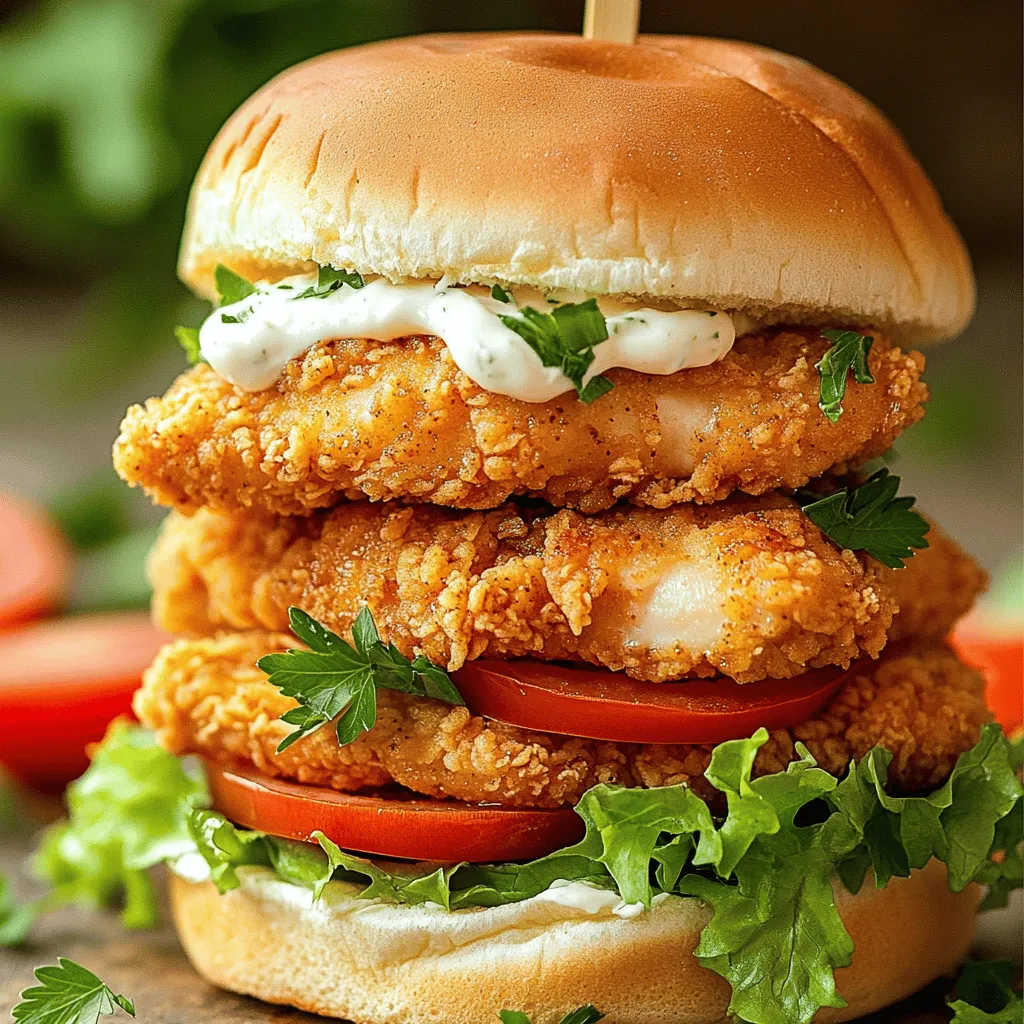
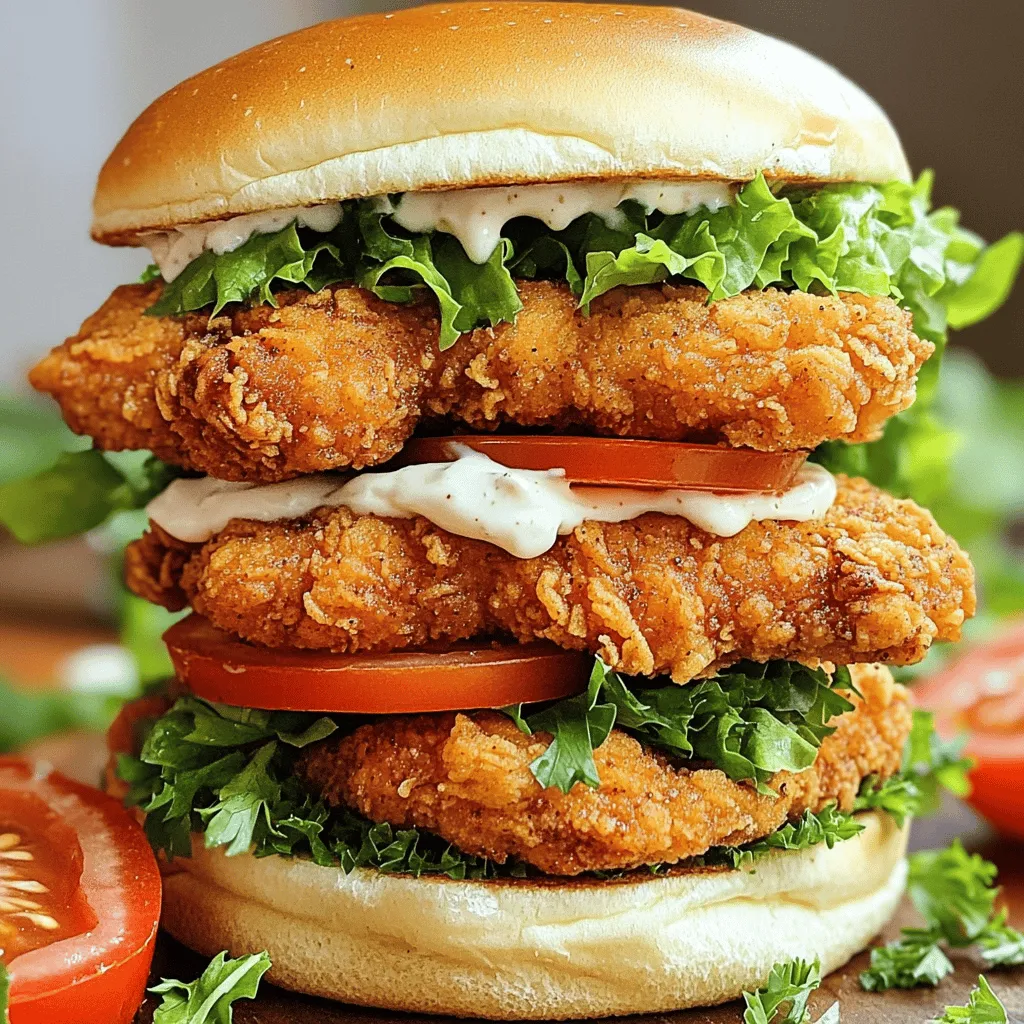
Are you ready to take your lunch game to the next level? This Crispy Garlic Chicken Sandwich is not only easy to make, but it’s also packed with bold flavors that will satisfy your taste buds. In this guide, I’ll walk you through each step—from gathering the best ingredients to mastering the perfect crunch. Get ready to impress your family or friends with a meal that’s sure to be a hit!
Ingredients
Main Ingredients for Crispy Garlic Chicken Sandwich
– 2 boneless, skinless chicken breasts
– 1 cup buttermilk
– 3 cloves garlic, minced
– 1 cup all-purpose flour
– 1 teaspoon paprika
– 1 teaspoon onion powder
– ½ teaspoon salt
– ½ teaspoon black pepper
– ½ teaspoon cayenne pepper (optional)
– 1 cup panko breadcrumbs
– Vegetable oil (for frying)
– 4 fresh hamburger buns
– Crisp lettuce leaves
– Juicy tomato slices
– Mayonnaise or garlic aioli for spreading
– Fresh parsley, chopped for garnish
These ingredients create a tasty garlic chicken sandwich. The chicken soaks in the buttermilk and garlic mix. This makes it juicy and flavorful.
Essential Cooking Tools
You’ll need a few tools for this recipe. Here’s what you should have:
– A medium-sized mixing bowl
– Two shallow bowls for breading
– A deep skillet or frying pan
– A meat thermometer
– Paper towels for draining
Having these tools ready helps you make the sandwich easily. You can cook the chicken evenly and check for doneness.
Optional Add-Ins and Toppings
Feel free to get creative with your sandwich. Here are some fun add-ins and toppings:
– Sliced pickles for a tangy crunch
– Avocado for creaminess
– Spicy mustard for a kick
– Coleslaw for extra texture
These options add unique flavors to your crispy garlic chicken sandwich. Mix and match to find your favorite combination.
Step-by-Step Instructions
Marinating the Chicken
Start by making the marinade. In a medium bowl, mix the buttermilk, minced garlic, salt, and black pepper. This mix adds flavor and tenderizes the chicken. Place the chicken breasts in the bowl. Ensure they are fully covered with the marinade. Cover the bowl with plastic wrap and place it in the fridge. Let it sit for at least 1 hour. For the best taste, marinate overnight.
Preparing the Breading Station
While the chicken marinates, set up your breading station. You need two bowls. In the first bowl, mix the flour, paprika, onion powder, cayenne pepper, and a pinch of salt. In the second bowl, add the panko breadcrumbs. This setup helps you coat the chicken easily.
Coating and Frying the Chicken
After marinating, take the chicken out of the fridge. Let the excess marinade drip off. First, dredge each chicken breast in the flour mix. Shake off any extra flour. Then, dip the chicken into the panko breadcrumbs. Press down firmly so the crumbs stick well. For frying, heat vegetable oil in a skillet to about 350°F (175°C). Carefully add the chicken and cook for about 5-7 minutes per side. The chicken should be golden brown and reach an internal temperature of 165°F (75°C). When done, place the chicken on a plate lined with paper towels to drain extra oil.
Assembling the Sandwich
Now it’s time to build your sandwich. Lightly toast the hamburger buns until they are golden. On each bottom bun, spread a generous layer of mayonnaise or garlic aioli. Place a crispy chicken breast on top. Add a layer of crisp lettuce and a few slices of juicy tomato. Finish by placing the top half of the bun over the fillings. Enjoy your delicious creation!
Tips & Tricks
Achieving the Perfect Crunch
To get that crunchy bite, use panko breadcrumbs. They give a lighter, crispier texture than regular breadcrumbs. Make sure to press the crumbs onto the chicken well. This step helps them stick during frying. For extra crunch, fry the chicken at the right temperature. Aim for about 350°F (175°C). If the oil is too cool, the chicken will soak up grease. Too hot, and the outside burns before the inside cooks.
Substitutions for Dietary Needs
You can easily adjust this recipe for different diets. For gluten-free options, replace all-purpose flour and panko with gluten-free versions. Use almond milk or coconut milk instead of buttermilk for a dairy-free option. If you’re cutting down on fat, bake the chicken instead of frying. Just coat the chicken in breadcrumbs and bake at 400°F (200°C) for about 20 minutes.
Serving Suggestions for the Perfect Meal
This crispy garlic chicken sandwich shines with fresh toppings. Serve it on toasted buns with crisp lettuce and juicy tomato slices. Add garlic aioli or mayo for extra flavor. You can pair it with sides like fries or a fresh salad. For a fun twist, try adding pickles or avocado slices. These toppings enhance the taste and make each bite exciting. Enjoy every flavorful bite!
Variations
Spicy Garlic Chicken Sandwich
You can add heat to your crispy garlic chicken sandwich easily. Just mix in cayenne pepper with the breading. You might also try a spicy sauce. A dash of hot sauce mixed with mayo can do the trick. This adds a kick that many enjoy. If you love heat, feel free to add more cayenne. Adjust it to your taste!
Vegetarian Alternative
You can swap the chicken for a veggie option. A crispy portobello mushroom works well. Just follow the same steps as you would for the chicken. Marinate the mushroom in the buttermilk, then bread it. Fry it until golden brown. You can also use a store-bought veggie patty. Just ensure it’s crispy to match the sandwich’s texture.
Adjusting Seasoning Flavors
If you want to change the flavors, play with the spices. Use garlic powder if you want a stronger garlic taste. You can also add herbs like thyme or rosemary for a fresh twist. If a sweeter flavor is your goal, try adding a touch of brown sugar to the breading mix. This balances well with the savory notes of the chicken. Experiment until you find your favorite mix!
Storage Info
How to Store Leftover Sandwiches
To store any leftover crispy garlic chicken sandwiches, wrap each sandwich tightly in plastic wrap. This keeps them fresh and prevents them from drying out. Place the wrapped sandwiches in an airtight container or a resealable bag. Store them in the fridge for up to three days. If you want to keep them longer, consider freezing them.
Reheating Instructions
When you’re ready to enjoy your leftover sandwiches, take them out of the fridge. I recommend reheating them in an oven for the best results. Preheat your oven to 350°F (175°C). Unwrap the sandwiches and place them on a baking sheet. Heat them for about 10-12 minutes. This will make the chicken crispy again. You can also use a microwave, but this may make the bread soggy. Heat them for 30 seconds to 1 minute, checking often.
Freezing Options for Chicken
If you want to freeze the chicken, first, let it cool completely. Then, wrap each piece in plastic wrap and place it in a freezer bag. Make sure to remove as much air as possible. You can freeze the chicken for up to three months. When you’re ready to eat, thaw the chicken overnight in the fridge. Reheat it as mentioned above for that crispiness you love. This way, you can enjoy a delicious crispy garlic chicken sandwich anytime!
FAQs
How can I make my chicken extra crispy?
To make your chicken extra crispy, use panko breadcrumbs. They add a great crunch. You can also double-coat the chicken. First, dip it in flour, then in buttermilk, and back in flour before coating with panko. This gives a thicker, crunchier crust. Let the coated chicken rest for a few minutes before frying. This helps the coating stick better.
What sides pair well with a crispy garlic chicken sandwich?
Many sides work great with this sandwich. Here are a few ideas:
– Golden fries
– Sweet potato fries
– Coleslaw
– Fresh garden salad
– Pickles
Each side adds a nice touch to your meal.
Can I make this recipe in an air fryer?
Yes, you can make this recipe in an air fryer! Preheat your air fryer to 400°F (200°C). Spray the basket lightly with oil. Place the breaded chicken in a single layer. Cook for about 12-15 minutes, flipping halfway through. Check the chicken reaches 165°F (75°C) to ensure it’s safe to eat.
What are the best sauces to use with the sandwich?
Sauces can add great flavor to your sandwich. Here are some tasty options:
– Classic mayonnaise
– Garlic aioli
– Spicy sriracha mayo
– Honey mustard
– BBQ sauce
You can mix and match, or even add a special sauce of your own!
This blog post covered how to make a crispy garlic chicken sandwich. You learned about key ingredients, tools, and optional toppings. I guided you through each step, from marinating to frying. You also discovered tips for the perfect crunch and variations for different tastes.
In the end, creating this sandwich is both fun and rewarding. Enjoy it fresh or store it for later. With these tips and tricks, you can impress your family and friends with your cooking skills.