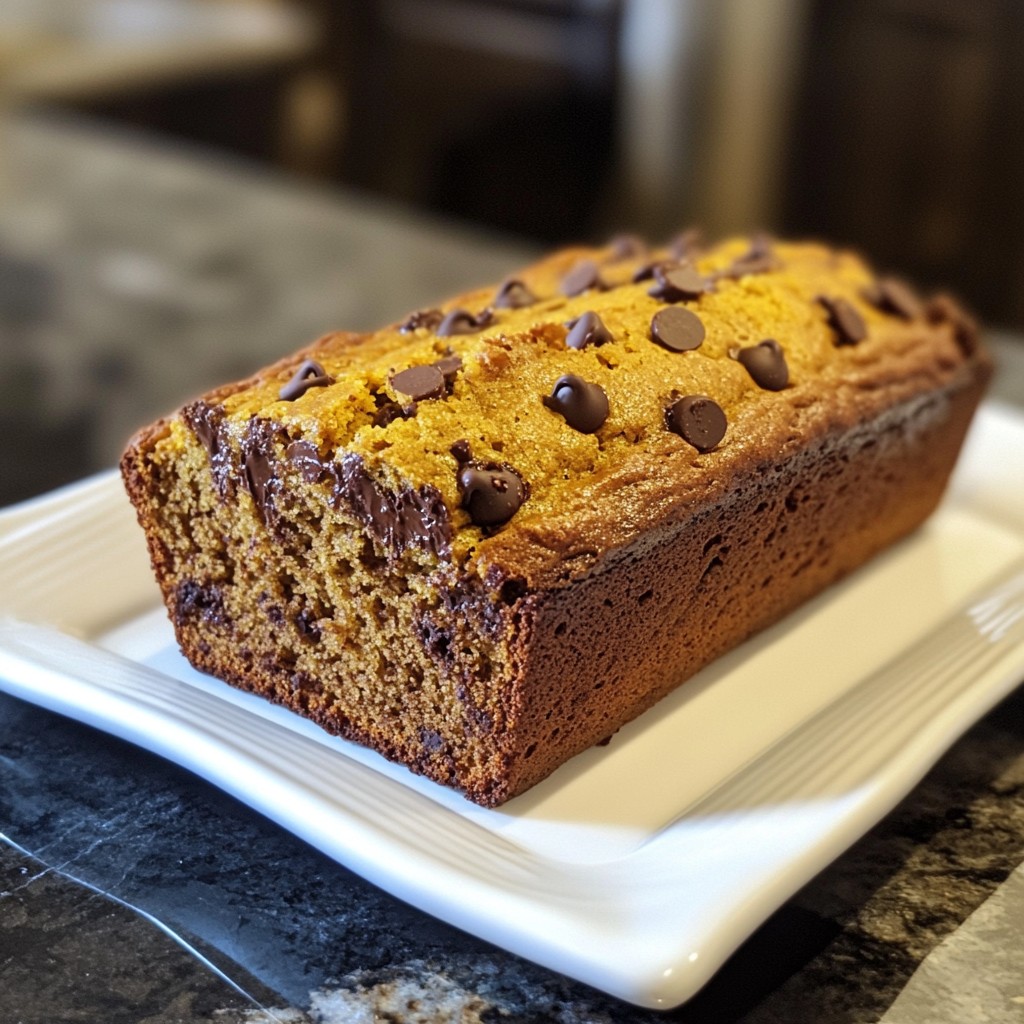
Fall is the perfect season for baking, and nothing says cozy like Chocolate Chip Pumpkin Bread. This recipe promises a deliciously moist treat that will warm your heart and home. With easy-to-find ingredients and simple steps, you'll impress family and friends in no time. Whether you’re a baking novice or a pro, this guide gives you all the tips to make the best pumpkin bread ever. Let’s get started!
Why I Love This Recipe
- Perfect Fall Flavor: This bread beautifully combines the rich taste of pumpkin with warm spices, making it a cozy treat for autumn.
- Chocolatey Delight: The addition of chocolate chips creates a delicious contrast to the spiced pumpkin, satisfying any sweet tooth.
- Easy to Make: This recipe is straightforward and quick, perfect for both novice bakers and seasoned chefs looking for a simple yet tasty option.
- Versatile Serving Options: Enjoy it plain, with cream cheese, or a sprinkle of cinnamon for added flavor – it’s great for breakfast or dessert!
Ingredients
Main Ingredients
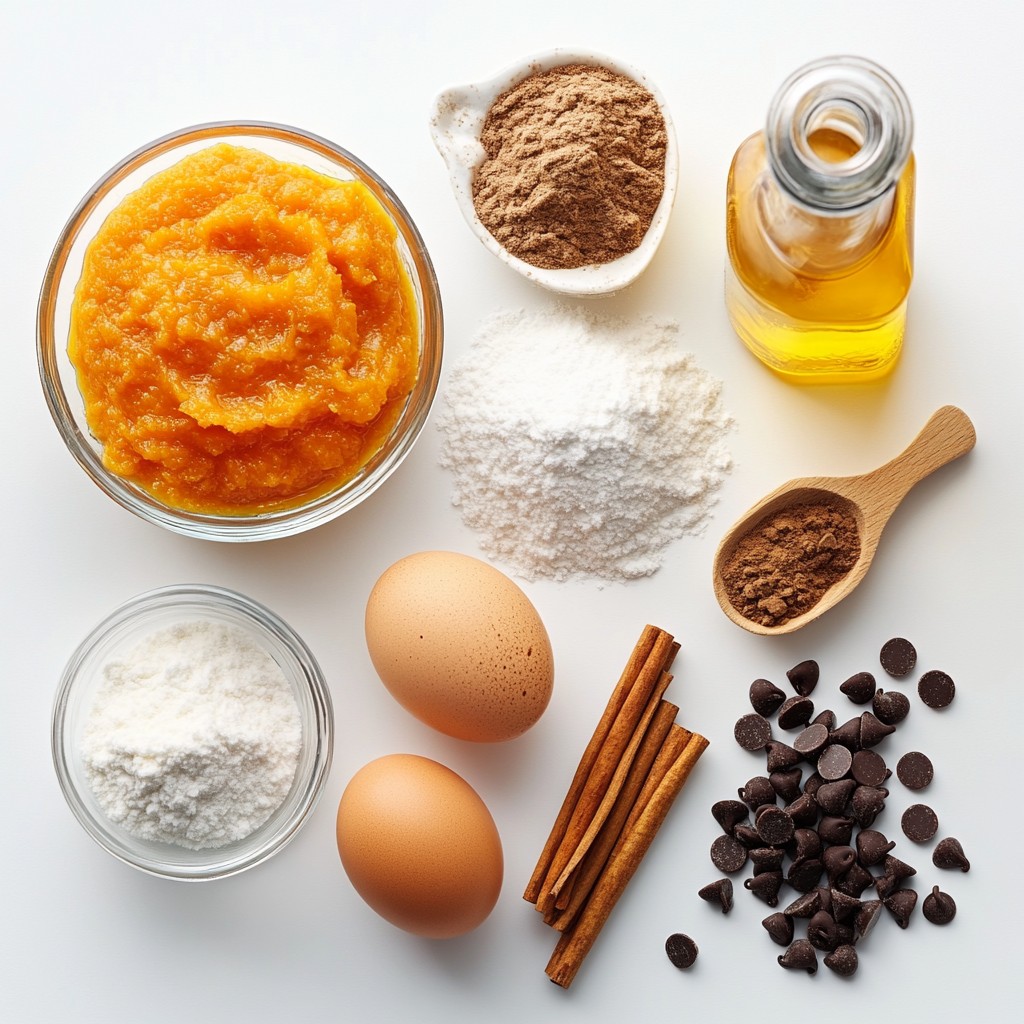
- Pumpkin puree: You can use canned pumpkin puree or make it fresh. Canned is easy and quick. Fresh pumpkin gives a more vibrant flavor. If using fresh, roast the pumpkin first for a deep taste.
- Types of sugars: This recipe uses granulated sugar and brown sugar. Granulated sugar adds sweetness. Brown sugar gives a nice, rich flavor. The mix makes the bread sweet and moist.
Baking Essentials
- All-purpose flour, baking soda, and baking powder: All-purpose flour forms the base of the bread. Baking soda helps it rise. Baking powder adds extra lift for a soft texture.
- Spices: Ground cinnamon, nutmeg, and ginger create warmth. Cinnamon gives a classic fall taste. Nutmeg adds depth, and ginger brings a hint of spice. Together, they make the bread aromatic and delicious.
Optional Add-ins
- Types of chocolate chips: You can choose semi-sweet or dark chocolate chips. Semi-sweet chips melt smoothly and are sweet. Dark chocolate offers a richer taste. Both options create a delightful contrast with the pumpkin flavor.
Step-by-Step Instructions
Preparing the Oven and Pan
First, set your oven to preheat at 350°F (175°C). This step warms your oven for even baking. While it heats, grab a 9x5 inch loaf pan. Grease it well or line it with parchment paper. This will help your bread slide out easily later.
Mixing Wet Ingredients
In a large bowl, add 1 cup of pumpkin puree. You can use canned or fresh pumpkin. Next, mix in 1/2 cup of granulated sugar and 1/2 cup of brown sugar. Then, pour in 1/2 cup of vegetable oil. Whisk these together until they are smooth and blended. Now, add in 2 large eggs one at a time. Make sure to mix well after each egg. Finally, add 1 teaspoon of vanilla extract and stir until it's all combined.
Combining Dry Ingredients
In another bowl, sift together 1 1/2 cups of all-purpose flour, 1 teaspoon of baking soda, and 1/2 teaspoon of baking powder. Also, add 1/2 teaspoon of salt, 1 teaspoon of ground cinnamon, 1/2 teaspoon of ground nutmeg, and 1/4 teaspoon of ground ginger. Sifting helps mix these dry ingredients evenly and ensures there are no lumps.
Combining Mixtures
Now, gradually add the dry ingredients to the wet mixture. Stir gently until just combined. Be careful not to overmix. Overmixing can make the bread tough. After that, fold in 1/2 cup of chocolate chips. Make sure they spread throughout the batter evenly.
Baking Process
Pour the batter into your prepared loaf pan. Smooth the top for even baking. Place the pan in the preheated oven. Bake for 60 to 70 minutes. To check if it is done, insert a toothpick into the center. If it comes out clean, your bread is ready. If the top browns too fast, cover it with aluminum foil halfway through. After baking, let the bread cool in the pan for about 10 minutes. Then, transfer it to a wire rack to cool completely before slicing.
Tips & Tricks
Perfecting the Texture
Avoid overmixing your batter. This step is key to soft bread. When you mix too much, the bread can turn out tough. Mix just until you see the dry flour disappear. You want to keep it light and airy. Fold in the chocolate chips gently. This helps keep the texture perfect.
Baking Time Adjustments
Knowing when your bread is done is crucial. Start checking at 60 minutes. Insert a toothpick into the center. If it comes out clean, your bread is ready. If the top starts to brown too much, cover it with foil. This will help cook the inside without burning the top.
Enhancing Flavor
Want to boost the taste? Adjust the spices! Add more cinnamon for warmth. You can also add chopped nuts for crunch. Different chocolate types can change the flavor too. Use dark chocolate for a richer taste. Semi-sweet chocolate gives a balanced sweetness. Experiment to find what you love!
Pro Tips
- Use Fresh Pumpkin: If using fresh pumpkin, roast it until tender before pureeing for a richer flavor.
- Storage Tips: Store leftover pumpkin bread in an airtight container to keep it moist for up to a week.
- Variations: Add nuts like walnuts or pecans for additional texture and flavor contrast.
- Check for Doneness: To ensure the bread is fully cooked, insert a toothpick into the center; it should come out clean.
Variations
Healthier Substitutions
You can make chocolate chip pumpkin bread healthier. One option is to use whole wheat flour instead of all-purpose flour. Whole wheat flour adds fiber and nutrients. It gives a nice, nutty flavor too. You can also swap vegetable oil for coconut oil. Coconut oil adds a hint of sweetness and richness.
Flavor Variations
Adding nuts or dried fruit can change the taste of your bread. Chopped walnuts or pecans add a nice crunch. They bring out the spices in the bread. Dried cranberries or raisins add sweetness and chewiness. You can mix and match these add-ins to suit your taste!
Gluten-Free Alternative
If you need a gluten-free option, it’s easy to adapt! Use a gluten-free flour blend in place of all-purpose flour. Make sure the blend has xanthan gum for structure. You can also add a bit of almond flour for added flavor. Check your chocolate chips too, as some contain gluten. You can still enjoy this delicious treat without gluten!
Storage Info
Room Temperature Storage
To keep your chocolate chip pumpkin bread fresh for a few days, store it at room temperature. Wrap it tightly in plastic wrap or place it in an airtight container. This keeps the moisture in and prevents it from drying out. Enjoy it within three to four days for the best taste.
Long-Term Storage Tips
For longer storage, freezing is your best option. First, let the bread cool completely. Then, wrap it tightly in plastic wrap. After that, place it in a freezer-safe bag. You can freeze it for up to three months. When you're ready to eat it, simply thaw it in the fridge overnight.
Best Practices for Reheating
To reheat chocolate chip pumpkin bread, preheat your oven to 350°F (175°C). Slice the bread and place the pieces on a baking sheet. Cover them with foil to keep them moist. Heat for about 10-15 minutes. This way, the bread stays soft and delicious, just like when it was fresh. Enjoy it warm, perhaps with some butter or cream cheese!
FAQs
Can I use fresh pumpkin instead of canned?
Yes, you can use fresh pumpkin. Fresh pumpkin gives a rich flavor. It also has less moisture. Canned pumpkin is easy and saves time. It is consistent in taste and texture. Use what you prefer. Fresh pumpkin needs cooking and straining. Canned pumpkin is ready to use.
How do I know when the bread is fully baked?
To check if the bread is done, use a toothpick. Insert it in the center of the loaf. If it comes out clean, the bread is ready. If it has wet batter, bake it a little longer. Watch the top; if it browns too fast, cover with foil. This helps it bake evenly.
What can I serve with chocolate chip pumpkin bread?
Chocolate chip pumpkin bread pairs well with many spreads. Cream cheese adds a nice tang. Butter gives a rich flavor. You can also try honey or maple syrup. Slices go well with coffee or tea. You can serve it warm or at room temperature.
In this blog post, we explored how to make chocolate chip pumpkin bread. We covered key ingredients like pumpkin puree and sugars, along with baking essentials. You learned step-by-step instructions from preparing your oven to monitoring baking times. Tips helped you perfect texture, adjust baking time, and enhance flavor. Variations showed options for healthier substitutes and gluten-free choices. Finally, storage tips ensured your bread stays fresh. Enjoy making this tasty treat and share it with others!