Skip to content
DisclaimerTerms Of UseGDPR PolicyCookie Policy

dailydishcraft

  • Home
  • Drinks
  • Appetizers
  • Dinner
  • Dessert
  • About
  • Contact
  • Privacy Policy
DisclaimerTerms Of UseGDPR PolicyCookie Policy

Jessica

The Everything Bagel Cheese Ball is a fun snack. It blends rich cream cheese with sharp cheddar. This snack is easy to make and great for gatherings. You can prepare it in just 15 minutes. Then, chill it for an hour before serving. - 16 oz cream cheese, softened to room temperature - 1 cup shredded sharp cheddar cheese - 1/2 cup finely chopped green onions (scallions) - 1/2 cup finely chopped fresh dill - 2 tablespoons sour cream - 1 tablespoon garlic powder - 1 tablespoon onion powder - 2 teaspoons sea salt - 1/4 cup everything bagel seasoning - An assortment of fresh vegetables (such as carrots, cucumber, and bell peppers) and a variety of crackers for serving These ingredients blend to create a creamy, flavorful cheese ball. The cream cheese gives it a smooth base. The sharp cheddar adds a nice bite. Fresh herbs like green onions and dill add bright flavors. Everything bagel seasoning adds the perfect crunch. For the full recipe, check out the instructions that follow. Mixing Cream Cheese and Cheddar Start by placing 16 oz of softened cream cheese in a large bowl. Add 1 cup of shredded sharp cheddar cheese and 2 tablespoons of sour cream. Mix with a hand mixer or spatula until creamy and smooth. Make sure there are no lumps in the mixture. Incorporating Herbs and Seasonings Next, fold in 1/2 cup of finely chopped green onions and 1/2 cup of fresh dill. Add 1 tablespoon of garlic powder, 1 tablespoon of onion powder, and 2 teaspoons of sea salt. Stir gently to combine all the ingredients well. This step adds flavor and freshness to your cheese ball. Forming and Coating the Cheese Ball Once mixed, use your hands to shape the cheese into a ball. It doesn’t have to be perfect, so don’t stress! Roll the cheese ball in 1/4 cup of everything bagel seasoning. Make sure to coat all sides evenly. This gives your cheese ball a tasty crust. Wrap your cheese ball tightly in plastic wrap and place it in the refrigerator. Let it chill for at least 1 hour. This helps the cheese ball firm up, making it easier to serve and enjoy. When you're ready to serve, unwrap the cheese ball and place it on a nice platter. Surround it with fresh veggie sticks like carrots and cucumber, and add an assortment of crackers. This makes a great spreading station for your guests. For a festive touch, serve it on a rustic wooden board. This Everything Bagel Cheese Ball is simple, tasty, and perfect for any gathering. Enjoy every bite! For the full recipe, check out the instructions above. To make your cheese ball just right, focus on the cream cheese. Start with softened cream cheese. This helps it mix smoothly. Blend it well with the cheddar and sour cream. You want a creamy, lump-free texture. If it feels too soft, chill it for a bit. This makes forming the ball easier. The key to flavor lies in the everything bagel seasoning. Look for a mix that has sesame seeds, poppy seeds, garlic, and onion. A good blend will pack a punch. You can even make your own if you like! Just mix equal parts of each ingredient. Taste it before using. Adjust the amounts based on your preference. For a stunning display, think outside the box. Use a rustic wooden board to serve your cheese ball. Surround it with colorful veggie sticks like carrots, cucumbers, and bell peppers. Add a variety of crackers for texture. Make it look inviting! This setup not only looks great but also makes it easy for guests to grab a bite. Remember to check out the Full Recipe for all the details needed to create this tasty snack! {{image_4}} Adding Spicy Elements Want to spice things up? You can mix in some diced jalapeños or a dash of cayenne pepper. This will give your cheese ball a nice kick. Just add a little at a time to find your perfect heat level. You will love how the heat balances with the creamy cheese. Incorporating Dried Fruits or Nuts For a sweet twist, consider adding dried cranberries or chopped pecans. These ingredients bring a new texture and flavor. The nuts add crunch, while the fruits add a hint of sweetness. Stir them in gently, and enjoy this new layer of taste. Gluten-Free Options If you're serving guests with gluten sensitivities, use gluten-free crackers. You can find many tasty options in stores. Also, check your everything bagel seasoning to ensure it’s gluten-free. This way, everyone can enjoy the cheese ball without worry. Vegan Alternatives For a vegan version, swap the cream cheese with a plant-based alternative. Use vegan cheddar cheese too. You can also replace sour cream with cashew cream or silken tofu. These swaps keep the creamy texture while making it plant-based. Enjoy a delightful, guilt-free snack that everyone can share! Store any leftover cheese ball in an airtight container. This keeps it fresh and prevents drying. If you do not have a container, wrap it tightly in plastic wrap. Store it in the fridge. It will stay good for about a week. You can freeze the cheese ball for longer storage. First, wrap it tightly in plastic wrap. Then, place it in a freezer bag or container. It will last about two months in the freezer. When you want to use it, move it to the fridge for a night. Let it thaw slowly to keep the texture nice. To keep your cheese ball fresh, avoid leaving it out too long. When serving, only take out what you need. Keep the rest in the fridge. If you notice the cheese ball getting too soft, it’s best to eat it soon. Always check for any signs of spoilage before serving. Enjoy your Everything Bagel Cheese Ball as fresh as possible! You can serve the cheese ball with fresh veggies and crackers. I love using carrots, cucumbers, and bell peppers. They add crunch and color. Crackers in different shapes and sizes are also great. You can even use breadsticks for a fun twist. Guests can spread the cheese ball on these snacks. It makes a tasty combo! The cheese ball can stay fresh in the fridge for up to five days. Make sure to wrap it well in plastic wrap. This keeps it from drying out. If you see any changes in texture or smell, it’s best to toss it. Always trust your senses! Yes, you can make this cheese ball ahead of time! You can prepare it a day or two before your event. Just remember to chill it in the fridge to set. This way, when guests arrive, you can simply unwrap it and serve. It's a perfect time-saver for your gathering! For full preparation details, check the Full Recipe. This blog post covered making the perfect Everything Bagel Cheese Ball. We explored key ingredients, like cream cheese and fresh herbs. You learned step-by-step instructions for mixing and chilling. Tips helped enhance flavor and improve texture. Variations showed how to customize for different diets. Lastly, storage information kept your cheese ball fresh. Making this cheese ball is fun and rewarding. Enjoy your creation with friends or family!

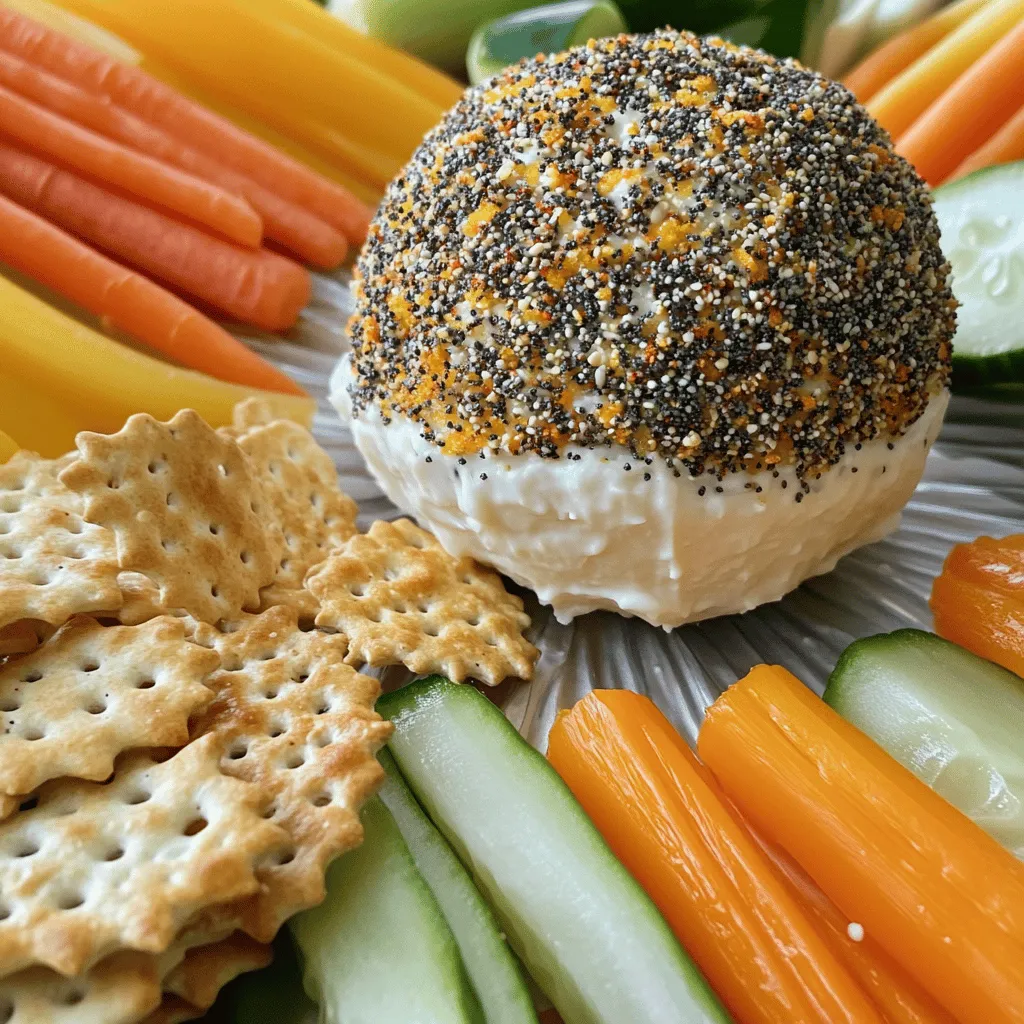
Everything Bagel Cheese Ball Tasty and Simple Snack

Looking for a quick and tasty snack? The Everything Bagel Cheese Ball is your answer! With rich cream cheese and

- 1 cup graham cracker crumbs - 1/4 cup granulated sugar - 1/2 teaspoon ground cinnamon - 1/2 cup unsalted butter, melted - 2 (14-ounce) cans sweetened condensed milk - 1/2 cup fresh key lime juice (or regular lime juice) - 1 tablespoon lime zest - 4 large egg yolks - 1 cup heavy whipping cream - 2 tablespoons powdered sugar - Lime slices, for garnish - Fresh mint leaves, for garnish For great Key Lime Pie Bars, measure accurately. Use a dry measuring cup for dry items. Level off the top with a straight edge. For liquids, use a liquid measuring cup. Pour until the liquid reaches the desired line. This will keep your bars from being too runny or too thick. Fresh ingredients make a big difference. Fresh key limes taste better than bottled juice. Always check the date on your cream for the best flavor. When choosing limes, key limes are best. They have a unique, tart taste that shines in this recipe. If you can't find them, regular limes work too. For dietary needs, you can swap sweetened condensed milk with coconut milk. You can also use a dairy-free cream option for the whipped cream. These swaps keep the flavor while fitting your needs. 1. Preheat the oven: Start by preheating your oven to 350°F (175°C). This step is key for an even bake. 2. Making the crust: In a medium bowl, mix graham cracker crumbs, granulated sugar, and ground cinnamon. Stir these ingredients well. Slowly add melted butter. The mix should feel like wet sand. Press this mixture into a greased 9x9 inch pan. Make sure the crust is even. 1. Baking the crust: Place the crust in the oven. Bake for 8-10 minutes. You want a lightly golden color. Once done, take it out and let it cool. 2. Preparing the filling: In a large bowl, whisk sweetened condensed milk, fresh key lime juice, lime zest, and egg yolks. Whisk until smooth. Make sure there are no lumps in your filling. 1. Baking the filling: Pour the filling over the cooled crust. Use a spatula to spread it evenly. Return the pan to the oven. Bake for 15-20 minutes. The filling should be set but still jiggle a bit in the center. 2. Cooling and chilling: Let the bars cool completely at room temperature. Once cool, put them in the fridge for at least 3 hours. Chilling helps the texture. Now your key lime pie bars are ready for a tasty treat! If you want to see the full recipe, check it out [here](Full Recipe). Enjoy! To make great Key Lime Pie Bars, avoid these common mistakes: - Overmixing the filling: Whisk just until smooth. Too much mixing adds air and can make the bars puffy. - Not cooling the crust: A hot crust can lead to a soggy bottom. Always let it cool. - Using old ingredients: Fresh key limes or lime juice makes a big difference in taste. Ensure your crust is firm by: - Pressing down hard: Use the back of a measuring cup to compact the crust. - Baking long enough: A golden color means it's ready. This will help keep it firm. Making the perfect whipped cream is easy. Here’s how you do it: - Chill your bowl and beaters: Cold tools help the cream whip faster. - Use heavy whipping cream: This has the right fat content for stiff peaks. For flavoring your whipped cream, try: - Adding vanilla extract: Just a teaspoon will enhance the taste. - Zesting a lime: This adds a fresh twist that pairs well with the bars. Creative plating options can impress your guests. Here are some ideas: - Use a decorative platter: Arrange the bars neatly for an eye-catching look. - Drizzle lime juice: A light drizzle over the whipped cream adds a zesty touch. Using garnishes effectively can enhance your dish: - Garnish with lime slices: Place them on top for a pop of color. - Add fresh mint leaves: These can brighten the plate and add flavor. For the full recipe, check out the details above. Enjoy making your dessert! {{image_4}} To make gluten-free key lime pie bars, swap the graham cracker crumbs with gluten-free graham cracker crumbs or almond flour. Both options work well. If using almond flour, add a bit of coconut oil to help bind the crust. This keeps the crust firm and delicious. To create vegan bars, replace the egg yolks with flaxseed meal or silken tofu. For the creaminess, use coconut cream instead of heavy whipping cream. You can also find vegan sweetened condensed milk at stores or make your own with coconut milk and sugar. This way, you keep the flavor and texture rich without dairy. You can change the flavor by adding shredded coconut to the crust. This gives a tropical twist. For a citrus mix, try using blood oranges or tangerines in place of some lime juice. Mixing different flavors adds fun and surprises to each bite. Feel free to experiment with your favorite citrus fruits! For the full recipe, check out the details above. To keep your Key Lime Pie Bars fresh, place them in an airtight container. Store them in the refrigerator. This helps maintain their creamy texture. If you want to save them for later, you can freeze them. Cut the bars first and wrap them tightly in plastic wrap. Place the wrapped bars in a freezer bag, removing as much air as possible. When stored properly, these bars last up to one week in the fridge. For the best taste, eat them within three days. If frozen, they can stay good for about three months. Look for signs of spoilage. If you see any mold or an off smell, it’s best to throw them away. Freshness is key for the best flavor! You can serve these bars chilled or at room temperature. I prefer them cold, as it enhances the flavors. If you want them at room temperature, take them out of the fridge for about 30 minutes before serving. This way, the creamy filling softens a bit, making every bite even more delightful. Key lime pie bars can last about one week in the fridge. Store them in an airtight container to keep them fresh. If you see any signs of moisture or texture change, it’s best to toss them. Always check for any odd smells or discoloration before eating. Yes, you can prepare these bars ahead of time. I recommend making them a day before you plan to serve. Once baked and cooled, chill them in the fridge. This allows the flavors to meld beautifully. Just remember to add the whipped cream right before serving for the best texture. Using fresh lime juice is key for flavor. It brings a bright, zesty taste that bottled juice can't match. Fresh juice enhances the overall experience of the dessert. Plus, the texture benefits from the natural acidity of fresh limes. If you're in a pinch, bottled juice works, but fresh is best! Key lime pie bars are simple and delicious. You learned about the main ingredients, how to measure them, and the best methods to prepare and bake. I shared tips to avoid mistakes and make the perfect whipped cream. You can even explore gluten-free and vegan options to suit your needs. Remember, using fresh ingredients and proper storage keeps your bars tasty. With these insights, you can create delicious treats for any occasion. Enjoy making and sharing these delightful key lime pie bars!

Key Lime Pie Bars Delightful Citrus Dessert Recipe

Are you ready to wow your taste buds? Key Lime Pie Bars are a sunny burst of flavor, making for

To make Cucumber Avocado Gazpacho, you need the following ingredients: - 2 large cucumbers, peeled and roughly chopped - 1 ripe avocado, pitted and diced - 1 green bell pepper, seeds removed and finely chopped - 1 small red onion, peeled and chopped - 2 cups vegetable broth (preferably chilled) - 2 tablespoons fresh lime juice - 1 clove garlic, minced - 1 teaspoon ground cumin - Salt and black pepper to taste - Fresh cilantro or mint leaves for garnish - Olive oil for drizzling (optional) Each ingredient brings its own health perks. Cucumbers are hydrating and low in calories. They help cool your body, especially in summer. Avocados add healthy fats, which are great for your heart. They also provide fiber and vitamins. Bell peppers add crunch and vitamin C, which boosts your immune system. Red onions bring flavor and antioxidants. Garlic offers health benefits like better digestion. When selecting produce, choose firm cucumbers and ripe avocados. Look for bright green bell peppers and onions without blemishes. Freshness is key for the best taste. Always wash your vegetables before you chop them. This helps remove dirt and pesticides. Enjoy making your gazpacho with these fresh and healthy ingredients! Start by getting all your ingredients ready. You need to peel the cucumbers. Roughly chop them and place them in a high-powered blender. Next, take the ripe avocado, pit it, and dice it. Add this to the blender too. Then, chop the green bell pepper and red onion. Toss these in with the minced garlic. To blend well, pour in the chilled vegetable broth and lime juice. Blend on high until the mix is smooth. This step is key to getting a creamy texture. Chilling the gazpacho is important. It helps the flavors blend and the soup cools down nicely. Ensure a smooth texture by blending all ingredients fully. If it feels too thick, add more broth or cold water. Blend again until it reaches your desired thickness. It's okay to taste as you go. Adjust the seasonings if needed for the best flavor. Make sure to mix the seasonings evenly. This way, every bite tastes just right. When serving, consider using bowls that contrast with the green soup. This makes it pop visually. Garnish with fresh cilantro or mint leaves for a fresh touch. You can also drizzle some olive oil on top for richness. Pair the gazpacho with crusty bread or a light salad. This makes for a lovely meal. You can serve it in fun glasses or small bowls for a creative touch. Enjoy your chilled cucumber avocado gazpacho! - Over-blending versus under-blending. Blend just enough to get a smooth texture. Too much blending can make it watery. Not enough blending leaves chunks. Aim for a creamy consistency. - Incorrect seasoning practices. Taste your mixture before serving. Adjust salt and pepper to match your taste. Too little seasoning can dull the flavors. - Improper chilling and serving temperatures. Chill the gazpacho for at least 30 minutes. Serve it cold for the best flavor. Warm gazpacho does not taste as good. - Variations using herbs and spices. Fresh herbs like cilantro or mint can add brightness. Use spices like smoked paprika for a warm kick. - Adding acidity or additional textures. A splash of vinegar or lemon juice brightens the dish. You can also add diced cucumber or avocado for crunch. - Incorporating complementary ingredients. Try adding jalapeños for heat or diced tomatoes for sweetness. Mix in some corn for a fun texture twist. - Recommended blenders for creamy soups. A high-powered blender works best for a smooth soup. Look for models that crush ice well. - Other essential kitchen tools for prep. Have a good cutting board and a sharp knife. These tools make chopping fast and safe. - Importance of high-quality knives and cutting boards. Invest in a solid chef's knife. It helps you cut ingredients precisely, making prep easier. {{image_4}} You can switch out the avocado and cucumber if you like. Try using zucchini instead of cucumber. For a creamy texture, use silken tofu. For avocado, you might use mashed banana for a different taste. Seasonal fruits, like ripe tomatoes or peaches, can add flavor and freshness. Local produce options also work well. Visit a farmer's market to see what’s fresh. You can customize this recipe for dietary needs. If you're dairy-free, simply skip the olive oil drizzle. Explore different flavor profiles for your gazpacho. For a Latino twist, add fresh cilantro and lime juice. You can spice things up with jalapeños or hot sauce. This gives the soup a kick. Adding fruits, like mango or pineapple, brings a lovely sweetness. You can also try citrus fruits for a tangy taste. Each variation lets you discover a new favorite. You can serve this gazpacho warm, too. Simply heat it gently in a pot. For a smoothie-style drink, blend it until super smooth and serve in a glass. Add ice cubes for a refreshing cold option. Flavored ice, made from fruit juice, can make it even better. Each serving style offers a fun way to enjoy this soup. You can adjust it based on how you feel that day! You can store gazpacho in the fridge for up to three days. Use an airtight container to keep it fresh. Glass or BPA-free plastic containers work best. If you want to enjoy it later, make sure to chill it well. You can even mix in some fresh herbs before serving for extra flavor. Yes, you can freeze gazpacho! However, the texture may change once thawed. To freeze, pour the gazpacho into freezer-safe bags or containers. Leave some space at the top to allow for expansion. When you are ready to eat, thaw it in the fridge overnight. Blend it again to restore its creamy texture. Look for changes in color or smell to check for spoilage. If it smells sour or has a strange texture, it’s best to toss it. Always trust your senses! If you have leftovers, consume them within three days for safety. Enjoy your chilled cucumber avocado gazpacho fresh for the best taste! Gazpacho is a cold soup from Spain. It usually blends fresh veggies like tomatoes, peppers, and cucumbers. This soup is perfect for hot weather. Traditional gazpacho often includes stale bread for texture. However, you can find many types of gazpacho, such as white gazpacho made with almonds or fruit-based versions. This cucumber avocado gazpacho stands out with its creamy texture and refreshing taste. Yes, you can make this gazpacho a day before serving. It tastes even better after chilling. I recommend chilling it for at least 30 minutes. If you have time, chilling it for a few hours enhances the flavors. Just remember to give it a stir before serving, as some separation may occur. Yes, this cucumber avocado gazpacho is vegan. It uses fresh vegetables and vegetable broth. You can adjust it for other diets by using low-sodium broth or adding a protein source. For instance, you can mix in some cooked quinoa for added texture and nutrition. This soup is versatile and can fit many dietary needs. Gazpacho is a simple and fresh dish. We covered key ingredients and their benefits. You learned preparation steps and blending techniques for the best texture. Serving suggestions, tips, and variations let you customize your gazpacho. Remember to avoid common mistakes for great flavor. Store properly to keep it fresh. Now, with these insights, you can enjoy gazpacho any time. Get creative and make it your own!

Cucumber Avocado Gazpacho Refreshing Cold Soup

Looking for a refreshing dish that’s perfect for warm weather? Cucumber Avocado Gazpacho is your answer! This cold soup is

To make orange glazed chicken, you need a few key ingredients. Here’s what you will use: - 4 boneless, skinless chicken breasts - 1 cup freshly squeezed orange juice (about 3-4 medium oranges) - 1 tablespoon freshly grated orange zest - 1/4 cup pure honey - 3 tablespoons soy sauce (low sodium is best) - 2 tablespoons extra virgin olive oil - 3 cloves garlic, minced (about 1 tablespoon) - 1 teaspoon fresh ginger, finely grated - Salt and freshly ground black pepper, to taste The right seasonings make your dish stand out. Here are the key flavors to add: - Freshly squeezed orange juice gives it a bright taste. - Honey adds sweetness and balances the tartness. - Soy sauce brings umami and depth to the glaze. - Garlic and ginger add warmth and zest to the dish. Want to take your orange glazed chicken to the next level? Consider these options: - 1 tablespoon cornstarch (for thickening the glaze) - Chopped green onions for garnish - Sesame seeds to add crunch and beauty These ingredients can enhance your meal and make it even more appealing. For the full recipe, check out the details above. Start by grabbing a medium bowl. In this bowl, you will mix the glaze. Whisk together the freshly squeezed orange juice, orange zest, honey, soy sauce, minced garlic, and ginger. Ensure the mixture is smooth. This glaze adds a bright, tangy flavor to your chicken, making it truly special. Next, season the chicken breasts. Sprinkle salt and black pepper on both sides. Then, heat olive oil in a large skillet over medium-high heat. When the oil shimmers, add the seasoned chicken. Cook for about 5-6 minutes on each side. Look for a golden brown color and an internal temperature of 165°F. This step seals in the juices and flavor. Once the chicken is cooked, lower the heat. Pour your orange glaze over the chicken in the skillet. Let it simmer for about 5 minutes. Turn the chicken occasionally to coat it evenly. If you want a thicker glaze, mix cornstarch with water in a small bowl. Add this slurry to the skillet to thicken the sauce. After that, remove the skillet from heat. Let the chicken sit for a few minutes in the warm glaze. Finally, slice the chicken diagonally and serve with the remaining glaze drizzled on top. Enjoy this dish with steamed rice and vegetables for a complete meal! For the full recipe, check out the details above. To get a great glaze, focus on balance. Combine sweet and tangy flavors. Use fresh orange juice and zest for a bright taste. Honey adds sweetness, while soy sauce gives depth. Simmer the glaze until it thickens slightly. Make sure to coat the chicken well for maximum flavor. One common mistake is not seasoning the chicken. Season both sides with salt and pepper. Another mistake is adding the glaze too soon. Let the chicken sear first for a nice crust. Avoid using low-quality ingredients. Fresh juice and zest make a big difference in taste. Serve your orange glazed chicken on a large platter. Garnish with chopped green onions and sesame seeds. This adds color and crunch. Pair it with fluffy steamed rice. A side of sautéed vegetables complements the dish well. Try adding a fresh salad for a complete meal. For more details, check out the Full Recipe. {{image_4}} You can change up your orange glazed chicken easily. Try using maple syrup instead of honey. This adds a nice depth of flavor. You can also swap orange juice for lemon or lime juice. This gives a tangy twist. To add a bit of heat, toss in some red pepper flakes. If you like nuts, add chopped cashews or almonds for crunch. Both stovetop and oven-baked methods work well for this dish. On the stovetop, you get a nice sear and quick cooking. Simply follow the steps in the Full Recipe for an easy meal. If you prefer oven-baked, preheat your oven to 400°F. Sear the chicken on the stovetop for 2-3 minutes on each side. Then, transfer it to a baking dish with the glaze. Bake for 20-25 minutes for juicy results. Orange glazed chicken is great for many occasions. For a family dinner, serve it with steamed rice and seasonal veggies. For a special occasion, add a side salad with mixed greens and a light vinaigrette. If you’re hosting friends, try serving it in small bites on skewers. This makes for a fun, shareable dish. You can also make it a part of a buffet spread with various sides to please everyone. After you enjoy your orange glazed chicken, store leftovers in an airtight container. Make sure the chicken is cool before sealing the container. This helps keep the chicken fresh and safe to eat. Leftovers can last for up to three days in the fridge. Always check for any signs of spoilage before eating. To reheat, place the chicken in a skillet over medium heat. Add a splash of water or extra orange juice to keep it moist. Cover the skillet to trap steam and heat for about 5-7 minutes. Stir occasionally so the chicken warms evenly. You can also use a microwave, but this might dry it out. If using a microwave, cover the chicken with a damp paper towel. If you want to save your orange glazed chicken for later, freezing is a great option. Place the cooled chicken in a freezer-safe bag or container. Remove as much air as possible before sealing. You can freeze it for up to three months. When you're ready to eat, thaw it in the fridge overnight. Then, reheat it as mentioned above for the best taste. Yes, you can use chicken thighs. They are juicier and have more flavor. Just adjust the cooking time. Thighs may take a few extra minutes to cook through. Always check that the internal temperature reaches 165°F for safety. To make this recipe gluten-free, use tamari instead of soy sauce. Tamari is a gluten-free soy sauce. Always check labels on all ingredients to ensure they are gluten-free. You can serve Orange Glazed Chicken with many tasty sides. Here are a few great options: - Steamed rice - Quinoa - Roasted vegetables - Stir-fried greens - A fresh garden salad These sides add color and balance to the meal while enhancing the citrus flavor. If you want a thicker glaze without cornstarch, reduce the glaze over heat. Simmer the orange juice mixture until it thickens naturally. This method adds depth to the flavor. Stir it frequently to avoid burning. Always keep an eye on it to get the right consistency. In this post, we explored how to make orange glazed chicken from start to finish. We covered the main ingredients, cooking steps, and helpful tips. I shared ways to store your leftovers and even suggested variations for new flavors. For best results, always focus on balance in your glaze. Avoid common mistakes, and explore different cooking methods. This dish is simple yet delicious, perfect for any meal. Now, get cooking and enjoy this tasty treat!

Orange Glazed Chicken Tasty Recipe for Dinner

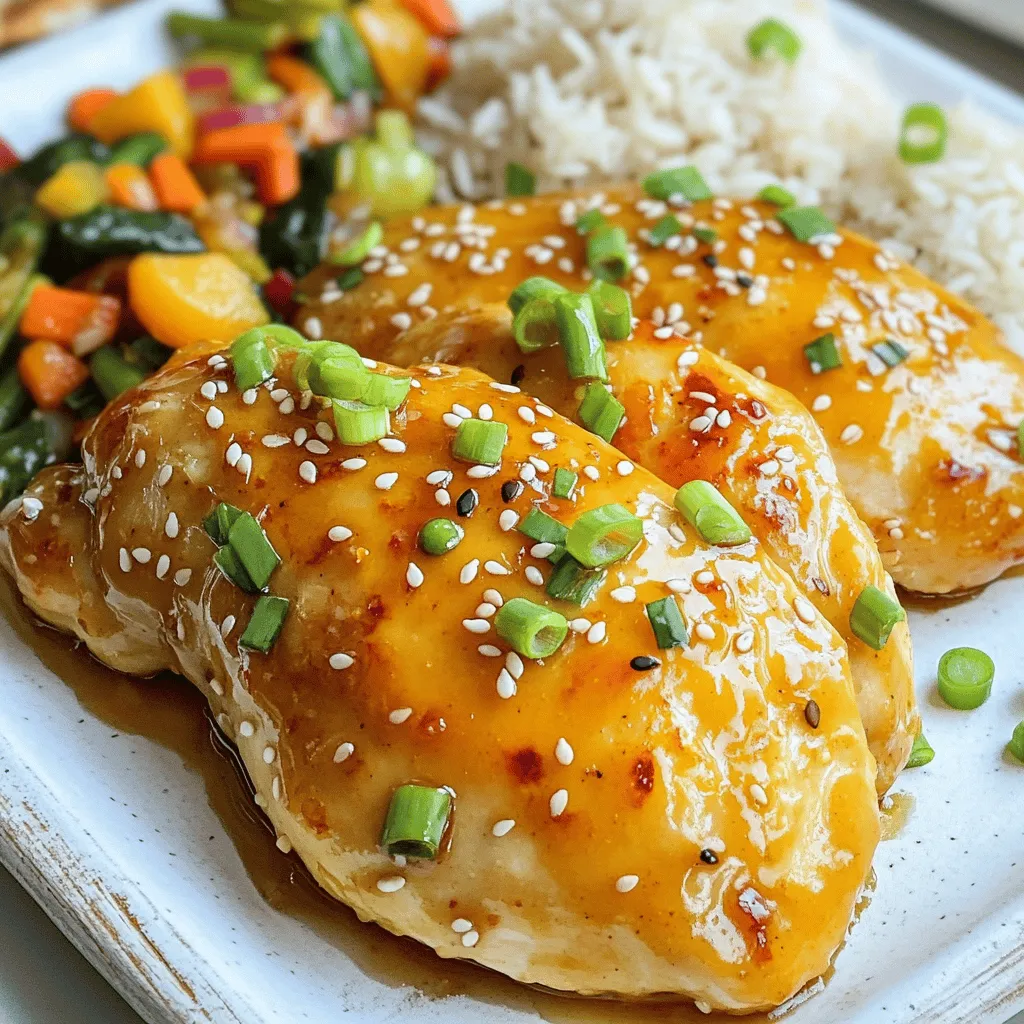
Looking to spice up your dinner routine? This Orange Glazed Chicken recipe will do just that! The sweet and tangy

- Baby spinach: Use 5 cups, washed and dried. This leafy green is fresh and tender. - Strawberries: You need 2 cups, hulled and sliced thin. Their sweetness shines in this salad. - Red onion: Use 1/4 cup, thinly sliced into rings. They add a nice crunch and mild flavor. - Pecans: Use 1/2 cup, roughly chopped. They provide a rich, nutty crunch to your salad. - Feta cheese: Use 1/4 cup, crumbled into bite-sized pieces. This cheese adds creaminess and tang. - Olive oil: Use 1/2 cup of extra virgin olive oil. It creates a rich base for your dressing. - Apple cider vinegar: Use 1/4 cup. This adds a pleasant tang to the dressing. - Honey: Use 2 tablespoons for sweetness. It balances the tanginess of the vinegar. - Poppy seeds: Add 1/4 cup for a nutty flavor and crunchy texture. - Salt and pepper: Use to taste, to balance all the flavors in your salad. This Strawberry Spinach Poppy Seed Salad is bright, fresh, and fun to make. For the full recipe, see the previous sections. To start, grab a small mixing bowl. You will need to whisk together the dressing ingredients. Combine 1/2 cup of extra virgin olive oil, 1/4 cup of apple cider vinegar, and 2 tablespoons of honey. Add salt and pepper to taste. Whisk until the mix is smooth and well blended. This is your delightful dressing. For a perfect emulsification, add the oil slowly while whisking. This helps the oil and vinegar blend well. Next, move to a large salad bowl. Add 5 cups of fresh baby spinach. Then, toss in 2 cups of sliced strawberries, 1/2 cup of chopped pecans, 1/4 cup of crumbled feta cheese, and 1/4 cup of thinly sliced red onion. It is important to use fresh, vibrant ingredients. The freshness makes the salad taste better and look appealing. Now, drizzle your prepared dressing over the salad. Use just enough to coat all the ingredients. Then, gently toss the salad with two large spoons or salad tongs. Be careful not to bruise the spinach or strawberries. Finally, sprinkle 1/4 cup of poppy seeds on top. This adds a nice crunch and makes the salad look pretty. Serve the salad right away for the best taste. Present it in a large glass bowl to show off the bright colors. You can garnish with more strawberry slices and poppy seeds for an extra touch. Using fresh ingredients makes a big difference. Fresh baby spinach and ripe strawberries bring bright flavor. Make sure your pecans are crunchy and feta is creamy. Freshness elevates each bite. Balancing flavors with salt and pepper is crucial. Salt boosts sweetness in strawberries. A pinch of pepper adds a nice kick. Taste as you go. Adjust the seasoning to your liking. Choose a large glass bowl to show off the colors. The green spinach and red strawberries create a stunning look. Garnish with extra strawberry slices and a sprinkle of poppy seeds. This adds texture and flair. For an elegant touch, serve with wooden salad tongs. It makes serving easy and fun. You want your guests to feel special and enjoy the view. Prep ingredients in advance to save time. Wash and dry the spinach earlier. Slice strawberries and store them in the fridge. You can chop nuts and cheese ahead of time too. For quick assembly, layer the ingredients in the bowl. Add spinach first, then strawberries, and so on. This makes it easy to toss together right before serving. You’ll have a fresh salad in no time. For the full recipe, check out the Strawberry Spinach Poppy Seed Salad! {{image_4}} You can easily change some ingredients in this salad. If you want to swap nuts, try walnuts instead of pecans. Walnuts offer a rich flavor and crunch. You can also use almonds for a lighter touch. Both options add a new twist. For cheese, feta is great, but you can try goat cheese. Goat cheese adds a tangy flavor that pairs well with strawberries. If you want a dairy-free option, use a nut cheese. It gives a creamy texture without dairy. To make this salad heartier, add proteins. Grilled chicken is a fantastic choice. It adds flavor and makes the salad more filling. Simply slice the chicken and toss it in. If you prefer a plant-based option, tofu works well too. Use firm tofu for the best texture. Press it to remove extra water, then cube and sauté it. This adds a nice taste and protein boost. Switching up dressings can change the whole salad vibe. Instead of apple cider vinegar, try balsamic vinegar. It gives a sweet and tangy twist. You can also use red wine vinegar for a sharper flavor. For sweeteners, honey is common, but maple syrup is a great alternative. It adds a lovely sweetness and pairs well with the salad’s flavors. You can even try agave nectar for a different taste. For the full recipe, make sure to check out the details earlier in the article. To keep your salad fresh, store the ingredients separately. Spinach and strawberries wilt easily. Use a clean, dry container for each. Keep the dressing in a jar. This helps maintain their crispness and flavor. For leftovers, use airtight containers. Glass or BPA-free plastic works best. Place spinach and dressing in one container. Store strawberries and other toppings in separate containers. This keeps the texture of each ingredient. Mix them when you are ready to eat. In the fridge, the salad ingredients last about three days. Spinach wilts after a day or two, while strawberries last three to five days. The dressing can last up to a week if stored well. Enjoy your Strawberry Spinach Poppy Seed Salad at its best by eating fresh! Check out the Full Recipe for more details. Spinach is a superfood. It is low in calories and high in nutrients. One cup of raw spinach has: - Vitamin A: Great for eye health. - Vitamin C: Boosts your immune system. - Vitamin K: Important for blood clotting. - Iron: Helps your blood carry oxygen. - Folate: Supports cell function and tissue growth. These nutrients work together. They help keep your body strong and healthy. Eating spinach can even boost your energy levels. Yes, you can prepare this salad ahead of time. Here are some tips for pre-preparation: - Wash and dry spinach: Keep it dry to avoid sogginess. - Slice strawberries: Do this close to serving time to keep them fresh. - Mix dressing separately: This keeps the salad crisp until you serve it. - Store in a sealed container: This helps keep the ingredients fresh. Assemble the salad just before serving. This way, you enjoy the best flavors and textures. You can switch the dressing if you want something different. Here are some suggestions for different dressings: - Balsamic vinaigrette: Adds a sweet and tangy flavor. - Lemon vinaigrette: Brightens up the salad with freshness. - Yogurt dressing: Creamy and tangy without being too heavy. - Honey mustard dressing: Sweet with a bit of spice. Feel free to experiment with these options. Each one adds a unique twist to the salad. Making this salad vegan is simple. Here are some substitutes for non-vegan ingredients: - Feta cheese: Use vegan feta or skip it entirely. - Honey: Replace it with maple syrup or agave nectar. - Check the dressing: Ensure it does not contain dairy. These swaps let you enjoy the salad while keeping it plant-based. This salad brings together fresh produce, nuts, and a delightful dressing. We learned how to prepare a tasty dressing and assemble a scrumptious salad. Using fresh ingredients is key for flavor and presentation. Consider experimenting with different proteins or dressings for variety. Proper storage extends freshness, so follow those tips. Enjoy making this salad your own, filled with nutrition and flavor. With simple swaps, it stays exciting and delicious. Embrace the joy of salad-making—it’s fun and healthy!

Strawberry Spinach Poppy Seed Salad Delightful Recipe

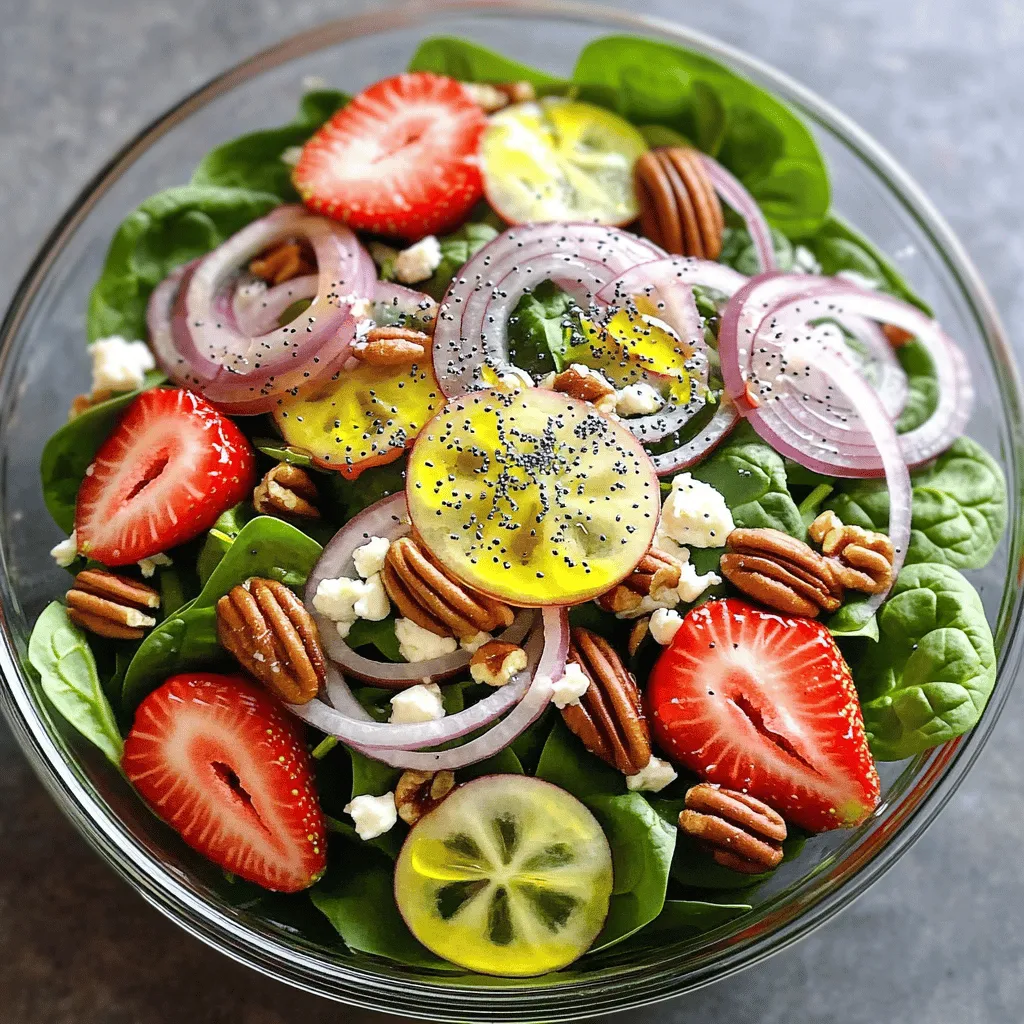
If you’re craving a refreshing and colorful dish, you’ve found the right recipe! The Strawberry Spinach Poppy Seed Salad not

To create these salted caramel brownie bites, you need the following ingredients: - 1 cup unsalted butter (equivalent to 2 sticks) - 1 1/4 cups granulated sugar - 1 cup packed brown sugar - 4 large eggs - 1 teaspoon pure vanilla extract - 1 cup all-purpose flour - 1/2 cup unsweetened cocoa powder - 1/2 teaspoon fine salt - 1 cup semi-sweet chocolate chips - 1/2 cup salted caramel sauce (store-bought or homemade) - Flaky sea salt, for finishing You can swap some ingredients if needed. Here are a few ideas: - Use coconut oil instead of unsalted butter for a dairy-free version. - Swap granulated sugar for coconut sugar for a lower glycemic option. - Use almond flour in place of all-purpose flour for a gluten-free version. - If you prefer, you can use dark chocolate chips instead of semi-sweet chocolate chips. Choosing good ingredients can make a big difference. Here are some tips: - Butter: Look for high-fat, unsalted butter. It gives better flavor. - Cocoa Powder: Choose high-quality cocoa powder for rich flavor. Look for brands like Valrhona or Ghirardelli. - Chocolate Chips: Use semi-sweet or dark chocolate chips with at least 60% cocoa for a rich taste. - Caramel Sauce: If you buy caramel sauce, check for natural ingredients. Homemade is always a great option! - Vanilla Extract: Use pure vanilla extract, not imitation, for the best flavor. Following these tips can help you get the most out of your salted caramel brownie bites. For the full recipe, check the details above. Enjoy your cooking! To make these salted caramel brownie bites, follow these simple steps. First, preheat your oven to 350°F (175°C). Line a 9x9 inch baking pan with parchment paper. This makes it easy to lift the brownies out later. Next, melt 1 cup of unsalted butter in a medium saucepan over low heat. Once melted, remove it from the heat and stir in 1 1/4 cups of granulated sugar and 1 cup of packed brown sugar. Mix until smooth. Let the mixture cool for a few minutes. Now, add 4 large eggs one at a time, whisking after each. Stir in 1 teaspoon of pure vanilla extract. In another bowl, sift together 1 cup of all-purpose flour, 1/2 cup of unsweetened cocoa powder, and 1/2 teaspoon of fine salt. Gently fold this dry mix into the wet ingredients. Be careful not to overmix; a few lumps are fine. Next, fold in 1 cup of semi-sweet chocolate chips. Pour half of the brownie batter into your prepared pan. Drizzle half of the 1/2 cup of salted caramel sauce over this layer. Spread the rest of the brownie batter on top. Finally, drizzle the remaining caramel on this layer. Use a knife to swirl the caramel into the batter for a pretty design. Bake the brownies for 25-30 minutes. To check if they’re done, insert a toothpick into the center. If it comes out with a few moist crumbs, they are ready. Don't worry if the toothpick shows some goo; that means a fudgy brownie! After baking, let the brownies cool in the pan for about 10 minutes. Use the parchment paper to lift the brownies out of the pan. Place them on a wire rack to cool completely. Once they are cool, cut them into small bite-sized squares. Before serving, sprinkle some flaky sea salt on top. This enhances the flavor and gives a nice contrast to the sweetness. Enjoy your delicious salted caramel brownie bites! For the full recipe, check it out above. To get that rich, fudgy texture, focus on your ingredients. Use high-quality chocolate chips and unsweetened cocoa powder. Mixing dry ingredients too much can lead to a cake-like brownie. When you combine the wet and dry ingredients, stir gently. Stop mixing as soon as you no longer see flour. This keeps your brownies dense and moist. Swirling caramel into your brownie batter adds a fun twist. Pour half of the batter in the pan first, then drizzle half of your salted caramel sauce over it. Use a knife to swirl gently. Don't overdo it; you want ribbons of caramel, not a fully mixed batter. Repeat this with the second layer of batter and caramel for a beautiful finish. - Overmixing the Batter: This can lead to tough brownies. Mix just until combined. - Not Checking for Doneness: Use a toothpick to check. A few moist crumbs mean they’re ready. - Skipping the Sea Salt: That sprinkle on top makes a big difference. It balances the sweetness. By following these tips and tricks, you will create the best salted caramel brownie bites. For more details on this dessert, check the Full Recipe. {{image_4}} You can make your brownie bites even better by adding nuts. Walnuts or pecans work well. Simply chop them coarsely and fold them into the batter. Use about 1 cup of nuts for a nice crunch. You can also try adding other mix-ins like chocolate chunks or dried fruit. These extras can add texture and flavor. To make gluten-free brownie bites, swap out regular flour for gluten-free flour. Many brands offer great flour blends that work well in baking. You can also use almond flour for a nutty taste. Just keep in mind that the texture might change slightly. Get creative with your flavors! You can add mint extract for a fresh twist. Try using different types of chocolate, like dark or white chocolate. For a fruity touch, add a little orange zest. Each of these options can bring a new taste to your brownie bites. Just remember to keep the base recipe the same for the best results. For a complete guide, check the Full Recipe. To keep your salted caramel brownie bites fresh, store them in an airtight container. Place a piece of parchment paper between layers to prevent sticking. They can last for up to five days at room temperature. If you want them to stay fresh longer, refrigerate them. Just remember, cold can change their texture a bit. You can freeze brownie bites for up to three months. First, cool them completely. Then, wrap each brownie bite in plastic wrap. Place the wrapped bites in a freezer-safe bag or container. When you want to enjoy them, let them thaw in the fridge overnight. You can also warm them up in the oven for a few minutes. To reheat your brownie bites, preheat your oven to 350°F (175°C). Place the brownies on a baking sheet and cover them with foil. Heat for about 10 minutes. This will help keep them soft and gooey. If you prefer, you can also use the microwave. Heat them for about 15-20 seconds, but be careful not to overdo it. Enjoy your treats warm, and don’t forget to drizzle a bit more salted caramel on top! To make salted caramel brownie bites from scratch, follow these simple steps. First, gather your ingredients. You need butter, sugars, eggs, vanilla, flour, cocoa powder, salt, chocolate chips, and salted caramel sauce. Next, melt the butter in a saucepan. Combine the melted butter with the sugars until smooth. Allow it to cool. Then, add the eggs one by one, mixing well. Stir in the vanilla extract. In another bowl, mix the flour, cocoa powder, and salt. Gradually fold this mix into the wet ingredients. Be careful not to overmix. Then, gently mix in the chocolate chips. Now, pour half of the batter into a lined pan. Drizzle half the salted caramel sauce on top. Spread the rest of the batter over it, then swirl the remaining caramel on top. Bake at 350°F for 25-30 minutes. Let them cool and cut into bites. Enjoy this delicious treat with friends or family. For the full recipe, refer to the previous section. Yes, you can use store-bought salted caramel sauce. It saves time and effort. Just make sure to choose a good brand. Look for one that has a rich flavor and a smooth texture. This will enhance your brownie bites. If you prefer, you can also make your own caramel sauce. Homemade versions can be richer and more flavorful. Just cook sugar until it melts and turns golden, then add cream and salt. For parties, I recommend cutting the brownie bites into small squares. Each bite should be about one inch. This size makes them easy to grab and enjoy. You can serve them on a nice platter. Add some fresh fruit or whipped cream for a colorful touch. Guests will love having a sweet treat that is easy to eat. For larger gatherings, consider doubling the recipe. This way, everyone can enjoy these tasty bites! This guide covers everything for perfect salted caramel brownies. We reviewed key ingredients, provided baking steps, and shared tips for that ideal fudgy texture. You learned to avoid common mistakes and explore fun variations. Remember to store your brownies well to keep them fresh. Experiment with mix-ins and flavors to make them your own. Brownies can be a simple treat or a fancy dessert. With these tips, your baking will impress everyone. Enjoy every delicious bite!

Salted Caramel Brownie Bites Irresistible Dessert Treat

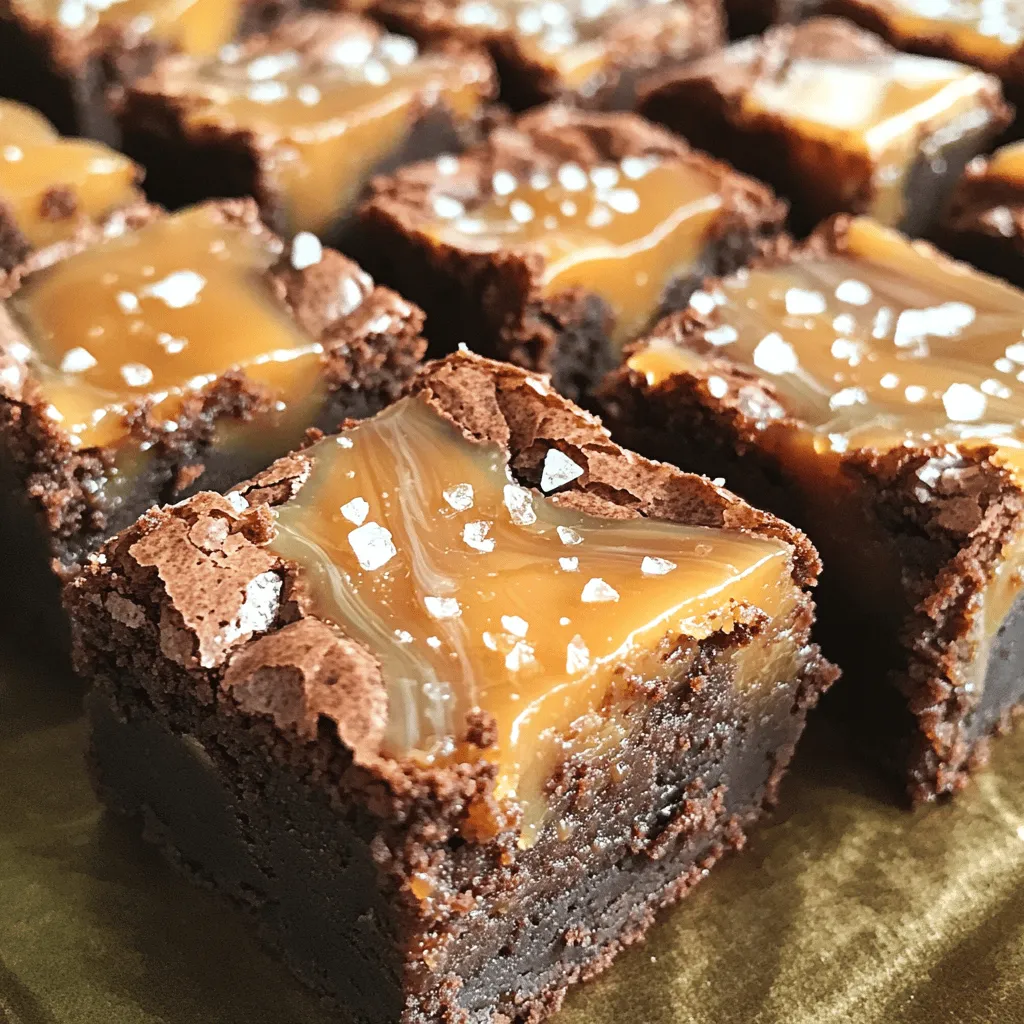
If you’re searching for a sweet treat that will wow your taste buds, you’ve come to the right place! These

To make these meatballs, you will need: - 1 lb of ground beef or ground turkey - 1/2 cup of breadcrumbs - 1/4 cup of grated Parmesan cheese - 1/4 cup of fresh parsley, finely chopped - 1 large egg These main ingredients create a tasty base. The ground beef gives you a rich flavor. Ground turkey is a leaner choice. Breadcrumbs provide texture and help the meatballs hold together. Parmesan adds a nice, cheesy touch. Fresh parsley gives a burst of color and freshness. The egg acts as a binder for the mixture. For the glaze, gather: - 1 cup of cranberry sauce (store-bought or homemade) - Zest from 1 medium orange - 2 tablespoons of fresh orange juice - 1 tablespoon of low-sodium soy sauce - 1 teaspoon of Dijon mustard The glaze is the star of the dish. Cranberry sauce provides sweetness and tartness. Orange zest and juice give a bright citrus flavor. Soy sauce adds depth and umami. Dijon mustard gives a slight kick that balances the sweetness. Don't forget to include: - 1 teaspoon of garlic powder - 1/2 teaspoon of onion powder - Salt and freshly ground pepper to taste These seasonings are key to enhancing the meatball flavor. Garlic powder and onion powder deepen the taste. Salt and pepper bring out all the flavors in the dish. Adjust these to your liking for a perfect bite. For the full recipe, follow the detailed instructions to make these delicious meatballs! 1. Preheat the oven to 375°F (190°C). 2. Line a baking sheet with parchment paper. This helps with cleanup. 3. In a large bowl, mix the ground beef or turkey, breadcrumbs, and Parmesan cheese. 4. Add the chopped parsley, egg, garlic powder, onion powder, salt, and pepper. 5. Use your hands or a spatula to blend everything well. 1. Scoop out portions of the meat mixture. 2. Roll them into small balls, about 1 inch wide. 3. Place the meatballs on the baking sheet, leaving space between them. 1. Bake the meatballs for about 20 minutes. They should be golden brown. 2. While they bake, make the glaze. 3. In a saucepan, mix cranberry sauce, orange zest, orange juice, soy sauce, and Dijon mustard. 4. Stir and simmer for 5 minutes to combine the flavors. 5. After baking, move the meatballs to the glaze and coat them well. 6. Return the coated meatballs to the baking sheet and bake for 5 more minutes. 7. Serve warm and enjoy the tasty treat! For the full recipe, check out the details above. To make great meatballs, focus on even cooking and texture. Use a mix of ground beef and breadcrumbs. I like to aim for a ratio of 1 pound of meat to 1/2 cup of breadcrumbs. This keeps them moist and tasty. Don’t overmix your ingredients, as this can make them tough. Gently combine the meat, herbs, and spices. This will help keep a light texture. Achieving the right glaze thickness is key. Start with 1 cup of cranberry sauce. Add 2 tablespoons of orange juice for the best flavor. If it's too thick, add a splash of water. If it’s too thin, let it simmer longer on medium heat. For flavor enhancement, consider adding a pinch of cinnamon or a splash of balsamic vinegar. These small tweaks add depth to the dish. Cranberry orange glazed meatballs pair well with many sides. Serve them over fluffy rice or creamy mashed potatoes. For a fresh taste, add a side of steamed green beans or a crisp salad. Garnish the meatballs with extra parsley or orange zest for a pop of color. This makes the dish more appealing and fun to eat. Explore different serving ideas to find your favorite! For the complete recipe, check out the [Full Recipe]. {{image_4}} You can switch the meat in this recipe. Ground chicken or pork works well. For a vegetarian twist, use lentils or chickpeas. They give you a great taste and texture. If you need gluten-free options, you can use gluten-free breadcrumbs. This keeps the dish light and tasty. Spices can add a nice kick. Try adding a pinch of cayenne pepper or smoked paprika. Fresh herbs like thyme or rosemary can make it unique. You can also swap the cranberry sauce for other fruit spreads, like raspberry or apricot. This change offers a different flavor profile while keeping it delicious. These meatballs are great for any occasion. Serve them as a fun appetizer at parties. Just make them smaller for easy bites. For a cozy dinner, serve them over rice or pasta. They also shine during holidays, adding a festive touch to your table. You can also use them in a meatball sub for a fun twist. Check out the Full Recipe for more ideas! After cooking, let the meatballs cool down. Place them in an airtight container. Glass or plastic containers work great for this. Make sure the lid seals tightly. This keeps the meatballs fresh and tasty. To freeze meatballs, first, let them cool completely. Arrange them in a single layer on a baking sheet. Freeze them for one to two hours until firm. Then, transfer the meatballs to a freezer bag. Remove as much air as you can. Meatballs can last in the freezer for up to three months. When you are ready to eat, thaw them in the fridge overnight. Reheat in the oven or microwave until hot. Cooked meatballs can last in the fridge for about three to four days. Always check for bad smells or color changes. If they smell sour or look strange, it's best to toss them. Fresh meatballs are always the tastiest! Yes, you can prepare these meatballs ahead of time. I often make the meatballs and glaze the night before. This saves time when you want to serve a tasty meal. You can store the raw meatballs in the fridge for up to a day. Just cover them well to keep them fresh. If you want to freeze them, place the raw meatballs on a baking sheet first. Freeze them until firm, then transfer them to a freezer bag. This way, you can cook them later without losing flavor. These meatballs pair well with many sides. You can serve them with rice or mashed potatoes. The sweet glaze complements the creamy texture of potatoes. Fresh salad or steamed veggies work great too. A side of crusty bread helps soak up the glaze. For a fun twist, try them in a slider with a small bun. To check if your meatballs are done, use a meat thermometer. The internal temperature should reach 165°F. If you don’t have a thermometer, cut one meatball in half. The inside should be no longer pink, and the juices should run clear. Baking them until golden brown also helps ensure doneness. Enjoy your delicious meal with peace of mind! In this article, I shared a tasty recipe for Cranberry Orange Glazed Meatballs. You learned about the key ingredients, from ground beef or turkey to the flavorful glaze. I went over simple steps for preparation, baking, and glazing. We explored tips for perfecting your meatballs and variations to customize your dish. Lastly, I covered storage tips to keep your meatballs fresh. Enjoy making these meatballs for any occasion. They are versatile and sure to impress.

Cranberry Orange Glazed Meatballs Flavorful Dinner Dish

Looking for a delicious twist on dinner? Try Cranberry Orange Glazed Meatballs! This simple dish combines juicy meatballs with a

To make lemon garlic roasted shrimp, gather these simple items: - 1 pound large shrimp, peeled and deveined - 4 cloves garlic, finely minced - 1/4 cup extra virgin olive oil - Fresh juice of 2 juicy lemons - Zest of 1 lemon, finely grated - 1 teaspoon smoked paprika - 1 teaspoon red pepper flakes - Sea salt and freshly cracked black pepper - Fresh parsley, finely chopped When buying shrimp, look for these signs of freshness: - Color: Fresh shrimp should be a light pink or grayish color. - Smell: They should smell like the ocean, not fishy. - Texture: The flesh should feel firm and springy. - Shell: Make sure the shells are shiny and not slimy. Always ask your fishmonger about where the shrimp come from. Local shrimp often tastes better. To prepare this dish, you will need these tools: - Mixing bowl: For combining the marinade. - Whisk: To blend the marinade well. - Baking sheet: For roasting the shrimp. - Parchment paper: For easy cleanup. - Spatula: To toss the shrimp in the marinade. Having the right tools makes your cooking process smooth and fun. Check the [Full Recipe] for more details. First, set your oven to 400°F (200°C). This heat is perfect for roasting shrimp. While the oven warms up, grab a baking sheet and line it with parchment paper. This step helps with easy cleanup later. In a large mixing bowl, add the olive oil, minced garlic, lemon juice, and lemon zest. Then, toss in the smoked paprika, red pepper flakes, sea salt, and black pepper. Whisk the mix well until all the ingredients blend. The smell will be amazing! Next, add the cleaned shrimp to the bowl with the marinade. Use your hands or a spatula to mix. Make sure all the shrimp get a nice coat of the marinade. Let them sit for about 15 minutes. This time helps the shrimp soak in all that flavor. Once the shrimp is marinated, spread them out on the baking sheet in a single layer. This helps them cook evenly. Place the baking sheet in your hot oven and roast for 8-10 minutes. They’re done when they turn pink and look just cooked. When ready, take them out and sprinkle fresh parsley on top. Serve them up and enjoy! For the full recipe, check out the detailed instructions earlier in the article. To get shrimp just right, focus on timing. Cook them for 8 to 10 minutes. They turn pink when done. Overcooking makes shrimp tough. Keep an eye on them. If you use large shrimp, they need a bit more time. For smaller shrimp, cut down the cooking time. To boost flavor, try adding fresh herbs. Basil, cilantro, or dill work well. You can also add lemon slices on top while roasting. This gives a fresh taste. For a kick, use more red pepper flakes. Experiment with different spices like cumin or coriander. Each adds a unique touch. If shrimp stick to the pan, use parchment paper. This helps with easy removal. If your shrimp are bland, check the seasoning. A touch of salt or lemon juice can help. If they are too salty, soak them in cold water for a few minutes. For leftover shrimp, add them to salads or pasta. They make great meals! For the full recipe, check the section above. {{image_4}} You can make this dish even better by adding vegetables. Try bell peppers, zucchini, or asparagus. These veggies roast well and add color to your plate. Just chop them into bite-sized pieces. Toss them in the marinade with the shrimp. They will soak up all the tasty flavors. This mix gives you a full meal in one pan. If you like heat, adjust the spice level. You can add more red pepper flakes if you want more kick. For a milder dish, reduce the amount or leave them out. You can also try adding a pinch of cayenne pepper for a different flavor. This lets you customize the heat to your taste. Feel free to experiment with different marinades. You can use honey for a sweet touch. Or swap lemon juice for lime juice for a fresh twist. Adding fresh herbs like basil or cilantro can bring new flavors. Try these ideas to keep the dish exciting. You can always find your favorite combination. For the complete recipe, check out the Full Recipe. After you enjoy your lemon garlic roasted shrimp, store any leftovers right away. Place them in an airtight container. This keeps them fresh. You can store them in the fridge for up to three days. Make sure the shrimp cool down before sealing the container. This helps prevent moisture buildup. To reheat your shrimp, use the oven for best results. Preheat your oven to 350°F (175°C). Spread the shrimp on a baking sheet. Warm them for about 5-7 minutes. This keeps the shrimp tender and avoids overcooking. You can also use a microwave. Just heat them in short bursts, checking often. If you want to save shrimp for later, freezing is a great option. Place the shrimp in a freezer-safe bag. Remove as much air as you can before sealing. They can stay fresh in the freezer for up to three months. When ready to use, thaw the shrimp in the fridge overnight before reheating. You’ll still enjoy their great flavor! For the full recipe, check the bottom of the article. You can tell when shrimp are done when they turn bright pink. The flesh should be opaque, not clear. Cooked shrimp curl into a C shape. If they form an O shape, they may be overcooked. Trust your eyes and your taste! Yes, you can use frozen shrimp. Just make sure to thaw them first. Place them in the fridge overnight or run them under cold water for a quick thaw. After thawing, pat them dry with a paper towel. This helps the marinade stick better. Lemon garlic roasted shrimp pairs well with many sides. Try serving them with rice or a fresh salad. Garlic bread makes a great addition too! You can also serve them with pasta for a heartier meal. You can find the full recipe for Lemon Garlic Roasted Shrimp in our recipe section. It has all the details you need to create this dish at home. In this blog, we explored how to make delicious lemon garlic roasted shrimp. We covered the key ingredients, tips for choosing fresh shrimp, and essential cooking tools. I provided step-by-step instructions for prepping, marinating, and roasting shrimp to perfection. We discussed flavor enhancements, storage tips, and more. Remember, with a few simple tricks, you can impress anyone at the dinner table. Enjoy experimenting with different flavors and variations for a fresh twist. Happy cooking!

Lemon Garlic Roasted Shrimp Savory and Simple Dish

Looking for a simple and savory dish? You’ve come to the right place! My Lemon Garlic Roasted Shrimp will wow

- 4 large eggs, hard-boiled and chopped - 1 ripe avocado, peeled and mashed - 2 tablespoons Greek yogurt (or mayonnaise) - 1 tablespoon Dijon mustard - 1 tablespoon fresh lemon juice - 1/4 cup red onion, finely chopped - 1/4 cup celery, finely chopped - Salt and pepper to taste - 4 large whole wheat or spinach tortillas - Fresh baby spinach or crisp lettuce leaves For this recipe, I start with the main ingredients that bring flavor and nutrition together. The hard-boiled eggs provide protein, while the avocado adds healthy fats. Greek yogurt or mayonnaise adds creaminess. The Dijon mustard and lemon juice give a zesty kick. The additional ingredients, like red onion and celery, add crunch and flavor. I love the fresh taste of spinach or lettuce in the wraps. They make each bite fresh and light! You can find the Full Recipe [here](#). This recipe is not only easy to make but also packs a nutritious punch. Enjoy these wraps as a quick lunch or a light dinner. - Place the eggs in a pot and cover with water. - Bring water to a boil, then let sit covered for 12 minutes. - Transfer eggs to an ice bath, cool, peel, and chop. Hard-boiling eggs is simple. Start by placing them in a pot. Cover them with cold water. Bring the water to a boil on high heat. Once it boils, cover the pot and remove it from heat. Let the eggs sit for 12 minutes. This method cooks the eggs evenly. After 12 minutes, cool the eggs quickly in an ice bath. This step makes peeling easier. Once cool, peel the eggs and chop them into small pieces. - Mix mashed avocado, Greek yogurt (or mayonnaise), Dijon mustard, and fresh lemon juice. - Fold in the chopped red onion and celery. Next, you need to prepare the avocado mixture. In a large bowl, add the mashed avocado. If you want creaminess, use Greek yogurt or mayonnaise. Add Dijon mustard and fresh lemon juice for flavor. Mix these ingredients until smooth. Then, gently fold in chopped red onion and celery. These add crunch and flavor to the salad. - Fold chopped hard-boiled eggs into the avocado mixture. - Season with salt and pepper to taste. Now it’s time to combine everything. Carefully fold the chopped hard-boiled eggs into your avocado mixture. Be gentle so the eggs stay chunky. Season this mixture with salt and pepper. Taste it to make sure it’s just right for you. - Lay tortillas flat, place spinach or lettuce, add egg salad mixture, then roll tightly. To make the wraps, lay out your tortillas on a clean surface. Place fresh baby spinach or crisp lettuce leaves on each tortilla. Then, spoon the avocado egg salad mixture onto the tortillas. Spread it out evenly. Start rolling the tortilla tightly from one end. Fold in the sides as you go. This keeps all the yummy filling inside. Enjoy your fresh and healthy avocado egg salad wraps! For the complete recipe, check out the Full Recipe. - Use ripe avocados for creaminess. They should feel soft but not mushy. - Don’t mash the eggs too much for texture. Leave some chunks for a nice bite. - Arrange wraps on a bright platter. This makes them look fresh and inviting. - Garnish with slices of fresh vegetables. Use tomatoes, cucumbers, or radishes for color. - Use vegan mayo for a plant-based version. This keeps the dish creamy without eggs. - Substitute Greek yogurt with dairy-free alternatives. Options like coconut yogurt work well. For more ideas, check the full recipe for Avocado Egg Salad Wraps! {{image_4}} You can change the protein in your wraps for a new twist. Use chicken or tuna for a protein-packed alternative. Both add great flavor and texture. If you want a vegetarian option, add beans. Black beans or chickpeas work well. They give you protein while keeping it plant-based. To make your avocado egg salad even more exciting, add spices. A sprinkle of paprika or cayenne gives a nice kick. If you like fresh tastes, try adding herbs. Dill or cilantro can brighten the dish. These simple changes can take your wraps to a new level. If you want to lower carbs, swap the tortillas for lettuce leaves. They make a fresh and crunchy wrap. For those with gluten sensitivities, try gluten-free tortillas. They work just as well and keep the meal enjoyable. Store any leftover avocado egg salad in an airtight container. It will stay fresh in the fridge for up to 2 days. Keep it sealed to avoid drying out. This way, you can enjoy the flavors later without losing quality. If you want to save some for later, wrap the salad tightly. Use plastic wrap first, then cover it with foil. This helps prevent freezer burn. Remember, the texture may change after freezing, so it’s best to eat it fresh. You can enjoy the salad cold right from the fridge. If you prefer it warm, reheat it gently in the microwave. Heat just until warm, not hot. This way, you keep the creamy texture and flavor intact. For a quick meal, serve it in a fresh wrap or on a bed of greens. You can use mayonnaise instead of Greek yogurt. If you want a dairy-free option, try vegan mayo. Yes, you can make the filling in advance. Just store it in the fridge. Keep the tortillas separate. Assemble the wraps right before you eat. Hard-boiled eggs can stay fresh for up to one week in the fridge. Make sure you store them in a sealed container. Absolutely! You can use any leafy green or lettuce. Choose what you like best for your wrap. Yes, this recipe is perfect for meal prep. Just keep the filling and tortillas separate until you are ready to eat. Enjoy making these tasty wraps! Check out the Full Recipe for all the details. This article covered how to make tasty avocado egg salad wraps step by step. We discussed essential and extra ingredients, how to boil eggs, and how to put everything together. You also learned tips for perfecting your wraps and explored fun variations. Remember, these wraps are healthy and easy to make. Whether you enjoy them fresh or meal prep for later, they can fit into any lunch plan. Experiment with flavors to find your favorite combination. Enjoy every bite and make it your own!

Avocado Egg Salad Wraps Healthy and Simple Meal

Looking for a quick, healthy meal that’s bursting with flavor? My Avocado Egg Salad Wraps might just become your new

- 2 ripe bananas, peeled - 1 cup rolled oats - 1/4 cup honey or pure maple syrup - 1/2 cup plain yogurt or unsweetened applesauce - 2 large eggs - 1 teaspoon baking soda - 1 teaspoon pure vanilla extract - 1/2 teaspoon ground cinnamon - 1/4 teaspoon salt - 1/2 cup chocolate chips or chopped nuts (optional) The ingredients for these muffins offer great health benefits. Ripe bananas provide potassium and fiber, helping your heart and digestion. Rolled oats add whole grains, which give energy and keep you full. Honey or maple syrup acts as a natural sweetener, giving you a healthier option than sugar. Yogurt boosts protein and calcium, which are good for your bones. Eggs add more protein and help bind the muffins together. Ground cinnamon helps regulate blood sugar and adds flavor without extra calories. You can swap ingredients based on your needs. For a vegan option, replace eggs with flax eggs or chia seeds. Use dairy-free yogurt or applesauce for a lactose-free version. If you want to cut sugar, try using mashed dates instead of honey or maple syrup. Instant oats can work if you are in a pinch, but rolled oats give better texture. You can also use nuts or seeds instead of chocolate chips for a healthier twist. For the full recipe, refer to the earlier section. First, preheat your oven to 350°F (175°C). This step is key to baking. Next, prepare your muffin tin. You can line it with paper liners or lightly grease it with oil. This helps the muffins come out easily. Now, it’s time to blend. In a high-speed blender, add the ripe bananas, rolled oats, honey or maple syrup, yogurt or applesauce, and the eggs. Don’t forget the baking soda, vanilla extract, ground cinnamon, and salt. Blend on high speed until it is smooth. If needed, stop to scrape the sides with a spatula. This ensures everything mixes well. If you want added texture, fold in chocolate chips or nuts after blending. Carefully pour the batter into your prepared muffin tin. Fill each muffin cavity about two-thirds full. This gives the muffins room to rise. Place the tin in the oven and bake for 18-20 minutes. Check with a toothpick; it should come out clean or with a few crumbs. Once done, let the muffins cool in the tin for 5 minutes. Then, transfer them to a wire rack. This helps them cool evenly. Enjoy your Banana Oat Blender Muffins with a drizzle of honey for extra sweetness! You can find the Full Recipe for more detailed steps. To get the best texture in your muffins, use ripe bananas. They should be spotty and soft. This adds natural sweetness and moisture. Blend the mixture well. You want it smooth and creamy. If you leave lumps, the muffins may not rise evenly. Fill the muffin cups only two-thirds full. This gives them space to puff up nicely. One common mistake is overmixing the batter. Blend just enough to combine the ingredients. Overmixing makes the muffins tough. Avoid using unripe bananas. They lack the sweetness and flavor you need. Also, do not skip the resting time after baking. Letting them cool helps improve the texture. Serve these muffins warm for the best taste. Try drizzling honey on top for extra sweetness. Adding sliced bananas on the side makes it look pretty. You can also enjoy them with yogurt or a nut butter spread. These muffins pair well with a cold glass of milk or a warm cup of tea. For the full recipe, check out the detailed instructions! {{image_4}} You can easily make these muffins gluten-free. Just use gluten-free oats. For a vegan version, swap eggs for flax eggs. Mix one tablespoon of ground flaxseed with three tablespoons of water. Let it sit for five minutes to thicken. Replace yogurt with plant-based options like almond or coconut yogurt. These changes keep the muffins tasty and healthy. Feel free to get creative with flavors! You can add mix-ins like berries, nuts, or dried fruits. Chocolate chips give a sweet touch, while nuts add a nice crunch. Adding spices like nutmeg or ginger can also enhance the flavor. A teaspoon of vanilla or almond extract makes the muffins even more delicious. These muffins are perfect for breakfast or snacks. You can make standard-sized muffins or mini ones for bite-sized treats. If you want larger muffins, just fill the cups more. Adjust baking time if you change the size. Mini muffins may bake in about 12-15 minutes, while larger ones might take a few extra minutes. Check with a toothpick to see if they are done. After baking, let your muffins cool fully on a wire rack. Once cooled, place them in an airtight container. This keeps them fresh for up to 3 days. If you want to keep them longer, consider freezing them. Storing muffins in a cool, dry place helps maintain their soft texture. To freeze your Banana Oat Blender Muffins, wrap each muffin tightly in plastic wrap. Then, place the wrapped muffins in a freezer bag. Make sure to squeeze out as much air as possible before sealing. They can stay fresh in the freezer for up to 3 months. When you're ready to eat one, just pull it out and thaw it at room temperature. To reheat your muffins, use a microwave or an oven. For the microwave, heat one muffin for about 15 to 20 seconds. This warms it up without drying it out. If you prefer the oven, preheat it to 350°F (175°C) and bake the muffin for about 5 to 10 minutes. This method gives it a nice, warm texture. Enjoy your muffins warm for the best taste! To make Banana Oat Blender Muffins, gather your ingredients first. You need ripe bananas, rolled oats, honey or maple syrup, yogurt or applesauce, eggs, baking soda, vanilla extract, cinnamon, salt, and optional chocolate chips or nuts. Start by preheating your oven to 350°F (175°C). Prepare your muffin tin by lining it with paper liners or greasing it. Next, blend all your ingredients in a high-speed blender. Blend until smooth, making sure to scrape the sides if needed. Then, fold in any chocolate chips or nuts if you want. Pour the batter into the muffin tin, filling each cup about two-thirds full. Bake for 18-20 minutes, or until a toothpick comes out clean. Let the muffins cool on a wire rack. For the full recipe, check the details above. Yes, you can use instant oats instead of rolled oats. Instant oats will change the texture, making your muffins a bit softer and denser. If you prefer a heartier muffin, I suggest sticking with rolled oats. Rolled oats give a nice chewiness and help the muffins rise better. These muffins can last about 3-5 days when stored properly. Keep them in an airtight container at room temperature. If you want them to last longer, you can freeze them. They stay good in the freezer for up to three months. Just make sure to wrap them well in plastic wrap or a freezer bag. When ready to eat, thaw them overnight in the fridge or warm them in the microwave. You've learned about the key ingredients, their benefits, and how to make banana oat blender muffins. We discussed preparations, baking, and tips to get the best results. Consider variations for different diets and flavors. Lastly, storing and reheating your muffins helps them stay fresh longer. Keep experimenting with these muffins and enjoy the delight they bring! Your kitchen is now a place for tasty, healthy treats. Happy baking!

Banana Oat Blender Muffins Easy Healthy Recipe

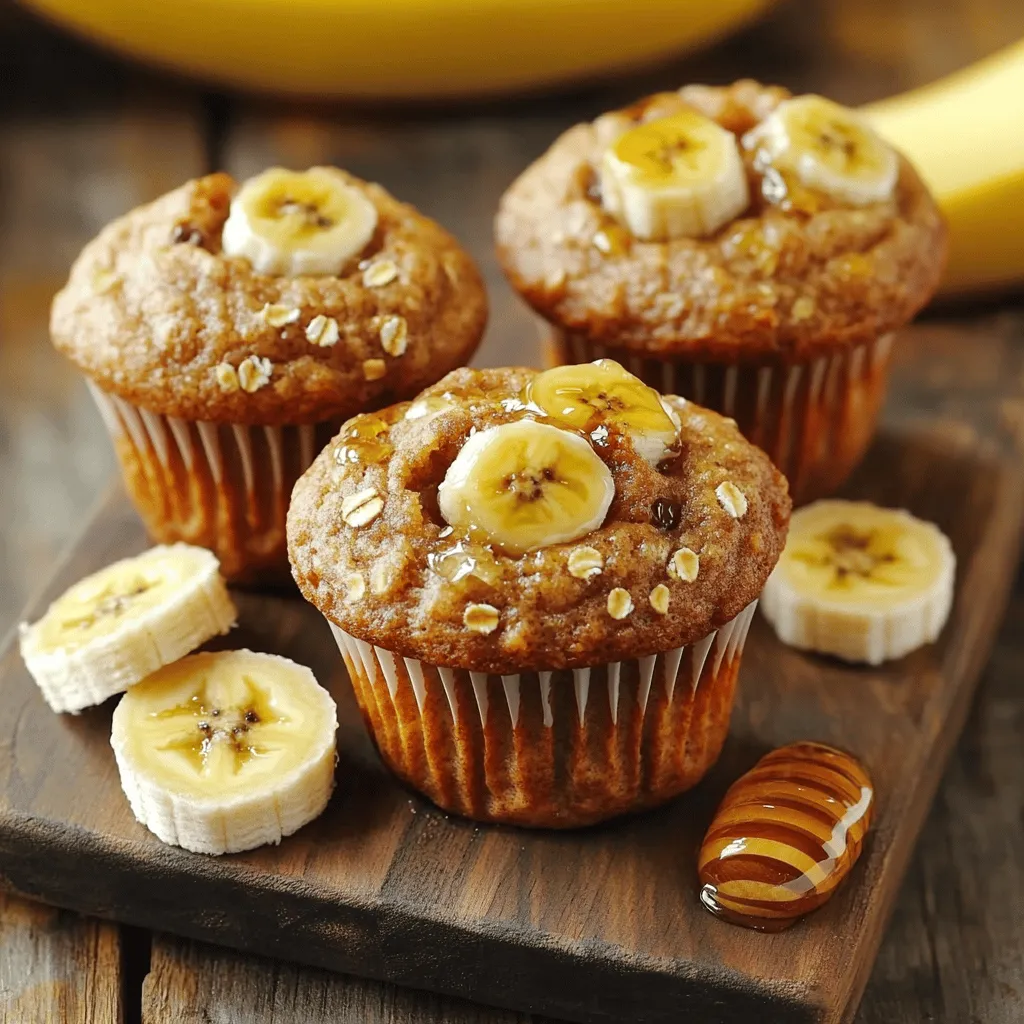
Looking for a simple and healthy treat? These Banana Oat Blender Muffins are perfect! With just a few ingredients and

Older posts
Page1 Page2 … Page74 Next →

dsad

© 2025 dailydishcraft • Built with GeneratePress

Our Policies

  • Copyright Policy
  • Cookie Policy
  • GDPR Policy
  • Privacy Policy
  • Disclaimer
  • Terms Of Use

More Information

  • Home
  • About
  • Contact
  • Appetizers
  • Dessert
  • Dinner
  • Drinks
©2025, dailydishcraft About Back To Top