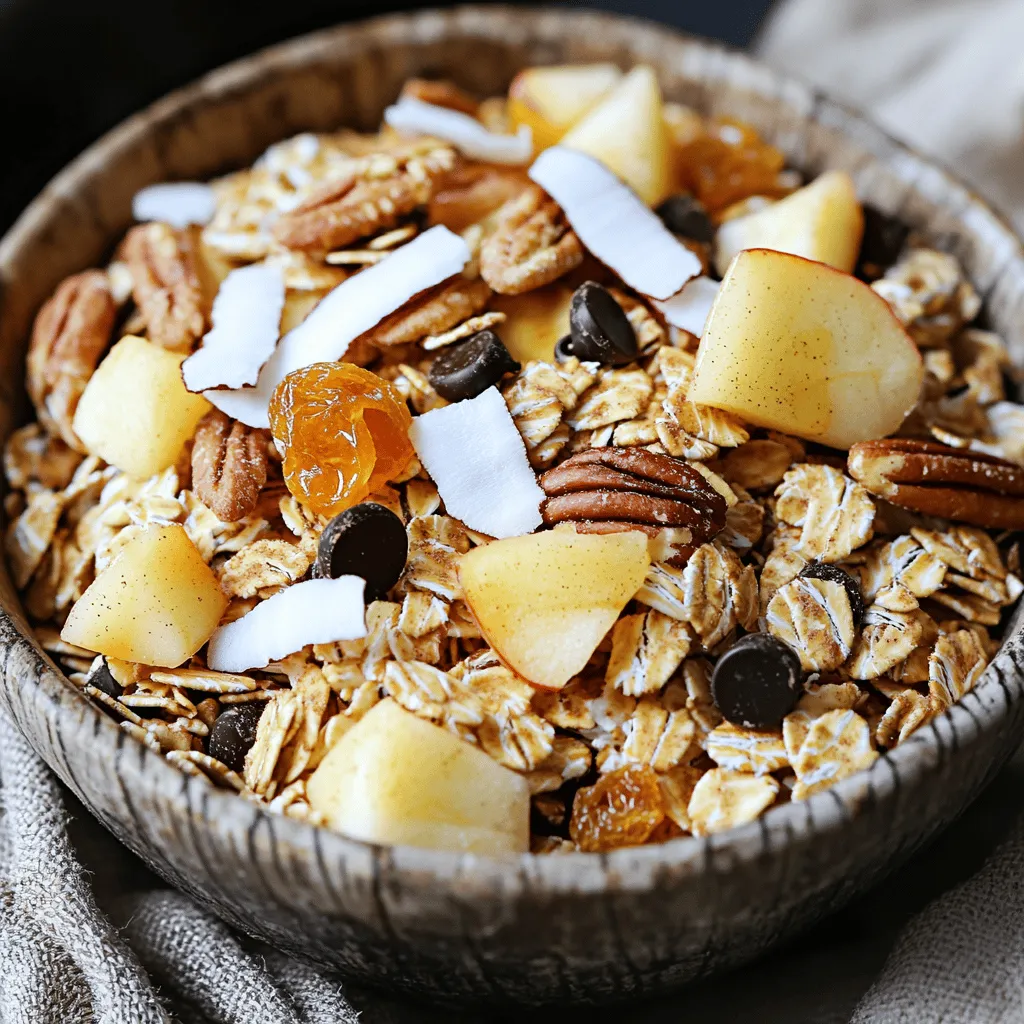
Apple Pie Spice Snack Mix Tasty and Simple Treat
Looking for a quick treat that’s packed with delicious flavor? Try my easy Apple Pie Spice Snack Mix! This fun
Looking for a quick treat that’s packed with delicious flavor? Try my easy Apple Pie Spice Snack Mix! This fun
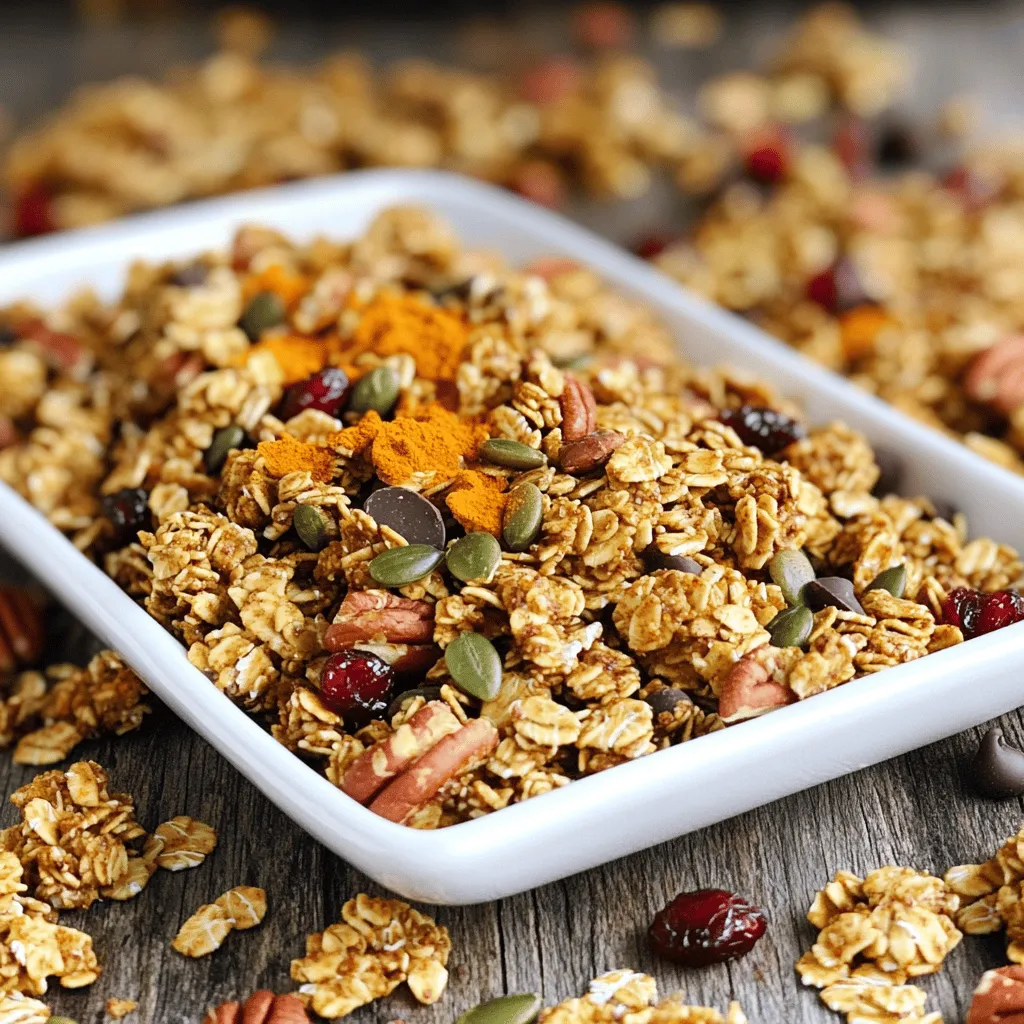
Get ready to enjoy a tasty treat that screams fall! My Pumpkin Spice Granola Snack Mix is a perfect blend
![- 1 medium head of cauliflower, broken into florets - 1 bulb of garlic - 2 tablespoons olive oil - 1/4 cup unsweetened almond milk (or any preferred milk) - 2 tablespoons unsalted butter (or plant-based butter) - Salt and black pepper, to taste - 1/4 teaspoon ground nutmeg (optional) - Fresh parsley, finely chopped (for garnish) To make the perfect roasted garlic mashed cauliflower, gather these simple ingredients. Cauliflower is the star here. It gives a creamy texture when mashed. The garlic adds a rich, sweet flavor. Olive oil and butter bring depth and moisture. You can use any milk you prefer. Seasonings like salt, pepper, and nutmeg give it a unique taste. Optional fresh parsley adds a nice touch for garnish. This recipe is easy and fun! You can find the full recipe in the article. Let’s start cooking! Roasting the Garlic Bulb Roasting garlic brings out its sweet and rich flavor. Take a whole bulb of garlic and slice off the top. Drizzle one tablespoon of olive oil over it. Wrap the bulb in aluminum foil. This keeps it moist while baking. Place it in the preheated oven at 400°F (200°C). Timing for Roasting Roast the garlic for about 30 to 35 minutes. Check if it is soft and caramelized. You’ll know it’s done when it smells amazing and is golden brown. Boiling Method While the garlic roasts, prepare your cauliflower. Fill a large pot with salted water and bring it to a boil. Break a medium head of cauliflower into florets. Carefully add the florets to the boiling water. Checking for Tenderness Cook the cauliflower for 10 to 12 minutes. It should be fork-tender when done. Test it by poking a piece with a fork. If it goes in easily, it’s ready to drain. Mashing Techniques Once drained, return the cauliflower to the pot. Squeeze the roasted garlic cloves out of their skins directly into the pot. Add the remaining tablespoon of olive oil, almond milk, butter, salt, and pepper. Achieving Desired Consistency Use an immersion blender or a potato masher to blend the mixture. Mash until it is smooth and creamy. You can add more almond milk if you want it creamier. Taste the mixture and adjust the seasoning as needed. For the full recipe, please refer to the note above. For the best texture, you can choose between an immersion blender or a potato masher. An immersion blender gives a super smooth finish. It blends the cauliflower and garlic into a creamy delight. If you prefer a chunkier feel, use a potato masher. Both tools work well, so pick what you like best. To adjust the creaminess, almond milk is key. Start with a little and add more if needed. This milk helps create a light and airy dish. You can also use regular milk if you prefer. To boost flavor, try adding seasonings. Garlic powder, onion powder, or smoked paprika can make a big difference. A touch of lemon juice brightens the taste. You can also experiment with fresh herbs. Chopped thyme or rosemary adds a lovely twist. For optional add-ins, consider mixing in roasted red peppers or sautéed mushrooms. These ingredients bring extra taste and texture. Feel free to get creative and make this dish your own. For the complete recipe, check out the [Full Recipe]. {{image_4}} You can switch up the ingredients in roasted garlic mashed cauliflower to fit your taste. For dairy-free options, use plant-based milk and butter. Almond milk works great, but any nut or oat milk is fine too. If you want a richer taste, add in some cheese. Cream cheese or Parmesan adds a lovely flavor. Fresh herbs can also boost the dish. Try adding parsley, chives, or thyme for a fresh twist. You can make this dish faster with an Instant Pot. Just place the cauliflower and garlic in the pot with some water. Cook on high for about 8 minutes. Quick and easy! If you don’t want to roast the garlic, you can sauté it. Just chop the garlic and cook it in olive oil over medium heat. This adds a nice, strong flavor to the mashed cauliflower. You can find the full recipe here: [Full Recipe]. After making your roasted garlic mashed cauliflower, let it cool down. Cooling helps keep the taste fresh. Once cool, you can store it in an airtight container. Place it in the fridge if you plan to eat it within a few days. Refrigeration Guidelines - Store in the fridge for up to 5 days. - Make sure the lid fits tightly to lock in moisture. Freezing Instructions and Duration If you want to keep it longer, freezing is a great option. - Place the mashed cauliflower in a freezer-safe container. - Leave some space at the top since it may expand. - Label the container with the date. - It will stay fresh for about 2 months in the freezer. When you're ready to enjoy your creamy comfort dish again, reheating is key. Microwave vs. Stovetop - Microwave: Place the desired amount in a bowl. Cover it with a microwave-safe lid or wrap. Heat for 1-2 minutes, stirring halfway through. - Stovetop: Warm it in a pan over low heat. Stir often to prevent sticking. You can add a splash of almond milk for creaminess. Following these steps ensures your roasted garlic mashed cauliflower stays tasty and satisfying! Can I use frozen cauliflower? Yes, you can use frozen cauliflower. Just cook it as per package directions. It may have more water, so drain it well. This helps keep your mash creamy. Is this recipe vegan-friendly? Yes, it can be vegan! Use plant-based butter and almond milk. This keeps the dish tasty and dairy-free. How to adjust the recipe for larger servings? To serve more people, double or triple the ingredients. Cook in batches if needed. Just remember to adjust cooking times for the cauliflower. Breakdown of Calories and Macronutrients One serving has about 120 calories. It contains 8g of carbs, 2g of protein, and 9g of fat. These numbers can change based on added ingredients. Health Benefits of Cauliflower Cauliflower is low in calories and high in fiber. It is rich in vitamins C and K. Eating it may help with digestion and weight loss. It also has antioxidants that can support your health. For the full recipe, check out the link. This article showed you how to make roasted garlic mashed cauliflower. We covered ingredients, cooking steps, and tips for perfecting texture and flavor. You learned how to customize the dish with different methods and variations. Storing the leftovers properly ensures you can enjoy this meal again. Remember, cooking is about experimenting. Don’t be afraid to try new flavors and techniques. Enjoy your cooking journey and embrace the taste of this healthy dish!](https://dailydishcraft.com/wp-content/uploads/2025/07/806ad243-0b6c-4423-9f67-e5f04c79f5ea.webp)
Are you ready to elevate your comfort food game? Roasted Garlic Mashed Cauliflower is the creamy, delicious dish you need
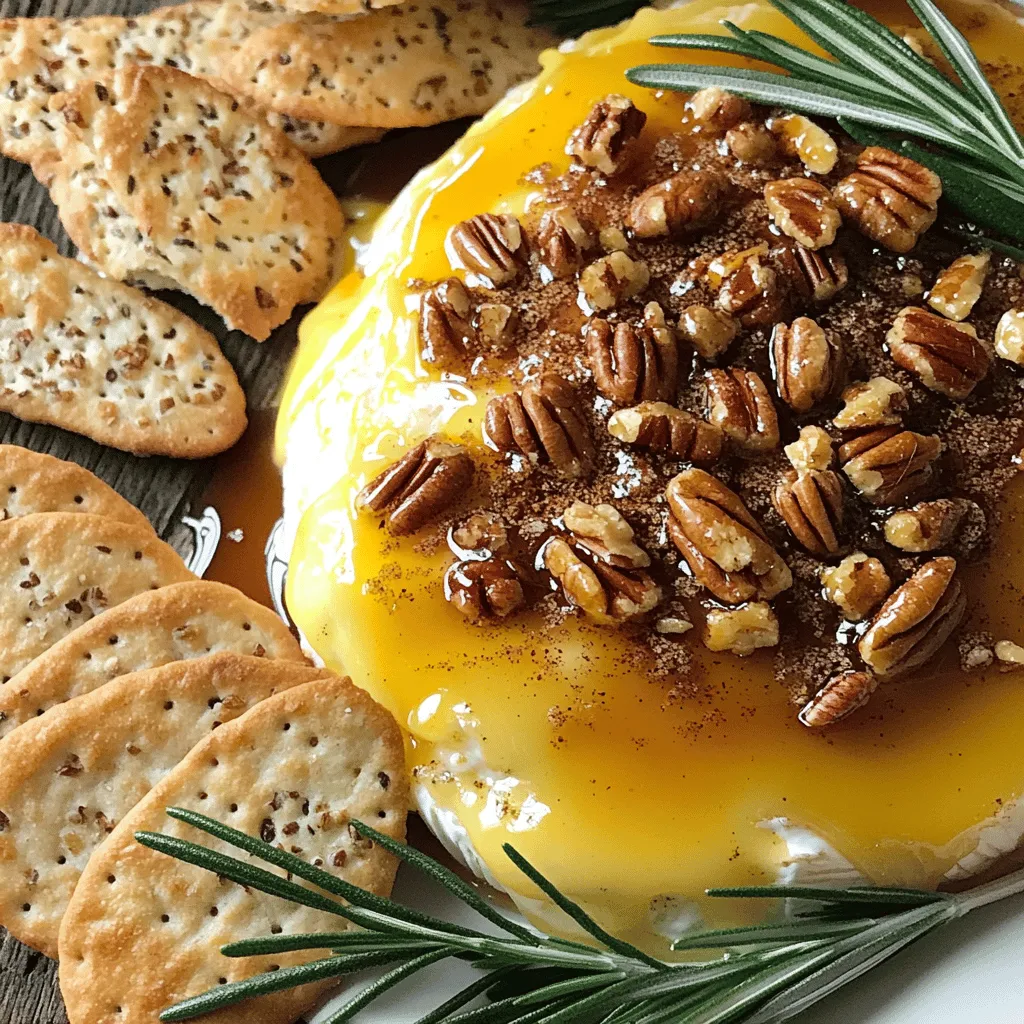
Get ready to impress your holiday guests with a Maple Pecan Baked Brie! This creamy, gooey delight topped with sweet
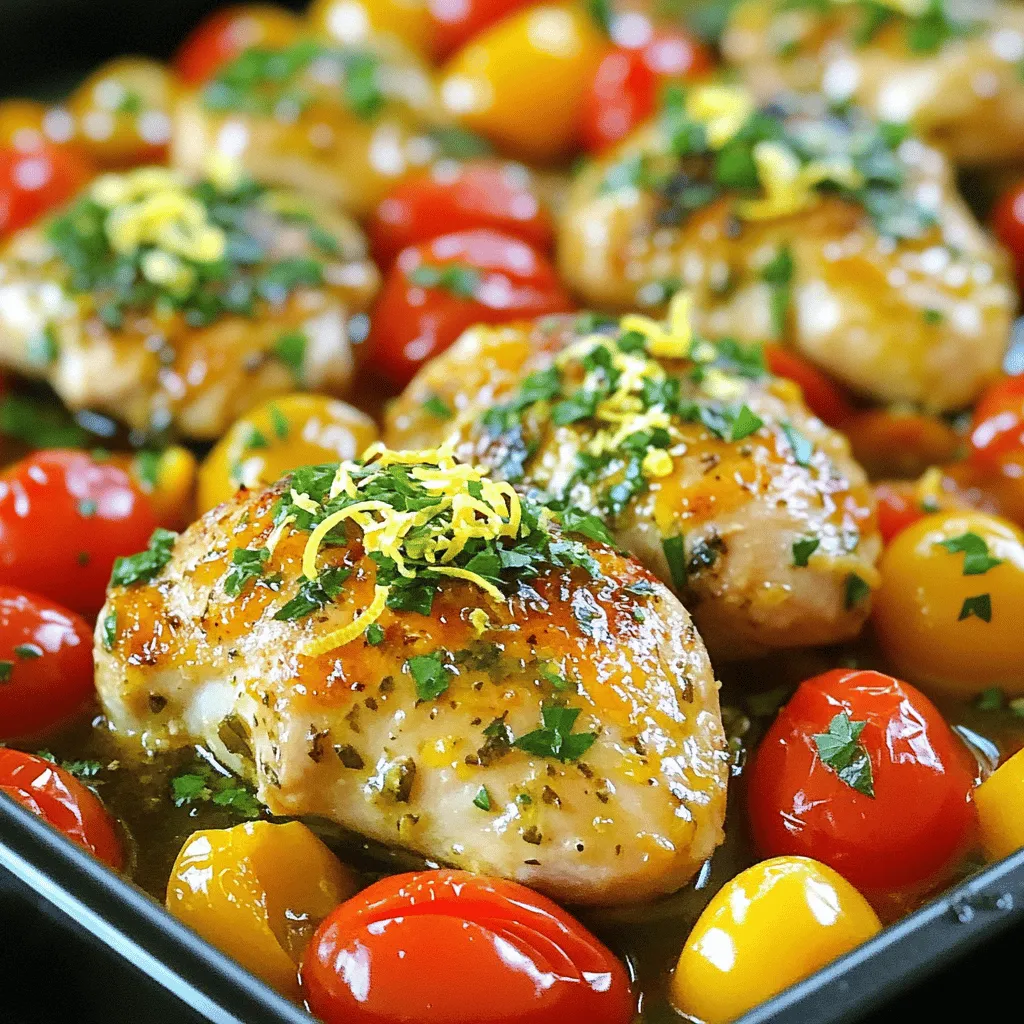
Looking for a simple yet delicious meal? You’ve found it! This One-Pan Lemon Herb Chicken is packed with flavor and

Looking for a tasty treat that blends the comfort of banana bread with the joy of cookies? You’re in luck!
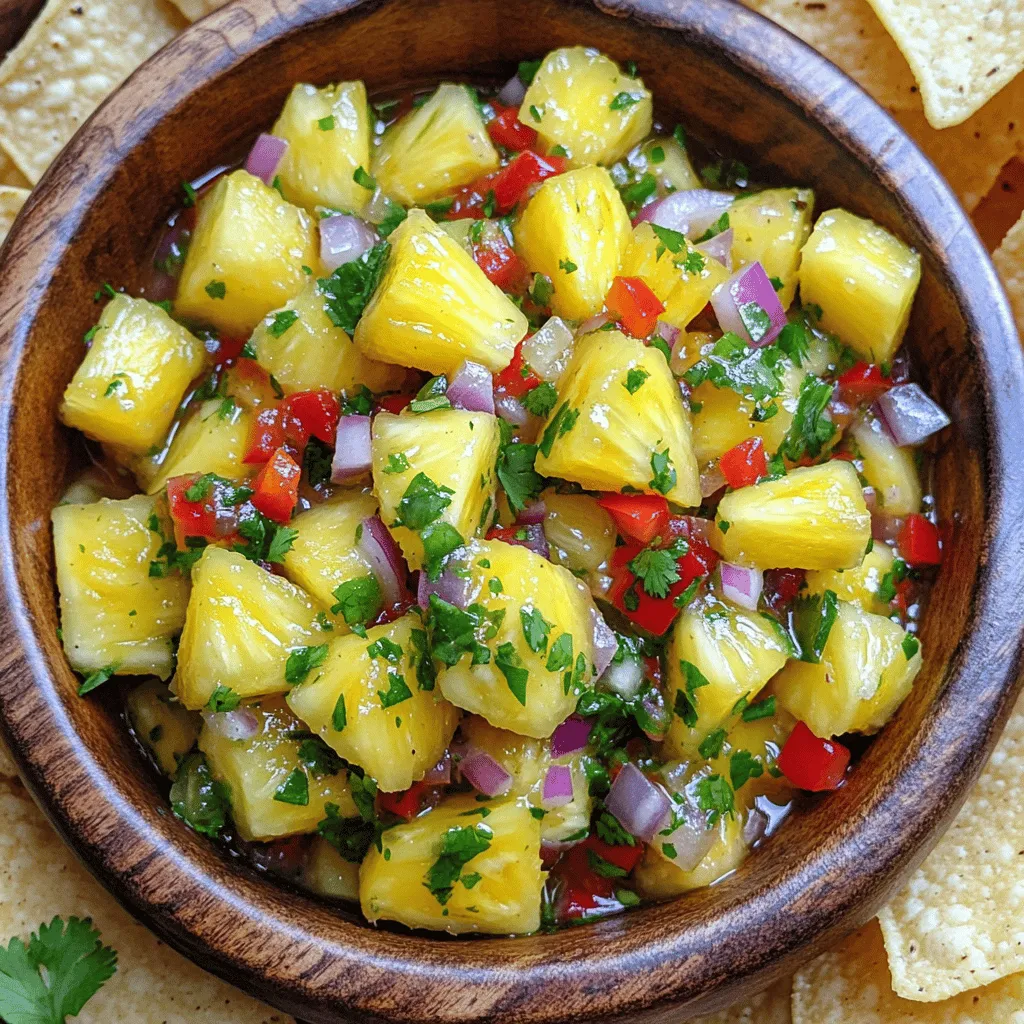
Get ready to spice up your meals with my quick and easy Pineapple Habanero Salsa! This vibrant salsa combines sweet
![- 4 medium sweet potatoes - 1 cup black beans, drained and rinsed - 1 cup corn kernels (fresh or canned) - 1 cup shredded cheddar cheese (or vegan cheese) - 1/2 cup sour cream (or Greek yogurt as a lighter alternative) - 1/4 cup green onions, finely chopped - 1 tablespoon olive oil - 1 teaspoon ground cumin - 1 teaspoon chili powder - Salt and pepper, to taste - Fresh cilantro, for garnish Sweet potatoes are the star of this dish. They give a natural sweetness and a nice texture. Black beans add protein and fiber, making this meal more filling. Corn brings a bit of crunch and sweetness, balancing out the flavors. Cheddar cheese, or vegan cheese, melts beautifully and adds richness. Sour cream or Greek yogurt gives a creamy finish, which is great with the spices. Green onions offer a fresh bite, while cilantro adds a pop of color and taste. - Sweet potatoes: High in vitamins A and C, great for your immune system. - Black beans: Packed with protein and fiber, they support digestive health. - Corn: A good source of carbohydrates and fiber, it provides energy. - Cheddar cheese: Rich in calcium and protein, it helps build strong bones. - Sour cream: Adds creaminess with some fats; Greek yogurt is lower in calories. - Olive oil: Contains healthy fats and antioxidants that are good for the heart. - Spices (cumin and chili powder): Have anti-inflammatory properties and add flavor. - Salt and pepper: Enhance the overall taste; use them wisely for balance. By knowing what goes into these loaded sweet potato skins, you can enjoy both the flavors and the health benefits. For the full recipe, check out the details above! How to preheat the oven effectively To start, preheat your oven to 400°F (200°C). This helps cook the sweet potatoes evenly. Make sure to set a timer so it's ready when you are. Rinsing and cutting the sweet potatoes Next, rinse the sweet potatoes under cold water. Scrub them well to remove any dirt. Use a fork to poke several holes in each potato. This lets the steam escape while they bake. Timing and temperature guidance for baking Place the sweet potatoes on a baking sheet lined with parchment paper. Bake them for 45 to 50 minutes. They should be tender when you poke them with a fork. Checking for doneness When the time is up, carefully take the sweet potatoes out of the oven. Let them cool for a few minutes. Then, check if they feel soft to ensure they are fully cooked. Creating the stuffing mixture In a bowl, mix the scooped sweet potato flesh with black beans, corn, olive oil, cumin, chili powder, salt, and pepper. Stir until everything is well blended. This mixture adds flavor and texture to the skins. Packing and topping the sweet potato skins Generously fill each sweet potato skin with the stuffing. Press it down to pack it in tightly. Top each filled skin with shredded cheese. This will melt and create a tasty layer when baked again. For the complete process, refer to the Full Recipe for more details. To make the best sweet potatoes, start with the right technique. First, wash the sweet potatoes well. Use cold water to scrub off any dirt. This ensures a clean skin. Next, poke holes in the potatoes with a fork. This step lets steam escape while baking. Bake your sweet potatoes at 400°F (200°C) for 45-50 minutes. To check if they are done, use a fork. The fork should easily pierce through the flesh. This means they are soft and ready to scoop. When scooping out the flesh, be gentle. Use a spoon and leave 1/4 inch of flesh in the skin. This keeps the skin strong and helps it hold the filling. To bring your loaded sweet potato skins to life, add spices. I suggest using ground cumin and chili powder. These spices give depth and warmth. You can also try garlic powder and smoked paprika for added flavor. Fresh ingredients make a big difference. Use ripe tomatoes and fresh herbs. Freshness brightens the dish. When you select ingredients, look for vibrant colors and firm textures. Garnishing your dish can make it stunning. Top your loaded sweet potato skins with a dollop of sour cream. Sprinkle fresh green onions and cilantro on top. These colors and textures make the dish pop. For serving, place the skins on a large platter. This creates a fun sharing experience. You can also serve them with a side of salsa or guacamole. This adds extra layers of flavor and enjoyment. {{image_4}} You can easily adapt loaded sweet potato skins to fit different diets. For those who follow a vegan diet, simply swap regular cheese for vegan cheese. You can also use dairy-free sour cream or Greek yogurt alternatives. Both options work well and keep the dish creamy. If you need to make it gluten-free, this recipe is already safe! Sweet potatoes are naturally gluten-free. Just ensure that any additional ingredients, like sauces, do not contain gluten. For people with allergies, here are some possible replacements: - Black beans: Use pinto beans or chickpeas. - Cheese: Try nutritional yeast for a cheesy flavor without dairy. - Sour cream: Opt for avocado or a nut-based cream. The flavor of loaded sweet potato skins is so versatile! You can change the spices to fit your taste. Here are a few blends you might enjoy: - Smoky Chipotle: Add smoked paprika and chipotle powder for a smoky kick. - Herbed Delight: Mix Italian herbs like oregano and basil for a fresh twist. - Curry Flavor: Use curry powder for a warm, exotic taste. You can also switch up the fillings for even more variety. Some tasty alternatives include: - Cooked Quinoa: For added protein and texture. - Grilled Veggies: Mix in zucchini or bell peppers for a fresh crunch. - Pulled Chicken or Beef: For meat lovers, this adds heartiness to your dish. Experimenting with these variations allows you to create a loaded sweet potato skin that suits your mood and taste! For the full recipe, check out the [Full Recipe]. To store leftovers correctly, let the loaded sweet potato skins cool down first. Place them in an airtight container. This keeps them fresh and tasty. You can store them in the fridge for up to three days. To maintain freshness, cover the skins with a damp paper towel before sealing the container. This helps keep them from drying out. To freeze loaded sweet potato skins, first let them cool completely. Then, wrap each skin tightly in plastic wrap or aluminum foil. Place them in a freezer-safe bag or container. You can freeze them for up to three months. When you’re ready to eat, take them out and reheat in the oven. Preheat the oven to 350°F (175°C) and bake for about 20 minutes. This helps retain their texture and flavor. For best results, check them often to avoid overcooking. You can find the Full Recipe to make these tasty treats and enjoy them fresh or stored. Can sweet potatoes be made ahead of time? Yes, you can bake sweet potatoes a day in advance. Just store them in the fridge. When you’re ready, scoop out the flesh and fill them as directed in the Full Recipe. What are the best serving suggestions? Serve loaded sweet potato skins with sour cream, green onions, and fresh cilantro. You can also add guacamole or salsa for extra flavor. How do I make loaded sweet potato skins spicier? To add heat, sprinkle red pepper flakes or diced jalapeños into the filling. You can also use spicy cheese or a hot sauce drizzle on top. How long do sweet potatoes last in the fridge? Raw sweet potatoes last for about 1-2 weeks in the fridge. Cooked sweet potatoes stay fresh for about 3-5 days. Can I use different types of cheese? Absolutely! You can use mozzarella, pepper jack, or even vegan cheese for a dairy-free option. Each will give a unique taste. What can I substitute for black beans? You can use pinto beans, kidney beans, or even chickpeas. They will all work well in this recipe. Are loaded sweet potato skins healthy? Yes! They are packed with fiber, vitamins, and minerals. Sweet potatoes are a great source of nutrients and antioxidants. What is the calorie count per serving? Each serving has around 300-400 calories, depending on the toppings you choose. The cheese and sour cream add most of the calories. How can I make this dish lower in calories? To lower the calories, use less cheese or opt for a lighter sour cream. You can also skip the cheese entirely for a lighter dish. In this post, we explored the delicious world of loaded sweet potato skins. We covered key ingredients, step-by-step baking instructions, and tips for great flavor. You learned about variations for different diets and how to store leftovers safely. Remember, loaded sweet potato skins are easy to make and enjoy. Customize them to match your taste. With fresh ingredients and a bit of creativity, you can make a tasty dish for everyone.](https://dailydishcraft.com/wp-content/uploads/2025/07/b31e000a-4e51-4b9b-b20a-3deadbe69009.webp)
If you’re looking for a dish that bursts with flavor and satisfies your cravings, loaded sweet potato skins are your
![For the perfect cinnamon roll mug cake, you need just a few simple items. Each ingredient plays a key role in creating that warm, gooey goodness. Here’s what you’ll need: - 4 tablespoons all-purpose flour - 1 tablespoon granulated sugar - 1/8 teaspoon baking powder - 1/4 teaspoon ground cinnamon - Pinch of salt - 3 tablespoons milk - 1 tablespoon vegetable oil - 1/2 teaspoon pure vanilla extract - 1 tablespoon brown sugar (for topping) - 1/2 teaspoon ground cinnamon (for topping) These ingredients come together to form a delightful treat. The flour gives structure, while the sugar adds sweetness. Baking powder helps it rise, making it fluffy. Ground cinnamon fills your kitchen with a warm scent. The milk and oil keep it moist, and vanilla adds a lovely flavor. The brown sugar topping creates a sweet crust that you will love! For the full recipe and a step-by-step guide to making your own cinnamon roll mug cake, check out the [Full Recipe]. Enjoy this easy treat anytime you need a quick dessert! To make the perfect cinnamon roll mug cake, follow these easy steps. - Combine dry ingredients in a mug Start by taking a microwave-safe mug. Add the all-purpose flour, granulated sugar, baking powder, ground cinnamon, and a pinch of salt. Mix these dry ingredients well with a fork or a small whisk. This helps break up lumps and ensures even flavor. - Mix wet ingredients separately In a small bowl, whisk together the milk, vegetable oil, and pure vanilla extract. Make sure they are blended nicely. This mixture adds moisture and flavor to your cake. - Combine wet and dry ingredients Slowly pour the wet mixture into the dry ingredients in your mug. Use your fork to stir gently. It’s okay if you see a few lumps; just make sure there is no dry flour left. - Prepare topping mixture In another small bowl, mix the brown sugar with the ground cinnamon. This will create a sweet topping for your mug cake. Sprinkle this mix over the batter in your mug. It will create a tasty crust when it bakes. - Microwave cooking instructions Place your mug in the microwave and cook on high for 1 minute and 30 seconds. Microwaves can vary, so check the cake after 1 minute. It should spring back when pressed. If it’s still wet in the center, cook for 15-second intervals until done. Be careful when removing the mug; it will be hot! Enjoy your easy cinnamon roll mug cake warm, and don't forget to check out the Full Recipe for more tips! - Avoiding overmixing: Mix the wet and dry ingredients just until combined. A few lumps are okay. Overmixing leads to a tough cake. - Checking doneness: After 1 minute and 30 seconds, gently press the center. It should spring back. If it looks wet, microwave in 15-second bursts until done. - Adjusting cooking time for different microwaves: Microwaves vary in power. Keep an eye on your cake as it cooks. You may need to change the time based on your microwave's strength. - Drizzling with icing: Mix powdered sugar with a bit of milk to make a simple icing. Drizzle it over the warm mug cake for a sweet touch. - Adding whipped cream: A dollop of whipped cream on top makes this treat even more special. The cool cream contrasts nicely with the warm cake. - Pairing with beverages: Enjoy your mug cake with a hot cup of coffee or tea. The flavors blend well, making each bite even better. For the full recipe, refer back to the ingredients and instructions provided above. {{image_4}} You can switch up your cinnamon roll mug cake in fun ways. Here are some ideas: - Chocolate cinnamon roll mug cake: Add 1 tablespoon of cocoa powder to the dry mix. This gives a rich chocolate flavor that pairs well with cinnamon. - Adding nuts or fruits: Try mixing in some chopped nuts like walnuts or pecans. You can also add in fruits like blueberries or diced apples. They add great texture and taste. - Making a pumpkin spice version: Swap out some of the cinnamon for pumpkin pie spice. You can also add 1 tablespoon of pumpkin puree for a cozy fall treat. If you have dietary needs, there are easy changes you can make: - Gluten-free alternative: Use 4 tablespoons of gluten-free flour blend instead of all-purpose flour. Ensure it has the right mix for baking. - Dairy-free options: Replace milk with almond milk or oat milk. This keeps the mug cake moist and tasty without dairy. - Low-sugar adjustments: Cut the granulated sugar to 1/2 tablespoon. You can also use a sugar substitute like stevia if you want it even lower in sugar. These variations let you enjoy the mug cake in your own way. You can find the [Full Recipe] for the original mug cake above. To keep your cinnamon roll mug cake fresh, store any leftovers in the refrigerator. Place it in an airtight container or cover the mug tightly with plastic wrap. This helps prevent it from drying out. You can also put it in the fridge for up to three days. When you're ready to enjoy it again, reheating is quick. Just pop it back in the microwave for about 15 to 30 seconds. Check it often to avoid overheating. If the cake feels dry, you can add a splash of milk to moisten it. Freezing is another option. If you want to save some for later, let the cake cool completely. Wrap it well in plastic wrap, then place it in a freezer-safe bag. It can stay in the freezer for up to one month. To eat, let it thaw in the fridge overnight and then reheat it in the microwave. The best time to enjoy your cinnamon roll mug cake is within three days if stored in the fridge. After that, the texture and flavor may change. Look for signs of spoilage, like an off smell or unusual texture. If it smells sour or looks dry, it's best to toss it. Enjoying your mug cake fresh is always the tastiest option! Can I double the recipe? Yes, you can double the recipe. Use a larger mug or two mugs. Just make sure to adjust the cooking time. It may take longer to cook. Check after two minutes, then add time if needed. What if my mug cake is too dry? If your mug cake is dry, it may have cooked too long. Each microwave is different. Try reducing the cooking time by 10-15 seconds next time. You can also add a bit more milk to the batter. How can I make it healthier? To make it healthier, use whole wheat flour instead of all-purpose flour. You can also reduce the sugar or use a sugar substitute. Adding applesauce can help keep it moist too. What is a mug cake? A mug cake is a small, single-serving cake cooked in a mug. You mix the ingredients right in the mug and microwave it. It’s quick and perfect for a sweet treat. Can I make this recipe without a microwave? Yes, you can bake it in an oven. Preheat your oven to 350°F (175°C). Pour the batter into a small oven-safe dish. Bake for about 15-20 minutes or until a toothpick comes out clean. What can I use instead of all-purpose flour? You can use almond flour or oat flour as a substitute. These options can change the taste and texture slightly, so keep that in mind. You learned how to make a tasty cinnamon roll mug cake using simple ingredients. We covered each step, from preparing the batter to tips for perfect results. You can even swap ingredients for your diet needs. Plus, we explored ways to enjoy it with toppings and drinks. Now you can impress friends or treat yourself. With easy instructions and tasty variations, this mug cake is a fun dessert. Enjoy your baking and all the delicious possibilities!](https://dailydishcraft.com/wp-content/uploads/2025/07/546fc906-b100-42aa-80c5-a70c16388577.webp)
If you’re craving something sweet and easy, I have the perfect solution: a Cinnamon Roll Mug Cake! This treat combines
![To make a delicious salted caramel apple crumble, you need these simple ingredients: - 5 medium-sized apples (preferably Granny Smith or Honeycrisp) - 1 tablespoon fresh lemon juice - 1 cup brown sugar (divided) - 1 teaspoon ground cinnamon - ½ teaspoon ground nutmeg - ½ cup salted caramel sauce - 1 cup rolled oats - ¾ cup all-purpose flour - ½ cup cold unsalted butter - ¼ teaspoon sea salt Each ingredient plays a special role in creating this tasty dish. The apples give sweetness and a nice tart flavor. The lemon juice keeps the apples from browning. Brown sugar adds a rich sweetness. The spices, like cinnamon and nutmeg, bring warmth and depth to the flavor. Salted caramel sauce is the star of the show. It adds a creamy texture and a sweet, salty taste that pairs perfectly with the apples. The oats and flour in the crumble topping give it a nice crunch. The cold butter helps create that crumbly texture we love. When you gather these ingredients, you set the stage for a delightful dessert. This recipe is perfect for sharing with family and friends. For the complete recipe, check out the Full Recipe. 1. Preheating the oven: Set your oven to 350°F (175°C). This step warms up your cooking space. It ensures even baking for your crumble. 2. Preparing the apple mixture: In a big bowl, combine 5 sliced apples with 1 tablespoon of lemon juice. Add ½ cup of brown sugar, 1 teaspoon of cinnamon, and ½ teaspoon of nutmeg. Toss it all well. You want every apple slice covered in sweet spices. 3. Layering the caramel sauce: Spread your apple mix evenly in a greased 9x13-inch dish. Drizzle ½ cup of salted caramel sauce over the apples. Make sure it covers all the fruit for that rich flavor. 1. Mixing dry ingredients: In another bowl, mix 1 cup of rolled oats, ½ cup of flour, and ½ cup of brown sugar. Add ¼ teaspoon of sea salt for a nice touch. 2. Incorporating the butter: Cut ½ cup of cold butter into small cubes. Add it to the dry mix. Use a fork or your hands to blend it. Aim for a mix that looks like coarse crumbs with some small butter chunks. 3. Applying the crumble topping: Sprinkle the crumble mix evenly over the apple layer in the dish. This topping creates a tasty crust when baked. 1. Baking time and temperature: Place your dish in the oven. Bake for 35-40 minutes. Look for a golden-brown top and bubbly apples. 2. Checking for doneness: Your crumble is ready when the topping is golden. The apples should be soft and juicy. 3. Cooling before serving: Take the dish out of the oven. Let it cool for about 10 minutes. This cooling time helps all flavors mix well. For the complete recipe, refer to the [Full Recipe]. Enjoy your cooking adventure! When selecting apples, choose ones that are firm and sweet. Firm apples hold their shape when baked. Sweet apples add a nice flavor contrast to the salty caramel. I recommend using Granny Smith or Honeycrisp apples. They balance sweetness and tartness well. You can use store-bought caramel sauce for ease. However, making homemade caramel sauce can elevate your dish. To make perfect caramel, start with sugar in a heavy pan. Heat it on medium until it melts and turns golden. Stir gently to avoid burning. Add cream slowly and mix well. Serve your crumble warm for the best taste. Pair it with a scoop of vanilla ice cream or a dollop of whipped cream. For a lovely touch, drizzle more salted caramel sauce on top. Sprinkle a pinch of sea salt for extra flavor. Arrange it nicely on a plate to impress your guests. {{image_4}} To make this recipe gluten-free, swap all-purpose flour with almond flour or gluten-free flour blend. Use certified gluten-free oats for the crumble. This change keeps the texture light and crumbly. You may need to adjust the baking time slightly. Check for a golden top to ensure it is baked well. For a vegan version, replace the butter with coconut oil or a vegan butter alternative. Use coconut cream or a plant-based caramel to ensure a rich flavor. You can make caramel using coconut sugar and plant milk. This keeps the recipe creamy without any animal products. To enhance the flavor, add chopped nuts like walnuts or pecans to the crumble. This adds crunch and depth. You can also sprinkle in additional spices, like ginger or cloves, for warmth. For a fruity twist, mix in berries or pears with the apples. These changes make each bite unique and exciting. To store leftovers, let the crumble cool completely. Then, cover it tightly with plastic wrap or place it in an airtight container. This keeps it fresh and prevents it from drying out. You can store it in the fridge for up to four days. If you want to retain the best flavor, eat it within two days. If you want to freeze the crumble, first let it cool. Cut it into portions, then wrap each piece in plastic wrap. After that, place the wrapped pieces in a freezer bag. This helps keep the air out. You can freeze it for up to three months. To reheat, place the crumble in the oven at 350°F (175°C) for about 25 minutes. Cover it with foil to prevent burning. The best time to enjoy the crumble is warm, right after it cools for ten minutes. This way, the caramel is gooey and the apples are tender. To maintain the texture after storage, reheat it gently. This keeps the crumble topping crisp. Pair it with vanilla ice cream for a special treat. For the ultimate experience, drizzle extra salted caramel on top! You can find the full recipe for this delightful dessert and more tips in the previous sections. To make salted caramel sauce, you need just a few simple ingredients: - 1 cup granulated sugar - 6 tablespoons unsalted butter - ½ cup heavy cream - 1 teaspoon sea salt Start by placing the sugar in a medium saucepan over medium heat. Stir gently until it melts and turns a deep amber color. Then, add the butter and stir until melted. Slowly pour in the cream while stirring. Be careful, as it will bubble up. Lastly, sprinkle in the salt and mix well. This sauce is rich and perfect for your crumble. Yes, you can prepare the crumble ahead of time! Here are some tips: - Make the apple filling and crumble topping separately. - Store the apple mixture in the fridge for up to two days. - Keep the crumble topping in an airtight container at room temperature for a day or in the fridge for longer. When ready to bake, layer the apple filling, add the salted caramel, and top with the crumble. This way, you save time on busy days! The salted caramel apple crumble lasts about 3 to 4 days in the fridge. To store it: - Allow the crumble to cool down completely. - Cover it tightly with plastic wrap or aluminum foil. - Place it in the fridge to keep it fresh. If you want to enjoy it later, reheat it in the oven for a few minutes before serving. Pair your salted caramel apple crumble with these delightful options: - Vanilla ice cream - Whipped cream - Freshly brewed coffee - Spiced chai tea - Caramel sauce drizzle These pairings enhance the flavors and make your dessert even more enjoyable. Try different combinations for a fun dessert experience! In this blog post, we explored a delicious salted caramel apple crumble. We covered essential ingredients, clear steps for preparation, and tips for selecting the best apples and caramel sauce. I also shared variations for gluten-free and vegan options and offered storage advice. Creating this crumble is easy and fun. Enjoy the warm flavors and share with friends. You can tweak it to suit your taste. Simple touches can make a big difference. Now, it’s time to bake and delight in every bite!](https://dailydishcraft.com/wp-content/uploads/2025/07/bec42685-db64-4a58-bb25-3811bda69a67.webp)
Are you ready to indulge in a warm, sweet treat? This Salted Caramel Apple Crumble combines juicy apples with a
