Skip to content
DisclaimerTerms Of UseGDPR PolicyCookie Policy

dailydishcraft

  • Home
  • Drinks
  • Appetizers
  • Dinner
  • Dessert
  • About
  • Contact
  • Privacy Policy
DisclaimerTerms Of UseGDPR PolicyCookie Policy

Jessica

To make crispy potato wedges, you need the right ingredients. Here’s what you will need: - 4 medium-sized russet potatoes - 3 tablespoons olive oil - 1 teaspoon garlic powder - 1 teaspoon onion powder - 1 teaspoon smoked paprika - 1 teaspoon dried rosemary - 1 teaspoon dried thyme - Salt and freshly cracked black pepper to taste I love using russet potatoes. Their high starch content gives the wedges a perfect, fluffy inside. The olive oil helps crisp the outside, while the spices add amazing flavor. The key to great flavor lies in the seasonings. Besides the essential spices I listed, here are a few more ideas: - Paprika gives a smoky taste. - Garlic powder adds depth. - Dried rosemary and thyme bring a lovely herb note. Mixing these spices with olive oil creates a fragrant blend. This mixture coats the potato wedges and enhances their taste. Garnishing your potato wedges can elevate the dish. Here are some options: - Fresh parsley, finely chopped, adds color and freshness. - A sprinkle of grated Parmesan cheese gives a rich twist. For dipping sauces, try these: - Garlic aioli for a creamy kick. - Spicy ketchup for those who love heat. These garnishes and sauces make your crispy potato wedges visually appealing and fun to eat. Check out the Full Recipe for more details on how to prepare them! Start by washing the russet potatoes well. Use cold water to scrub off any dirt. Keep the skins on for added texture. Cut each potato in half lengthwise, then slice into wedges. Aim for six to eight wedges per potato. This size helps them crisp up nicely. In a large bowl, mix the olive oil with spices. Use three tablespoons of olive oil. Add one teaspoon each of garlic powder, onion powder, and smoked paprika. Include one teaspoon of dried rosemary and one teaspoon of dried thyme. Don’t forget salt and pepper to taste. Whisk until the oil and spices blend well. This mix makes the wedges flavorful. Preheat your oven to 425°F (220°C). Line a large baking sheet with parchment paper. Place the potato wedges in the bowl with the oil and toss them well. Coat each wedge fully for the best flavor. Spread them out on the baking sheet in a single layer. Bake for 30-35 minutes. Flip them halfway through. This step ensures they get golden and crispy on both sides. Let them cool for a few minutes after baking. Sprinkle with fresh parsley for a pop of green before serving. Enjoy your crispy potato wedges! You can find more details in the Full Recipe. To make your potato wedges super crispy, follow these steps. First, soak the cut wedges in cold water for at least 30 minutes. This removes excess starch, which helps them crisp up better. After soaking, dry the wedges well with a towel. Make sure they are not wet. A dry surface means less steam and more crunch. Use a good amount of oil, but don’t drown them. Just enough to coat each wedge nicely will do. Avoid cutting your potatoes too thick. If they are too thick, they won’t cook through and will remain soft inside. Also, don’t overcrowd the baking sheet. Give each wedge space to breathe. This allows hot air to circulate and crisp them up. Lastly, be careful with the salt. Too much can draw out moisture, which makes them soggy. These crispy wedges taste great with dips! Try garlic aioli or spicy ketchup for a fun twist. They also pair well with burgers or grilled chicken. If you want a fresh side, serve them with a salad. For a gourmet touch, sprinkle some grated cheese on top right before serving. You can find the full recipe for these delicious wedges [here](#). {{image_4}} You can change the flavor of your potato wedges with many spices. Try adding chili powder for heat. Or mix in cumin for a warm, earthy taste. You can also use curry powder for an exotic twist. Experiment with herbs like oregano or basil for a fresh vibe. The right spices can make your wedges unique and delicious. Want to mix it up? Use sweet potatoes instead of regular ones. Sweet potatoes add a nice sweetness and a lovely orange color. They are packed with vitamins and minerals too. Just follow the same steps as with russet potatoes. Sweet potato wedges cook faster, so check them a few minutes early. If you own an air fryer, it’s a game changer! This method makes the wedges super crispy without much oil. Start by seasoning your potato wedges as you normally would. Place them in the air fryer basket in a single layer. Cook at 400°F (200°C) for about 20 minutes. Shake the basket halfway through for even cooking. You will love how crispy they turn out! For the full recipe of crispy herb-infused potato wedges, see the section above. Store leftover potato wedges in an airtight container. Let them cool completely first. Place a paper towel at the bottom to absorb moisture. This helps keep them crispy. Seal the container and put it in the fridge. Use the wedges within 3-4 days for the best taste. To reheat your potato wedges, use an oven or an air fryer. Preheat the oven to 400°F (200°C). Spread the wedges on a baking sheet in a single layer. Bake for about 10-15 minutes until they crisp up again. If using an air fryer, set it to 375°F (190°C) and heat for about 5-7 minutes. Both methods help keep the wedges crispy. You can freeze potato wedges for later use. First, bake them as per the full recipe and let them cool completely. Place the cooled wedges in a single layer on a baking sheet. Freeze for about 1-2 hours until firm. After that, transfer them to a freezer bag. Remove as much air as possible before sealing. Use frozen wedges within 2-3 months for the best quality. To make your potato wedges extra crispy, start by soaking them in cold water for 30 minutes. This removes excess starch and helps with crispiness. After soaking, pat the wedges dry with a towel. Use a good amount of oil when baking them. The herb-infused oil from the recipe also adds flavor and helps them crisp up. Arrange the wedges in a single layer on the baking sheet, leaving space between each one. Flip them halfway through baking for even crispiness. Yes, you can prepare the wedges ahead of time! Cut and season them a few hours in advance. Store the seasoned wedges in the fridge until you are ready to bake. You can also soak them in cold water overnight. Just remember to dry them well before cooking for the best crispiness. Crispy potato wedges pair well with many dipping sauces. Some great options include: - Garlic aioli - Spicy ketchup - Creamy ranch dressing - Sour cream with chives - Barbecue sauce - Chipotle mayo Try different sauces to find your favorite combination! Enjoy these delicious wedges with the dips of your choice. For the full recipe, check out the Crispy Herb-Infused Potato Wedges section. In this blog post, we explored how to make crispy potato wedges. We discussed essential ingredients, seasonings, and the best cooking methods. You learned how to prep, bake, and maximize crispiness. Plus, we covered fun variations and smart storage tips. Now, you’re ready to enjoy tasty potato wedges any way you like. Whether you stick to the classic recipe or try sweet potatoes, delicious results await you. Enjoy your cooking!

Crispy Potato Wedges Golden and Flavorful Treat

Get ready for a crispy sensation! This guide will show you how to make golden, flavorful potato wedges that are

- 1 large French baguette - 1 cup pitted green olives, finely chopped - 1 cup pitted black olives, finely chopped - 2 cups shredded mozzarella cheese - 1 cup crumbled feta cheese - 3 tablespoons extra virgin olive oil - 2 cloves garlic, minced - 1 teaspoon dried oregano - 1 teaspoon red pepper flakes (optional) - Salt and freshly cracked black pepper to taste - Fresh parsley for garnish Using these ingredients, you can create a delicious Olive Cheese Bread appetizer. The combination of olives and cheese makes a rich flavor. I love how the green and black olives blend together. The mozzarella provides a gooey texture, while the feta adds a nice tang. The extra virgin olive oil enhances the taste and helps mix the ingredients. Garlic gives a nice aroma and flavor kick. You can add red pepper flakes if you want some heat. Always season with salt and pepper to bring out the flavors. Fresh parsley not only adds color but also a fresh taste. I like to chop it finely and sprinkle it on top just before serving. This mix of ingredients is simple but creates a fantastic dish. For the full experience, check out the [Full Recipe]. Enjoy every bite of this tasty delight! - Preheat the oven to 375°F (190°C). - Slice the baguette in half lengthwise. Cut each half into pieces about 3-4 inches long. Place them cut-side up on a baking sheet lined with parchment paper. - In a bowl, mix the chopped green and black olives. - Add the shredded mozzarella, crumbled feta, minced garlic, and olive oil. - Season with dried oregano, red pepper flakes, salt, and black pepper. Mix well until all is combined. - Spread the olive and cheese mixture on each baguette slice. Make sure they are well-covered. - Place the baking sheet in the oven and bake for 15-20 minutes. Look for bubbly cheese and a golden edge. Don't forget to check out the Full Recipe for all details! To make your olive cheese bread even better, consider adding fresh herbs. Basil, thyme, or rosemary add a punch. You can also mix in sun-dried tomatoes for a touch of sweetness. For some heat, sprinkle in red pepper flakes or chopped jalapeños. For toasting bread perfectly, keep an eye on the oven. Check at the 12-minute mark. You want it crispy but not burnt. Using a baking stone can help, too. It distributes heat evenly for a great crust. When serving, think about presentation. Use a rustic wooden board to show off the bread. Cut it into bite-sized pieces for easy sharing. Sprinkle fresh parsley on top for a colorful finish. You can also add a small bowl of olives on the side. This makes the dish feel more complete. Pair your olive cheese bread with a light salad or a dip. A fresh tomato salsa or a zesty hummus works well. To get the best cheese texture, use a mix of cheeses. Mozzarella melts well, while feta adds a nice tang. Make sure to spread the cheese mixture thickly. This helps it stay creamy inside while the top gets crispy. To prevent sogginess, avoid overloading the bread with the filling. Ensure the olives are well-drained before mixing. If the mixture is too wet, it can make the bread mushy. For the full recipe, check out Olive Cheese Bread Extravaganza. {{image_4}} You can switch up the cheese in this recipe. Try cheddar for a sharp taste. Goat cheese adds a creamy twist that many enjoy. For those who need dairy-free options, use vegan cheese. These alternatives melt well and still taste great. Olives come in many types. You can use Kalamata olives for a rich flavor. Try green olives for a milder taste. You can also add roasted red peppers to give a sweet, smoky flavor. Sun-dried tomatoes bring a chewy texture and tangy taste. Mix and match to find your favorite combo! Serve the olive cheese bread on a big platter. Cut the bread into small pieces for easy sharing. You can also add dips like hummus or a yogurt spread. This adds more flavors and fun to your meal. Guests will love trying different combinations! To keep your leftover olive cheese bread fresh, store it in an airtight container. This method helps maintain moisture and flavor. You can also wrap the bread in plastic wrap or foil. Make sure it is tightly sealed. When reheating, I suggest using the oven. Preheat it to 350°F (175°C). Place the bread on a baking sheet. Heat for about 10 minutes. This method warms the bread without making it soggy. Avoid the microwave; it can ruin the texture. You can freeze olive cheese bread before or after baking. If freezing before baking, assemble the bread as directed. Wrap it well in plastic wrap and then place it in a freezer bag. This way, it stays fresh for up to three months. To freeze after baking, let the bread cool completely. Then, wrap it tightly in plastic wrap and place it in a freezer bag. When you’re ready to enjoy it, thaw in the fridge overnight. Reheat as mentioned earlier. This way, you can enjoy the delicious flavors anytime! For detailed cooking instructions, check the Full Recipe. Making Olive Cheese Bread is quick and easy. It takes about 10 minutes to prep. The cooking time is around 15 to 20 minutes. So, you can enjoy this tasty treat in just 30 minutes! Yes, you can prepare it in advance. You can mix the olive and cheese filling a few hours before. Store it in the fridge until you are ready to bake. Just spread the filling on the bread and bake when guests arrive. Yes, this recipe fits a vegetarian diet. It uses olives, cheese, and bread, which are all vegetarian. Just check that your cheese choices are rennet-free if you want to stay strictly vegetarian. You can find the Olive Cheese Bread Extravaganza recipe for detailed instructions. This will help you create this simple and tasty delight with ease. This blog post covered the tasty Olive Cheese Bread recipe. We discussed the key ingredients, including olives, cheeses, and seasonings. I shared step-by-step instructions for making, baking, and serving this delicious dish. Plus, I offered tips for variation and storage. You can easily customize this recipe to fit your taste. Enjoy making it for friends, family, or yourself! This dish is sure to impress. Happy cooking!

Olive Cheese Bread Appetizer Simple and Tasty Delight

If you’re looking for a simple and tasty appetizer that impresses every time, try Olive Cheese Bread. This recipe combines

- 4 large russet potatoes, peeled and diced into 1-inch cubes - 1 medium onion, finely chopped - 3 cloves garlic, minced - 4 cups vegetable broth - 1 cup sharp cheddar cheese, freshly shredded - 1 cup heavy cream - 1 teaspoon dried thyme - 1 teaspoon smoked paprika - Salt and freshly ground black pepper to taste - 4 green onions, thinly sliced (for garnish) - Croutons (optional, for garnish) When measuring ingredients, be precise for the best flavor. For potatoes, use a kitchen scale if you have one. One large russet potato weighs about 10 to 12 ounces. For liquids like broth and cream, use a measuring cup. Level off dry ingredients with a straight edge for accuracy. If you're missing something, don't worry! Here are some easy swaps: - Potatoes: Try Yukon Gold or red potatoes for a different taste. - Onion: Shallots or leeks work well too. - Garlic: Garlic powder can replace fresh garlic. - Vegetable broth: Chicken broth adds a deeper flavor. - Cheese: Use mozzarella for a milder taste or gouda for a smoky flavor. - Cream: Milk or a plant-based milk can lighten the soup, but it will change the texture. Feel free to mix and match based on what you have! This recipe is all about making it your own while still achieving that rich, cheesy goodness. For the complete recipe, check out the Full Recipe section. Start by getting your slow cooker ready. Add the diced potatoes, chopped onion, and minced garlic to the pot. Make sure they sit evenly in the bottom. Next, pour in the vegetable broth. It should fully cover the veggies. Add the dried thyme and smoked paprika for a nice kick. Season with salt and freshly ground black pepper to taste. Mix everything well to blend the flavors. Now, cover the slow cooker with its lid. You can choose to cook on low for 6 hours or high for 3 hours. The goal is to make the potatoes tender. Check with a fork; they should pierce easily. Cooking on low brings out rich flavors, while high cooks faster. Pick what suits your time best. Once your soup is done, it's time for the fun part! Use a potato masher to gently break down some potatoes. This creates a chunky texture. If you want it creamier, use an immersion blender for a smoother finish. Stir in the heavy cream and shredded sharp cheddar cheese. Mix until the cheese melts completely. Taste and adjust the seasoning if needed. Let it cook on low for an extra 15-20 minutes to thicken. To serve, ladle the soup into bowls. Garnish with freshly sliced green onions and croutons for some crunch. Enjoy your warm, cheesy potato bliss! For the complete recipe, check out the Full Recipe. To boost the taste of your soup, use fresh herbs. Thyme adds warmth. Consider adding a bay leaf during cooking. It deepens the flavor. You can also use chicken broth instead of vegetable broth. This change gives the soup a richer taste. Don’t forget to sauté the onion and garlic before adding them. This step brings out their sweetness. If you want a thicker soup, mash more potatoes. Use a potato masher for a chunky style. For a creamier soup, blend some of it using an immersion blender. This makes it smooth and velvety. For extra creaminess, add more heavy cream or cheese. Just mix it in before serving, so it melts perfectly. Serve your soup hot in a deep bowl. Garnish it with green onions for a fresh touch. Croutons add a fun crunch. You can also drizzle some olive oil or extra cream on top. Pair it with crusty bread for dipping. This makes the meal feel cozy and complete. For a fun twist, offer toppings like bacon bits or fresh herbs. For the complete recipe, check out the Full Recipe. {{image_4}} You can boost the flavor of your cheesy potato soup by adding proteins. Bacon gives a nice smoky taste. Just cook it until crispy, then crumble it into the soup before serving. For ham, you can use leftover pieces. Chop them up and stir them in during the last hour of cooking. If you prefer chicken, use cooked, shredded chicken. Add it in the last 30 minutes to keep it tender and juicy. To make this soup vegetarian or vegan, swap the vegetable broth for a hearty vegetable stock. Use plant-based cream, like cashew or coconut cream, to keep it creamy. For cheese, look for vegan cheese options that melt well. Nutritional yeast can also offer a cheesy flavor without dairy. These changes keep the soup rich and delicious while fitting your dietary needs. You can change the soup's flavor by adding different spices and herbs. Try adding cayenne pepper for a spicy kick. A pinch of nutmeg can add warmth. Fresh herbs, like parsley or chives, can brighten the taste. You can also mix in some cumin for a smoky flavor. Adjust these spices to match your taste buds and enjoy a new twist on this cozy dish. After making your Slow Cooker Cheesy Potato Soup, let it cool first. Store the soup in an airtight container. It will stay fresh for about three to five days in the fridge. If you want to enjoy it later, it’s best to divide it into smaller portions. This way, you can reheat only what you need. If you want to save some soup for later, freezing is a great option. First, let the soup cool completely. Then, spoon it into freezer-safe containers or bags. Leave some space at the top, as the soup will expand when frozen. This soup can last up to three months in the freezer. Remember to label your containers with the date. To reheat your soup, thaw it in the fridge overnight if it’s frozen. You can heat it on the stove over medium heat. Stir it often to prevent sticking. If it seems too thick, add a bit of broth or water. You can also reheat it in the microwave. Use a microwave-safe bowl and cover it loosely. Heat in short bursts, stirring in between, until hot. Enjoy your delicious soup! For the full recipe, check out the Full Recipe section. Yes, you can use other types of potatoes. If you want a creamier texture, try Yukon gold potatoes. They are buttery and smooth. For a firmer bite, use red potatoes. They hold their shape well. Just keep in mind that the flavor may vary slightly. Always peel and cube them to keep it consistent with the recipe. To spice up the soup, add more spices. You can include cayenne pepper or crushed red pepper flakes. Start with a small amount, like 1/4 teaspoon. Then, taste and adjust as needed. Fresh jalapeños are another good option. Just chop them finely and add them in when you mix in the broth. This soup pairs well with many sides. Fresh, crusty bread is a great choice for dipping. A simple green salad can lighten the meal. If you like protein, grilled cheese sandwiches work well too. For a fun twist, serve it with crispy bacon bits on top. You can also check the Full Recipe for more serving ideas. In this blog post, we explored how to make Slow Cooker Cheesy Potato Soup. We looked at the ingredients, measurement guides, and substitutions to help you succeed. I shared step-by-step instructions to prepare your slow cooker, cook on different settings, and add final touches. We also covered tips for flavor, thickness, and serving suggestions. Variations included proteins and vegetarian options. Lastly, I explained storage, freezing, and reheating. With these simple steps and tips, you can create a warm, tasty dish everyone will love. Enjoy making your delicious soup!

Savory Slow Cooker Cheesy Potato Soup Recipe

Craving a warm, comforting dish that will brighten your day? Your search ends here! This Savory Slow Cooker Cheesy Potato

To make the Red, White, and Blueberry Trifle, gather the following fresh ingredients: - 2 cups fresh strawberries, hulled and sliced - 2 cups fresh blueberries - 1 cup vanilla Greek yogurt - 1 cup heavy whipping cream - 1/4 cup powdered sugar - 1 teaspoon pure vanilla extract - Ladyfinger cookies or pound cake - Fresh mint leaves for garnish These ingredients create a bright and tasty treat. The strawberries give a sweet, juicy flavor. The blueberries add a pop of color and tartness. The vanilla yogurt adds creaminess, while the whipped cream brings lightness. You can choose ladyfinger cookies or pound cake for the layers. Both options work well, but they change the texture. Ladyfingers are soft and soak up flavors, while pound cake adds a dense layer. Fresh mint leaves on top add a nice touch and a refreshing taste. You can find these ingredients at any local grocery store. For the full recipe on how to put it all together, check out the Full Recipe link. Enjoy making this delightful trifle! - Whipping the cream: Start by pouring the heavy cream into a bowl. Use an electric mixer to beat the cream at medium speed. After 2-3 minutes, you will see soft peaks forming. Gradually add the powdered sugar and vanilla extract. Keep beating until you see stiff peaks, which takes about 2 more minutes. Set the whipped cream aside. - Creating the base layer: Grab a large trifle dish or individual cups. Place a layer of sliced strawberries evenly at the bottom. This will be your base layer. Make sure the strawberries are spread out well. - Adding the cookie layer: Next, take ladyfinger cookies or cubes of pound cake. Carefully arrange this layer over the strawberries. Spread them evenly to cover the strawberries completely. - Adding yogurt and blueberries: Now, use a spoon or spatula to add a layer of vanilla Greek yogurt over the cookies. Smooth it out nicely. After that, sprinkle fresh blueberries across the yogurt layer. This will add a nice color contrast. - Repeating layers: Keep repeating the layering process. Add more strawberries, cookies, yogurt, and blueberries. Do this until you use all ingredients. Make sure the top layer is a thick mound of whipped cream. - Chilling the trifle: To let the flavors blend, cover the trifle with plastic wrap. Place it in the refrigerator for at least 1 hour. This step is key for a tasty treat. - Garnishing before serving: When you are ready to serve, take off the plastic wrap. Garnish the whipped cream with fresh mint leaves and a handful of extra blueberries. This adds a pop of color and freshness to your trifle. For a detailed list of ingredients, check the Full Recipe. Enjoy the process and savor each step! - Use a clear trifle bowl to show off the layers. - Serve in individual dessert cups for a fun touch. - Garnish with mint leaves and extra blueberries for color. - Add fruit preserves for an extra layer of sweetness. - Incorporate citrus zests like lemon or lime for brightness. - Whip the cream until you see soft peaks form. - Avoid over-whipping; stop when stiff peaks appear. These simple tips can change your trifle game. They help you create a stunning dessert that tastes as good as it looks. For a full recipe, check the Red, White, and Blueberry Trifle. {{image_4}} You can use other fruits to mix things up. Raspberries or blackberries add a tart twist. They pair well with the sweet cream and yogurt. Seasonal fruits also work great here. In summer, peaches or cherries can shine. In fall, try apples or pears for a cozy feel. Feel free to let your taste guide you! You can change the cream for a lighter touch. Whipped topping can be a quick substitute. It saves time and still tastes great. If you want a healthier option, use flavored yogurt. Greek yogurt adds protein and tang. It gives a new layer of flavor to your trifle. For a more decadent treat, use brownie chunks instead of cookies. They add richness and a fudgy texture. If you need a gluten-free option, choose gluten-free cookies or cake. This way, everyone can enjoy the trifle without worry. You can mix and match to create your perfect Red, White, and Blueberry Trifle. For the full recipe, check out the instructions above. The Red, White and Blueberry Trifle stays fresh for about 3 days in the fridge. To keep it tasty, cover it tightly with plastic wrap or a lid. This helps stop air from getting in and keeps your trifle moist. You can freeze this trifle, but it might change in texture. If you decide to freeze it, first remove the whipped cream. The cream can become watery when thawed. Store the other layers in an airtight container. When you want to eat it, thaw the trifle in the fridge overnight. After it thaws, add fresh whipped cream on top for the best taste. For the full recipe, check out the details above. You can store the trifle in the fridge for up to three days. After that, it may lose its freshness. Make sure to cover it tightly with plastic wrap to keep it safe from other fridge smells. Yes, you can make the trifle a day in advance. This allows the flavors to mix well. Just remember to cover it and chill it overnight for the best taste. If you can't find ladyfinger cookies, you can use pound cake or even sponge cake. Cubed brownies also work for a fun twist. To keep layers distinct, let each layer set a bit before adding the next. Use a gentle hand when adding layers, too. Yes, you can make a vegan version by using coconut cream for the whipped topping. For yogurt, try dairy-free yogurt. Use vegan cookies or cake for the layers. This blog post shared a simple, tasty recipe for a Red, White, and Blueberry Trifle. I covered fresh ingredients, step-by-step instructions, and tips for presentation and flavor. You can customize this dessert with various fruits and creams. Proper storage guidelines help keep it fresh longer. Remember, make it your own with different layers and flavors. Enjoy creating this trifle, and impress friends and family at your next gathering!

Red, White and Blueberry Trifle Fresh and Tasty Treat

Looking for a fun and easy treat for your next celebration? Try my Red, White and Blueberry Trifle! It combines

To make these no-bake cheesecake bites, you need: - 1 cup graham cracker crumbs - 4 tablespoons unsalted butter, melted - 2 tablespoons granulated sugar - 8 oz cream cheese, softened at room temperature - 1/2 cup powdered sugar - 1 teaspoon pure vanilla extract - 1 cup heavy whipping cream - Fresh berries (like strawberries, blueberries, or raspberries) for topping You can add your twist with these optional items: - Chocolate sauce for a rich flavor - Caramel sauce for a sweet touch - Nuts for extra crunch - Different fruits like mango or kiwi Choosing the best ingredients is key. Here’s how: - Cream Cheese: Look for blocks, not spreads. It should be smooth and creamy. - Heavy Cream: Pick a brand with high fat content for the best texture. - Berries: Choose firm, plump berries with bright colors. Avoid any that are mushy. - Graham Crackers: Check for freshness. They should not be stale or broken. Using fresh ingredients makes your cheesecake bites taste amazing. You can find the full recipe above to create these delicious treats! To start, gather your ingredients for the crust. You need: - 1 cup graham cracker crumbs - 4 tablespoons unsalted butter, melted - 2 tablespoons granulated sugar In a medium bowl, mix the graham cracker crumbs, melted butter, and sugar. Stir until it looks like wet sand. Press this mixture firmly into the bottom of your molds or mini muffin tray. Make sure it’s compact, like a solid layer. Refrigerate for 10-15 minutes so it can set while you make the filling. Now, let’s make the filling. You will need: - 8 oz cream cheese, softened - 1/2 cup powdered sugar - 1 teaspoon pure vanilla extract - 1 cup heavy whipping cream In a large bowl, beat the softened cream cheese until it’s smooth, about 2-3 minutes. Add the powdered sugar and vanilla, mixing until it’s all combined. In another bowl, whip the heavy cream until it forms stiff peaks, taking about 3-5 minutes. Gently fold the whipped cream into the cream cheese mixture. This step is key for a light, fluffy filling. Spoon the cheesecake filling over the crusts in your molds. Fill them about three-quarters full for the best results. Smooth the tops with a spatula. Place the molds in the freezer for 30 minutes to 1 hour, letting them firm up. After they are set, gently pop them out of the molds. If they stick, run a knife around the edges. Top each cheesecake bite with fresh berries or a drizzle of chocolate or caramel. These steps make your treats look and taste amazing. Serve right away or keep them in the fridge until you're ready to enjoy. For the complete recipe, check the Full Recipe above. When making no-bake cheesecake bites, avoid using cold cream cheese. Cold cream cheese will not mix well. Always let it soften at room temperature. Another mistake is overmixing the whipped cream. If you whip it too much, your cream will turn to butter. Finally, do not skip chilling the crust. A cold crust ensures a nice base for your bites. To whip cream perfectly, start with cold heavy cream. The colder it is, the better it whips. Use clean beaters and a large bowl. This helps the cream whip faster. Start at a low speed, then increase gradually. Stop whipping as soon as stiff peaks form. This should take about 3-5 minutes. Avoid over-whipping, as this can ruin the texture. For a light and fluffy filling, fold the whipped cream gently into the cream cheese mix. Use a spatula and make sweeping motions. This helps incorporate air without losing volume. Filling the molds three-quarters full gives the bites the right balance. After chilling, they should feel firm but still creamy. Enjoy the creamy texture and smooth taste of these delightful treats! {{image_4}} You can change the flavor of your cheesecake bites easily. Try adding chocolate or lemon for a twist. For chocolate, mix cocoa powder into the cream cheese. Use about 1/4 cup for a rich taste. For lemon, add lemon juice and zest to the filling. About 2 tablespoons of juice and the zest of one lemon work well. These flavors make each bite unique and fun. The toppings can change the whole look and taste. Fresh berries are great, but you can also try nuts or shredded coconut. If you want a sweeter touch, drizzle chocolate or caramel sauce on top. You can even use a mix of both! This adds flair and flavor to your cheesecake bites. Add the toppings right before serving for a fresh look. These no-bake cheesecake bites fit any event. For a party, place them on a fancy tray with extra berries around. At a picnic, pack them in a cooler for a sweet treat. For a cozy night in, serve them with tea or coffee. They are perfect for birthdays or holiday gatherings, too. Each bite makes the occasion special. Check the Full Recipe for more ideas on how to enjoy these bites! To keep your no-bake cheesecake bites fresh, store them in an airtight container. This helps maintain their creamy texture and flavor. Place a layer of parchment paper between layers to avoid sticking. Keep them in the fridge if you plan to eat them within a week. You can freeze these cheesecake bites for longer storage. First, let them set in the molds. Once firm, pop them out and place them in a single layer on a baking sheet. Freeze them for about two hours. After that, transfer them to a freezer-safe container. They can last up to three months. When ready to enjoy, thaw them in the fridge overnight. No-bake cheesecake bites can last in the fridge for about 5 to 7 days. Look for signs of spoilage like an off smell or a change in texture. If you see any mold, discard them immediately. Always trust your senses; fresh bites should smell sweet and creamy! Yes, you can make these cheesecake bites ahead of time. Prepare them up to 24 hours in advance. Just store them in the fridge. They stay fresh and tasty when covered tightly. This makes them a great option for parties or last-minute gatherings. If you want to swap cream cheese, use Greek yogurt. It has a similar texture and tangy taste. You can also try mascarpone cheese for a rich flavor. Both options work well in this recipe. These cheesecake bites last about 5 days in the fridge. Just keep them in an airtight container. Check for freshness before serving. If they look or smell off, it's best to toss them. Enjoy your Full Recipe for delightful treats! You learned how to make no-bake cheesecake bites in this article. We covered ingredients, steps, and tips for success. Remember, fresh ingredients make a big difference. Use your favorite flavors and toppings for a fun twist. Avoid common mistakes for the best texture. Store them right to enjoy later. Making these treats is easy and rewarding. Now, grab your ingredients and start creating delicious bites that everyone will love! Enjoy your cheesecake adventure!

No-Bake Cheesecake Bites Quick and Easy Treat

Are you craving a sweet treat but short on time? No-Bake Cheesecake Bites are here to save the day! These

To make a tasty red velvet cake, you need these key items: - 2 ½ cups all-purpose flour - 1 ½ cups granulated sugar - 1 teaspoon baking soda - 1 teaspoon baking powder - 1 teaspoon salt - 1 teaspoon unsweetened cocoa powder - 1 ½ cups vegetable oil - 1 cup buttermilk, at room temperature - 2 large eggs, at room temperature - 2 tablespoons red food coloring - 1 teaspoon vanilla extract - 1 teaspoon white vinegar These ingredients work together to create a moist, rich cake with that signature red hue. For the frosting, gather these items: - 1 cup cream cheese, softened - ½ cup unsalted butter, softened - 4 cups powdered sugar - 1 teaspoon vanilla extract (for frosting) This creamy frosting adds a sweet, tangy contrast to the cake's flavor. Choosing the right ingredients makes a big difference. Here are some tips: - All-purpose flour: Look for unbleached flour for better taste. - Buttermilk: Fresh buttermilk makes the cake tender. - Red food coloring: Use gel food coloring for a vibrant color. - Vanilla extract: Pure vanilla extract offers richer flavor than imitation. - Cream cheese: Use full-fat cream cheese for a rich, creamy frosting. By selecting the best ingredients, you ensure a delicious cake that everyone will love. For the complete process, check out the Full Recipe. Start by preheating your oven to 350°F (175°C). This ensures even baking. While waiting, prepare two 9-inch round cake pans. Grease them with butter and dust with flour. This will help the cakes come out easily. In a large mixing bowl, sift together these dry ingredients: - 2 ½ cups all-purpose flour - 1 ½ cups granulated sugar - 1 teaspoon baking soda - 1 teaspoon baking powder - 1 teaspoon salt - 1 teaspoon unsweetened cocoa powder Sifting helps blend the ingredients and removes lumps. Mix them well with a whisk. In another bowl, whisk together: - 1 ½ cups vegetable oil - 1 cup buttermilk, at room temperature - 2 large eggs, at room temperature - 2 tablespoons red food coloring - 1 teaspoon vanilla extract - 1 teaspoon white vinegar Keep whisking until the mixture is smooth and vibrant. Carefully pour the wet ingredients into the dry ingredients. Stir gently until just combined. Pour the rich red batter into the prepared pans. Smooth the tops with a spatula. Bake for 25-30 minutes. Check doneness by inserting a toothpick in the center. It should come out clean. Let the cakes cool in the pans for about 10 minutes. Then, transfer them to wire racks until fully cool. For the frosting, mix together: - 1 cup cream cheese, softened - ½ cup unsalted butter, softened Beat these until smooth and creamy, about 2-3 minutes. Gradually add: - 4 cups powdered sugar - 1 teaspoon vanilla extract (for frosting) Continue to beat until the frosting is light and fluffy. Once the cakes are cool, place one layer on your serving plate. Spread a generous amount of cream cheese frosting on top. Place the second cake layer on top and cover the entire cake with the remaining frosting. For a beautiful finish, add fresh raspberries and mint leaves on top. This gives a nice pop of color and flavor. Enjoy the delightful process of creating this Red Velvet Dream Cake following the [Full Recipe]. Baking can be tricky. Here are some mistakes to watch out for: - Not measuring ingredients correctly: Always use a scale or measuring cups. - Over-mixing the batter: Mix until just combined for a soft cake. - Skipping the cooling step: Let your cakes cool fully to avoid a gooey mess. - Not using room temperature ingredients: Cold eggs and buttermilk can affect the batter. The red color is key to red velvet cake. Here are my tips: - Use gel food coloring: It gives a deeper color than liquid dye. - Add vinegar: It enhances the red hue during baking. - Don't skip the cocoa powder: A small amount boosts the color and flavor. - Test the color: Adjust the food coloring if needed before baking. Frosting can make or break your cake. Follow these tips: - Use a crumb coat: Spread a thin layer of frosting first. This traps crumbs. - Keep it smooth: Use a spatula dipped in hot water to smooth the frosting. - Layer your frosting: Add more frosting between each cake layer for balance. - Decorate with care: Use fresh raspberries and mint leaves for a beautiful touch. For a full recipe, check out Red Velvet Dream Cake. {{image_4}} You can easily make a vegan version of red velvet cake. Start by replacing the eggs with flaxseed meal or applesauce. Use a dairy-free milk like almond or soy instead of buttermilk. For the cream cheese frosting, opt for vegan cream cheese and vegan butter. This way, everyone can enjoy this classic treat without any animal products! If you need a gluten-free red velvet cake, swap all-purpose flour for a gluten-free blend. Many brands work well, so choose one that fits your taste. Make sure your baking powder is gluten-free too. This will keep your cake light and fluffy just like the traditional version. Adding unique flavors can elevate your red velvet cake. Try mixing in a splash of almond extract for a nutty twist. You can also add a bit more cocoa for a richer chocolate taste. If you want a surprise, consider folding in mini chocolate chips or even crushed raspberries. These additions can make your cake stand out and taste amazing! For the full recipe, check out the Red Velvet Dream Cake. To keep your red velvet cake fresh, wrap it in plastic wrap. Place it in an airtight container. You can also use a cake dome if you have one. This method helps keep the cake moist. Store it at room temperature for up to three days. If you want it to last longer, store it in the fridge. Just remember to bring it back to room temperature before serving. Freezing your red velvet cake is a great option. First, let the cake cool completely. Then, slice it into individual pieces. Wrap each piece in plastic wrap tightly. Place the wrapped pieces in a freezer bag and remove as much air as you can. Label the bag with the date. You can freeze the cake for up to three months. When you're ready to eat it, thaw it in the fridge overnight. Homemade red velvet cake lasts well when stored properly. At room temperature, it stays fresh for about three days. In the fridge, it can last up to a week. If you freeze it, you can enjoy it for up to three months. Always check for any signs of spoilage, like mold or an off smell, before eating. Following these tips will help you enjoy your cake longer! For the full recipe, check out the Red Velvet Dream Cake section. Red velvet cake has a rich history. It likely began in the 1800s. The cake's name comes from its soft, velvety texture and deep red color. Some think the red hue comes from cocoa powder's reaction with acid. Others say it was a result of using beet juice. This cake gained fame in the 1920s when it appeared in a Waldorf-Astoria recipe. Now, it’s a popular treat at many celebrations, especially on Valentine’s Day. If your red velvet cake turns out dry, don’t worry. You can fix it! The key is to add moisture. Try these tips: - Simple Syrup: Brush the cooled cake layers with a simple syrup made of equal parts water and sugar. - Frosting: Use a generous amount of cream cheese frosting to add moisture. - Serve with Ice Cream: This also helps bring back that moist texture. Yes, you can use different food coloring options for red velvet cake. While red is classic, you can experiment! Here are some ideas: - Natural Dyes: Use beet juice for a natural red hue. - Gel Food Coloring: This gives a brighter color and requires less. - Other Colors: Try blue or green for fun twists. Just remember, the flavor may change slightly with different colors. Serving red velvet cake can be fun! Here are some ideas: - Chilled: Serve it cold for a refreshing treat. - Garnish: Add fresh raspberries and mint leaves for color. - Pair with Drinks: It goes great with coffee or sweet tea. - Layered Dessert: Cut it into smaller pieces and serve in jars with extra frosting. Finding the best red velvet cake can be an adventure! Here are some tips: - Local Bakeries: Check out bakeries known for cakes. - Farmers’ Markets: Local bakers often showcase their best creations. - Online: Many bakeries offer delivery. Look for reviews before ordering. - Chain Stores: Some grocery stores have good options. Just check the freshness! For the full recipe, dive into the delightful details and create your own red velvet masterpiece! Red velvet cake is a delight that combines rich flavors and vibrant colors. In this post, I shared essential ingredients and provided clear steps to bake your own. You learned about common mistakes and ways to customize your cake, plus tips for storage. Remember, using quality ingredients makes a big difference. Enjoy experimenting with variations and create a cake that impresses everyone.

Red Velvet Cake Delight Simple Recipe and Tips

Are you ready to make a stunning Red Velvet Cake that will wow your friends? I’m here to guide you

- 6 medium Granny Smith apples, peeled, cored, and sliced - ¾ cup granulated sugar - ½ cup packed brown sugar - 2 tablespoons all-purpose flour - 1 teaspoon ground cinnamon - ¼ teaspoon ground nutmeg - 1 tablespoon fresh lemon juice - 1 tablespoon unsalted butter, cut into small cubes - 1 package (14 oz) pre-made pie crusts (contains 2 crusts) - 1 egg, beaten (for egg wash) - A pinch of salt When making a classic apple pie, I always choose Granny Smith apples. They are tart and firm, which gives your pie the right balance of flavors. Granulated and brown sugars add sweetness and depth. The flour helps thicken the filling, ensuring it stays nice and firm. Next, I love to mix in spices like cinnamon and nutmeg. They add warmth and a nice aroma as the pie bakes. A splash of lemon juice brightens the flavors, making the apples taste fresh. Butter adds richness and creaminess, making every bite melt in your mouth. For the crust, I often use pre-made pie crusts. They save time and still taste great. An egg wash gives the top a golden color, while a pinch of salt enhances all the flavors. Gather these ingredients for your homemade apple pie. They’re simple, but they create something truly special. If you want to see how to use these items, check out the Full Recipe for all the steps. 1. Preheat the oven: Set your oven to 425°F (220°C). This step is key for a great pie crust. 2. Prepare the apple filling: In a large bowl, mix sliced Granny Smith apples with granulated sugar, brown sugar, flour, cinnamon, nutmeg, lemon juice, and salt. Stir gently until all apples are coated. This ensures each bite is flavorful. 1. Fit the pie crust in the pan: Unroll one pie crust and place it in a 9-inch pie pan. Press it down gently so it fits snugly. 2. Fill with apple mixture and add butter: Pour the apple filling into the crust. Spread it out evenly. Place small cubes of butter on top for richness. 3. Cover with top crust and seal: Take the second pie crust and lay it over the filling. Trim any extra dough. Pinch the edges to seal. Cut small slits in the top for steam to escape. 1. Brush with egg wash: Use a pastry brush to coat the top crust with beaten egg. This gives a nice golden color. 2. Bake and monitor browning: Place the pie in the oven and bake for 45-50 minutes. Watch for a deep golden brown crust. If the edges darken too fast, cover them with foil. 3. Cooling the pie before serving: Once baked, take the pie out and let it cool on a wire rack for at least 2 hours. This helps the filling set, so it slices perfectly later. For more details, check the Full Recipe. - Achieving a perfect crust: Start with cold ingredients. This helps your crust stay flaky. Use a light touch when mixing. Overworking the dough makes it tough. Roll it out on a floured surface for even thickness. Always chill the crust before baking for the best results. - Preventing over-browning: If you notice the edges browning too fast, cover them with foil. This protects the crust while allowing the filling to cook. Keep an eye on it during baking. A deep golden color means it's just right. - Selecting the right apples: Granny Smith apples are great for pies. They have a tart flavor that balances the sweetness. Mix them with other apples for more depth. Honeycrisp or Braeburn also work well. - Achieving the right sweetness level: Taste your apples before mixing. Adjust sugar based on their sweetness. If they are very tart, add a bit more sugar. For a sweeter pie, use more brown sugar. - Pairing with ice cream or whipped cream: A scoop of vanilla ice cream on warm pie is a classic. Whipped cream adds a light touch. Both options bring out the flavors of the pie. - Presentation ideas for a festive look: Serve slices on colorful plates. Garnish with a sprinkle of cinnamon. You can also add fresh mint leaves for color. A dusting of powdered sugar makes it extra special. For the full recipe, check out the Apple Pie Delight section. {{image_4}} To make a lattice crust, start by rolling out your pie dough. Cut it into long strips, about one inch wide. Lay half of the strips across the pie in one direction. Then, fold back every other strip. Place a new strip across. Unfold the strips back down. Repeat this by folding the opposite strips. Pros: - A lattice crust looks pretty. - It lets steam escape, which keeps the filling from being too wet. Cons: - It takes more time to weave the strips. - It can be less forgiving if you make a mistake. For a tasty streusel topping, you will need: - ¾ cup all-purpose flour - ½ cup rolled oats - ½ cup brown sugar - ½ cup cold butter, cut into small pieces - 1 teaspoon ground cinnamon To make it, mix the flour, oats, brown sugar, and cinnamon in a bowl. Add the cold butter pieces. Use your fingers to blend the mix until it looks like crumbs. Sprinkle the streusel topping over the filled apple pie before baking. This will add a crunchy layer on top that pairs well with the soft apples. You can make your apple pie even more exciting with some flavor twists. Adding a splash of caramel sauce gives a sweet richness. Just drizzle it over the apple filling. You can also add a teaspoon of vanilla extract to the apple mix for a warm note. Another fun idea is to mix in other fruits. Try adding a cup of berries or peaches. This adds color and new flavors to your pie. These variations let you personalize your classic apple pie while keeping it delicious. For a full recipe, check out the Apple Pie Delight section. To keep your apple pie fresh, use these simple tips. For short-term storage, cover the pie with plastic wrap or foil. Place it at room temperature for up to two days. If you want to keep it longer, freeze it. Wrap the pie tightly in plastic wrap and then in aluminum foil. It can stay in the freezer for up to three months. To reheat your pie, keep the crust crispy. Preheat your oven to 350°F (175°C). Place the pie on a baking sheet. Heat it for about 15 to 20 minutes. This method warms the filling and keeps the crust flaky. After reheating, let it cool for a few minutes. Serve it warm, maybe with ice cream on top. The warm pie with cold ice cream is a classic treat! For more ideas, check out the Full Recipe. For a great apple pie, I recommend using Granny Smith apples. They are tart and firm. This tartness balances the sweetness from sugar. Other good choices are Honeycrisp and Braeburn apples. They hold their shape well when baked. - Granny Smith: Tart and firm, ideal for balance. - Honeycrisp: Sweet and crunchy, adds flavor. - Braeburn: Sweet and tangy, great texture. Using a mix of these apples can enhance the flavor. Different apples bring different tastes and textures. So, feel free to experiment! Absolutely! Making your own pie crust can be fun and rewarding. A flaky crust adds a special touch. Here are some tips for a homemade crust: - Use cold butter for flakiness. - Mix until just combined; avoid overworking dough. - Chill the dough for at least 30 minutes. You can find many simple pie crust recipes online. A good crust can elevate your apple pie to a new level! A soggy pie crust is a common issue. Here are some tips to keep your crust crispy: - Pre-bake the crust for a few minutes. - Use a thickener like flour or cornstarch in the filling. - Avoid excess liquid from apples; drain if necessary. Taking these steps can help ensure a perfectly baked pie. Enjoy your baking journey! This blog covered the key ingredients and steps for making a delicious apple pie. You now know to choose the right apples, prepare your filling, and follow tips for a perfect crust. Consider variations like a lattice crust or a streusel topping for a twist. Remember, storage and reheating are also important for enjoying your pie later. With these steps and tips, you're set to impress everyone with your baking skills. Get started, and enjoy the process of creating something amazing!

Classic Apple Pie Tempting and Easy Homemade Recipe

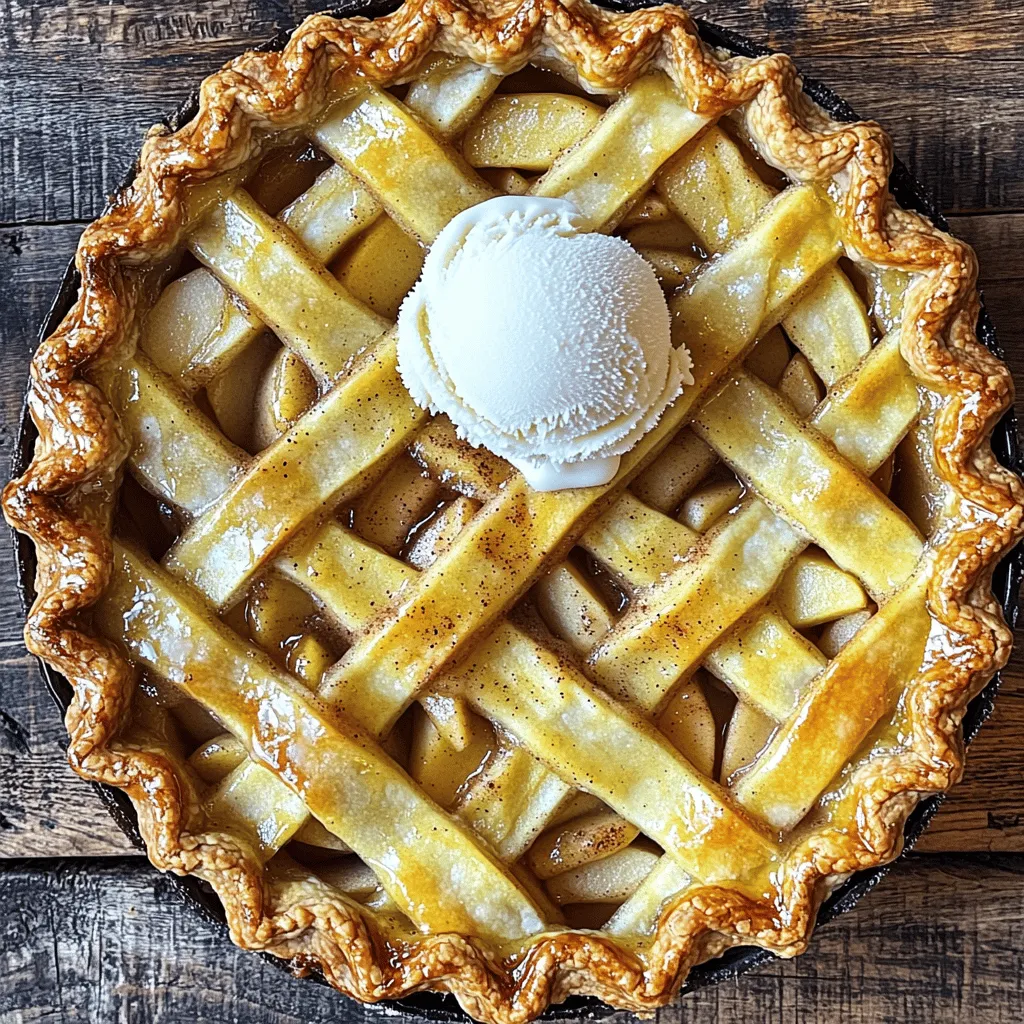
Are you ready to impress your friends and family with a homemade classic apple pie? This easy recipe uses tart

To make glazed lemon sugar cookies, gather these fresh ingredients: - 2 ¾ cups all-purpose flour - 1 teaspoon baking soda - ½ teaspoon baking powder - 1 teaspoon salt - 1 cup unsalted butter, softened - 1 ½ cups granulated sugar - 1 large egg - 1 tablespoon freshly grated lemon zest (from about 2 lemons) - 2 tablespoons freshly squeezed lemon juice - 1 teaspoon vanilla extract - 1 ½ cups powdered sugar (for the glaze) - 2 tablespoons freshly squeezed lemon juice (for the glaze) - Optional: Lemon slices and additional lemon zest for garnish Measuring ingredients correctly is key. Use a dry measuring cup for flour. Spoon flour into the cup, then level it off with a knife. For butter, it should be soft but not melted. If you need a dairy-free option, use vegan butter instead. You can swap the egg with a flax egg or applesauce for a vegan version. If you run out of lemon, lime juice works too, but it will change the flavor a bit. These cookies burst with bright lemon flavor. The fresh zest and juice give a tangy taste that balances the sweetness. The glaze adds a sweet, tart finish. This recipe is perfect for brightening up your day. Plus, lemon is rich in vitamin C, which is great for your health. Enjoy these cookies with tea or coffee for a delightful treat! Start by preheating your oven to 350°F (175°C). This helps cookies bake evenly. Line a baking sheet with parchment paper. This keeps cookies from sticking. In a medium bowl, whisk together the flour, baking soda, baking powder, and salt. Set this mix aside for later. In a large bowl, cream the softened butter and granulated sugar with an electric mixer. Mix on medium speed for about 3 minutes. The mix should be light and fluffy. Next, add the egg, lemon zest, lemon juice, and vanilla extract. Beat until everything is combined well. Gradually mix in the dry ingredients. Do this on low speed to avoid overmixing. Once combined, use a cookie scoop or tablespoon to drop rounded dough onto the baking sheet. Space each cookie about 2 inches apart. Bake for 8-10 minutes. Look for lightly golden edges while the centers stay soft. They will firm up as they cool. Once cookies cool, it’s time to make the glaze. In a small bowl, whisk together the powdered sugar and lemon juice until smooth. Drizzle the glaze over each cookie. You can use a spoon or a piping bag for this. If you like, add small lemon slices or lemon zest while the glaze is wet. Let the glaze set for about 30 minutes. Enjoy your beautiful glazed lemon sugar cookies! For the full recipe, check out the details. To make the best glazed lemon sugar cookies, start with soft butter. This helps give your cookies a light texture. Use fresh lemon juice and zest. This gives your cookies a bright, zesty flavor. Chill the dough for 30 minutes before baking. This helps the cookies hold their shape. Make the glaze while the cookies cool. Mix powdered sugar with fresh lemon juice until smooth. The glaze should be pourable but thick enough to stay on the cookies. Drizzle the glaze right after the cookies cool. This helps it stick better. For a fun touch, add lemon zest or slices on top of the glaze. Don't overmix the dough. This can make your cookies tough. Watch the baking time closely. Overbaking will lead to dry cookies. Let the cookies cool completely before glazing. If they are warm, the glaze will melt off. Lastly, use a cookie scoop for even sizes. This ensures all cookies bake evenly. {{image_4}} You can play with different glazes and flavors to make your cookies unique. For a sweeter twist, try a vanilla glaze. Just mix powdered sugar with a splash of milk and vanilla extract. For a berry kick, use raspberry or strawberry puree in the glaze. You can even add a hint of lavender for a floral touch. Mixing spices like cinnamon or cardamom into the dough can also create a fun flavor profile. If you need to swap ingredients, you have options. For a lighter cookie, use coconut oil instead of butter. If you want a different sweetener, try brown sugar or maple syrup. You can also use almond flour or oat flour if you prefer a gluten-free option. Just remember, different flours may change the cookie texture a bit, so keep that in mind when baking. Making these cookies gluten-free is easy. Simply use a gluten-free flour blend that measures cup-for-cup like regular flour. For a vegan version, substitute the egg with flaxseed meal. Mix one tablespoon of flaxseed meal with three tablespoons of water. Let it sit for a few minutes until it thickens. You can use plant-based butter to replace regular butter as well. These adjustments keep the cookies tasty while meeting dietary needs. Check the Full Recipe for more details! To keep your glazed lemon sugar cookies fresh, store them in an airtight container. Place parchment paper between layers to avoid sticking. Keep the cookies at room temperature for best taste. Avoid direct sunlight or heat, as these can make the cookies lose their charm. You can freeze these cookies for later enjoyment. First, let them cool completely. Then, place them in a single layer on a baking sheet. Freeze until firm, then transfer them to a freezer-safe bag. Squeeze out excess air before sealing. You can freeze the cookies for up to three months. When stored properly, these cookies last about a week at room temperature. If frozen, they can stay fresh for about three months. Always check for any signs of spoilage before eating. Enjoy your cookies while they are fresh for the best flavor and texture. For the full recipe, refer to the instructions above. To make lemon sugar cookies without glaze, simply skip the glaze step. After baking, let the cookies cool. You can enjoy them plain or add a light dusting of powdered sugar on top for a sweet touch. The cookies will still have a bright lemon flavor from the zest and juice. Yes, you can substitute lemon extract for lemon zest. Use about 1 teaspoon of lemon extract in place of the zest. However, fresh zest gives a brighter flavor and aroma. If possible, use both for a more intense citrus taste. If your cookies turn out too dry, check your ingredient measurements. Make sure you used the correct amount of butter and sugar. You can also try adding a bit more lemon juice next time. This will add moisture and improve the texture. To keep your cookies soft, don’t overbake them. Pull them out when the edges are just golden. The centers will look soft but will firm up as they cool. Also, store the cookies in an airtight container after they cool. This will help maintain their softness. Now you have all the tools to bake delicious glazed lemon sugar cookies. We looked at the ingredients, measurements, and flavor benefits. You learned step-by-step instructions, baking tips, and common mistakes. We also explored variations and dietary swaps to fit your needs. Baking cookies can be fun and rewarding. Enjoy sharing them with others or savoring them yourself! With these tips, you can create perfect cookies every time. Happy baking!

Glazed Lemon Sugar Cookies Easy and Delicious Recipe

Are you ready to enjoy a sweet burst of flavor? These Glazed Lemon Sugar Cookies are easy to make and

- 3 medium Granny Smith apples, peeled, cored, and diced - 1 teaspoon fresh lemon juice - 1/2 cup packed brown sugar - 1 teaspoon ground cinnamon - 1/4 teaspoon ground nutmeg - 1 tablespoon cornstarch - 1 tablespoon unsalted butter To make the apple pie filling, I start with Granny Smith apples. Their tartness balances the sweetness of the filling. The fresh lemon juice brightens the flavor. Brown sugar adds rich sweetness, while ground cinnamon and nutmeg give warmth and depth. Cornstarch thickens the filling, ensuring it holds together well. The unsalted butter enhances the richness. - 2 cups cream cheese, softened to room temperature - 1 cup granulated sugar - 1 teaspoon pure vanilla extract - 3 large eggs, at room temperature - 1 cup sour cream For the cheesecake layer, I use cream cheese as the base. It must be softened for easy mixing. Granulated sugar sweetens the cream cheese, while pure vanilla extract adds flavor. I add eggs one by one, mixing gently. Sour cream gives a creamy texture and slight tang. - 1 1/2 cups graham cracker crumbs - 1/4 cup granulated sugar - 1/2 cup unsalted butter, melted The crust is simple and delicious. I combine graham cracker crumbs with sugar for sweetness. Then, I mix in melted butter for a rich flavor. This mixture forms a solid base for the cheesecake. This recipe is a true treat for apple lovers and cheesecake fans alike. For the full recipe, check out the details above. Set your oven to 325°F (163°C). This is the perfect temperature for baking. In a medium saucepan, melt 1 tablespoon of unsalted butter over medium heat. Add 3 diced Granny Smith apples. Stir in 1 teaspoon of fresh lemon juice, 1/2 cup of packed brown sugar, 1 teaspoon of ground cinnamon, 1/4 teaspoon of ground nutmeg, and 1 tablespoon of cornstarch. Mix everything well. Cook this mixture for about 5-7 minutes. The apples should get tender but not mushy. Remove it from the heat and let it cool while you make the crust and cheesecake batter. In a medium bowl, mix 1 1/2 cups of graham cracker crumbs, 1/4 cup of granulated sugar, and 1/2 cup of melted unsalted butter. Stir until it looks like wet sand. Press this mixture into the bottom of a 9-inch springform pan to form a solid crust. Bake the crust for 10 minutes. After baking, let it cool a bit while you prepare the cheesecake batter. In a large bowl, beat 2 cups of softened cream cheese with an electric mixer. Mix until it is smooth and creamy, with no lumps. Add 1 cup of granulated sugar and 1 teaspoon of pure vanilla extract. Mix until combined. Add 3 large eggs, one at a time, mixing on low speed until each is blended. Finally, add 1 cup of sour cream and mix until the batter is silky smooth. Pour half of the cheesecake batter over the cooled crust. Spread it evenly. Carefully spoon the cooled apple pie filling over the cheesecake layer. Distribute it evenly. Pour the remaining cheesecake batter over the apple filling. Smooth the top gently with a spatula. Place the assembled cheesecake in the oven. Bake for 60-70 minutes. The center should be set but still have a slight jiggle. When baked, turn off the oven and crack the door open slightly. Let the cheesecake cool in the oven for 1 hour. This helps prevent cracks. After an hour, remove the cheesecake. Cover it with plastic wrap or aluminum foil. Refrigerate for at least 4 hours, or overnight. This allows it to set and develop flavors. For the full recipe, check the section above. Enjoy your delightful Apple Pie Stuffed Cheesecake! To avoid cracks in your cheesecake, use a gentle cooling method. After baking, turn off your oven and crack the door open. This lets the heat escape slowly. Let the cheesecake cool in the oven for about an hour. This step helps prevent sudden temperature changes that can cause cracks. For a smooth cheesecake batter, start with room-temperature cream cheese. Mix it well until it's creamy and lump-free. Add sugar slowly to keep the texture light. Incorporate eggs one at a time, mixing just until combined. Finally, add sour cream and blend until silky. This will make your cheesecake rich and creamy. When serving, slice your cheesecake into generous pieces. Place each slice on a decorative plate for a stunning presentation. Drizzle warm caramel sauce over the top. Add a dollop of whipped cream and a light sprinkle of cinnamon for flair. These small touches make your dessert look beautiful and inviting. {{image_4}} You can use many types of apples in this recipe. Granny Smith apples bring a tart flavor, but feel free to mix it up. Try Honeycrisp for sweetness or Fuji for a crisp bite. Each type of apple adds its own taste and texture. For a unique twist, blend different apples together. This will give you a more complex flavor in every bite. Adding spices can elevate your cheesecake to new heights. Besides cinnamon and nutmeg, consider using ginger or allspice for warmth. You can also add a swirl of caramel sauce inside the cheesecake. This will create a rich and sweet contrast to the tart apples. Another idea is to mix in some chopped nuts for a crunchy texture. Pecans or walnuts work wonderfully here. If you need a gluten-free crust, you have options. Use almond flour or gluten-free graham cracker crumbs instead. You can combine these with melted butter and sugar. Press the mixture into your pan, just like the original crust. This way, everyone can enjoy this delicious dessert without worry. Check the labels to ensure your ingredients are truly gluten-free. To keep your apple pie stuffed cheesecake fresh, place it in the fridge. Use an airtight container or cover it tightly with plastic wrap. This helps maintain its creamy texture and flavor. Make sure to store it within two hours of serving, so it stays safe to eat. Enjoy your leftovers within five days for the best taste. If you want to save some for later, freezing is a great option. First, let the cheesecake cool completely in the fridge. Then, wrap it tightly in plastic wrap or aluminum foil. For extra protection, place it in a freezer-safe bag. This way, you can keep it for up to three months. When you’re ready to enjoy it, move it to the fridge overnight to thaw slowly. When it's time to serve your cheesecake again, you want it just right. If it’s frozen, let it thaw in the fridge overnight. For a warm slice, you can gently heat it in the microwave. Use low power for about 10-15 seconds. Watch it closely, so it doesn’t get too hot. Enjoy it with a drizzle of caramel or a scoop of ice cream for a treat! Yes, you can use store-bought apple pie filling. It saves time and effort. However, homemade filling tastes fresher and allows for custom flavors. If you choose store-bought, look for high-quality brands. Check the label for natural ingredients. I recommend adding a touch of lemon juice for brightness. The cheesecake needs to chill for at least 4 hours. However, overnight is best. This time allows the flavors to meld and the texture to set. Proper chilling is key to a smooth slice. Don't skip this step if you want perfect results. Yes, you can make this cheesecake ahead of time. It keeps well in the fridge for up to 5 days. Prepare it a day or two before your event. Just cover it tightly to keep it fresh. This strategy saves you stress on the day of serving. To slice a cheesecake cleanly, use a hot knife. Dip the knife in hot water, then wipe it dry. This method prevents sticking. Slice slowly and gently. For best results, clean the knife between each cut. This way, every piece looks neat and appetizing. This article covered how to make a delicious apple cheesecake. You learned about the key ingredients like Granny Smith apples, cream cheese, and graham cracker crust. We broke down the steps for preparing each layer and shared tips to avoid cracks. I provided variations to tailor the cheesecake to your taste and advice on storage. Now, you're ready to impress your friends and family with this sweet treat. Enjoy baking and savor every slice!

Savory Apple Pie Stuffed Cheesecake Recipe

Get ready for a dessert that will wow your taste buds! This Savory Apple Pie Stuffed Cheesecake combines sweet, spiced

- 4 cups all-purpose flour - 1/4 cup granulated sugar - 1 packet (2 1/4 teaspoons) instant yeast - 1/2 teaspoon salt - 1 cup whole milk, warmed (not hot) - 1/4 cup unsalted butter, melted - 2 large eggs, at room temperature - 1 tablespoon ground cinnamon - 1/2 cup brown sugar, packed tightly - 1/4 cup unsalted butter, softened (for filling) - 1 cup powdered sugar (for icing) - 2 tablespoons milk (for icing) - 1 teaspoon vanilla extract (for icing) Gather these ingredients before starting. Each one plays a key role in making your cinnamon rolls perfect. The flour gives structure, while the sugar adds sweetness. Yeast brings the dough to life. Milk and butter create a rich, soft texture. Eggs help bind everything together. Ground cinnamon and brown sugar add that classic flavor that makes these rolls so special. For icing, powdered sugar, milk, and vanilla extract create a sweet finish. With these ingredients on hand, you're ready to make a batch of warm, gooey cinnamon rolls. Enjoy the process! - Whisk together warm milk, melted butter, and sugar. - Sprinkle yeast and let it rest until frothy. To start, I whisk warm milk with melted butter and sugar in a bowl. The warmth helps wake up the yeast. After mixing, sprinkle the yeast on top. Let it sit for about 5 to 10 minutes. You want it to look frothy and bubbly. This shows the yeast is alive and ready to work. - Add eggs and salt, then gradually incorporate flour. - Knead on a floured surface until elastic. Next, I add room temperature eggs and salt to the yeast mix. Stir it well to combine. Then, I add flour one cup at a time. Mix until it forms a soft dough. Transfer the dough to a floured surface. Knead it for about 5 to 7 minutes. You want the dough to be smooth and elastic, which means it’s ready. - Place in a greased bowl, cover, and let rise for 1 hour. Now, shape the dough into a ball and place it in a greased bowl. Cover the bowl with a clean towel. Set it in a warm spot to rise for 1 hour. The dough should double in size during this time. This makes the rolls fluffy and light. - Combine softened butter, brown sugar, and cinnamon in a bowl. While the dough rises, I prepare the filling. I mix softened butter, packed brown sugar, and ground cinnamon in a bowl. Stir until you have a smooth paste. This blend gives the rolls their sweet and spicy flavor. - Roll dough into a rectangle and spread the cinnamon mixture. - Roll tightly and slice into rolls. Once the dough has risen, punch it down to release air. Roll it out into a rectangle about 16x12 inches. Spread the cinnamon mixture evenly over the dough. Make sure to leave a small border. Then, roll the dough tightly from one long edge. Use a sharp knife to cut it into 12 equal slices. - Let rolls rise a second time, then bake at 375°F for 25-30 minutes. - Prepare icing while baking. Place the cinnamon roll slices in a greased baking dish. Cover them with a towel and let rise for another 30 minutes. Preheat your oven to 375°F (190°C) while they rise. After 30 minutes, bake the rolls for 25 to 30 minutes. They should be golden brown and spring back when pressed lightly. Meanwhile, I prepare the icing to drizzle over the warm rolls. To make the best cinnamon rolls, start with fresh yeast. Fresh yeast helps the dough rise properly. If the yeast is old, it won't work well. This can lead to flat rolls that lack fluffiness. Next, knead the dough just enough. Over-kneading makes the rolls tough. You want a soft and smooth dough, not a hard one. For the perfect icing, adjust its thickness by changing the amount of milk. If you want a thicker icing, use less milk. For a thinner icing, add more milk. Drizzle the icing on the rolls while they are warm. This helps the icing soak in better, making them extra delicious. Make your cinnamon rolls look great on a nice platter. A beautiful dish can make your treat more inviting. After you drizzle the icing, you can add a sprinkle of ground cinnamon on top. You can also toss on some nuts for crunch. This adds flavor and makes your rolls even more appealing. {{image_4}} You can enjoy vegan cinnamon rolls by making a few swaps. Use plant-based milk instead of whole milk. Choose vegan butter in place of regular butter. This keeps the flavor rich and the rolls soft. If you need gluten-free cinnamon rolls, it's simple! Just use gluten-free all-purpose flour as a substitute for regular flour. This way, everyone can savor these treats, regardless of dietary needs. Want to add a twist? You can mix in nuts or dried fruits to the filling for extra flavor. Walnuts or pecans work well! You can also try different spices like nutmeg. This gives your rolls a unique taste. Experiment and find your favorite combination! Keep uniced cinnamon rolls in an airtight container for up to 5 days. This way, they stay soft and fresh. If you do not finish them, this method helps maintain flavor and texture. You can freeze unbaked rolls before the second rise. Wrap them well in plastic wrap, then place them in a freezer bag. When you want to bake them, just thaw overnight in the fridge before baking. This keeps them fresh for a longer time. Warm leftover rolls in the microwave or oven for best results. In the microwave, heat them for about 15-20 seconds. For the oven, preheat to 350°F and warm for 10 minutes. This way, they taste almost as good as fresh! Yes, prepare the dough and refrigerate overnight before baking. This method saves time and keeps the rolls fresh. Just remember to let the dough warm up before rolling it out. They should be golden brown and spring back when lightly touched. The color and texture are key signs of readiness. A toothpick test can help too; it should come out clean. You can use active dry yeast, but you'll need to proof it first. To proof, mix the yeast with warm water and a pinch of sugar. Wait until it becomes frothy before adding it to your dough. Store them in an airtight container; they can also be frozen. For best taste, eat them within five days. To reheat, pop them in the microwave or oven for a few minutes. Refer to the detailed recipe titled "Heavenly Cinnamon Rolls " for complete instructions on making the best homemade cinnamon rolls. You’ve learned how to make delicious cinnamon rolls from scratch. We covered each step, from activating the dough to baking and icing. Remember, you can customize these rolls with different flavors and easily store leftovers. Whether you enjoy them fresh or frozen, these treats will delight your taste buds. Don’t be afraid to experiment as you bake. Your next batch could be the best yet! Happy baking!

Best Homemade Cinnamon Rolls Delightful and Easy Recipe

Are you ready to delight your taste buds with the best homemade cinnamon rolls? This easy recipe will help you

Older posts
Newer posts
← Previous Page1 … Page34 Page35 Page36 … Page39 Next →

dsad

© 2025 dailydishcraft • Built with GeneratePress

Our Policies

  • Copyright Policy
  • Cookie Policy
  • GDPR Policy
  • Privacy Policy
  • Disclaimer
  • Terms Of Use

More Information

  • Home
  • About
  • Contact
  • Appetizers
  • Dessert
  • Dinner
  • Drinks
©2025, dailydishcraft About Back To Top