![- 2 cups cooked jasmine rice (preferably cold) - 1 cup medium shrimp, peeled and deveined - 2 tablespoons vegetable oil (divided) - 2 large eggs, beaten - 1 cup mixed vegetables (peas, diced carrots, corn) - 3 green onions, sliced (reserve the green tops separately) - 3 garlic cloves, minced - 2 tablespoons low-sodium soy sauce - 1 tablespoon oyster sauce (optional for extra flavor) - 1 teaspoon sesame oil - Salt and pepper to taste - Fresh cilantro for garnish (optional) To make great shrimp fried rice, focus on using cooked jasmine rice. Cooked rice should be cold for the best texture. This helps keep the grains separate. If you use fresh rice, it can become mushy. For the shrimp, it's best to choose medium-sized shrimp. Peel and devein them before cooking. This makes them easy to eat and helps them cook evenly. Sauces bring the dish to life. Low-sodium soy sauce adds umami flavor without too much salt. You can use oyster sauce for extra flavor, but it's not a must. Sesame oil gives a nice nutty taste to the rice. - Fresh cilantro - Lime wedges - Sliced chili for heat Garnishes can make your dish pop. Fresh cilantro adds a burst of color and flavor. Lime wedges give a tangy kick when squeezed over the rice. If you like spice, sliced chili can add some heat. These garnishes enhance the meal and make it more fun to eat. For the complete recipe, check out the Full Recipe. 1. Marinate shrimp and scramble eggs: Start by marinating your shrimp. In a bowl, add a pinch of salt and pepper to the peeled and deveined shrimp. Let it sit while you prepare the other ingredients. This enhances the shrimp's flavor. Next, heat 1 tablespoon of vegetable oil in a large skillet. Pour in the beaten eggs, cooking them until they are set. Then, remove the scrambled eggs and set them aside. 2. Sauté vegetables and add rice: In the same skillet, add the remaining tablespoon of oil. Toss in the minced garlic and white parts of the green onions. Sauté for about 30 seconds. Then, add your mixed vegetables and cook them until bright and tender. Now, add your cold jasmine rice. Break up any clumps with a spatula to mix everything well. - How to achieve perfectly cooked shrimp: Cook the marinated shrimp in the hot skillet for about 2-3 minutes. Stir occasionally until they turn pink and firm. Once done, remove the shrimp and set them aside with the scrambled eggs. This method ensures your shrimp stay juicy and tender. - Mixing and flavoring the rice correctly: Pour in the low-sodium soy sauce and optional oyster sauce over the rice. Mix well to coat all the rice evenly. Gently fold in the scrambled eggs and cooked shrimp, stirring until everything is heated through. Drizzle sesame oil on top before serving. This adds a nice nutty flavor. - Presentation tips for an appealing dish: Serve the shrimp fried rice in individual bowls or plates. Garnish with the green tops of the green onions and a sprig of fresh cilantro. A lime wedge adds color and a zesty touch. - Best accompaniments or side dishes: Pair your fried rice with a light soup or a fresh salad. These sides balance the meal and add freshness. You can also consider serving it with a simple cucumber salad for a refreshing crunch. To get the best taste in your shrimp fried rice, always use cold rice. Cold rice has a firmer texture. It helps avoid clumps when you stir-fry it. Freshly cooked rice can be too soft and sticky. This can lead to a mushy dish. Using a wok is key for good shrimp fried rice. The high heat from a wok quickly cooks the shrimp and veggies. This keeps them crisp and flavorful. Stir-frying in a wok allows for even cooking and great flavor. One big mistake is overcooking the shrimp. Shrimp only needs a few minutes to cook. If you cook them too long, they become rubbery and tough. You want them tender and pink. Another common issue is soggy rice. This problem often comes from using warm or fresh rice. It may create a sticky mess. Stick to cold rice for the best results. For this recipe, a good skillet or wok is important. Non-stick skillets can work, but a wok is best. It allows for better heat distribution and cooking. You will also need some essential utensils, like a spatula and a slotted spoon. A spatula helps mix the rice, and a slotted spoon is great for removing shrimp. Having the right tools makes your cooking much easier. For the full recipe and more details, check out the Full Recipe section. {{image_4}} You can easily switch shrimp for chicken or tofu. Chicken adds a hearty taste, while tofu is great for a vegetarian meal. Just cook chicken until it’s no longer pink or sauté tofu until golden. Both options work well with the same spices and sauces in the recipe. Feel free to mix in seasonal vegetables. Fresh broccoli, bell peppers, or snap peas can add color and crunch. You can also try adding mushrooms for a rich flavor or baby corn for a fun twist. These additions can really enhance your dish. Explore local substitutes for sauces. If soy sauce is hard to find, you can use tamari or coconut aminos. For a unique twist, try adding a local hot sauce or a different kind of oil. This way, your shrimp fried rice reflects your local taste and ingredients. For the full recipe, check out [Full Recipe]. When you have leftover shrimp fried rice, store it in an airtight container. Make sure it cools down first. Place it in the fridge within two hours of cooking. This keeps the rice fresh and safe to eat. For freezing, divide the rice into smaller portions. Use freezer-safe bags or containers. Remove as much air as possible before sealing. This helps prevent freezer burn. To reheat, use a skillet over medium heat. Add a splash of water or oil. This helps keep the rice moist. Stir it often until heated through. You can also use a microwave. Place the rice in a bowl, cover it with a damp paper towel, and heat for 1-2 minutes. To avoid mushy rice, don’t overheat it. Stirring helps keep the texture right. In the fridge, shrimp fried rice lasts about 3-4 days. Always check for signs of spoilage. Look for any off smells or discoloration. If you see mold, throw it away. Trust your senses; if it seems off, don’t eat it. Enjoy your shrimp fried rice fresh for the best taste! For the full recipe, check out Shrimp Fried Rice Delight. You can use a large skillet instead of a wok. A skillet works well to stir and fry the rice. If you have a non-stick pan, that’s even better. Heat the pan over medium heat. Add the oil, then follow the steps in the Full Recipe for shrimp fried rice. Yes, using day-old rice is a great idea! Day-old rice is drier and firmer. This helps the grains separate during cooking. Freshly cooked rice can become mushy. Day-old rice absorbs flavors better too. It gives your fried rice a nice texture. If you want an alternative to oyster sauce, try soy sauce or hoisin sauce. Soy sauce adds saltiness and umami. Hoisin sauce brings a sweet and thick flavor. You can also mix soy sauce with a bit of sugar. This gives a similar taste to oyster sauce. In this post, we explored how to make delicious Chinese-style shrimp fried rice. We discussed key ingredients and shared step-by-step instructions. Important tips helped you avoid common mistakes for the best flavor. I also offered ideas for variations and ways to store leftovers. Now, you're ready to create a tasty dish. With a few simple steps, you can impress yourself and others. Enjoy experimenting with flavors and making this dish your own. Happy cooking!](https://dailydishcraft.com/wp-content/uploads/2025/05/cd935795-0dc6-4338-84d8-ae04be4788f1.webp)
Chinese Style Shrimp Fried Rice Quick and Flavorful Meal
Looking for a quick and tasty meal? This Chinese Style Shrimp Fried Rice is your answer! With simple ingredients and
Looking for a quick and tasty meal? This Chinese Style Shrimp Fried Rice is your answer! With simple ingredients and
. I encourage you to try making this delightful dish at home! In summary, we explored the essential ingredients and steps to make delicious German potato dumplings. I shared tips to help you achieve the best texture, avoid common mistakes, and explore variations. You now know how to store and reheat dumplings for later enjoyment. These dumplings are a tasty dish with many serving options. I encourage you to try making them and share your results. Enjoy the process and the flavors!](https://dailydishcraft.com/wp-content/uploads/2025/05/b897a571-b728-40f9-a3e7-5766903d871b.webp)
If you’re looking for a comforting dish that’s easy to make, German potato dumplings are the perfect choice. With just
![To make these meatballs, you need a few key ingredients. Here’s what you will need: - 1 pound ground beef or ground turkey - 1 cup fresh spinach, finely chopped - 1/2 cup mozzarella cheese, shredded - 1/4 cup grated Parmesan cheese - 1/2 cup Italian-style breadcrumbs - 2 cloves garlic, minced - 1 large egg - 1 teaspoon dried oregano - 1 teaspoon dried basil - Salt and pepper to taste These ingredients work together to create a juicy, flavorful meatball that everyone will love. You can add some extra ingredients to make your meatballs even tastier. Here are some options: - 1/2 teaspoon red pepper flakes (for heat) - Fresh basil leaves (for garnish) - Chopped onions or bell peppers (for added texture) These optional ingredients can give your meatballs a unique twist. Feel free to experiment with your favorites! Getting the right measurements is key to great meatballs. Here’s a quick guide: - Use a kitchen scale for the ground meat. - Measure the spinach tightly packed in a cup. - Shred the mozzarella finely for even melting. - Use a standard measuring cup for breadcrumbs. By following these tips, you ensure that your meatballs will be the right size and texture. For the full recipe, click [Full Recipe]. First, you need to prepare the spinach. Take a small saucepan and add a drizzle of olive oil. Heat it over medium. Then, add the finely chopped spinach. Sauté the spinach for about 2-3 minutes, until it wilts down. This step adds flavor and softens the spinach. Once done, remove it from heat and let it cool for a few minutes. Now it's time to mix everything. Grab a large mixing bowl. Add the ground beef or turkey, the sautéed spinach, shredded mozzarella, and grated Parmesan. Next, include the Italian-style breadcrumbs, minced garlic, and the egg. Sprinkle in the dried oregano, dried basil, and red pepper flakes if you like heat. Don't forget to add salt and pepper! Use your hands or a spatula to mix the ingredients. Be gentle! Overmixing can make the meatballs tough. Just combine them until everything is evenly mixed. It's shaping time! With clean hands, take about 1/4 cup of the mixture and roll it into a ball. Place each meatball on a parchment-lined baking sheet. Make sure to space them out. This helps them cook evenly. Keep going until you shape all of the mixture. You should get about 12-15 meatballs. Now, let’s cook! Heat a good amount of olive oil in a large skillet over medium heat. Once hot, add the meatballs in batches. Don’t crowd the pan! Cook them for about 4-5 minutes on each side. Look for a nice golden brown color. If you prefer baking, preheat your oven to 375°F (190°C). Place the meatballs on a lined baking sheet and bake for 20-25 minutes. Turn them halfway for even browning. When the meatballs are ready, transfer them to a serving platter. For a nice touch, garnish with fresh basil leaves. You can enjoy them alone or serve over spaghetti with marinara sauce. This makes a hearty and tasty meal. For the full recipe, check out the link above. Enjoy your cooking! To make great meatballs, start with quality meat. Use ground beef or turkey that is fresh. The right fat content helps keep them juicy. Mix your ingredients gently. Overmixing makes the meatballs tough. Shape them evenly for uniform cooking. Use a scoop for consistent sizes. When cooking, don’t overcrowd the pan. This allows them to brown well. A common mistake is using too much salt early on. Add salt to taste during cooking. Another mistake is not sautéing the spinach first. This helps remove excess water. This step keeps your meatballs from being soggy. Lastly, avoid cooking them at high heat. This can lead to burnt outsides and raw insides. You can boost flavor by adding herbs. Fresh herbs like parsley or thyme work great. Try a pinch of smoked paprika for warmth. A dash of lemon zest brightens the dish. If you like heat, add more red pepper flakes. Each twist will make your meatballs unique. For a richer taste, consider adding a splash of Worcestershire sauce. These tips will elevate your meatballs to a new level. For the full recipe, check out the details above. {{image_4}} You can change the meat in the recipe. Ground turkey works nicely. It keeps the dish leaner. Ground chicken is another great choice. Each meat gives its flavor. I suggest using ground pork for a richer taste. Mix two types of meat, like beef and pork, for added depth. If you want a vegetarian option, try using lentils. Cooked lentils are great for meatballs. They add protein and fiber. Another choice is mushrooms. Finely chop them and mix with breadcrumbs. For a vegan option, skip the egg. Use a flaxseed meal mix instead. Combine one tablespoon of flaxseed meal with two tablespoons of water. Let it sit until it thickens. This keeps the meatballs together. To spice things up, add some chopped sun-dried tomatoes. They bring a nice tang. You can also include chopped olives for a salty kick. For a cheesy twist, mix in feta cheese. It adds a creamy texture. If you like heat, try adding jalapeños. Just chop them finely and mix them in. Each of these ingredients can create a new flavor. Experiment and find your favorite combination. To keep your meatballs fresh, let them cool down. Place them in an airtight container. This helps prevent moisture loss. Store the container in the fridge. Your meatballs will stay good for 3-4 days. If you want to enjoy them later, freezing is a great option. When reheating meatballs, use the oven or stovetop. The oven helps keep them crispy. Preheat your oven to 350°F (175°C). Place the meatballs on a baking sheet. Heat for about 10-15 minutes. If using the stovetop, add a little olive oil to a skillet. Heat over medium and gently warm the meatballs for 5-7 minutes. Avoid microwaving, as it can make them tough. To freeze meatballs, first let them cool completely. Arrange them on a baking sheet. Make sure they are not touching. Freeze them for 1-2 hours until solid. Once frozen, transfer them to a freezer bag. Label the bag with the date. Your meatballs can last up to 3 months in the freezer. When ready to eat, just reheat from frozen or thaw in the fridge overnight. For meal prep, these tips make cooking easy! For the complete recipe, check out the Full Recipe section. You can tell meatballs are cooked when they reach 165°F (75°C) inside. Use a meat thermometer for accuracy. If you cut one open, the center should be no longer pink. The juices should run clear. These signs ensure your meatballs are safe and tasty. Yes, you can use frozen spinach! Just thaw it first and drain any excess water. Frozen spinach is often just as flavorful. It can save time too. Use about 1/2 cup of thawed spinach for this recipe. These meatballs shine with several sides. You can serve them with spaghetti and marinara. They also go well in a sub sandwich with melted cheese. For a lighter meal, try them on a salad. These options create a balanced plate. You can skip breadcrumbs by using ground oats or crushed nuts. Mashed potatoes also work well as a binder. Just add enough to hold the meat together. This keeps the meatballs moist and tasty without gluten. In this blog post, we explored how to make delicious spinach garlic mozzarella meatballs. We discussed the key ingredients, step-by-step instructions, tips for perfect cooking, and creative variations. Remember, you can adjust flavors or substitute meats based on your needs. My final thoughts: experimenting with these meatballs can lead to tasty meals. Enjoy cooking and share these with family or friends!](https://dailydishcraft.com/wp-content/uploads/2025/05/61a31bc4-4625-4db6-81d0-a3a2bb4c6cbe.webp)
Looking for a tasty way to enjoy your greens? Try my Savory Spinach Garlic Mozzarella Meatballs! Packed with fresh spinach
![- 200g ramen noodles - 200g mixed mushrooms (shiitake, portobello, and enoki), sliced - 1 tablespoon sesame oil - 3 garlic cloves, minced - 1 inch ginger, grated - 4 cups vegetable broth - 2 tablespoons soy sauce - 1 tablespoon miso paste - 1 teaspoon chili paste (adjust to taste) - 1 cup baby spinach - 1 boiled egg (soft or hard, depending on preference), halved - 2 green onions, sliced - Sesame seeds, for garnish - Fresh cilantro, for garnish - Pot for cooking - Strainer for noodles - Knife and cutting board When I prepare savory Asian mushroom ramen, I gather these ingredients first. The ramen noodles serve as the base. Mixed mushrooms add a rich umami taste, while garlic and ginger bring warmth. The broth is key to making this dish flavorful. I also suggest toppings for extra flavor and texture. A boiled egg adds creaminess, while green onions and sesame seeds provide crunch. Fresh cilantro brightens the dish. For equipment, having a good pot is essential for cooking the ramen. A strainer helps drain the noodles. A knife and cutting board make chopping easy. To see the full recipe, check out the detailed instructions. Enjoy your cooking adventure! Start by cooking the ramen noodles according to the package instructions. This usually takes about 3-5 minutes. Once they are cooked, drain them well. Rinse the noodles under cold water to stop the cooking process. This step helps keep them firm. Set the noodles aside for later. Next, heat 1 tablespoon of sesame oil in a large pot over medium heat. Once the oil is hot, add 3 minced garlic cloves and 1 inch of grated ginger. Stir them together. Cook for about 1-2 minutes until they smell great and turn golden. This adds a lot of flavor to your dish. Now, toss in 200 grams of mixed mushrooms, like shiitake and portobello. Stir them well and cook for about 5-7 minutes. You want the mushrooms to soften and release their moisture. This step brings out their rich flavor. Pour in 4 cups of vegetable broth along with 2 tablespoons of soy sauce, 1 tablespoon of miso paste, and 1 teaspoon of chili paste. Mix everything well. Bring the broth to a boil. Then, lower the heat and let it simmer for about 10 minutes. This helps all the flavors blend nicely. After simmering, gently fold in 1 cup of baby spinach and the cooked ramen noodles. Stir carefully to combine everything. Heat it all through for 3-4 minutes. The spinach will wilt, and the noodles will soak up the broth's flavor. Once heated, remove the pot from the heat. Ladle your savory ramen into deep bowls. Top each bowl with a halved boiled egg, sliced green onions, and a sprinkle of sesame seeds. For a bright touch, finish with fresh cilantro. It makes the dish look great and adds more flavor. For a full recipe, check the instructions above. To make your ramen taste amazing, start with high-quality broth. A rich vegetable broth gives depth. You can use store-bought or make your own. Just remember, the broth is the heart of the dish. Adjust the spice levels to your liking. If you want more heat, add chili paste. Start with a little and taste as you go. This way, you get the perfect balance without overpowering the flavors. Cooking noodles al dente is key. Follow the package instructions, but check a minute early. You want the noodles firm, not mushy. Rinse them under cold water after cooking. This stops the cooking process and helps keep them chewy. For mushrooms, sauté them until they are tender. This usually takes about 5 to 7 minutes. Stir often to prevent sticking. The goal is to bring out their rich flavor without losing their texture. For a beautiful dish, arrange your toppings with care. Place the boiled egg halves on top of the noodles. Add green onions and sesame seeds around them. This makes each bowl look inviting and colorful. Using contrasting colors is also important. The vibrant green of spinach against the dark broth is eye-catching. A sprinkle of fresh cilantro adds a pop of color and flavor. This makes your ramen not just tasty, but visually appealing too. For the full recipe, check out the detailed instructions. {{image_4}} You can easily boost your ramen's protein. Here are two great options: - Adding tofu: Firm tofu works well. Cut it into cubes and sauté before adding it to your soup. This adds texture and protein. - Chicken or beef options: For meat lovers, grilled chicken or thinly sliced beef adds a hearty touch. Cook the meat separately and mix it in just before serving. Want a plant-based bowl? You can make simple swaps: - Substituting ingredients to stay plant-based: Use vegetable broth and skip the egg. Add more veggies instead, like carrots or bell peppers. - Alternative broths: Try miso broth for a richer flavor. Coconut milk can also create a creamy vegan soup. Ramen can change with the seasons. Here’s how: - Using seasonal vegetables: In spring, add fresh peas or asparagus. In fall, use pumpkin or squash for a cozy twist. - Adapting flavor profiles for different seasons: Use lighter flavors in summer, like basil or cilantro. In winter, add warming spices like cinnamon or nutmeg for comfort. You can find the full recipe for these savory Asian mushroom ramen noodles [Full Recipe]. To keep your Asian mushroom ramen fresh, store leftovers in an airtight container. It is best to separate the noodles from the broth. This way, the noodles stay firm and do not get mushy. Place the broth in another container. Store both in the fridge for up to three days. When reheating, use a pot over medium heat. Pour the broth in and add the noodles. Stir gently until heated through. To avoid mushy noodles, do not boil them again. Heat just until warm. You can also use the microwave, but do it in short bursts. This keeps the noodles from overcooking. If you want to freeze portions, pack the noodles and broth separately. Use freezer-safe bags or containers. This way, they can last up to three months. When ready to eat, thaw the broth in the fridge overnight. Reheat it in a pot and add the noodles. This method keeps the texture of the noodles nice. For the full recipe, check out the detailed steps above. Yes, you can. Instant ramen cooks faster than fresh ramen. You will need to adjust the cooking time. Instant noodles usually take about 3-5 minutes. They may also have a softer texture compared to traditional ramen. If you prefer a chewier bite, stick with fresh ramen. To add heat, try these options: - Chili oil: Drizzle some on top before serving. - Fresh chilies: Slice and add them to the broth. - Sriracha: Stir it in for a tangy kick. You can also increase the chili paste in the recipe for more spice. Some great options include: - Shiitake: Rich and meaty flavor. - Portobello: Earthy and hearty texture. - Enoki: Delicate and slightly crunchy. These mushrooms add depth and umami to your ramen. Yes, you can! Look for gluten-free noodles made from rice or buckwheat. For the broth, check that your soy sauce is gluten-free. Tamari is a good option. This way, you keep the flavor but avoid gluten. You can boost umami with these ingredients: - Miso paste: Adds a savory depth. - Nutritional yeast: Gives a cheesy, nutty flavor. - Dried mushrooms: Add them to the broth for extra richness. These additions will make your ramen even more delicious. For the full recipe, see the detailed guide above. To make a delicious ramen, gather your main ingredients: noodles, mushrooms, garlic, and broth. Follow the step-by-step instructions for cooking and combining them. Enhance flavor with tips, try variations with proteins, and store leftovers properly. You can customize this dish for any taste. With these guidelines, you can create a tasty bowl of ramen. Enjoy your cooking adventure, and share your tasty results with others!](https://dailydishcraft.com/wp-content/uploads/2025/05/ea25e339-7fb6-48bf-9ba7-586c85757910.webp)
Craving a warm bowl of comfort? Look no further than this Savory Asian Mushroom Ramen Noodles recipe. Packed with delicious

If you crave a warm, tasty treat, these Herb & Garlic Swirl Rolls are for you! With just a few

When you crave comfort, nothing beats a warm bowl of Cajun Potato Soup. This dish blends creamy goodness with bold
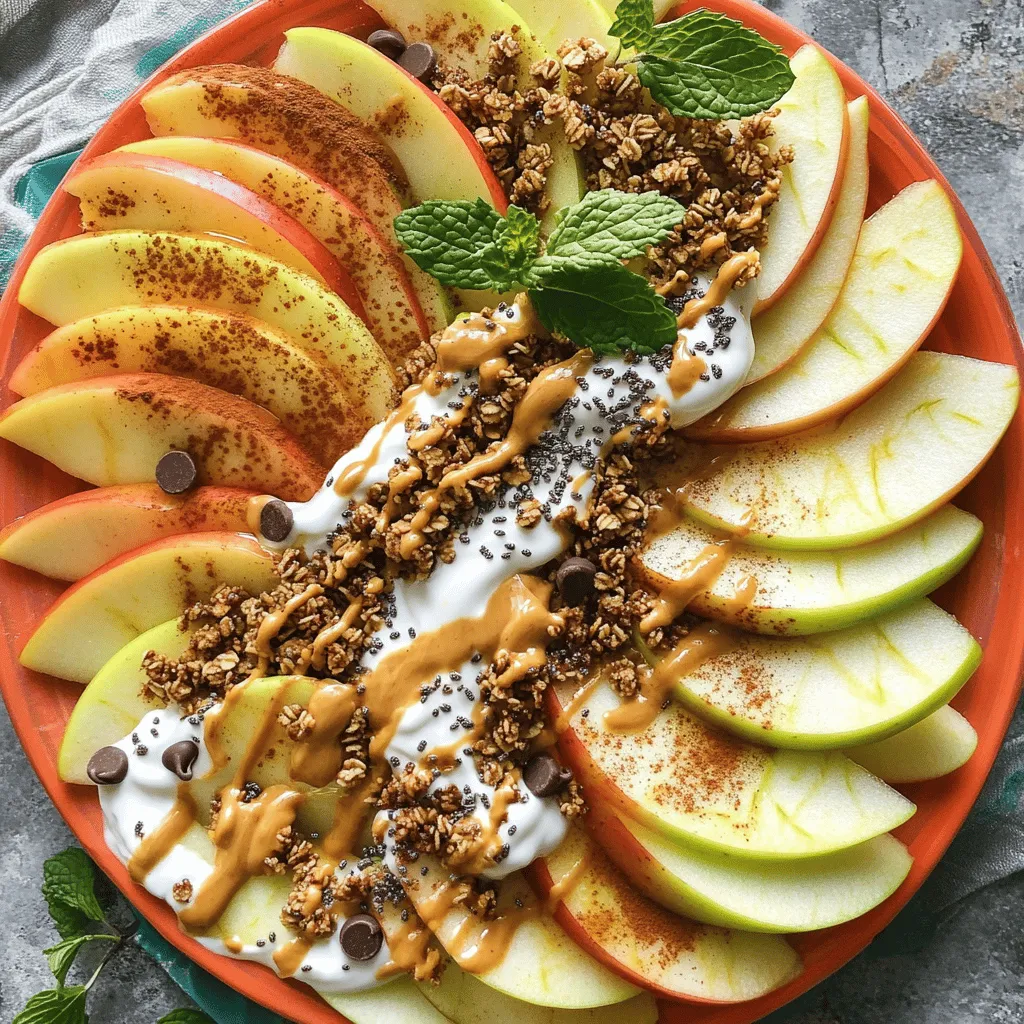
Are you looking for a quick, tasty snack? Try Healthy Apple Nachos! This simple treat combines crisp apples and creamy
. {{image_4}} You can get creative with your milk and cookies fudge. Start by changing the cookie types. Try using peanut butter cookies or even ginger snaps. Each cookie gives a new taste and texture. For the chocolate, swap semi-sweet chips for dark or white chocolate. This change adds a fun twist to the flavor. Making a vegan version is easy! Use coconut milk instead of sweetened condensed milk. Choose dairy-free chocolate chips to keep it plant-based. For gluten-free options, select gluten-free cookies. Check labels to be sure they fit your diet. You can still enjoy fudge without missing out. To make your fudge special, add unique ingredients. Chopped nuts like walnuts or almonds give a great crunch. A drizzle of caramel on top can make it even sweeter. For holidays, think about adding festive sprinkles or a hint of peppermint. These little touches can make a big difference in taste and fun. Feel free to explore these variations and enjoy the process of making this delightful treat. For the complete recipe, check out the Full Recipe for more details! To keep your milk and cookies fudge fresh, store it in an airtight container. This helps prevent moisture from ruining the texture. I recommend using a glass or plastic container with a tight seal. If you stack fudge layers, place parchment paper between them to avoid sticking. When stored in the fridge, your fudge will last about two weeks. Look for signs of spoilage, like a hard or dry texture, or unwanted smells. If it looks or smells off, it's best to toss it. Fresh fudge should stay soft and sweet. Freezing fudge is easy! Here's how to do it step-by-step: 1. Cut the Fudge: First, slice the fudge into squares. 2. Wrap Each Piece: Use plastic wrap to cover each piece tightly. This keeps air out. 3. Place in a Freezer Bag: Put the wrapped fudge in a freezer bag or container. Label it with the date. 4. Freeze: Place the bag in the freezer. Fudge can stay good for up to three months. When you’re ready to enjoy your fudge, remove it from the freezer. - Thawing Tips: Let it sit at room temperature for about 30 minutes. This brings back its soft texture. Enjoy it as is, or use it to top ice cream or desserts. For a delicious treat, try the full recipe for milk and cookies fudge! Making milk and cookies fudge takes about 2 hours and 15 minutes. This includes 15 minutes for prep and 2 hours for chilling. The chilling time is key to firming up the fudge. Trust me, waiting makes it taste even better! Yes, you can use other cookies! Oreos and chocolate chip cookies work great. Feel free to mix it up with peanut butter cookies or even gingersnaps. Just crush them well and fold them into the fudge mixture. To cut fudge, lift it out of the pan using the parchment paper. Use a sharp knife for clean cuts. Wipe the knife between cuts for neat squares. This keeps your fudge looking nice and tidy. - Additional common questions related to fudge making and recipes: - How can I make my fudge creamier? You can add a little more sweetened condensed milk. This helps with creaminess. - Why did my fudge not set? If it does not set, it might need more chilling time. Always check the fridge! - Can I add nuts to my fudge? Absolutely! Chopped nuts add a nice crunch and flavor. Just mix them in with the cookies. In this post, I covered how to make delicious milk and cookies fudge. You learned about the key ingredients, from sweetened condensed milk to crushed cookies. I provided easy steps for preparation, assembling, and chilling your fudge. You also discovered tips for perfect texture and fun variations. Remember, customizing your fudge can make it unique. Don't shy away from trying new flavors. With a little care, you will create a treat that everyone will love. Enjoy making your fudge!](https://dailydishcraft.com/wp-content/uploads/2025/05/19983913-a475-472e-be60-e9614e708f3f.webp)
If you love sweet treats, you’re in for a delight! Milk and Cookies Fudge is easy to make and taste
![- 4 medium zucchinis - 1 cup grated Parmesan cheese - 1 cup breadcrumbs - Olive oil spray or drizzling oil The base of this dish is the zucchini. Choose firm, fresh zucchinis for the best taste. I love using medium-sized ones, as they hold up well during baking. The cheese adds a rich, salty flavor, and the breadcrumbs give a nice crunch. - Garlic powder - Dried oregano - Smoked paprika - Salt and black pepper Seasoning is key to elevating this dish. Garlic powder gives a savory kick. Dried oregano adds an earthy tone, while smoked paprika brings a hint of smokiness. Salt and black pepper enhance all the flavors, making each bite pop. - Fresh parsley - Lemon wedges Garnishes can make your dish shine. Fresh parsley adds color and freshness. A squeeze of lemon brightens the flavors and gives a zesty finish. For a full guide, check out the Full Recipe. 1. Preheat your oven to 425°F (220°C). This heat helps the zucchini get crispy. 2. Line a baking sheet with parchment paper. This makes for easy cleanup and prevents sticking. 3. In a large bowl, combine grated Parmesan cheese, breadcrumbs, garlic powder, dried oregano, smoked paprika, salt, and black pepper. Mix well so everything is blended together. 1. Take your zucchinis and slice them into 1/4-inch thick rounds. Aim for even slices for uniform cooking. 2. Place the sliced zucchini on a paper towel. Gently press them to absorb moisture. This step is key for a crispy treat. 1. Lightly spray your baking sheet with olive oil. This helps the zucchini not stick. 2. One by one, dip each zucchini slice into the cheese and breadcrumb mix. Make sure each slice is well-coated for a tasty crust. 3. Arrange the coated zucchini slices in a single layer on your baking sheet. If using olive oil, drizzle it over the tops to help them crisp up. 4. Place the baking sheet in your preheated oven. Bake for 20-25 minutes. Look for golden brown tops and tender zucchini. 5. Once done, take them out and let them cool for a few minutes. Just before serving, sprinkle with fresh parsley for a pop of color. Follow the Full Recipe for more detailed steps! To get crispy zucchini, start with moisture removal. Zucchini has a lot of water. If you don’t remove some, it will steam instead of bake. After slicing the zucchini, place the rounds on a paper towel. Press gently to soak up excess water. This step makes a big difference in texture. Next, use the right oven temperature. Preheat your oven to 425°F (220°C). A hot oven helps to crisp the zucchini quickly. It also browns the cheese and breadcrumbs nicely. This way, you get that golden crust we all love. When serving Baked Parmesan Zucchini, presentation matters. Use a rustic wooden platter for a charming look. Add fresh lemon wedges on the side. Their bright color and flavor enhance the dish. A sprinkle of extra parsley on top adds a nice touch, too. For pairing ideas, serve with grilled chicken or fish. The flavors balance well and make a complete meal. You can also enjoy it as a tasty snack or appetizer. Pair it with a zesty dipping sauce for extra fun. For the full recipe, check out Baked Parmesan Zucchini Surprise. {{image_4}} You can switch out the Parmesan cheese for other kinds. Use sharp cheddar for a bold flavor. Mozzarella brings a nice meltiness. Try feta for a tangy twist. Grated pecorino adds saltiness, which is great too. Each cheese gives a new taste to your baked zucchini. Spices can change the whole dish. Add a pinch of red pepper flakes for heat. Italian seasoning gives a nice, herbal taste. Try fresh herbs like basil or thyme for brightness. A squeeze of lemon juice before serving can give it a fresh kick. Don't be afraid to experiment with flavors you love. If you need a gluten-free option, use ground almonds or chickpea flour. Both work well and add a unique flavor. Panko breadcrumbs are a great choice too. They give an extra crunch that you will enjoy. Try using a mix of different breadcrumbs for more texture. For the details on making Baked Parmesan Zucchini, see the [Full Recipe]. For short-term storage, keep your baked Parmesan zucchini in the fridge. Place them in an airtight container. They will stay fresh for up to three days. Before sealing, let them cool to room temperature. This helps prevent moisture buildup. If you want to freeze them, first allow the zucchini to cool completely. Spread the slices on a baking sheet in a single layer. Freeze them for about two hours until firm. Then, transfer the slices to a freezer bag. Remove as much air as possible. They can last for up to three months in the freezer. To reheat your baked Parmesan zucchini, use the oven for best results. Preheat your oven to 350°F (175°C). Place the zucchini in a single layer on a baking sheet. Bake for about 10-15 minutes. This will keep them crispy and warm. You can also use an air fryer. It’s quick and helps to maintain that crunchy texture. Set the air fryer to 350°F (175°C) and heat for about 5-7 minutes. Enjoy your tasty treat just as you did the first time! How can I make baked zucchini more flavorful? To boost flavor, add herbs like thyme or basil. You can also mix in some red pepper flakes for heat. A squeeze of lemon juice right before serving adds a bright taste. Can I use a different type of squash? Yes, you can use yellow squash or pattypan squash. These varieties work well and taste great when baked. Just cut them into similar-sized rounds to ensure even cooking. What should I serve with baked Parmesan zucchini? Baked Parmesan zucchini pairs well with grilled chicken or fish. You can also serve it alongside a fresh salad or pasta. It makes a great side dish or a tasty snack on its own. For a complete guide, check out the Full Recipe for all the details. Baked Parmesan zucchini is a simple, tasty dish. We covered key ingredients, preparation steps, and tips for perfecting this snack. Don’t forget to add your favorite herbs or even different cheeses for fun! Storage is easy, too, so you can savor it later. Enjoy experimenting with flavors and sharing this dish with friends and family. This recipe is sure to become a favorite in your kitchen.](https://dailydishcraft.com/wp-content/uploads/2025/05/db0f100b-dad9-4d7c-bd20-30b94183700f.webp)
Looking for a tasty snack or side dish that stands out? My Baked Parmesan Zucchini is flavorful and crispy! With
![To make a tasty Teriyaki Chicken Casserole, you'll need these main ingredients: - 2 cups cooked white rice - 1 pound boneless, skinless chicken thighs, diced - 1 cup fresh broccoli florets - 1 cup bell peppers, sliced - 1 cup shredded carrots - 1 cup low-sodium teriyaki sauce - 1 cup shredded mozzarella cheese, divided - 2 green onions, chopped - 1 tablespoon sesame seeds - Salt and pepper to taste - 1 tablespoon olive oil When selecting fresh vegetables, look for bright colors and firm textures. For broccoli, choose florets that are deep green. Bell peppers should feel heavy for their size. Carrots should be crisp and not soft. Freshness matters for flavor! You can make this dish healthier by using brown rice instead of white. Brown rice has more fiber and nutrients. Look for low-sodium teriyaki sauce to cut back on salt. You can also add more veggies like snap peas or zucchini for extra nutrition. For the full recipe, check the instructions above! First, you need to preheat your oven to 375°F (190°C). This step is key. A hot oven helps cook the casserole evenly. While the oven heats, grab a 9x13 inch baking dish and grease it lightly. This will help the casserole not stick. Next, let's cook the chicken. Heat 1 tablespoon of olive oil in a large skillet over medium heat. Add 1 pound of diced chicken thighs. Season it with salt and pepper. Sauté the chicken for about 5-7 minutes. You want it browned and cooked through. Stir it often to avoid burning. Now, it's time to add the veggies. Toss in 1 cup each of fresh broccoli florets, sliced bell peppers, and shredded carrots. Cook these for about 3-4 minutes. This way, the veggies will soften but still have some crunch. After that, reduce the heat. Pour in 1 cup of low-sodium teriyaki sauce. Stir everything well. Let it simmer for 2-3 minutes. The flavors will blend beautifully. In a large mixing bowl, combine the cooked rice with the chicken and veggies. Use 2 cups of cooked white rice. Mix in half of the shredded mozzarella cheese and half of the chopped green onions. Fold everything gently. This step is vital for even flavor distribution. Now, transfer this mixture into your greased baking dish. Spread it evenly across the dish. For that cheesy finish, sprinkle the rest of the mozzarella cheese on top. This will create a lovely, gooey layer as it bakes. Cover the casserole dish tightly with aluminum foil. Place it in your preheated oven and bake for 25 minutes. This allows the flavors to meld together. After 25 minutes, carefully remove the foil. Return the casserole to the oven. Bake for an extra 10-15 minutes. You want the cheese to be bubbly and golden brown. Once done, take the casserole out of the oven. Let it rest for a few minutes before serving. This resting time helps the flavors settle. Just before serving, garnish with remaining green onions and a sprinkle of sesame seeds for extra flavor and crunch. For the full recipe, please refer to the earlier sections. Marinating your chicken makes it tastier. I recommend marinating for at least 30 minutes. This gives the teriyaki sauce time to soak in. You can even marinate it overnight for deeper flavor. Try adding a splash of lime juice or garlic for extra kick. You might also consider using soy sauce or honey for a twist. Pair the casserole with simple side dishes. Steamed rice or a fresh salad works well. For a fun touch, serve with chopsticks and forks together. You can also add a sprinkle of sesame seeds on top for extra crunch. This adds visual flair too. To keep your casserole moist, avoid overcooking the chicken. Cook it just until it’s done. If you want a saucy dish, use less rice. Adjust the teriyaki sauce to match your taste. If you love spice, add a pinch of red pepper flakes. Always taste before serving to ensure it’s just right. {{image_4}} You can make teriyaki chicken casserole fit your diet. For gluten-free needs, choose tamari instead of regular soy sauce. Tamari has a rich flavor similar to soy sauce but is made without wheat. Many grocery stores carry gluten-free teriyaki sauce too. If you want plant-based options instead of chicken, try tofu or tempeh. Both soak up the teriyaki sauce well and give a great texture. You can also use chickpeas for a protein punch. Just sauté them with the veggies for a hearty dish. Adding spices and herbs can give your casserole a new twist. Try ginger or garlic powder for extra zing. Fresh herbs like cilantro or basil can brighten the dish. Don’t be afraid to mix and match flavors! You can also add different veggies. Snap peas bring a nice crunch, while zucchini adds moisture. Carrots, bell peppers, and broccoli are great, but don’t be shy to experiment. Fresh corn or baby corn could add some sweetness. When it comes to cheese, you have choices! Cheddar cheese gives a sharp taste, while Monterey Jack melts smoothly. For a twist, blend different cheeses for a unique flavor. If you prefer dairy-free, there are vegan cheese options. Look for brands that melt well, like cashew-based cheese. Some almond or coconut cheese can work too. They may not melt like real cheese, but they can still add creaminess to your casserole. For the full recipe, check out the Teriyaki Chicken Casserole page. To store leftover Teriyaki Chicken Casserole, let it cool first. Place it in a sealed container. This keeps it fresh for up to three days in the fridge. When reheating, use the oven for best results. Preheat the oven to 350°F (175°C). Cover the casserole with foil to prevent it from drying out. Heat for about 20-25 minutes until it’s hot all the way through. You can freeze this casserole before cooking it. Prepare the dish as directed but do not bake it. Instead, cover it tightly with plastic wrap and aluminum foil. This helps prevent freezer burn. You can freeze it for up to two months. When you're ready to cook, take it out of the freezer. Let it thaw in the fridge overnight. Once thawed, bake it in the preheated oven at 375°F (190°C) for about 40-45 minutes. This ensures it cooks evenly. Enjoy your delicious meal! For the complete recipe, you can refer to the [Full Recipe]. To make Teriyaki Chicken Casserole healthier, you can: - Use brown rice instead of white rice for added fiber. - Choose skinless chicken breasts to lower fat content. - Add more vegetables like spinach or zucchini for extra nutrients. - Substitute low-calorie teriyaki sauce or make your own. - Limit cheese or use a lighter cheese option like mozzarella. These tweaks help cut calories while keeping the dish tasty and satisfying. Yes, you can use brown rice! Brown rice adds a nutty taste and more fiber. However, it does take longer to cook. - Cook brown rice for about 30-40 minutes before mixing it in. - Keep in mind that brown rice may make the casserole a bit chewier. - Adjust the cooking time to ensure everything is warm and cooked through. If you want to swap out chicken, consider these options: - Tofu: Firm tofu works well and absorbs flavors nicely. - Tempeh: This has a hearty texture and is great for protein. - Portobello mushrooms: These add a meaty flavor and are packed with nutrients. - Cooked chickpeas: They are a great plant-based protein and add texture. These alternatives can make the dish vegan while still being delicious. To reheat the casserole, follow these steps: - Preheat your oven to 350°F (175°C). - Cover the casserole with foil to keep it moist. - Heat for about 20-25 minutes or until warmed through. - You can also use a microwave; just cover it and heat in 1-minute intervals. This way, the casserole stays flavorful and doesn’t dry out. For the full recipe, check out the cooking instructions above. Teriyaki Chicken Casserole combines fresh ingredients, quick steps, and tasty flavors. We explored key ingredients, cooking tips, and how to avoid common mistakes. Remember to choose fresh veggies and cook your chicken well. Don’t forget to let the casserole rest before serving for the best taste. With these ideas, you can make a delightful meal everyone will enjoy. Enjoy experimenting with the variations to suit your taste!](https://dailydishcraft.com/wp-content/uploads/2025/05/457ab190-b4c0-4b09-90b4-eb72b6cb8770.webp)
Are you ready for a dish that warms the heart and satisfies the tummy? This Teriyaki Chicken Casserole blends savory
