Skip to content
DisclaimerTerms Of UseGDPR PolicyCookie Policy

dailydishcraft

  • Home
  • Drinks
  • Appetizers
  • Dinner
  • Dessert
  • About
  • Contact
  • Privacy Policy
DisclaimerTerms Of UseGDPR PolicyCookie Policy

Jessica

To make a great tomato basil soup, you need a few key ingredients: - 2 tablespoons extra-virgin olive oil - 1 medium onion, finely chopped - 3 cloves garlic, minced - 1 can (28 oz) crushed tomatoes, preferably San Marzano - 2 cups low-sodium vegetable broth - 1 teaspoon granulated sugar - Sea salt and freshly cracked pepper to taste - 1 cup heavy cream (or coconut cream for a vegan alternative) - 1 cup fresh basil leaves, roughly chopped - 1 tablespoon aged balsamic vinegar Olive oil adds a rich flavor. Onions and garlic bring depth to the soup. Crushed tomatoes form the base, giving a sweet and tangy taste. Broth adds liquid and richness. Cream makes the soup smooth, and sugar balances acidity. Seasoning helps enhance all the flavors. Fresh basil is key for this soup. It gives a bright, aromatic flavor. When choosing basil, look for vibrant green leaves without brown spots. Fresh tomatoes also elevate the dish, but use them only if they are in season. Ripe tomatoes add sweetness and depth. If using fresh tomatoes, try to select those that are firm but slightly soft to the touch. If you want a dairy-free version, you can use coconut cream instead of heavy cream. This keeps the soup creamy while adding a hint of coconut flavor. For those watching their sodium intake, use low-sodium broth and skip the added salt. You can also use herbs like oregano or thyme as a twist instead of basil if needed. These substitutions still keep the soup flavorful and enjoyable. - Estimated prep time: 10 minutes - Necessary kitchen tools: - Large heavy-bottomed pot - Cutting board and knife - Measuring spoons - Immersion blender or countertop blender First, heat the extra-virgin olive oil in your pot over medium heat. Once the oil is hot, add the finely chopped onion. Sauté the onion for about five minutes until it turns soft and translucent. This step builds a strong flavor base. Next, introduce the minced garlic. Stir continuously for one minute. Keep an eye on it; you don’t want the garlic to burn. If it starts to brown, remove it from heat right away. Now, it's time to pour in the crushed tomatoes and vegetable broth. Stir in the granulated sugar, sea salt, and cracked pepper. Increase the heat slightly to bring the mixture to a gentle simmer. Let it simmer uncovered for 15 to 20 minutes. Stir occasionally to help the flavors meld together. After simmering, remove the pot from the heat. If you have an immersion blender, blend the soup until it’s smooth and creamy. If you use a countertop blender, let the soup cool slightly first. Transfer it in batches, blending until smooth. Once blended, return the pot to low heat. Gradually stir in the heavy cream (or coconut cream for a vegan option). Gently heat until warmed through, but do not boil. Finally, add the roughly chopped fresh basil leaves and aged balsamic vinegar. Stir well to mix everything in. Taste the soup and adjust the seasoning with more sea salt and pepper if needed. For a complete guide to the recipe, refer to the Full Recipe. To make your tomato basil soup stand out, focus on balanced flavors. Start by adding a pinch of sea salt early in the cooking process. This helps draw out the natural sweetness of the onions and tomatoes. You can also add a teaspoon of sugar to cut acidity, which enhances the soup's taste. Avoid burning garlic by keeping an eye on the heat. Cook it on medium heat for just a minute. If it starts to brown, remove it from the pot right away. Burnt garlic adds a bitter taste that can ruin your soup. Garnishing can elevate your dish. Top your soup with fresh basil leaves for a vibrant touch. A drizzle of olive oil adds richness and a glossy finish. You can also sprinkle some grated cheese, like Parmesan, for added flavor. Serve the soup warm, but not too hot. Aim for a cozy temperature that invites you to enjoy each spoonful. Pair it with crusty garlic bread; it makes for a perfect dipping experience. To enhance the flavor, consider adding spices. A dash of red pepper flakes can bring heat, while a bit of thyme adds depth. Fresh herbs, like oregano or parsley, can introduce new notes that complement the basil. For toppings, think about adding croutons for crunch. A dollop of sour cream or a spoonful of pesto can also provide a delightful contrast to the tomato flavor. These small additions can transform your soup from delicious to gourmet. For the complete cooking experience, refer to the Full Recipe. {{image_4}} For a vegan twist, you can swap heavy cream with coconut cream. This creamy option adds a subtle sweetness and rich texture. It blends perfectly, keeping your soup smooth and satisfying. You might also want to explore different herbs. Try using fresh dill or cilantro instead of basil. These herbs can give your soup a unique taste. They bring fresh notes that can surprise your palate. Adding different vegetables can elevate your soup. Consider tossing in some chopped carrots, bell peppers, or zucchini. These veggies can enhance the flavor and add vibrant colors. You can also infuse your soup with spices. A pinch of red pepper flakes or smoked paprika can change the flavor profile. These spices add warmth and depth, making each bite exciting. When summer arrives, you might want a chilled version. To make this, cool the soup after blending, then refrigerate for a few hours. Serve it cold, garnished with fresh basil. Pairing your soup with side dishes can make a meal complete. Try it with crusty garlic bread or a light salad. These pairings enhance the meal and provide a nice crunch alongside the smooth soup. For the full recipe, check out [Full Recipe]. To keep your homemade tomato basil soup fresh, store it in an airtight container. Refrigerate it right after it cools down. This method helps retain flavor and quality. Your soup will stay good for about 4 to 5 days in the fridge. If you want to keep it longer, freezing is a great option. Pour the cooled soup into freezer-safe bags or containers. Make sure to leave some space for expansion. Frozen soup can last up to 3 months. When you’re ready to enjoy your soup again, there are a few good ways to reheat it. The best method is to use a pot on the stove. Simply pour the soup in and heat it over low to medium heat. Stir it often to make sure it heats evenly. If you need a quick option, you can use the microwave. Just heat it in short bursts, stirring in between. This helps keep the soup smooth. If it gets too thick, add a splash of water or broth to bring back the right texture. Your soup's shelf life depends on how you store it. In the fridge, it lasts about 4 to 5 days. In the freezer, it can stay fresh for 3 months. Always check for signs of spoilage before eating. Look for changes in color or texture. If it smells off or has mold, throw it away. Keeping these tips in mind helps ensure your soup stays delicious. For the full recipe, check out the section above! Can I use fresh tomatoes instead of canned? Yes, you can use fresh tomatoes. I recommend using ripe, juicy tomatoes. They will add a bright flavor. About 2 pounds of fresh tomatoes should work. Just peel and chop them before adding to your pot. How can I make the soup spicier? Want a kick? You can add red pepper flakes or diced jalapeños. Start with a small amount and taste as you go. This way, you can find the right level of heat for your taste. Is this soup gluten-free? Yes, this soup is gluten-free. The main ingredients do not contain gluten. Always check labels on broth and cream for additional safety. Caloric content per serving Each serving has about 300 calories. This can vary based on your cream choice. For a lighter option, use coconut cream or skip the cream altogether. Where to find the best basil? Look for fresh basil at farmers' markets or grocery stores. The best basil has bright green leaves and a strong aroma. If you can, buy it just before cooking for peak flavor. Alternatives for hard-to-find ingredients If you can't find San Marzano tomatoes, use any high-quality canned tomatoes. For basil, try dried basil if fresh isn’t available. It won't taste the same, but it will still add flavor. Homemade tomato basil soup is simple and tasty. We covered key ingredients like fresh basil and creamy textures, plus helpful tips for perfecting flavor. Remember, selecting fresh tomatoes makes a big difference. You can customize this soup with dairy-free options or new spices. Store it properly for the best taste later. Try out the variations for fun twists. Enjoy your cooking journey and make this soup your own. You’ll love the process and the result!

Homemade Tomato Basil Soup Fresh and Flavorful Recipe

Are you ready to elevate your soup game? My homemade tomato basil soup is fresh, vibrant, and easy to make.

- Medium zucchini - Bell pepper (red or yellow) - Red onion - Cherry tomatoes - Button or cremini mushrooms - Olive oil - Balsamic vinegar - Garlic powder or fresh minced garlic - Dried oregano - Salt and black pepper - Fresh basil leaves Gathering fresh ingredients is key. Choose a medium zucchini and cut it into thick rounds. Pick a bell pepper—red or yellow works well—and chop it into large chunks. Slice a red onion into wedges, keeping them about 1-2 inches. Don’t forget the cherry tomatoes; they should stay whole and rinsed. Lastly, add button or cremini mushrooms, cleaned and left whole. For the marinade, you will need olive oil, balsamic vinegar, garlic powder, dried oregano, salt, and black pepper. This mix will bring out the flavors of the veggies. The optional garnish of fresh basil adds a lovely touch at the end. You can find the full recipe above. Enjoy creating your skewers! First, preheat your grill to medium-high heat. This means you want it around 375°F to 400°F. A hot grill helps cook the veggies evenly and gives them nice grill marks. Next, let’s make the marinade. In a large mixing bowl, whisk together olive oil and balsamic vinegar. Then add garlic powder, dried oregano, and a pinch of salt and black pepper. This mix adds flavor to your veggies. Let the vegetables soak in this tasty mix for about five minutes. This time allows them to soak up all that goodness. Now, it's time to assemble the skewers. Carefully thread the marinated vegetables onto the skewers, mixing different types for a colorful look. If you use wooden skewers, soak them in water for about 30 minutes. This step stops them from burning on the grill and keeps your veggies safe. Once your skewers are ready, place them on the grill. Grill them for about 10-12 minutes. Turn the skewers every few minutes. This helps them cook evenly and get those nice marks. Check if the vegetables are tender; they should look bright and slightly charred. After grilling, let them rest for a couple of minutes to keep their juiciness. For the full recipe, check out the Grilled Vegetable Skewers Delight . To get those beautiful grill marks, start with the right grill temperature. Preheat your grill to medium-high heat, around 375°F to 400°F. This heat level helps the veggies cook evenly and prevents burning. When grilling, turn the skewers every few minutes. This way, you get nice marks and avoid sticking. To boost the flavor of your skewers, think about adding more spices. Try smoked paprika for a hint of earthiness or cumin for warmth. You can also swap in fresh herbs like thyme or rosemary for a fragrant twist. For marinades, play with ingredients like soy sauce or citrus juice. These add depth and zing to your grilled veggies. Pair your skewers with sides like quinoa salad or a fresh green salad. They also work well with dips like tzatziki or hummus. For presentation, serve the skewers on a colorful platter. Drizzle a little balsamic glaze on top for a touch of elegance. This makes your dish pop and invites everyone to dig in! {{image_4}} You can use many different veggies for your skewers. Try these options: - Eggplant - Asparagus - Bell peppers - Sweet potatoes - Portobello mushrooms These veggies are tasty and grill well. You can pair your skewers with plant-based proteins. Tempeh or tofu works great. They soak up flavors nicely. You have choices when it comes to skewers. Metal skewers are strong and reusable. They heat up well, so food cooks faster. Wooden skewers are light and easy to find. Just soak them in water for 30 minutes. This helps stop burning. You can also cook skewers in other ways. Try using your oven or broiler. This method is great for bad weather. Just set your oven to broil and keep an eye on them. Want to spice up your grilled veggies? Use international marinades! Teriyaki adds a sweet touch. Chimichurri brings fresh herbs and garlic. Both make your skewers unique. Consider using seasonal vegetables too. In summer, use zucchini and corn. In fall, try butternut squash and Brussels sprouts. They add variety and fresh tastes to your meal. For the full recipe, check the section above. To keep your grilled vegetable skewers fresh, store them in an airtight container. Place a paper towel inside to absorb extra moisture. This helps maintain their texture. Refrigerate the skewers within two hours of cooking. They stay good for up to three days in the fridge. When reheating, avoid the microwave if possible. The microwave makes veggies soggy. Instead, use an oven or a skillet. Preheat your oven to 350°F. Place the skewers on a baking sheet for about 10 minutes. If using a skillet, heat it over medium heat. Cook for about 5 minutes, turning often to warm them evenly. Yes, you can freeze grilled vegetable skewers! To do this, let them cool completely. Wrap each skewer tightly in plastic wrap. Place the wrapped skewers in a freezer bag. This keeps them fresh for up to three months. When ready to eat, thaw them overnight in the fridge. To reheat, follow the tips above for the best results. For grilling, choose vegetables that hold up well to heat. Some great options are: - Zucchini - Bell peppers - Red onion - Cherry tomatoes - Mushrooms These vegetables add color and flavor. Their textures also ensure they won’t fall apart on the grill. You can tell grilled vegetables are ready by checking for two things: 1. Tenderness: Use a fork to pierce the vegetables. They should be soft but not mushy. 2. Grill marks: Look for nice char marks. They show that the heat cooked the veggies well. Each type of vegetable may cook at different rates, so keep an eye on them. Yes, you can use either gas or charcoal. Each has its perks: - Gas grill: Heats up fast and offers precise temperature control. Great for quick grilling. - Charcoal grill: Gives a smoky flavor that many love. It takes longer to heat up but can enhance taste. Both can make tasty skewers, so choose based on your preference. Grilled vegetable skewers pair well with many dishes. Here are some ideas: - Quinoa or rice salads - Grilled meats or tofu - Fresh salads with vinaigrette - Pita bread or flatbreads These sides complement the flavors of the skewers beautifully. Marinating is not a must, but it adds depth. Here’s why you might want to marinate: - Flavor enhancement: Marinades soak into the veggies, making them tastier. - Moisture retention: Marinated veggies can stay juicier during cooking. You can grill them plain, but marinating makes a big difference. For the full recipe, check out Grilled Vegetable Skewers Delight. Grilled vegetable skewers are fun and easy to make. You learned about the main ingredients like zucchini and bell peppers. The marinade adds great flavor with simple items like olive oil and garlic. Following the steps helps achieve perfect grilling results. You can get creative with variations and storage tips too. Grilled skewers suit any meal and are a great way to enjoy veggies. Try mixing up flavors and enjoy this tasty dish!

Grilled Vegetable Skewers Flavorful and Easy Recipe

Are you ready to elevate your cookout? Let’s make Grilled Vegetable Skewers that are both flavorful and easy! This recipe

- 2 cups fresh strawberries, hulled and sliced - 2 tablespoons granulated sugar - 1 teaspoon pure vanilla extract - 1 cup heavy whipping cream - 2 tablespoons powdered sugar - 8 ounces shortcake or pound cake, cut into 1-inch cubes - 1 cup creamy vanilla yogurt - Fresh mint leaves for garnish Selecting the best strawberries When choosing strawberries, look for ones that are bright red and firm. Fresh berries should smell sweet and have no soft spots. This helps ensure they taste great in your trifle. Suggested alternatives for shortcake If you can't find shortcake, use pound cake or sponge cake. Both options work well and add a nice texture. You could also try a gluten-free cake for a different twist. Best types of yogurt to use For this dessert, creamy vanilla yogurt works best. You can also use Greek yogurt for a thicker texture. If you want a fruitier taste, look for strawberry or honey-flavored yogurt. These ingredient tips make sure you create a delicious strawberry shortcake trifle. For the full recipe, check out the details above. To start, you need fresh strawberries. Grab 2 cups of berries, hull them, and slice them. Place them in a medium bowl. Add 2 tablespoons of granulated sugar and 1 teaspoon of pure vanilla extract. Gently toss everything together. This step helps the strawberries absorb the sweet flavor. Set the bowl aside for about 15 minutes. This lets the strawberries macerate and release their delicious juices. Next, grab a large mixing bowl for the cream. Pour in 1 cup of heavy whipping cream and add 2 tablespoons of powdered sugar. Use an electric mixer to whip the cream. Beat it until you see soft peaks form. Be careful not to over-whip it. If you do, it may turn into butter, and we want soft, fluffy cream. Now, it’s time to layer your trifle! Start with half of the cubed shortcake at the bottom of your trifle dish. This creates a solid base. Then, spoon half of the creamy vanilla yogurt over the shortcake, smoothing it out evenly. Next, take half of the macerated strawberries and spread them on top of the yogurt. Finally, add half of the whipped cream, covering the strawberries completely. Repeat this layering process. Add another layer of shortcake, yogurt, strawberries, and whipped cream. For the final touch, garnish the top with fresh strawberries and mint leaves. This adds color and freshness to your trifle. For the best taste, cover the trifle with plastic wrap. Refrigerate for at least 30 minutes before serving. This chilling time allows all the flavors to mix together. Enjoy your beautiful and tasty dessert! You can find the full recipe for more details. To make great whipped cream, first, use cold cream. This helps it whip up nicely. Avoid over-whipping. If you whip too long, it will turn into butter. Stop when you see soft peaks. You can add flavor to your whipped cream. Try a splash of vanilla or a hint of almond extract. Both add a lovely taste. When layering your trifle, think about stability. Start with a firm layer of cake. This helps hold everything together. Make sure each layer is even. This ensures a nice look when you serve it. You can also use different colors in your layers. Bright strawberries next to white cream looks stunning. For garnishes, fresh mint leaves are a great choice. They add color and taste. You can also sprinkle some crushed cookies on top for crunch. To present individual servings, use clear glasses. This shows off all the beautiful layers. It makes each dessert feel special and ready to enjoy. {{image_4}} You can change the strawberries for other fruits. Raspberries, blueberries, or peaches work great. Each fruit adds a unique flavor. For summer, try using fresh peaches or cherries. In the fall, apples and pears add a nice twist. Feel free to mix different fruits for a fun look and taste. If you want a twist, use flavored yogurt instead of cream. Vanilla or lemon yogurt adds a tasty kick. For those who are dairy-free, try coconut cream or almond milk yogurt. These options keep the trifle creamy without dairy. They also add a new layer of flavor to your dessert. You can make your trifle a bit healthier. Start by reducing the sugar in the recipe. Use just one tablespoon of sugar for the strawberries. You can also swap shortcake for whole grain or nut-based cakes. These changes keep the taste great while making it a bit lighter. Enjoy the same delicious dessert with added health benefits! You can store the trifle in the fridge for up to three days. Cover it well with plastic wrap. This keeps it fresh and prevents it from absorbing other odors. For the best taste, eat it within one to two days. The longer it sits, the soggier the layers may become. Yes, you can freeze a trifle, but it may not be its best after thawing. The cream and yogurt can separate, affecting texture. If you want to freeze it, remove the whipped cream first. Freeze the cake and fruit layers in airtight containers. Thaw them in the fridge overnight before serving. If you have leftover trifle components, get creative! Use the shortcake in a parfait or as a topping on ice cream. Mix the strawberries with yogurt for a quick snack. Store any extra ingredients in airtight containers in the fridge. This way, they stay fresh for your next sweet creation. The Strawberry Shortcake Trifle stays fresh for about 2-3 days in the fridge. The shelf life depends on factors like the freshness of the ingredients and how well you store it. Make sure to cover it tightly to prevent it from drying out or absorbing other smells from the fridge. Yes, you can make this trifle in advance! I recommend preparing it up to a day ahead. This allows the flavors to mix and become even tastier. Just remember to chill it in the fridge for at least 30 minutes before serving. Serve the trifle cold for the best taste. I love presenting it in clear glasses to show off the lovely layers. Garnish with fresh strawberries and mint leaves for a pop of color. It makes the dish look so inviting! Absolutely! You can use store-bought shortcake or pound cake to save time. Ready-made whipped cream can also work well. This way, you keep the taste good without spending too much time in the kitchen. You can easily adapt this recipe. For gluten-free options, use gluten-free cake. If you want a vegan version, swap the cream with coconut cream and use dairy-free yogurt. This way, everyone can enjoy the deliciousness! This blog post covered how to make a delicious Strawberry Shortcake Trifle. You learned about the best ingredients, including fresh strawberries and heavy whipping cream. I shared tips for preparing the strawberries and whipping the cream just right. You also discovered fun variations and storage tips for keeping your trifle fresh. In closing, this trifle is sure to impress your friends and family. Whether you stick to the classic recipe or try new fruits, enjoy the sweet layers every time.

Strawberry Shortcake Trifle Delightful and Easy Recipe

Looking for a sweet, easy dessert that wows your guests? The Strawberry Shortcake Trifle is the answer! This delightful recipe

- Ripe avocados - Whole-grain bread - Optional toppings: - Feta cheese - Tomatoes - Peaches - Basil Ripe avocados are the star of this dish. They should be soft yet firm. Whole-grain bread adds a hearty touch. You can use any bread you like, but whole grain adds great flavor. Toppings can make your toast special. Feta cheese gives a salty bite. Fresh tomatoes add juicy freshness. Sweet peaches can balance the taste. Fresh basil brings a nice herbal note. - Lime juice - Salt and cracked pepper - Balsamic glaze Seasoning is key to great flavor. Lime juice adds a zesty kick. Salt and cracked pepper enhance all the tastes. Drizzling balsamic glaze offers a sweet and tangy finish. Use these ingredients to take your toast to the next level. - Serving suggestions: - Side salads - Smoothies Pairing your avocado toast with a side salad can add crunch and freshness. A smoothie can also complement it well, adding nutrition and flavor. - Beverage pairings: - Coffee - Fresh juice Coffee can bring warmth and richness to your meal. Fresh juice adds a bright note and can refresh your palate. Enjoy your meal with these tasty drinks! To start, you need to toast the bread. You can use a toaster or grill it. If grilling, use medium heat. This will give your bread a nice golden-brown color. I recommend using whole-grain bread for the best taste. It adds fiber and a nutty flavor that pairs well with the creamy avocado. Next, let’s mash the avocados. Scoop out the flesh and squeeze in lime juice. This helps keep the color bright. Season with salt and cracked pepper. For the best texture, mash gently with a fork. You want some chunks for that perfect bite. To enhance flavor, try adding spices like smoked paprika or fresh herbs like cilantro or basil. Now it’s time to assemble. Spread the mashed avocado on each slice of toast. Make sure to cover it fully for great flavor. For a savory twist, add sliced tomatoes on top. Then sprinkle crumbled feta cheese over that. Drizzle balsamic glaze to add sweetness and depth. For a sweet twist, place thin peach slices on the avocado. Garnish with fresh basil leaves for a refreshing touch. Drizzle a little balsamic glaze here too. Avoid the mistake of overloading your toast. Keep it simple for the best taste. For a complete guide, check the Full Recipe. Enjoy your tasty creations! To make great avocado toast, you need ripe avocados. Look for ones that are slightly soft when you press them gently. If they are hard, let them ripen on your counter for a few days. Once ripe, store them in the fridge to slow down browning. To prevent browning, squeeze lime juice on the mashed avocado. The acid helps keep it fresh. You can also cover the avocado with plastic wrap, pressing it against the surface. This reduces air exposure. Plating your avocado toast can make it extra special. Use a large platter and arrange the toast in a fun pattern. Stack the savory and sweet variations next to each other for contrast. For garnishing, sprinkle fresh herbs like basil or cilantro on top. You can also use colorful toppings, like sliced tomatoes or peaches. This makes your dish look fresh and appealing. One common mistake is over-mashing the avocado. You want some chunks for texture. A little creaminess is nice, but too much makes it mushy. Another mistake is using stale or unsuitable bread. Choose fresh whole-grain bread for the best taste. If the bread is dry, it won't hold the toppings well. Always toast it until it’s golden brown and crisp. {{image_4}} For a classic savory avocado toast, start with simple ingredients. You need: - 2 ripe avocados - 4 slices of whole-grain bread - 1 medium tomato, thinly sliced - 1/4 cup feta cheese, crumbled - 1 tablespoon balsamic glaze - 1 teaspoon smoked paprika - Juice of 1 lime - Salt and freshly cracked pepper to taste To make it, toast the bread until golden. Mash the avocado, adding lime juice, salt, and pepper. Spread it on the toast. Top with tomato slices and feta cheese. Drizzle with balsamic glaze and sprinkle smoked paprika for extra flavor. This toast is rich and satisfying. If you want a sweet twist, try this unique combination. Use: - 2 ripe avocados - 4 slices of whole-grain bread - 1 ripe peach, thinly sliced - Fresh basil leaves, for garnish - Juice of 1 lime - Salt and freshly cracked pepper to taste After toasting the bread, mash the avocado as before. Spread it on the toast. Then, layer thin peach slices on top. Add fresh basil for a pop of color and flavor. Drizzle with balsamic glaze to balance the sweetness. This toast is refreshing and fun. Explore global flavors for your avocado toast. Here are some ideas: - Mediterranean: Use ingredients like olives, sun-dried tomatoes, and a sprinkle of oregano. - Asian: Add sesame seeds, sliced radishes, and a drizzle of soy sauce for a unique taste. You can swap ingredients to match these themes. For example, use pita bread for Mediterranean or rice cakes for Asian flair. These variations will take your avocado toast to new heights, adding exciting flavors from around the world. For a complete guide, check out the Full Recipe. To keep your avocados fresh, store them in a cool, dry place. If you cut an avocado, sprinkle some lime juice on the flesh. This helps keep it from turning brown. Wrap it tightly in plastic wrap or place it in an airtight container. Whole-grain bread should sit in a cool, dark spot. For longer storage, keep it in the fridge. Just make sure it’s in a bag to prevent it from drying out. You can store assembled avocado toast, but it’s not ideal. The bread gets soggy from the avocado. If you must store it, place the toast in an airtight container. Try to eat it within a few hours for the best taste. For longer shelf life, keep the ingredients separate. Assemble them right before you want to eat. You can freeze avocado toast, but it takes some prep. Start by mashing the avocado and mixing it with lime juice. Spread the mixture on toasted bread. Wrap each piece in plastic wrap, then place them in a freezer bag. When you’re ready to eat, thaw in the fridge overnight. Toast again to bring back the crunch. This way, you enjoy quick meals without losing flavor. Whole-grain bread is great for avocado toast. It adds fiber and nutrients. You can also use sourdough or rye. These breads have a good texture and flavor. Choose bread that is fresh and sturdy. This way, it holds the toppings well. To keep avocado green, use lime juice. The acid slows browning. Spread the avocado right before serving. Cover the toast tightly if you need to store it. Use plastic wrap to keep air out. This will help keep it fresh longer. You can prep the toppings in advance. Store the mashed avocado in an airtight container. Add lime juice to help keep it green. Toast the bread just before serving. This way, your toast stays crispy and tasty. Avocado is full of healthy fats. It has fiber, vitamins, and minerals. These nutrients help with heart health. They also support good digestion. Eating avocado toast can keep you full for longer. It is a smart choice for breakfast or a snack. Avocado toast is simple, tasty, and versatile. You learned about key ingredients, seasonings, and ways to enhance your toast. We covered preparation methods, common mistakes, and creative variations. As a final thought, avocado toast can fit any meal. With practice, you'll master your own style. Enjoy making it fresh and fun, just how you like!

Avocado Toast Variations Tasty and Simple Recipes

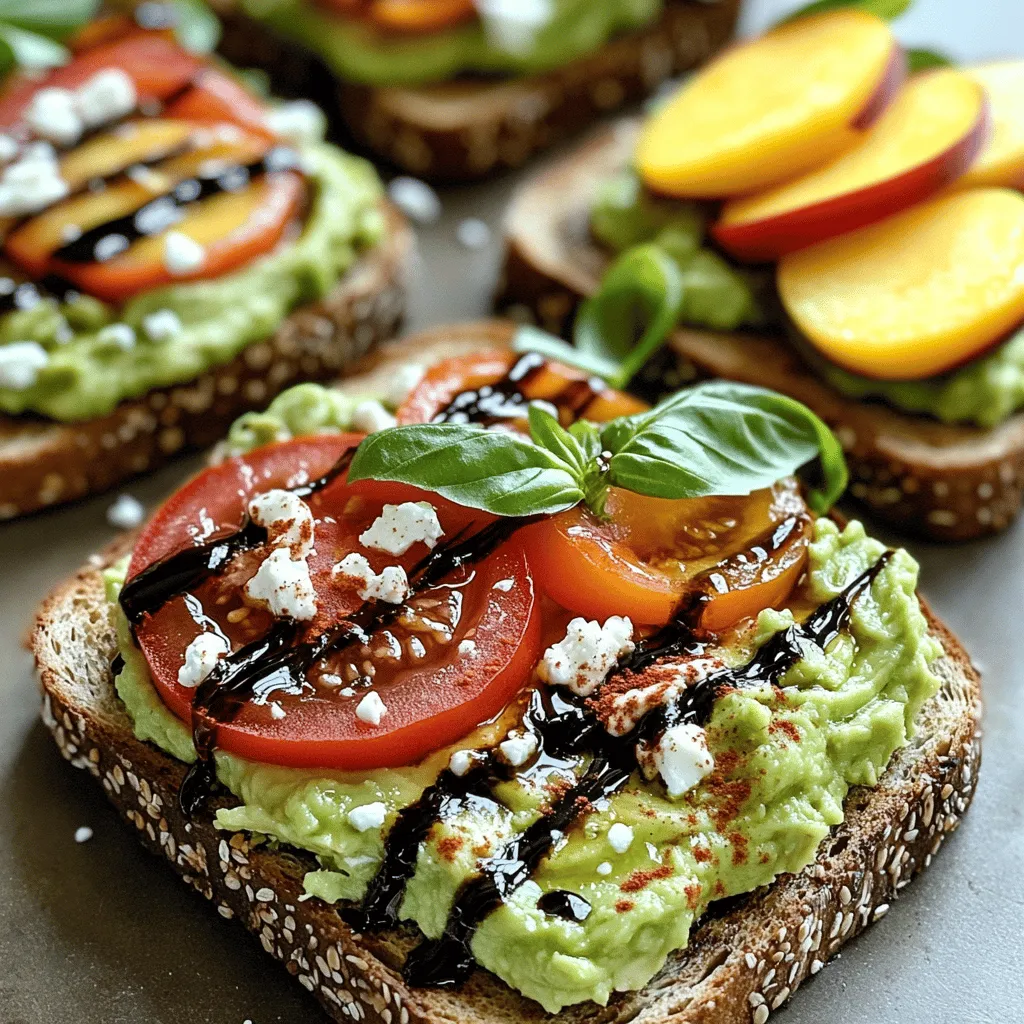
If you think avocado toast is just smashed avocado on bread, think again! In this post, I’ll show you how

To make a chocolate lava cake, you need a few simple ingredients. Here is the list: - 1 cup semi-sweet chocolate chips - ½ cup unsalted butter - 2 large eggs - 2 large egg yolks - ½ cup granulated sugar - 1 teaspoon pure vanilla extract - ¼ cup all-purpose flour - A pinch of salt - Cocoa powder for dusting - Optional toppings Each ingredient plays a key role. The semi-sweet chocolate chips give the cake its rich flavor. The butter keeps it moist and adds a silky texture. The eggs and yolks help the cake rise and create that gooey center. When you mix the sugar and vanilla, it adds sweetness and aroma. The flour is crucial for structure, while the salt enhances all the flavors. Dusting the ramekins with cocoa powder prevents sticking and adds a touch of chocolate. Optional toppings like vanilla ice cream or whipped cream can enhance your dessert. They provide a cool contrast to the warm, molten cake. Don’t forget, the full recipe guides you through the steps to create this treat! Start by preheating your oven to 425°F (220°C). I like to use four ramekins for this recipe. First, coat the insides with a thin layer of butter. This helps the cake slide out easily. Next, lightly dust each ramekin with cocoa powder. This step adds flavor and prevents sticking. For the melting part, grab a microwave-safe bowl. Add 1 cup of semi-sweet chocolate chips and ½ cup of unsalted butter. Microwave the mix in 30-second bursts. Stir after each round until smooth. Be careful, as the bowl can get hot. Let it cool a bit before using. In a separate bowl, whisk together two large eggs, two large egg yolks, and ½ cup of granulated sugar. Keep mixing until it’s light and fluffy. Add 1 teaspoon of pure vanilla extract and mix well. Now, pour in the warm chocolate mix, whisking as you go. This helps create a smooth batter. Next, sift in ¼ cup of all-purpose flour and a pinch of salt. Use a spatula to fold it all together. Be gentle! Over-mixing can change the texture of your cake. Evenly divide the batter among the prepared ramekins, filling them about ¾ full. This gives the cakes room to rise. Place the ramekins on a baking sheet to catch spills. Bake them for 12–14 minutes. You should see set edges but a jiggly center. That’s the sweet spot! After baking, take the ramekins out and cool them for about 1 minute. Use a knife to run along the edges. This helps loosen the cake. Now, flip each ramekin onto a plate. Lift it off gently to reveal that gooey, molten center! Serve right away for the best experience. You can add a scoop of vanilla ice cream or a dollop of whipped cream for extra delight. For the full recipe, check out the details above! To get the perfect molten center, timing is key. Bake your cakes for 12 to 14 minutes. Check after 12 minutes. The edges should be firm, while the center jiggles. If you bake too long, the center will cook through. Each oven is different, so watch closely. Use an oven thermometer to ensure your oven is at the right temp. Avoid over-mixing your batter. This makes the cake dense and tough. Gently fold in the flour. Another mistake is not preparing the ramekins well. If you skip the butter and cocoa powder, your cakes can stick. Also, do not open the oven door while baking. This can lower the temperature and ruin the cake. For a stunning finish, dust your cakes with powdered sugar. Add fresh berries on the side for color. A sprig of mint also adds a nice touch. Serve your cakes warm with a scoop of vanilla ice cream or whipped cream. This makes for a beautiful and delicious dessert. Want the full details? Check out the Full Recipe for all the steps! {{image_4}} You can make your chocolate lava cake even better with a few simple tweaks. Try adding orange zest for a bright taste. A hint of peppermint oil gives it a fresh twist. You can also mix in espresso powder. It enhances the chocolate flavor and adds depth. If you need a gluten-free option, use a gluten-free flour blend. This works well and keeps the cake soft. For a dairy-free version, swap butter for coconut oil and use dairy-free chocolate. Both options give you a rich flavor without the dairy. Serve your lava cake with a drizzle of warm chocolate sauce. It adds extra richness. You can also pair it with different ice cream flavors. Vanilla is classic, but try mint or coffee for something new. Explore toppings like fresh berries or nuts for added crunch. For the full recipe, check the [Full Recipe]. To keep your chocolate lava cake fresh, store leftovers in the fridge. Place each cooled ramekin in an airtight container. This helps maintain the cake's texture. You can store it for up to 2 days. If you want to keep it longer, freeze the cake. Wrap each ramekin tightly in plastic wrap and then foil. This way, it stays fresh for up to 3 months. To enjoy your chocolate lava cake again, you'll want to reheat it properly. The best method is to use the oven. Preheat your oven to 350°F (175°C). Remove the ramekin from the fridge or freezer. Cover it with foil to keep the heat in. Bake for about 10-12 minutes if it's cold. If frozen, it may take 15-20 minutes. Check if the center is warm and gooey. Enjoy it with a scoop of ice cream for the best experience! Yes, you can prepare the batter ahead of time. Store it in the fridge for up to 24 hours. Just remember to bring it to room temperature before baking. You can also bake the cakes in advance. Let them cool, then cover and store them in the fridge. When ready to serve, reheat them in the oven for a few minutes. If your cake did not ooze, it likely baked too long. The center needs to stay soft. Next time, reduce the baking time by one or two minutes. Check the cakes at the 10-minute mark. Also, ensure you used the correct oven temperature. An oven thermometer can help with this. Look for firm edges and a soft center. The top should look set, but the middle should still jiggle slightly. If the edges are firm, that’s a good sign. You want the center to remain gooey for the perfect lava effect. Practice makes perfect, so don’t worry if it takes a few tries! Yes, you can use dark or milk chocolate. Each type gives a unique flavor. Dark chocolate will make the cake richer and less sweet. Milk chocolate offers a sweeter taste. Feel free to mix in flavored chocolates, like orange or mint. These changes can create fun new flavors. Enjoy experimenting with what you like best! You now know how to make a perfect chocolate lava cake from scratch. We discussed the key ingredients, step-by-step instructions, and tips to achieve that gooey center. I also shared variations and storage tips, so you can enjoy this treat anytime. With simple tweaks, you can make it your own, whether you prefer a different flavor or have dietary needs. The joy of baking brings everyone together, so have fun with it! Enjoy every bite of your delicious creation.

Decadent Chocolate Lava Cake Easy and Irresistible

Are you ready to impress your family and friends with a dessert that’s easy and oh-so-delicious? This Decadent Chocolate Lava

To make nutty granola bars, gather these important items: - 2 cups rolled oats - 1 cup mixed nuts (almonds, walnuts, pecans, roughly chopped) - 1/2 cup honey or maple syrup - 1/2 cup nut butter (peanut or almond) - 1/4 cup unsweetened shredded coconut - 1/2 cup dried fruits (raisins, cranberries, or chopped apricots) - 1/4 teaspoon salt - 1/2 teaspoon ground cinnamon - 1/2 teaspoon pure vanilla extract These ingredients work together to create a chewy, tasty snack. The oats provide a great base. The nuts add crunch and healthy fats. Honey or maple syrup sweetens the bars while binding them. You can add extra flavors or textures to your granola bars. Consider these options: - 1/4 cup chocolate chips or cacao nibs - 1/4 cup seeds (pumpkin or sunflower) - 1/2 teaspoon nutmeg for warmth - A handful of nutmeg or ginger for spice Feel free to mix and match these add-ins. They can make your bars unique and fun. These bars can fit many diets. They are naturally gluten-free if you choose certified oats. If you want a vegan option, use maple syrup and a plant-based nut butter. For nut allergies, you can replace nuts with seeds. This way, you can still enjoy a great snack without worry. For the full recipe, head to the recipe section above. Start by gathering all your ingredients. You need: - 2 cups rolled oats - 1 cup mixed nuts (almonds, walnuts, pecans, roughly chopped) - 1/2 cup honey or maple syrup - 1/2 cup nut butter (peanut or almond) - 1/4 cup unsweetened shredded coconut - 1/2 cup dried fruits (raisins, cranberries, or chopped apricots) - 1/4 teaspoon salt - 1/2 teaspoon ground cinnamon - 1/2 teaspoon pure vanilla extract First, preheat your oven to 350°F (175°C). Line a 9x9-inch baking pan with parchment paper. Make sure the paper hangs over the sides. This will help you lift the bars out later. In a large bowl, mix the rolled oats, chopped nuts, shredded coconut, dried fruits, salt, and ground cinnamon. Stir well so everything is combined. In a separate microwave-safe bowl, mix the honey and nut butter. Heat it for 20-30 seconds until warm. Stir in the vanilla extract after it is warm. Next, pour this warm mixture over the dry ingredients. Use a spatula or wooden spoon to mix until everything is coated. It should stick together nicely. Transfer the mixture into your lined baking pan. Press it down firmly to create an even layer. Bake it in the preheated oven for 20-25 minutes. The edges should look golden brown. After baking, take it out and let it cool in the pan on a wire rack. This cooling step is important to help the bars set. Once cool, use the parchment paper to lift out the slab. Cut it into bars or squares. Store them in an airtight container to keep them fresh. Enjoy your healthy snack anytime! For the full recipe, check out the complete details above. To get the best texture for your nutty granola bars, the key is to press the mixture firmly into the pan. This helps the bars hold together. Make sure to bake them until the edges turn golden brown for a nice crunch. Letting them cool completely in the pan is crucial. If you cut them too soon, they may crumble. You can easily swap ingredients in this recipe to fit your taste. If you don't have mixed nuts, use your favorite nut or seed. Sunflower seeds work well too. For sweeteners, maple syrup can replace honey. If you want a nut-free option, use sunflower butter instead of nut butter. If your bars crumble, it might be due to not pressing the mixture enough. Try using a larger pan or adding more nut butter to help bind them together. If they are too hard, bake them for less time next time. Adjusting the baking time can change the texture, making them softer or crunchier. {{image_4}} You can change the flavors of your nutty granola bars easily. Add different spices like nutmeg or ginger for a warm taste. You can also swap the honey for flavored syrups, like maple or agave. For a chocolatey twist, stir in some cocoa powder or mini chocolate chips. You can even use flavored nut butters, like cashew or hazelnut, to give a unique taste. If you need a nut-free option, you can still enjoy these bars. Instead of nuts, try using seeds like sunflower or pumpkin seeds. You can also add more oats or use rice cereal for crunch. For flavor, include sunflower seed butter or tahini as a base. These swaps keep the bars tasty and safe for anyone with nut allergies. Want to add protein to your bars? There are many easy ways to do this. You can mix in protein powder to the wet ingredients. Add some hemp seeds or chia seeds to the dry mix for an extra boost. You could also include Greek yogurt in the wet mixture for creaminess and protein. These options make your granola bars even more filling and nutritious. For the full recipe, check out the details above. To keep your nutty granola bars fresh, store them in an airtight container. Choose a cool, dry place. This will help maintain their texture and taste. You can also use parchment paper between bars to prevent sticking. This makes it easy to grab one when you need a snack. You can freeze these bars for long-term storage. First, cut the bars into pieces. Wrap each piece in plastic wrap, then place them in a freezer-safe bag or container. This prevents freezer burn. When you are ready to eat, thaw them in the fridge or at room temperature. Homemade nutty granola bars last about one week at room temperature. If you keep them in the fridge, they stay good for two weeks. Freezing extends their life to three months. Always check for any signs of spoilage before eating. Enjoy these tasty snacks knowing they stay fresh! You can easily customize your nutty granola bars. Start by swapping nuts or seeds. Use pumpkin seeds or sunflower seeds instead of nuts. You can also change the dried fruits. Try using apricots, dates, or figs. For a sweeter taste, add chocolate chips or nutmeg. Mix in some protein powder for an extra boost. The key is to keep the same ratio of wet to dry ingredients. This way, your bars will still hold together well. Yes, you can make nutty granola bars vegan. Just replace honey with maple syrup or agave nectar. Use a nut butter that fits your diet, like almond or cashew butter. Check the labels to ensure no animal products are in your ingredients. You can also add more seeds and dried fruits for extra flavor. Nutty granola bars offer many health benefits. They provide fiber, which helps digestion. The nuts give you healthy fats and protein. This can keep you full and energized. Dried fruits add natural sweetness and vitamins. Using whole oats adds more nutrients and keeps your heart healthy. Overall, these bars are a great choice for a quick and nutritious snack. You can find the full recipe to create these bars and enjoy their health benefits. Nutty granola bars use simple ingredients and easy steps. We discussed essential components, optional add-ins, and dietary considerations. You learned the steps for preparing, combining, baking, and cooling your bars. I shared tips for perfect texture and common fixes. We explored flavor variations, nut-free options, and protein boosts. Lastly, I covered storage tips and answered common questions. Now, you can make delicious granola bars at home, tailored to your taste! Enjoy your healthy snack.

Nutty Granola Bars Easy Recipe for Healthy Snacking

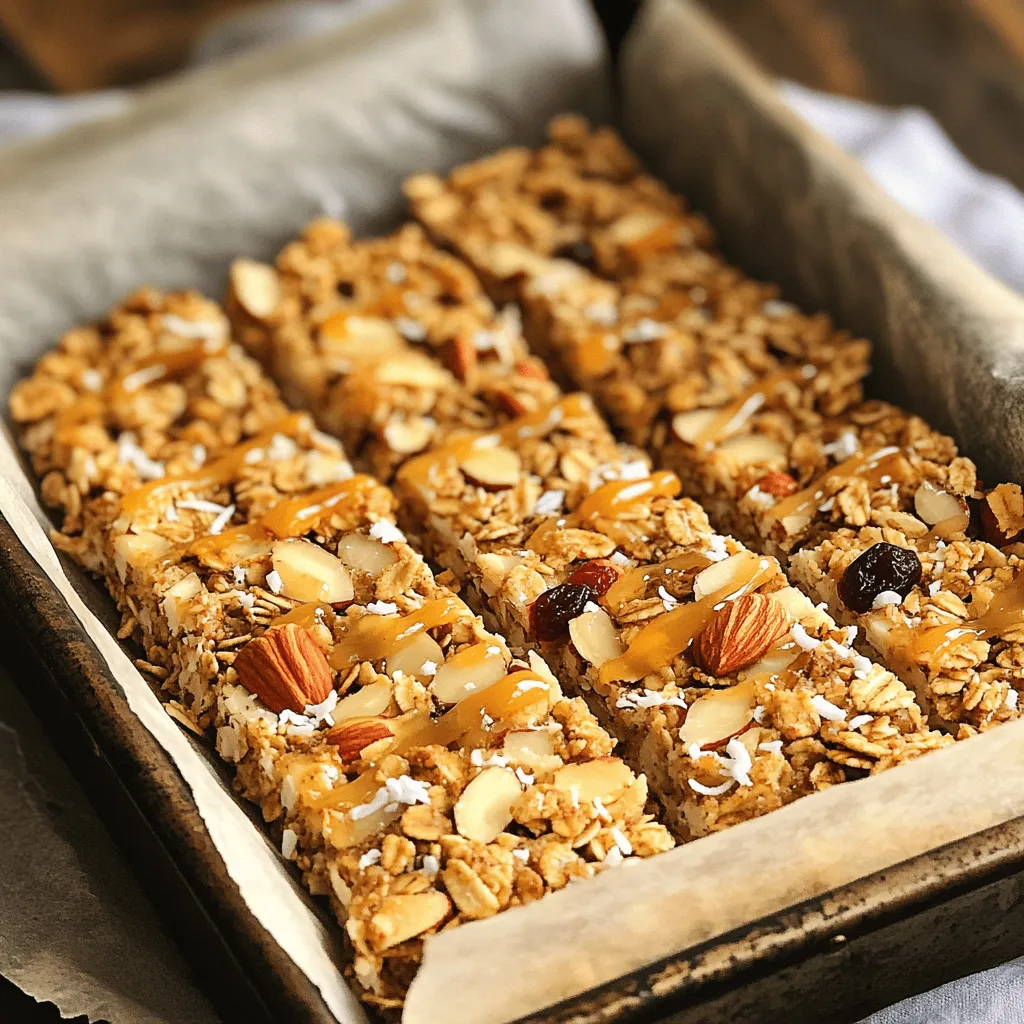
Looking for a healthy snack that’s easy to make? I’ve got the perfect recipe for nutty granola bars! These homemade

- 1 cup quinoa - 2 cups vegetable broth (or water) - 1 cup cherry tomatoes, halved - 1 cucumber, diced - 1 red bell pepper, diced - 1/2 red onion, finely chopped - 1 cup feta cheese, crumbled - 1/4 cup fresh parsley, finely chopped - 1/4 cup Kalamata olives, pitted and sliced - 3 tablespoons extra virgin olive oil - 2 tablespoons freshly squeezed lemon juice - 1 teaspoon dried oregano - Salt and freshly cracked black pepper to taste Gather these ingredients before you start cooking. Quinoa is the star here. It gives the salad a hearty base. Feta adds a nice salty kick. The veggies bring freshness and crunch. Make sure to use ripe cherry tomatoes and crisp cucumbers for the best taste. Kalamata olives add a delicious briny flavor. Fresh herbs like parsley brighten the dish. Extra virgin olive oil and lemon juice tie all the flavors together. You can find the full recipe for this delightful dish that highlights these ingredients. 1. Rinse your quinoa under cold running water. This helps remove its bitter taste. 2. In a pot, boil 2 cups of vegetable broth or water. Add the rinsed quinoa. 3. Reduce the heat and let it simmer. Cook until all the liquid is absorbed. This takes about 15-20 minutes. 1. In a large bowl, combine 1 cup of halved cherry tomatoes, 1 diced cucumber, 1 diced red bell pepper, 1/2 finely chopped red onion, and 1/4 cup of sliced Kalamata olives. 2. Once the quinoa cools, mix it in with the fresh vegetables. The flavors blend nicely. 1. Drizzle 3 tablespoons of olive oil and 2 tablespoons of lemon juice over the salad. 2. Season with 1 teaspoon of dried oregano, salt, and freshly cracked black pepper. Toss gently to coat everything. 1. Fold in 1 cup of crumbled feta cheese and 1/4 cup of finely chopped fresh parsley. 2. Let the salad rest for at least 15 minutes. This allows the flavors to meld together nicely. For the full recipe, check out the detailed instructions above! To make the best quinoa, rinsing is key. Rinse the quinoa well under cold running water. This step removes its natural bitter taste. It makes the final dish much tastier. For fluffy quinoa, cook it right. Use two cups of vegetable broth or water for one cup of quinoa. Bring the liquid to a rolling boil. Then, add the rinsed quinoa and reduce the heat to a gentle simmer. Cover the pot and let it cook for 15-20 minutes. The quinoa is done when it absorbs all the liquid and looks fluffy. Try not to stir it too much while cooking, as this can make it mushy. Presentation matters. Serve the salad in a large, bright bowl. This will make the colors pop. Garnish with a sprig of parsley and some feta crumbles on top. If you want a fancy touch, use individual bowls. This way, each guest can enjoy their own colorful serving. Pair this salad with grilled chicken or fish for a complete meal. It also goes well with roasted vegetables or a hearty soup. The flavors blend nicely, making a satisfying feast. Quinoa is a superfood. It is high in protein and fiber. It also has essential vitamins and minerals. Feta cheese adds calcium and healthy fats. Together, they make a nutritious base for your salad. The fresh vegetables bring antioxidants. Cherry tomatoes, cucumbers, and bell peppers are full of vitamins. They help fight free radicals and keep your body healthy. Eating this salad is not just tasty; it’s good for you, too. For the full recipe, check out the main section! {{image_4}} You can easily change the vegetables in your salad. Try using: - Zucchini, diced - Carrots, grated - Spinach, chopped These swaps add new colors and flavors. You can also switch up the cheese. If you want a creamier taste, try goat cheese or ricotta. For a sharper flavor, use aged cheddar or blue cheese. You can even change the dressing! Instead of olive oil and lemon juice, use balsamic vinegar or a yogurt-based dressing. These swaps keep the salad exciting and fresh. Making this salad vegan is easy. Just leave out the feta cheese. You can use avocados instead for creaminess. To make it gluten-free, ensure you use certified gluten-free quinoa. For added protein, consider adding grilled chicken or chickpeas. Chickpeas are great for a plant-based option. They give the salad a nice texture and help keep you full. You can mix and match these ideas to fit your diet and taste. Enjoy making this salad just right for you! To keep your savory quinoa salad fresh, store it in an airtight container. This helps to lock in moisture and flavor. Place the container in the fridge right after serving. The salad stays fresh for about three to five days. After this time, the vegetables may lose their crunch, and the flavors may fade. Can you freeze quinoa salad? Yes, but I recommend only freezing the quinoa without the veggies and dressing. The textures of fresh vegetables change when frozen. To freeze, put the cooled quinoa in a freezer-safe bag. Label it with the date and remove as much air as possible. To thaw and refresh frozen salad, move the quinoa to the fridge a day before you want to eat it. This slow thaw keeps it from becoming mushy. Once thawed, mix in fresh veggies and dressing for a tasty meal. Enjoy your delicious dish! For the full recipe, check back to the ingredients section. To cook quinoa perfectly, rinse it well under cold water. This step removes bitterness. Use a ratio of 1 cup quinoa to 2 cups vegetable broth or water. Bring the liquid to a boil, then add the rinsed quinoa. Cover and simmer for about 15 to 20 minutes. The quinoa is ready when it absorbs all the liquid and looks fluffy. Let it cool before mixing it with other ingredients. Yes, you can swap feta cheese with other options. Goat cheese adds creaminess, while mozzarella gives a mild flavor. Parmesan adds a rich taste. For a dairy-free choice, try vegan feta or nutritional yeast for a cheesy flavor without dairy. The savory quinoa salad stays fresh in the fridge for about 3 to 5 days. Store it in an airtight container to maintain its flavor and texture. If you notice any liquids forming, just give it a gentle stir before serving. You can make this salad ahead of time. Prepare it a day before and store it in the fridge. The flavors meld together, making it even tastier. Just add the feta cheese and parsley right before serving for the best texture. Yes, the savory quinoa salad is gluten-free. Quinoa is a gluten-free grain, making it a great choice for those with gluten intolerance. Just ensure that any added ingredients, like olives or dressings, also meet gluten-free standards. This blog post covered a tasty Savory Quinoa Salad with Feta. We explored a list of fresh ingredients and easy steps to make it. I shared tips for cooking perfect quinoa and ideas to store or freeze leftovers. You can adapt the recipe to fit many diets and preferences. In final thoughts, try this salad for a healthy meal. Enjoy the flavors and benefits of each ingredient. Your taste buds and body will thank you!

Savory Quinoa Salad with Feta Fresh and Flavorful Dish

Are you ready to whip up a fresh and tasty dish? This Savory Quinoa Salad with Feta brings together vibrant

- Refrigerated crescent roll dough - Nutella - Cream cheese - Powdered sugar - Vanilla extract - Egg for egg wash - Optional toppings (chopped hazelnuts or chocolate chips) Gathering the right ingredients is key to making Nutella rolls with cream cheese. First, you need one can of refrigerated crescent roll dough. This dough is easy to work with and gives a nice flaky texture. Next, grab half a cup of Nutella. This chocolate-hazelnut spread adds a rich and creamy layer. You will also want half a cup of softened cream cheese. This gives a smooth, tangy contrast to the sweet Nutella. Add in one tablespoon of powdered sugar. This sweetens your cream cheese mixture perfectly. Don't forget half a teaspoon of vanilla extract for extra flavor. For the egg wash, you will need one beaten egg. This helps the rolls turn a lovely golden brown. Lastly, you can choose optional toppings like chopped hazelnuts or chocolate chips. These add a delightful crunch on top. Make sure you have all these ingredients ready before you start. Using fresh, quality items will enhance the taste of your Nutella rolls with cream cheese. Check out the Full Recipe to see how to combine these ingredients into a delicious treat! 1. Preheat your oven to 375°F (190°C). This helps the rolls bake evenly. 2. Line a baking sheet with parchment paper. This prevents the rolls from sticking. 3. In a bowl, mix together the softened cream cheese, powdered sugar, and vanilla extract. Blend until smooth and creamy. Set aside. 4. Open the can of crescent roll dough. Gently unroll it on a clean surface. 5. Carefully separate the dough into triangles along the lines. 1. Take a tablespoon of Nutella and spread it evenly on the wide base of each triangle. You want a good amount, but don’t overdo it. 2. Spoon the cream cheese mixture on top of the Nutella. Spread just enough to cover. 1. Starting at the wide end of the triangle, roll the dough tightly towards the point. This keeps the filling inside. 2. Place each rolled crescent on the baking sheet, seam side down. 3. Brush the tops with a beaten egg. This gives them a nice golden color. 4. If you like, sprinkle chopped hazelnuts or chocolate chips on top for extra flavor. 5. Bake in the oven for 12-15 minutes. Look for them to be puffed and golden brown. 6. Once they’re done, take them out and let them cool for a few minutes. 7. Dust the rolls with powdered sugar before serving. This adds a sweet touch. You can find the detailed process in the Full Recipe. Enjoy these delightful Nutella rolls! To make the best Nutella rolls, focus on the dough. Use fresh crescent roll dough for soft rolls. Let your dough rest at room temperature. This helps it roll easily and keeps it fluffy. For a richer taste, add a pinch of salt to your cream cheese mixture. This enhances flavors without being salty. To avoid spills, don’t overfill your rolls. Spread Nutella and cream cheese just enough to cover the base. Leave some space at the edges. When rolling, start tightly from the wide end. This keeps the filling inside and prevents leaks. Presentation matters! Serve your Nutella rolls warm on a pretty platter. Dust them with powdered sugar for a sweet look. You can also add some fresh berries or a scoop of ice cream beside the rolls. For extra fun, include a bowl of Nutella for dipping. Pair these rolls with coffee, tea, or even a glass of milk. The warm chocolate and creamy cheese mix well with these drinks. Your guests will love the taste and the look! One common mistake is overfilling the rolls. This makes them hard to roll and can cause messy spills. Stick to a tablespoon or less of each filling. Another mistake is misjudging baking time. Keep an eye on your rolls as they bake. If they look golden brown, they are likely done. Overbaking can lead to dry rolls. For more details on making these rolls, check the Full Recipe. {{image_4}} You can change the flavor of your Nutella rolls easily. Try using other spreads. Peanut butter adds a nutty taste. Almond butter gives a rich and creamy flavor. For a seasonal twist, use pumpkin spice in fall. Peppermint works great during winter holidays. These changes keep the recipe exciting and fun. If you need gluten-free rolls, use gluten-free crescent dough. Many brands offer good options. For a vegan version, swap the cream cheese for a plant-based alternative. Look for vegan cream cheese at your store. These swaps make this treat fit many diets. How you serve your Nutella rolls can make them special. Try adding fresh fruits like strawberries or bananas on the side. A drizzle of chocolate or caramel sauce can add flair. For themed occasions, shape the rolls into holiday symbols. This simple touch makes your treat stand out. Explore the [Full Recipe] for more details and tips! To keep your Nutella rolls fresh, store them in an airtight container. This helps maintain their soft texture. You can keep them at room temperature for up to two days. If you want to store them longer, place them in the fridge. They can last up to a week when refrigerated. When it’s time to enjoy your rolls again, reheating is key. You can use a microwave or an oven. If you choose the microwave, heat them in short bursts to avoid drying them out. Start with 10-15 seconds and check if they’re warm enough. Using the oven works well too. Preheat it to 350°F (175°C). Place the rolls on a baking sheet and heat for about 5-10 minutes. This method keeps them crispy on the outside. To keep the rolls moist, add a small dish of water in the oven. This will create steam and help maintain their soft texture. Enjoy your delicious Nutella rolls fresh and warm! Can I make Nutella Rolls ahead of time? Yes, you can prepare the rolls a few hours in advance. You can fill and roll them, then store them in the fridge. Just bake them fresh before serving. How long do Nutella Rolls last? Nutella Rolls stay good for about 2-3 days at room temperature. They taste best when warm and fresh. What should I do if I don’t have crescent roll dough? If you lack crescent roll dough, you can use puff pastry. Just roll it out and follow the same steps. What to do if rolls don’t rise? If your rolls do not rise, check your oven temperature. An oven that is too cool can stop them from puffing up. How to fix spills or messy rolls? If your rolls spill filling, it’s okay! Use a spatula to clean the baking sheet. Next time, just reduce the filling to prevent mess. Caloric content and serving size Each Nutella Roll has about 200 calories. This can vary based on toppings and portion size. How to modify for lower calories or sugar content You can use sugar-free cream cheese or a low-calorie spread to cut down on calories. Replace Nutella with a lower-calorie nut spread for fewer sugars. You now have a detailed guide to make delicious Nutella Rolls. We covered key ingredients, simple steps, helpful tips, and fun variations. Remember to store them properly for the best taste and texture. You can also try different spreads or toppings to switch things up. Making these rolls is easy and fun. Enjoy sharing them with friends or family while creating sweet memories. Happy baking!

Nutella Rolls with Cream Cheese Delightful Treat Recipe

Are you ready to dive into a world of deliciousness? This Nutella Rolls with Cream Cheese recipe combines sweet and

- 8 oz of fettuccine or spaghetti - 1 lb of large shrimp, peeled and deveined - 3 tablespoons unsalted butter In this dish, pasta serves as the base. You can choose fettuccine or spaghetti, both work well. The shrimp adds a sweet and tender bite. I love using large shrimp so each piece stands out. Butter brings a rich flavor that enhances the dish. - 1 cup heavy cream - 1/2 cup freshly grated Parmesan cheese - 1 tablespoon fresh lemon juice For the sauce, heavy cream gives that creamy texture we desire. Parmesan cheese adds depth with its salty bite. A dash of lemon juice brightens the flavor, making each bite special. Together, they create a smooth sauce that clings to the pasta. - 1 teaspoon smoked paprika - Salt and freshly ground black pepper, to taste - Fresh parsley, finely chopped, for garnish Seasoning is key to making this dish shine. Smoked paprika gives a warm, smoky note. Salt and pepper balance the flavors. Finally, fresh parsley adds a pop of color and freshness. It makes the dish look inviting on the plate. For the full recipe, check the [Full Recipe]. First, bring a large pot of salted water to a boil. This step is key for flavor. Add 8 ounces of fettuccine or spaghetti to the boiling water. Cook it until it is al dente, which usually takes about 8 to 10 minutes. Once cooked, drain the pasta in a colander. Make sure to reserve about 1 cup of that starchy pasta water. This water helps adjust the sauce later. In a large skillet, melt 3 tablespoons of unsalted butter over medium heat. Once the butter is melted, add 4 cloves of minced garlic. Sauté the garlic for about 1 minute. You want it fragrant but not browned; it can burn quickly. Next, increase the heat to medium-high and add 1 pound of large shrimp, peeled and deveined. Season with 1 teaspoon of smoked paprika, salt, and freshly ground black pepper. Cook the shrimp for about 2 to 3 minutes on each side. They should turn pink and opaque. Once done, transfer the shrimp to a plate and set aside. In the same skillet, reduce the heat to medium. Pour in 1 cup of heavy cream and stir it gently. As it simmers, lower the heat to low. Now, add 1/2 cup of freshly grated Parmesan cheese and 1 tablespoon of fresh lemon juice. Stir until the cheese melts. This creates a smooth and creamy sauce. Taste it and adjust the seasoning as needed. Return the cooked shrimp to the skillet. Gently fold in the pasta. Toss everything together while adding the reserved pasta water gradually. This helps to get your desired sauce consistency. Make sure to taste again and adjust the seasoning if necessary. Remove the skillet from heat. Before serving, sprinkle fresh parsley on top. This adds color and fresh flavor to your creamy shrimp pasta. Enjoy this rich and flavorful delight! To get that perfect creaminess, you must save some pasta water. This water has starch, which helps thicken the sauce. Just before draining, scoop out about a cup. You can add it slowly to the sauce. This way, you control how thick it gets. For cheese, I recommend using Parmigiano-Reggiano or Grana Padano. Both give a rich, nutty flavor. Freshly grated cheese melts better than pre-grated. It makes your sauce smooth and tasty. Cooking shrimp can be tricky. Overcooked shrimp turns rubbery and tough. Cook them just until they are pink and opaque. This usually takes about 2-3 minutes per side. I suggest using large shrimp, around 21/25 count per pound. They are big enough to hold their shape and flavor. They work well in the sauce and pair nicely with the pasta. Pairing wine with creamy shrimp pasta enhances the meal. A crisp white wine, like Sauvignon Blanc or Pinot Grigio, works great. Their acidity cuts through the richness of the dish. As for sides, think fresh and light. A simple green salad with lemon vinaigrette complements the pasta. Garlic bread or roasted veggies are also great choices. They add texture and balance to your plate. For the full recipe, check out the detailed instructions above. Enjoy your cooking! {{image_4}} You can make creamy shrimp pasta healthier. Try using whole wheat or gluten-free pasta. Both options add fiber and nutrients. Whole wheat pasta gives a nutty taste. Gluten-free pasta works well for those with dietary needs. For a lighter dish, substitute heavy cream with low-fat cream. This change lowers the calories without losing creamy texture. You still get that rich flavor, just a bit lighter. To boost flavor, consider adding spinach, sun-dried tomatoes, or artichokes. Spinach adds color and nutrients. Sun-dried tomatoes bring a sweet and tangy taste. Artichokes offer a unique twist that surprises the palate. For a spicy kick, incorporate red pepper flakes. This adds heat and depth to the dish. Adjust the amount based on your spice level preference. If you want to change the protein, substitute shrimp with chicken or scallops. Chicken is easy to find and works well with the sauce. Scallops add a touch of luxury and flavor. Both options keep the dish exciting. For a vegan alternative, try using plant-based proteins. Options like tofu or chickpeas work nicely. They soak up the sauce and add a great texture. You can still enjoy creamy shrimp pasta without animal products. For the full recipe, check out the [Full Recipe]. To keep your creamy shrimp pasta fresh, use airtight containers. Glass containers work well, as they do not retain odors. Store the pasta in the fridge for up to three days. When storing, make sure to divide the pasta into smaller portions. This helps cool it faster and keeps it fresh longer. To reheat your creamy shrimp pasta, you have two main options. The stovetop method is best for keeping the creaminess. Place the pasta in a skillet over low heat. Add a splash of milk or cream to help restore the sauce. Stir gently until warm. If you use a microwave, heat it in short bursts. Stir every 30 seconds to avoid hot spots. This method can dry out the pasta, so be careful. Yes, you can freeze creamy shrimp pasta! However, the cream sauce may change texture when thawed. To freeze, let the pasta cool completely. Then, place it in airtight containers or freezer bags. Make sure to remove as much air as possible. To thaw, move the pasta to the fridge for a few hours or overnight. Reheat on the stovetop with a little cream to bring back the smooth texture. For the best results, enjoy within three months. For the full recipe of creamy shrimp pasta, check the earlier sections. Creamy shrimp pasta lasts about 3 to 4 days in the fridge. Store it in an airtight container. Keeping it cold helps avoid spoilage. Always check for any signs of mold or bad smell before eating. Yes, you can make creamy shrimp pasta in advance. Cook the pasta and sauce separately. Mix them together just before serving. This keeps the pasta from getting too soft and soggy. Creamy shrimp pasta is not the best for freezing. The cream can separate when thawed. If you freeze it, use a freezer-safe container. Thaw in the fridge overnight before reheating. You can use half-and-half or whole milk for a lighter option. You can also try coconut cream for a dairy-free choice. These options give a different taste but still work well in the dish. To spice up your creamy shrimp pasta, add red pepper flakes. You can also use cayenne pepper or hot sauce. Start with a small amount and adjust to your taste. Serve creamy shrimp pasta with garlic bread or a fresh salad. A crisp green salad pairs nicely. You can also enjoy it with a glass of white wine for a complete meal. For the full recipe, check it out [here](Full Recipe). This creamy shrimp pasta recipe blends rich flavors and easy steps. You’ll cook pasta, sauté shrimp, and create a luscious cream sauce. Don’t forget to adjust the consistency with pasta water for the best texture. Try adding veggies or spices for a twist. With a few simple tips, you can enhance flavors and store leftovers. Enjoy this meal as is or mix it up with alternative ingredients. Whether you share it or savor it solo, this dish is sure to please.

Creamy Shrimp Pasta Rich and Flavorful Delight

If you crave a dish that brings joy to your plate, you’ll love this creamy shrimp pasta! It’s rich, flavorful,

To make Hot Honey Chicken Bowls, you need the right ingredients. Here’s what you will need: - 1 lb boneless, skinless chicken thighs - 2 tablespoons olive oil - 1 teaspoon smoked paprika - 1 teaspoon garlic powder - 1 teaspoon onion powder - 1 teaspoon sea salt - 1/2 teaspoon freshly cracked black pepper - 1/4 teaspoon cayenne pepper (adjust to taste) - 1/3 cup hot honey (store-bought or homemade) - 2 cups cooked brown rice or quinoa - 1 cup corn kernels (freshly cooked or canned) - 1 cup black beans, rinsed and drained - 1/2 cup diced bell pepper (choose red, yellow, or a mix for added color) - 1/4 cup freshly chopped cilantro - Juice of 1 fresh lime These ingredients work together to create a tasty and filling dish. The chicken is the star with a sweet and spicy glaze. The rice or quinoa provides a hearty base. The veggies add color and texture. Garnishes can elevate your dish. Here are some great options: - Sliced jalapeños (for garnish, optional) - Creamy avocado slices (for garnish, optional) These toppings add flavor and make the bowl visually appealing. You can choose what you like best. If you have dietary needs, you can make easy swaps: - Use tofu or tempeh instead of chicken for a plant-based meal. - Try cauliflower rice instead of brown rice or quinoa for a lighter option. - For gluten-free, use certified gluten-free grains and check your hot honey. These substitutions keep the dish tasty while meeting your needs. You can enjoy this dish no matter your diet! Start by making the marinade. In a medium bowl, mix the olive oil, smoked paprika, garlic powder, onion powder, sea salt, black pepper, and cayenne pepper. This mix will give your chicken great flavor. Next, add the chicken thighs to the bowl. Make sure each piece is well-coated with the marinade. Cover the bowl and let it chill in the fridge for at least 30 minutes. If you have more time, letting it sit for two hours will enhance the taste. Now, heat a large skillet over medium-high heat. Once it’s hot, add the marinated chicken thighs. Cook each side for about 6 to 7 minutes. You want them golden brown and fully cooked. The internal temperature should reach 165°F. This step ensures your chicken is juicy and safe to eat. In the last few minutes of cooking, drizzle the hot honey over the chicken. This will create a sweet glaze that caramelizes nicely. While the chicken cooks, prepare the bowl base. In a large bowl, combine the cooked brown rice or quinoa, corn kernels, black beans, diced bell pepper, lime juice, and chopped cilantro. Mix everything well. Taste it and add salt if you want. Once the chicken is done, slice it into strips. Place the chicken on top of the rice and veggie mix. For extra flavor, drizzle any leftover hot honey from the skillet over the bowls. You can also add optional toppings like sliced jalapeños and creamy avocado slices. Enjoy this colorful and tasty dish! For the complete recipe, check out the Full Recipe. To make juicy chicken, start by using thighs instead of breasts. Chicken thighs have more fat and stay moist. Marinate the chicken for at least 30 minutes. This adds flavor and helps keep it tender. When cooking, do not overcrowd the pan. This allows the chicken to brown well. Always check the internal temperature. It should reach 165°F for safety. Let the chicken rest for a few minutes before slicing. This helps keep the juices inside. Having the right tools makes cooking easier and more fun. Here’s what you need: - A medium mixing bowl for marinating - A large skillet for cooking the chicken - A meat thermometer to check doneness - A cutting board for slicing - A sharp knife for easy cutting - Measuring spoons for accurate ingredient amounts These tools help ensure your chicken turns out just right. Presentation matters! Serve the hot honey chicken atop a bed of brown rice or quinoa. This adds texture and flavor. For added color, garnish with diced bell peppers and fresh cilantro. A squeeze of lime juice brightens the dish and adds freshness. If you like a kick, add sliced jalapeños on top. Creamy avocado slices also pair well and provide richness. Drizzle extra hot honey over the bowls for a sweet finish. Enjoy every bite of this tasty dish! For the complete method and ingredients, check out the Full Recipe. {{image_4}} You can swap chicken thighs for chicken breast. This change cuts fat and adds lean protein. Try using cauliflower rice instead of brown rice. It lowers carbs but keeps the meal filling. You can also add more veggies, like spinach or zucchini. This boosts fiber and nutrients without losing flavor. Add fresh herbs like basil or mint for a fresh taste. A sprinkle of feta cheese gives a salty kick. For more heat, mix in crushed red pepper flakes. You can also use different hot honey brands for unique sweetness. Adjust the cayenne pepper to your liking for extra spice. Brown rice is great, but quinoa adds a nutty flavor and is gluten-free. Barley or farro are hearty choices too. For a lighter option, use shredded cabbage as a base. This adds crunch and makes the bowl feel fresh. Explore these options to create your perfect bowl. Check out the Full Recipe for more ideas! To keep your Hot Honey Chicken Bowls fresh, store leftovers in an airtight container. This helps prevent moisture loss and keeps flavors intact. Make sure to let the food cool before sealing it. You can keep them in the fridge for up to three days. When you're ready to enjoy your leftovers, reheat them gently. Use a microwave or a skillet. If using a microwave, cover the bowl to avoid splatter. Heat for about 2-3 minutes, stirring halfway. If using a skillet, warm it over medium heat until heated through. Add a splash of water if needed to keep it moist. You can freeze Hot Honey Chicken Bowls for longer storage. Place the chicken and rice mix in freezer-safe bags. Squeeze out the air to prevent freezer burn. They can last up to three months in the freezer. To eat, thaw in the fridge overnight before reheating. This option is great for meal prep and busy weeks. Hot honey is a mix of honey and chili peppers. It adds a sweet and spicy kick to dishes. To make your own, combine honey with crushed red pepper flakes or fresh chilies. Heat the mixture gently to infuse the flavors. Let it cool, and you have your hot honey ready! Yes, you can! While chicken thighs work great, you can swap them for chicken breasts, pork, or tofu. Each protein will bring its own flavor and texture. Adjust cooking times for different proteins to ensure they're fully cooked. Many sauces can enhance your hot honey chicken bowls. Consider using soy sauce, ranch dressing, or a tangy vinaigrette. These sauces add depth and contrast to the sweet heat of the hot honey. Feel free to mix and match to find your favorite combo! Hot honey chicken bowls can be a healthy option. They include lean protein, whole grains, and fresh veggies. You control the ingredients, so you can keep it light. Use less honey if you prefer lower sugar. Enjoy a balanced meal that satisfies your cravings! Hot Honey Chicken Bowls combine many tasty ingredients and easy steps. You learned about the main ingredients and how to prepare them. I shared tips for juicy chicken and fun serving ideas. Remember, you can adapt this dish to fit your taste or health needs. Whether you are storing leftovers or exploring variations, these bowls are versatile. Enjoy making this meal your own!

Hot Honey Chicken Bowls Flavorful and Simple Dish

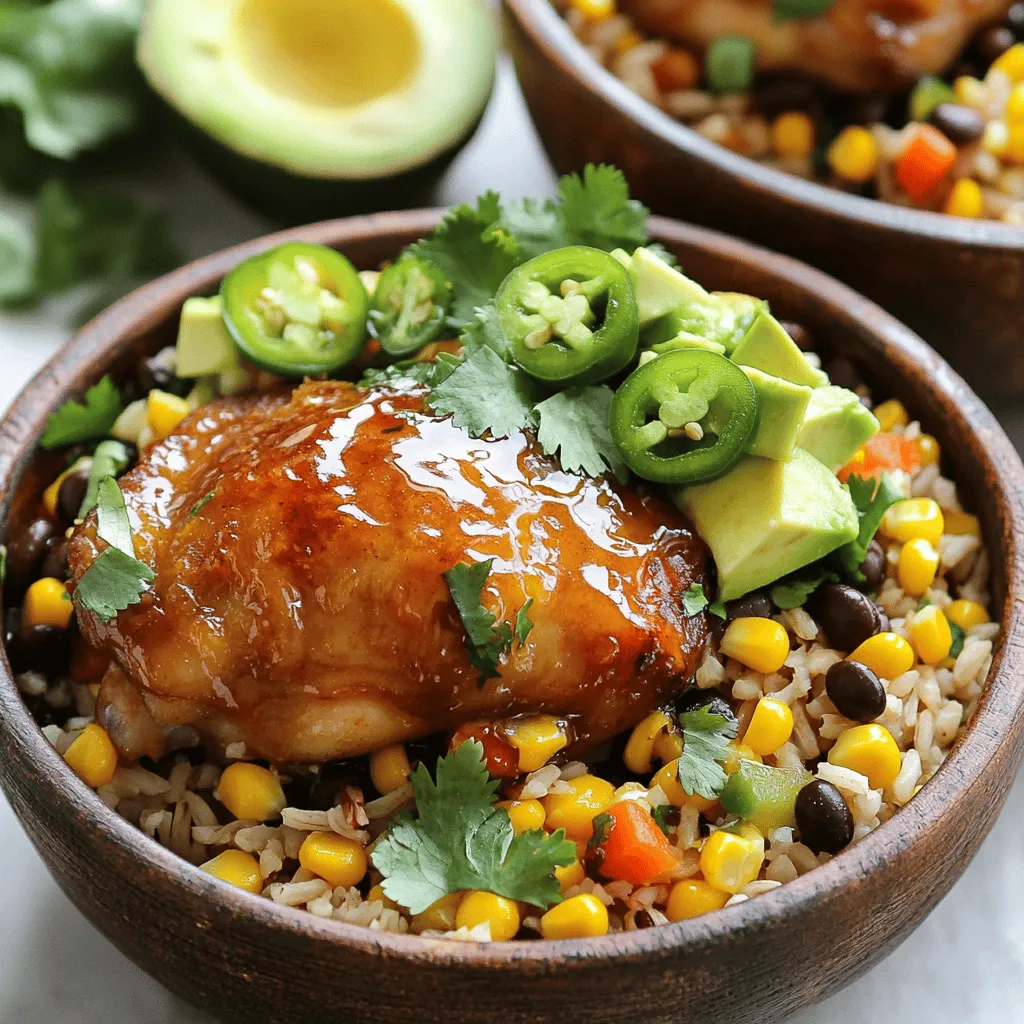
Are you ready to savor a dish that’s both spicy and sweet? Hot Honey Chicken Bowls bring bold flavor and

Older posts
Newer posts
← Previous Page1 … Page29 Page30 Page31 … Page40 Next →

dsad

© 2025 dailydishcraft • Built with GeneratePress

Our Policies

  • Copyright Policy
  • Cookie Policy
  • GDPR Policy
  • Privacy Policy
  • Disclaimer
  • Terms Of Use

More Information

  • Home
  • About
  • Contact
  • Appetizers
  • Dessert
  • Dinner
  • Drinks
©2025, dailydishcraft About Back To Top