Skip to content
DisclaimerTerms Of UseGDPR PolicyCookie Policy

dailydishcraft

  • Home
  • Drinks
  • Appetizers
  • Dinner
  • Dessert
  • About
  • Contact
  • Privacy Policy
DisclaimerTerms Of UseGDPR PolicyCookie Policy

Jessica

To make crispy shrimp balls, you need: - 1 pound fresh shrimp, peeled and deveined - 1/2 cup breadcrumbs (plus extra for coating) - 1/4 cup green onions, finely chopped - 2 cloves garlic, minced - 1 tablespoon ginger, grated - 1 large egg, beaten - 1 tablespoon soy sauce - 1 teaspoon fresh lime juice - Salt and freshly ground pepper to taste - Vegetable oil, for frying These ingredients create a mix that’s full of flavor. The shrimp gives the balls a sweet, ocean taste. Using fresh shrimp is vital for the best result. For the sweet chili sauce, you will need: - 1/2 cup store-bought sweet chili sauce - 1 tablespoon fresh lime juice - 1 teaspoon sesame oil - 1 teaspoon sriracha sauce (optional for added heat) This sauce adds a sweet and tangy kick to your shrimp balls. You can adjust the heat with sriracha to match your taste. You can add these optional ingredients for more flavor: - Fresh cilantro, chopped - Red pepper flakes for heat - Chopped bell peppers for crunch These extras can enhance your dish. Fresh herbs or spices elevate the taste. Feel free to mix and match based on what you enjoy. For the complete recipe, check out the Full Recipe. To start, gather your fresh shrimp. Use one pound of shrimp, peeled and deveined. Place the shrimp in a food processor. Add 1/2 cup of breadcrumbs, 1/4 cup of finely chopped green onions, 2 minced garlic cloves, and 1 tablespoon of grated ginger. Next, add 1 beaten egg, 1 tablespoon of soy sauce, 1 teaspoon of fresh lime juice, and a sprinkle of salt and pepper. Pulse the mixture until it blends well but remains slightly chunky. This texture adds a nice bite to your shrimp balls. Now, it's time to shape the shrimp mixture. With clean hands, take a small scoop, about the size of a golf ball. Roll it gently into a ball. Repeat this process until all the mixture is shaped. Place the balls on a plate as you work. Next, take additional breadcrumbs and roll each ball in the breadcrumbs. This coating is crucial. It gives your shrimp balls that perfect crispy outer layer when they fry. Heat vegetable oil in a large, deep skillet. Aim for a temperature of 350°F (175°C). Carefully add the shrimp balls to the hot oil, but don’t overcrowd the pan. Fry them in batches for about 4-5 minutes. You want them to turn golden brown and cooked through. Use a slotted spoon to lift them out of the oil. Place them on a plate lined with paper towels to drain any excess oil. For the full recipe, check the complete instructions above. Enjoy these crispy shrimp balls with your sweet chili sauce! To achieve that perfect crunch, it’s all about the coating. Use fresh breadcrumbs instead of dry ones. Fresh breadcrumbs stick better and create a thicker crust. Make sure to coat the shrimp balls evenly. If you want extra crunch, double coat them by rolling them in egg and breadcrumbs twice. This adds texture and makes them even crispier when cooked. If frying isn't your thing, you can bake or air fry the shrimp balls. For baking, preheat your oven to 425°F (220°C). Place the shrimp balls on a lined baking sheet and lightly spray them with oil. Bake for 20-25 minutes, flipping halfway through. For air frying, preheat your air fryer to 375°F (190°C) and cook for about 10-12 minutes. Both methods will give you a tasty result with less oil. Serve crispy shrimp balls hot with sweet chili sauce for dipping. You can also add lime wedges and fresh herbs for extra flavor. Pair them with a refreshing salad or some crispy spring rolls. These shrimp balls make a great appetizer or a fun snack at parties. For a twist, try serving them in lettuce wraps for a light, tasty bite. For the full recipe, check the section above! {{image_4}} If you love heat, try adding sriracha to the shrimp mixture. Just mix in one to two teaspoons, based on how spicy you want it. This simple change makes the shrimp balls pack a punch. The spicy flavor pairs well with the sweet chili sauce. You will enjoy this bold twist on the classic recipe. You can also add vegetables or herbs for extra flavor. Finely chopped bell peppers, carrots, or cilantro are great options. Just mix them into the shrimp mixture before forming the balls. This adds color and nutrition. It makes the dish even more appealing to eat. Feel free to experiment with your favorite veggies for a personal touch. If you need a gluten-free option, use ground oats or almond flour instead of breadcrumbs. Both work as great binders. They keep the shrimp balls together while frying. You can also use a gluten-free soy sauce to keep the flavors intact. This way, everyone can enjoy crispy shrimp balls no matter their dietary needs. For the full recipe, refer to the earlier section. After enjoying your crispy shrimp balls, let any leftovers cool. Place them in an airtight container. Store them in the fridge for up to three days. This keeps them fresh and ready for your next snack. To reheat, use an oven or an air fryer. Preheat your oven to 350°F (175°C). Spread the shrimp balls on a baking sheet. Heat for about 10 minutes or until warm. This helps them regain their crispiness. Avoid using a microwave, as it can make them soggy. For long-term storage, freeze the shrimp balls before frying. Arrange them on a baking sheet in a single layer. Freeze for about two hours until firm. Then transfer them to a freezer bag. They can last for up to three months. When ready to eat, fry them straight from the freezer for best results. Visit the Full Recipe for more tips on making these delicious shrimp balls. Yes, you can use frozen shrimp. Just make sure to thaw it first. Place the shrimp in the fridge overnight or run it under cold water. Once thawed, peel and devein the shrimp before using. This will keep the flavors fresh and vibrant. If you don't have sweet chili sauce, try using a mix of honey and hot sauce. Combine two tablespoons of honey with one tablespoon of your favorite hot sauce. This blend gives you that sweet and spicy kick you desire. You can also use a homemade mix of ketchup and sugar for a different twist. Check the color and texture of the shrimp balls. They should turn golden brown and feel firm to the touch. Fry each batch for about 4-5 minutes. If you're unsure, cut one open. It should be opaque and cooked through. Enjoy the crispy goodness right away for the best taste! In this post, we explored making perfect crispy shrimp balls. We covered main ingredients, sweet chili sauce, and optional flavor boosters. I shared step-by-step instructions, tips for crispiness, and cooking methods like baking. You learned about fun variations and how to store leftovers. In closing, this dish is simple yet offers endless flavor. Enjoy making shrimp balls that impress!

Crispy Shrimp Balls with Sweet Chili Sauce Delight

Get ready to dive into a world of flavor with my Crispy Shrimp Balls and Sweet Chili Sauce! This treat

- 2 large egg whites - 1/2 cup granulated sugar - 1/4 teaspoon cream of tartar - 1 teaspoon pure vanilla extract - A pinch of salt - Optional: food coloring for tinting When measuring ingredients, use dry measuring cups for sugar. For egg whites, crack the eggs carefully. Make sure no yolk gets into the whites. This helps the frosting whip up nicely. Use a scale for accuracy if you have one. It ensures you get the right amount every time. If you don't have cream of tartar, use lemon juice. It helps stabilize the egg whites. For a vegan option, consider aquafaba, which is the liquid from canned chickpeas. It whips up just like egg whites. You can also use vanilla bean paste instead of extract for a richer flavor. If you want a sweeter taste, use powdered sugar in place of granulated sugar. Just remember, it may change the texture a bit. This recipe is simple and fun! You can find the Full Recipe above to get started right away. Start by getting your mixing bowl ready. Use a heatproof bowl, like metal or glass. Add the egg whites, granulated sugar, cream of tartar, and salt. Stir the mixture gently. This step is key for a smooth frosting. Make sure it’s well mixed before moving on. Next, fill a medium saucepan with about an inch of water. Heat it over medium heat until it simmers gently. Place the mixing bowl on top. Be careful! The bowl should not touch the water. This setup keeps everything warm and helps the sugar dissolve evenly. Now it’s time to whip the mixture. Using a whisk or a handheld mixer, blend the ingredients. Do this for about 3 to 4 minutes. You want the mixture to feel warm to the touch. Check if the sugar is fully dissolved. Once warm, remove the bowl from heat. Switch to an electric mixer and beat on high speed. Do this for another 3 to 4 minutes. Look for stiff peaks to form. The frosting should look glossy. Add in the vanilla extract gently. If you want color, mix in the food coloring now. Fold it in carefully to keep the fluffiness. Your fluffy frosting is now ready! Use it on cakes, cupcakes, or cookies. If you need to store it, keep it in an airtight container at room temperature for up to 2 hours. Enjoy this light and fluffy treat from the Full Recipe! To get stiff peaks, you must beat the mixture well. Start with clean, dry tools. Any grease will stop the egg whites from whipping properly. When you mix on high speed, look for glossy, firm peaks. They should stand tall without drooping. If they fall, keep mixing until they hold their shape. Remember, the right timing makes a big difference in texture. One big mistake is not mixing enough. If the sugar does not dissolve, your frosting will be grainy. Another common error is letting the bowl touch the water in the double boiler. This can cook the egg whites instead of fluffing them. Also, don’t skip the cream of tartar. It helps stabilize the mixture. Lastly, be careful with coloring. Too much can change the texture. You can make this frosting even better! Adding more vanilla gives it a rich taste. Try different extracts like almond or peppermint for a twist. For color, use gel food coloring. It mixes in easily and won’t change the texture. You can also swirl in cocoa powder for a chocolate version. These simple changes can make your frosting unique and fun. For the complete method, check the Full Recipe. {{image_4}} You can easily change the flavor of your frosting. Add cocoa powder for a rich chocolate twist. Just mix in 2 tablespoons of cocoa while you whip the frosting. You can also use extracts like almond or mint for unique tastes. A few drops of lemon or orange extract can brighten the flavor too. These small changes can make your frosting special and fun. If you want a healthier version, try using an egg substitute. There are many options like aquafaba, the liquid from canned chickpeas. It works well and is vegan. For sweetness, you can use natural sweeteners like honey or maple syrup. Just remember, these can change the texture a bit. Adjust the amount based on your taste and enjoy a lighter treat. This frosting is very versatile. Use it on cakes, cupcakes, or cookies. It adds a light and fluffy touch to any dessert. Spread it thick on a chocolate cake or pipe it onto cupcakes for a beautiful finish. You can even use it as a dip for fruits or pretzels. The options are endless, so get creative and have fun with your 7-Minute Marshmallow Frosting! For the full recipe, check the details above. Store your 7-Minute Marshmallow Frosting at room temperature. Keep it in an airtight container. It will stay fresh for up to 2 hours. After that, the texture may change. This frosting loves to be fluffy, so don't let it sit too long. For longer storage, you can refrigerate or freeze the frosting. If you're refrigerating, put it in a sealed container. It can last up to a week in the fridge. To freeze, use a freezer-safe container. Make sure to leave some space for expansion. It can stay good for about a month. If you have leftover frosting, you can refresh it. Take the frosting out of the fridge or freezer. Let it sit at room temperature for about 30 minutes. Then, whip it gently with a mixer. This will help bring back its light and fluffy texture. Use it again on your favorite treats! For more details, check the Full Recipe. 7-Minute Marshmallow Frosting lasts for about two hours at room temperature. After that, it may start to lose its light and fluffy texture. If you need to keep it longer, store it in an airtight container. You can make 7-Minute Marshmallow Frosting in advance, but it's best to use it right away. If you store it, try to use it within two hours. The frosting may lose some volume and fluffiness if left too long. Yes, this frosting is stable enough for piping. It holds its shape well, making it great for decorating cakes and cupcakes. Just be sure to work quickly after making it to keep that airy texture. Yes, you can use pasteurized egg whites instead of fresh. They work well in the recipe, providing safety without compromising texture. For full details on preparation, refer to the Full Recipe. In this blog post, we explored making 7-minute marshmallow frosting. We covered main ingredients, step-by-step instructions, and helpful tips. You learned about measuring, possible substitutes, and storage tips. Remember, perfect frosting requires practice. Experiment with flavors and avoid common mistakes to boost your skills. This easy recipe suits cakes, cookies, and more. Have fun customizing it to match your favorite treats. Dive into this sweet adventure and share your creations with others!

7-Minute Marshmallow Frosting Light and Fluffy Treat

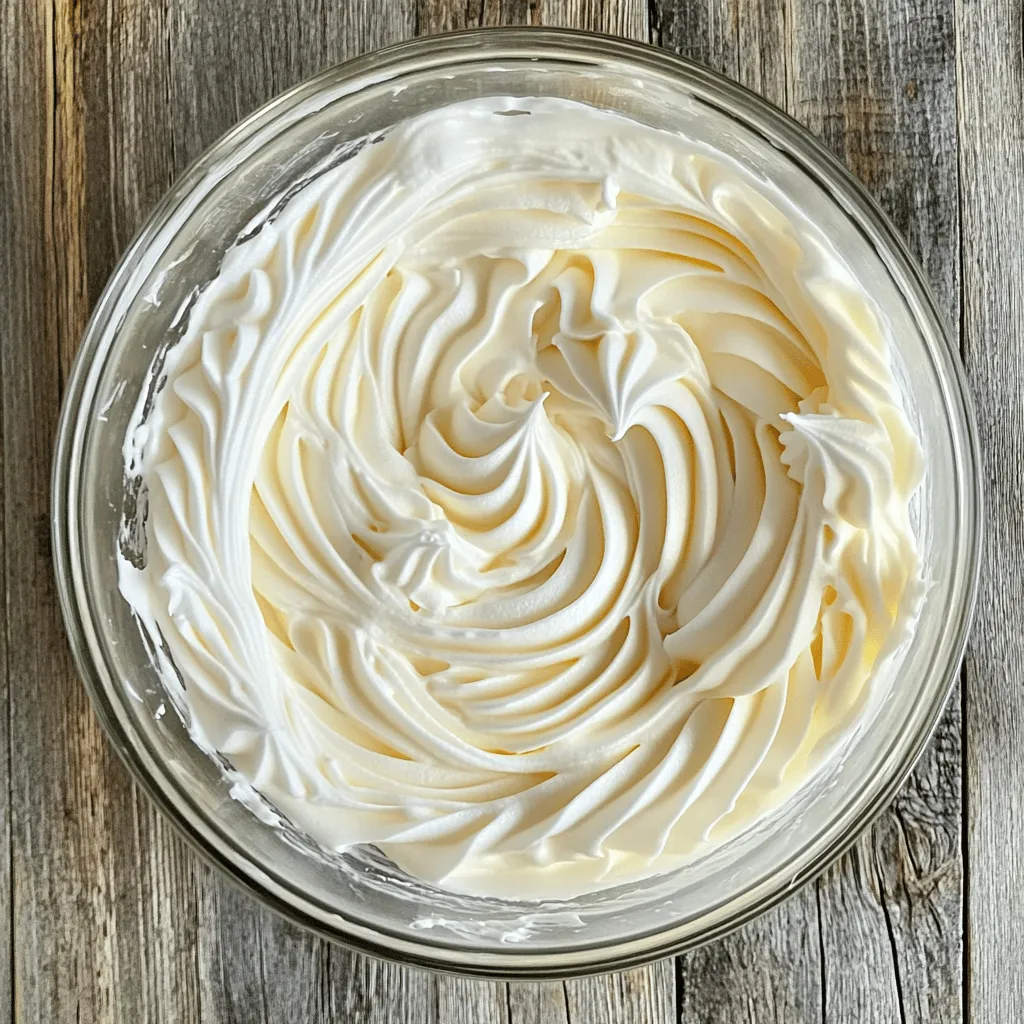
Looking for a quick and sweet treat? You’ll love this 7-Minute Marshmallow Frosting! It’s light, fluffy, and ready in just

- 1 cup dried chickpeas, soaked overnight - 1 small onion, finely chopped - 2 cloves garlic, minced - 1/4 cup fresh parsley, finely chopped - 1/4 cup fresh cilantro, finely chopped - 1 teaspoon ground cumin - 1 teaspoon ground coriander - 1/2 teaspoon baking soda - 1/2 teaspoon salt - 1/4 teaspoon black pepper - 3 tablespoons all-purpose flour (or chickpea flour) - Cooking spray or olive oil spray You can swap chickpeas for canned beans. Just use one can, drained and rinsed. If you don’t like cilantro, try using more parsley instead. For a gluten-free option, use chickpea flour in place of all-purpose flour. You can also add spices like paprika or chili powder for a kick. Each serving of falafel offers about: - Calories: 180 - Protein: 8g - Carbohydrates: 28g - Fat: 6g - Fiber: 6g These numbers can vary with substitutions. Be sure to check your specific ingredients if you track nutrition. These falafels are a great snack or meal option, packed with plant-based protein and fiber. They satisfy cravings while being healthy. Enjoy making them your own! To start, soak 1 cup of dried chickpeas overnight. This step softens the beans and enhances the flavor. After soaking, drain and rinse the chickpeas well. It is vital to dry them completely on a towel. Wet chickpeas can lead to soggy falafel. Next, place the dried chickpeas in a food processor. Add the finely chopped onion, minced garlic, parsley, cilantro, cumin, coriander, baking soda, salt, and black pepper. Pulse the mix for about 10-15 seconds. You want it finely ground but not mushy. Scrape the sides occasionally to ensure everything blends evenly. Transfer the mixture into a large bowl. Gradually add 3 tablespoons of flour to the mix. Stir until it combines well; if it's too wet, add more flour. With slightly damp hands, shape the mixture into small balls. Aim for the size of a golf ball. You should get 12 to 15 falafel pieces. Before cooking, preheat your air fryer to 375°F (190°C) for about 5 minutes. This step is key for even cooking. Arrange the falafel balls in a single layer in the air fryer basket. Make sure they don’t touch each other, as air needs to flow around them. Lightly spray the tops with cooking spray. Cook for 12-15 minutes, turning halfway through. They should be golden brown and crispy when done. For a full recipe, check the earlier section. To get crispy falafel, start with dried chickpeas. Soak them overnight. This step hydrates them for better texture. Drain and dry thoroughly before blending. If the mixture feels wet, add more flour. Shape the balls firmly. A little pressure helps them hold together. Set your air fryer to 375°F (190°C). This temperature cooks them evenly, giving a nice crunch. Preheat the air fryer for about five minutes. This step aids in achieving that golden color. Cook the falafel for 12-15 minutes. Flip them halfway through for even browning. Avoid using canned chickpeas; they make falafel soggy. Don’t overcrowd the air fryer basket. This limits air flow and makes them less crispy. Skip the oil spray, and you risk dry falafel. Always check for doneness by looking for a golden-brown exterior. For more tips, check the Full Recipe. {{image_4}} You can easily change the flavor of your falafel. For a spicy kick, add red pepper flakes or diced jalapeños to the mix. For a herby twist, try adding fresh mint or dill. These herbs bring a bright flavor. Experiment and find what you love best! If you need a gluten-free falafel, substitute all-purpose flour with chickpea flour. This simple swap keeps the taste delicious while making it safe for anyone avoiding gluten. You can also skip the flour altogether if you want a lighter version. Just be sure to shape your falafel carefully since they might be a bit more fragile. Falafel pairs well with many dips. Hummus is a classic choice, but tzatziki adds a nice coolness. You can also try tahini sauce for a nutty flavor. Serve your falafel with warm pita bread and fresh veggies for a tasty meal. A side salad with cucumber and tomato works great too. For the full recipe, check the main article. Store leftover falafel in an airtight container. This keeps them fresh for up to four days. Place a paper towel inside the container. It absorbs excess moisture and helps maintain crispness. To reheat falafel, use your air fryer. Set it to 350°F (175°C) for about 5-7 minutes. This method makes them crispy again. You can also use the oven at the same temperature for 10 minutes. Just keep an eye on them to avoid burning. You can freeze uncooked falafel for later use. Shape the balls and freeze them in a single layer on a baking sheet. Once frozen solid, transfer them to a freezer bag. They last for up to three months. When ready to cook, no need to thaw. Just add a few extra minutes to the cooking time in the air fryer. If you prefer cooked falafel, you can freeze them too, but they may lose some crunch. Yes, you can use canned chickpeas. They save time and are convenient. However, they may make your falafel softer. To get the right texture, drain and rinse them well. Pat them dry with a towel to remove excess moisture. This helps keep your falafel crispy. The falafel recipe is already vegan! It uses chickpeas, herbs, and spices. Just ensure you use chickpea flour instead of all-purpose flour if you prefer. This keeps the dish plant-based and delicious. Air fryer falafel tastes great with many dips. Here are a few to try: - Tahini sauce - Hummus - Tzatziki - Yogurt sauce These dips add flavor and creaminess. You’ll know your falafel is done when it is golden brown and crispy. The outside should feel firm to the touch. If you cut one open, it should be warm and soft inside. Cooking time is usually 12-15 minutes. The best air fryer for falafel has good air circulation. Look for one with an adjustable temperature and timer. A basket-style air fryer works well for even cooking, too. Popular brands include Philips and Ninja. Always choose one that fits your kitchen needs. You can find the full recipe for crispy air fryer falafel to start your cooking adventure! Making air fryer falafel is simple and fun. You start with chickpeas. Soak them overnight to soften. This step is key for a great texture. Drain and rinse them well before using. Next, blend the chickpeas with onion, garlic, parsley, cilantro, and spices. I love using ground cumin and coriander for deep flavor. Pulse the mix until it’s finely ground but still has some chunk. This gives the falafel a nice bite. Once blended, transfer the mix to a bowl. Gradually add flour. Mix until it holds together. If it’s too wet, add a bit more flour. You want to easily form small balls or patties. Shape the mixture into golf ball-sized pieces. You’ll get about 12 to 15 falafel. This size is perfect for cooking and eating. Preheat your air fryer to 375°F (190°C) for about 5 minutes. This helps them cook evenly. Place the falafel in a single layer in the basket. Make sure they don’t touch. Spray the tops lightly with cooking spray. Cook them for 12 to 15 minutes. Flip them halfway through for even browning. Your goal is golden-brown, crispy falafel. Once done, let them cool for a minute. Serve with tahini sauce or hummus for a tasty dip. Enjoy with warm pita or a fresh salad. For the full recipe, check out the detailed instructions above. This blog post covered everything you need for tasty falafel. We explored ingredients and tips to ensure crispy results. I shared how to prepare, mix, shape, and cook your falafel in an air fryer. Plus, you learned smart storage and reheating methods. Variations and serving ideas add fun to your meal. Now, you can make great falafel at home. Enjoy trying different flavors and dips. Happy cooking!

Air Fryer Falafel Crunchy and Flavorful Snack

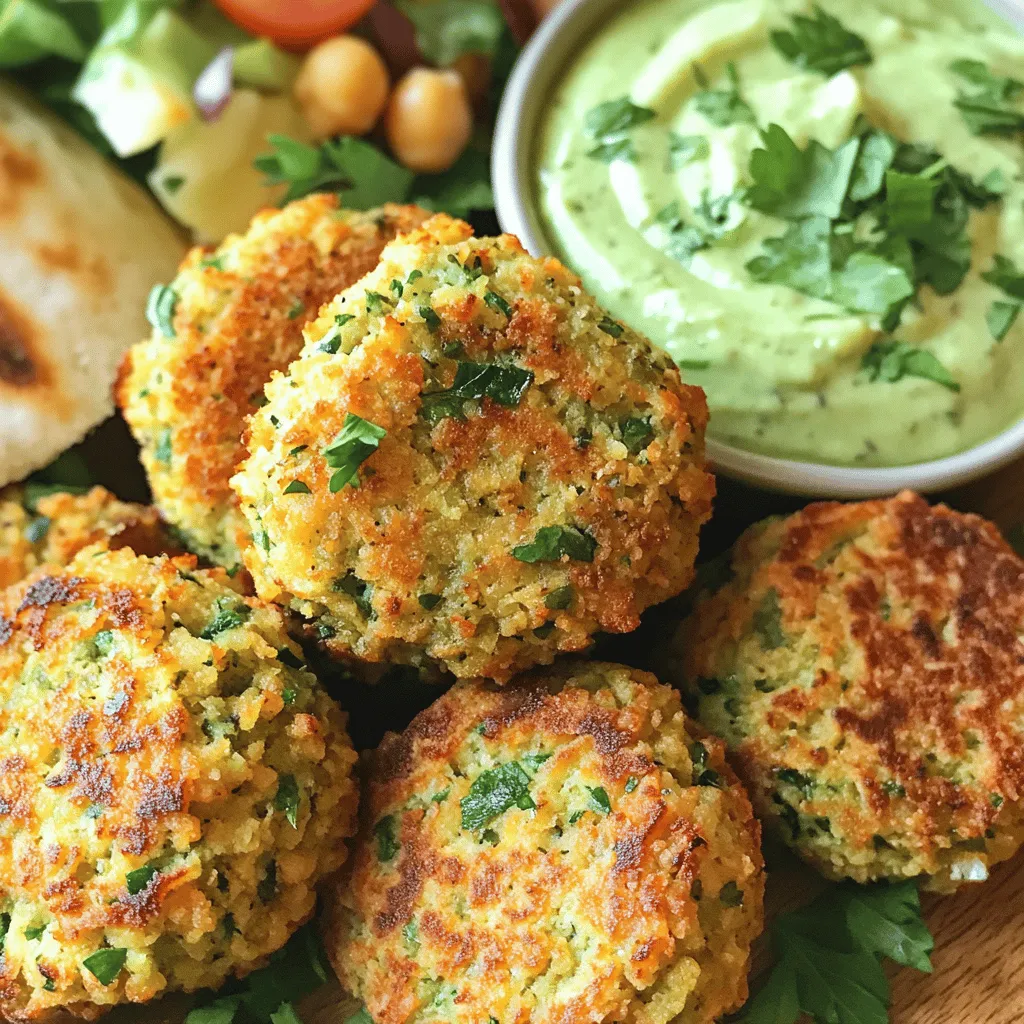
If you’re looking for a healthy, crunchy snack, air fryer falafel is a game changer! These tasty bites are packed

- Chicken and Breading Components - 1 lb boneless, skinless chicken breasts - 1 cup panko breadcrumbs - 1/2 cup all-purpose flour - 1 large egg, beaten - Seasoning Essentials - 1 teaspoon garlic powder - 1 teaspoon paprika - Salt and pepper to taste - Sauce and Garnish Ingredients - 1/2 cup mayonnaise - 1 tablespoon Sriracha (adjust according to your spice preference) - 1 tablespoon honey - 6 mini slider buns - Fresh lettuce leaves (for garnish) - Pickled jalapeños (optional, for an extra kick) These ingredients come together to create a fun and tasty dish. The chicken forms the base, while the panko breadcrumbs add crunch. The sauce blends creamy and spicy flavors, making each bite exciting. Fresh lettuce and pickled jalapeños add color and zest. When you gather these ingredients, you're ready to dive into a cooking adventure. For the full recipe, check out the detailed instructions to make these delightful Bang Bang chicken sliders! To start, slice the chicken breasts into small pieces. Aim for about 2 inches long. This size fits perfectly on slider buns. After slicing, pat the chicken dry with paper towels. Dry chicken helps the breading stick better. Next, set up your breading stations. You will need three shallow bowls. In the first bowl, mix all-purpose flour with salt, pepper, garlic powder, and paprika. In the second bowl, whisk a large egg until it’s smooth. In the third bowl, spread out the panko breadcrumbs. This setup ensures you have everything ready for breading. Now, let’s coat the chicken. Take a piece of chicken and coat it in the seasoned flour. Shake off any extra flour. Next, dip it into the beaten egg. Let any excess egg drip off. Finally, press the chicken into the panko breadcrumbs. Make sure to coat it evenly by pressing down gently. This step is key for a crispy texture. For cooking, heat up oil in a large skillet. You want enough oil for shallow frying, about 1/4 inch deep. Once the oil is hot, add the breaded chicken pieces in batches. Don’t overcrowd the pan; this helps the chicken cook evenly. Fry each piece for about 3-4 minutes on each side. Look for a golden brown color. Make sure the chicken cooks through. You can check this by cutting into a piece to see if it’s no longer pink. While the chicken cooks, you can prepare the Bang Bang sauce. In a small bowl, whisk together mayonnaise, Sriracha, and honey. Mix until smooth and well blended. Taste the sauce and adjust the spice level if needed. If you like it spicier, add more Sriracha. Once everything is cooked, it’s time to assemble your sliders. Start by lightly toasting the slider buns until golden. On the bottom half of each bun, place one piece of fried chicken. Drizzle the Bang Bang sauce generously over the chicken. Add a fresh lettuce leaf on top. If you want an extra kick, add some pickled jalapeños. Now you're ready to enjoy the delicious flavors! For the full recipe, check the detailed instructions above. To make your Bang Bang Chicken Sliders even tastier, try adding some spice! Here are a few seasoning ideas: - Smoked paprika: Gives a nice smoky flavor. - Cayenne pepper: Adds heat. Start with a pinch. - Onion powder: Adds depth to the taste. - Cumin: Offers a warm, earthy flavor. For the sauce, you can improve the flavor by: - Adding garlic: Mince some fresh garlic. Mix it into the sauce. - Using lime juice: A touch of acidity brightens the sauce. - Experimenting with honey: Add more for sweetness or less for spice. You can cook your sliders in different ways. Each method gives a unique taste and texture. Oven-Baking vs. Frying: - Frying: Gives a crispy, golden texture. - Oven-baking: Healthier option! Preheat your oven to 425°F. Bake for 20-25 minutes, flipping halfway through. Air Fryer Instructions for Healthier Sliders: - Preheat your air fryer to 375°F. - Place the breaded chicken in one layer. - Cook for about 10-12 minutes. Flip halfway for even crispiness. Using these tips and tricks, you can create Bang Bang Chicken Sliders that burst with flavor and fun! For the full recipe, check out the earlier section. {{image_4}} You can change the main protein in these sliders. For a plant-based option, use tofu. Firm tofu works best. Press it to remove extra water. Then, slice it into pieces like chicken. You can also use turkey if you want a leaner meat. Simply follow the same cooking steps as for chicken. If you're looking for gluten-free options, replace the breadcrumbs. Use crushed gluten-free crackers or cornmeal instead. For the flour, almond flour or a gluten-free blend works well. These swaps keep the sliders tasty and accessible for everyone. These sliders shine with tasty sides. Serve them with sweet potato fries for a sweet crunch. A light salad with fresh veggies is a great match, too. You can also add coleslaw for some tang and crunch. When it comes to drinks, a cold soda or iced tea pairs nicely. If you want something special, try a light beer. For a non-alcoholic option, fresh lemonade is refreshing. For the full recipe, check out the Bang Bang Chicken Sliders section above. To keep your Bang Bang Chicken Sliders fresh, follow these tips: - Best Practices for Refrigeration: Place leftover sliders in an airtight container. This keeps them moist. Store them in the fridge for up to three days. If you want to keep them longer, consider freezing them. - Freezing Tips for Long-Term Storage: Wrap each slider in plastic wrap. Then, place them in a freezer bag. This prevents freezer burn. You can store them for up to three months. When ready to eat, let them thaw in the fridge overnight. To enjoy your sliders again, reheating is key: - Best Methods to Maintain Crispiness: The oven is best. Preheat the oven to 375°F (190°C). Place sliders on a baking sheet. Heat for about 10-15 minutes. This keeps them crispy. - Microwave vs. Oven: If you use the microwave, sliders can get soggy. Heat them for 30 seconds but check often. For best results, use the oven. It keeps the texture just right. What is Bang Bang Sauce? Bang Bang sauce is a creamy mix of mayonnaise, Sriracha, and honey. It gives a sweet and spicy kick to the sliders. You can adjust the heat level by adding more or less Sriracha. Can I make these sliders ahead of time? Yes, you can prepare the chicken and sauce ahead of time. Just store them separately in the fridge. When you're ready to eat, fry the chicken and assemble the sliders. How can I adjust the spiciness for kids? To make the sliders milder, use less Sriracha in the Bang Bang sauce. You could also leave it out entirely and serve the sauce on the side for dipping. What are good side dishes to serve with Bang Bang Chicken Sliders? Great sides include sweet potato fries, a light salad, or fresh veggies. These options balance the rich flavors of the sliders. How do I know when the chicken is fully cooked? The chicken is done when it is golden brown and the internal temperature reaches 165°F. Use a meat thermometer for best results. To make Bang Bang Chicken Sliders, start with the right ingredients and follow each step. From prepping the chicken to making the perfect sauce, each part matters. Remember to explore flavor tips and cooking methods to suit your taste. Don't hesitate to modify the recipe with substitutes or side dishes. Lastly, store leftovers properly to enjoy later. With this guide, you can impress anyone with your sliders. Enjoy the cooking process and have fun with it!

Bang Bang Chicken Sliders Flavorful and Fun Recipe

Are you ready to spice up your next meal? My Bang Bang Chicken Sliders are packed with bold flavors and

- 1 lb ground chicken - 1 cup fresh spinach, finely chopped - 3/4 cup white cheddar cheese, shredded - 1/2 cup breadcrumbs - 1/4 cup grated Parmesan cheese - 1 large egg - 2 cloves garlic, minced - 1 teaspoon onion powder - 1 teaspoon sea salt - 1/2 teaspoon freshly ground black pepper - 4 burger buns - Lettuce - Tomato - Pickles - Your favorite condiments When making these burgers, I love using fresh ingredients. The ground chicken gives a nice base for flavor. Fresh spinach adds a pop of color and nutrients. Using white cheddar cheese makes these burgers creamy and rich. Breadcrumbs help hold everything together. Grated Parmesan adds a nice salty kick. For the extra ingredients, the egg binds the mixture. Garlic adds a lovely aroma, while onion powder enhances the flavor. Sea salt and black pepper are key for taste. When it comes to toppings, I recommend soft burger buns. Crisp lettuce and juicy tomato bring freshness. Pickles add a nice crunch and tang. Don't forget your favorite condiments to make each bite tasty. You can find the full recipe for these White Cheddar Spinach Chicken Burgers to start your cooking adventure! - In a large bowl, combine: - 1 lb ground chicken - 1 cup fresh spinach, finely chopped - 3/4 cup white cheddar cheese, shredded - 1/2 cup breadcrumbs - 1/4 cup grated Parmesan cheese - 1 large egg - 2 cloves garlic, minced - 1 teaspoon onion powder - 1 teaspoon sea salt - 1/2 teaspoon black pepper Mix these ingredients gently. Use your hands to blend them. Be careful not to overmix. Overmixing can make the burgers tough. - Divide the mixture into four equal parts. - Shape each part into a patty. Each patty should be about 1/2 inch thick. Make sure they hold their shape well. This will help them cook evenly. - Heat 1 tablespoon of olive oil in a skillet over medium heat. - Once the oil is hot, add the patties. Cook each patty for 5-6 minutes on each side. They should turn golden brown and reach an internal temperature of 165°F (75°C). If you want to toast the burger buns, do that in a separate pan. Toast them until they are golden and crispy. Once the patties are cooked, assemble your burgers. Place each patty on a toasted bun. Add toppings like lettuce, tomato, or pickles. For more details, check the Full Recipe. To make the best White Cheddar Spinach Chicken Burgers, avoid overcooking them. Cooking too long makes them dry. Cook each patty for about 5-6 minutes on each side. Use a meat thermometer to check for an internal temperature of 165°F (75°C). This ensures they are juicy and safe to eat. For even cooking, space the patties well in the skillet. Don’t overcrowd them. This allows hot air to circulate and cook them evenly. You can also flip them just once during cooking. This helps maintain their shape and keeps them moist. Adding spices can really boost flavor. Consider mixing in some paprika or smoked paprika for a nice kick. Fresh herbs like basil or parsley can also brighten the taste. You can fold in a dash of crushed red pepper if you like some heat. For extra ingredients, try adding diced sun-dried tomatoes or artichoke hearts. These add a tasty twist and bring out the flavors of the spinach and cheese. You can customize your burgers to fit your taste. Pair your burgers with sides for a full meal. Sweet potato fries or a crisp garden salad work great. They balance the rich flavors of the burger well. When it comes to toppings, use crisp lettuce and fresh tomato slices. Pickles add a nice crunch too. For condiments, classic ketchup and mustard are good choices. You can also try a zesty garlic aioli or a creamy ranch dressing to elevate your burger even more. For the full recipe, check out the [Full Recipe]. {{image_4}} You can switch things up with ground turkey or beef. Ground turkey gives a lighter taste. Beef adds rich flavor. Both options work well with the same spices and cheese. If you want a dairy-free version, try dairy-free cheese options. Look for brands that melt well. They can replace white cheddar without losing taste. Want some heat? Add spices like cayenne or chili powder to the mix. This will give your burgers a nice kick. For a Mediterranean twist, include feta cheese and chopped olives. The tangy feta pairs well with spinach. This change brings a fresh flavor to your burger. You can grill, pan-fry, or bake these burgers. Grilling gives them a smoky taste. Just make sure your grill is hot before cooking. Pan-frying allows for a crispy outside. Use a bit of oil to keep them moist. Baking is a healthier option. Place them on a baking sheet and cook until golden. Each method creates a tasty burger. For the full recipe, check the link above. After cooking your white cheddar spinach chicken burgers, you want to store them right. Place the cooked patties in an airtight container. This keeps them fresh. Store them in the fridge if you plan to eat them soon. Use them within three days for the best taste. If you want to keep them longer, consider freezing. Wrap each patty tightly in plastic wrap. Then, place them in a freezer-safe bag. They can last up to three months in the freezer. Just label the bag with the date so you know when you froze them. Reheating your chicken patties is easy. You can use a skillet or the oven. For the skillet, heat it on medium-low. Add a little olive oil to prevent sticking. Cook the patties for about 3-5 minutes on each side. Keep an eye on them to ensure they don't dry out. If using an oven, preheat it to 350°F (175°C). Place the patties on a baking sheet. Cover them with foil to keep moisture in. Heat for about 10-15 minutes. This way, your burgers stay juicy and tasty. Cooked chicken burgers last about three days in the fridge. If you freeze them, they can last up to three months. Always check for signs of spoilage. Look for any strange smells or changes in color. If something seems off, it’s best to toss it out. Keeping your food safe is very important. For more details on making these delicious burgers, check the Full Recipe. The best way to cook chicken burgers is to pan-fry them. This method gives a nice crust and juicy inside. First, heat olive oil in a skillet on medium heat. Place the burgers in the pan without crowding them. Cook each side for about 5-6 minutes. Use a meat thermometer to check the inside. It should reach 165°F (75°C). For extra flavor, you can add spices or herbs to the mix. Yes, you can make these burgers in advance. Prepare the patties and cover them well. Store them in the fridge for up to one day. You can also freeze the patties for later use. Just wrap them tightly in plastic wrap. When ready to cook, thaw them in the fridge overnight. This saves time on busy days. Yes, there are gluten-free options for breadcrumbs. You can use almond flour or crushed gluten-free crackers. Both work well in the recipe. Adjust the amount based on the texture you want. These substitutes keep the burger moist while making it safe for gluten-free diets. To know when chicken burgers are fully cooked, check the internal temperature. Use a meat thermometer; it should read 165°F (75°C). You can also look for visual cues. The burgers should be golden brown on the outside, and no pink should show inside. Proper cooking ensures safety and taste. For the complete recipe, check out the Full Recipe section! In this article, we covered how to make delicious white cheddar spinach chicken burgers. We discussed key ingredients like ground chicken, fresh spinach, and white cheddar. I shared step-by-step instructions for mixing and cooking the patties, plus tips for perfect results. You can also explore variations and storage tips. Remember, these burgers are versatile. Adjust flavors and toppings to suit your taste. Enjoy the cooking process, and savor each bite!

White Cheddar Spinach Chicken Burgers Tasty and Simple

Get ready to spice up your dinner routine with my White Cheddar Spinach Chicken Burgers! These tasty and simple burgers

To make these tasty cinnamon roll French toast bites, you need the following items: - 1 can refrigerated cinnamon roll dough (8 rolls) - 2 large eggs - 1/4 cup milk - 1/2 teaspoon vanilla extract - 1 teaspoon ground cinnamon - 1 tablespoon granulated sugar - 1 tablespoon unsalted butter - Maple syrup, for serving - Powdered sugar, for dusting (optional) If you need to swap out any items, here are some great ideas: - Use almond or oat milk instead of regular milk for a dairy-free option. - You can replace eggs with 1/4 cup of unsweetened applesauce for a vegan choice. - If you don’t have cinnamon, pumpkin pie spice works well too. - Instead of granulated sugar, try honey or maple syrup for a natural sweetener. To make this recipe, you will need some basic kitchen tools: - A mixing bowl for whisking ingredients - A sharp knife or kitchen scissors for cutting the dough - A skillet for cooking the bites - A spatula for flipping - A baking sheet lined with parchment paper for easy cleanup - An oven for baking the bites These ingredients and tools will set you up for a delicious treat! Follow the full recipe for clear steps. Start by preheating your oven to 350°F (175°C). This ensures a nice bake. Next, open the can of refrigerated cinnamon roll dough. Carefully pull apart the rolls. Use a sharp knife to cut each roll into quarters. This gives you small, bite-sized pieces. These pieces soak up the egg mixture well. In a medium mixing bowl, whisk together the eggs, milk, vanilla extract, ground cinnamon, and granulated sugar. Make sure the mixture is smooth and well combined. This step is key. It adds flavor to your bites. Once mixed, gently add the cinnamon roll pieces. Coat each piece well. Let them soak for about 5 minutes. This allows the dough to absorb all the flavors. Melt the butter in a large skillet over medium heat. When the butter is bubbling, add the soaked cinnamon roll bites. Sauté them for 2-3 minutes. Stir occasionally until they turn golden brown. Don’t overcrowd the skillet; cook in batches if needed. After sautéing, place the bites on a baking sheet lined with parchment paper. Spread them out evenly. Bake in the preheated oven for 8-10 minutes. They should be puffed and golden. Once done, let them cool for a few minutes. If you want, dust them with powdered sugar for a sweet touch. Serve warm with maple syrup for dipping. You will love these delightful bites as a breakfast treat or snack. For the full recipe, check out the details above! To get a soft inside and a crisp outside, soak the cinnamon roll pieces well. Aim for a soak time of about five minutes. This allows the egg mixture to penetrate the dough fully. When cooking, keep the heat at medium. Too high, and you risk burning the outside before the inside cooks. A quick sauté in butter adds to the texture. Cooking in batches helps avoid overcrowding the skillet. If you add too many pieces at once, they will steam instead of crisp. This step is key for that perfect bite. I suggest working in groups of five or six pieces. This way, each piece gets enough heat and space to cook evenly. You can keep the cooked bites warm in the oven while you finish. You can top your cinnamon roll bites with many tasty options. Maple syrup is a classic choice. You can also try fresh fruit like strawberries or blueberries for a fresh twist. A sprinkle of powdered sugar makes them look fancy. Another option is a drizzle of chocolate sauce for a sweet touch. Get creative and mix and match your favorites for fun! {{image_4}} You can change the flavor with different dough. Try using apple or pumpkin spice cinnamon rolls. Each flavor brings a unique taste to your bites. If you want a fun twist, use chocolate or cream cheese-filled dough. These options make for a tasty surprise! Fruits and nuts can enhance your bites. You might add chopped apples or berries for sweetness. Walnuts or pecans add a nice crunch. Just mix these into your egg mixture before soaking the dough pieces. This adds flavor and texture to each bite. Making these bites gluten-free is easy. Use gluten-free cinnamon roll dough. For vegan options, try plant-based eggs and milk. This way, everyone can enjoy these treats. Just ensure your dough is made with suitable ingredients. You won’t lose the fun or flavor! For the full recipe, check out the detailed instructions above. Enjoy your cooking adventure! To keep your cinnamon roll French toast bites fresh, store them in an airtight container. Make sure they cool completely before sealing. They will stay good for about three days in the fridge. If they start to dry out, you can add a little maple syrup before eating. When you're ready to enjoy the leftovers, you can reheat them easily. Place them in the microwave for about 20-30 seconds. If you prefer, you can also warm them in a skillet over low heat. Just watch closely to avoid burning. Add a drizzle of maple syrup for extra flavor. If you want to save some bites for later, freezing is a great option! Arrange the bites on a baking sheet in a single layer and freeze them for about an hour. Once they are frozen, transfer them to a freezer bag. This method prevents them from sticking together. They will stay good for up to two months in the freezer. When you're ready to eat, thaw them in the fridge overnight, then reheat as mentioned above. For the full recipe, check out the details provided earlier. Enjoy your delicious bites! Yes, you can prepare these bites a bit early. Just make the egg mixture and soak the dough pieces. Store them in the fridge for up to one day. When you're ready to cook, simply sauté and bake them as directed in the Full Recipe. This saves you time on busy mornings! To cut down the sweetness, reduce the sugar in the egg mixture. You can also skip the powdered sugar topping. Instead, focus on the rich flavor of cinnamon and vanilla. This way, you can still enjoy the bites without them being too sugary. These bites go great with coffee or tea. A warm cup of chai or a classic black coffee enhances the cinnamon flavor. If you want something fruity, try a fresh orange juice. The citrus will balance the sweet notes nicely. Absolutely! You can try using biscuit dough or even puff pastry for a twist. Each type of dough adds a unique texture and flavor. Just adjust the cooking time as needed to ensure they bake properly. To store leftovers, place them in an airtight container. They will stay fresh in the fridge for up to three days. You can also freeze them for up to one month. Just make sure they cool completely before freezing. Yes, you can reheat the bites. Use an oven or toaster oven to warm them at 350°F (175°C) for about 5-7 minutes. This way, they will regain their crispiness. Microwaving is quick but may make them soft. Definitely! You can add nuts or fruit for extra flavor and texture. Some people love drizzling chocolate sauce or caramel on top. Be creative and find your perfect topping! From start to finish, it takes about 30 minutes to make these tasty treats. This includes prep time and cooking time. So, they are perfect for a quick breakfast or snack! You now have the tools to make delicious cinnamon roll bites. We covered the key ingredients and how to mix them. I shared tips for perfect texture and suggested tasty toppings. You can even explore different variations, like gluten-free options. Lastly, I provided tips for storing and reheating these treats. Enjoy making your own versions and share them with friends. Cinnamon roll bites can be fun and easy, offering a treat for everyone. Get cooking!

Cinnamon Roll French Toast Bites Tasty Delightful Treat

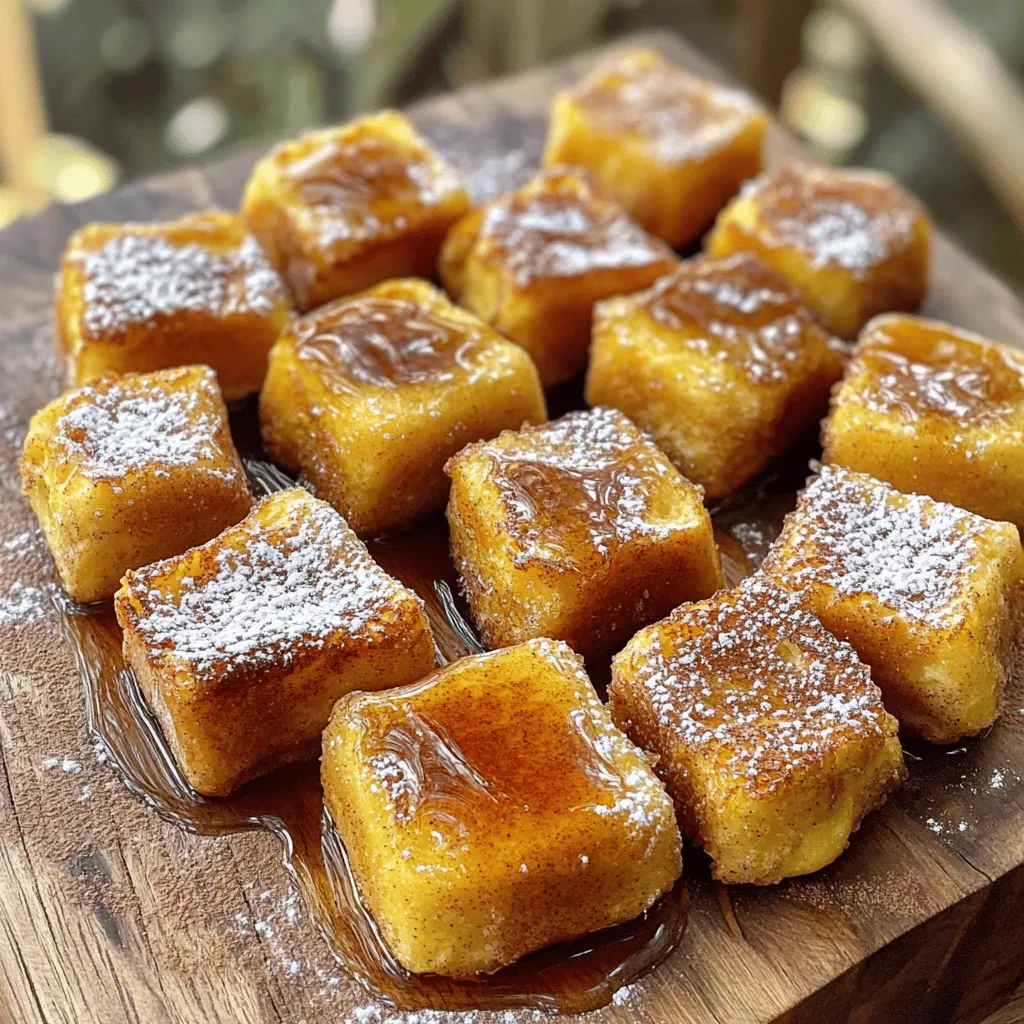
If you love breakfast treats, you won’t want to miss these Cinnamon Roll French Toast Bites! They combine warm cinnamon

- 1 ½ cups fresh strawberries - ½ cup low-fat Greek yogurt - 1 ½ cups whole wheat flour - 1 teaspoon baking powder - ½ teaspoon baking soda - ¼ teaspoon salt - ½ cup unsweetened applesauce - ½ cup honey or pure maple syrup - 2 large eggs - 1 teaspoon vanilla extract - Optional: Powdered sugar for dusting Using fresh ingredients is key for a tasty cake. Fresh strawberries bring bright flavor and color. The low-fat Greek yogurt adds moisture and protein. Whole wheat flour gives the cake a nice texture. It also makes it a bit healthier. Baking powder and baking soda help the cake rise. Salt balances the sweetness and enhances flavor. Applesauce replaces oil or butter, keeping it light. Honey or maple syrup adds natural sweetness. The eggs help bind everything together and add richness. Finally, vanilla extract rounds out the flavors. You can dust the top with powdered sugar for a pretty finish. The ingredients work together to create a cake that is simple, healthy, and delicious. For the complete recipe, check the full recipe section. - Preheat oven to 350°F (175°C) - Grease and dust an 8-inch round cake pan To start, I preheat my oven to 350°F. This step is key to getting the cake to rise well. While the oven heats, I prepare my cake pan. I grease it with a little oil or butter. Then, I dust it with flour to help the cake come out easily after baking. - Combine whole wheat flour, baking powder, baking soda, and salt Next, I mix my dry ingredients. In a medium bowl, I combine 1 ½ cups of whole wheat flour, 1 teaspoon of baking powder, ½ teaspoon of baking soda, and ¼ teaspoon of salt. I whisk these together well. This mix gives the cake a nice rise and keeps it light. - Beat unsweetened applesauce, honey (or maple syrup), eggs, and vanilla extract In a separate large bowl, I focus on my wet ingredients. I beat together ½ cup of unsweetened applesauce, ½ cup of honey (or maple syrup), 2 large eggs, and 1 teaspoon of vanilla extract. I use an electric mixer, but a whisk works too. I mix until everything is smooth and well combined. - Gently fold dry mix into wet mix - Incorporate low-fat Greek yogurt and sliced strawberries Now, it's time to combine the two mixes. I gently fold the dry mix into the wet mix. I do this slowly to avoid overmixing, which can make the cake tough. Next, I add ½ cup of low-fat Greek yogurt. This gives the cake moisture and flavor. Then, I fold in 1 ½ cups of sliced strawberries, saving some for later. - Pour batter into the prepared pan - Bake for 25-30 minutes, check doneness with a toothpick Once the batter is ready, I pour it into my prepared pan. I spread it evenly using a spatula. Then, I place it in the oven to bake for 25-30 minutes. I check for doneness by inserting a toothpick into the center. If it comes out clean or with just a few crumbs, the cake is ready! - Cool in the pan for 10 minutes, then transfer to a wire rack - Optional: Dust with powdered sugar and add strawberry garnish After baking, I take the cake out and let it cool in the pan for about 10 minutes. This makes it easier to remove. Then, I transfer it to a wire rack to cool completely. For a little fun, I dust the top with powdered sugar and add some fresh strawberries for garnish. This makes the cake look pretty and inviting. Enjoy this lovely treat! For the full recipe, check out the earlier section. To get the best texture, avoid overmixing the batter. Mixing too much can make the cake tough. When you combine the wet and dry ingredients, mix gently until they are just blended. This keeps the cake light and fluffy. Check for doneness by inserting a toothpick into the center of the cake. If it comes out clean with a few crumbs, your cake is ready. If it has wet batter on it, bake for a few more minutes. You can swap out regular sugar with alternative sweeteners like honey or pure maple syrup. These options add sweetness without all the extra calories. They also bring a unique flavor to the cake. Greek yogurt is different from regular yogurt. It is thicker and has more protein. Using Greek yogurt in this cake makes it moist and adds a creamy texture. Regular yogurt is fine, but it won't give the same richness. For a beautiful presentation, top the cake with fresh strawberries. You can arrange them in a pattern or simply scatter them on top. This adds a pop of color and makes it look appetizing. You can also serve each slice with a dollop of whipped Greek yogurt. This makes each bite creamy and adds a nice touch. Plus, it pairs well with the fresh strawberries on top. {{image_4}} You can make this cake even more fun by adding flavors. Try adding lemon zest for a fresh twist. It brightens the cake and pairs well with strawberries. You can also add fruit purées like mango or peach for a unique taste. Adjusting the sweetness is easy too. If you want a less sweet cake, cut back on the honey or maple syrup. This will let the natural strawberry flavor shine more. For a gluten-free version, swap the whole wheat flour for almond or coconut flour. Almond flour gives a rich taste and a moist texture. Coconut flour is lighter but absorbs more moisture. If you use coconut flour, add an extra egg or more yogurt to keep the cake moist. Both options will create a delicious and fluffy cake. To make this cake vegan, you need to replace the eggs. You can use flax eggs or chia seeds mixed with water. For each egg, mix one tablespoon of ground flaxseed or chia seeds with three tablespoons of water. Let it sit until it thickens. For yogurt, you can use plant-based yogurt like almond or coconut yogurt. This way, everyone can enjoy this tasty treat! To keep your cake moist, wrap it well. Use plastic wrap or foil. Place it in an airtight container. This helps seal in the freshness. Store it in the fridge for up to five days. The cooler air keeps the cake tasty and soft. If you want to save some for later, freezing works great. Slice the cake into pieces. Wrap each slice in plastic wrap tightly. Then, put them in a freezer bag. This helps prevent freezer burn. You can freeze the cake for up to three months. When you're ready to eat, thaw the cake in the fridge overnight. For a quicker method, leave it on the counter for a few hours. This keeps the texture nice and fluffy. To enjoy the cake warm, use an oven or microwave. If using an oven, preheat it to 350°F (175°C). Place the slice on a baking sheet. Heat for about 10 minutes. This way, the cake regains its soft texture. If you prefer the microwave, warm it for about 15-20 seconds. Check often to avoid overheating. The cake should be warm but not hot. This keeps all the flavors intact. To make a healthier strawberry cake, consider these options: - Use whole wheat flour instead of white flour. - Replace sugar with honey or maple syrup. - Add unsweetened applesauce to cut fat. - Use low-fat Greek yogurt for creaminess. These swaps help lower calories and sugar while keeping the cake moist and tasty. Each choice adds fiber and nutrients, making your dessert a better option. Yes, you can use frozen strawberries! However, they may change the cake's texture and flavor. Frozen strawberries have more moisture. This can lead to a denser cake. Thaw and drain them before mixing in. This way, your cake stays light and fluffy. This cake lasts about 3 to 5 days in the refrigerator. Store it in an airtight container to keep it fresh. You can also freeze it for longer storage. Wrapped well, it can last up to 3 months in the freezer. Pair your skinny strawberry cake with these tasty options: - Whipped Greek yogurt for a creamy touch. - Fresh strawberries for added flavor. - A drizzle of honey or maple syrup for sweetness. - A scoop of low-fat ice cream for fun. These toppings add extra flavor and make the cake even better. To help your cake rise, follow these tips: - Preheat your oven to the right temperature. - Use fresh baking powder and baking soda. - Measure ingredients accurately for the best results. - Avoid overmixing the batter. This can make it dense. These steps ensure a fluffy, well-risen cake every time. For the full recipe, check out the details above. This blog post covered everything you need to create a healthy strawberry cake. You learned about the fresh, dry, and wet ingredients to use, plus detailed steps to bake perfectly. I shared helpful tips for success, variations for different diets, and how to store your cake. Making this cake is simple and fun! You’ll enjoy a delicious treat without feeling guilty. Baking can be an exciting journey, so don’t hesitate to explore your own twists on this recipe. Happy baking!

Skinny Strawberry Cake Simple and Healthy Treat

Looking for a light and delicious dessert? This Skinny Strawberry Cake is a simple and healthy treat you can whip

To create this tasty dish, gather these main ingredients: - 1 large loaf of Italian bread - 1 cup cooked chicken, shredded - 1 cup creamy Alfredo sauce - 1 cup mozzarella cheese, shredded - 1/2 cup Parmesan cheese, freshly grated - 4 cloves garlic, finely minced - 1/2 cup unsalted butter, softened - 2 tablespoons fresh parsley, finely chopped - Salt and black pepper to taste These ingredients work together to give the bread its rich taste. The chicken adds protein, while the cheeses create a creamy, gooey filling. Feel free to get creative! Here are some optional ingredients to enhance your dish: - Crushed red pepper flakes for heat - Spinach or broccoli for extra veggies - Sun-dried tomatoes for a tangy twist - Different cheeses like cheddar or gouda These options let you make this dish your own. You can experiment based on what you like. To make your cooking easier, have these tools ready: - A sharp bread knife for slicing - A mixing bowl for the filling - A baking sheet lined with parchment paper - A spatula for spreading the garlic butter Having the right tools helps keep the process smooth. You’ll find that this dish comes together quickly! For the full recipe, check the details above. Start by preheating your oven to 375°F (190°C). This step is key for great baking. A hot oven ensures the bread turns golden and crispy. In a medium bowl, mix the shredded chicken with the creamy Alfredo sauce. Add the mozzarella and Parmesan cheeses. Season with salt and black pepper to your taste. Stir until everything is well combined. This filling is the heart of your dish. Take your large loaf of Italian bread and slice it in half lengthwise. Be careful not to cut all the way through. Use a spoon to scoop out the soft inside, leaving some bread to hold its shape. Save the scooped-out bread for breadcrumbs or another recipe. In a small bowl, blend the softened butter with minced garlic and chopped parsley. Mix until the garlic and herbs are evenly combined. This garlic butter will add rich flavor to your bread. Spread it evenly on the inner sides of both bread halves. Spoon the chicken Alfredo mixture into each half of the bread. Make sure to spread it out evenly. You want every bite to be packed with flavor. Fill it generously to create a hearty dish. Place the stuffed bread halves on a baking sheet lined with parchment paper. This makes for easy cleanup and prevents sticking. Arrange them so there is space around each half. Bake the bread in your preheated oven for 15-20 minutes. Look for a bubbly, golden top. It should smell wonderful and look slightly crispy. This is when your dish starts to shine. Once baked, take the garlic bread out of the oven. Let it cool for a few minutes before slicing. This cooling time helps the filling set. Then, cut into servings and get ready to enjoy! When making Chicken Alfredo stuffed garlic bread, avoid these common mistakes: - Not preheating the oven: Always preheat to ensure even cooking. - Overstuffing the bread: Too much filling can cause spills and uneven baking. - Skipping the garlic butter: This adds flavor and moisture—don’t skip it! - Not cooling before slicing: Allow it to cool a bit to keep the filling intact. To make your stuffed garlic bread perfect, follow these tips: - Use fresh ingredients: Fresh garlic and herbs enhance the flavor. - Shred the chicken finely: Smaller pieces blend better with the sauce and cheese. - Use room temperature butter: This helps the garlic butter spread easily. - Keep an eye on baking: Remove the bread once it’s golden and bubbly. You can customize your stuffed garlic bread with these substitutions: - Chicken: Try cooked shrimp or sautéed mushrooms for a different protein. - Alfredo sauce: Use a homemade version or a creamy cheese sauce. - Cheese: Swap mozzarella for provolone or gouda for a unique flavor. - Bread: Any crusty bread works, like French or ciabatta. For the complete recipe, check the [Full Recipe]. Enjoy crafting your tasty Chicken Alfredo stuffed garlic bread! {{image_4}} If you want a meat-free option, skip the chicken. Use mushrooms, spinach, or artichokes instead. These veggies add flavor and texture. Mix them in with the creamy Alfredo sauce and cheeses. You can enjoy a rich and tasty dish while keeping it vegetarian. Cheese is key for flavor. You can switch up the cheeses in this recipe. Try using gouda, cheddar, or fontina. Each cheese brings a unique taste. Mixing different cheeses creates a creamy and delicious filling. Don't be afraid to get creative! For a little kick, add some heat to your dish. Mix in red pepper flakes or diced jalapeños with the chicken and sauce. This spicy twist makes the garlic bread exciting. You’ll enjoy the added flavor and warmth. Spice lovers will appreciate this variation! For the full recipe, refer back to the beginning. To store leftover Chicken Alfredo stuffed garlic bread, wrap it tightly in aluminum foil or plastic wrap. Place it in an airtight container to keep it fresh. Leftovers can stay in the fridge for up to three days. This way, you’ll still enjoy that creamy chicken flavor later! When you want to enjoy your leftovers, reheating is easy. Preheat your oven to 350°F (175°C). Place the stuffed bread on a baking sheet. Cover it loosely with foil to prevent it from getting too brown. Heat for about 10-15 minutes or until warmed through. This keeps the bread nice and soft. If you want to save some for later, freezing works well! After baking, let the garlic bread cool completely. Wrap it tightly in plastic wrap, then in foil. Label it with the date. You can freeze it for up to three months. When ready to eat, thaw it in the fridge overnight before reheating. This way, you’ll have a delicious meal ready anytime! Yes, you can make Chicken Alfredo Stuffed Garlic Bread ahead of time. Prepare the filling and stuff the bread. Wrap it well and store it in the fridge for up to one day. When ready to eat, just bake it as directed. This makes it easy for busy days or last-minute gatherings. To make homemade Alfredo sauce, you need: - 1 cup heavy cream - 1/2 cup unsalted butter - 1 cup grated Parmesan cheese - 2 cloves garlic, minced - Salt and pepper to taste 1. In a saucepan, melt the butter over medium heat. 2. Add minced garlic and cook for about one minute. 3. Pour in the heavy cream and stir. 4. Gradually add the Parmesan, mixing until smooth. 5. Season with salt and pepper. This sauce is rich and creamy, perfect for your stuffed garlic bread. Chicken Alfredo Stuffed Garlic Bread pairs well with: - A fresh green salad - Steamed broccoli - Roasted vegetables - Garlic knots A light side helps balance the richness of the bread. Yes, you can use different types of bread. Try French bread, ciabatta, or even whole wheat. Just make sure it can hold the filling. Each bread type will add its own flavor and texture. To enhance the flavors of your Chicken Alfredo Stuffed Garlic Bread, consider: - Adding cooked spinach or kale for extra nutrition. - Mixing in sun-dried tomatoes for a tangy kick. - Sprinkling red pepper flakes for heat. - Using smoked cheese for depth. These small changes can make a big difference in taste. For the complete recipe, check out the Full Recipe. In this post, we explored making Chicken Alfredo Stuffed Garlic Bread. We covered essential and optional ingredients, tools, and step-by-step baking instructions. I shared tips to avoid common mistakes and suggested variations for different tastes. Remember, perfecting this dish can be a fun adventure. Whether you stick to the classic or get creative, your meal can impress anyone. Enjoy your cooking, and don't forget to savor every bite!

Mouthwatering Chicken Alfredo Stuffed Garlic Bread

If you love cheesy, creamy, and garlic-infused dishes, you are in for a treat! In this blog post, I will

- 4 large russet potatoes - 1 cup shredded pepper jack cheese - 2 tablespoons extra virgin olive oil - 1 teaspoon smoked paprika - 1 teaspoon garlic powder - 1 teaspoon onion powder - 1 teaspoon cayenne pepper (adjust as needed) - Salt, to taste - Fresh jalapeño, sour cream, green onions, cilantro Voodoo Fries start with simple but key ingredients. The russet potatoes give a crisp texture. You want them large to make nice, thick fries. The shredded pepper jack cheese adds a creamy, spicy kick. The extra virgin olive oil helps the fries crisp up in the oven. For the seasonings, smoked paprika brings a rich, smoky flavor. Garlic powder and onion powder add depth and taste. Cayenne pepper gives that extra heat, so feel free to adjust it. Salt enhances all the flavors. The fresh jalapeño, sour cream, green onions, and cilantro are the finishing touches. They add freshness and a burst of color. You can find the full recipe below, but knowing these ingredients sets you up for success in making delicious Voodoo Fries. - Preheat the oven to 425°F (220°C). - Rinse and dry the cut fries. First, I love to preheat the oven. This step is key for crispy fries. While the oven heats, I rinse the cut fries under cold water. This helps remove extra starch. Less starch means crispier fries. After rinsing, dry them well with a towel. Moisture is not your friend here! - Combine fries with olive oil and seasonings. - Bake fries for 30-35 minutes. In a big bowl, add the fries. Drizzle the olive oil over them. Now, sprinkle in smoked paprika, garlic powder, onion powder, cayenne pepper, and salt. Toss until every fry gets coated. This is where the magic starts! Spread the fries out on a baking sheet. Make sure they are not crowded. Bake for 30-35 minutes. Flip them halfway through for even cooking. You want them golden and crispy! - Add cheese and bake until melted. - Garnish with jalapeños, sour cream, and herbs. Remove the fries after baking. Now, sprinkle shredded pepper jack cheese on top. Bake again for 5 minutes. You want the cheese to melt and bubble. While the cheese melts, slice the jalapeño, chop the cilantro, and slice the green onions. Once the cheese is ready, add the toppings. Jalapeños, sour cream, and herbs add flavor and color. Serve hot for the best taste! For the full recipe, check out the detailed instructions above to create your own Voodoo Fries! To get crispy fries, start by rinsing the potatoes. This removes excess starch. Starch can make fries soggy. After rinsing, dry them well with a kitchen towel. Moisture is the enemy of crispiness. Next, spread the fries out on a baking sheet. Leave space between each fry. This helps them cook evenly. If they touch, they will steam instead of crisp. Voodoo Fries are great as they are, but you can make them even better. Try adding toppings like diced tomatoes or olives. Fresh herbs like parsley or chives can add nice flavor. If you want more heat, adjust the cayenne pepper. Add less for a mild taste or more for a spicy kick. You can mix in hot sauce for an extra punch. Make it your own with these simple changes! {{image_4}} You can switch up the cheese for Voodoo Fries. Try using cheddar cheese. It melts well and adds a rich taste. If you want a vegan option, look for plant-based cheese. These can taste great too! Mixing different cheeses can give more flavor. Blend pepper jack with mozzarella for a creamy texture. Each cheese brings its own twist, so feel free to explore. Want to spice things up? Add chili flakes or hot sauce. A sprinkle of chili flakes gives a nice kick. Hot sauce can boost the flavor and heat level. You can even use different peppers for extra fun! Try jalapeños or serranos for a fresh bite. Each pepper adds its own unique taste to the dish. Experiment until you find your perfect heat level! To keep your Voodoo Fries fresh, follow these tips: - Refrigerating Leftovers: Let the fries cool to room temperature. Place them in an airtight container. They can last in the fridge for about 3 days. If you want to keep them longer, it’s best to freeze them. - Freezing Cooked Fries: Spread the fries on a baking sheet in a single layer. Freeze them for about 2 hours until firm. After that, transfer them to a freezer-safe bag. They can last up to 2 months in the freezer. To enjoy your fries again, reheating is key. Here are some methods: - Retain Crispiness: Use an oven or an air fryer to reheat fries. Preheat your oven to 375°F (190°C). Spread the fries on a baking sheet and heat for about 10-15 minutes. This method keeps them crispy. - Topping Additions: If you want to add more toppings, do it before reheating. Add cheese or jalapeños on top before placing them back in the oven. This way, they melt perfectly and add extra flavor. For the full recipe, check the earlier section. Voodoo fries are a fun twist on classic fries. They originated from the vibrant food scene in New Orleans. These fries feature crispy potatoes topped with spicy seasonings and melted cheese. The balance of flavors makes them a hit for any meal or snack. The combination of spices, like cayenne pepper and smoked paprika, gives them a delightful kick. People love them for their bold taste and satisfying crunch. Yes, you can easily make Voodoo fries in an air fryer! Start by preheating your air fryer to 400°F (200°C). Cut the potatoes and season them just as you would for baking. Place the seasoned fries in a single layer in the air fryer basket. Cook for about 15-20 minutes, shaking the basket halfway through. Once they are crispy, add the cheese and cook for an additional 3-5 minutes until melted. Using an air fryer makes them even crispier and healthier! Voodoo fries pair well with many dishes. They make a great side for burgers or grilled chicken. You can also serve them with a fresh salad for a tasty meal. For snacks, try them with spicy dipping sauces like ranch or chipotle mayo. As for drinks, a cold soda or a light beer complements the spice. For a more fun pairing, try a fruity cocktail or iced tea for a refreshing touch. You can find Voodoo fries at many restaurants, especially in New Orleans. Look for local eateries that focus on Cajun or Creole food. Some popular spots include food trucks and casual dining places. If you can't find them nearby, many online recipes can help you create them at home. You can easily make them using the full recipe provided. Enjoy exploring new places or trying your hand at this delicious dish! Voodoo fries combine crispy potatoes, spicy seasonings, and creamy toppings. You learned how to prepare, season, and bake these tasty fries. Adding your favorite cheese and toppings enhances the flavor. Leftover storage and reheating methods keep them crispy too. Voodoo fries are great for sharing or pairing with meals. Experiment with toppings and spices to make them your own. Enjoy the delicious journey of creating your perfect plate!

Voodoo Fries Flavorful Comfort Food Delight

Are you ready to spice up your snack game? Voodoo Fries are not just any fries; they’re a flavorful comfort

To make this dish, you need fresh ingredients. Here is what you'll need: - 1 lb large shrimp, deveined and with shells on for flavor - 4 tablespoons unsalted butter - 4 tablespoons olive oil - 5 cloves garlic, minced - 1 tablespoon Cajun seasoning (store-bought or homemade) - 1 teaspoon smoked paprika - 1 teaspoon Worcestershire sauce - 1 teaspoon hot sauce (adjust according to your heat preference) - 1 tablespoon fresh lemon juice - 1/4 cup chicken broth These main ingredients create the rich and bold taste that makes this dish a favorite. Besides the main ingredients, seasonings enhance the flavor. Here are some key extras: - 1 teaspoon salt - Freshly cracked black pepper to taste These seasonings balance the heat and richness, making every bite memorable. Garnishes add a fresh touch to your dish. Try these: - 2 green onions, finely chopped (for garnish) - Fresh parsley, finely chopped (for garnish) - Crusty French bread (for serving) The green onions and parsley brighten the dish. The bread is perfect for soaking up the sauce. Enjoy the flavors and textures this recipe offers. For the complete cooking process, check the Full Recipe. First, gather your shrimp. Use 1 pound of large shrimp, deveined, with shells on. The shells add great flavor to the dish. Rinse the shrimp under cool water and drain. This step helps remove any grit. Next, pat them dry using a paper towel. Dry shrimp will cook better and absorb the sauce well. In a large skillet, heat 4 tablespoons of olive oil and 4 tablespoons of unsalted butter over medium heat. As the butter melts, it creates a tasty base. Once the mixture is bubbly, add 5 cloves of minced garlic. Sauté the garlic for about 1 minute. This step brings out its rich aroma. Then, mix in 1 tablespoon of Cajun seasoning and 1 teaspoon of smoked paprika. Add 1 teaspoon of Worcestershire sauce and 1 teaspoon of hot sauce too. Stir the mixture and let it bubble for about 30 seconds. This time allows the flavors to blend nicely. Next, add the shrimp to the skillet in a single layer. Cook them for 2-3 minutes on one side until they turn pink. Then, flip each shrimp to cook the other side. Pour in 1/4 cup of chicken broth and 1 tablespoon of fresh lemon juice. Reduce the heat slightly and allow the shrimp to simmer for 3-4 minutes. They will soak up the sauce and get a great flavor. Once done, check if the shrimp are curled and firm. If you want more heat, add a dash of hot sauce. Finally, garnish with green onions and parsley before serving. Enjoy this dish with crusty French bread for dipping into the sauce! To make your Louisiana BBQ shrimp shine, use fresh ingredients. Fresh shrimp give the best taste. I recommend getting your shrimp from a local market. Cajun seasoning is key. You can use store-bought or make your own. Combine spices like paprika, garlic powder, and cayenne for a unique blend. Adjust the heat to match your taste. Feel free to add more hot sauce if you want extra spice. Sautéing is a great method for this dish. It keeps the shrimp juicy and tender. Use a large skillet for even cooking. Heat olive oil and butter together for rich flavor. If you want a smoky taste, try grilling the shrimp. Skewer them for easy handling. Grilling adds a nice char and depth to the dish. No matter which method you choose, watch the shrimp closely. They cook quickly and can become tough if overdone. Serve your Louisiana BBQ shrimp with crusty French bread. The bread is perfect for soaking up the rich sauce. You can also pair it with a fresh salad for balance. A simple green salad with lemon vinaigrette works well. For a fun twist, serve the shrimp over grits or rice. This adds heartiness to the meal. Don't forget to sprinkle chopped green onions and parsley on top for a fresh finish. For the full recipe, check out the details above. {{image_4}} You can change a few ingredients in Louisiana BBQ shrimp for a new flavor. Try using different types of seafood, like scallops or crab. These options add a sweet taste that pairs well with the spices. You can also switch the butter for ghee or coconut oil for a dairy-free version. For a zing, add lime juice instead of lemon juice. If you like heat, increase the hot sauce in the recipe. For milder shrimp, reduce the hot sauce or leave it out. You can also use sweet paprika instead of smoked paprika. This change gives a different flavor without the heat. Try adding a pinch of cayenne pepper for a little kick without being too hot. You can make this dish heartier by adding vegetables. Bell peppers, onions, or zucchini cook well with the shrimp. Just chop them up and sauté them before adding the shrimp. For sides, serve with rice or grits to soak up the sauce. Crusty French bread is great for dipping and adds a nice crunch. After enjoying your Louisiana BBQ shrimp, cool the dish to room temperature. Transfer leftovers to an airtight container. Keep the container in the fridge. Properly stored, your shrimp will last for up to three days. If you want to keep it longer, consider freezing. To reheat, place the shrimp in a skillet over medium heat. Add a splash of chicken broth or water to keep it moist. Heat for about 5 minutes or until warmed through. Stir occasionally to ensure even heating. You can also use the microwave, but be careful not to overcook the shrimp. If you want to freeze your Louisiana BBQ shrimp, do so before adding garnishes. Place the shrimp and sauce in a freezer-safe bag. Remove as much air as possible. Label the bag with the date. These shrimp can last in the freezer for up to three months. When ready to enjoy, thaw in the fridge overnight before reheating. The best shrimp for Louisiana BBQ shrimp are large, deveined shrimp with shells on. The shells add great flavor to the dish. Fresh shrimp is ideal, but frozen shrimp works too. Just make sure to thaw them before cooking. The size matters; larger shrimp hold up well and soak in the sauce nicely. Yes, you can make Louisiana BBQ shrimp without shells, but it won't be as rich. Removing the shells makes the shrimp easier to eat. However, you lose some flavor from the shells. If you choose to go shell-less, consider adding a bit more seasoning or broth for taste. In Louisiana, you can find the best BBQ shrimp in many restaurants. Look for local seafood spots or Cajun eateries. New Orleans is famous for this dish. Try places like Mr. B's Bistro or a local dive. Each restaurant has its own twist on the recipe. For the full recipe, check out Cajun Spiced Louisiana BBQ Shrimp. This will guide you step-by-step to create this amazing dish. Enjoy cooking! In this blog post, we explored the key ingredients for Louisiana BBQ shrimp, from shrimp to seasonings. I shared step-by-step cooking instructions to ensure a great meal. Tips on perfecting the Cajun flavor and alternative ingredient variations were also covered. Finally, we discussed how to store and reheat your delicious leftovers. Louisiana BBQ shrimp is fun to make and enjoy. With these insights, you can impress your friends and family with a tasty dish. Dive in and make this classic recipe your own!

Louisiana BBQ Shrimp Flavorful and Simple Recipe

If you’re craving a bold and tasty dish, look no further than Louisiana BBQ shrimp. This simple recipe packs in

Older posts
Newer posts
← Previous Page1 … Page28 Page29 Page30 … Page41 Next →

dsad

© 2025 dailydishcraft • Built with GeneratePress

Our Policies

  • Copyright Policy
  • Cookie Policy
  • GDPR Policy
  • Privacy Policy
  • Disclaimer
  • Terms Of Use

More Information

  • Home
  • About
  • Contact
  • Appetizers
  • Dessert
  • Dinner
  • Drinks
©2025, dailydishcraft About Back To Top