Skip to content
DisclaimerTerms Of UseGDPR PolicyCookie Policy

dailydishcraft

  • Home
  • Drinks
  • Appetizers
  • Dinner
  • Dessert
  • About
  • Contact
  • Privacy Policy
DisclaimerTerms Of UseGDPR PolicyCookie Policy

Jessica

To make the Strawberry Shortcake Trifle, you need some simple, fresh ingredients. Here’s what you’ll need: - 2 cups fresh strawberries, hulled and sliced - 1/4 cup granulated sugar - 1 tablespoon freshly squeezed lemon juice - 1 pound vanilla sponge cake or pound cake, cut into 1-inch cubes - 2 cups heavy whipping cream - 1/4 cup powdered sugar - 1 teaspoon pure vanilla extract - Fresh mint leaves for garnish (optional) These ingredients come together to create a sweet, creamy delight. The fresh strawberries shine in this dish. Their bright flavor pairs perfectly with the soft cake. The whipped cream adds a rich, fluffy texture. You can use a store-bought cake if you like. This recipe is all about ease and joy in the kitchen. The combination of flavors makes each bite a celebration. I love how the whipped cream and strawberries mix together. It creates a dreamy taste that feels special. Plus, this trifle looks stunning when served. The layers of cake, strawberries, and cream create a beautiful display. You can find the Full Recipe to guide you through making this delightful treat. First, take 2 cups of fresh strawberries. Hull and slice them. In a medium bowl, combine the strawberries with 1/4 cup of granulated sugar and 1 tablespoon of lemon juice. Toss them gently until the strawberries are well coated. Let the mixture sit for 15-20 minutes. This process is called maceration. It helps the strawberries become soft and juicy. Next, grab 2 cups of heavy whipping cream. Pour it into a large bowl. Using an electric mixer, beat the cream on high speed for about 2 minutes. Slowly add in 1/4 cup of powdered sugar and 1 teaspoon of vanilla extract. Keep beating until you see soft peaks form. Be careful not to over-whip. You want it fluffy, not grainy. Now, take a large glass trifle bowl or individual serving glasses. Start with about 1/3 of your sponge cake cubes on the bottom. Spread them evenly. Then, spoon a layer of your macerated strawberries and their juices over the cake. After that, add a layer of whipped cream. Spread it smoothly to cover the strawberries. Repeat this layering process two more times. Use the remaining sponge cake, then more strawberries, and finish with a thick layer of whipped cream on top. Make sure the top layer has a generous dollop of whipped cream for a nice finish. Finally, cover the trifle with plastic wrap or a lid. Place it in the refrigerator for at least 2 hours. This chilling time helps all the flavors come together perfectly. When you are ready to serve, you can add fresh mint leaves on top for a pop of color. For the complete recipe, check out [Full Recipe]. - Start with cold heavy cream. This helps it whip faster. - Use a large bowl for more room to whip. - Beat the cream until soft peaks form. Stop before it becomes grainy. - If you over-whip, you can mix in more fresh cream to fix it. - Use clear glass bowls or cups. This shows off the beautiful layers. - When serving, place whole strawberries on top. They add color and charm. - Add fresh mint leaves for a pop of green. This also adds a nice aroma. - Try adding a splash of orange juice for a citrus twist. - Mix in different berries like blueberries or raspberries for fun. - Use a lemon sponge cake for a zesty flavor. It pairs well with strawberries. - Experiment with flavored extracts, like almond or coconut, for a unique taste. For the complete process, refer to the Full Recipe. {{image_4}} You can switch up the berries in your trifle. Blueberries and raspberries work great too! Mixing different berries adds fun flavors. Use strawberries, blueberries, and raspberries for a colorful twist. Each berry brings its unique taste and texture. This variety makes your trifle even more delightful. If you need gluten-free options, no problem! You can use gluten-free cake mixes. They taste just as good as regular cake. Make sure to check the labels for gluten-free ingredients. Almond flour or coconut flour can also be good substitutes. These options keep your trifle tasty while catering to dietary needs. Get creative with flavor add-ins! Adding lemon zest brightens up the trifle. You can also try almond or coconut extract for a new twist. For chocolate lovers, layer in some chocolate or caramel sauce. These sweet additions will surprise your taste buds and make your trifle stand out. [Full Recipe] To keep your Strawberry Shortcake Trifle fresh, cover it well. Use plastic wrap or a lid. This helps prevent it from drying out and keeps flavors strong. Store it in the refrigerator. The trifle stays good for about 2 to 3 days. It’s best to eat it fresh, but it can last for a short while. You can freeze leftover trifle, but it’s not ideal. The whipped cream may lose its texture. If you want to freeze it, layer the cake, strawberries, and cream in a safe container. Make sure to seal it tightly. When you’re ready to eat, take it out and let it thaw in the fridge overnight. When serving your chilled trifle, check its look. If it seems a bit flat, give it a light stir. This helps mix the flavors again. You can also add fresh strawberries or a sprinkle of sugar. This brings back the fresh taste. Serve it cold for the best experience. You can prepare your trifle a day before serving. This gives the flavors time to blend. Just make sure to cover it well with plastic wrap. Keep it in the fridge until you are ready to serve. If you want to add mint leaves, do it right before serving for freshness. Yes, you can use whipped topping for a quicker option. It saves time and still tastes good. Just layer it the same way as the homemade cream. Remember, store-bought whipped topping is often sweeter, so adjust the sugar in your recipe if needed. Leftover trifle can be a treat for another day! Store it in the fridge. You can also use the leftover cake and strawberries for other desserts. Mix them into yogurt for a parfait or use them in smoothies for a fruity boost. This blog post covered how to make a delicious trifle. We explored the ingredients, like fresh strawberries and whipped cream, and how to layer them. I shared tips for perfecting your whipped cream and presented ideas for variations, like using other berries or gluten-free options. In conclusion, creating a trifle is fun and easy. Customize it to fit your taste and share the joy with others. You’ll impress everyone with this tasty dessert. Enjoy making your trifle, and don’t be afraid to try new flavors!

Strawberry Shortcake Trifle Delightful and Easy Treat

Looking for a sweet treat that’s both delightful and simple to make? This Strawberry Shortcake Trifle is your answer! With

- Puff Pastry: What to Choose For this recipe, select a good-quality puff pastry. You can find it in the freezer section. Look for brands that use real butter. This will give your pastry a rich taste and flaky texture. Each package usually contains two sheets. Thaw them in the fridge overnight or for about 30 minutes at room temperature. - Fresh Spinach: Quantity & Preparation You need 2 cups of fresh spinach, finely chopped. Make sure to wash the spinach well to remove any dirt or grit. You can use baby spinach for a milder flavor, or regular spinach for a more robust taste. After washing, chop the leaves into small pieces. This helps the spinach cook evenly and fit well inside the pastry. - Feta Cheese: Types and Flavor Profiles For the best taste, use 1 cup of crumbled feta cheese. Feta can be made from sheep's milk, goat's milk, or cow's milk. Each type has a unique flavor. Sheep's milk feta is creamier, while goat’s milk feta offers a tangy bite. For a stronger flavor, look for feta that’s been aged longer. You can also try flavored feta, like those with herbs or spices, for a twist in your dish. This recipe combines these ingredients to create a delightful savory treat. For the full recipe, check the details above and get cooking! 1. Preheat your oven to 400°F (200°C). This hot temperature is key for a crispy crust. 2. Clear your kitchen space. Gather all your tools and ingredients, so you’re ready to cook. 1. In a large skillet, add 2 tablespoons of olive oil. Heat it over medium heat. 2. Add 1 small chopped onion. Sauté for about 3-4 minutes until it’s soft and clear. 3. Next, add 2 minced garlic cloves. Cook for 1 more minute until the garlic smells great. 4. Now stir in 2 cups of finely chopped spinach. Cook it for 2-3 minutes until it wilts. Then, remove the skillet from heat and let it cool. 1. On a floured surface, roll out the thawed puff pastry. Each package has 2 sheets, so you will get plenty of pastry. 2. Cut each sheet into quarters. This gives you 4 squares per sheet. 3. Spoon the cooled spinach and feta filling into the middle of each square. 4. Fold the corners of each square over the filling to form triangles or rectangles. Pinch the edges to seal them well. 1. Line a baking sheet with parchment paper. Place the filled pastries on it. 2. Brush the tops with the beaten egg. This helps them turn golden brown. 3. Optionally, sprinkle sesame seeds on top for extra crunch. 4. Bake in the oven for 20-25 minutes. Check for a golden brown color and puffiness. Following these steps will help you create a delicious and visually appealing dish. Be sure to check the [Full Recipe] for more tips and details. Enjoy your cooking! To get that golden brown finish, watch the egg wash. Brush it evenly on the pastry tops. This simple step gives your pastries a rich color. Bake them until they puff up and turn golden. This usually takes about 20-25 minutes at 400°F (200°C). Keep an eye on them towards the end to avoid burning. Balancing fillings is key. The feta cheese adds a salty note, while the spinach offers earthiness. Add salt and pepper to taste, but don’t go overboard. Too much salt can overwhelm the flavors. A teaspoon of dried oregano gives it a nice herbal touch. You’ll need a few tools for this recipe. A large skillet is great for sautéing. A mixing bowl helps combine your filling ingredients. Use a rolling pin to roll out the puff pastry smoothly. A baking sheet lined with parchment paper helps with easy cleanup. Avoid common mistakes by not overfilling the pastries. Leave some space at the edges to seal them well. If you don’t seal the edges tightly, the filling might leak out during baking. Also, make sure your oven is fully preheated. This helps the pastries cook evenly. For the full recipe, check the detailed instructions above. {{image_4}} Adding Other Greens: What Works You can mix in other greens for more flavor. Kale, Swiss chard, or arugula work well. Just chop them finely, like spinach. They add color and nutrients. You can also use herbs like parsley or dill for a fresh taste. Alternative Cheeses: Flavor Swaps Feta is great, but other cheeses can add fun twists. Try goat cheese for a tangy bite. Cream cheese gives a smooth texture. Cheddar adds a sharp flavor that many love. Mix and match to find your favorite combo! Ideal Pairings for Side Dishes These pastries shine with simple sides. A fresh salad with lemon dressing works perfectly. You can also serve them with a side of tzatziki for a cooling dip. Roasted vegetables add color and nutrition to your plate. Presentation Ideas for Events To impress guests, arrange the pastries on a colorful platter. Add fresh herbs around them for a pop of green. You can even sprinkle some sesame seeds on top for a nice touch. This makes your dish look as good as it tastes! To keep your savory spinach and feta puff pastry fresh, follow these tips: - Best Practices for Refrigeration: Let the pastries cool completely. Place them in an airtight container. Store them in the fridge for up to three days. If you expect to eat them later, avoid stacking them to keep them from getting soggy. - How to Reheat Without Losing Crispiness: Preheat your oven to 350°F (175°C). Place the pastries on a baking sheet. Heat for about 10-15 minutes. This method keeps the pastry crisp and the filling warm. Freezing is a great way to save your tasty puff pastries for later. - Proper Freezing Techniques: After baking, let the pastries cool completely. Wrap each pastry in plastic wrap. Then, place them in a freezer bag. You can freeze them for up to two months without losing quality. - Thawing and Cooking Frozen Pastry: When ready to eat, remove the desired number of pastries from the freezer. Thaw them in the fridge overnight. For a quick option, you can bake them straight from the freezer. Just add 5 more minutes to the baking time. This way, you'll enjoy delicious pastries any time! How to Make Puff Pastry from Scratch? Making puff pastry from scratch takes time and patience. You need flour, butter, salt, and water. Start by mixing flour and salt. Cut in cold butter until it looks like crumbs. Slowly add cold water to form a dough. Chill the dough, then roll it out. Fold it several times to create layers. Chill again, then roll out for use. Can I Use Frozen Spinach Instead of Fresh? Yes, you can use frozen spinach. It’s quick and easy. Just thaw the spinach first. Squeeze out excess water to avoid a soggy filling. Frozen spinach saves time, but fresh has a brighter taste. Choose based on what you have. What Are the Nutrition Facts for Savory Spinach and Feta Puff Pastry? This recipe serves eight. Each serving has about 200 calories. It contains protein, fiber, and vitamins from spinach and feta. Puff pastry adds carbs and fat. For exact nutrition, check the labels of your ingredients. How Long Do Leftovers Last in the Fridge? Leftovers last about three days in the fridge. Store them in an airtight container. Reheat in the oven to keep them crispy. You can also freeze them for up to a month. Just make sure they cool before freezing. For the full recipe, you can refer to the earlier sections. This blog post covered how to make a tasty spinach and feta puff pastry. You learned about key ingredients, the steps for cooking, and tips to enhance flavor. I shared ways to customize your filling and how to store leftovers properly. In summary, enjoy cooking this dish your way. Experiment with flavors and share it at gatherings. Cooking is fun, and each bite will bring smiles.

Savory Spinach and Feta Puff Pastry Delight Recipe

Looking for a quick and tasty snack? You’ll love this Savory Spinach and Feta Puff Pastry Delight Recipe! It’s easy

- 2 ripe avocados - 1/2 cup unsweetened cocoa powder - 1/4 cup pure maple syrup (or agave syrup) For this mousse, ripe avocados are key. They give it a creamy texture. The unsweetened cocoa powder adds rich chocolate flavor. Pure maple syrup, or agave syrup, gives sweetness. - 1/4 cup almond milk (or your preferred dairy-free milk) - 1 teaspoon vanilla extract - A pinch of salt Almond milk helps blend the mousse smoothly. Vanilla extract adds a warm flavor. A pinch of salt balances the sweetness. - Fresh berries - Crushed nuts - Toasted coconut flakes For a fun twist, add toppings! Fresh berries add color and freshness. Crushed nuts give a nice crunch. Toasted coconut flakes add a tropical touch. Check out the Full Recipe for more details on making this delightful dessert! To start, cut the ripe avocados in half. Be careful when using a knife. Next, remove the pits. You can do this by gently twisting the pit with a spoon. After that, scoop out the creamy flesh with a spoon. Place it in a food processor or a high-speed blender. This smooth base is key to your mousse. Now, it's time to blend! Add the unsweetened cocoa powder, pure maple syrup, almond milk, vanilla extract, and a pinch of salt to the avocado. Blend everything on high speed. You want a velvety smooth and creamy texture. If the mixture sticks to the sides, stop blending. Use a spatula to scrape it down. Blend again until it is silky and well combined. Taste the mousse! If you want it sweeter, add a bit more maple syrup. Blend for a few more seconds to mix it well. Once it’s perfect, spoon the mousse into individual bowls or glasses. Cover with plastic wrap and refrigerate for at least 30 minutes. This helps the mousse set and lets the flavors come together. For a fun touch, top with fresh berries, crushed nuts, or toasted coconut flakes before serving. Enjoy every luscious spoonful! For the full recipe, check out the instructions above. To achieve a smooth blend, start with ripe avocados. They should feel soft but not mushy. Cut them in half and remove the pits. Scoop the flesh into your blender. Use a high-speed blender or food processor for the best results. This helps create a velvety texture. Blend on high until you have a creamy consistency. If needed, stop to scrape down the sides. This ensures every part mixes well. For the best texture, make sure your ingredients are at room temperature. Cold almond milk can cool the mixture too much. If you use cold syrup, it may not blend as well. You can easily boost the flavor by trying different sweeteners. Maple syrup works well, but agave syrup is a great option too. Both add sweetness without dairy. Want to spice things up? Add a pinch of cinnamon or espresso powder. These add depth to the chocolate taste. Just a little can make a big change. When it comes to presentation, get creative! You can spoon the mousse into small cups or elegant glasses. This makes for a beautiful display. For fun portioning, use shot glasses for a bite-sized treat. This is perfect for parties or gatherings. Don’t forget to garnish your mousse! Fresh berries, crushed nuts, or toasted coconut flakes add a nice touch. These toppings not only look great but also enhance flavor. For the full recipe, check out the complete instructions. Enjoy this rich and creamy treat! {{image_4}} You can make this mousse even more delicious. Try adding almond or peanut butter to the mix. Just a couple of tablespoons will give your mousse a nutty twist. You can also switch up the milk. Use coconut or oat milk for a different flavor. Each option adds a unique taste that can change the whole dessert. If you want to make this mousse low-carb or keto-friendly, swap the maple syrup for a low-calorie sweetener. Erythritol or stevia works well for this purpose. For those needing a nut-free version, use sunflower seed butter instead of nut butter. This keeps the flavor rich while accommodating different diets. Seasonal fruits can elevate your mousse. Add fresh strawberries in the spring or pumpkin puree in the fall. Holiday-themed toppings, like crushed peppermint or cinnamon, can make this dessert festive. Get creative with your toppings to match the season. Each twist can bring new joy to this classic treat. For the full recipe, check out the [Full Recipe]. To keep your mousse fresh, store it in the refrigerator. Use airtight containers for best results. This prevents air from getting in and keeps the mousse creamy. Make sure the lid fits snugly. If you do not have a container, cover it tightly with plastic wrap. You should eat the mousse within three days. After that, it may lose its rich flavor and texture. Watch for signs of spoilage. If the mousse changes color or develops an odd smell, it's time to throw it away. Yes, you can freeze dairy-free chocolate avocado mousse! Place the mousse in an airtight container. Leave some space at the top for expansion. When you're ready to enjoy it, thaw in the fridge overnight. Avoid microwaving, as it can change the texture. Serve chilled for the best taste. For the full recipe, check out the earlier section. Yes, you can use chocolate. Choose dark chocolate that is dairy-free. Melt it first before adding it to the avocados. This change makes the mousse richer. However, it may add sweetness. Adjust the maple syrup if needed. Absolutely! This mousse is dairy-free. It uses avocados and dairy-free milk. The sweetener, maple syrup, is also vegan. This dessert fits well into vegan diets. It’s a perfect treat for everyone. To reduce sweetness, cut back on syrup. Add less than the recipe calls for. Taste as you blend. You can also use unsweetened cocoa powder. This adds flavor without extra sweetness. Try a pinch of sea salt to balance taste. Serve this mousse with fresh berries. Strawberries, raspberries, or blueberries add bright flavor. You can also use crushed nuts for crunch. Toasted coconut flakes bring a tropical twist. These add fun textures and flavors to your dessert. For the full recipe, check the main section above. This blog post covered how to make a yummy dairy-free chocolate avocado mousse. You learned about the main ingredients, tips for perfecting texture, and tasty variations. I shared ideas for storage and answered common questions. In summary, this mousse is not just easy to make, but also fun to customize. Try different flavors or toppings to find your favorite. Enjoy your delicious creation!

Dairy-Free Chocolate Avocado Mousse Rich and Creamy Treat

If you crave a rich and creamy dessert without dairy, you’re in for a treat! This Dairy-Free Chocolate Avocado Mousse

To make One-Pot Creamy Mushroom Pasta, you need fresh and tasty ingredients. Here’s what you will need: - 12 oz (340g) penne pasta - 8 oz (225g) fresh cremini mushrooms, sliced thinly - 1 medium yellow onion, diced finely - 3 cloves garlic, minced - 4 cups vegetable broth (preferably low-sodium) - 1 cup heavy cream (or a dairy-free alternative if desired) - 1 cup freshly grated Parmesan cheese (plus extra for garnish) - 2 tablespoons extra virgin olive oil - 1 teaspoon dried thyme (or 1 tablespoon fresh thyme, if available) - Salt and black pepper to taste - Fresh parsley, finely chopped (for garnish) Each ingredient adds depth and flavor to this dish. The cremini mushrooms give it an earthy taste. The heavy cream makes it rich and smooth. The Parmesan cheese adds a lovely cheesy flavor. Using fresh herbs, like thyme and parsley, enhances the dish. You can find the full recipe in this article to guide you through cooking this delightful meal. 1. Start by warming the olive oil in a large pot over medium heat. 2. Add the diced onion and sauté it for about 2-3 minutes. You'll know it's ready when it turns translucent and fragrant. 3. Next, add minced garlic and sliced cremini mushrooms. Cook this mix for 5-7 minutes. Stir occasionally until the mushrooms brown and become tender. 4. Once the mushrooms are ready, add the penne pasta to the pot. Pour in the vegetable broth, then sprinkle in the dried thyme. Season with salt and black pepper to taste. Stir everything until it’s well mixed. 1. Increase the heat to bring the mixture to a boil. 2. After it starts to boil, lower the heat and cover the pot. Let it simmer gently for 10-12 minutes. Stir it occasionally, so the pasta cooks evenly. It should be al dente and most of the liquid should be absorbed. 3. After the pasta is cooked, lower the heat even more. Gradually pour in the heavy cream. Stir thoroughly to mix it, creating a rich and creamy sauce. 1. Slowly add the freshly grated Parmesan cheese into the pot. Stir it until it melts and mixes smoothly into the sauce. 2. Taste the dish and adjust the seasoning if needed. Let it cook for another 1-2 minutes to ensure everything is well blended. 3. Remove the pot from the heat and let it sit for a couple of minutes. This allows the dish to thicken slightly before serving. For the full recipe, check out the complete instructions. Enjoy the rich and flavorful experience of making this one-pot creamy mushroom pasta! - Achieving the perfect mushroom sauté: Start by using fresh cremini mushrooms. Slice them thinly for even cooking. Heat olive oil in a pot until it's shimmering. Add the diced onion first, then the garlic. Cook until the onion turns soft. Finally, add the mushrooms. Sauté them until they are golden brown. This step brings out their rich flavor. - How to ensure creamy texture: To keep the sauce creamy, add the heavy cream slowly. Stir it well to coat the pasta. The cheese also helps with creaminess. Use freshly grated Parmesan cheese for the best results. - Adjusting flavors to taste: Taste your sauce before serving. If it needs more flavor, add a pinch of salt or black pepper. You can also add a bit more thyme if you like. Adjust the seasoning based on your preference. - Best dishes to pair with creamy mushroom pasta: This pasta pairs well with a simple green salad. A crisp Caesar salad also works nicely. You can serve it alongside garlic bread for a hearty meal. - Recommended wine pairings: A light white wine, like Pinot Grigio, complements this dish well. If you prefer red, try a light-bodied wine like Pinot Noir. Both enhance the flavors without overpowering them. - Presentation ideas for serving: For a beautiful presentation, serve the pasta in warm bowls. Garnish with fresh parsley and extra Parmesan cheese. A drizzle of olive oil adds a nice touch too. This makes the dish look as good as it tastes. For the full recipe, check out the One-Pot Creamy Mushroom Pasta. {{image_4}} You can easily adjust this recipe to fit your needs. Here are some ideas: - Pasta alternatives for dietary preferences: If you need gluten-free pasta, try using brown rice or chickpea pasta. They work well and taste great. - Dairy-free options for the creamy sauce: Use coconut cream or cashew cream instead of heavy cream. This keeps the dish rich and creamy without dairy. - Adding protein: chicken or shrimp ideas: For extra protein, add cooked chicken or shrimp. Just stir them in after you mix in the cream and cheese. To make your dish even more flavorful, consider these tips: - Additional herbs and spices for extra flavor: Try adding fresh basil or oregano. A pinch of red pepper flakes can also add a nice kick. - Incorporating vegetables for color and nutrition: Add spinach, peas, or bell peppers. They not only look good but also boost the dish's nutrition. - Vegan adaptations for the recipe: Use nutritional yeast instead of Parmesan for a cheesy flavor. This makes the dish completely plant-based. For the full recipe, you can follow the steps above and enjoy a rich, creamy mushroom pasta that suits your taste. To keep your one-pot creamy mushroom pasta fresh, store it in an airtight container. Glass or plastic containers work well. Make sure to let the pasta cool down before sealing it. This helps prevent steam buildup. Place the container in the fridge. This dish stays good for up to three days. When you want to enjoy your pasta again, you can reheat it in two ways. For quick reheating, use the microwave. Place the pasta in a bowl, then add a splash of water or cream. Cover it with a microwave-safe lid. Heat it in short bursts until warm. If you prefer the stove, heat a pan over low heat. Add the pasta and a little cream to keep it creamy. Stir often until it’s warm. This method helps keep the sauce smooth and delicious. Can I make this pasta dish ahead of time? Yes, you can prepare this dish a day ahead. Cook the pasta and sauce, then cool it. Store in the fridge in an airtight container. When ready to eat, reheat gently on the stove. How do I know when the pasta is al dente? Pasta is al dente when it has a firm bite. Test it by tasting a piece a minute or two before the cook time ends. It should not be hard but should have a slight resistance when bitten. What can I serve with one-pot creamy mushroom pasta? This pasta pairs well with a fresh salad. You can also serve garlic bread or roasted vegetables on the side for added flavors and textures. Can I freeze the leftover pasta? Yes, you can freeze the leftover pasta. Place it in an airtight container. It can last up to three months in the freezer. When you want to eat it, thaw it overnight in the fridge and reheat on the stove. What to do if the sauce is too thick? If your sauce is too thick, add a splash of vegetable broth or water. Stir well to combine and heat gently. This will help loosen the sauce back to a creamy state. How to fix overly salty pasta? If your pasta is too salty, add a little more cream. You can also mix in a small amount of unsalted broth. This helps balance the saltiness without losing the dish's flavor. Tips for preventing sticking during cooking To prevent sticking, stir the pasta every few minutes while it cooks. Make sure to use enough liquid, as this helps keep the pasta loose and free from clumping. In this blog post, I covered the ingredients and steps to make a creamy mushroom pasta. You learned how to sauté onions and garlic, brown mushrooms, and create a rich sauce. I shared handy tips for flavor and serving, along with variations and storage advice. Creamy mushroom pasta is a warm dish fit for any meal. Enjoy it your way!

One-Pot Creamy Mushroom Pasta Rich and Flavorful Dish

Do you crave a warm, rich dish that’s easy to prepare? One-pot creamy mushroom pasta is here to satisfy your

- 3 medium zucchinis - 1 cup fresh basil leaves - 1/2 cup pine nuts (toasted for enhanced flavor, if desired) - 2 cloves garlic, minced - 1/2 cup grated Parmesan cheese (or substitute with nutritional yeast for a vegan option) - 1/3 cup extra virgin olive oil - Sea salt and freshly cracked black pepper, to taste - 1 cup cherry tomatoes, halved - 1/4 teaspoon red pepper flakes (optional, for a spicy kick) Choosing the right ingredients makes a big difference. For zucchinis, look for firm ones with smooth skin. Pick basil leaves that are bright green and fragrant. When using pine nuts, choose fresh ones as they can quickly go stale. You can also try walnuts or almonds if you want some variety. Seasonal cooking is key. In summer, zucchinis are at their best. You can also swap cherry tomatoes for sun-dried tomatoes in the fall. This dish shines with fresh ingredients. Using what is in season often leads to the best flavors. For the full recipe, check out the details in the main article. To start, you need to spiralize the zucchinis. I love using a spiralizer because it makes perfect noodle shapes. Simply secure the zucchini and twist it through the device. If you don't have a spiralizer, no problem! You can use a vegetable peeler instead. Just slice the zucchini lengthwise to create long, flat ribbons. Next, let's make the pesto. Grab your food processor and add the fresh basil leaves, pine nuts, minced garlic, and grated Parmesan cheese. Toss in a pinch of sea salt and black pepper. Pulse the mixture until it's finely chopped. This step is crucial for blending the flavors well. Now, while the processor runs on low, slowly drizzle in the extra virgin olive oil. This helps the pesto become creamy. Keep blending until you reach your desired consistency. Taste it! Adjust the salt or pepper if needed. Now it's time to combine everything. In a large mixing bowl, add the spiralized zucchini noodles. Pour your freshly made pesto over the noodles. Gently toss them together until every noodle is well coated. This ensures every bite is packed with flavor. To add some freshness, toss in the halved cherry tomatoes. Mix them in gently again. If you like a little heat, sprinkle in some red pepper flakes. Serve the dish right away for the best taste and texture. Enjoy the vibrant flavors from this meal. For the full recipe, check out the detailed instructions provided earlier. To enhance your pesto, consider adding a splash of lemon juice. It brightens the flavor. If you want a nut-free option, try sunflower seeds instead of pine nuts. For a vegan twist, swap Parmesan cheese with nutritional yeast. This keeps the taste rich and savory without dairy. Zucchini can hold a lot of water. To avoid sogginess, sprinkle salt on the spiralized noodles. Let them sit for 10 minutes, then pat them dry. This step makes a big difference. For added protein, serve the noodles with grilled chicken or shrimp. You can also mix in other veggies like bell peppers or spinach. This adds color and nutrition to your dish. Enjoy your zucchini noodles with pesto as a light meal or a side dish. For a complete experience, check the Full Recipe for more details! {{image_4}} You can tweak the classic pesto recipe to match your taste. Try using different nuts. Walnuts, almonds, or cashews create unique flavors. Each nut brings its own twist, so experiment with what you like best. For cheese, you can switch Parmesan for pecorino or even a dairy-free option like nutritional yeast. Adding fresh herbs can also elevate your pesto. Mix in cilantro, parsley, or even mint for a fresh twist. These herbs can brighten your dish and add layers of flavor. Experiment with what’s available in your kitchen or garden. Zucchini noodles are just the start. You can use other vegetables to mix things up. Carrots, sweet potatoes, or butternut squash all spiralize well. Each choice adds a different texture and taste. If you want something heartier, consider whole grain or gluten-free pasta. Whole wheat pasta adds a nutty flavor and extra fiber. Gluten-free options like rice or chickpea pasta work too. They pair nicely with pesto and keep the dish light yet filling. For the full recipe, check out the Zesty Zucchini Noodle Paradise section. To store leftover zucchini noodles and pesto, use airtight containers. This keeps moisture out and helps maintain freshness. Place the noodles in one container and the pesto in another to avoid sogginess. Zucchini noodles last about 3 days in the fridge. Pesto can stay fresh for up to one week. To keep pesto vibrant, drizzle a thin layer of olive oil on top before sealing the container. This helps prevent browning. Freezing zucchini noodles and pesto is a great way to extend their shelf life. To freeze the noodles, spread them on a baking sheet. Place them in the freezer for about an hour. Once frozen, transfer them to a freezer bag. This method keeps them from clumping together. For pesto, pour it into ice cube trays. Once frozen, pop the cubes into a freezer bag. This allows you to use only what you need later. When you're ready to use them, thaw the zucchini noodles in the fridge overnight. For pesto, simply heat it gently on the stove. This helps maintain the flavor and texture of both ingredients. Yes, you can use regular pasta. Traditional pasta adds a chewy texture and familiar taste. It serves well in many dishes. However, it contains more carbs and calories. Zucchini noodles are low in carbs and great for light meals. They also add more veggies to your diet. You might miss the texture of pasta with zucchini noodles. It's best to try both and see which you prefer. Homemade pesto lasts about one week in the fridge. Store it in an airtight container to keep it fresh. You can cover the top with olive oil to prevent browning. If you want to keep it longer, freeze it in small portions. Pesto freezes well and can last for up to three months. Just thaw it in the fridge before use. If you don’t have a spiralizer, don’t worry. You can use a vegetable peeler. Slice the zucchini into thin, flat ribbons. You can also use a box grater for longer strips. Another option is to cut zucchini into small cubes. They won't look like noodles, but they will taste great. Each method gives a different shape, so try what you have! In this article, we covered how to make a delicious zucchini noodle dish with pesto. You learned about key ingredients, step-by-step instructions, and helpful tips for perfecting your meal. Remember to select fresh ingredients and experiment with variations. Proper storage is important for keeping leftovers fresh. Enjoy creating variations of your dish to suit your taste. With these tips, you can impress anyone with your healthy, flavorful meal. Making zucchini noodles and pesto is easy and fun. Get cooking and enjoy every bite!

Zucchini Noodles with Pesto Fresh and Flavorful Meal

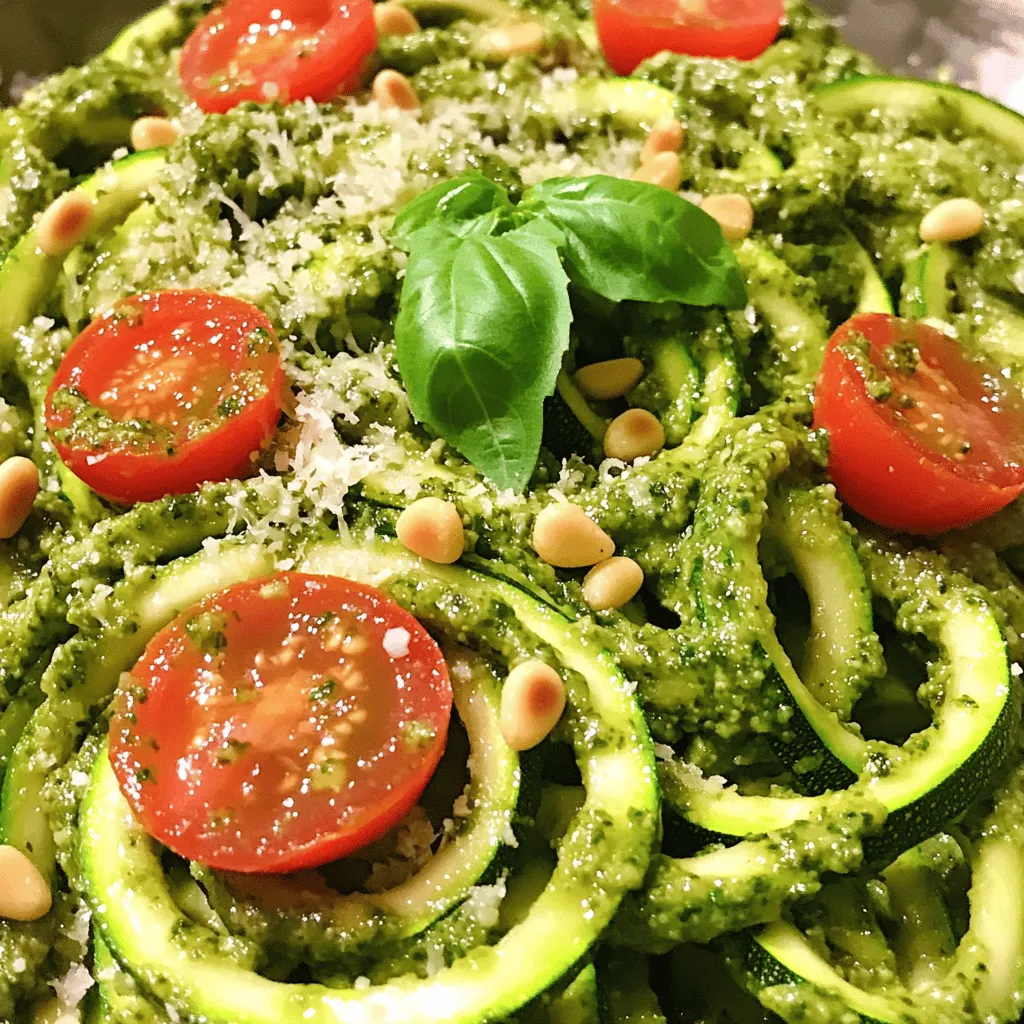
Looking for a fresh, tasty meal that’s quick and easy? Zucchini noodles with pesto are the perfect solution. You can

- 1 cup creamy peanut butter - 1/2 cup unsalted butter - 1 cup brown sugar - 1/2 cup granulated sugar - 2 large eggs - 1 teaspoon pure vanilla extract - 1 1/2 cups all-purpose flour - 1 teaspoon baking powder - 1/2 teaspoon fine salt - 1 cup chocolate chips Using fresh ingredients is key to great blondies. Fresh peanut butter gives a smooth texture and rich taste. I recommend brands like Jif or Skippy for creamy peanut butter. These brands blend well and taste amazing. For chocolate chips, go for semi-sweet or dark chips. Ghirardelli and Nestlé are both great choices. Their chocolate melts nicely and adds depth to your blondies. Always check the expiration dates on your ingredients. This ensures the best flavor and texture in your treats. - Preheat your oven to 350°F (175°C). - Prepare a 9x9 inch baking dish. Use butter to grease it or line it with parchment paper. This makes for easy removal later. - In a large mixing bowl, combine 1/2 cup softened unsalted butter with 1 cup creamy peanut butter. Use a hand mixer or a spatula to beat them together until smooth. The mix should look fluffy, like a creamy cloud. - Gradually add in 1 cup packed brown sugar and 1/2 cup granulated sugar. Mix until light and airy. - Add 2 large eggs, one at a time. Beat well after each egg for even mixing. Stir in 1 teaspoon pure vanilla extract to boost flavor. - In another bowl, whisk together 1 1/2 cups all-purpose flour, 1 teaspoon baking powder, and 1/2 teaspoon fine salt. This step helps the blondies rise evenly. - Slowly add the dry mix to the wet ingredients. Stir gently until just combined. Do not overmix; this keeps the blondies tender. - Carefully fold in 1 cup of chocolate chips. Make sure they spread throughout the batter. - Pour the rich batter into the prepared dish. Use a spatula to spread it evenly. - Bake for 25-30 minutes. The top should turn golden brown. To check if they’re done, insert a toothpick into the center. It should come out with a few moist crumbs. - Once baked, let them cool in the pan for about 10 minutes. Then move them to a wire rack to cool completely. - Cut into 16 squares. Enjoy your peanut butter chocolate chip blondies! They are ideal for sharing or enjoying alone. For the full recipe, refer to the earlier section. To make your blondies soft and chewy, use room temperature ingredients. This includes butter, eggs, and peanut butter. They mix better and create a smoother batter. When mixing, be gentle. Overmixing can make them tough. For a great presentation, serve blondies on a nice plate. You can dust them with powdered sugar for a fancy touch. They pair well with vanilla ice cream or a drizzle of chocolate sauce. A cup of milk or coffee makes a perfect drink choice. Avoid overbaking your blondies. Check them a few minutes early. A toothpick should come out with a few moist crumbs, not wet batter. Mix your ingredients evenly but avoid overmixing. This keeps your blondies light and fluffy. For a full recipe, click [Full Recipe]. {{image_4}} You can change up the flavors of your blondies. Try adding nuts like walnuts or pecans. They give a nice crunch and extra taste. You can also swap in white chocolate chips for a sweeter twist. If you're feeling adventurous, try swapping peanut butter for almond or cashew butter. This swap gives a new flavor and texture. Each nut butter brings its own charm to the dish, so have fun experimenting! If you need gluten-free blondies, use almond flour instead of regular flour. Almond flour gives a great texture and taste. It keeps the blondies soft and chewy. For those who follow a vegan diet, you can replace eggs with flaxseed meal or applesauce. Use 1 tablespoon of flaxseed meal mixed with 3 tablespoons of water for each egg. This will help bind the ingredients together. These modifications make the recipe more inclusive while keeping it tasty and fun. For the Full Recipe, check out the detailed instructions and enjoy baking! To keep your peanut butter chocolate chip blondies fresh, follow these tips: - Cool completely: Always let your blondies cool fully before storing. - Use an airtight container: Store them in a container with a tight seal. This keeps them soft. - Layer with parchment: If stacking, place parchment paper between layers to prevent sticking. - Room temperature: Keep them at room temperature for up to 4 days. For longer storage, consider refrigeration. This option can extend freshness for about a week. Freezing blondies lets you enjoy them later. Here’s how: - Wrap tightly: Use plastic wrap to wrap each blondie. You can also use aluminum foil. - Place in a container: Put the wrapped blondies in a freezer-safe container. - Label and date: Mark the container with the date so you know when to enjoy them. To thaw, take them out of the freezer and leave them at room temperature. For best texture, you can warm them in the microwave for a few seconds before eating. This brings back their soft, gooey goodness. Enjoy your treats whenever you crave them! Yes, you can use natural peanut butter, but it changes the blondies. Natural peanut butter has more oil and less sugar. This can make the texture more crumbly and less sweet. Creamy peanut butter blends better with the other ingredients. For best results, stick to creamy peanut butter. If your blondies turn out dry, try these tips: - Add moisture: Mix in extra peanut butter or a splash of milk. - Check baking time: Do not overbake them. The center should be soft. - Store properly: Keep them in an airtight container. This helps retain moisture. Blondies will stay fresh for about 3 to 5 days at room temperature. If you keep them in the fridge, they last about a week. Store them in an airtight container to keep them soft. Yes, you can double the recipe! Use a larger pan, like a 9x13 inch one. Make sure to check the baking time. It may take a few more minutes to bake through. Always test with a toothpick to see if they're done. For the full recipe, visit the [Full Recipe] link. This blog post shows you how to make perfect blondies. We discussed key ingredients, like creamy peanut butter and brown sugar. Quality matters, so use fresh and trusted brands. Follow the clear steps for mixing and baking to ensure great texture. Remember to store them properly, and they’ll stay fresh longer. With variations and tips, you can make these blondies your own. Enjoy the process, and let your creativity shine. Happy baking!

Peanut Butter Chocolate Chip Blondies Delightful Recipe

Are you ready for a sweet treat that combines the best of peanut butter and chocolate? These Peanut Butter Chocolate

To make a delicious Eggnog Cake, you need the following ingredients: - 2 cups all-purpose flour - 1 ½ teaspoons baking powder - ½ teaspoon baking soda - ½ teaspoon salt - 1 teaspoon ground nutmeg - 1 teaspoon ground cinnamon - ½ cup unsalted butter, softened to room temperature - 1 cup granulated sugar - 3 large eggs, at room temperature - 1 cup non-alcoholic eggnog - 1 teaspoon pure vanilla extract - 1 cup powdered sugar (for frosting) - 2 tablespoons unsalted butter, softened (for frosting) - 2 tablespoons non-alcoholic eggnog (for frosting) - Additional ground nutmeg for garnish If you have dietary restrictions, here are some alternatives: - Use gluten-free flour to make it gluten-free. - Substitute eggs with flaxseed meal or applesauce for a vegan option. - For a lower-sugar version, use a sugar substitute. When baking, it's crucial to measure ingredients accurately. Here are some helpful conversions: - 1 cup of all-purpose flour = 120 grams - 1 cup of granulated sugar = 200 grams - 1 stick of butter = 113 grams For the best results, use a kitchen scale. It ensures you get the right amount every time. When measuring flour, spoon it into the cup, then level it off with a knife. This method prevents packing, which can lead to dense cake. 1. Preheat the Oven: Set your oven to 350°F (175°C). 2. Prepare Cake Pans: Grease two 9-inch round cake pans with butter. Dust them with flour to avoid sticking. 3. Combine Dry Ingredients: In a bowl, whisk together the flour, baking powder, baking soda, salt, nutmeg, and cinnamon. Mix well and set aside. 4. Cream Butter and Sugar: In a large bowl, cream the softened butter and granulated sugar using an electric mixer. Mix on medium speed for about 3-4 minutes until light and fluffy. 5. Add Eggs and Vanilla: Add the eggs one at a time, mixing well after each. Pour in the vanilla extract and mix until combined. 6. Mix Wet and Dry Ingredients: Gradually add the dry mixture to the wet ingredients. Alternate with the eggnog. Start and end with the dry mix. Mix until just combined; do not over-mix. 1. Fill Cake Pans Evenly: Divide the batter between the prepared cake pans. Use a spatula to smooth the tops. 2. Bake the Cakes: Place the pans in the oven and bake for 25-30 minutes. Test for doneness by inserting a toothpick into the center; it should come out clean. 3. Cool the Cakes: After baking, let the cakes cool in the pans for 10 minutes. Then, turn them out onto wire racks to cool completely. 1. Mix the Frosting Ingredients: While the cakes cool, make the frosting. In a clean bowl, combine powdered sugar, softened butter, and eggnog. Whisk until smooth and creamy. 2. Achieve the Perfect Consistency: If the frosting is too thick, add a little more eggnog. If it’s too runny, add more powdered sugar. You want it spreadable but not watery. For the full recipe, check the details provided above. - How to avoid over-mixing: Mix the batter until just combined. Stop when no dry flour shows. This keeps your cake light and fluffy. - Ensuring cakes rise evenly: Use room temperature ingredients. This helps the batter mix well. Always level your cake pans with a spatula. - Techniques for smooth frosting application: Start with a crumb coat. This is a thin layer of frosting that seals in crumbs. Chill the cake before adding the final coat. - Ideas for decorating the cake: Use a piping bag for fun designs. Top with ground nutmeg or festive sprinkles for a cheerful look. - Best accompaniments for Eggnog Cake: Serve with whipped cream or vanilla ice cream. They add creaminess to each bite. - Pairing with beverages for holiday gatherings: Enjoy with hot cocoa or spiced cider. These drinks enhance the holiday spirit. {{image_4}} You can change the taste of your eggnog cake in fun ways. Adding chocolate gives it a rich twist. Just mix in some cocoa powder when you combine the dry ingredients. You can also add spices like ginger or cloves for a warm flavor. Fruits can make your cake even better. Try adding chopped apples or pears for a sweet touch. You can also add cranberries for a tart burst. Just make sure to adjust the liquid in your recipe to keep the cake moist. For those needing gluten-free options, you can swap all-purpose flour with a gluten-free blend. Look for blends that include xanthan gum for the best results. This keeps the cake fluffy and light. If you want a vegan cake, replace the eggs with flax eggs or applesauce. Use a plant-based eggnog for the liquid. For the frosting, swap butter with vegan butter and use non-dairy milk. This way, everyone can enjoy a piece! You can make your eggnog cake for any holiday. For Christmas, add festive decorations like holly or edible glitter. For Thanksgiving, consider using pumpkin spice in the batter. This gives it a seasonal touch. Creative decorations can also change the vibe of the cake. Use whipped cream for a fun topping or sprinkle nuts for crunch. You can find many ways to dress up your cake for any event. The choice is yours! For the full recipe, check out the details above. To keep your eggnog cake fresh, use a few simple tricks. First, let the cake cool completely. Wrap it tightly in plastic wrap or foil. This helps keep moisture in and prevents drying out. You can also place it in an airtight container. Store the cake in the fridge if you plan to eat it within a week. Recommended containers include glass or plastic cake domes. These allow you to see the cake while keeping it safe. If you use a cake box, make sure it is sealed well. This will help maintain its flavor and texture. If you want to save your eggnog cake for later, freezing is easy. Start by wrapping slices in plastic wrap. Make sure they are tightly sealed to avoid freezer burn. Then, place the wrapped slices in a freezer bag or an airtight container. Label the bag with the date for easy tracking. To thaw the cake, remove it from the freezer. Place it in the fridge overnight. If you're in a hurry, you can leave it on the counter for about 2-3 hours. This keeps the cake moist and tasty. Remember, thawed cake is best enjoyed within a few days for the best flavor. For the full recipe, check out the details above. Enjoy your delicious eggnog cake! What is Eggnog Cake? Eggnog cake is a festive dessert that tastes like classic eggnog. It usually has flavors of nutmeg and cinnamon. The cake is moist and rich, perfect for holiday gatherings. Can I use store-bought eggnog? Yes, you can use store-bought eggnog. It saves time and works well in the recipe. Just ensure it's non-alcoholic if you want a family-friendly cake. Why did my cake sink in the middle? A cake may sink if it is underbaked. Make sure to bake until a toothpick comes out clean. It can also sink if you open the oven too soon. What can I do if my frosting is too runny? If your frosting is too runny, add more powdered sugar. Mix until you reach a thicker consistency. You can also chill it for a few minutes to help it set. How long can Eggnog Cake sit out? Eggnog cake can sit out for up to two hours. After that, refrigerate it to keep it fresh. Tips for serving at room temperature vs. chilled Serving at room temperature brings out the flavors. Chilled cake is refreshing and easy to slice. I recommend trying both ways to see which you prefer. Eggnog Cake is a festive treat, perfect for holidays. We covered ingredients, including alternatives for diets. Accurate measurements help ensure great results every time. I detailed each baking step, from mixing to frosting. Helpful tips will prevent common mistakes and elevate your cake. Remember, you can customize flavors and themes to match any celebration. Store your cake right, and it will taste fresh longer. Whether serving or freezing, follow the steps for success. Enjoy making and sharing this delightful dessert with loved ones.

Eggnog Cake Delightful Holiday Dessert Recipe

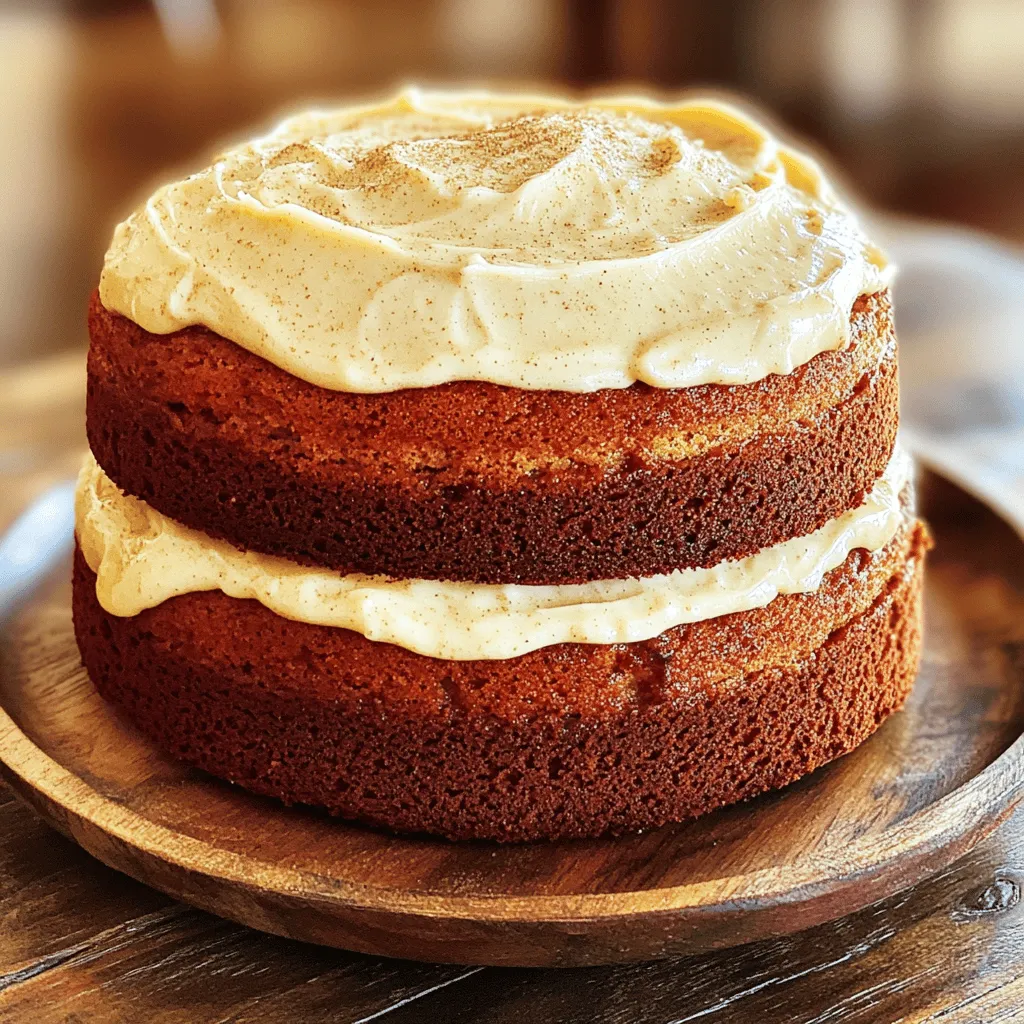
Are you ready to spice up your holiday dessert table? My Eggnog Cake recipe is here to impress! It’s rich,

To make crispy garlic Parmesan potatoes, gather these key ingredients: - Baby potatoes - Garlic - Parmesan cheese - Olive oil - Oregano, paprika, salt, and pepper - Fresh parsley for garnish Baby potatoes are great because they cook quickly and have a creamy texture. Garlic adds a strong flavor that pairs well with the cheese. Freshly grated Parmesan cheese gives the dish a rich taste and crispy texture. Olive oil helps the potatoes roast nicely and adds healthy fats. For seasoning, oregano and smoked paprika add warmth and depth. Salt and pepper enhance all the flavors. Finally, fresh parsley brings a pop of color and freshness to your dish. You can find the Full Recipe for detailed steps on how to prepare and cook these potatoes! First, preheat your oven to 425°F (220°C). This step is key for crispy potatoes. Next, line a large baking sheet with parchment paper. This makes cleanup easy and prevents sticking. In a big mixing bowl, add the halved baby potatoes. Then, add the minced garlic, olive oil, dried oregano, smoked paprika, salt, and pepper. Toss everything well until the potatoes are fully coated. This ensures every bite is full of flavor. Now, transfer the seasoned potatoes onto your prepared baking sheet. Spread them out in a single layer. This helps them cook evenly and get crispy. Place the baking sheet in the oven and roast the potatoes for about 25 minutes. This initial roasting time gets the potatoes tender and starts the golden color. After 25 minutes, take the baking sheet out of the oven. Sprinkle the grated Parmesan cheese evenly over the warm potatoes. This cheese will melt and turn golden brown. Return the baking sheet to the oven for another 10-15 minutes. Keep an eye on them until the cheese is bubbly and the potatoes are crispy. Once done, let them cool for a few minutes. Finish with a sprinkle of fresh parsley for color and taste. Enjoy your delicious crispy garlic Parmesan potatoes! For the Full Recipe, check the complete details. To get those potatoes nice and crispy, spread them out in a single layer. This allows hot air to circulate around each piece and helps them cook evenly. I recommend roasting the potatoes for about 25 minutes first. After that, add the Parmesan cheese and roast for an extra 10 to 15 minutes. This method gives you that perfect golden-brown crust. Want to take your potatoes up a notch? Try adding some extra seasonings. A pinch of garlic powder or a dash of cayenne can add a nice kick. Fresh herbs like rosemary or thyme can also make a big difference. Just toss them in with the potatoes before baking for a fresh burst of flavor. One common mistake is overcrowding the baking sheet. If the potatoes are too close together, they will steam instead of roast. This can lead to soggy potatoes. Also, make sure to preheat your oven before baking. A hot oven is crucial for that crispy texture. Following these tips will help you create perfect crispy garlic Parmesan potatoes every time! If you want to see the Full Recipe, check out the earlier section. {{image_4}} You can change the taste of crispy garlic Parmesan potatoes easily. Try adding different cheeses like mozzarella or cheddar for a new twist. Each cheese brings a unique flavor. You can also mix in herbs like rosemary or thyme. These herbs add freshness and depth to the dish. Just chop them finely and toss them with the potatoes. Making this dish gluten-free is simple. The ingredients do not contain gluten, so you can enjoy it without worry. If you want a vegan version, swap the Parmesan cheese for nutritional yeast or a plant-based cheese. Both options give a cheesy flavor without dairy. Crispy garlic Parmesan potatoes pair well with many proteins. They go great with grilled chicken or steak. You can also serve them with fish for a lighter meal. For dips or sauces, consider garlic aioli or creamy ranch. These add a fun touch and enhance the flavors. To keep your crispy garlic Parmesan potatoes fresh, place them in an airtight container. Make sure they cool down first. This way, they won’t steam and lose their crispiness. They can last in the fridge for about three days. After that, they might not taste as good. When you want to enjoy leftovers, reheating is key. The best method is to use the oven. Preheat the oven to 375°F (190°C). Spread the potatoes on a baking sheet. This helps them stay crispy. Heat them for about 10 to 15 minutes. You can also use an air fryer. It works great for retaining that crunch. If you want to freeze the potatoes, start by letting them cool completely. Then, place them in a single layer on a baking sheet. Freeze them for about an hour. After that, transfer them to a freezer-safe bag or container. They can stay in the freezer for up to a month. To thaw, place them in the fridge overnight. After thawing, reheat them in the oven for best results. For crispy garlic Parmesan potatoes, I recommend using baby potatoes. They have a thin skin and cook evenly. Other good options include Yukon Gold and red potatoes. These types create a lovely, crispy outside and a soft inside. Yes, you can prep the ingredients ahead of time. Cut the baby potatoes and mix them with olive oil, garlic, and spices. Store the mix in the fridge for up to a day. This way, when you are ready, you can quickly roast them without much fuss. To avoid soggy potatoes, make sure to spread them out in a single layer. Do not overcrowd the baking sheet. This allows hot air to circulate around each potato. Also, preheating the oven is key. A hot oven helps to crisp them up quickly. You can access the Full Recipe for crispy garlic Parmesan potatoes online. It includes all the steps and details to help you create this tasty dish. This blog post provided a simple guide to roasting baby potatoes that are crispy and flavorful. We covered the essential ingredients, preparation steps, and roasting process. I also shared tips for achieving the perfect texture and flavor modifications. Remember to avoid common mistakes like overcrowding the baking sheet and not preheating the oven. With just a few adjustments, you can enjoy delicious roasted potatoes that fit your dietary needs. Get creative with the recipe and enjoy every bite!

Crispy Garlic Parmesan Potatoes Easy and Flavorful Dish

If you crave a side dish that’s easy to make and packed with flavor, you’re in the right spot! Crispy

To make Cheese Pizza Monkey Bread, you need a few simple ingredients. Here is the list: - 2 cans of refrigerated biscuit dough (16 oz each) - 1 cup shredded mozzarella cheese - 1 cup pizza sauce, plus extra for dipping - 1/2 cup sliced pepperoni (optional) - 1 teaspoon Italian seasoning - 1/4 teaspoon garlic powder - 1/4 cup unsalted butter, melted - 1/4 cup grated Parmesan cheese - Fresh basil leaves for garnish (optional) The biscuit dough serves as the base for our monkey bread. I love using mozzarella cheese for its meltiness. The pizza sauce adds a nice tangy flavor, while pepperoni gives it that classic pizza taste. You can also sprinkle some herbs for extra flavor. Each ingredient plays a role in making this dish tasty and fun to share. For a full recipe, check out the detailed steps. 1. Preheat the oven: Start by setting your oven to 350°F (175°C). 2. Prepare the bundt pan: Grease the bundt pan with cooking spray or melted butter. This helps prevent sticking. 3. Cut the biscuit dough: Open the cans of biscuit dough. Cut each biscuit into four equal pieces. 1. Combine biscuit pieces: In a big bowl, mix the biscuit pieces with shredded mozzarella cheese, pepperoni (if you want), Italian seasoning, and garlic powder. Toss gently to coat everything well. 2. Prepare the butter and Parmesan mixture: In another bowl, whisk together melted butter and grated Parmesan cheese until mixed evenly. 1. Layer the biscuit mixture: Take each biscuit piece and dip it in the butter-Parmesan mix. Layer the coated pieces in the bundt pan, pressing them down gently. 2. Pour the pizza sauce: After layering, pour pizza sauce over the top. Make sure to cover all the biscuit pieces. Now, you’re ready to bake! For the full recipe, check the details provided. To get the best out of your cheese pizza monkey bread, aim for a baking time of 30 to 35 minutes at 350°F (175°C). This temperature helps the bread bake evenly. Keep an eye on it in the last few minutes. You want a golden brown top. This shows the dough is fully cooked. To ensure even cooking, make sure your biscuit pieces are similar in size. Cutting them into quarters helps with this. Layer them gently in the bundt pan. This allows heat to circulate well, promoting even browning. For dipping, pizza sauce is a classic choice. You can also try spicy marinara for a kick. Creamy ranch dressing pairs well too. It adds a nice contrast to the savory bread. To make your dish look appetizing, consider garnishing with fresh basil leaves. They add color and a fresh flavor. You can also sprinkle some extra Parmesan on top right before serving. One common mistake is overmixing your ingredients. This can lead to tough dough. Mix just until the biscuit pieces are coated with cheese and seasonings. Another mistake is not greasing the pan well. A well-greased bundt pan ensures your monkey bread comes out easily. Use cooking spray or melted butter, and coat every inch of the pan. This step is crucial for easy removal. {{image_4}} You can change the flavors in cheese pizza monkey bread. For a vegetarian option, try mixing different cheeses. Use mozzarella, cheddar, or even goat cheese. Add veggies like bell peppers, mushrooms, or olives for color and taste. If you want a spicy kick, slice up some jalapeños. You can also add spicy sausage for more heat. These changes make your monkey bread fun and exciting. Want to serve cheese pizza monkey bread in a new way? Try making mini versions in muffin tins. They bake faster and are easy for kids to grab. Another fun idea is to make it pull-apart style. Use different herbs and spices, like oregano or red pepper flakes, for extra flavor. This way, everyone can enjoy their own piece of cheesy goodness. You don’t need to stick to one type of dough. Experiment with different types of bread, like soft baguette or even pizza dough. This can change the texture and flavor. For sauces, you can use Alfredo or pesto instead of pizza sauce. Feel free to mix and match toppings too. Think about adding artichokes, sun-dried tomatoes, or even bacon. These swaps let you create a unique dish each time. To keep your cheese pizza monkey bread fresh, store it in the fridge. Place the leftovers in an airtight container. This keeps moisture in and prevents it from drying out. You can also wrap it tightly in plastic wrap or aluminum foil. This method helps maintain its soft texture. For long-term storage, consider freezing the monkey bread. Allow it to cool completely before wrapping it. Use plastic wrap followed by aluminum foil to protect it from freezer burn. This way, you can enjoy it later without losing taste or texture. When you want to enjoy your leftover monkey bread, reheating is key. You can use the oven, microwave, or air fryer. Each method has its perks. - Oven: Preheat it to 350°F (175°C). Place the bread on a baking sheet. Cover it with foil to keep it from drying out. Heat for about 10-15 minutes, or until warm. - Microwave: Place a piece on a microwave-safe plate. Heat for 20-30 seconds. Check if it's warm enough. Add a few seconds if needed. - Air Fryer: Set it to 300°F (150°C). Heat for about 5-7 minutes. This keeps it crispy on the outside while warm inside. To maintain the best texture, avoid reheating for too long. This keeps the bread from becoming tough or chewy. Enjoy your flavorful cheese pizza monkey bread just as much as the first time! Cheese pizza monkey bread is a fun twist on classic pizza. It combines bite-sized pieces of biscuit dough with gooey cheese and savory pizza sauce. This dish is unique because it’s not just a pizza; it’s a shareable snack that you can pull apart. Each piece brings a cheesy burst of flavor, making it perfect for parties or family dinners. The blend of seasonings adds depth to the taste, while the melted cheese keeps it oh-so-delicious. Yes, you can make this recipe gluten-free! Look for gluten-free biscuit dough at your local store. Many brands offer tasty options that work well in this recipe. Just follow the same steps with the gluten-free dough. It will still taste great and satisfy your pizza cravings without the gluten. You can tell the monkey bread is done by its golden brown top. The edges should look crispy and the dough inside should not be raw. You can also insert a toothpick in the center. If it comes out clean, it’s ready to eat. Keep an eye on it during the last few minutes of baking to avoid overcooking. Cheese Pizza Monkey Bread combines easy-to-make biscuit dough with your favorite pizza flavors. You’ve learned how to mix, layer, and bake it perfectly. Remember to avoid common mistakes for great results. You can also try variations for new tastes or serving ideas. Whether you share it as a snack or meal, this dish brings fun to the table. Enjoy your cooking and the delicious bites ahead!

Cheese Pizza Monkey Bread Tasty and Simple Recipe

Craving something fun and cheesy? Let me introduce you to Cheese Pizza Monkey Bread. This simple recipe combines bite-sized biscuit

- 1 package (8 oz) refrigerated crescent roll dough - 1 cup fresh or frozen wild blueberries - 4 oz cream cheese, softened to room temperature - 2 tablespoons granulated sugar - 1/4 cup powdered sugar - 1/2 teaspoon ground cinnamon - Baking sheet - Parchment paper - Mixing bowls When I create Wild Blueberry Coffee Cake Danishes, I focus on simple yet tasty ingredients. The refrigerated crescent roll dough serves as a flaky base. It puffs up beautifully in the oven, giving each Danish a light texture. Wild blueberries add a burst of flavor. They are sweet and slightly tart, which makes them perfect for this recipe. Cream cheese brings a creamy richness that complements the fruit well. While the main ingredients are key, optional ingredients can enhance the flavor. Granulated sugar adds sweetness to the blueberries. Powdered sugar is great for a light dusting on top after baking. Ground cinnamon adds warmth and a lovely aroma. For equipment, I recommend using a baking sheet lined with parchment paper. This prevents sticking and helps with cleanup. Mixing bowls are essential for combining your filling and cream cheese mixture effectively. Using fresh ingredients makes a big difference. Always choose the best blueberries you can find. If using frozen blueberries, ensure they are thawed and drained. This keeps your Danishes from getting soggy. If you want the full recipe, be sure to check that out! - Preheat the oven to 375°F (190°C). - Line a baking sheet with parchment paper. This helps keep the danishes from sticking. - In a bowl, combine 1 cup of wild blueberries, 2 tablespoons of granulated sugar, 1 teaspoon of fresh lemon juice, and 1/2 teaspoon of ground cinnamon. Mix well. - In another bowl, blend 4 oz of softened cream cheese, 1/4 cup of powdered sugar, and 1 teaspoon of vanilla extract. Whisk until smooth. - Open the crescent roll dough and place it on a floured surface. Unroll it and pinch the seams together. - Cut the dough into 4 equal squares. Each square will hold your filling. - Take a spoonful of cream cheese mixture and place it in the center of each square. - Add a spoonful of blueberry filling on top of the cream cheese. - Fold each corner of the dough square towards the center, creating a pocket. Pinch the edges to seal them tight. - Place the danishes on the lined baking sheet. Brush the tops with a beaten egg for a nice shine. - Bake for 15-20 minutes until they are golden brown. Keep an eye on them to avoid burning. - Once baked, drizzle melted butter over the danishes for extra flavor. - Let them cool slightly before serving. Enjoy your warm, tasty danishes. For the full recipe of Wild Blueberry Coffee Cake Danishes, check the detailed instructions above. To seal the danishes well, pinch the corners tightly. This keeps the filling inside while baking. Make sure to press down firmly. If any filling oozes out, it may burn. For preventing sogginess from blueberries, drain any excess juice if using frozen ones. If you use fresh blueberries, pat them dry with a paper towel. This helps keep the dough crisp. You can add spices or zest to boost the taste. Try mixing in a pinch of nutmeg or a teaspoon of lemon zest. These flavors pair well with blueberries and cream cheese. Baking techniques also matter. To achieve a golden color, set your oven to the correct temperature. Rotate the baking sheet halfway through to ensure even cooking. Enjoy your danishes warm for the best taste. They are perfect for breakfast or as a snack. Pair them with coffee or tea for a delightful treat. The sweet flavor of the danishes goes well with a rich cup of coffee or a soothing cup of tea. For the full recipe, check out the complete instructions provided earlier. {{image_4}} You can get creative with your Wild Blueberry Coffee Cake Danishes. Swap wild blueberries for other berries. Raspberries or strawberries work great. Each berry brings its own taste. You can also add nuts like walnuts or pecans for crunch. Chocolate chips can add a sweet twist. Just sprinkle a few on top of the cream cheese. If you need gluten-free options, use alternative dough. Look for gluten-free crescent roll dough at the store. For a vegan version, replace cream cheese with a plant-based option. You can find vegan cream cheese in many grocery stores. This way, everyone can enjoy these tasty danishes. Embrace the seasons by adding different flavors. In the fall, try using pumpkin spice in your cream cheese. It adds warmth and coziness. During summer, mix in lemon zest or fresh herbs like mint. These flavors brighten up the danishes and make them refreshing. Each season brings new ideas to your kitchen! For the full recipe, check out the cooking instructions above. Enjoy experimenting! To keep your danishes fresh, store them in an airtight container. Place the container in the fridge. This helps seal in moisture and flavor. The danishes will stay fresh for about 2 to 3 days. If you want longer storage, consider freezing them. To enjoy your danishes warm, reheat them in the oven. Set the oven to 350°F (175°C). Place the danishes on a baking sheet. Heat them for about 10 minutes. This method keeps the pastry crisp. Avoid microwaving, as it can make them soggy. You can freeze these danishes before or after baking. If freezing before baking, assemble the danishes and place them on a baking sheet. Cover with plastic wrap and freeze until firm. Then transfer to a freezer bag. For baking later, bake from frozen, adding a few extra minutes to the time. If you freeze them after baking, let them cool first. Wrap each danish in plastic wrap and put them in a freezer bag. To thaw, leave them in the fridge overnight. Reheat in the oven for best results. For full details, refer to the Full Recipe. Wild blueberry coffee cake danishes stay fresh for about 2-3 days. Store them in an airtight container at room temperature. If you want them to last longer, you can refrigerate them. They may lose some crispness in the fridge. Reheat them in the oven for the best taste. Yes, you can definitely use frozen blueberries. Just make sure to thaw them completely first. Drain any excess juice to avoid a soggy filling. This way, your danishes will still turn out delicious and flavorful. If you need a cream cheese substitute, try using Greek yogurt. It adds creaminess and a nice tang. You can also use mascarpone cheese or a dairy-free alternative if needed. Adjust the sugar to taste, as some substitutes can be sweeter. You can prepare the filling and dough ahead of time. Assemble the danishes, then cover and chill them in the fridge. Bake them fresh when you’re ready to enjoy. This method keeps them nice and warm for serving. These danishes are best served warm. Pair them with a hot cup of coffee or tea. You can also dust them with powdered sugar for extra sweetness. They make a lovely treat for brunch or a cozy afternoon snack. You now have a clear path to create delicious Wild Blueberry Coffee Cake Danishes. We covered ingredients, equipment, and step-by-step instructions, making it easy to follow along. Remember the tips for sealing the dough and preventing sogginess. Also, feel free to get creative with flavors and variations. These danishes pair well with coffee and can be stored for later. Enjoy your baking adventure!

Wild Blueberry Coffee Cake Danishes Savory Delight

Looking for a tasty treat to brighten your morning? Wild Blueberry Coffee Cake Danishes blend rich flavors and a fun

Older posts
Newer posts
← Previous Page1 … Page25 Page26 Page27 … Page43 Next →

dsad

© 2025 dailydishcraft • Built with GeneratePress

Our Policies

  • Copyright Policy
  • Cookie Policy
  • GDPR Policy
  • Privacy Policy
  • Disclaimer
  • Terms Of Use

More Information

  • Home
  • About
  • Contact
  • Appetizers
  • Dessert
  • Dinner
  • Drinks
©2025, dailydishcraft About Back To Top