Skip to content
DisclaimerTerms Of UseGDPR PolicyCookie Policy

dailydishcraft

  • Home
  • Drinks
  • Appetizers
  • Dinner
  • Dessert
  • About
  • Contact
  • Privacy Policy
DisclaimerTerms Of UseGDPR PolicyCookie Policy

Jessica

- 3 cups shredded unsweetened coconut - 1 cup sweetened condensed milk - 2 large egg whites These three main ingredients make the base of our coconut macaroons. The shredded coconut gives each cookie that classic chewy texture. Sweetened condensed milk adds richness and sweetness. The egg whites help bind everything together, creating a light and airy feel. - 1/2 cup dark chocolate chips - 1 teaspoon pure vanilla extract - 1/4 teaspoon fine sea salt Adding dark chocolate chips gives a lovely contrast to the coconut's sweetness. A hint of vanilla extract enhances the flavor. A pinch of sea salt balances the sweetness, making every bite more exciting. - Mixing bowls - Electric mixer - Baking sheet with parchment paper You need a few simple tools to make these cookies. Mixing bowls help you combine the ingredients. An electric mixer whips the egg whites, making them fluffy. A baking sheet lined with parchment paper prevents sticking and makes cleanup easy. You can find the Full Recipe to make these delicious treats in the article. First, preheat your oven to 325°F (160°C). This temperature helps the macaroons bake evenly. Next, line your baking sheet with parchment paper. This step prevents the macaroons from sticking to the sheet and makes cleanup easier. In a large bowl, combine 3 cups of shredded coconut, 1 cup of sweetened condensed milk, and 1 teaspoon of pure vanilla extract. Add 1/4 teaspoon of fine sea salt. Mix everything well until the coconut is fully coated. This mixture will be the heart of your macaroons. In another bowl, whip 2 large egg whites with 1/4 teaspoon of cream of tartar. Beat them until stiff peaks form. This process usually takes about 3 to 5 minutes. The fluffy egg whites add air to the mix. It is important to fold them in gently to keep the airiness intact. Using a cookie scoop or spoon, drop heaping tablespoons of the mixture onto your prepared baking sheet. Make sure to leave about 1 inch between each blob. Bake them in the oven for 15 to 20 minutes. You want them to turn a lovely golden brown. Once baked, let them cool on the sheet for 5 minutes before transferring them to a wire rack. For an added touch of joy, you can drizzle melted dark chocolate on top once they cool. Enjoy making these delightful treats! For the complete recipe, see the Full Recipe. To get chewy coconut macaroons, you must fold gently. This keeps the egg whites airy. If you mix too hard, your cookies will flatten. Also, monitor your oven temperature. If it’s too hot, your macaroons will brown too fast. Use an oven thermometer to be sure. Garnishing your macaroons can make them look fancy. You can drizzle melted dark chocolate on top. It adds a nice touch! Serve them on a decorative plate. Toss in some fresh mint leaves or a sprinkle of shredded coconut. This makes your treats even more appealing. One common mistake is not separating egg whites properly. This can lead to flat cookies. Make sure no yolk gets in the whites. Another mistake is overmixing. If you mix too much after folding, your macaroons will lose their fluff. Be gentle and mix just until combined. For the Full Recipe, check out the Coconut Cloud Macaroons. Enjoy baking! {{image_4}} To add a sweet touch, you can drizzle chocolate on your macaroons. Here’s how: 1. Melt dark chocolate chips in the microwave, stirring often. 2. Once melted, use a fork to drizzle over the cooled macaroons. If you want to mix it up, consider using: - White chocolate for a sweeter taste. - Milk chocolate for creaminess. - Dark chocolate for a rich flavor. You can make these macaroons even more special with flavor add-ins. Try using: - Almond extract for a nutty twist. - Coconut extract for an extra coconut boost. You can also add nuts or dried fruits. Consider: - Chopped almonds for crunch. - Dried cherries for a tart kick. - Raisins for extra sweetness. If you follow a specific diet, you can still enjoy these cookies. Here are some options: - For gluten-free macaroons, ensure all ingredients are gluten-free. - If you need vegan substitutes, use aquafaba instead of egg whites. Aquafaba is the liquid from canned chickpeas and works well. These simple changes let everyone enjoy your coconut macaroon cookies. To keep your coconut macaroons fresh, store them in airtight containers. This prevents air from making them dry. You can keep them at room temperature for up to five days. If you want to keep them longer, place them in the fridge. Just remember, refrigeration can change their texture a bit. If you want to enjoy these treats later, freezing works well. First, let the macaroons cool completely. Then, place them in a single layer on a baking sheet. Freeze them for about an hour. Once firm, transfer them to a freezer-safe bag or container. Make sure to remove as much air as possible. For best taste, eat them within three months. To thaw, just leave them at room temperature for about 30 minutes. Coconut macaroons can last up to one week at room temperature. If stored in the fridge, they can stay fresh for around two weeks. Keep an eye out for signs of spoilage. If they become hard or develop an off smell, it’s time to toss them. Enjoy your homemade coconut macaroons at their best! Coconut macaroon cookies are sweet treats made from coconut, egg whites, and sweetened milk. They have a chewy texture and a rich, sweet flavor. The outside is slightly crisp, while the inside is soft and moist. The taste of coconut shines through, making them a favorite for many. You can enjoy them plain or drizzled with chocolate for extra delight. Yes, you can make coconut macaroons ahead of time. To prepare them in advance, follow these tips: - Mix the coconut mixture and form the cookies. - Place them on a baking sheet and freeze until solid. - Once frozen, transfer them to an airtight container. - You can bake them fresh when needed. This way, they stay fresh and delicious. To keep your macaroons from spreading, follow these key steps: - Ensure your egg whites are whipped to stiff peaks. - Fold the egg whites gently into the coconut mixture. - Use a cookie scoop to maintain their shape. - Space them out on the baking sheet. This helps them stay round and fluffy while baking. You can find the Full Recipe for Coconut Cloud Macaroons [here](#). Enjoy making these delightful treats! Coconut macaroon cookies are simple yet delicious treats made with a few key ingredients. You can customize them with optional toppings like chocolate or nuts. Remember to handle your egg whites gently and monitor your oven closely. Store your macaroons in an airtight container to keep them fresh. With a bit of practice, you can create the perfect coconut macaroon. Enjoy sharing these delightful cookies with friends and family!

Coconut Macaroon Cookies Perfectly Chewy Delight

Are you ready to indulge in a sweet treat that’s both soft and chewy? Coconut Macaroon Cookies are a delightful

To make these delightful cupcakes, gather the following ingredients: - 1 cup all-purpose flour - 1/2 teaspoon baking powder - 1/2 teaspoon baking soda - 1/4 teaspoon salt - 1 tablespoon pumpkin spice blend (a mix of cinnamon, nutmeg, ginger, and allspice) - 1/2 cup unsalted butter, softened to room temperature - 1 cup granulated sugar - 2 large eggs, at room temperature - 1/2 cup pure pumpkin puree - 1/2 cup brewed coffee, cooled to room temperature - 1 teaspoon vanilla extract - 1/4 cup milk (or a dairy-free alternative, such as almond or oat milk) For the frosting, you will need: - 1/2 cup cream cheese, softened to room temperature - 1/4 cup unsalted butter, softened to room temperature - 2 cups powdered sugar - 1 tablespoon brewed coffee To make your cupcakes extra special, consider these garnishes: - Additional pumpkin spice blend for garnish - Cute fall-themed sprinkles - Edible gold stars for a touch of magic These ingredients create a warm and cozy flavor. Each bite offers the taste of fall. Enjoy the sweet and spicy notes of pumpkin and coffee together. For the full recipe and detailed instructions, check the [Full Recipe]. First, preheat your oven to 350°F (175°C). This helps the cupcakes bake evenly. Next, line a muffin tin with cupcake liners. This step makes it easy to remove the cupcakes later. In a medium bowl, mix the dry ingredients. Combine 1 cup of all-purpose flour, 1/2 teaspoon of baking powder, 1/2 teaspoon of baking soda, 1/4 teaspoon of salt, and 1 tablespoon of pumpkin spice blend. Whisk these together until they are well blended. Set this bowl aside. In a large mixing bowl, cream together 1/2 cup of softened unsalted butter and 1 cup of granulated sugar. Use a hand mixer on medium speed. Mix for about 3-4 minutes, until the mixture looks light and fluffy. This step is key for a nice texture. Add 2 large eggs to the butter and sugar mixture, one at a time. Mix well after each addition. Then, gently fold in 1/2 cup of pure pumpkin puree, 1/2 cup of cooled brewed coffee, and 1 teaspoon of vanilla extract. Mix until everything is smooth. Now, gradually add the dry ingredients. Alternate with 1/4 cup of milk, starting and ending with the dry mix. Mix just until combined. Avoid overmixing to keep the cupcakes fluffy. Fill each cupcake liner about two-thirds full with batter. This allows room for rising. Bake in your preheated oven for 18-20 minutes. Check with a toothpick; it should come out clean when the cupcakes are done. Let them cool in the pan for 5 minutes, then move them to a wire rack to cool completely. While the cupcakes cool, make the frosting. In a bowl, beat together 1/2 cup of softened cream cheese and 1/4 cup of softened butter until smooth. Gradually add 2 cups of powdered sugar. Mix well, then add 1 tablespoon of brewed coffee. Mix until you reach your desired frosting consistency. Once the cupcakes are cool, frost each one generously. Use a piping bag for a fancy look or a knife for a simple touch. Finally, sprinkle some extra pumpkin spice on top for a festive finish. For the full recipe, check out the earlier section. Enjoy your baking! To get soft and fluffy cupcakes, mix your batter just right. Overmixing makes them dense. Mix the wet and dry ingredients until they just come together. Use room-temperature eggs and butter for a smooth batter. This helps make a light and airy texture. Keep your cupcakes fresh by storing them in an airtight container. They stay good for about three days at room temperature. If you need them to last longer, put them in the fridge. For even longer storage, you can freeze them. Wrap each cupcake in plastic wrap, then put them in a freezer bag. They can last up to three months in the freezer. Make your cupcakes stand out with fun decorations! Top them with cream cheese frosting for a rich flavor. Sprinkle extra pumpkin spice on top for a nice touch. You can also use fall-themed sprinkles or edible glitter for a festive vibe. Arrange them on a colorful platter to impress your guests. For a fun twist, try adding mini pumpkin candies or chocolate-covered espresso beans on top. Check out the Full Recipe for more ideas! {{image_4}} To make gluten-free pumpkin spice latte cupcakes, swap all-purpose flour with a gluten-free blend. Many brands work well, but look for one that includes xanthan gum. This will help create a good texture. Follow the same steps in the recipe. You may not notice a big difference in taste or texture! For dairy-free frosting, use vegan cream cheese and dairy-free butter. Blend them just like the original recipe. You can also add maple syrup for sweetness. This gives a nice flavor to your cupcakes. Trust me, your guests will love this option, too! Want to amp up the flavor? Try adding a splash of almond extract or a hint of orange zest to the batter. These additions can enhance the pumpkin spice flavor. You can also mix in chocolate chips or nuts for extra texture. Don't shy away from experimenting with flavors! To keep your Pumpkin Spice Latte Cupcakes fresh, store them in an airtight container. This keeps moisture in and prevents them from drying out. Place them at room temperature if you plan to eat them within a few days. If you want to keep them longer, store them in the fridge. Just remember, cold temperatures can change the texture of the frosting. You can freeze these cupcakes for up to three months. First, let them cool completely. Then, wrap each cupcake in plastic wrap tightly. Next, place them in a freezer-safe bag or container. When you want to enjoy them, simply take them out and let them thaw at room temperature. Frost them after thawing for the best taste. If you'd like to warm your cupcakes, preheat your oven to 350°F (175°C). Place the cupcakes on a baking sheet and cover them with foil to keep the moisture in. Heat for about 5 to 10 minutes. This will bring back that fresh-baked warmth and flavor. Enjoy them as if they just came out of the oven! Pumpkin Spice Latte Cupcakes stay fresh for about 3 to 5 days. Store them in an airtight container. This keeps them moist and tasty. Yes, you can make these cupcakes a day or two ahead. Just store them in an airtight container. Frost them just before serving for the best taste. If you don't want to use coffee, try using brewed tea or warm milk. Both give a nice flavor, but coffee adds a special richness. Of course! You can make mini cupcakes using the same recipe. Just reduce the baking time to about 12 to 15 minutes. Keep an eye on them to avoid overbaking. To make the frosting less sweet, add more cream cheese. You can also use less powdered sugar. Taste as you go to find the right balance. Serve these cupcakes on a pretty platter. You can garnish with extra pumpkin spice. For fun, add decorative fall-themed sprinkles. Each cupcake looks festive and inviting. For the full recipe, check out the detailed instructions above. Enjoy your baking! In this post, we explored how to make Pumpkin Spice Latte Cupcakes. We covered essential ingredients, like the perfect spices and cream cheese frosting. I shared clear steps to mix, bake, and decorate. You learned tips for great texture and fresh storage. Variations let you adjust for gluten-free or dairy-free needs. Now, you can enjoy these tasty treats year-round. They’re perfect for any occasion, bringing warm flavor and joy to every bite. Happy baking!

Pumpkin Spice Latte Cupcakes Festive and Flavorful Treat

Are you ready to indulge in a festive treat? These Pumpkin Spice Latte Cupcakes blend warm spices and rich coffee

- 2 medium eggplants - 3 cups marinara sauce - 2 cups shredded mozzarella cheese - 1 cup grated Parmesan cheese - 1 cup all-purpose flour - 2 large eggs - 1 cup breadcrumbs - 2 teaspoons dried oregano - 1 teaspoon garlic powder - Salt and freshly ground black pepper - Fresh basil leaves for garnish To create a delicious Baked Eggplant Parmesan, you need fresh and quality ingredients. Let’s break it down. First, we start with two medium eggplants. Choose firm and shiny ones for the best flavor. Next, you will need three cups of marinara sauce. You can use homemade sauce or store-bought. Both work well! Cheese is key in this dish. You will want two cups of shredded mozzarella cheese. This cheese melts beautifully and adds that gooey texture. Also, use one cup of grated Parmesan cheese for a nice salty kick. For breading the eggplant, gather one cup of all-purpose flour, two large eggs, and one cup of breadcrumbs. Italian seasoned breadcrumbs can add extra flavor. Finally, you will need two teaspoons of dried oregano to boost the taste. For seasoning, add one teaspoon of garlic powder, salt, and freshly ground black pepper. This will enhance the dish’s overall flavor. Don’t forget some fresh basil leaves for garnish! They add color and a lovely aroma. For the full recipe, check the [Full Recipe]. It will guide you through the cooking process! First, slice your eggplants into ½-inch thick rounds. Lay the slices on a clean towel. Sprinkle a good amount of salt on both sides. Let them rest for about 30 minutes. This step helps to draw out any bitterness. After 30 minutes, rinse the slices under cold water. This removes the salt and any bitterness. Pat them dry with a clean towel to remove excess moisture. Next, set up your breading station. Use three shallow dishes. Put all-purpose flour in the first dish. In the second dish, place the beaten eggs. In the third dish, mix breadcrumbs with dried oregano, garlic powder, salt, and black pepper. Now, take a slice of eggplant. Dredge it in the flour, then dip it in the egg. Finally, coat it in the breadcrumb mix. Place the breaded slices on lined baking sheets. Preheat your oven to 375°F (190°C). Bake the breaded eggplant slices for 25-30 minutes. Flip them halfway through so both sides get crispy. While they bake, grab a large baking dish. Pour a thin layer of marinara sauce at the bottom. Add a layer of baked eggplant slices. Sprinkle mozzarella and Parmesan cheese over the top. Repeat this process until all ingredients are used. Always end with marinara sauce and a generous layer of cheese. Return the dish to the oven and bake for another 20-25 minutes. The cheese should melt and turn golden. Once done, let it cool for about 10 minutes before cutting. For the full recipe, check out the details above. Choosing the right eggplant is key. Look for medium-sized eggplants. They should be firm with smooth skin. Avoid any that feel soft or have blemishes. You can adjust the seasoning to your taste. A pinch of salt can enhance the flavors well. If you like it spicy, add some red pepper flakes. For a great presentation, cut the eggplant into squares. Place them on a plate and drizzle with marinara sauce. Garnish with fresh basil for a vibrant touch. This adds color and freshness. Serve alongside a simple salad or garlic bread. A light red wine pairs well with this dish. One common mistake is over-salting the eggplant. This can make your dish too salty. Always rinse your eggplant after salting. Another mistake is uneven baking. Make sure to flip the slices halfway through. This helps them bake evenly and get crispy all over. {{image_4}} - You can use whole wheat breadcrumbs. This adds fiber and makes it healthier. - Consider low-fat cheese options to cut down on calories but keep the flavor. - For a vegan twist, use chickpea flour or flaxseed meal instead of eggs. - Plant-based cheese alternatives can replace regular cheese. Look for brands that melt well. - Adding spinach or bell peppers boosts nutrition and flavor. - Try different sauces, like pesto or arrabbiata, for a new taste. - Experiment with seasonings like smoked paprika or crushed red pepper for a kick. These variations make baked eggplant parmesan fun and tasty. Enjoy creating your own version! For the complete recipe, check out the Full Recipe. To keep your uneaten eggplant parmesan fresh, store it in the fridge. Place it in an airtight container. This will help keep it safe for 3 to 5 days. If you want to keep it longer, consider freezing it. Wrap it well in plastic wrap and foil. Label it with the date. You can freeze it for up to three months. Just remember to let it cool completely before storing. When it's time to enjoy your leftovers, reheating is key. The oven is the best method. Preheat it to 350°F (175°C) and place the dish inside. Cover it with foil to keep moisture in. Heat for about 20 to 25 minutes. If you use the microwave, it can heat unevenly. Heat in short bursts, checking often. This can make it less crispy, so the oven is better. In the fridge, your eggplant parmesan lasts about 3 to 5 days. Always check for signs of spoilage. Look for an off smell or mold. If it smells sour or looks strange, it’s best to throw it away. You want to enjoy this dish at its best, so trust your senses! To stop bitterness in eggplant, use the salting technique. Start by slicing the eggplant into rounds. Then, sprinkle a good amount of salt on both sides. This step draws out excess moisture and any bitter taste. Let the slices sit for about 30 minutes. After that, rinse the slices under cold water. Pat them dry with a towel. This method helps you enjoy a sweeter, more flavorful dish. Yes, you can prepare Baked Eggplant Parmesan ahead of time. To do this, bake the breaded eggplant slices. Once they are cool, layer them with marinara and cheese in a dish. Cover it tightly with plastic wrap or foil and store it in the fridge. You can bake it later when you are ready to serve. This makes it easy for busy days or gatherings. Eggplant Parmesan pairs well with many sides. Consider a fresh green salad with a light vinaigrette. Garlic bread is also a great choice for soaking up sauce. For drinks, serve a nice red wine or sparkling water. You can even try a fruity iced tea. These options bring out the flavors of the dish. Baked Eggplant Parmesan can be made gluten-free. Use gluten-free breadcrumbs instead of regular ones. You can find these in most grocery stores. For the flour, opt for almond flour or a gluten-free blend. These substitutions ensure everyone can enjoy this tasty dish. Baked Eggplant Parmesan is a delicious dish you can easily make at home. You learned the key ingredients, from eggplants to cheeses and spices. I provided step-by-step instructions to prep and bake your dish perfectly. We covered tips to avoid common mistakes and explored tasty variations. Finally, I shared helpful storage instructions to keep your leftovers fresh. By using these insights, you can impress friends and family. Enjoy your cooking journey and savor every bite.

Baked Eggplant Parmesan Hearty and Comforting Dish

If you love comforting, hearty meals, then Baked Eggplant Parmesan is for you! This dish features layers of tender eggplant,

Here’s what you need to make a classic Margherita pizza. Each ingredient plays a key role in the flavor and texture. - 2 cups all-purpose flour - 1 teaspoon active dry yeast - 3/4 cup warm water (about 110°F or 43°C) - 1 teaspoon sugar - 1 teaspoon salt - 1 tablespoon olive oil - 1 cup tomato sauce - 8 ounces fresh mozzarella cheese - Fresh basil leaves - Sea salt and black pepper - Red pepper flakes (optional) Each item is simple yet vital. The flour forms the base of the dough. The yeast helps it rise. Warm water activates the yeast. Sugar feeds the yeast and gives a hint of sweetness. Salt adds flavor, and olive oil gives the dough a nice texture. For the toppings, tomato sauce is key. Use a good quality sauce for the best taste. Fresh mozzarella melts beautifully and gives that classic pizza vibe. Fresh basil adds aroma and taste. Finally, salt, pepper, and optional red pepper flakes bring out the flavors. For the full recipe, please refer to the instructions section. - Mix 1 teaspoon of active dry yeast and 1 teaspoon of sugar with 3/4 cup of warm water. - In a separate bowl, combine 2 cups of all-purpose flour and 1 teaspoon of salt. - Pour the yeast mixture into the flour mixture. Knead until smooth. - Place the dough in an oiled bowl to prevent sticking. - Cover the bowl and let it rise in a warm spot for 1-2 hours. - Preheat your oven to 475°F (245°C) and prepare your baking surface. - Once the dough has risen, punch it down gently. Shape it into discs, about 10-12 inches wide. - Spread a thin layer of tomato sauce on each dough disc. Layer fresh mozzarella on top. - Carefully place the pizza in the hot oven. Bake for 10-12 minutes. - Watch closely for golden bubbles and browning. - Remove the pizza from the oven. Garnish with fresh basil, sea salt, and black pepper. - Slice and serve hot for the best taste. Enjoy the rich flavors! To get a great crust, focus on the dough. You want it soft, but not sticky. Knead it well for about 10 minutes. This builds strength in the dough. If it feels sticky, sprinkle a little flour as you knead. Let the dough rise in a warm spot. Cover it with a damp cloth. This helps it double in size. Rising gives the crust a light texture. Don't rush this step; it makes a big difference. High-quality tomatoes are key. I love using San Marzano tomatoes. They have a sweet taste and rich flavor. If you can, use homemade tomato sauce. It makes your pizza special. For cheese, go for fresh mozzarella. It melts beautifully and has a rich flavor. Slice it into rounds. Spread it evenly over the sauce for the best taste. Your oven temperature matters. Preheat it to its highest setting, around 475°F (245°C). This helps the crust get crispy. If you have a pizza stone, use it. Place it in the oven as it heats. A hot stone creates a nice crust. If not, a baking sheet works fine, but watch the bake time closely. For the full recipe, check out the Classic Margherita Pizza section. {{image_4}} You can customize your Margherita pizza with fun toppings. Seasonal vegetables add color and flavor. Think fresh bell peppers, zucchini, or mushrooms. You can also use a variety of cheeses. Try adding provolone or goat cheese for a twist. While tomato sauce is classic, you can explore other sauces. Pesto gives a fresh, herby kick. It pairs well with the cheese and basil. White sauce options, like Alfredo, can also be delightful. These sauces change the pizza's taste while keeping it rich. Many people have dietary needs. You can make gluten-free crust alternatives using almond flour or cauliflower. These options keep the pizza tasty and friendly for gluten-free eaters. If you want to go vegan, try using vegan cheese. There are many brands that melt well and taste great. To keep your pizza fresh, store it properly. First, let it cool down to room temperature. Then, wrap each slice in plastic wrap or aluminum foil. This protects the pizza from air and moisture. Place the wrapped slices in an airtight container. A good container will keep them from drying out. You can also use a resealable plastic bag. Just make sure to remove as much air as possible. Store your leftovers in the fridge for up to three days. When you want to enjoy your pizza again, reheating is key. One great method is using the oven. Preheat your oven to 375°F (190°C). Place the pizza on a baking sheet lined with parchment paper. Bake for about 10 minutes or until the cheese is bubbly. This method keeps the crust crispy. You can also use a skillet for reheating. Heat a non-stick skillet over medium-low heat. Place the pizza in the skillet and cover it with a lid. Cook for about 5-7 minutes. This keeps the crust crunchy and warms the toppings well. Avoid using the microwave, as it can make the crust soggy. For the best results, always check your pizza as it reheats. Enjoy every bite of your Classic Margherita Pizza with these simple tips! Classic Margherita Pizza comes from Italy, specifically Naples. It dates back to the late 1800s. Legend says Queen Margherita of Savoy enjoyed it during a visit. The pizza colors represent Italy: red tomatoes, white mozzarella, and green basil. This pizza is simple yet rich in flavor and history. It reflects Italian pride and culinary tradition. Yes, making dough ahead of time is a great idea! You can prepare the dough the night before. After kneading, place it in a bowl and cover it with plastic wrap. Store it in the fridge. When ready to use it, let it come to room temperature. This makes it easier to shape. If your dough doesn’t rise, it might be due to cold temperatures. Make sure your kitchen is warm. Another reason could be old yeast. Always check the expiration date on the yeast package. If your dough is still flat, try adding a bit of sugar to feed the yeast. To prevent soggy pizza, use a hot oven. Preheat it to the highest setting. Also, avoid using too much sauce. A thin layer works best. Drain canned tomatoes before using them. Lastly, bake your pizza on a hot pizza stone or baking sheet. This helps create a crispy crust. Making your own Classic Margherita Pizza is fun and rewarding. This guide covered all you need, from ingredients to techniques. You learned how to mix the dough, let it rise, and bake it to perfection. Experiment with toppings or sauces for your unique spin. Remember, the perfect pizza focuses on high-quality ingredients and careful baking. Enjoy your delicious creation with friends and family.

Classic Margherita Pizza Delightful Easy Recipe

If you crave a simple yet satisfying dish, look no further than Classic Margherita Pizza. This easy recipe brings together

To make the best meringue cookies, you need a few key ingredients. Here’s what you’ll need: - 4 large egg whites, at room temperature - 1 cup granulated sugar - 1/2 teaspoon cream of tartar - 1 teaspoon vanilla extract - 1/2 cup mixed dried fruits (such as cranberries, apricots, and mango) - 1/2 cup fresh berries (such as strawberries and blueberries) - A pinch of salt Egg whites create the structure for your cookies. The sugar adds sweetness and helps form that lovely glossy texture. Cream of tartar stabilizes the egg whites, making them fluffier. Vanilla extract enhances the flavor. Dried fruits add texture, while fresh berries bring a burst of freshness. You can get creative with fruits for your meringue cookies. Here are some tasty options: - Dried cranberries for a tangy twist - Dried apricots for a chewy texture - Dried mango for a tropical flair - Fresh strawberries for sweetness - Fresh blueberries for a pop of color Mix and match these fruits to find your favorite combination. Each fruit will give your meringue cookies a unique flavor and look. Want to take your meringue cookies to the next level? Here are some ideas: - Add a sprinkle of lemon zest for brightness. - Mix in a bit of almond extract for a nutty profile. - Try cocoa powder for a chocolatey touch. - Fold in finely chopped nuts for added crunch. These enhancements can make your cookies stand out even more. With these ingredients and ideas, you’re ready to create delightful meringue cookies with fruit. For the complete guide, check out the Full Recipe. First, gather your ingredients. You will need egg whites, sugar, cream of tartar, and fruit. Make sure your egg whites are at room temperature. This helps them whip better. Next, preheat your oven to 225°F (110°C). Line a baking sheet with parchment paper. This keeps your cookies from sticking. In a clean mixing bowl, add the egg whites and a pinch of salt. Start mixing with an electric mixer on medium speed. Mix until the whites are frothy. This should take about 1-2 minutes. Next, add the cream of tartar. Increase the mixer speed to high. Beat until soft peaks form, which will take another 2-3 minutes. Now, it’s time to add the sugar. Do this slowly, one tablespoon at a time. Keep the mixer on high. Mix until the mixture is glossy and holds stiff peaks. This will take about 5-7 minutes. Carefully fold in the vanilla and dried fruits. Use a spatula and be gentle. You want to keep the mixture light and airy. Prepare your baking sheet with the meringue mixture. You can use a piping bag or spoon. Each meringue should be about 1.5 inches wide. Leave space between each one. For a special touch, add fresh berries on top of each meringue. Now, place the baking sheet in the oven. Bake for 1.5 to 2 hours. Watch them closely. They should be dry and lift easily from the parchment. When they are done, turn off the oven. Leave the meringues inside with the door slightly open. This cooling method helps stop cracks from forming. For the full recipe, refer to the earlier section. Enjoy your beautiful meringue cookies! To get the best meringue, start with clean tools. Any grease can ruin your meringue. Use room temperature egg whites. They whip up better than cold ones. You want the egg whites to become frothy first. Then, add cream of tartar. This helps stabilize the meringue. Beat until soft peaks form. When you lift the mixer, the peaks should bend slightly. Gradually add sugar. This step is key to a smooth texture. Keep beating until stiff peaks form. The mixture will look glossy and thick. One mistake is adding sugar too fast. This can make your meringue grainy. Avoid mixing on low speed. You need high speed to incorporate air. If you open the oven door too soon, the meringues may crack. Always let them cool in the oven. This prevents sudden changes in temperature. Another issue is overbaking. They should feel dry but not browned. Aim for a light, airy texture. Serving meringue cookies is fun! Arrange them on a bright platter. Add a sprinkle of powdered sugar for style. Fresh berries look great on top. You can serve them with whipped cream. This adds creaminess to the crisp meringue. For a twist, try drizzling with chocolate. You can also pair them with ice cream. They make a delightful dessert for any event. For the full recipe, check out Cloud Nine Meringue Cookies with a Fruity Twist. {{image_4}} You can switch up the fruits in your meringue cookies to create new flavors. Try using diced peaches or ripe bananas for a fresh twist. If you want a tart touch, go for kiwi or passion fruit. You can even mix dried fruits like figs or dates for a chewy texture. The key is to balance the sweetness of the meringue with the tartness of the fruit for the best taste. Adding chocolate or nuts can elevate your meringue cookies. You can fold in mini chocolate chips or cocoa powder to give them a rich flavor. Toasted nuts, like almonds or hazelnuts, add a nice crunch. Just remember to chop them finely so they mix well. With these add-ins, your meringue cookies gain a unique personality. Seasonal fruits can inspire creative combinations in your meringue cookies. In spring, use fresh strawberries and rhubarb for a vibrant mix. Summer calls for juicy peaches and blueberries. For fall, think about apples and cinnamon for a cozy flavor. Winter can bring in pomegranates and citrus for brightness. Each season offers its own palette of flavors, making your meringue cookies exciting all year round. Meringue cookies are light and crispy. To keep them fresh, store them in an airtight container. Use a container that fits the cookies without squishing them. Place a piece of parchment paper between layers if you stack them. This helps prevent sticking. For the best taste and texture, keep meringue cookies away from moisture. Moisture can make them soft and chewy. Store them in a cool, dry place. If you live in a humid area, consider using silica gel packets in the container to absorb extra moisture. You can freeze meringue cookies if you want to keep them longer. First, let them cool completely. Then, place them in a single layer on a baking sheet. Freeze them for 1-2 hours until firm. After that, transfer them to an airtight container or freezer bag. They can last up to three months in the freezer. When ready to eat, just thaw them at room temperature. Enjoy your meringue cookies fresh and crisp! For the full recipe, check the link above. Meringue cookies can last up to two weeks when stored correctly. Keep them in an airtight container at room temperature. Avoid humid places, as moisture can make them chewy. If you notice any cracks, enjoy them quickly, as they are best fresh. You can use egg substitutes, but results may vary. Aquafaba, the liquid from canned chickpeas, works well. It mimics egg whites and can whip up nicely. Use around 3 tablespoons of aquafaba for each egg white. Make sure your bowl is clean and free from grease for the best results. Fruits like strawberries, blueberries, and raspberries work best with meringue cookies. Their sweet and tangy flavors complement the light texture of the meringues. Fresh fruits add color and taste, making your treat even more delightful. You can mix dried fruits like cranberries and apricots for added texture and flavor, too. For the full recipe, check out Cloud Nine Meringue Cookies with a Fruity Twist. In this post, we explored how to make meringue cookies. We covered key ingredients and flavor options. I shared step-by-step instructions for mixing and baking. We discussed tips to get the right texture and avoid common mistakes. Plus, I mentioned fun variations like seasonal fruits and nut add-ins. Remember, storing meringue cookies properly keeps them fresh and tasty. Now, you have everything you need to create delicious meringue treats. So, get baking and enjoy every bite!

Meringue Cookies with Fruit Delightful and Easy Treat

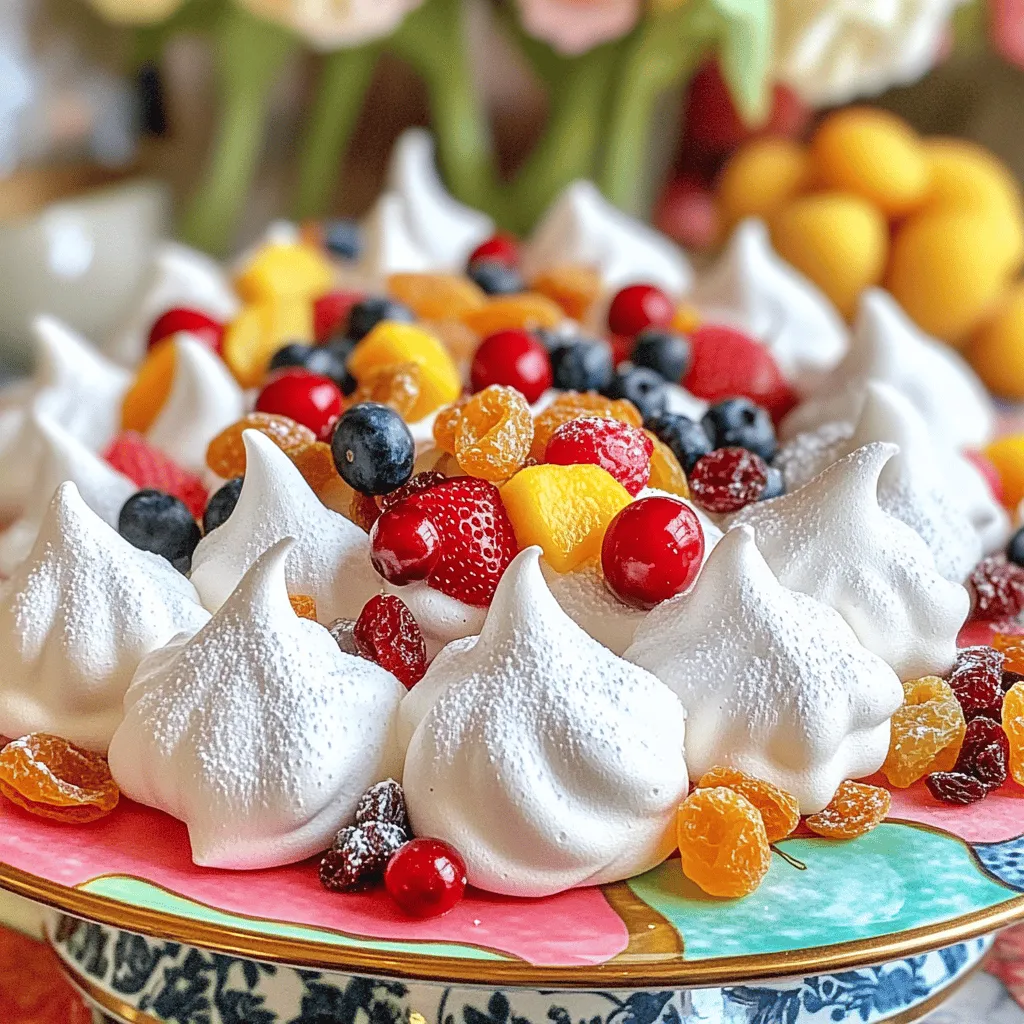
If you crave a sweet treat that’s fun to make, look no further! Meringue cookies with fruit are light, crispy,

- 1 cup frozen mixed berries - 1 ripe banana - 1 cup unsweetened almond milk - ½ cup Greek yogurt or plant-based alternative - 1 tablespoon chia seeds - Optional: 1 tablespoon honey or maple syrup For this berry smoothie bowl, the main ingredients create a tasty blend. The frozen mixed berries give a sweet and tangy flavor. I love using strawberries, blueberries, and raspberries. They blend well and add great color. The ripe banana adds creaminess and natural sweetness. Almond milk is my go-to for a dairy-free option. Greek yogurt adds protein and a creamy texture. Chia seeds help thicken the mix and add fiber. If you want a sweeter taste, you can add honey or maple syrup. Just mix it in with the other ingredients. It’s easy to adjust the sweetness to fit your taste. - Fresh fruit slices - Crunchy granola - Shredded coconut - Whole berries Toppings make your smoothie bowl fun and nutritious. I like to add fresh fruit slices, like bananas or kiwis. Crunchy granola gives a nice texture. Shredded coconut adds a tropical touch, while whole berries look great on top. Feel free to mix and match toppings to suit your mood. You can also try seeds or nuts for extra crunch and health benefits. - Calories per serving: About 200 - Key vitamins and minerals: Vitamin C, potassium, and calcium - Protein, carb, and fat breakdown: - Protein: 8g - Carbs: 35g - Fat: 5g This berry smoothie bowl is not just tasty; it's also good for you. Each serving has around 200 calories. You get a boost of Vitamin C from the berries, which is great for your immune system. The banana gives you potassium, and the yogurt adds calcium for strong bones. In terms of macronutrients, you get a nice balance. With 8 grams of protein, it keeps you full. The 35 grams of carbs give you energy, while the 5 grams of fat help keep your heart healthy. For a full recipe, check out the Berry Bliss Smoothie Bowl 🥥. Enjoy your healthy treat! 1. In a high-speed blender, combine: - 1 cup frozen mixed berries - 1 ripe banana, sliced - 1 cup unsweetened almond milk - ½ cup Greek yogurt - 1 tablespoon chia seeds - Optional: 1 tablespoon honey or maple syrup 2. Blend on high speed until creamy and smooth. 3. Stop to scrape down the sides for an even mix. - If the smoothie is too thick, add more almond milk. - Blend until you reach your desired thickness. This usually takes about 30 seconds. 1. Pour the smoothie into a large serving bowl. 2. Get creative with toppings! Use: - Fresh fruit slices - Crunchy granola - Shredded coconut - Whole berries 3. Arrange the toppings for a fun look. Serve with a spoon and enjoy! Using frozen berries gives your smoothie bowl a thick and creamy texture. Frozen berries blend easier and chill the smoothie perfectly. Fresh berries work too, but they may make the bowl runny. Choosing the right yogurt is key. A thick yogurt, like Greek yogurt, adds creaminess. If you prefer a lighter mix, use regular yogurt or a plant-based option. Adjust the amount based on your taste. Add superfoods to boost nutrition. Chia seeds offer fiber and omega-3s. Protein powders can also make your bowl filling. Choose a flavor that blends well with berries. For sweetness, use ripe bananas or dates instead of added sugar. They give a natural sweetness without extra calories. You can also try a splash of pure vanilla extract for extra flavor. A high-speed blender is essential for a smooth mix. Look for one with a strong motor to handle frozen fruit. When it comes to bowls, choose wide ones for easy topping placement. Shallow bowls make it simple to enjoy each bite. Essential gadgets include measuring cups for precise ingredient amounts and a spatula to scrape the blender clean. These tools help make your smoothie bowl prep smooth and easy. For the full recipe of the Berry Bliss Smoothie Bowl, check the recipe section above. {{image_4}} For a vegan berry smoothie bowl, swap the Greek yogurt. Use a plant-based yogurt instead. Almond milk works great, but any nut or oat milk is fine. You can also add nut butter for creaminess and flavor. Try cashew or coconut yogurt for a richer taste. This makes your bowl creamy and delicious without any dairy. To keep your smoothie bowl keto-friendly, change some ingredients. Use unsweetened coconut milk instead of almond milk. Replace the banana with avocado for healthy fats. You can also skip the honey or maple syrup. This keeps carbs low while still tasting great. Add seeds or nuts for extra crunch without the carbs. Using seasonal berries can change your smoothie bowl game. In spring and summer, use fresh strawberries, blueberries, and raspberries. In fall, consider adding pumpkin puree or spices like cinnamon. Winter allows for frozen berries, which are still nutritious. Top with seasonal fruits like pomegranate seeds or slices of kiwi for a fresh twist. This keeps your smoothie bowl exciting all year round. To keep your smoothie bowl fresh, store it in the fridge. Use an airtight container. Smoothie bowls taste best within 24 hours. If you have leftovers, seal them tightly. You can keep them in the fridge for up to two days. If you want to save it for longer, freeze it. Pour the smoothie into freezer-safe containers. Leave some space at the top for expansion. Smoothie bowls can last up to two months in the freezer. Choose the right container for storage. I recommend using airtight containers. They keep your smoothie bowl fresh and tasty. You can use glass jars or plastic bowls. Glass jars are great for easy viewing. They also help keep flavors locked in. Plastic bowls are lightweight and easy to store. Both options work well, so pick what you like best. Have extra berries or yogurt? Don’t let them go to waste! You can make quick snacks or meals. Mix leftover berries into oatmeal for breakfast. Blend yogurt with fruit for a smoothie. Use berries in salads for a fresh taste. You could also make yogurt parfaits. Layer yogurt, granola, and berries for a fun treat. These ideas help cut down on waste while enjoying tasty meals. To make your smoothie bowl thicker, adjust your ingredient ratios. Start with less liquid, like almond milk. Use more frozen berries or banana for a creamier texture. You can also add chia seeds. They soak up liquid and help thicken the mix. Blend everything until smooth. If it's still too thin, add more frozen fruit. The best berries are strawberries, blueberries, and raspberries. These berries pack a nutritional punch. Strawberries are high in vitamin C, while blueberries boost heart health. Raspberries are great for fiber. Each berry adds flavor and color to your smoothie bowl. You can mix and match them for a tasty treat. Yes, you can prepare a smoothie bowl in advance. Make the base and store it in the fridge for up to two days. Keep it in a sealed container to prevent browning. Add toppings just before serving to keep them fresh. This way, you save time and still enjoy a quick breakfast. Yes, you can use non-dairy yogurt. Plant-based yogurt options are great for those who avoid dairy. Almond, coconut, and soy yogurts are popular choices. They add creaminess without dairy. Plus, they often have probiotics, which are good for digestion. The Berry Bliss Smoothie Bowl recipe makes two servings. You can easily adjust the recipe for more or fewer servings. Just double or halve the ingredients as needed. Each bowl is perfect for sharing or enjoying solo. Making a berry smoothie bowl is simple and fun. We covered key ingredients, like frozen berries and bananas, to create a tasty blend. You learned how to prepare the base, adjust its thickness, and present it attractively. With tips on nutrition and variations, you can customize your bowl any way you like. Remember, you can store leftovers easily for later. Now, it’s your turn to enjoy a delicious, healthy treat that fits your needs! Dig in and get creative with your toppings!

Berry Smoothie Bowl Energizing and Simple Recipe

Are you ready to whip up a delicious and energizing Berry Smoothie Bowl? This easy recipe not only delights your

To make zesty cilantro lime rice, you will need: - 1 cup jasmine rice - 2 cups vegetable broth (or water) - 1 tablespoon olive oil - 1 lime (zested and juiced) - 1/2 cup fresh cilantro, finely chopped - 1/2 teaspoon garlic powder - 1/2 teaspoon onion powder - Salt, to taste - Optional: 1 jalapeño, finely chopped (for an extra kick) You can switch jasmine rice for basmati rice if you prefer. Brown rice works too, but cook it longer. Instead of vegetable broth, use chicken broth for a different flavor. If you want a lighter version, you can skip the olive oil; just use water. For the lime, lemon juice can be a tasty substitute. You can also replace cilantro with parsley if you don’t like it. This recipe serves four people. If you want more, just double the amounts. For a smaller meal, cut the ingredients in half. Zesty cilantro lime rice is great as a side dish. It pairs well with many proteins like chicken, fish, or beans. Each serving gives you a lovely burst of flavor and freshness! First, rinse the jasmine rice. Use a fine-mesh strainer. Run cold water over the rice until it is clear. This takes about 1-2 minutes. Rinsing helps remove extra starch. It keeps the rice fluffy and light. Next, heat olive oil in a medium saucepan over medium heat. Add the rinsed rice to the hot oil. Sauté the rice for about 2-3 minutes. Stir it often until it is lightly toasted. This step adds a nutty flavor. Carefully pour in vegetable broth or water. Bring it to a boil. Then, add garlic powder, onion powder, and a pinch of salt. Lower the heat to a gentle simmer. Cover the saucepan. Cook for 15-20 minutes. The rice will absorb the liquid and become tender. After cooking, remove the saucepan from heat. Keep the lid on for 5 more minutes. This lets the rice steam and become fluffy. Now, use a fork to fluff the rice gently. Add lime zest, lime juice, and chopped cilantro. If you like spice, add finely chopped jalapeño. Stir everything until mixed well. Taste the rice and add more salt if you need. You can find the full recipe in another section. Serve the zesty cilantro lime rice warm. Enjoy it as a side dish or with your favorite protein! To make great rice, start with good rinsing. Rinse jasmine rice until the water runs clear. This step is key to fluffy rice. Use the right water-to-rice ratio. For jasmine rice, two cups of water for one cup of rice works best. Heat the oil before adding the rice. Toasting it for a few minutes adds a nice flavor. After cooking, let the rice sit covered for five minutes. This helps it finish cooking and stay fluffy. Want to add more flavor? Try squeezing in extra lime juice right before serving. Add zest for a stronger lime taste. You can also mix in spices like cumin or smoked paprika. For heat, dice a jalapeño and stir it in. If you like cheese, sprinkle some feta or cotija on top. Fresh herbs like parsley or green onions can also brighten the dish. One common mistake is cooking rice with too much water. This can make the rice mushy. Avoid stirring the rice while it cooks. Stirring can release starch and make it sticky. If you’re using broth, check the salt content. You may not need to add more salt. Lastly, don’t skip the resting time after cooking. It’s crucial for the best texture. For the full recipe, check out the detailed steps above! {{image_4}} You can easily add proteins to your zesty cilantro lime rice. Consider grilled chicken, shrimp, or tofu. These proteins pair well with the bright flavors of lime and cilantro. Start by cooking your protein separately. Once cooked, mix it into the rice just before serving. This adds heartiness and makes the dish more filling. You can also marinate the protein in lime juice for added flavor. This recipe is naturally vegan and gluten-free. Use vegetable broth to keep it plant-based. If you want a heartier dish, add beans like black beans or chickpeas. These options add protein and fiber. They also enhance the flavor, making your meal more satisfying. Always check your broth to ensure it is gluten-free. If you love heat, add a finely chopped jalapeño to the rice. This gives a nice kick without overpowering the dish. If you're cooking for kids or those who prefer milder food, skip the jalapeño. Instead, you can add a sprinkle of smoked paprika or cumin for warmth without the heat. Adjusting the spice level allows everyone to enjoy this dish their own way. Once you finish your meal, let the rice cool. Place it in an airtight container. Store it in the fridge for up to four days. If you want to keep it longer, consider freezing it. To reheat, use the microwave or stovetop. For the microwave, place rice in a bowl. Add a splash of water and cover. Heat for 1-2 minutes, stirring halfway. On the stovetop, add rice to a pan with a bit of water. Heat over low until warm. You can freeze this rice for up to three months. Scoop the cooled rice into freezer bags. Flatten the bags to save space. When ready to use, thaw it in the fridge overnight. Reheat as described above. Enjoy your zesty cilantro lime rice later! The best type of rice for Zesty Cilantro Lime Rice is jasmine rice. Jasmine rice has a soft, slightly sticky texture, which makes it perfect for this dish. It also absorbs the flavors well, enhancing every bite. You can use other long-grain rice, but jasmine gives the best taste and aroma. Yes, you can make this recipe ahead of time. Cook the rice and let it cool completely. Store it in an airtight container in the fridge for up to three days. When you're ready to serve, just reheat it on the stove or in the microwave. Add fresh lime juice and cilantro just before serving for the best flavor. If you want to make this recipe without cilantro, you can use parsley instead. Parsley adds a fresh flavor, similar to cilantro, but without the strong taste. You may also try adding green onions or a pinch of fresh mint for a unique twist. Just remember to adjust the lime juice to balance the flavors. This blog post covered key steps to make tasty rice. We discussed essential ingredients and how to measure them. I shared helpful tips for cooking rice to perfection and enhancing flavor. You can also explore variations to suit your taste and dietary needs. In conclusion, following these guidelines will help you create delicious rice every time. With a few tricks and tweaks, you can impress anyone at your table. Enjoy your cooking journey and make every meal special!

Zesty Cilantro Lime Rice Flavorful and Easy Recipe

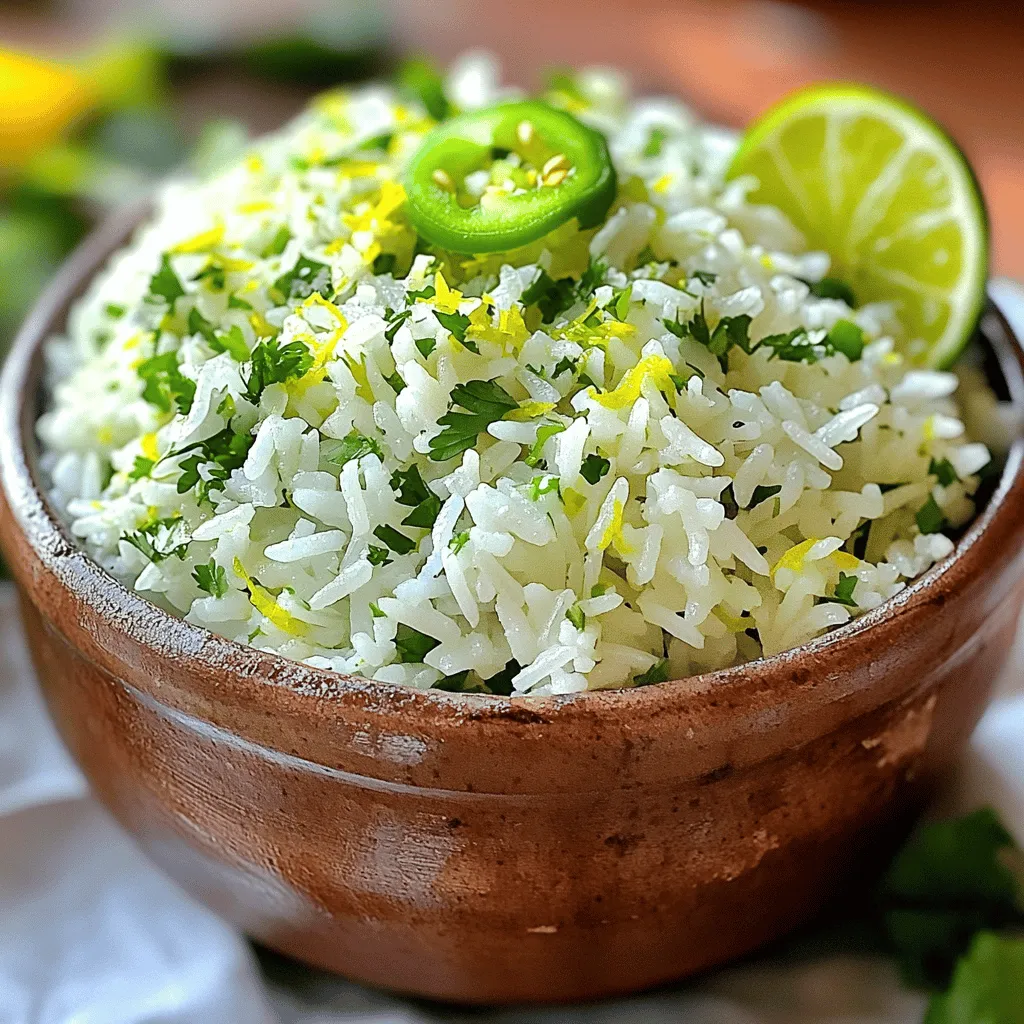
Are you ready to transform your meals with a burst of flavor? My Zesty Cilantro Lime Rice recipe is not

To create a tasty quinoa vegetable pilaf, you need a few key ingredients. Here is the list: - 1 cup quinoa, thoroughly rinsed - 2 cups vegetable broth - 1 medium onion, finely diced - 2 garlic cloves, finely minced - 1 medium carrot, peeled and diced - 1 bell pepper (any color), diced into bite-sized pieces - 1 medium zucchini, diced - 1 cup frozen peas - 1 teaspoon ground cumin - 1 teaspoon ground turmeric - 2 tablespoons extra virgin olive oil - Salt and freshly cracked black pepper to taste - Fresh parsley, chopped, for garnish These ingredients come together to create a vibrant and satisfying dish. The quinoa acts as a great base, soaking up all the flavors. While the essential ingredients deliver great taste, you can add more to customize your pilaf. Here are some optional ingredients you might like: - Cherry tomatoes, halved - Spinach or kale, chopped - Corn, fresh or frozen - Nuts, like almonds or pistachios, for crunch - Fresh herbs, like cilantro or basil Feel free to mix and match these options based on what you have at home. The pilaf will still taste delicious. This quinoa vegetable pilaf is not just tasty; it's healthy too. Here are some benefits of the key ingredients: - Quinoa: Packed with protein, quinoa is a complete source of amino acids. It also contains fiber, which aids digestion. - Vegetables: The mix of onion, bell pepper, carrots, and zucchini adds vitamins A and C. These are great for your immune system and skin health. - Olive Oil: Extra virgin olive oil is rich in healthy fats. It helps reduce inflammation and supports heart health. - Spices: Ground cumin and turmeric add flavor and have anti-inflammatory properties. They may also boost your metabolism. By using these ingredients, you create a dish that is not only delicious but also good for your body. Each bite offers a blend of flavors and nutrients that keep you feeling great. For the full recipe, check the provided instructions. First, gather your tools. You need a medium saucepan. Pour in 2 cups of vegetable broth. Heat it until it boils. Once it’s boiling, add 1 cup of rinsed quinoa. Stir it well and lower the heat. Cover the pot tightly. Let it simmer for about 15 minutes. The quinoa should absorb all the liquid. After cooking, fluff it with a fork. Set it aside while you prepare the rest. Next, take a large skillet. Pour in 2 tablespoons of extra virgin olive oil. Heat it over medium heat. Chop 1 medium onion into small pieces. Add the onion to the hot oil. Sauté it for about 3-4 minutes. You want it to become soft and clear. Now, finely mince 2 garlic cloves. Add the garlic to the skillet. Stir it for about a minute until it smells great. Be careful not to burn it. Now it’s time to add the fun part: the veggies! Dice 1 medium carrot, 1 bell pepper, and 1 medium zucchini. Toss them into the skillet. Cook them for about 5-6 minutes. Stir occasionally. You want them to be tender but still crunchy. Sprinkle in 1 teaspoon of ground cumin and 1 teaspoon of ground turmeric. Add salt and black pepper to taste. Mix everything well. Finally, add 1 cup of frozen peas and the cooked quinoa. Stir gently to combine. Heat everything for an additional 2-3 minutes. Taste your pilaf. Adjust the seasoning if needed. Remove the skillet from the heat. Garnish with fresh parsley, and enjoy your dish! For the complete recipe, check out the Full Recipe. To cook perfect quinoa, first rinse it well. This removes the bitter coating called saponin. Use a 2:1 ratio of liquid to quinoa. For this recipe, I use vegetable broth. Bring the broth to a boil, then add the rinsed quinoa. Lower the heat, cover, and simmer for about 15 minutes. When it’s done, fluff it gently with a fork. This will keep the grains light and airy. To make your pilaf even tastier, try these tips. Use fresh herbs like basil or cilantro. They add a bright flavor. A squeeze of lemon juice can also give it a fresh kick. For a bit of heat, add some red pepper flakes or diced jalapeños. You can also swap in different spices. Try smoked paprika or curry powder for a unique twist. One common mistake is overcooking the quinoa. This can make it mushy. Always follow the cooking time and check for doneness. Another pitfall is not seasoning enough. Taste your dish before serving. Adjust the salt and pepper to your liking. Lastly, don’t skip the garnish. Fresh parsley adds color and a pop of flavor to your dish, making it more appealing. For the full recipe, check out the complete instructions above. {{image_4}} You can easily make this dish fit your diet. The base recipe is already vegetarian. To keep it vegan, skip any cheese toppings. You can add more veggies too. Try mushrooms, spinach, or kale. These add flavor and color. For a spicy kick, toss in some diced jalapeños. The options are endless! Quinoa is naturally gluten-free. This makes it great for those with gluten issues. You can enjoy this pilaf without worry. Just ensure your vegetable broth is gluten-free. Some brands add gluten, so check the label. You can also swap the broth with water if you prefer a lighter taste. Want to make this dish more filling? Add protein! Chickpeas or black beans work well. They blend nicely with the quinoa. You could also use cooked chicken or shrimp for meat lovers. If you want a plant-based option, try tofu. Just sauté it with the veggies for a delicious twist. For the full recipe, check out the Quinoa Veggie Delight Pilaf. To keep your quinoa vegetable pilaf fresh, store it in an airtight container. Make sure to let it cool before sealing. This helps prevent moisture buildup. Place the container in the fridge. It should stay good for about 3 to 5 days. If you notice any off smells or changes in color, it’s best to toss it. Freezing is a great way to save your pilaf. Divide it into smaller portions for easy meals later. Use freezer-safe bags or containers. Squeeze out as much air as possible to prevent freezer burn. Label each bag with the date. Your pilaf can last up to 3 months in the freezer. Thaw it in the fridge overnight before reheating. To reheat your pilaf, you can use a microwave or stovetop. For the microwave, place your pilaf in a bowl. Add a splash of water to help with steam. Cover it and heat for 1 to 2 minutes. Stir and check if it’s hot enough. On the stovetop, heat a skillet over low heat. Add your pilaf and a little water. Stir until warmed through. Enjoy your meal! For the full recipe, check out the [Full Recipe]. Quinoa is a tiny seed that acts like a grain. It is rich in protein and fiber. This makes it a great choice for a healthy diet. Quinoa has all nine essential amino acids. It is also gluten-free, making it safe for many people. The high fiber content helps with digestion and keeps you full. Quinoa is packed with vitamins and minerals too. It contains magnesium, iron, and antioxidants. These benefits make quinoa a smart food choice for everyone. Yes, you can make quinoa vegetable pilaf ahead of time. It stores well in the fridge for up to five days. Just let it cool before putting it in an airtight container. This makes meal prep easy. You can reheat it in the microwave or on the stove. If you want to add freshness, toss in some herbs or a splash of lemon juice before serving. Quinoa vegetable pilaf goes well with many dishes. Here are some ideas: - Grilled chicken or fish for protein. - A fresh salad for crunch and color. - Roasted vegetables for extra flavor. - Hummus or tzatziki as a dip on the side. - A light yogurt sauce to drizzle on top. These options will make your meal more filling and tasty. You can mix and match based on your mood or what you have at home. This makes quinoa vegetable pilaf a flexible dish. Enjoy trying out different pairings! This blog post covered how to make Quinoa Vegetable Pilaf. We explored key ingredients, their benefits, and cooking steps. I shared tips to cook quinoa perfectly and to enhance flavors. We also looked at variations for different diets and how to store leftovers. In closing, this dish is tasty and healthy. You can easily mix it up, too. Enjoy making your own Quinoa Vegetable Pilaf!

Savory Quinoa Vegetable Pilaf Easy and Healthy Recipe

Welcome to a flavorful journey with my Savory Quinoa Vegetable Pilaf recipe! This dish is simple, healthy, and packed with

- Ripe avocados - Whole wheat pasta - Fresh lemon juice - Garlic - Basil leaves - Olive oil - Parmesan cheese - Cherry tomatoes - Red pepper flakes To create creamy avocado pasta, start with ripe avocados. They add rich creaminess and healthy fats. Then, use whole wheat pasta for a wholesome base. Fresh lemon juice brightens the dish and balances flavors. Next, don’t skip the garlic. It brings a nice, savory taste to the sauce. Fresh basil leaves add a lovely herby note. Extra-virgin olive oil ties everything together and gives a smooth texture. For those who want to elevate their dish, consider adding Parmesan cheese. It adds depth and a savory kick. Cherry tomatoes provide a pop of color and freshness. If you like some heat, red pepper flakes can spice things up. For the full recipe, check the details above. Enjoy making this dish with simple and fresh ingredients! - Bring a large pot of salted water to a boil. - Add 12 ounces of whole wheat pasta. Cook until al dente, about 8-10 minutes. - Before draining, reserve 1 cup of pasta water. Drain the pasta and set it aside. - In a food processor, combine: - 2 ripe avocados, pitted and flesh scooped - 3 cloves garlic, minced - 2 tablespoons fresh lemon juice - 1/4 cup fresh basil leaves - 1/4 cup extra-virgin olive oil - Blend until smooth. Scrape down the sides as needed. - In a large bowl, add hot drained pasta to the sauce. - Toss gently to coat the pasta evenly with the avocado sauce. - If the sauce is thick, add reserved pasta water, one tablespoon at a time. Blend until you reach your desired creaminess. - Season with sea salt and freshly cracked black pepper to taste. - If you want a richer flavor, fold in 1/4 cup grated Parmesan cheese. Enjoy making this creamy avocado pasta with the full recipe for more details! To make your creamy avocado pasta just right, you need to focus on the sauce's thickness. If your sauce is too thick, it won't coat the pasta well. You can fix this by adding the reserved pasta water. Start with one tablespoon at a time. Blend after each addition until you reach your desired creaminess. Adding cheese can boost the richness of your dish. Parmesan cheese adds a savory note that blends well with the avocado. You can also play with seasoning. Try adding a pinch of garlic powder or some fresh herbs. Taste as you go to find what you love. When serving your creamy avocado pasta, think about how it looks. Use deep bowls to hold the pasta. Garnish with halved cherry tomatoes for color. You can also add a few whole basil leaves on top. A light drizzle of olive oil can make your dish shine. These small details make your meal look and taste even better. For the full recipe, check out the earlier sections! {{image_4}} You can switch up the pasta type in this recipe. Whole wheat pasta works well, but you can use gluten-free pasta or any shape you love. Try penne or fusilli for a fun twist. Adding protein can make the dish heartier. Consider cooked chicken, shrimp, or chickpeas. These options pair nicely with the creamy avocado sauce. To make your creamy avocado pasta more exciting, add spices and herbs. A pinch of garlic powder or onion powder can boost flavor. Fresh herbs like parsley or cilantro can also add brightness. Adding veggies is a great way to enhance nutrition. Try mixing in spinach, peas, or bell peppers. These colorful additions can make your dish more vibrant and tasty. For gluten-free options, use gluten-free pasta. This swap ensures everyone can enjoy the dish. For a vegan version, skip the Parmesan cheese or use a dairy-free alternative. If you want to cut back on fat or calories, use less olive oil or skip the cheese. You can still enjoy a creamy texture by using more avocado or adding a bit of vegetable broth instead. Explore these variations to make your creamy avocado pasta fit your tastes and needs. For the full recipe, check out the main section. To keep your creamy avocado pasta fresh, store leftovers in an airtight container. Place the pasta in the fridge right after serving. This method keeps the dish tasty for up to 2 days. Remember, avocado can brown quickly, so enjoy it soon! If you want to save it longer, you can freeze the sauce and pasta separately. Cooked pasta freezes well, but the sauce may change texture. For best flavor, freeze them in sealed bags or containers. Use within a month for the best taste. To reheat your pasta, use a skillet on low heat. Add a splash of water or olive oil to keep it moist. Heat until warm but do not overcook. Aim for a temperature of about 165°F. This helps maintain the creamy texture and flavor. You can easily make creamy avocado pasta vegan. Simply skip the Parmesan cheese. You can replace it with nutritional yeast for a cheesy taste. For added flavor, try using miso paste or tahini. These options give a nice depth without animal products. Yes, you can prepare the sauce ahead of time. Store it in an airtight container in the fridge. To keep it fresh, add a little lemon juice on top. This will help prevent browning. Use the sauce within two days for the best taste and texture. Pair creamy avocado pasta with a light salad or garlic bread. A simple arugula salad adds a nice peppery kick. For drinks, try a crisp white wine or sparkling water. These choices balance the rich flavors of the pasta. Enjoy your meal! In this post, we explored creamy avocado pasta, highlighting key ingredients and steps. We covered how to make the sauce, cook the pasta, and combine them perfectly. We also shared tips for creamy texture and flavor tweaks. Remember, you can customize this dish with different proteins and veggies. Leftovers can be stored easily, and reheating is simple. Enjoy this dish in many ways, from a quick lunch to a dinner feast. Creating this pasta dish will surely impress anyone at your table.

Creamy Avocado Pasta Simple and Flavorful Recipe

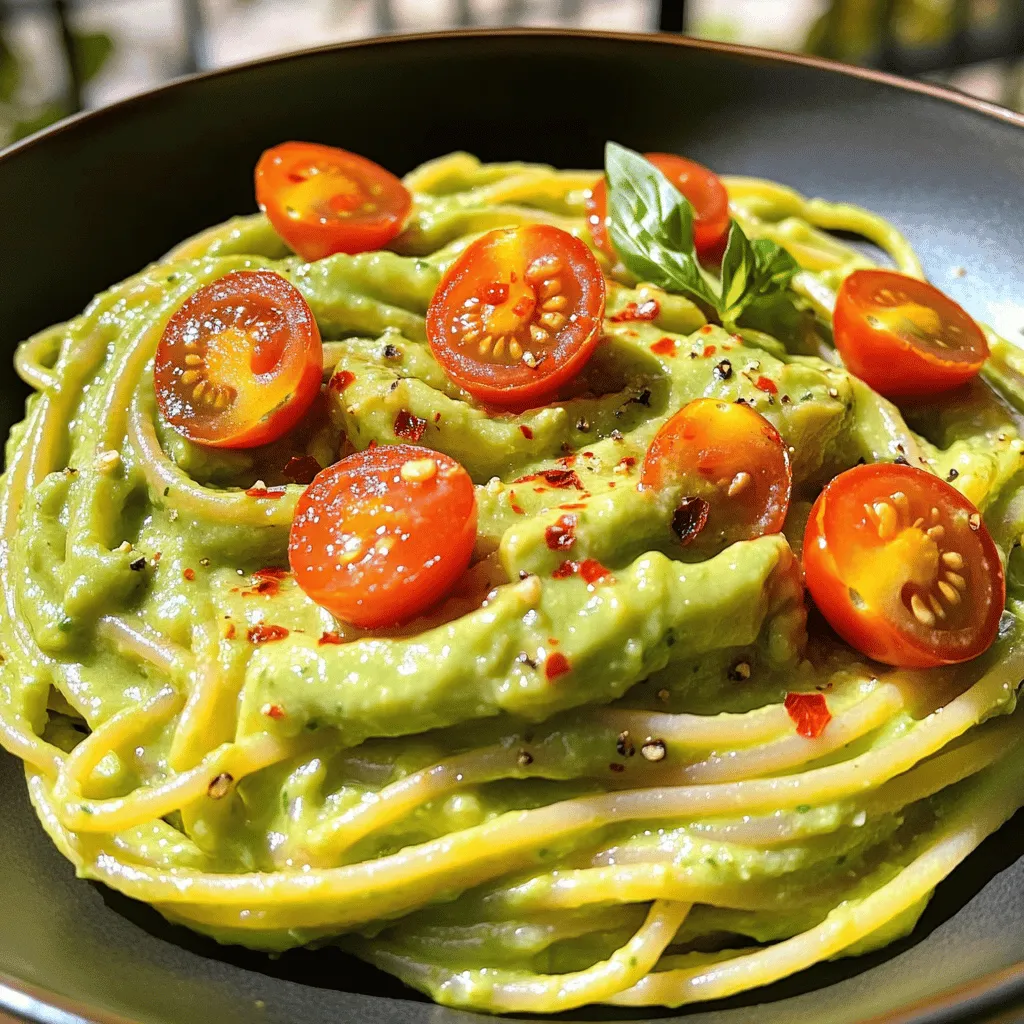
If you’re craving a dish that’s both creamy and healthy, you’re in the right spot. This Creamy Avocado Pasta recipe

- 1 large head of cauliflower, cut into bite-sized florets - 1 cup all-purpose flour (or chickpea flour for gluten-free) - 1 cup plant-based milk (such as almond or soy) These main ingredients form the base of your vegan cauliflower buffalo wings. Cauliflower is the star here, giving you that satisfying bite. The flour helps create a crispy coating, while the plant-based milk keeps it moist. - 1 teaspoon garlic powder - 1 teaspoon onion powder - 1 teaspoon smoked paprika - Salt and black pepper, to taste - 1 cup buffalo sauce (ensure it's vegan-friendly) - 2 tablespoons olive oil - Fresh parsley, finely chopped (for garnish) The seasonings add depth to the flavor. Garlic and onion powder bring warmth, while smoked paprika adds a hint of smokiness. The buffalo sauce gives it that signature spicy kick. Olive oil enhances the sauce and makes the wings rich. Garnishing with parsley adds a fresh touch. - Celery sticks for serving - Vegan ranch or blue cheese dressing (for dipping) Celery sticks help cool the heat and add crunch. Vegan ranch or blue cheese dressing pairs perfectly with the spicy wings. It balances the flavors and makes every bite enjoyable. For the full recipe, check out the detailed instructions to bring these delicious wings to life! First, you need to preheat your oven to 450°F (230°C). This high heat helps crisp the wings. Next, line a baking sheet with parchment paper. This makes for easy cleanup and prevents sticking. In a medium bowl, whisk together the flour, plant-based milk, garlic powder, onion powder, smoked paprika, salt, and black pepper. Mix until the batter is smooth. Aim for a lump-free texture. This batter coats the cauliflower well, giving it flavor. Take each cauliflower floret and dip it into the batter. Ensure each piece is fully coated. Shake off any extra batter. Place the coated florets evenly on the baking sheet. Bake for 20-25 minutes. Flip the florets halfway through baking for even crispiness. After baking, combine the baked cauliflower wings with buffalo sauce and olive oil in a clean bowl. Toss gently to coat each floret in the spicy sauce. This step is key for flavor. Return the sauced cauliflower wings to the oven. Bake for another 10-15 minutes. This final bake allows the sauce to caramelize, enhancing taste and texture. Once done, remove the wings from the oven and sprinkle fresh chopped parsley on top. This adds a nice touch. Serve the hot buffalo wings with celery sticks and a bowl of vegan ranch or blue cheese dressing. These sides cool down the heat and make a great pairing. For the complete recipe, check out the Full Recipe. To make your Vegan Cauliflower Buffalo Wings extra crispy, follow these tips: - Use a dry coating: Before dipping, dust the florets with a little flour. This helps the batter stick. - Hot oven: Set your oven to 450°F (230°C). A high temperature gives a better crunch. - Flip halfway: Bake for 20-25 minutes, flipping the wings halfway. This ensures even crispiness. Adjusting the baking time can also help. If you want them crunchier, add a few extra minutes. Just keep an eye on them to avoid burning. You can boost the flavor of your wings in fun ways: - Add spices: Try cayenne pepper for heat or smoked paprika for a deeper flavor. - Top with extras: After baking, sprinkle on some chopped green onions or drizzle with vegan ranch. For a homemade buffalo sauce, mix hot sauce with melted vegan butter and a touch of garlic powder. This makes it even more delicious. Using the right tools makes cooking easier: - Baking sheets: Use heavy-duty baking sheets for even cooking. Parchment paper prevents sticking. - Utensils: A whisk for mixing and tongs for flipping the wings work great. After cooking, clean your baking sheets with warm soapy water. This keeps them in good shape for next time. {{image_4}} If you need a gluten-free option for your Vegan Cauliflower Buffalo Wings, use chickpea flour. Chickpea flour works great in place of all-purpose flour. It adds a nutty flavor and a nice crispness. Plus, it’s packed with protein! Just swap the flour in the batter. You will still enjoy the same tasty wings. You can easily change the flavor of your buffalo wings. Try using different sauces like BBQ or teriyaki. These sauces add a sweet or tangy twist. If you love heat, add hot sauce or pepper flakes to the batter. This extra spice can make your wings even more exciting. Feel free to mix and match flavors to find your favorite combination! Get creative with how you serve your cauliflower wings. Pair them with various dips like guacamole or hummus. You can also serve them with fresh veggies or crispy fries on the side. Another fun idea is to incorporate the wings into salads or wraps. This way, you can enjoy a delicious and filling meal. Each option lets you enjoy these wings in a new way! To keep your Vegan Cauliflower Buffalo Wings fresh, store them in the fridge. Place the wings in an airtight container. This helps lock in moisture and flavor. Make sure they cool down before you seal the container. They can last up to three days in the fridge. If you want to keep them longer, freezing is a good option. For the best crispy texture, reheat in the oven. Preheat the oven to 375°F (190°C). Spread the wings on a baking sheet and heat for about 10 to 15 minutes. This method keeps them crunchy. You can use a microwave, but they may get soft. If you choose the microwave, heat them for 1-2 minutes and check often. You can freeze both unbaked and baked wings. For unbaked wings, coat them with batter and freeze them before baking. Lay them flat on a baking sheet until frozen, then transfer to a freezer bag. For baked wings, allow them to cool before freezing. Thaw them in the fridge overnight before reheating. This method helps retain flavor and texture. Vegan cauliflower buffalo wings can last about 3 to 5 days in the fridge. Store them in an airtight container to keep them fresh. If you have uncooked wings, they last about 1 to 2 days in the fridge. For the best taste, eat them fresh! Yes, you can make these wings in an air fryer! Preheat your air fryer to 400°F (200°C). Dip the cauliflower florets in the batter and place them in the air fryer basket. Cook for about 12-15 minutes, flipping halfway through. This gives you a crispy texture without using a lot of oil. You can try several sauces instead of buffalo sauce. BBQ sauce works well for a sweeter flavor. Teriyaki sauce adds a nice Asian twist. You could also use a spicy garlic sauce for extra heat. Make sure to check that they are vegan-friendly! Yes, these wings are healthier than traditional wings. Cauliflower is low in calories and full of nutrients. The batter uses plant-based milk, which is lighter than heavy creams. Plus, you control the amount of buffalo sauce you use. Enjoy them guilt-free with celery sticks and a healthy dip! This blog post walks you through making vegan cauliflower buffalo wings. You learned about the key ingredients, including cauliflower, flour, and plant-based milk. I shared step-by-step instructions for cooking these tasty wings to perfection. You also discovered tips for keeping them crispy and variations to suit your taste. Finally, we discussed storage options for leftovers and reheating methods. Enjoy your cooking, and have fun experimenting with flavors! Your healthy snack is just a recipe away.

Vegan Cauliflower Buffalo Wings Delicious and Easy Recipe

Ready to spice up your snack game? These Vegan Cauliflower Buffalo Wings are your go-to for a tasty, plant-based treat.

Older posts
Newer posts
← Previous Page1 … Page24 Page25 Page26 … Page43 Next →

dsad

© 2025 dailydishcraft • Built with GeneratePress

Our Policies

  • Copyright Policy
  • Cookie Policy
  • GDPR Policy
  • Privacy Policy
  • Disclaimer
  • Terms Of Use

More Information

  • Home
  • About
  • Contact
  • Appetizers
  • Dessert
  • Dinner
  • Drinks
©2025, dailydishcraft About Back To Top