No Bake Chex Peanut Butter Bars Easy and Quick Treat
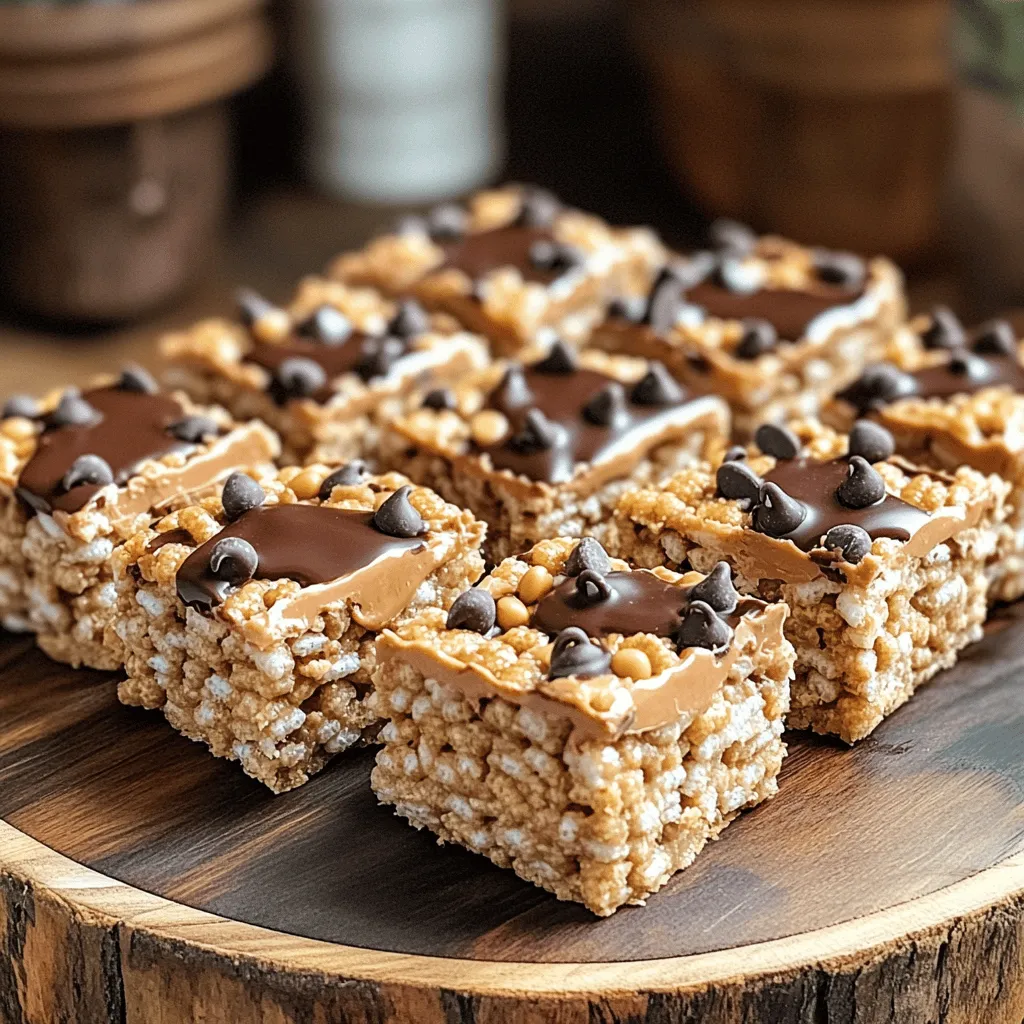
Looking for an easy treat that satisfies your sweet tooth? Try these No Bake Chex Peanut Butter Bars! They’re quick
Looking for an easy treat that satisfies your sweet tooth? Try these No Bake Chex Peanut Butter Bars! They’re quick

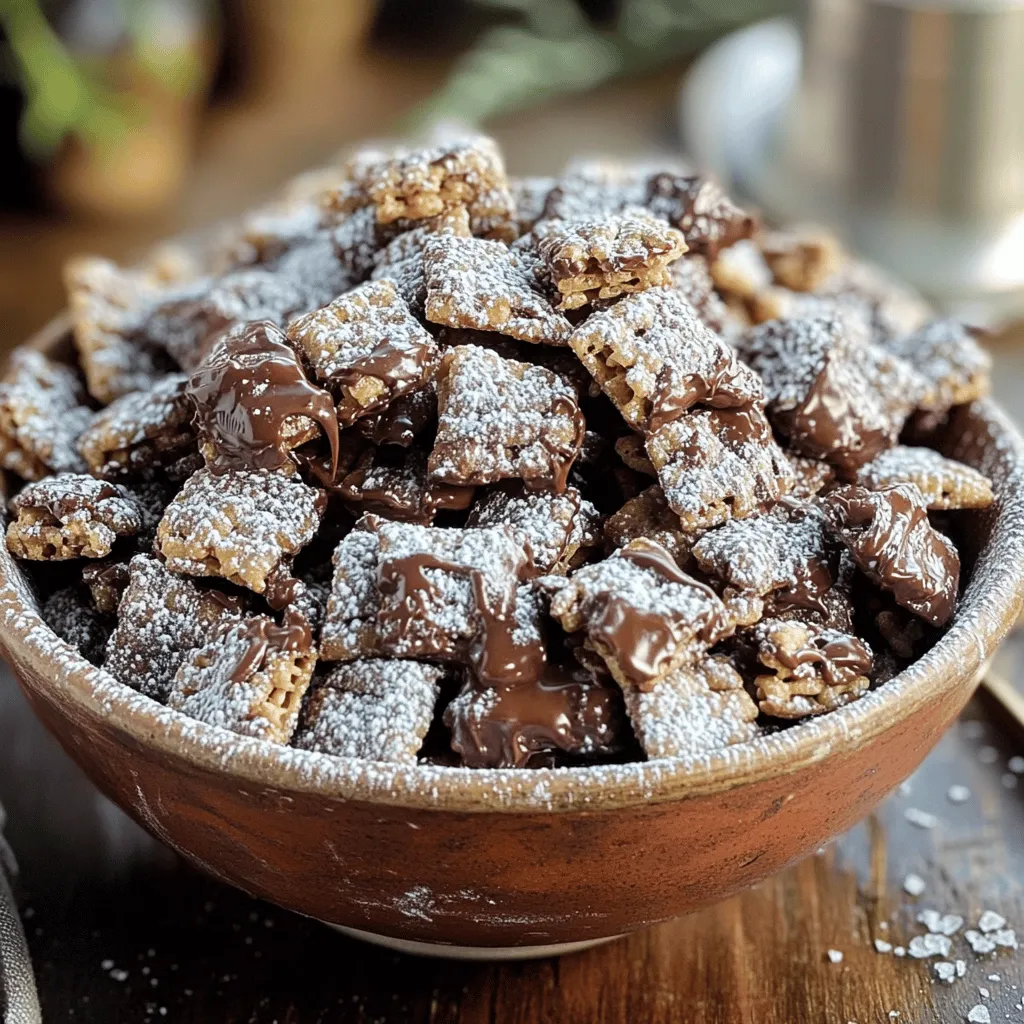
Looking for a fun, sweet snack that’s easy to make? White Chocolate Trash Mix is your answer! This delicious mix

Get ready to delight your taste buds with Peppermint Bark Puppy Chow, the ultimate holiday treat! This sweet and crunchy
Are you ready to whip up a delightful treat that will make your taste buds dance? Chocolate Peanut Butter Puppy
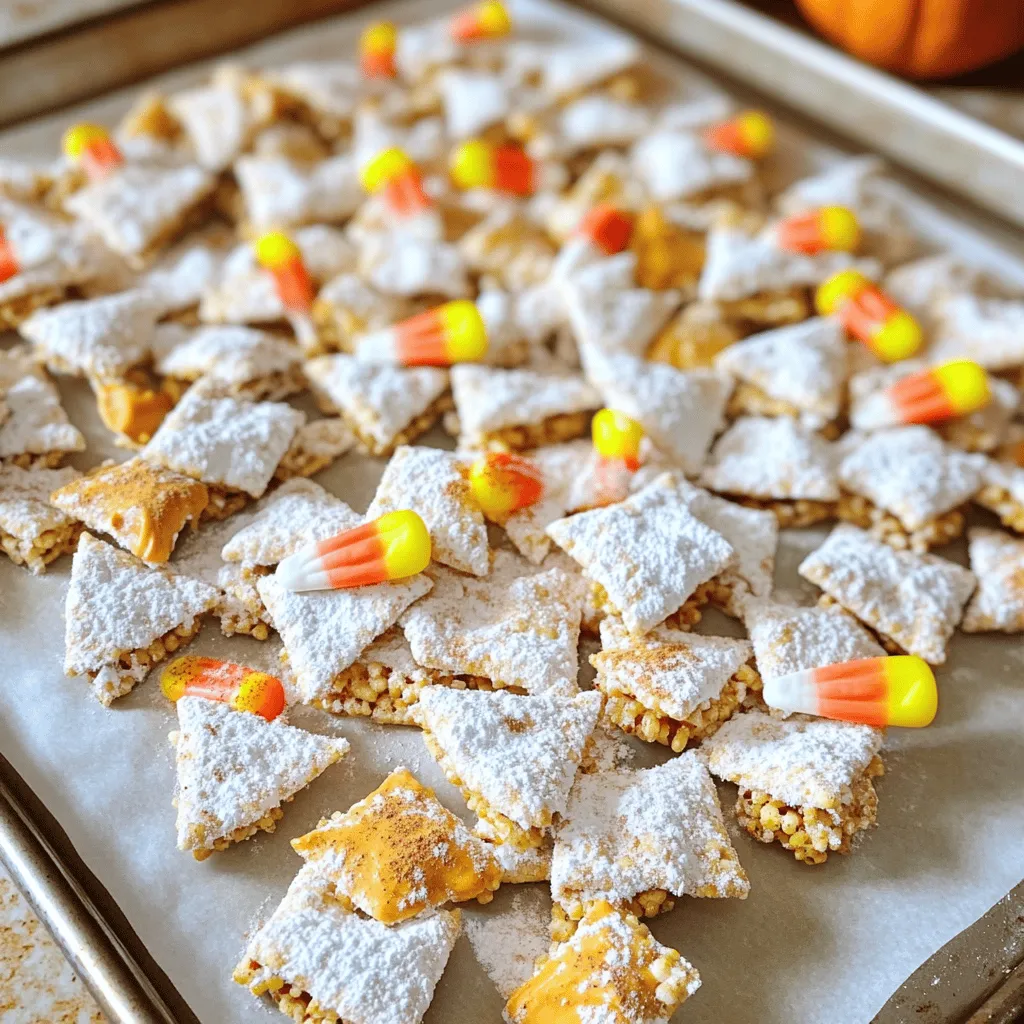
Are you ready to spice up your fall snacking? This Pumpkin Spice Puppy Chow recipe combines the best seasonal flavors
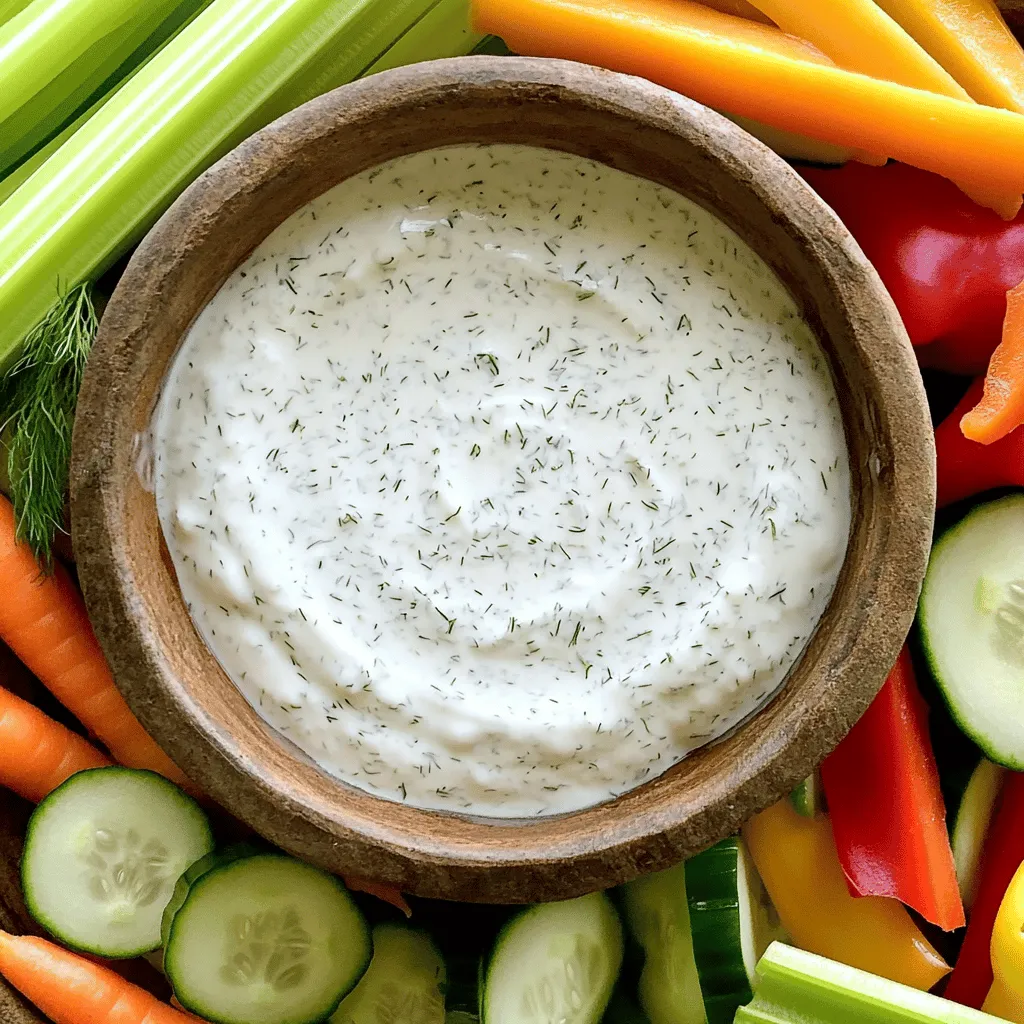
Looking for a tasty dip that’s easy to make? Greek Yogurt Ranch Dip is the perfect choice! It’s creamy, fresh,
. Enjoy creating this delightful snack! In a big bowl, combine the cream cheese, cheddar, and feta. Blend them until creamy. A hand mixer works best for super smooth cheese. This mix is the heart of your cheese ball. Next, slowly mix in the honey. This adds a lovely sweetness to the mix. Then, sprinkle in the red pepper flakes. Stir well to spread the spice throughout. Taste it and add more flakes if you like more heat. Once mixed well, shape the cheesy blend into a ball. Wrap it tightly in plastic wrap. Chill it in the fridge for at least one hour. This helps the cheese ball hold its shape when you serve it. You can find the full recipe in the ingredients section. Enjoy making this tasty snack! To get the right texture for your cheese ball, use softened cream cheese. This makes mixing easier and helps achieve a smooth blend. Chilling the cheese ball is also key. Refrigerate it for at least one hour. This helps the cheese ball hold its shape. You can enhance the flavor by trying different types of cheese. For example, swap cheddar for gouda or pepper jack. Adjust the honey and heat levels too. If you like it sweeter, add more honey. If you enjoy heat, increase the red pepper flakes. Garnish your cheese ball with extra honey and chopped chives. This adds a nice touch of color and flavor. When serving, pair it with a variety of crackers and slices of crusty bread. This pairing creates a great balance of flavors and textures. For the Full Recipe, click here to discover how to make this delightful snack. {{image_4}} Spicing up your hot honey cheese ball can be fun. If you want more heat, try these spicy alternatives. - Increase red pepper flakes: Add more flakes for a hotter kick. - Add jalapeños: Chopped jalapeños bring a fresh, spicy flavor. You can also change the cheese for exciting new tastes. Here are some great cheese variations. - Substitute goat cheese: This gives a tangy twist that many enjoy. - Use smoked cheddar: Smoked cheddar adds a unique, rich flavor. Finally, consider different coatings to enhance your cheese ball. Here are some alternative coatings. - Try using seeds: Use sesame or sunflower seeds for a crunchy texture. - Roll in herbs: Fresh herbs like parsley or dill add a bright taste. These variations keep your cheese ball fresh and exciting. Check out the Full Recipe for more delicious details! Store any leftover hot honey cheese ball in an airtight container. This keeps it fresh and tasty. Enjoy it within 3-5 days for the best flavor and texture. You can freeze the cheese ball before chilling it. However, this may change the texture. Wrap it tightly in plastic wrap and foil. For best quality, eat it within a month. If you freeze the cheese ball, let it thaw in the refrigerator before serving. This helps restore some texture. The cheese ball is best served cold or at room temperature. Enjoy your snack! For the full recipe, check out the details above. Yes, you can prepare it the day before serving. Just store it in the fridge. This gives the flavors time to mix and deepen. Plus, it saves you time when guests arrive. It pairs well with crackers, bread, and fresh veggies. You can use an array of colors and textures. This makes your platter look great and adds variety. Try serving with crunchy veggies like carrots and bell peppers. Make sure to chill it long enough to set properly before serving. I recommend at least one hour in the fridge. This helps the cheese ball hold its shape. If it's too soft, it won't look as nice on the plate. The spice level can be adjusted by modifying the amount of red pepper flakes used. Start with one teaspoon for mild heat. If you like it hotter, add more. Taste as you go, and find the heat that suits you best. This blog post covered how to make a delicious hot honey cheese ball. You learned the key ingredients, easy steps, and tips to perfect your dish. Remember, you can adjust flavors to suit your taste. Experimenting with different cheeses and toppings can lead to unique variations. Storing leftovers is simple, too. Enjoy this fun appetizer at your next gathering or snack time. With these steps, you'll impress your friends and family in no time. Happy cooking!](https://dailydishcraft.com/wp-content/uploads/2025/07/dfc884b7-f3cf-4fd0-9c1c-25ebd577b2d1.webp)
Looking for a crowd-pleasing snack that packs a punch? Try my Hot Honey Cheese Ball! This easy recipe combines smooth
![- Spinach - Artichoke Hearts - Cream Cheese - Sour Cream - Mozzarella Cheese - Parmesan Cheese - Garlic - Red Pepper Flakes - Lemon Juice - Seasoning You can make this dip your own by using some easy swaps. - Dairy-free options: Use cashew cream or dairy-free cream cheese instead of regular cream cheese. Coconut yogurt works well in place of sour cream. - Veggie additions: Try adding chopped bell peppers or sun-dried tomatoes for extra flavor. You can even use kale instead of spinach for a twist. Feel free to explore these ideas to suit your taste. They can change the flavor and make the dip unique. Want to try a new spin? Check out the Full Recipe for more ideas! - Preheat your oven to 350°F (175°C). A hot oven helps the dip bake well. - In a medium bowl, mix the cream cheese and sour cream. Blend until smooth and creamy. - Fold in the fresh spinach and artichoke hearts. Add in the minced garlic and red pepper flakes. - Squeeze in the lemon juice, then add the mozzarella and Parmesan cheese. Mix until everything is well combined. - Choose a medium-sized baking dish. It should hold all the dip without overflowing. - Pour the mixture into the dish and smooth it out. Bake for 20-25 minutes. Look for a bubbly top that is golden brown. This simple method brings out the best in your spinach artichoke dip. Enjoy the creamy goodness! For the complete recipe, check out the [Full Recipe]. To get the best texture in your dip, you want it creamy. Start with room temperature cream cheese. This helps it blend smoothly. Mix the cream cheese and sour cream well. Use a hand mixer or a sturdy spatula. This step is key to avoiding lumps. When you add the spinach and artichokes, fold gently. This keeps the dip light. If you stir too hard, it can get tough. Make sure to mix the ingredients evenly. A smooth, rich dip is your goal. To boost the taste, add spices. A pinch of garlic powder or onion powder works great. If you want more heat, use extra red pepper flakes. For a fun twist, try smoked paprika or cayenne. Fresh herbs also add a nice touch. Chopped basil or parsley can brighten the dip. You can mix in fresh dill for a unique flavor. These little changes can make a big difference. Serve this dip warm for the best taste. Pair it with tortilla chips or toasted baguette slices. Both options make for a great crunch. For a nice look, serve it in the baking dish. Add a sprinkle of extra Parmesan on top. You can also garnish with fresh spinach leaves. This adds color and makes it more appealing. Enjoy the dip with friends and family for a fun gathering! {{image_4}} You can make this dip even better with simple changes. Adding spices boosts the flavor. For example, try smoked paprika or cayenne pepper. These spices add warmth and depth. You can also mix in herbs like basil or oregano for freshness. For different taste profiles, swap out ingredients. Use Greek yogurt instead of sour cream for tanginess. Change cream cheese for ricotta for a lighter texture. These swaps keep the dip exciting. Want a lighter dip? Use reduced-fat cream cheese and sour cream. This cuts calories but keeps great taste. You can also add more spinach to boost nutrition without adding many calories. If you're gluten-free, serve the dip with veggie sticks or gluten-free chips. This way, everyone can enjoy it. You can even use rice cakes for a crunchy dipper. Serving matters! Try using a bread bowl for a fun twist. Hollow out a loaf of bread and fill it with the dip. It looks great and tastes delicious. For dipping alternatives, use fresh veggies like carrots and bell peppers. They add crunch and color. You can also serve with pita chips or pretzel bites for a fun texture. By trying these variations, you'll keep your spinach artichoke dip fresh and fun. For the complete method, check the Full Recipe. To keep your spinach artichoke dip fresh, use airtight containers. Glass containers work best. They help keep flavors intact. You can also use plastic containers with tight lids. Store the dip in the fridge within two hours after serving. It keeps well for about three days. When ready to enjoy again, the oven is your best friend. Set it to 350°F (175°C). Place the dip in an oven-safe dish. Heat for about 15 minutes until warm. Stir halfway through to keep it smooth. You can also use a microwave for quick reheating. Put a small portion in a microwave-safe bowl. Heat for 30 seconds, then stir. Repeat until warm. This method can change the texture slightly, so watch it closely. Keep the dip creamy by not overheating. Enjoy your delicious leftovers just as much as the first time! For the full recipe, check out the creamy spinach artichoke delight. Can I make this dip ahead of time? Yes, you can prepare this dip a day in advance. Just mix the ingredients, place them in your baking dish, and cover it with plastic wrap. Store it in the fridge until you are ready to bake it. This saves time and lets the flavors blend. How long will leftovers last? Store any leftover dip in an airtight container. It will stay fresh for about 3 to 4 days in the fridge. Reheat it in the oven or microwave before serving again. Why is my dip too thick? If your dip is too thick, it may need more creaminess. You can add a bit of sour cream or cream cheese to loosen it up. Mix well until you reach your desired texture. What can I use as a dipper? Tortilla chips and toasted baguette slices work great. You can also use fresh veggies like carrots, celery, or bell peppers for a healthy twist. The caloric content of this dip depends on the ingredients you use. Here is a rough estimate per serving: - Cream cheese: 100 calories - Sour cream: 60 calories - Mozzarella cheese: 80 calories - Parmesan cheese: 20 calories - Spinach and artichokes add minimal calories. Spinach is rich in vitamins A, C, and K. It helps boost your immune system. Artichokes are high in fiber and good for digestion. Together, they make this dip not just tasty but also healthy. Enjoying this dish can be a smart choice for your snacking needs. This blog post showed how to make a creamy spinach artichoke dip. We covered the main ingredients and substitutions. I shared step-by-step instructions, tips for perfect consistency, and ideas for serving. You learned about variations and how to store leftovers. Remember, you can customize this dip to suit your taste. Enjoy exploring different flavors and tweaks. Whether it’s for a party or a quiet night, this dip will shine. Dive into your culinary adventure with confidence and creativity. Happy cooking!](https://dailydishcraft.com/wp-content/uploads/2025/07/beac67e7-b554-4339-b90d-acea7577e4f4.webp)
If you crave a delicious and easy appetizer, look no further than my Savory Spinach Artichoke Dip. This creamy blend
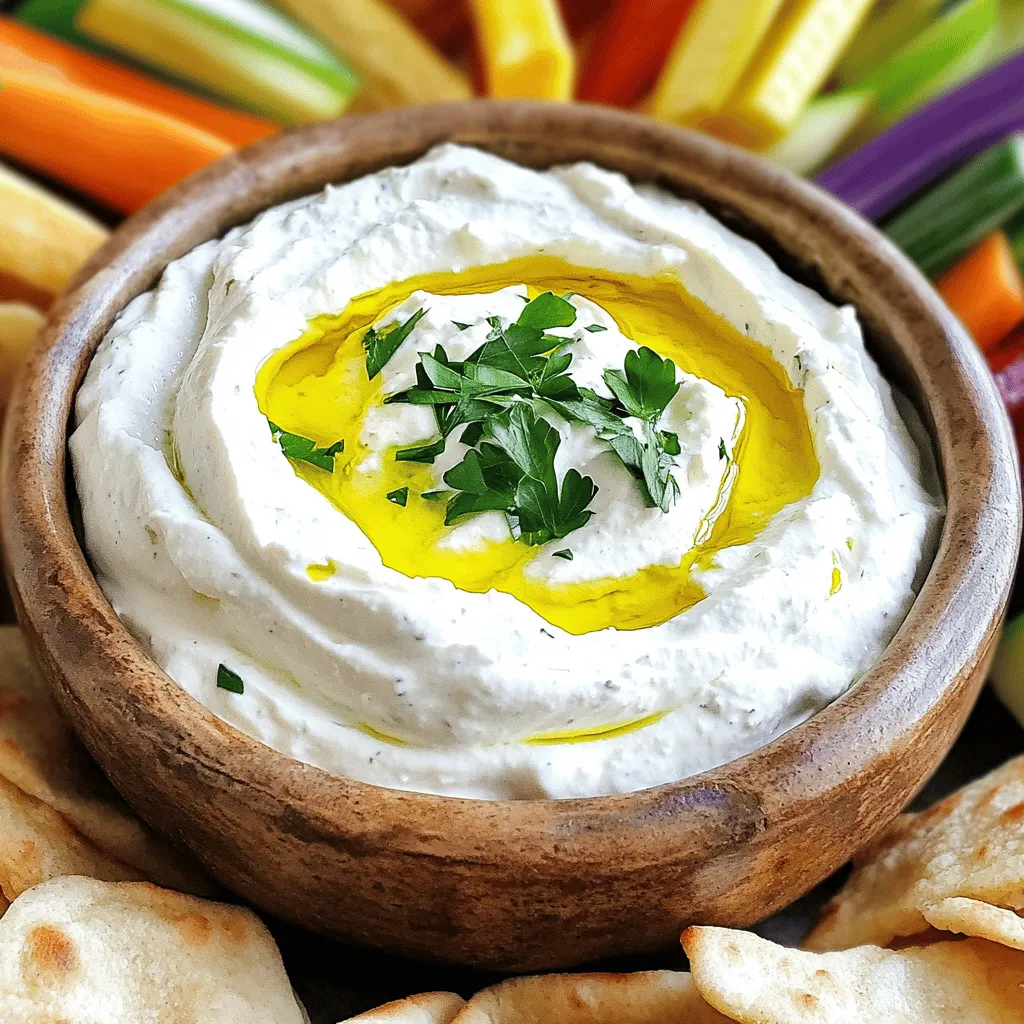
Looking for a simple yet delicious appetizer? This Whipped Feta Dip is a game-changer! With just a few key ingredients,

As the leaves change and the air cools, there’s nothing quite like a warm cup of Caramel Apple Cider to
