
Pumpkin Pie Overnight Chia Pudding Healthy Delight
If you love pumpkin pie, you’ll adore my Pumpkin Pie Overnight Chia Pudding. It’s delicious, easy to make, and packed
If you love pumpkin pie, you’ll adore my Pumpkin Pie Overnight Chia Pudding. It’s delicious, easy to make, and packed
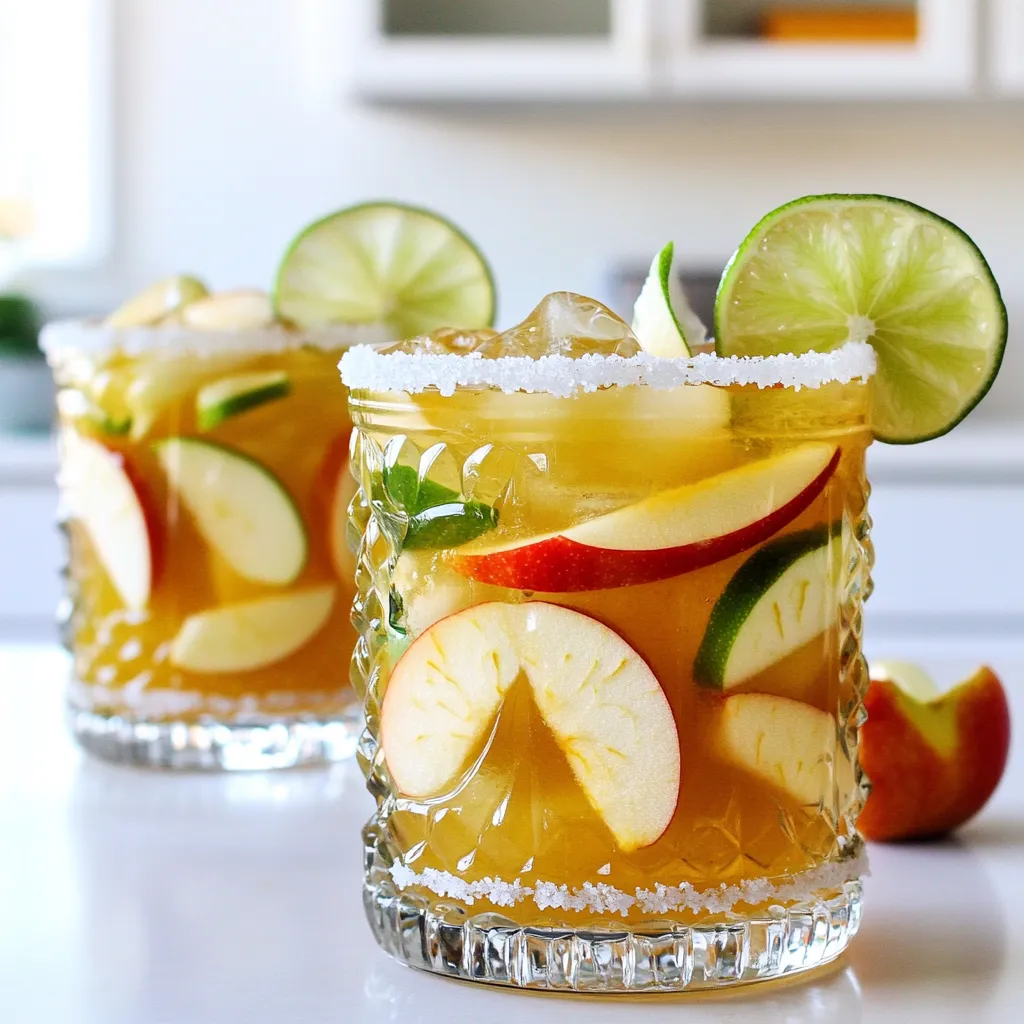
Looking for a refreshing twist on your favorite fall flavors? This Apple Cider Margarita Mocktail is your answer! Made with
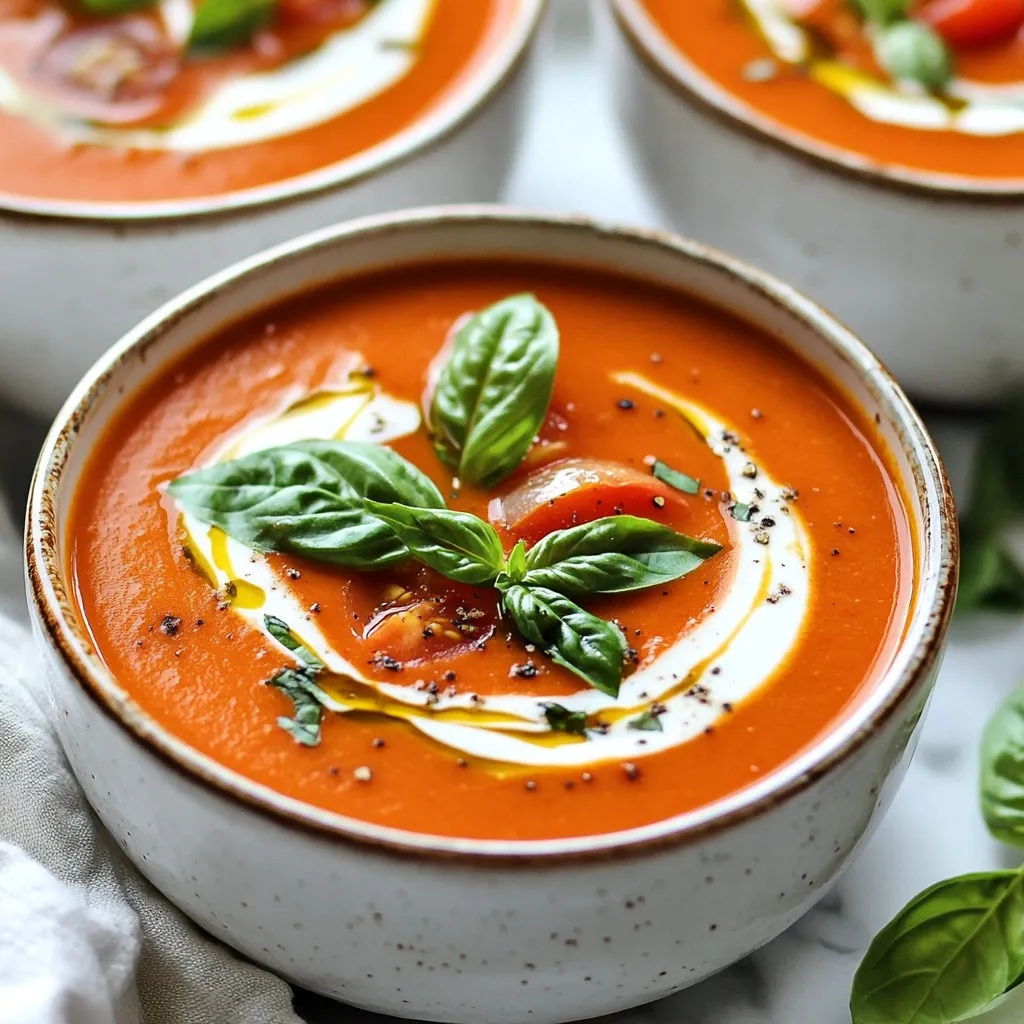
Craving a warm bowl of soup that’s both creamy and flavorful? You’re in the right place! My Instant Pot Creamy

Get ready to delight your taste buds with my easy Caramel Apple Popcorn Clusters recipe! This snack combines sweet caramel,
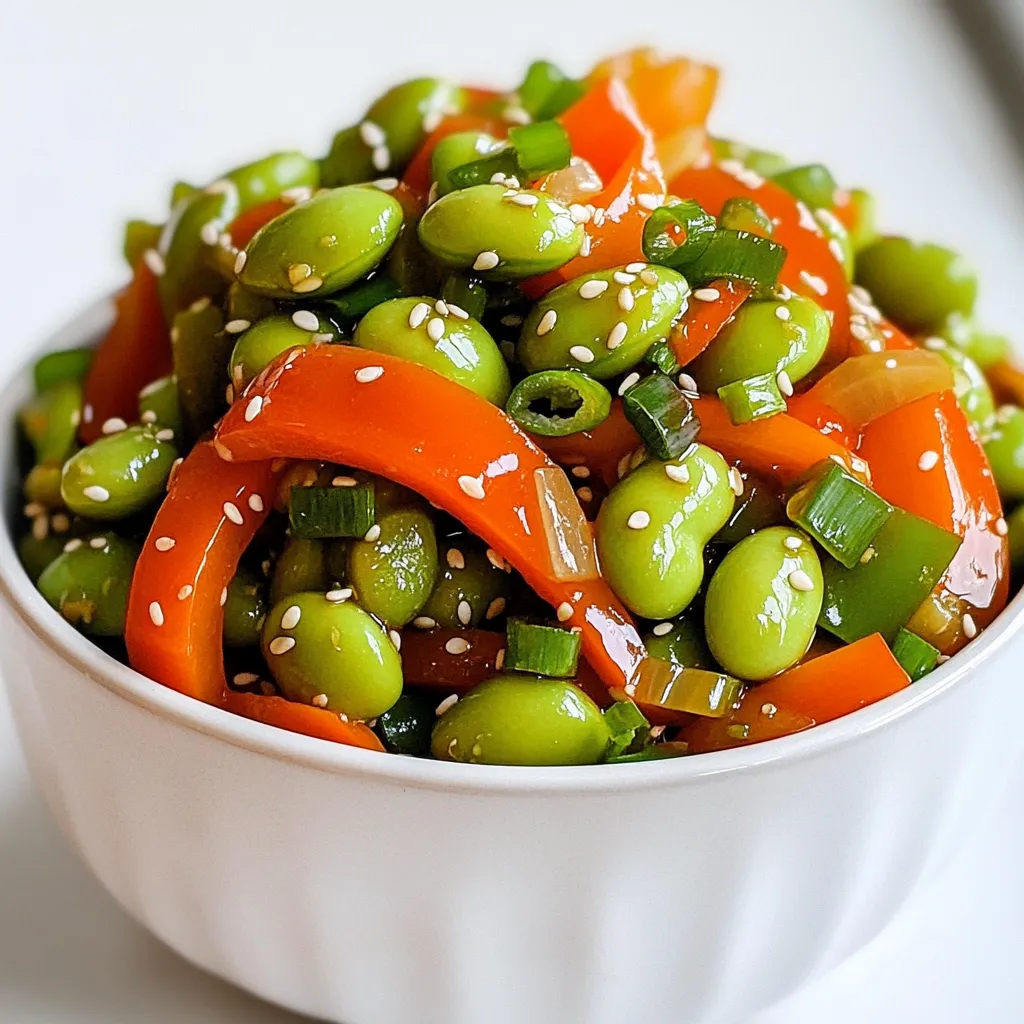
Are you craving a quick yet tasty dish? This Spicy Garlic Edamame Stir Fry is perfect for you! Packed with
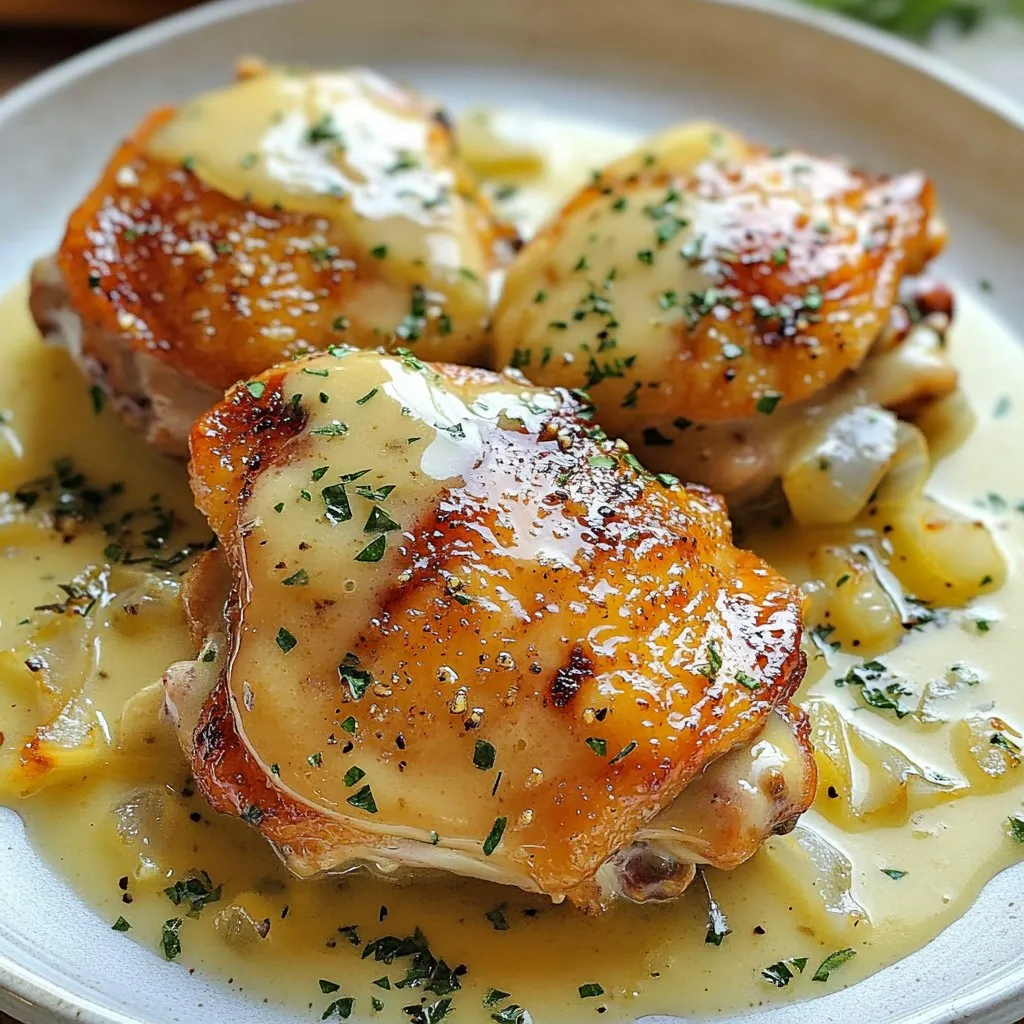
Looking for a quick, tasty meal? One-Skillet Smothered Chicken is your answer! This dish brings juicy chicken and creamy sauce
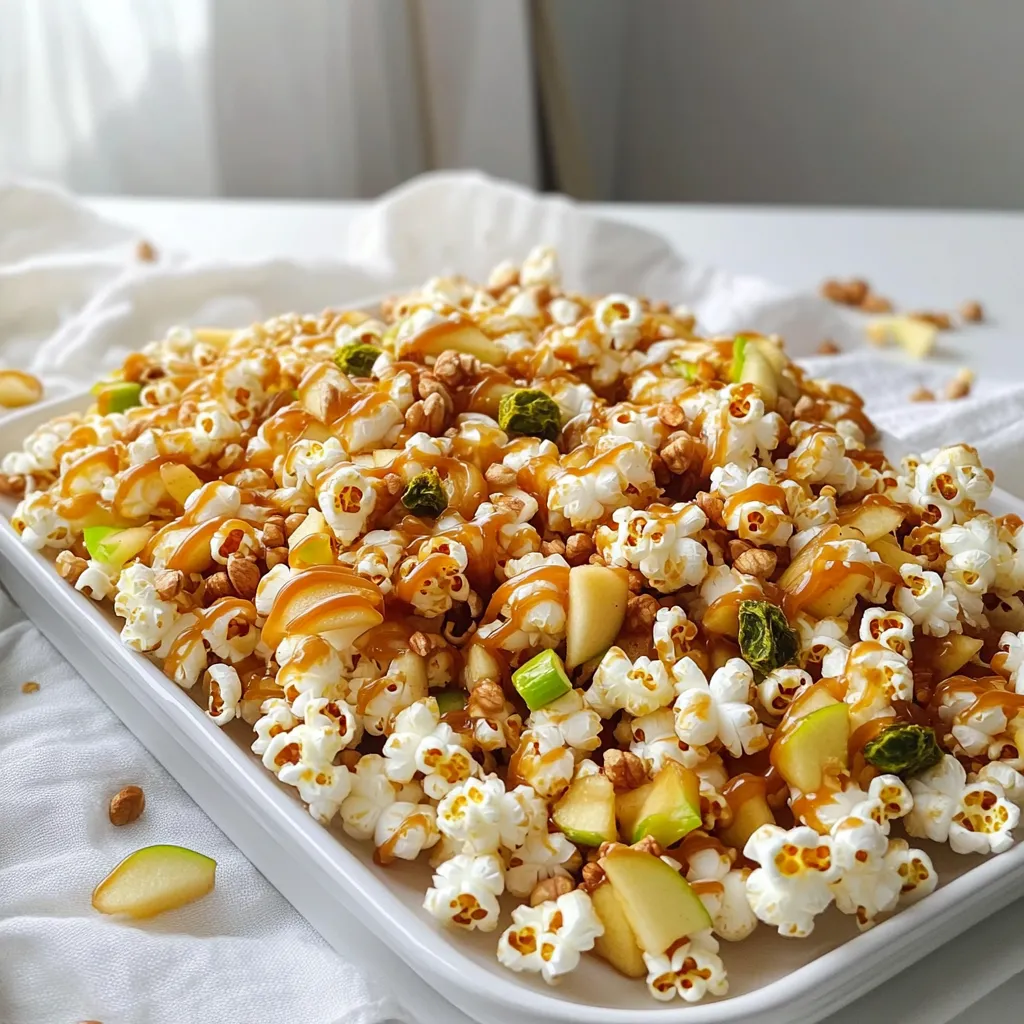
Get ready to make a treat that combines sweet and crunchy goodness! In this post, I’ll guide you through my
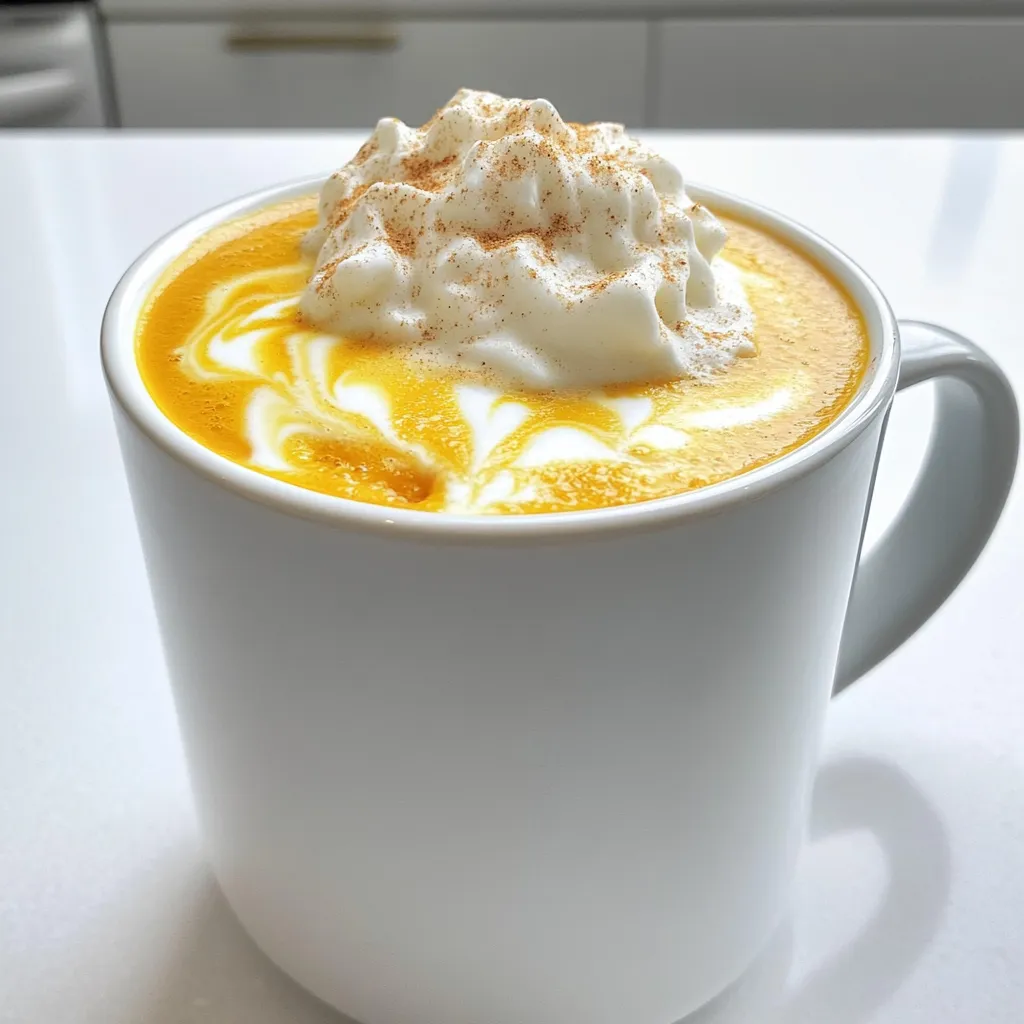
Craving that cozy Pumpkin Spice Latte but don’t want to hit the café? You’re in luck! This Pumpkin Spice Latte
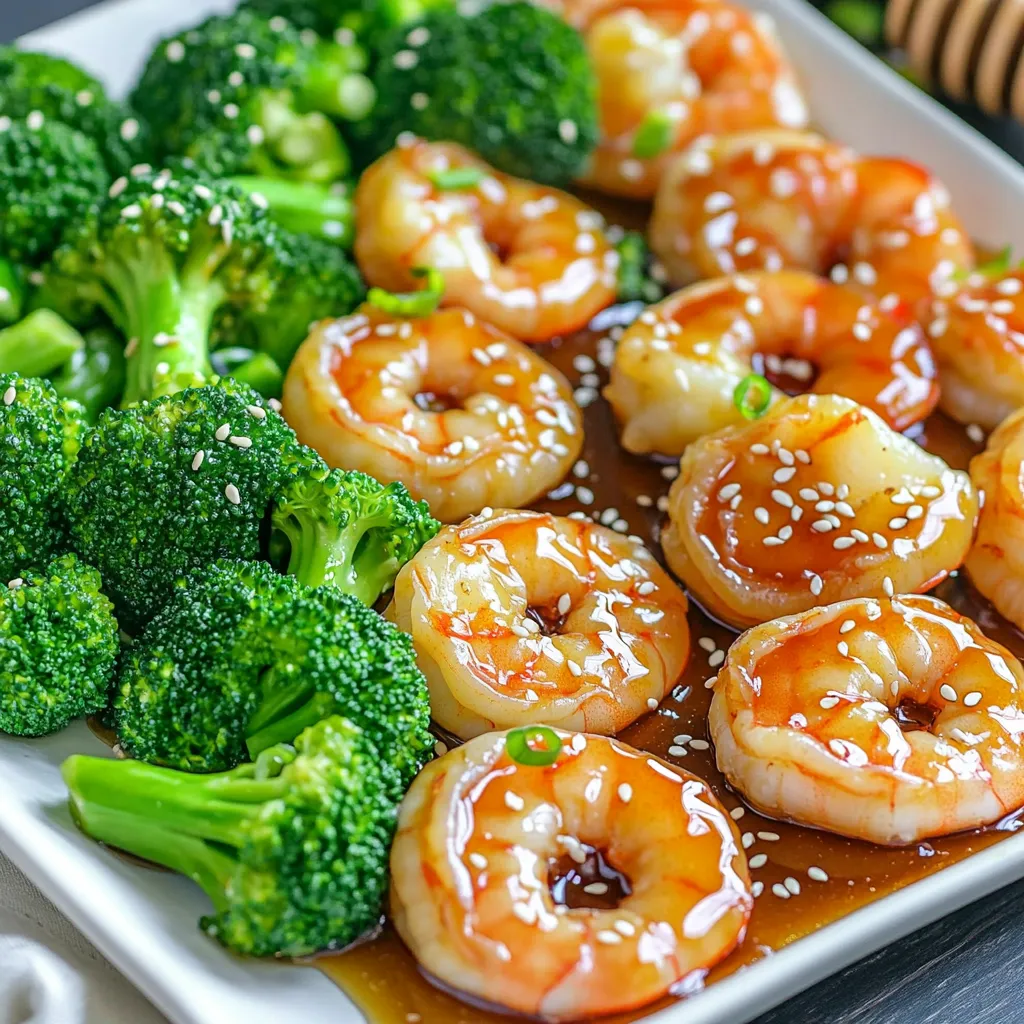
Are you ready for a quick and tasty dinner? Sheet-Pan Honey Garlic Shrimp and Broccoli Delight is the answer! This

If you’re ready to elevate your baking game, these Brown Butter Maple Glazed Shortbread Cookies will amaze you. Imagine a
