Skip to content
DisclaimerTerms Of UseGDPR PolicyCookie Policy

dailydishcraft

  • Home
  • Drinks
  • Appetizers
  • Dinner
  • Dessert
  • About
  • Contact
  • Privacy Policy
DisclaimerTerms Of UseGDPR PolicyCookie Policy

Jessica

- 1 can (15 oz) chickpeas, drained and rinsed - 1 tablespoon olive oil - 1 teaspoon ground cumin - 1 teaspoon smoked paprika - 1/2 teaspoon chili powder - Salt and pepper, to taste - 6 small corn tortillas - 1 ripe avocado, sliced - 1 cup shredded lettuce - 1 medium tomato, diced - Hot sauce, to taste (optional) These ingredients are simple and cheap. You can find them in most grocery stores. Chickpeas are great for protein and fiber. Avocados add healthy fats, while spices bring flavor. - Chickpeas: $1.00 - Olive oil: $0.25 - Ground cumin: $0.10 - Smoked paprika: $0.10 - Chili powder: $0.05 - Corn tortillas: $1.50 - Avocado: $1.00 - Shredded lettuce: $0.50 - Tomato: $0.50 - Hot sauce: $0.25 Total estimated cost: around $5.25 for 2-3 servings. This meal is budget-friendly and filling. These tacos are not just cheap; they are also healthy. Each serving has approximately: - Calories: 350 - Protein: 12g - Carbohydrates: 40g - Fiber: 10g - Fat: 15g These numbers may vary based on the size of the avocado and tortillas you use. Overall, this meal gives you good nutrition while keeping costs low. Enjoy making this tasty recipe! [Full Recipe] First, you'll want to heat a skillet over medium heat. Add 1 tablespoon of olive oil. Wait until the oil shimmers. Then, take 1 can of chickpeas, drained and rinsed. Carefully add the chickpeas to the skillet. Sprinkle 1 teaspoon of ground cumin, 1 teaspoon of smoked paprika, and 1/2 teaspoon of chili powder over them. Don’t forget salt and pepper to taste. Stir well to coat each chickpea in the spices. Cook the chickpeas for about 5 to 7 minutes. Stir occasionally until they are slightly crispy and fragrant. This step makes your tacos pop with flavor. While the chickpeas cook, grab another skillet. Heat it on low to medium heat. Place the corn tortillas in the skillet. Warm each tortilla for about 30 seconds on each side. You want them soft and pliable, not crispy. This makes them easy to fold later. Keep an eye on them so they don’t burn. Once they are warm, set them aside on a plate. Now comes the fun part! Take one warm tortilla and place it on your plate. Add a generous scoop of the spicy chickpeas in the center. Next, add a few slices of ripe avocado. Then, a handful of shredded lettuce goes on top. Finish with some diced tomato. If you like heat, drizzle hot sauce over the top. Carefully fold the tortilla in half. Now, enjoy your delicious taco! For a nice touch, serve with lime wedges and fresh cilantro for garnish. Check out the Full Recipe for more details! To save money on groceries, start with a list. Stick to it while shopping. Buy in bulk when possible. This often cuts costs. Look for store brands, as they are usually cheaper. Check for sales and coupons. Use apps to track weekly deals. Avoid shopping when hungry. It helps you to resist extra items. Try to buy seasonal fruits and veggies. They cost less and taste better. Flavor is key, even on a budget. Use spices you already have. For instance, cumin, paprika, and chili powder bring great taste. A simple dash of salt and pepper can brighten any dish. You can also add garlic or onion for more depth. If you have vinegar or citrus, use them to add tang. They can change a meal from bland to bold. If you want to cook for more people, it’s easy to scale up. Just double or triple the ingredients. For the Budget-Friendly Spicy Chickpea Tacos, this means using more chickpeas and tortillas. Increase spices equally for flavor balance. Make sure your cooking time stays the same, as it won’t change much. Plan ahead and prepare larger batches. This way, you can enjoy meals without stress. {{image_4}} These spicy chickpea tacos are already vegan. You can keep them plant-based by using fresh veggies. Try diced bell peppers, corn, or black beans. Adding these ingredients boosts flavor and nutrients. You can also swap in different beans like pinto or kidney. They all work great! If you need gluten-free options, use corn tortillas. They are usually safe and tasty. You can also try lettuce wraps instead of tortillas. They add a fresh crunch. If you want, make your own tortillas from gluten-free flour. This way, you control the ingredients. Toppings can change the game for your tacos. Here are some great ideas to enhance flavors: - Crumbled feta or vegan cheese - Fresh cilantro or parsley - Pickled onions for tang - Pineapple salsa for sweetness - Jalapeños for extra heat Feel free to mix and match toppings. Each adds a unique twist to your taco experience. For more ideas, check out the Full Recipe. To keep your leftover tacos fresh, wrap them tightly in foil or plastic wrap. You can also place them in an airtight container. Store them in the fridge. They will stay good for up to three days. If you want to save them longer, freezing is a great option. When you're ready to eat, you can reheat your tacos easily. If you use a microwave, put the tacos on a plate and cover them with a damp paper towel. Heat them for about 30-60 seconds until warm. If you prefer a crispier taco, heat a skillet over medium heat and warm the tacos for 2-3 minutes, turning them to heat evenly. To freeze your tacos, don't add the fresh toppings like avocado or lettuce. Freeze the spiced chickpeas and tortillas separately. Place them in freezer-safe bags or containers. When you're ready to enjoy, thaw them overnight in the fridge. Reheat as mentioned above. This way, you can have a quick meal ready when you're broke and hungry. Try this method with the Full Recipe for Budget-Friendly Spicy Chickpea Tacos for tasty results! If you don’t have chickpeas, use black beans or lentils instead. Both options are affordable and tasty. Black beans add a nice creaminess, while lentils offer a different texture. They cook quickly, too. You can follow the same recipe steps for these substitutes. To spice up your tacos, add jalapeños or a spicy salsa. You can also mix in more chili powder or cayenne pepper with the chickpeas. Another option is to use a hot sauce of your choice. Just remember to start light and add more as needed. Yes, you can make low-calorie tacos by skipping the avocado. Use lettuce leaves as taco shells instead of corn tortillas. This swap cuts calories and carbs. You can also load up on veggies like bell peppers or zucchini to add volume without many calories. For the full recipe, check out the Budget-Friendly Spicy Chickpea Tacos. This blog post offered a clear guide on making delicious tacos. We discussed affordable ingredients, their costs, and nutritional value. You learned how to prepare chickpeas, cook tortillas, and assemble your tacos. I shared tips for saving money and enhancing flavors. We also explored variations to meet different dietary needs. Finally, the storage info helps you keep leftovers fresh. Use this knowledge to create tasty tacos that fit your budget and feed your family. Enjoy experimenting with flavors and making these tacos your own!

Cheap Meals to Make When You Are Broke Fast

Are you strapped for cash but still want to eat well? In this post, I’ll share quick, tasty, and budget-friendly

To create a bowl of fiery chicken ramen, gather fresh, quality ingredients. Here’s what you need: - Chicken: 2 boneless, skinless chicken thighs, sliced into strips - Broth: 4 cups chicken broth (low-sodium recommended) - Noodles: 2 packs of instant ramen noodles (discard flavor packets) - Sauces: 2 tablespoons chili paste, 1 tablespoon soy sauce, ½ cup heavy cream, 1 teaspoon sesame oil - Flavorings: 2 garlic cloves, minced; 1 tablespoon olive oil; 1 tablespoon freshly squeezed lemon juice; salt and pepper to taste - Garnishes: 1 cup fresh baby spinach; 1 green onion, thinly sliced; 1 large boiled egg, cut in half; ¼ teaspoon red pepper flakes These ingredients come together to create a spicy, creamy delight. For detailed cooking steps, check the full recipe. To start, season the chicken thighs. Use a mixing bowl to add salt, black pepper, and chili paste. Toss the chicken pieces until each is coated well. Allow the chicken to marinate for about 10 minutes. This step helps lock in flavor. Next, heat olive oil in a large pot over medium heat. Add minced garlic and sauté it for about 1 minute. The garlic should become fragrant but not brown. Then, carefully pour in the chicken broth and add soy sauce. Let this mixture come to a gentle simmer. Once the broth simmers, add the marinated chicken. Stir occasionally as it cooks for 5-7 minutes. This ensures the chicken is fully cooked and tender. The broth will absorb the chicken's flavors, making it even tastier. Now, it's time for the noodles. Add the instant ramen noodles directly into the pot. Cook them according to the package instructions, usually about 3-4 minutes. The noodles will soak up the spicy broth, making them deliciously flavorful. While the noodles cook, whisk the creamy garlic sauce. In a small bowl, combine heavy cream, lemon juice, and sesame oil. Mix until everything is smooth. This sauce adds a rich, creamy layer to your ramen. After the noodles are tender, stir in fresh baby spinach. Let it wilt for about 1 minute. Then, pour the creamy garlic sauce into the pot. Gently mix everything until combined. The result is a beautiful blend of flavors. When ready to serve, ladle the ramen into deep bowls. Top each bowl with a halved boiled egg and sliced green onions. For an extra kick, sprinkle red pepper flakes on top. This dish looks stunning and is sure to impress! [Full Recipe] - Choosing the right chili paste: I love using a good chili paste. It adds real heat and depth. For a milder taste, try gochujang. This Korean paste gives a nice touch without too much burn. - Balancing spice and creaminess: The creamy garlic sauce is key. It helps tone down the heat from the chili paste. Adjust the amount of cream to find your perfect balance. - Tips for perfectly cooked noodles: Start cooking the ramen just as your broth simmers. Follow the package time, usually 3-4 minutes. This keeps noodles tender yet firm. - Ensuring the chicken is tender: Marinate chicken with the chili paste. This helps it stay juicy. Cook until it’s no longer pink, about 5-7 minutes. - Time-saving strategies: Pre-measure your ingredients before starting. It makes cooking smoother and faster. - Pre-preparing elements for quick assembly: You can marinate chicken and make the garlic sauce ahead. This way, you can whip up this dish in no time. For more tips, check the Full Recipe for Fiery Chicken Ramen with Creamy Garlic Sauce. Enjoy cooking! {{image_4}} You can switch proteins easily in this dish. For a light option, try shrimp. Shrimp cooks fast and adds a nice flavor. Tofu is a great choice for a plant-based meal. It soaks up the broth well, too. When it comes to veggies, feel free to mix it up! Try bok choy, mushrooms, or even carrots. Each adds its own taste and texture to your bowl. You can customize based on what you have at home or what you like best. Want less heat? Use less chili paste or soy sauce. You can also add a splash of coconut milk for creaminess without the spice. For those who love heat, add more fresh chili slices or sriracha. Extra toppings can boost the spice, too. Consider adding jalapeños, crushed red pepper, or hot sesame oil. Each bite can become a new adventure! If you're gluten-free, look for rice noodles or buckwheat ramen. These options taste great and fit your diet. Just check the package to ensure they're gluten-free. For a dairy-free creamy sauce, substitute heavy cream with coconut cream or cashew cream. They create a rich flavor without dairy. You won't miss the creaminess at all! For the full recipe, check out the Fiery Chicken Ramen with Creamy Garlic Sauce. To store your Fiery Chicken Ramen with Creamy Garlic Sauce, let it cool first. Place it in a sealed container. This keeps the flavors fresh. Store it in the fridge for up to three days. If you keep it longer, the flavor may fade. When reheating ramen, make sure to keep it tasty. Use a stovetop for the best results. Heat it in a pot over low heat. Add a splash of chicken broth or water to keep it moist. Stir frequently to warm it evenly. If you use a microwave, cover it with a lid. Heat it for one minute at a time, stirring in between. Yes, you can freeze Fiery Chicken Ramen! It’s easy and great for meal prep. Let it cool completely, then put it in a freezer-safe container. If you want to keep the noodles separate, freeze the broth and chicken together. This helps them stay fresh. Use the frozen ramen within three months for the best taste. To make Fiery Chicken Ramen less spicy, you can adjust the chili paste. Use less chili paste or switch to a mild version, like gochujang. Adding more heavy cream also helps cool down the heat. You could also serve the ramen with extra lemon juice, which adds flavor without spice. I recommend using boneless, skinless chicken thighs. They stay juicy and tender during cooking. You can also use chicken breast if you prefer a leaner option. Just remember, thighs add more flavor and richness to the dish. Yes, homemade broth is a great choice. It adds depth and flavor that store-bought broth may lack. To make it, simmer bones with vegetables for several hours. You can also add herbs for extra taste. Homemade broth is healthier and can help you control the salt level. To make the ramen vegetarian, swap chicken for tofu or mushrooms. You can use vegetable broth instead of chicken broth to keep it flavorful. For added protein, try adding edamame or chickpeas. Use the same creamy garlic sauce to keep it rich and satisfying. For the full recipe, check out the complete instructions. In this blog post, we covered the essentials for making Fiery Chicken Ramen. We explored ingredients, preparation steps, and tips for perfecting flavor and texture. You learned how to adjust spice levels and even help with dietary needs. In conclusion, making this dish is not just easy but also fun. With the right ingredients and a few simple tips, you can create a meal everyone will love. Try it out and enjoy your cooking adventure!

Fiery Chicken Ramen with Creamy Garlic Sauce Delight

Craving a bold and comforting dish? Let me introduce you to Fiery Chicken Ramen with Creamy Garlic Sauce! This recipe

- 1 pound large shrimp, peeled and deveined - 4 cloves garlic, finely minced - 1 tablespoon extra-virgin olive oil - 2 tablespoons unsalted butter - 1 cup heavy cream - 1 teaspoon smoked paprika - 1 teaspoon mixed dried Italian herbs (oregano, thyme, basil) - Salt and freshly ground black pepper, to taste - Fresh parsley, chopped, for garnish - Lemon wedges, for serving - Additional herbs for garnish - Grated Parmesan cheese for adding a cheesy flavor For a creamy garlic shrimp dish, quality ingredients matter. Fresh shrimp gives the best taste. I often choose wild-caught shrimp for flavor and texture. Garlic adds a punch, while olive oil helps everything cook nicely. Unsalted butter enriches the sauce, creating that creamy texture we love. Using heavy cream makes the sauce rich and smooth. Smoked paprika gives a nice depth. The dried Italian herbs add a hint of earthiness. Don't forget to season with salt and black pepper, as they bring out all the flavors. For a personal touch, try adding fresh herbs or grated Parmesan on top. These optional ingredients elevate your dish, making it even more special. You can find the full recipe in the article for a detailed guide. - First, gather all your ingredients and tools. You need a large skillet, a spatula, and measuring cups. - Next, prepare the shrimp. If they are not already peeled and deveined, do that now. This helps them cook quickly and evenly. - In your large skillet, heat the olive oil over medium heat. Wait until the oil shimmers. - Add the minced garlic to the skillet. Sauté for about one minute. The garlic should smell great but not brown. - Carefully add the shrimp to the skillet. Season them with salt, black pepper, and smoked paprika. Cook for about 3-4 minutes. The shrimp should turn pink and opaque. - Once cooked, remove the shrimp from the skillet. Place them on a warm plate. Cover them loosely to keep them warm. - In the same skillet, add the unsalted butter. Let it melt completely. Then, pour in the heavy cream. Stir well to mix both ingredients smoothly. - Sprinkle in the dried Italian herbs. Bring the sauce to a gentle simmer. Cook for about 3-4 minutes, or until the sauce thickens slightly. - Return the cooked shrimp to the skillet. Gently fold them into the creamy sauce. Let it heat through for another 2 minutes. - Taste the sauce and adjust seasoning if needed. Add more salt or pepper to suit your taste. - Once cooked, remove the skillet from heat. Generously garnish your dish with freshly chopped parsley. - Serve the creamy garlic shrimp over fluffy jasmine rice or alongside crusty artisan bread. Don’t forget lemon wedges for a fresh zest that brightens the dish. For the full recipe, check out the full recipe section. To make the best creamy garlic shrimp, start with fresh shrimp. They should be pink and firm. Rinse them under cold water. Next, season them well with salt and pepper. This step adds flavor to the dish. When cooking, heat your pan until it shimmers. This helps to cook the shrimp evenly. For the creamy sauce, keep the heat low. If it's too high, the cream may split. Stir often to combine the cream with the shrimp. You can boost the flavor with fresh herbs. Try adding basil or thyme. A sprinkle of red pepper flakes gives it a kick. For a richer taste, add a squeeze of lemon. This adds brightness to the creaminess. Don't forget to taste your sauce! Adjust the spices to your liking. If you want a thicker sauce, let it simmer longer. If you have dietary needs, there are great swaps. Use shrimp alternatives like chicken or tofu. If you're dairy-free, choose coconut cream or cashew cream. Both give a nice texture. For a lighter version, try using half-and-half instead of heavy cream. These substitutions keep the dish delicious while fitting your diet. For the full recipe, check the details above! {{image_4}} You can easily make this dish fit different diets. For a keto-friendly option, just swap the heavy cream with a low-carb cream alternative, like coconut cream. This keeps the dish rich without the carbs. You can also use cauliflower rice instead of regular rice to keep it low-carb. If you need a gluten-free version, this recipe is already gluten-free! Just ensure your seasonings are free from gluten. Check labels on any store-bought ingredients to be safe. To add more color and flavor, toss in some vegetables. Spinach wilts down nicely and adds nutrients. Bell peppers bring sweetness and crunch. You can add them while cooking the garlic for an extra flavor boost. If you want a seafood mix, try adding scallops or crab. These add a new taste and texture to the dish. Simply cook them with the shrimp until they are done. For a Mediterranean twist, add olives or sun-dried tomatoes. These ingredients enhance the flavors and give a nice kick. Just stir them in before serving to keep them bright and fresh. If you crave heat, try Cajun seasoning. It adds a spicy kick that can elevate the dish. Mix in some cayenne pepper or Cajun spice blend after cooking the garlic. This will bring a whole new level of flavor to your creamy garlic shrimp. Feel free to get creative with these ideas! The full recipe can be your guide as you explore different tastes. To store leftovers, let the shrimp cool first. Place them in an airtight container. This keeps the shrimp fresh for up to three days in the fridge. When ready to eat, reheat gently on low heat. This helps to keep the shrimp tender. You can freeze creamy garlic shrimp for up to three months. To freeze, let it cool completely. Transfer the shrimp into a freezer-safe bag. Squeeze out the air and seal it tightly. To reheat, thaw overnight in the fridge. Heat gently on the stove to keep the sauce creamy and the shrimp tender. For quicker cooking, prep ingredients ahead. You can clean and chop garlic and parsley. Store them in the fridge. You can also season the shrimp in advance. This saves time when you cook. Keep the shrimp and sauce separate until just before serving for the best texture. How do I know when shrimp are fully cooked? Shrimp are fully cooked when they turn pink and opaque. They should also curl slightly. This usually takes about 3 to 4 minutes when sautéed over medium heat. If they look shiny and firm, they are ready. Can I use frozen shrimp for this recipe? Yes, you can use frozen shrimp. Just make sure to thaw them first. You can leave them in the fridge overnight or place them in cold water for quicker thawing. Once thawed, they can be cooked just like fresh shrimp. What can I serve with creamy garlic shrimp? Creamy garlic shrimp pairs well with fluffy jasmine rice or crusty bread. You can also serve it over pasta for a hearty meal. Add a side salad for some crunch and freshness. Is there a way to make this recipe lighter in calories? You can use half-and-half instead of heavy cream. It will reduce the calories but still provide a creamy texture. You can also cut down on the butter or use a non-dairy substitute. What is the best method for sautéing shrimp? The best method is to heat oil in a skillet over medium heat. Add minced garlic first, then shrimp. Cook them for about 3 to 4 minutes, stirring often. This helps them cook evenly and prevents burning. How can I thicken the sauce further if needed? If you want a thicker sauce, you can add a little cornstarch mixed with water. Stir it into the sauce and let it simmer for a few minutes. This will help it thicken nicely without changing the flavor. For the full recipe, check the detailed instructions. This blog post covered the key ingredients and steps to make creamy garlic shrimp. I shared cooking tips, variations, and storage advice to help you enjoy this dish. With fresh shrimp, a rich sauce, and easy adjustments, you can create a delightful meal. Remember, the real magic lies in personalizing your dish to your taste. Enjoy making this recipe your own!

Easy Creamy Garlic Shrimp Flavorful and Quick Meal

Craving a quick and tasty meal? You’ll love this Easy Creamy Garlic Shrimp recipe! Packed with flavor, this dish comes

- 1 lb large shrimp, peeled and deveined - 2 cups fresh spinach, roughly chopped - 1 cup canned artichoke hearts, drained and quartered - 1 medium onion, diced - 3 cloves garlic, minced - 1 cup heavy cream - 1/2 cup sun-dried tomatoes, chopped - 1 cup shredded mozzarella cheese - 1/4 cup grated Parmesan cheese - 2 tablespoons olive oil - 1 teaspoon Italian seasoning - Salt and freshly cracked pepper to taste - Fresh basil leaves, for garnish When I make Tuscan shrimp with spinach and artichokes, I gather these fresh ingredients first. The shrimp give the dish a sweet flavor, while spinach adds a vibrant green touch. Artichokes add a nice texture. The onion and garlic provide a strong base for the sauce. The heavy cream makes the sauce rich and smooth. Sun-dried tomatoes bring in a sweet and tangy taste. I always use mozzarella and Parmesan cheese to finish the sauce. They melt beautifully, creating a creamy texture. For seasoning, I love Italian seasoning. It adds warmth and depth. A bit of salt and pepper brings everything together nicely. Finally, I garnish with fresh basil leaves for a pop of color. You can check the full recipe for more details. - Step 1: Sauté the onion Start by heating olive oil in a large skillet over medium heat. Add the diced onion and cook for about 3-4 minutes. You want the onion to be soft and clear. This adds a nice base flavor to our dish. - Step 2: Add garlic and Italian seasoning Next, add minced garlic and Italian seasoning to the skillet. Stir for 1-2 minutes. The garlic will fill your kitchen with a lovely aroma. This step brings out the great flavors we want. - Step 3: Cook the shrimp Now it’s time to add the shrimp. Season them with salt and freshly cracked pepper. Cook for about 3-4 minutes. The shrimp should turn pink and opaque, showing they are done. - Step 4: Stir in sun-dried tomatoes, spinach, and artichokes Add chopped sun-dried tomatoes, fresh spinach, and quartered artichokes to the skillet. Stir well and cook for about 2 minutes. You want the spinach to wilt and the colors to blend beautifully. - Step 5: Pour in heavy cream and simmer Lower the heat and pour in the heavy cream. Stir everything together and let it simmer for 2-3 minutes. This will help the sauce thicken, making it rich and creamy. - Step 6: Add cheeses and melt Gradually add shredded mozzarella and grated Parmesan cheese. Stir continuously until the cheeses melt completely. You’ll get a nice, creamy sauce that coats everything perfectly. - Step 7: Garnish with basil and serve Finally, remove the skillet from the heat. Garnish your dish with fresh basil leaves. This adds a pop of color and fresh flavor. Serve it hot and enjoy! For the full recipe, check the details above! - Importance of shrimp quality: Always choose fresh, high-quality shrimp. Look for shrimp that is firm, moist, and has a clean ocean smell. Avoid any shrimp that has a strong fishy scent. Fresh shrimp ensures better flavor and texture in your dish. - Monitoring cream sauce consistency: Keep an eye on your sauce. It should be thick but pourable. If it gets too thick, add a splash of broth or water. This keeps the dish creamy and helps balance the flavors. - Suggestions for spice adjustments: If you like heat, consider adding red pepper flakes. Start with a pinch and taste as you go. This adds warmth without overpowering the dish. - Ideas for using fresh herbs: Fresh herbs elevate flavors. Try adding parsley or thyme for a fresh touch. Basil is great too, and it complements the shrimp well. - Pairing with sides: This dish pairs well with rice or crusty bread. These sides soak up the creamy sauce. You can also serve it with a light salad for a fresh contrast. - Ideal presentation serving: Serve the shrimp in shallow bowls. Drizzle the sauce over the top. Add extra basil leaves and a sprinkle of Parmesan for a beautiful finish. This makes the dish look as good as it tastes! {{image_4}} You can swap shrimp for other proteins. Chicken works well and is easy to cook. Scallops are another tasty option. They add a nice sweetness to the dish. You can also add more veggies. Try bell peppers, zucchini, or mushrooms for extra flavor and color. If you need a gluten-free dish, this recipe is already perfect. Just check your sun-dried tomatoes for gluten. For a dairy-free version, use coconut cream instead of heavy cream. Nutritional yeast can replace cheese for a cheesy flavor without dairy. Want to change up the flavors? Try different cheeses like feta or goat cheese. They add a tangy taste that’s delightful. You can also squeeze in some lemon juice or add lemon zest. This will brighten the dish and enhance the flavors. To store leftover Tuscan shrimp with spinach artichokes, use an airtight container. Place the shrimp, spinach, and artichokes inside. This helps keep the flavors fresh. Store it in the fridge for up to three days. When reheating, use a skillet or microwave. If using a skillet, warm it over low heat. Stir often to avoid burning. If using a microwave, heat in short bursts. This keeps the shrimp tender and the sauce creamy. To freeze this dish, let it cool completely first. Place the shrimp and sauce in a freezer-safe container. Ensure it is tightly sealed to prevent freezer burn. You can freeze it for up to three months. When ready to eat, thaw in the fridge overnight. Reheat gently on the stove or microwave to enjoy. Make sure to stir well to combine the sauce and seafood. How long does it take to cook shrimp? Cook shrimp for about 3-4 minutes. They turn pink and opaque when done. Timing can change based on size. Always check to avoid overcooking. Can I use frozen shrimp for this recipe? Yes, you can use frozen shrimp. Just thaw them first. Place shrimp in cold water for 15-20 minutes. Dry them before cooking to avoid excess water in the dish. What can I substitute for heavy cream? You can use half-and-half or coconut cream. For a lighter option, consider using milk mixed with a bit of flour. This will help thicken the sauce. Can this dish be made ahead of time? Yes, you can prepare this dish ahead. Cook it and store it in the fridge. Reheat on the stove over low heat, stirring gently. How healthy is this dish? This dish offers protein from shrimp and vitamins from spinach and artichokes. It’s rich in flavor and nutrients. Serve it with a salad for a balanced meal. What are the calorie counts per serving? Each serving contains about 450 calories. It can vary based on the cheese and cream used. Check your ingredients for the most accurate count. This dish combines shrimp, spinach, and artichokes for a tasty, creamy meal. You learned how to prep, cook, and serve it perfectly. Remember, using fresh shrimp and monitoring the sauce keeps it delicious. You can easily switch ingredients to match your tastes or dietary needs. With proper storage, leftovers keep well, so enjoy them later. I hope you're excited to try this recipe and share it with friends!

Tuscan Shrimp with Spinach Artichokes Delightful Dish

Are you ready for a tasty adventure? Today, I’m sharing my favorite recipe: Tuscan Shrimp with Spinach Artichokes. This dish

- 1 lb ground beef (80/20 blend) - 1 large onion, thinly sliced - Swiss cheese - 4 brioche burger buns - 2 tablespoons unsalted butter - 1 tablespoon olive oil - 1 teaspoon sugar - 1 teaspoon salt - 1/2 teaspoon freshly cracked black pepper - 1 teaspoon dried thyme - 1 cup beef broth - 1 tablespoon Worcestershire sauce - Garnish with fresh parsley - Serve with fries or a simple salad When making French onion soup burgers, the right ingredients are key. The ground beef must have enough fat to stay juicy. I recommend an 80/20 blend. This blend gives you the best flavor and moisture. The onions are equally important. You want them sweet and caramelized. Thinly slice a large onion. This way, they cook evenly. Caramelizing them takes time but is worth it. Swiss cheese melts well. It adds a creamy texture to the burger. Use fresh brioche buns for a touch of sweetness. They hold up well when loaded with toppings. For seasoning, I like to keep it simple. Use unsalted butter and olive oil to cook the onions. Sugar helps with caramelization. Salt and pepper enhance the beef's natural flavors. Dried thyme adds a subtle earthiness. Don’t forget the beef broth and Worcestershire sauce. They add depth and richness to the onions. Finally, fresh parsley gives a vibrant look and taste. For a complete meal, serve the burgers with crispy fries or a fresh salad. These sides balance the richness of the burgers. For the full recipe, check out the cooking instructions. To start, you need to cook the onions. I use a large skillet for this. First, melt 2 tablespoons of unsalted butter and 1 tablespoon of olive oil together over medium heat. This mix gives the onions a rich flavor. Next, add 1 large, thinly sliced onion to the skillet. To help them caramelize, sprinkle 1 teaspoon of sugar and 1 teaspoon of salt over the onions. Stir them well to coat. Cook for about 15 to 20 minutes. Stir often to prevent burning. You want the onions to turn a nice golden brown. This brings out their sweet taste. For a perfect caramelization, keep the heat steady. If the onions cook too fast, they may burn. If they cook too slow, they won't brown. Patience is key here. While the onions cook, it's time to shape the burger patties. Take 1 pound of ground beef, preferably an 80/20 blend. This blend gives juicy burgers. Shape the beef into four equal patties. Each one should be about 3/4 inch thick. Season each side with 1 teaspoon of salt, 1/2 teaspoon of black pepper, and 1 teaspoon of dried thyme. These spices add depth to the flavor. Now, let’s cook the patties. You can use a grill or a skillet. I prefer grilling for that smoky taste. Preheat it over medium-high heat. Once hot, place the patties on the grill. Cook for about 4 to 5 minutes on each side. You want them to reach your desired doneness. In the last minute of cooking, add a slice of Swiss cheese on each patty. Cover the grill or skillet. This helps the cheese melt perfectly. Now comes the fun part: assembling your burgers! Start with the bottom half of each brioche bun. Place a burger patty on top. Next, spoon a generous amount of your caramelized onions over the melted cheese. Don’t skimp on the onions; they are the star here! Finally, cap each burger with the top half of the brioche bun. For a gourmet touch, serve the burgers with some extra caramelized onions and a small bowl of broth for dipping. Enjoy every bite! For the complete recipe, check the Full Recipe. To make your French onion soup burgers even better, try adding more spices. A pinch of smoked paprika can add warmth. Fresh herbs like thyme or rosemary will boost the taste. You can also stir in some garlic powder for a deeper flavor. For a twist, consider using Gruyère cheese instead of Swiss. It adds a rich, nutty flavor. You can also mix in sautéed mushrooms for an earthy touch. These ingredients give your burgers that classic French onion soup taste. Making juicy burgers is all about technique. Start with high-fat ground beef, like an 80/20 blend. This fat keeps the meat moist. When shaping patties, make a small dent in the center. This helps them cook evenly. When cooking, avoid pressing down on the patties. This keeps the juices inside. To check doneness, use a meat thermometer. Aim for 160°F for medium doneness. If you like it less cooked, adjust the time. Let them rest a few minutes before serving. This keeps them juicy. Serving your burgers in style makes a big difference. Place the burger on a nice plate and drizzle some of the onion broth around it. This adds color and looks fancy. You can also add a small bowl of extra caramelized onions for dipping. For side dishes, consider crispy fries or a fresh salad. A light drink, like iced tea or sparkling water, pairs well. Add a sprig of parsley on each plate for a pop of green. This makes your meal look as good as it tastes. {{image_4}} For a meat-free version, use plant-based ground meat. Brands like Beyond Meat work well. You can also swap Swiss cheese for a dairy-free option. Try cashew cheese or vegan mozzarella. Top with fresh spinach or avocado for added texture. Grilled mushrooms also add a savory touch. Boost the taste with toppings like sautéed mushrooms or crispy bacon. These add depth and crunch. Experiment with different cheeses too. Gruyère melts beautifully and adds a nutty flavor. Cheddar brings a sharpness that pairs nicely with the soup flavors. Add global flavors to your burger. Try using spicy kimchi for a Korean kick. You can also use chimichurri sauce for a fresh Argentine touch. A hint of curry powder in the beef gives an Indian flavor profile. These simple tweaks can change the taste entirely. For more ideas, check out the Full Recipe. To keep your French Onion Soup Burgers fresh, store them properly. First, separate the burger patties from the buns and onions. This helps avoid soggy bread. Place the patties in an airtight container. Wrap the buns in plastic wrap or foil. Store the caramelized onions in a separate container. This keeps the flavors intact. - Burger Patties: Airtight container. - Brioche Buns: Wrap in plastic wrap or foil. - Caramelized Onions: Store in a separate container. Store all components in the fridge. They will stay fresh for up to three days. When you're ready to enjoy your leftovers, reheating is key. For best results, use the oven or stovetop. This method keeps the patties juicy. 1. Oven Method: Preheat the oven to 350°F (175°C). Place the patties on a baking sheet. Cover them with foil to keep moisture in. Heat for about 10 minutes. 2. Stovetop Method: Heat a skillet over medium heat. Add a small amount of water or broth. Place the patties in the skillet. Cover with a lid for a few minutes. This method helps retain juiciness. Freezing your French Onion Soup Burgers is easy. First, let the cooked patties and onions cool completely. Then, place the patties in freezer-safe bags. Remove as much air as possible to prevent freezer burn. For the onions, use a rigid container. - Cooked Patties: Place in freezer-safe bags. - Caramelized Onions: Store in a rigid container. To defrost, place the patties in the fridge overnight. For the onions, you can microwave them in short bursts. This keeps their flavor and texture. Enjoy your meal anytime by following these tips! For the full recipe, check out the link above. Yes, you can use ground turkey in this recipe. Ground turkey is leaner than beef. This may affect the flavor and juiciness. To keep the turkey moist, add a bit of olive oil or some broth to the meat. You might also want to increase the seasoning to enhance the taste. Ground turkey works well, but it will create a different burger experience. To make this recipe gluten-free, start with gluten-free brioche buns. Many brands offer tasty gluten-free options in stores. Check the labels to ensure they are safe for your diet. For the broth, use gluten-free beef broth. Lastly, watch for any hidden gluten in seasonings and sauces. This way, you can enjoy this burger without worry. A great wine to pair with French Onion Soup Burgers is a medium-bodied red wine. Merlot or Pinot Noir works well. These wines complement the savory flavors of the beef and cheese. If you prefer white wine, try a dry Riesling. It balances the richness of the burger. Enjoying a glass with your meal makes it feel more special. For the full recipe, click here. This blog post covered how to make delicious French Onion Soup Burgers. We discussed the main ingredients, like ground beef and Swiss cheese. You learned the steps to caramelize onions, shape patties, and assemble these tasty burgers. I shared tips on flavor enhancements and how to present them well. Remember, there are plenty of variations to explore, from vegetarian options to international flavors. In the end, this burger is not just a meal; it’s a way to impress your family and friends. Enjoy the cooking process!

French Onion Soup Burgers Flavorful and Satisfying Meal

Imagine biting into a juicy burger that combines all the rich flavors of French onion soup! French Onion Soup Burgers

- Large shrimp: 1 lb, peeled and deveined - Cooking base: 2 cups cooked quinoa or brown rice - Avocado corn salsa components: corn kernels, avocado, tomato, red onion - Extra virgin olive oil: 2 tablespoons - Spices: smoked paprika, garlic powder, ground cumin - Seasoning: sea salt and black pepper - Fresh cilantro for garnish - Lime for zest and flavor When I make my Grilled Shrimp Bowl with Avocado Corn Salsa, I focus on fresh ingredients. Using large shrimp makes a big difference. They grill up juicy and plump. You want the shrimp peeled and deveined for easy eating. For the base, I often choose quinoa or brown rice. Both add a nutty flavor and nice texture. They also help fill you up. The avocado corn salsa adds brightness. You need corn kernels, ripe avocado, diced tomato, and finely chopped red onion. This mix gives a crunchy and creamy contrast. The marinade is key for flavor. I use two tablespoons of extra virgin olive oil. Then, I add smoked paprika, garlic powder, and ground cumin. These spices give the shrimp a smoky, savory kick. Season it with sea salt and freshly ground black pepper for balance. For garnishing, I love to sprinkle fresh cilantro on top. It adds color and freshness. Don’t forget lime juice! It brightens up the whole dish. This bowl is not just a meal; it's a feast for the eyes too. For the full recipe, check out the details I’ve laid out for you. To start, gather your shrimp and marinade. You will need 1 pound of large shrimp, peeled and deveined. In a bowl, mix the shrimp with 2 tablespoons of extra virgin olive oil, 1 teaspoon of smoked paprika, 1 teaspoon of garlic powder, 1 teaspoon of ground cumin, sea salt, and freshly ground black pepper. Toss the shrimp gently until they are fully coated. Cover the bowl and let it marinate for 15 minutes. This step adds flavor and makes the shrimp juicy. Next, get your grill ready. Set it to medium-high heat, about 375-400°F. Clean the grill grates and oil them lightly. This helps prevent the shrimp from sticking. A well-prepped grill ensures your shrimp cook evenly and get those nice grill marks. Once your grill is hot, it’s time to grill. If you’re using wooden skewers, soak them in water for 30 minutes. Then, thread the marinated shrimp onto the skewers. Grill the shrimp for 2-3 minutes on each side. Look for a pink color and a slight char. When done, remove the skewers and let them cool for a bit. This step locks in the flavor and keeps the shrimp tender. While the shrimp cools, let’s make the salsa. In a medium bowl, combine 1 cup of corn kernels, 1 diced avocado, 1 diced tomato, and 1/4 finely chopped red onion. Squeeze the juice of 1 lime over the mix. Season with salt and pepper. Gently combine everything with a spatula. Be careful not to mash the avocado. This salsa adds a fresh and vibrant touch to the bowl. Now, it’s time to put everything together. In serving bowls, add a layer of 2 cups of cooked quinoa or brown rice as the base. Place the grilled shrimp on top of the grain. Finally, spoon a generous amount of avocado corn salsa over the shrimp. This creates a beautiful and colorful dish. For the final touch, sprinkle freshly chopped cilantro on each bowl. Add lime wedges on the side for an extra burst of flavor. Your Grilled Shrimp Bowl with Avocado Corn Salsa is now ready to enjoy! This dish not only looks great but tastes even better. For the full recipe, check the details above. To grill shrimp well, start by preventing them from sticking to the grill. Here are some tips: - Clean the grill grates: A clean surface helps the shrimp slide right off. - Oil the grates: Use a paper towel dipped in oil and wipe the grates before grilling. For juicy shrimp, cook them for the right amount of time. Grill the shrimp for about 2-3 minutes on each side. They should turn pink and opaque. Overcooking makes shrimp tough, so watch them closely. Selecting the perfect avocado is key for your salsa. Look for avocados that feel slightly soft when you press them gently. They should not feel mushy. To handle and dice an avocado, first cut it in half and remove the pit. Use a spoon to scoop out the flesh. Then, slice it into cubes while it is still in the skin. This method helps you keep the pieces intact. For a stunning bowl, choose shallow and wide bowls. This shape lets the colors of the salsa pop. When serving, you can add lime wedges on the side. They not only look great, but they also add more flavor. Consider placing fresh cilantro on top for extra color and taste. For the full recipe, check the section above. {{image_4}} You can switch out shrimp for chicken or tofu. Chicken adds a nice twist. Tofu is a great choice for vegans. Both options taste great with the same marinade. For the base, try using farro or white rice instead of quinoa. Each grain brings a unique flavor and texture. Quinoa is nutty, while farro is chewy. Choose what you like best! Want to spice things up? Add some cayenne or chili powder to the marinade. This will give your shrimp a nice kick. You can also add fresh herbs like dill or basil for extra flavor. In the salsa, feel free to mix in bell peppers or cucumbers. These veggies add crunch and freshness. You can even toss in some black beans for added protein. To make this dish gluten-free, simply ensure your grains are gluten-free. Quinoa and brown rice are safe bets. They work well with the other ingredients. For vegetarian or vegan options, use tofu and skip the shrimp. You can also add more beans to boost protein. This makes a filling meal that everyone can enjoy. Check out the Full Recipe for all the details! To keep your leftover grilled shrimp bowl fresh, use airtight containers. Glass or plastic containers work well. Store them in your fridge right away. This helps keep the shrimp and salsa safe to eat. You should eat leftovers within three days for the best taste. When it’s time to eat, you can reheat the shrimp and grains easily. Use a microwave or a skillet. If using a microwave, heat in short bursts. Stir in between to heat evenly. In a skillet, warm them over medium heat. Add a splash of water to keep them moist. This helps avoid drying out the shrimp. You can freeze the shrimp and salsa if you have extra. Place the shrimp in a freezer-safe bag. Remove as much air as possible. Salsa can also freeze, but the texture may change. For best results, freeze the salsa without the avocado. When ready to eat, thaw in the fridge overnight. Reheat the shrimp and mix with fresh salsa for a tasty meal. For the full recipe, check out the Grilled Shrimp Bowl with Avocado Corn Salsa. You can store grilled shrimp in the fridge for one to two days. Make sure to place them in an airtight container. This keeps them fresh and safe to eat. Check for any off smells or changes in texture before enjoying them again. Yes, you can use frozen shrimp for this dish. First, thaw the shrimp in cold water. This takes about 15-20 minutes. Avoid using hot water as it can cook the shrimp. Once thawed, pat them dry with a paper towel before marinating. If you need a substitute for quinoa, try brown rice, farro, or couscous. Each grain has a different cooking time. For brown rice, cook it for about 40-45 minutes. Farro cooks in about 30 minutes, while couscous only takes about 10 minutes. Shrimp are cooked when they turn pink and opaque. They should curl into a “C” shape. Avoid overcooking, as shrimp can become tough. A good rule is to grill them for 2-3 minutes on each side. For more details, check the Full Recipe. This grilled shrimp bowl combines fresh shrimp, flavorful marinade, and a tasty avocado corn salsa. You learned to marinate, grill, and assemble layers for a delightful meal. Remember, you can customize and store this dish easily. With basic tips, you'll achieve juicy shrimp and vibrant flavors. Enjoy experimenting with variations to suit your taste. I hope this recipe inspires many delicious meals in your kitchen. Cook well, and savor every bite!

Grilled Shrimp Bowl with Avocado Corn Salsa Delight

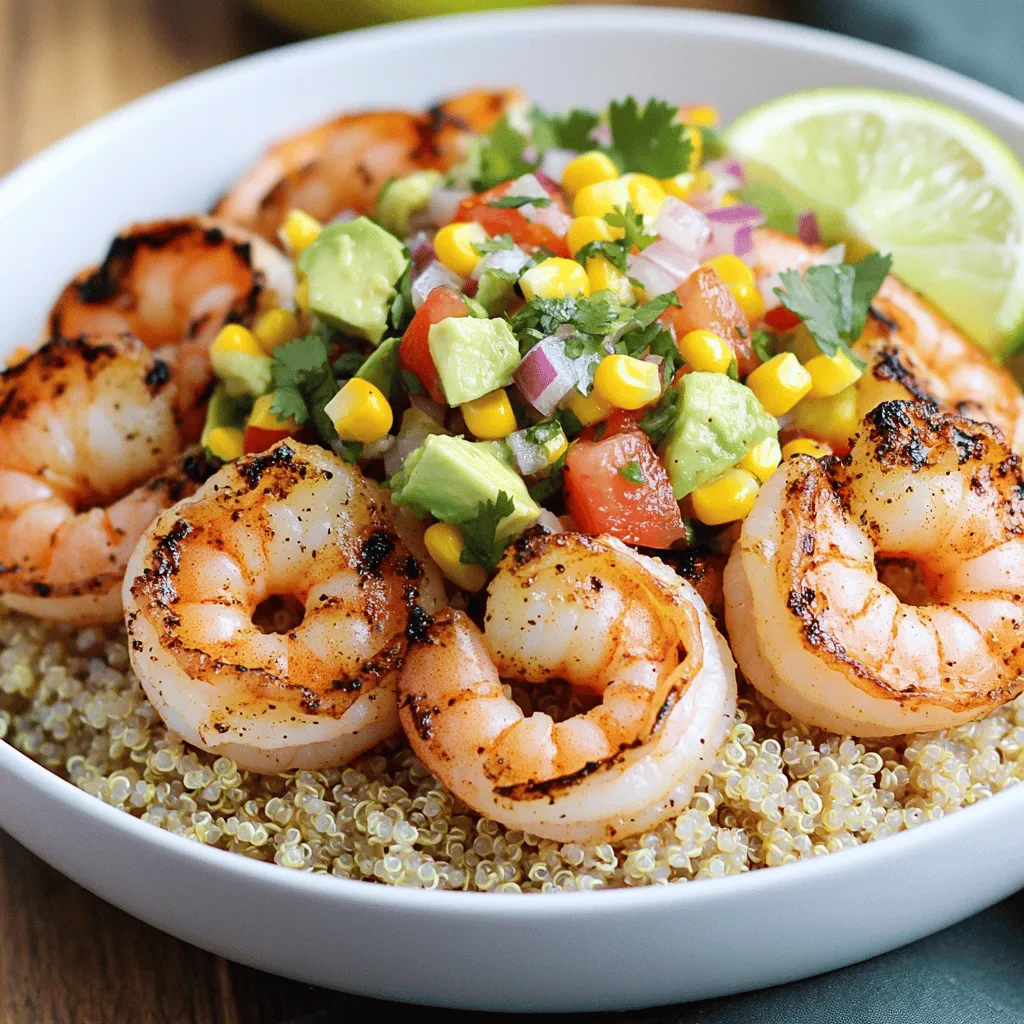
Are you craving a fresh, tasty meal that’s quick to make? Dive into my Grilled Shrimp Bowl with Avocado Corn

- 8 oz Shanghai-style noodles (or alternative egg noodles) - 2 tablespoons vegetable oil - 1 clove garlic, minced - 1 inch piece of ginger, minced - 1 small carrot, julienned - 1 bell pepper (red or green), thinly sliced - 1 cup fresh bean sprouts - 1 cup cooked chicken or tofu - 3 tablespoons soy sauce - 1 tablespoon oyster sauce - 1 tablespoon sesame oil - 2 green onions, chopped - Salt and pepper to taste When making Shanghai Fried Noodles, the right ingredients make a big difference. I love using Shanghai-style noodles because they have a nice chewy texture. If you can't find them, egg noodles work great too. I always keep fresh garlic and ginger on hand. They add a punch of flavor to the stir-fry. For veggies, I use a small carrot and a bell pepper. They give the dish a nice crunch and color. For protein, you can choose either chicken or tofu. Both work well with the sauces. The bean sprouts add freshness and a bit of crispness, which I really enjoy. The sauces are key to this dish. Soy sauce gives saltiness, while oyster sauce adds depth. A splash of sesame oil at the end brings in a lovely nutty flavor. Don’t forget the green onions! They add a pop of color and a mild onion taste to finish things off. Use salt and pepper to your liking. You can find the full recipe right here, and let the delicious journey begin! Start by bringing a large pot of water to a boil. You want it bubbling and hot. Once boiling, add the Shanghai-style noodles. Cook them according to the package instructions. This usually takes about 3-5 minutes. You want them tender but not mushy. When they are done, drain the noodles. Rinse them under cold water to stop the cooking process. This keeps them from sticking together. Set the noodles aside for later. Next, take a large wok or non-stick skillet. Pour in 2 tablespoons of vegetable oil. Heat it over medium-high heat. Make sure the oil is hot before you add anything. Once hot, stir in 1 clove of minced garlic and 1 inch of minced ginger. Stir them for about 30 seconds. You want them to smell good but don’t let them burn. Now it’s time for the veggies! Add the julienned carrot and sliced bell pepper to the wok. Sauté them for about 2-3 minutes until they start to soften. Then, toss in 1 cup of fresh bean sprouts and 1 cup of cooked chicken or tofu. Keep stir-frying for another 2 minutes. This heats everything and helps the flavors blend. Now, gently add the precooked noodles into the skillet. Pour in 3 tablespoons of soy sauce, 1 tablespoon of oyster sauce, and 1 tablespoon of sesame oil. Mix everything well so the noodles get coated in the sauces. Let it cook for another 2-3 minutes. Stir frequently to let the noodles fry slightly and soak up flavors. Finally, season with salt and pepper to taste. Before serving, sprinkle 2 chopped green onions on top for a fresh finish. Enjoy your delicious Shanghai Fried Noodles! For the complete recipe, check the Full Recipe section. To get the best taste in your Shanghai fried noodles, always use fresh ingredients. Fresh veggies enhance flavor and crunch. Look for bright carrots, crisp bell peppers, and crunchy bean sprouts. They make a big difference. For sauces, I recommend using soy sauce, oyster sauce, and sesame oil. These add depth and richness to the dish. If you want a little heat, try adding chili oil or sauce. Just a small amount can really wake up the flavors. Stir-frying is all about high heat. Use a large wok if you have one. Heat the oil until it shimmers before adding anything. This helps to sear the ingredients quickly and keeps them from getting soggy. To prevent sticking, keep stirring. Use a spatula to move everything around. If you notice any sticking, add a splash of water or more oil. This keeps the noodles and veggies moving and cooking evenly. Presentation matters! Serve the noodles in a large, wide bowl to show off their texture. For extra flair, add chopped green onions on top. A sprinkle of sesame seeds adds visual interest and a nice crunch. You can also add a handful of extra bean sprouts as a garnish. This looks great and gives a fresh taste. To enjoy your meal, use chopsticks for an authentic feel. For more detailed steps, check out the Full Recipe. {{image_4}} For a vegetarian or vegan twist on Shanghai Fried Noodles, swap out the chicken for tofu. Firm tofu soaks up flavors well. You can also use tempeh for a different texture. If you want more protein, add edamame or chickpeas. When it comes to sauces, soy sauce works great. You can use a mushroom-based oyster sauce for a vegan version. This gives a rich flavor without animal products. If you want a bit more zing, try hoisin sauce or a splash of rice vinegar. Different regions of China add their own flair to fried noodles. In Shanghai, you might find scallions and bok choy mixed in. In Sichuan, expect spicy peppers and garlic for a kick. You can also play with vegetable combinations. Use snow peas, shiitake mushrooms, or even zucchini. Each adds unique taste and texture. Pair your Shanghai Fried Noodles with a light side salad. A simple cucumber salad with rice vinegar is refreshing. You can also serve pickled vegetables for added crunch. For drinks, try jasmine tea or a light lager. Both complement the flavors well. If you want something warm, hot sake is a great choice. This recipe is simple and fun, and you can customize it. For the full recipe, follow the link to explore more! To keep your Shanghai Fried Noodles fresh, store leftovers soon after eating. Place the noodles in a container with a tight seal. Make sure the noodles cool down first. This helps avoid steam buildup, which can make them soggy. Use glass or plastic containers that are safe for your fridge. I recommend using shallow containers for even cooling. Label your container with the date. This way, you know when to use them. When it's time to eat your leftovers, you want them warm and tasty. Use a skillet for the best results. Heat a little oil in the skillet over medium heat. Add the noodles and stir them gently. This helps keep the noodles from sticking together. If you prefer, you can also use a microwave. Place the noodles in a microwave-safe dish. Add a splash of water to help keep them moist. Cover the dish with a lid or plastic wrap. Heat in short intervals, stirring in between. This way, the noodles warm evenly and maintain their flavor. Enjoy your Shanghai Fried Noodles again with their great taste intact! Shanghai-style noodles are thick, chewy noodles made from wheat flour. They have a soft texture and absorb flavors well. These noodles are often used in stir-fries, making them perfect for Shanghai Fried Noodles. Their shape allows them to hold onto sauce and ingredients, giving you a delicious bite every time. Yes, you can use other types of noodles. Egg noodles work well as a substitute. They are a bit thinner but still offer a nice texture. Rice noodles are another option, but they will change the dish’s flavor. Just remember to adjust the cooking time based on the noodle type you choose. Shanghai Fried Noodles are usually not very spicy. They focus more on savory flavors. If you enjoy heat, you can add chili oil or fresh chili peppers. Start with a little and taste as you go. This way, you can find the perfect spice level for your taste. You can find authentic Shanghai Fried Noodles at Chinese restaurants, especially those specializing in Shanghai cuisine. Street vendors in busy markets often sell delicious versions too. Look for places that have a good crowd; they usually serve fresh, tasty dishes. Yes, you can make this dish ahead of time. Prepare the noodles and stir-fry them as directed. Let them cool, then store them in airtight containers. When you’re ready to eat, just reheat in a pan. This method helps the flavors blend even more! In this post, we explored making Shanghai Fried Noodles. We covered the key ingredients, from noodles to sauces. I shared step-by-step instructions for cooking, stir-frying, and mixing in flavors. Tips on achieving authentic taste and presentation were included, too. Remember, fresh ingredients and the right techniques make a big difference. Whether you opt for chicken or tofu, this dish is versatile and fun to make. Enjoy your cooking and share your results with friends!

Savory Shanghai Fried Noodles Simple and Quick Recipe

Craving a quick and delicious meal? Let me introduce you to Shanghai Fried Noodles! This simple recipe combines fresh ingredients

For the best flavor, I love using a mix of strawberries, blueberries, and raspberries. These berries taste great together. You can use fresh or frozen berries. If you use frozen, just let them thaw a bit. Sweetness is key, so I often add honey or maple syrup. Adjust this based on how sweet you want your snacks. Fresh lemon juice adds brightness and balances the sweetness. It truly makes a difference! Gelatin gives a nice chewy texture to your snacks. It comes from animal sources. If you prefer a plant-based option, try agar-agar. This vegan substitute works well but needs a bit more heat. Both options can create yummy fruit snacks, so choose what fits your diet. To make your snacks pop, you can use spices. A touch of cinnamon or a splash of vanilla extract can add depth. Feel free to mix in other fruits too! Mango or banana adds a tropical twist. These additions make your fruit snacks unique and fun. For the full recipe, check out the Chewy Berry Bliss Fruit Snacks! Start by washing fresh berries. Rinse them under cool water. This helps remove dirt and germs. If you use frozen berries, let them thaw. Leave them at room temperature for about 10 minutes. This makes them easier to mash. To mash the berries, you can use a fork or a potato masher. Aim for an even consistency. This helps blend flavors well in the next steps. If you like some texture, leave a few small chunks. Now, combine the mashed berries with other ingredients. Place them in a medium saucepan. Add honey or maple syrup, lemon juice, and a pinch of sea salt. Stir gently to mix everything well. Set the heat to medium. Cook while stirring often for 5-7 minutes. You want the berries to soften and release their juices. When you see bubbles forming, it’s almost ready for pureeing. Blooming the gelatin is key for the right texture. In a small bowl, mix gelatin with cold water. Let it sit for a few minutes. This allows the gelatin to absorb water and swell. Once the berry mixture is smooth, add the bloomed gelatin. Stir until it fully dissolves. If you use agar-agar, return the mixture to low heat. Simmer for 2-3 minutes, stirring all the time. This activates its gelling properties. For the full recipe, check out the Chewy Berry Bliss Fruit Snacks section! To get the right texture, start with smooth purees. Blend the berries until they are completely smooth. If you want some texture, mash the berries instead of blending. This gives a chunkier feel. Avoid overcooking the mixture, as it can become too thick. Keep an eye on the heat and stir often. This helps to prevent burning and sticking. Serving your fruit snacks in fun ways adds joy! Use bright molds to create fun shapes, like stars or hearts. You can also cut them into squares for easy sharing. Try placing the snacks on a colorful platter. Garnish with whole berries or coconut flakes for a nice touch. These small details make your snacks look more inviting. You can change the sweetness to fit your taste. If you prefer sweeter snacks, add more honey or syrup. For less sweetness, cut back on these ingredients. You can also use other natural sweeteners like agave. If you need a vegan option or avoid gelatin, use agar-agar instead. This keeps the snacks firm without animal products. {{image_4}} You can mix berries with tropical fruits for a fun twist. Try adding mango or pineapple to your berry mix. This combo gives a bright and fresh taste. Citrus flavors, like orange or lime, also work great. They add a zesty kick that brightens your fruit snacks. For a sugar-free option, use stevia or monk fruit in place of honey. This keeps the snacks sweet without added sugar. If you want low-calorie snacks, use less fruit or choose berries with lower sugar. For vegans, use agar-agar instead of gelatin. It sets just as well and makes a tasty treat. You can use the same recipe to make fruit leather or jerky. Just spread the mixture thinly and dehydrate it. This creates a chewy snack perfect for on-the-go. If you want a fun shape, use gummy bear molds. Kids love these, and they are easy to eat! To keep your homemade fruit snacks fresh, use airtight containers. These containers prevent air from spoiling your snacks. You can also use freezer bags for longer storage. Make sure to squeeze out excess air before sealing. For the best taste, refrigerate your snacks right after they set. If you plan to freeze them, wait until they are completely cool. In the refrigerator, your fruit snacks will stay fresh for about one week. If you freeze them, they can last up to three months. When you are ready to eat, thaw them in the fridge overnight. This keeps their texture nice and firm. Avoid using a microwave to thaw, as this may change their shape. Look for changes in color or smell to know if your fruit snacks have gone bad. If they become sticky or slimy, it’s time to toss them out. Proper storage is key to keeping your snacks tasty and safe. Always check for these signs to ensure you enjoy every bite! Homemade fruit snacks are chewy treats made from real fruit. They are simple and fun to make. Unlike store-bought snacks, these have no added colors or flavors. You get pure fruit goodness in every bite. They are healthy and packed with vitamins. Plus, you can control the sweetness. This means you can enjoy a tasty snack without guilt. Yes, you can swap out fruits easily. Try using mango, peaches, or even apples. Each fruit brings its own unique flavor. Mixing fruits like strawberries and blueberries can create a delightful taste. You can also choose frozen or fresh fruits based on what you have. This flexibility makes the recipe fun and personal. These fruit snacks last about one week in the fridge. Store them in an airtight container to keep them fresh. You can also freeze them for longer storage. When frozen, they can last up to three months. Just remember to thaw them in the fridge before eating. This helps keep their flavor and texture. Yes, adding vegetables can boost nutrition. Carrots or spinach can mix well with fruits. They can add extra vitamins without changing the taste much. Just blend them smoothly into the fruit mixture. This is a great way to sneak in more veggies for kids or picky eaters. It makes your snacks not only tasty but also healthy. Homemade fruit snacks can be fun and simple to make. We covered ingredients like fresh berries, gelatin options, and tasty flavor boosters. The step-by-step guide taught you how to prepare the mixture and ensure the right texture. You can personalize recipes to meet your taste and dietary needs. In the end, these snacks are not only easy to store but also a great way to enjoy fruits. You can experiment with flavors, textures, and presentations. Enjoy your snack-making journey!

Homemade Fruit Snacks Simple and Flavorful Recipe

If you love fruity treats but want a healthier option, you’re in the right place! In this post, I’ll show

For Southern-Style Honey Butter Cornbread Poppers, you need a mix of pantry staples and fresh items. Here’s the list: - 1 cup cornmeal - 1 cup all-purpose flour - 1 tablespoon baking powder - 1/2 teaspoon salt - 1 cup buttermilk (room temperature for best results) - 2 large eggs (lightly beaten) - 1/4 cup vegetable oil - 1/4 cup honey (plus extra for drizzling) - 1 cup corn kernels (fresh or frozen, thawed) - 1/2 cup shredded cheddar cheese (optional, for added flavor) - 4 tablespoons unsalted butter (softened) - 2 tablespoons honey (for mixing with butter) - Optional: Fresh chives or parsley for garnish Gathering these ingredients makes the cooking process fun and easy. You can find most of these items at any grocery store. If you want to add a twist, consider using fresh corn when it's in season. The sweetness and texture will elevate your poppers. To learn how to make this delightful dish, check the Full Recipe. - Preheat the Oven: First, set your oven to 400°F (200°C). This helps the poppers bake evenly. Grease a mini muffin tin or use mini muffin liners for easy removal. - Mix the Dry Ingredients: In a large bowl, combine 1 cup cornmeal, 1 cup all-purpose flour, 1 tablespoon baking powder, and 1/2 teaspoon salt. Whisk these together until smooth and free of lumps. - Combine the Wet Ingredients: In another bowl, whisk together 1 cup buttermilk, 2 large eggs, 1/4 cup vegetable oil, and 1/4 cup honey. Mix until all the wet ingredients are smooth and blended. - Combine Mixtures: Gently pour the wet mix into the dry mix. Using a spatula, fold the two together until just combined. Don’t overmix; a few lumps are okay. - Add Corn and Cheese: Carefully fold in 1 cup corn kernels and 1/2 cup shredded cheddar cheese if you like. This adds great flavor and texture. - Pour the Batter: Use a spoon or a small ice cream scoop to fill the mini muffin cups. Fill each about two-thirds full. This allows space for rising while baking. - Bake: Place the tin in the preheated oven. Bake for 15-18 minutes. You want the poppers to be golden brown and firm. A toothpick should come out clean when inserted in the center. - Make Honey Butter: While they bake, mix 4 tablespoons softened butter with 2 tablespoons honey in a small bowl. Whip until creamy and well combined. This sweet spread pairs perfectly with the poppers. - Cool and Serve: Once baked, let the poppers cool in the tin for about 5 minutes. Transfer them to a wire rack to cool slightly. Enjoy them warm with your honey butter. - Presentation Tips: Arrange the poppers on a rustic wooden board for a lovely display. Drizzle extra honey on top and garnish with fresh chives or parsley for color. For the full recipe, check out the details above. - Importance of Room Temperature Ingredients: Using room temperature buttermilk and eggs helps the batter mix evenly. Cold ingredients can cause clumping and uneven baking. - How to Avoid Overmixing: When combining wet and dry ingredients, mix just until they come together. A few lumps are okay. Overmixing can lead to tough poppers. - Pairing with Other Dishes: These poppers go well with chili, BBQ, or a fresh salad. Their sweet and buttery flavor balances spicy or savory dishes. - Creative Serving Ideas: Serve them warm in a basket lined with a cloth. Drizzle extra honey on top for a sweet touch. - Alternative Sweeteners: If you prefer less sugar, use maple syrup or agave nectar. These options add unique flavors and keep things sweet. - Gluten-Free Options: Substitute the all-purpose flour with a gluten-free flour blend. This keeps the texture light and fluffy without gluten. {{image_4}} You can spice up your Southern-Style Honey Butter Cornbread Poppers in fun ways. Adding jalapeños gives a nice kick. A bit of garlic powder adds depth to the flavor. You can also try mixing in different cheeses, like pepper jack or feta. These options make your poppers even tastier and more unique. If you want a vegan version, swap the eggs with flaxseed meal and use plant-based milk. You can replace honey with maple syrup for sweetness. For a low-carb option, use almond flour instead of cornmeal. These swaps keep the poppers tasty and fit your diet. Think of these poppers as more than just snacks. Serve them as a side dish with chili or barbecue. You can make them a main dish by adding cooked veggies or proteins, like shredded chicken or black beans. This way, your poppers become a whole meal. For the full recipe, check out the details above. To store leftover Southern-Style Honey Butter Cornbread Poppers, let them cool first. Place them in an airtight container. This keeps them fresh and tasty. I recommend using glass or plastic containers with tight-fitting lids. These work best to prevent drying out. You can freeze baked poppers for later. To do this, let them cool completely. Then, wrap each popper in plastic wrap. Place them in a freezer bag or a safe container. When you want to eat them, take out the desired amount. Thaw them in the fridge overnight for best results. You can reheat them in the oven or microwave. This keeps their soft, warm texture. In the fridge, these poppers last about 3 to 4 days. If you freeze them, they can last up to 3 months. Just remember to label your containers with the date. This way, you always know how long they have been stored. Enjoy your poppers both fresh and as leftovers! Can I make these in advance? Yes, you can make these poppers ahead of time. Just bake them and let them cool. Store in an airtight container for up to two days. Reheat in the oven for a warm treat. How do I know when the poppers are fully cooked? The poppers are done when they turn a golden brown color. Insert a toothpick into the center; if it comes out clean, they are ready. If there’s batter on the toothpick, bake for a few more minutes. What can I serve these with? These poppers pair well with chili, soups, or a fresh salad. You can also enjoy them with extra honey butter for a sweet touch. Can I use frozen corn? Absolutely! Frozen corn works just fine. Just make sure to thaw and drain it before adding to the batter for the best texture. What if I don’t have buttermilk? If you lack buttermilk, you can easily make a substitute. Mix 1 cup of milk with 1 tablespoon of vinegar or lemon juice. Let it sit for about 5 minutes before using. How can I adjust the sweetness? You can adjust the sweetness by adding more or less honey. Start with the recipe's amount and taste the batter. Add more honey if you want it sweeter. Can I double the recipe? Yes, you can double the recipe. Just make sure to use a larger mixing bowl. Also, you may need to bake in batches if your muffin tin can’t hold all the batter at once. For the full recipe, check the main guide. In this post, we covered the ingredients, steps, and variations for delicious corn poppers. You learned how to mix dry and wet ingredients, bake them, and create tasty honey butter. With tips for storage and serving, you can enjoy these poppers anytime. Remember, feel free to get creative with flavors and dietary needs. Your kitchen is a place for fun and flavor. Enjoy your cooking journey!

Southern-Style Honey Butter Cornbread Poppers Delight

Discover the joy of Southern-Style Honey Butter Cornbread Poppers! These bite-sized treats are perfect for snacks, parties, or a comforting

- 1 pound beef sirloin, thinly sliced - 2 tablespoons olive oil - 1 medium onion, finely chopped - 3 cloves garlic, minced - 8 ounces mushrooms, sliced (button or cremini) - 2 tablespoons all-purpose flour - 2 cups low-sodium beef broth - 1 cup sour cream - 1 tablespoon Dijon mustard - 1 teaspoon Worcestershire sauce - Salt and black pepper, to taste - Fresh parsley, finely chopped (for garnish) - Cooked egg noodles or rice, for serving When making Beef Stroganoff, each ingredient plays a key role. The beef sirloin gives a rich flavor. Use thin slices for tender bites. Olive oil helps brown the beef, adding depth. Onions and garlic create a base of flavor. They add sweetness and aroma. Mushrooms give the dish an earthy note. I prefer button or cremini mushrooms, but you can explore different types. Flour thickens the sauce, making it creamy. Beef broth gives richness and ties everything together. Sour cream adds that signature creaminess. Dijon mustard and Worcestershire sauce boost the flavor. Finally, salt and pepper are vital for taste. Fresh parsley adds a pop of color. Serve your stroganoff over cooked egg noodles or rice for a satisfying meal. - Additional vegetables (carrots, bell peppers) - Different types of mushrooms (shiitake, portobello) - Seasonings for extra flavor (paprika, thyme) For a personal touch, consider adding extra vegetables. Carrots or bell peppers can give crunch. You can also try different mushrooms for new tastes. Adding seasonings like paprika or thyme can elevate your dish. Each optional ingredient adds an exciting twist, making your Beef Stroganoff unique. Check the Full Recipe for more details. - Seasoning and browning the beef Start by seasoning the beef sirloin with salt and pepper. Heat the olive oil in a large skillet over medium-high heat. Add the beef in batches. Brown each side for 2-3 minutes. Remove the beef when done and set it aside. - Sautéing onions and garlic Lower the heat to medium. In the same skillet, add the chopped onion and minced garlic. Stir often for about 2 minutes until the onions turn translucent. - Cooking mushrooms to tenderness Add the sliced mushrooms to the skillet. Cook them for about 5 minutes until they are golden and tender. This step adds great flavor to the dish. - Incorporating flour for thickening Sprinkle the flour over the mushroom mix. Stir well for about 1 minute to blend. This helps to remove the raw flour taste and starts thickening the sauce. - Gradually adding beef broth Slowly pour in the low-sodium beef broth while stirring. Bring the mix to a gentle simmer. Cook it for about 5 minutes until it thickens slightly. - Mixing in sour cream and other flavorings Lower the heat to low. Carefully mix in the sour cream, Dijon mustard, and Worcestershire sauce. Add the beef back to the skillet. Let it warm for 3-4 minutes without boiling. - Warm the dish without boiling Ensure the dish is warm but do not let it boil. This keeps the sauce creamy and smooth. - Adjusting seasoning Taste the stroganoff and adjust the salt and pepper as needed. This step is key for a balanced flavor. - Plating and serving suggestions Serve the beef stroganoff over cooked egg noodles or rice. Garnish with fresh parsley for a pop of color. Enjoy this rich and creamy comfort dish! For detailed cooking steps, refer to the [Full Recipe]. - How to properly sear the beef: Start with thin slices of beef sirloin. Season them with salt and pepper. Heat olive oil in a large skillet over medium-high heat. Add the beef in batches so it doesn’t steam. Cook for 2-3 minutes until browned. This step gives the beef a great flavor and texture. - Best practices for sautéing mushrooms: Use fresh button or cremini mushrooms. Slice them evenly for uniform cooking. After removing the beef, add onions and garlic to the skillet. Sauté for 2 minutes, then add mushrooms. Cook them for about 5 minutes, until they are golden and tender. This step enhances the dish's overall flavor. - Ensuring a creamy sauce without curdling: Lower the heat before adding sour cream. Stir it in gently to avoid boiling. Mix in Dijon mustard and Worcestershire sauce after the sour cream. This method ensures a smooth and creamy sauce that stays rich. - Recommended herbs and spices: Fresh parsley adds a bright touch. Consider adding thyme for a warm flavor. A pinch of paprika can also enhance the dish's richness. Experiment with these to find your favorite blend. - Ideas for enhancing umami flavor: Use a good quality beef broth. Adding a splash of soy sauce can deepen flavor. You can also try adding a bit of balsamic vinegar for a sweet undertone. These tweaks make the dish more savory and complex. - Importance of using high-quality beef broth: High-quality broth makes a big difference. It adds depth and richness to the sauce. Look for low-sodium options to control salt levels. Homemade broth can elevate the dish even more. - Ideal sides to pair with Beef Stroganoff: Egg noodles are classic, but rice works too. Consider serving with steamed green beans or a fresh salad. These sides balance the richness of the stroganoff. - Garnishing tips for visual appeal: Sprinkle freshly chopped parsley on top before serving. Add a light drizzle of olive oil for shine. This not only looks great but adds flavor. - Wine pairings that complement the dish: A medium-bodied red wine pairs well. Try a Merlot or Cabernet Sauvignon. These wines enhance the flavors of the beef and sauce. {{image_4}} Traditional Russian Beef Stroganoff This dish hails from Russia and uses tender beef strips. It often includes onions, mushrooms, and a rich sauce. Serve it over egg noodles or rice for a classic touch. Vegetarian alternatives (mushroom stroganoff) If you want a meatless option, use mushrooms as the main star. Portobello or cremini mushrooms add great depth. Replace beef broth with vegetable broth for a rich flavor. Gluten-free substitutes for flour To make this dish gluten-free, swap all-purpose flour with cornstarch or a gluten-free blend. Mix the substitute with cold broth before adding it to avoid lumps. This keeps your sauce smooth and creamy. Adding sour cream or Greek yogurt variations Sour cream is a must for creaminess. For a lighter option, try Greek yogurt. It adds a nice tang and boosts protein without losing creaminess. Incorporating spicy elements (chili flakes, peppers) Want some heat? Add chili flakes to kick it up a notch. Sauté some diced jalapeños or serrano peppers with onions for an extra spicy twist. Unique ingredient swaps (balsamic vinegar, brandy) For a twist, use balsamic vinegar for a sweet note. A splash of brandy can deepen the flavors. Just add it before the broth to cook off the alcohol while enhancing the taste. For a complete guide to making this dish, check out the Full Recipe. Store leftover Beef Stroganoff in an airtight container. Make sure it cools down first. This way, you keep the flavors fresh. You can refrigerate it for up to three days. If you want to eat it later, label it with the date. This helps you remember when you made it. When reheating, the stovetop is best. It warms the dish evenly. Use low heat to avoid boiling. This keeps the sauce smooth and creamy. If you use a microwave, cover the dish. Stir every minute to heat it well. This prevents the sauce from separating. To freeze Beef Stroganoff, let it cool completely first. Place it in a freezer-safe container. You can freeze it for up to three months. To thaw, move it to the fridge overnight. Reheat it on the stovetop for best results. Stir often to keep the sauce creamy. You can find the Full Recipe in the earlier section. Enjoy your rich and creamy Beef Stroganoff! Beef Stroganoff is a classic dish from Russia. It features tender beef in a creamy sauce. The main ingredients include beef, mushrooms, onions, and sour cream. Some recipes add mustard and Worcestershire sauce for flavor. This dish is often served over egg noodles or rice. You can prepare Beef Stroganoff ahead of time. Cook the beef and sauce, then cool them down. Store them in an airtight container in the fridge for up to three days. When ready to eat, reheat gently on the stove. Avoid boiling to keep the sauce creamy. Yes, you can use various cuts of beef for this dish. Beef sirloin is ideal for its tenderness. Flank steak or tenderloin also works well. Make sure to slice the beef thinly for the best texture. Always cook until just browned to keep it juicy. If your sauce is too thin, there are simple fixes. You can mix a bit of flour with cold water to create a slurry. Stir this into the sauce while it simmers. Let it cook for a few minutes until it thickens. You can also add more sour cream for extra creaminess. Beef Stroganoff is not spicy. It has a rich, creamy flavor profile. The dish features savory notes from the beef and mushrooms. The sour cream adds tanginess without heat. If you prefer spice, consider adding a pinch of black pepper or chili flakes. For the complete experience, check the Full Recipe. This blog post covers the essential ingredients, steps, and tips for making Beef Stroganoff. You now have the knowledge to create a rich, creamy sauce that pairs perfectly with beef. From classic variations to unique twists, you can customize this dish to suit your taste. Remember to store leftovers properly for future meals. With these insights, I hope you feel excited to cook and serve this comforting dish. Enjoy every delicious bite!

Beef Stroganoff Rich and Creamy Comfort Dish

If you crave a rich and creamy dish that warms the soul, Beef Stroganoff is it. This classic comfort food

Older posts
Newer posts
← Previous Page1 … Page67 Page68 Page69 … Page75 Next →

dsad

© 2025 dailydishcraft • Built with GeneratePress

Our Policies

  • Copyright Policy
  • Cookie Policy
  • GDPR Policy
  • Privacy Policy
  • Disclaimer
  • Terms Of Use

More Information

  • Home
  • About
  • Contact
  • Appetizers
  • Dessert
  • Dinner
  • Drinks
©2025, dailydishcraft About Back To Top