Skip to content
DisclaimerTerms Of UseGDPR PolicyCookie Policy

dailydishcraft

  • Home
  • Drinks
  • Appetizers
  • Dinner
  • Dessert
  • About
  • Contact
  • Privacy Policy
DisclaimerTerms Of UseGDPR PolicyCookie Policy

Jessica

This sweet potato and black bean chili is simple and tasty. It’s a healthy dish that anyone can make. You can whip it up in just 45 minutes. This chili is perfect for lunch, dinner, or meal prep. Here’s what you need for the full recipe: - 2 medium sweet potatoes, peeled and diced into 1-inch cubes - 1 can (15 oz) black beans, rinsed and drained - 1 can (14 oz) diced tomatoes, including their juices - 1 medium onion, finely chopped - 2 cloves garlic, minced - 1 bell pepper of any color, chopped into small pieces - 1 tablespoon chili powder - 1 teaspoon ground cumin - 1 teaspoon smoked paprika - 1/2 teaspoon ground cinnamon - 2 cups vegetable broth (low sodium recommended) - 1 tablespoon olive oil - Salt and pepper to taste - Fresh cilantro, chopped (for garnish) You can top your chili to make it even better. Try these options: - A dollop of sour cream or Greek yogurt - A sprinkle of fresh cilantro - Tortilla chips for crunch - Shredded cheese for richness To start, grab a large pot. Heat some olive oil over medium heat. Add the chopped onion and cook for about five minutes. You want the onion to turn soft and clear. Next, add the minced garlic and chopped bell pepper. Cook these for two to three minutes. Stir often until the garlic smells great and the bell pepper softens a bit. Once your aromatics are ready, it’s time to add the sweet potatoes. Dice them into one-inch cubes if you haven’t already. Toss them into the pot with the onion, garlic, and bell pepper. Stir well to mix everything. This step helps the sweet potatoes absorb all those tasty flavors. Now, let’s spice things up! Add the chili powder, ground cumin, smoked paprika, and ground cinnamon to the pot. Mix it all together. Make sure every sweet potato cube is covered in spice. This will give your chili a warm, inviting taste. Pour in the canned diced tomatoes along with their juices. Then, add the vegetable broth. Stir everything well to combine. This mixture should now look colorful and vibrant. Bring it to a gentle boil. As soon as it boils, reduce the heat to let it simmer. Cover the pot and let it cook for about 25 minutes. Check the sweet potatoes with a fork. They should be tender and easy to pierce. This is when the magic happens! After the sweet potatoes are cooked, fold in the rinsed black beans. These add protein and richness. Season the chili with salt and pepper to your taste. Let it simmer for another five minutes to heat the beans. Finally, taste your chili. Adjust the seasonings if needed. You want it to be just right! Now you have a hearty and simple dish ready to enjoy! For the full recipe, check out the earlier section. To make this chili great, start with fresh ingredients. Use firm sweet potatoes. They should be vibrant and free of spots. When chopping, try to keep the sizes uniform. This helps them cook evenly. Always rinse canned beans well. This removes extra sodium and improves taste. Stir the pot often to prevent sticking. To bring out deeper flavors, add spices early. Sautéing the onion and garlic first makes a big difference. You can also use smoked sea salt for a unique twist. Fresh herbs like cilantro brighten the dish. For an extra kick, add a pinch of cayenne pepper. You can also squeeze lime juice just before serving. Serve the chili hot in colorful bowls. A sprinkle of fresh cilantro on top adds a nice touch. Add a dollop of sour cream or Greek yogurt for creaminess. For crunch, pair it with tortilla chips or bread. You can even serve it over rice for a hearty meal. Check out the Full Recipe for more ideas! {{image_4}} You can boost the chili's protein by adding meat or other options. Ground turkey or chicken works well. Just brown it with the onions before adding other ingredients. If you want a vegetarian choice, try adding tofu or tempeh. Both options soak up the flavors. You can also mix in cooked quinoa or lentils for extra protein and texture. If you love heat, add more chili powder, cayenne, or jalapeños. Start small, then taste as you go. You can also use hot sauce for easy spice control. If you prefer a milder chili, reduce the chili powder or skip it altogether. You can add a dash of brown sugar to balance the heat. Feel free to swap in your favorite veggies. Carrots, zucchini, or corn add nice flavors and textures. You could also try adding spinach or kale for added nutrients. Just stir them in during the last few minutes of cooking. This keeps them vibrant and fresh. For the full recipe, check out the cooking instructions above. After you make Sweet Potato and Black Bean Chili, let it cool. Transfer it to an airtight container. Store it in the fridge. It stays fresh for about 4 days. When you are ready to eat, check for any signs of spoilage. To freeze chili, use a freezer-safe container. Leave some space at the top for expansion. You can also use freezer bags. Make sure to squeeze out the air before sealing. This chili can last up to 3 months in the freezer. When you want to reheat, take it out of the fridge or freezer. If frozen, thaw it overnight in the fridge. Heat the chili on the stove over medium heat. Stir often to warm it evenly. You can also use a microwave. Just heat it in short intervals, stirring in between. Always check the temperature before serving. Enjoy your warm, hearty meal! Yes, you can! If you want a change, use butternut squash or regular potatoes. Both options work well. They add a nice texture and flavor. The dish will still be hearty and delicious. To add heat, try these tips: - Add chopped jalapeños or a dash of hot sauce. - Use cayenne pepper in the spice mix. - Include diced green chilies for a milder heat. These options let you control the spice level and suit your taste. Absolutely! This chili stores well and tastes even better the next day. - Divide it into containers for easy meals. - Keep it in the fridge for up to five days. - You can also freeze it for later. Just thaw and reheat when needed. Meal prep makes it simple to enjoy this dish anytime. For the complete method, check out the Full Recipe. This blog post covered a tasty chili recipe. We looked at the key ingredients and toppings. I shared step-by-step instructions to make cooking easy. You learned tips to boost flavor and serving ideas. We also explored variations like protein options and spice levels. Lastly, we discussed storage methods, including freezing and reheating. Now, you have all the tools to create a delicious and flexible dish. Enjoy experimenting and making this chili your own!

Sweet Potato and Black Bean Chili Hearty and Simple Dish

Are you ready to warm up with a delicious bowl of Sweet Potato and Black Bean Chili? This hearty dish

To make easy turkey meatballs, you need the following ingredients: - 1 pound ground turkey - 1/2 cup bread crumbs (whole grain adds great texture) - 1/4 cup grated Parmesan cheese - 1/4 cup fresh parsley, finely chopped - 1 large egg, beaten - 2 cloves garlic, minced - 1 teaspoon onion powder - 1 teaspoon Italian seasoning - Salt and black pepper to taste - 2 cups marinara sauce (use store-bought or homemade) - 1 tablespoon olive oil These ingredients come together to create tender, flavorful meatballs that will impress anyone. You can choose between homemade and store-bought marinara sauce. Homemade sauce offers a fresh taste and allows you to control the flavors. You can simmer tomatoes, garlic, and herbs together for a rich sauce. Store-bought marinara is quick and easy. Look for options with simple ingredients and no added sugars. Both choices work well, so pick one that suits your time and taste. To make these delicious meatballs, you will need a few simple tools: - Mixing bowl - Baking sheet - Parchment paper (for easy cleanup) - Spoon or your hands for mixing - Meat thermometer (to check doneness) These tools help you prepare and cook the meatballs without any hassle. First, preheat your oven to 400°F (200°C). This step is key for perfect meatballs. Next, take a baking sheet and line it with parchment paper. This helps prevent sticking and makes cleanup easy. In a large bowl, combine the ground turkey, bread crumbs, Parmesan cheese, parsley, and beaten egg. Add the minced garlic, onion powder, Italian seasoning, salt, and pepper. Mix it all together gently. Use your hands or a spoon, but don’t over-mix. Overworking the meat can make it tough. Now it’s time to shape the meatballs. Scoop a portion of the mixture and roll it into a ball, about 1 inch in size. Place each meatball on the baking sheet with space between them. This helps them cook evenly. Drizzle a bit of olive oil over the meatballs for a nice crust. While the meatballs bake, grab a medium saucepan. Pour in the marinara sauce and heat it on medium. Stir it from time to time. You want it warm and ready to marry with the meatballs. Once the meatballs are golden and cooked through, take them out of the oven. Carefully transfer them to the saucepan with the hot marinara sauce. Gently stir to coat each meatball in the sauce. Let them simmer for about 5 minutes. This allows the meatballs to soak up all that tasty flavor. For serving, you have options! Place the turkey meatballs over your favorite pasta, or put them in a sub roll with melted cheese on top. Garnish with more parsley and Parmesan cheese for a pretty finish. Enjoy your meal! For the full recipe, click here: [Full Recipe]. To make moist turkey meatballs, start with the right ingredients. Use ground turkey that has some fat. The fat helps keep them juicy. Mix the ingredients gently. Over-mixing makes the meatballs tough. Use a beaten egg to bind everything together and add moisture. Lastly, don’t bake them too long. Check them at 20 minutes to avoid dryness. Crumbly meatballs can ruin your meal. To avoid this, ensure you use enough binding agents. The bread crumbs and egg work together to keep them together. You can add a little milk to the mixture for extra moisture. Make sure to shape them firmly but not too tight. This helps them hold their shape while cooking. Storing leftover turkey meatballs is easy. Place them in an airtight container. Refrigerate them within two hours of cooking. They will stay fresh for up to three days. For longer storage, freeze them in a freezer-safe container. They can last up to three months frozen. When reheating, make sure they reach 165°F for safe eating. Enjoy your delicious meal again! {{image_4}} You can switch the ground turkey for ground beef or chicken. Each type brings its own flavor. Ground beef offers a rich, hearty taste, while chicken provides a light option. If you prefer beef, use lean ground beef for a healthier choice. For chicken, ground breast works best. Just follow the same steps in the full recipe. The cooking times might vary slightly, so check for doneness. If you need a gluten-free option, use gluten-free bread crumbs. You can also crush gluten-free crackers or oats. These options provide a similar texture. If you choose oats, make sure they are certified gluten-free. This way, everyone can enjoy the meatballs without worry. The flavor remains just as delicious, and no one will notice the difference! Want to kick up the flavor? You can add more spices or herbs to the mix. Try adding a pinch of red pepper flakes for heat. Fresh basil or oregano can enhance the Italian flavor, too. For a smoky taste, consider adding a dash of smoked paprika. Feel free to experiment with your favorite spices. Each addition makes the meatballs uniquely yours! To keep leftover meatballs fresh, place them in an airtight container. Make sure the container seals tightly. If you have leftover marinara sauce, store it in another container. This way, you can enjoy the meatballs later without losing flavor. Keep them in the fridge. They will stay good for about three days. If you want to keep meatballs longer, freezing is a great option. First, let the meatballs cool completely. Then, place them in a single layer on a baking sheet. Freeze them for about an hour. This stops them from sticking together. After they are frozen, transfer them to a freezer bag. Squeeze out as much air as possible before sealing. For marinara, use a freezer-safe container. Label both bags with the date. Frozen meatballs and sauce can last up to three months. When you are ready to eat the meatballs, there are a few great ways to reheat them. The best method is to use the oven. Preheat it to 350°F (175°C). Place meatballs in a baking dish, cover with foil, and heat for about 15 minutes. You can also reheat them in the microwave. Just place them in a bowl, cover with a paper towel, and heat for one to two minutes. If you want, heat the marinara sauce on the stove until warm. Enjoy the flavors of your tasty turkey meatballs again! For the complete recipe, check out the Full Recipe. To make turkey meatballs dry, use less liquid in the mix. Skip the egg or reduce the amount of marinara. You can also add more bread crumbs to soak up moisture. Overmixing can also make them dense. Keep the mixing gentle and stop as soon as it comes together. Yes, you can use a slow cooker. After mixing your meatballs, place them in the cooker. Pour marinara sauce over them. Cook on low for 4-6 hours or high for 2-3 hours. This method makes the meatballs tender and flavorful. The best way to check is with a meat thermometer. Insert it into the center of a meatball. It should read 165°F (74°C) to be safe to eat. You can also cut one open. The inside should be no longer pink and the juices should run clear. Leftover turkey meatballs last in the fridge for about 3 to 4 days. Store them in an airtight container for best results. If you want to keep them longer, freeze them for up to 3 months. Just make sure to label them with the date. Yes, you can make meatballs in advance. Prepare the mixture and roll them into balls. Place them on a baking sheet and freeze until firm. After that, transfer them to a freezer bag. You can bake them straight from frozen when you're ready to cook. For a complete guide on how to prepare these delicious meatballs, check out the Full Recipe. You can make tasty turkey meatballs with simple steps and easy ingredients. We covered what you need, from meat to marinara sauce. We also shared handy tips for moisture and flavor, plus ways to store leftovers. Remember, meatballs are flexible. You can swap meats and add spices. Enjoy making them your way! With practice, you’ll create a dish that you and others will love. Happy cooking!

Easy Turkey Meatballs with Marinara Simple Recipe

Are you ready to whip up a simple yet tasty dinner? My Easy Turkey Meatballs with Marinara recipe is just

- 2 medium zucchinis, grated - 1 cup shredded mozzarella cheese - 1/2 cup grated Parmesan cheese - 1/2 cup all-purpose flour - 2 large eggs - 1/4 cup green onions, finely chopped - 2 cloves garlic, minced - 1 teaspoon dried oregano - 1/2 teaspoon salt - 1/4 teaspoon black pepper - Olive oil for frying These ingredients create a mix that bursts with flavor. First, the zucchinis bring moisture and a mild taste, making them perfect for fritters. The mozzarella cheese adds a gooey texture. Parmesan provides a nutty kick that balances the dish well. The flour helps bind everything together while giving the fritters their crispy texture. The green onions add a fresh bite. Adding garlic infuses a savory depth. Dried oregano rounds out the flavor profile with its earthy notes. Salt and black pepper enhance all the ingredients, ensuring a tasty bite every time. Olive oil is key for frying, giving that golden, crispy finish we crave. - Calories per serving: Approximately 180 calories - Protein: 8 grams - Carbs: 12 grams - Fat: 10 grams - Dietary considerations: Vegetarian, can be made gluten-free by using alternative flours Each serving packs a good amount of protein from the cheese and eggs. The carbs come mainly from flour and zucchini. This recipe is vegetarian friendly, making it a great choice for meatless meals. With the right flour, you can easily adapt it to be gluten-free. For the full recipe, check out the Savory Cheesy Zucchini Fritters! 1. Grating the zucchinis and removing excess moisture: Start by grating two medium zucchinis. I like to use a box grater or a food processor for quick work. After grating, place the zucchini in a clean kitchen towel. Twist the towel tightly to get rid of extra moisture. This step is key. Too much water makes the fritters soggy, not crispy. 2. Mixing the ingredients in a bowl: In a large bowl, add the drained zucchini. Then, mix in one cup of shredded mozzarella cheese, half a cup of grated Parmesan cheese, and half a cup of all-purpose flour. Next, crack in two large eggs. Toss in a quarter cup of finely chopped green onions, two minced garlic cloves, one teaspoon of dried oregano, half a teaspoon of salt, and a quarter teaspoon of black pepper. Stir until everything combines well. Your mixture should be thick and sticky. 1. Heating the skillet and adding olive oil: Place a large skillet on the stove over medium heat. Pour in a couple of tablespoons of olive oil. Wait for the oil to heat up and shimmer. You want it hot enough for frying. 2. Frying the fritters and ensuring they are golden brown: Use a tablespoon or small cookie scoop to drop the zucchini mixture into the hot skillet. Slightly flatten each portion with the back of the spoon. Fry for about 3 to 4 minutes on each side. You want them to turn a lovely golden brown color with crispy edges. This is where the magic happens! 1. Transferring cooked fritters to paper towels: Once cooked, carefully move the fritters to a plate lined with paper towels. This helps absorb any extra oil, making them lighter and crispier. 2. Serving suggestions: Serve the fritters warm on a nice platter. I love adding a dollop of sour cream or creamy Greek yogurt on the side. Finish with a sprinkle of fresh herbs like dill or parsley for a burst of flavor and color. For the full recipe, check out the link! To ensure your fritters are crispy, start by removing as much moisture from the zucchini as possible. Grating the zucchini is just the first step. Place it in a clean kitchen towel and twist to squeeze out excess water. Frying temperature matters too. Heat your skillet over medium heat and add olive oil. A hot skillet helps create that perfect golden crust. If the oil shimmers, it’s ready. If you want to switch up the cheese, consider using cheddar or feta for a new twist. Both bring unique flavors that work well with zucchini. For those with gluten sensitivity, try almond flour or chickpea flour instead of all-purpose flour. They both bind well and keep the fritters tasty. Pair your fritters with sauces or dips for extra flavor. A tangy Greek yogurt or sour cream works great. You can also try a spicy salsa for a kick. As for side dishes, a fresh salad or roasted veggies complement the fritters nicely. They add a bright flavor and round out your meal. For the full recipe, check out Savory Cheesy Zucchini Fritters! {{image_4}} You can boost the flavor of your zucchini fritters in simple ways. Adding fresh herbs like basil or thyme gives a lovely taste. You can also mix in spices such as paprika or cumin for extra warmth. If you're feeling creative, try adding other veggies! Grated carrots or finely chopped bell peppers add color and flavor. They mix well with zucchini and enhance the dish. If you want a vegan version of these fritters, it's easy! Replace the eggs with flaxseed meal. Mix one tablespoon of flaxseed with three tablespoons of water, and let it sit for five minutes. This mixture acts like an egg. For a gluten-free option, use almond flour or chickpea flour instead of all-purpose flour. These swaps help everyone enjoy these tasty fritters without worry. For the Full Recipe, refer to the section above for a detailed list of ingredients and instructions. To keep your savory cheesy zucchini fritters fresh, store them in the fridge. Place them in an airtight container. This helps lock in moisture and flavor. Make sure they cool down before sealing the container. You can store them for up to three days. If you want to keep them longer, freezing is a great option. To freeze fritters, first let them cool completely. Then, place them in a single layer on a baking sheet. Freeze them for about one hour. This step keeps them from sticking together. Once frozen, transfer them into a freezer-safe bag. You can store them for up to three months. When ready to enjoy your fritters again, reheating is key. For the best crispiness, use the oven. Preheat your oven to 375°F (190°C). Place the fritters on a baking sheet in a single layer. Heat them for about 10 to 15 minutes. This keeps them golden and crunchy. If you prefer the stovetop, use a skillet. Heat it over medium heat and add a little olive oil. Place the fritters in the pan and cook for about 3-4 minutes on each side. This method also helps restore their crispiness. Enjoy your leftovers just like they were fresh from the pan! For the full recipe, check back at the top of the article. How do I make zucchini fritters without eggs? You can use mashed bananas, applesauce, or flaxseed meal mixed with water. These options help bind the fritters without using eggs. Try 1 tablespoon of flaxseed meal mixed with 2.5 tablespoons of water for each egg. Can I use frozen zucchini for this recipe? Yes, you can use frozen zucchini. Thaw it first, then squeeze out as much water as possible. This step helps keep your fritters from getting soggy. What to do if my fritters fall apart while cooking? If your fritters fall apart, add a bit more flour to the mixture. This helps bind the ingredients better. You can also let the mixture rest for a few minutes to firm up. How long do the fritters last in the fridge? The fritters can last up to 3 days in the fridge. Make sure to store them in an airtight container to keep them fresh. Are zucchini fritters healthy? Yes, zucchini fritters can be healthy. They are packed with nutrients and are lower in carbs than traditional fritters. You can also use less cheese or swap for low-fat options. Can I bake zucchini fritters instead of frying them? Yes, you can bake them! Preheat your oven to 400°F (200°C). Place the fritters on a baking sheet lined with parchment paper. Bake for about 20 minutes, flipping halfway through, until they are golden and crispy. For the full recipe, check out the detailed steps to create these delicious fritters! Zucchini fritters are tasty and easy to make. We covered the key ingredients and how to prepare them. You learned about cooking tips, variations, and storage methods. You can customize these fritters to fit your diet and enjoy them at any meal. In conclusion, zucchini fritters are a flexible dish that anyone can enjoy. Try making them your own!

Savory Cheesy Zucchini Fritters Crispy and Flavorful

Are you ready to elevate your appetizer game? These Savory Cheesy Zucchini Fritters are crispy, flavorful, and packed with good

- 1 cup fresh spinach, finely chopped - 1 cup canned artichoke hearts, drained and coarsely chopped - 1/2 cup cream cheese, softened - 1/2 cup sour cream - 1/2 cup mayonnaise - 1 cup shredded mozzarella cheese - 1/4 cup grated Parmesan cheese - 2 cloves garlic, finely minced - 1/4 teaspoon red pepper flakes (optional) - Salt and freshly ground black pepper to taste - Fresh parsley for garnish When I make creamy spinach and artichoke dip, I start with fresh ingredients. The spinach brings a bright color and a slight earthy flavor. Fresh spinach adds nutrition, too. I use canned artichoke hearts because they offer a sweet and tangy taste that pairs well with our creamy base. Next, I gather my dairy components. Cream cheese is key for that rich texture. Sour cream and mayonnaise create a smooth blend that balances the flavors. I love adding shredded mozzarella for a gooey pull, while grated Parmesan brings a salty bite. For flavor, garlic is a must. It adds depth and warmth. If you enjoy a kick, you can add red pepper flakes for heat. I always season with salt and freshly ground black pepper to bring out the taste. Lastly, I sprinkle fresh parsley on top for a pop of color and freshness. These ingredients blend together to create a dip that is hard to resist. Check out the Full Recipe to see how to bring this dish to life! - Preheat the oven to 375°F (190°C). - In a large bowl, combine cream cheese, sour cream, and mayonnaise until smooth. - Fold in the spinach, artichokes, garlic, and half of the mozzarella. - Season with salt and pepper, then mix in the grated Parmesan. - Pour the mixture into a baking dish and top with the remaining mozzarella. - Bake for 20-25 minutes until the top is golden brown. I love this part! Watching it bubble and turn golden is so satisfying. You can find the full recipe at the top of the article. To get that smooth, creamy dip, start with room temperature cream cheese. Cold cream cheese is hard to mix. Room temperature cream cheese blends easily with sour cream and mayonnaise. This step is key for a silky texture. Blend all your ingredients well until they are fully combined. This helps avoid lumps and ensures a perfect dip every time. Serve this dip warm for the best taste. It pairs wonderfully with tortilla chips or warm pita bread. If you want a healthier choice, try fresh veggies like carrots, celery, or bell peppers. They add crunch and color to your plate. You can make your dip even tastier by adding spices. Try onion powder or cayenne pepper for extra zest. If you like smoky flavors, consider adding cooked, crumbled bacon. This twist adds a delicious depth to your creamy spinach and artichoke dip. For the full recipe, check out the link above. {{image_4}} To make this dip a bit healthier, you can switch out some ingredients. Here are two easy swaps: - Use Greek yogurt instead of sour cream or mayonnaise. This adds protein and cuts fat. - Swap low-fat cheese options for a lighter version. This way, you still get the cheesy goodness but with fewer calories. If you want to change the flavor, try these ideas: - Add chopped sun-dried tomatoes for an Italian twist. They give a sweet and tangy taste. - Incorporate sautéed bell peppers for extra taste and color. This adds crunch and a vibrant look. You can make a vegan version of this dip that still tastes great: - Substitute cream cheese with a plant-based alternative. Many brands offer creamy options that are dairy-free. - Use cashew cream in place of sour cream and mayonnaise. Blend soaked cashews with a bit of water for a smooth, rich texture. These variations keep the core flavors while adding your personal touch! If you want to try these options, check out the Full Recipe for details on how to make the dip. After you enjoy your creamy spinach and artichoke dip, let it cool completely. This step helps keep the dip fresh. Once cool, transfer it to an airtight container. You can store it in the refrigerator for up to 3-4 days. Keep it tightly sealed to maintain its flavor and texture. When you're ready to enjoy the dip again, you can reheat it easily. Use the oven or microwave to warm it up. If the dip seems a bit thick, add a splash of water or milk. This trick helps bring back its creamy texture. If you want to save some for later, you can freeze the dip. Place it in a freezer-safe container and freeze for up to 2 months. When you're ready to eat it, thaw it in the fridge overnight. This method keeps it tasty and fresh, making for a quick snack anytime. Yes, you can prepare the dip ahead of time. Just mix all the ingredients and store them in the fridge. When you're ready to serve, simply bake it. This saves you time and lets the flavors blend nicely. Typically, it takes 20-25 minutes at 375°F (190°C). Keep an eye on it. You want a golden brown top and bubbling edges. This shows it's hot and ready for dipping. This dip is perfect with tortilla chips, pita bread, or fresh vegetables. You can also use crackers or breadsticks. These options add great crunch and flavor. Enjoy experimenting with different dippers! For the full recipe, check out the details above. In this article, we've covered how to make a creamy spinach and artichoke dip. We discussed the fresh ingredients needed, how to mix and bake, and tips for perfect creaminess. I shared ideas for healthier swaps and variations to suit any taste. Remember, your dip can be stored or frozen for later enjoyment. Try these steps and enjoy a warm, delicious treat that everyone will love. Happy cooking!

Creamy Spinach and Artichoke Dip Irresistibly Tasty

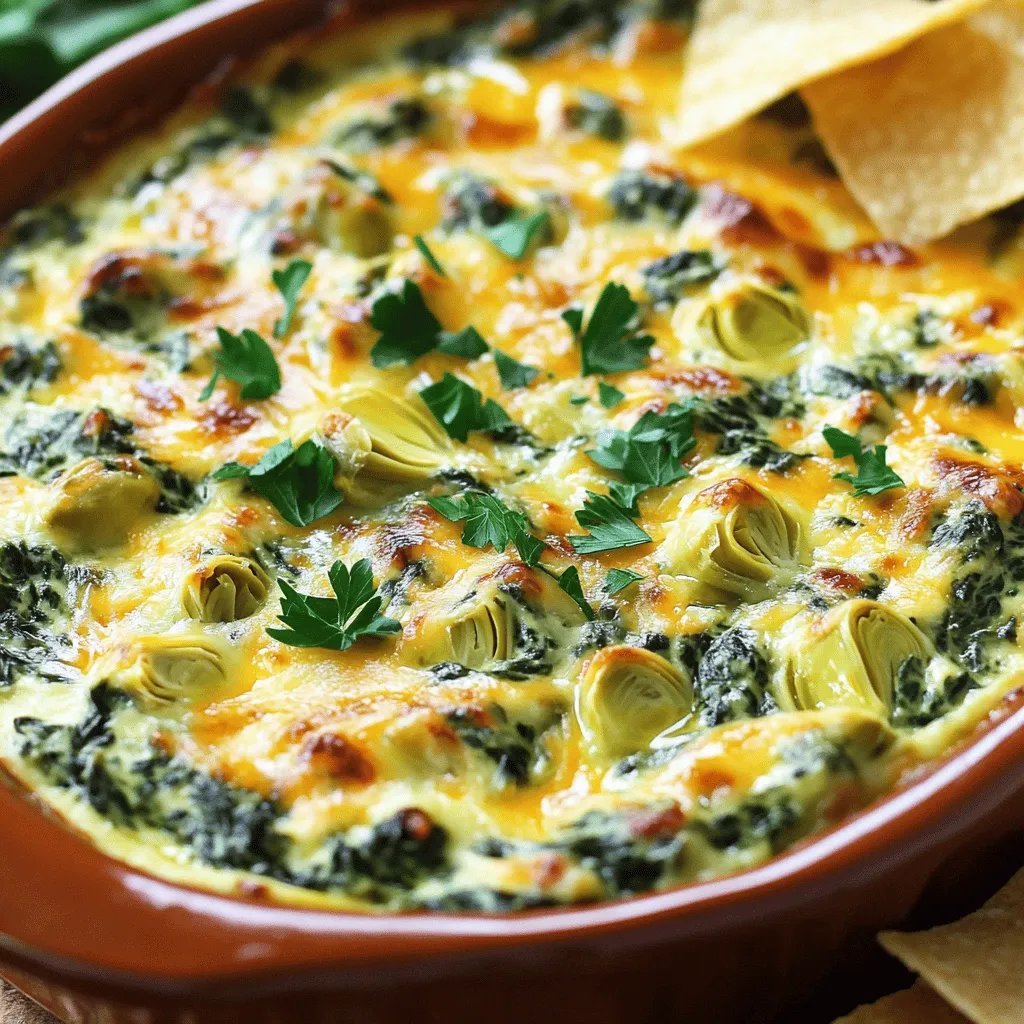
Are you ready to elevate your snack game? This Creamy Spinach and Artichoke Dip is irresistibly tasty, easy to make,

To make Nutella-stuffed banana bread, you need these key ingredients: - 3 perfectly ripe bananas, mashed - 1/2 cup unsalted butter, melted and slightly cooled - 1/2 cup packed brown sugar - 1/4 cup granulated sugar - 2 large eggs, at room temperature - 1 tsp pure vanilla extract - 1 tsp baking soda - 1/2 tsp salt - 1 1/2 cups all-purpose flour - 1/2 cup Nutella These ingredients work together to create a soft and moist bread. The ripe bananas add natural sweetness and moisture. Butter gives it a rich flavor, while the sugars help with browning. You can boost the flavor with these optional ingredients: - 1/4 cup chopped hazelnuts for topping Chopped hazelnuts add a nice crunch. They also enhance the nutty notes in the banana bread. You can skip them if you prefer a smoother texture. If you need to make substitutions, here are some ideas: - Use coconut oil instead of butter for a dairy-free option. - Substitute maple syrup for brown sugar for a unique flavor. - Swap all-purpose flour with a gluten-free blend to make it gluten-free. These swaps can help you customize the recipe based on your dietary needs or preferences. Don't hesitate to get creative! For the full recipe, check the details provided in the article. First, preheat your oven to 350°F (175°C). Grab a 9x5-inch loaf pan and grease it with butter or a non-stick spray. This helps the bread come out easily. Next, take three ripe bananas and mash them well with a fork until smooth. Make sure there are no lumps left. After that, pour in 1/2 cup of melted butter into the mashed bananas and mix until combined. Add 1/2 cup of packed brown sugar and 1/4 cup of granulated sugar to the bowl, stirring until the sugars dissolve. Now crack in two large eggs and add 1 teaspoon of pure vanilla extract. Mix everything together until you have a nice, smooth batter. Now it’s time for the Nutella! Pour half of your banana batter into the prepared loaf pan. Use a spoon to create a well in the center of the batter. This well will hold the Nutella. Spoon in 1/2 cup of Nutella, making sure to spread it evenly in the well. This will create a rich, chocolatey center. Carefully pour the rest of the banana batter over the Nutella, smoothing the top with a spatula. If you want, you can sprinkle 1/4 cup of chopped hazelnuts on top for added crunch and flavor. Place the loaf pan in the preheated oven and bake it for 55-65 minutes. Keep an eye on it! When it's done, a toothpick should come out clean or with just a few moist crumbs. Once baked, let the banana bread cool in the pan for about 10 minutes. Then, transfer it to a wire rack to cool completely. Cooling is key for the best texture and flavor. Enjoy the process and your delicious Nutella-stuffed banana bread will be ready to share! For the complete recipe, check out the Full Recipe. To get the best banana bread, focus on ripeness. Use bananas that are very ripe, with brown spots. They add natural sweetness and moisture. Mix the batter gently. Over-mixing can lead to a tough loaf. Aim for a smooth batter, but don’t worry about tiny lumps. The Nutella filling adds a rich twist. You can adjust the amount of Nutella to match your taste. I often use more for a gooey center. A common mistake is using cold eggs. Always bring eggs to room temperature first. This helps them blend smoothly into the batter. Don't skip the cooling step for melted butter. If it's too hot, it can cook the eggs. Another error is not greasing the pan well. A well-greased pan helps the bread release easily. Lastly, be careful not to bake it too long. Keep an eye on the time; check for doneness with a toothpick. Enjoy this banana bread warm for an extra treat. Drizzle some melted Nutella on top for a rich finish. A light dusting of powdered sugar adds a nice touch too. Serve slices with whipped cream for a special dessert. You can also pair it with a hot cup of coffee or tea. For a fun twist, serve it with a scoop of vanilla ice cream. Each slice can be a delightful experience! {{image_4}} You can change up your Nutella-stuffed banana bread by adding nuts. Chopped hazelnuts work great, adding a nice crunch. You can also use walnuts or pecans. They add flavor and texture. If you want something extra, consider adding chocolate chips. They melt and blend perfectly with the Nutella. For a fruity twist, try adding blueberries or raspberries too. They bring a nice tartness that balances the sweetness. If you need gluten-free banana bread, swap the all-purpose flour for a gluten-free blend. Ensure the blend has a binding agent, like xanthan gum. For a vegan version, replace the eggs with flaxseed meal. Mix one tablespoon of flaxseed with three tablespoons of water. Let it sit to thicken. You can also swap the butter for coconut oil or a vegan butter. Use a dairy-free Nutella or a similar spread to keep it vegan. Try different flavors to spice up your banana bread. For a tropical vibe, add shredded coconut. This gives a nice chew and sweetness. If you love spice, add cinnamon or nutmeg to the batter. It pairs well with bananas. You can also mix in peanut butter for a fun twist. The nutty flavor complements the banana and Nutella perfectly. Experiment with different combinations to find your favorite! For the complete recipe, check the Full Recipe. To keep your Nutella-stuffed banana bread fresh, wrap it tightly in plastic wrap. You can also use aluminum foil. This keeps moisture in and prevents it from drying out. Store it at room temperature if you plan to eat it within a few days. If you want it to last longer, place it in the fridge. Just remember to let it return to room temp before eating. When stored properly, your banana bread lasts about 3-4 days at room temperature. In the fridge, it can last up to a week. If you freeze it, it can stay good for about 2-3 months. Just make sure to wrap it well to prevent freezer burn. To enjoy the banana bread warm, slice a piece and place it in the microwave. Heat it for 15-20 seconds. If you prefer it toasted, pop the slice in the toaster or toaster oven for a few minutes. This adds a nice crunch and warms the Nutella inside. Enjoy it fresh and warm for the best taste! Yes, you can use frozen bananas. Just let them thaw completely before using. Once thawed, mash them well. They will add great flavor to your banana bread. The texture may be softer, but that’s okay. The moisture helps keep the bread moist. To keep your banana bread moist, use ripe bananas. Their natural sugars add sweetness and moisture. Also, do not over-mix the batter. Mixing too much can make bread tough. Adding a bit of melted butter also helps. Finally, avoid baking it too long. Yes, you can freeze this treat! Wrap it tightly in plastic wrap or foil. Place it in an airtight container or freezer bag. It will stay fresh for up to three months. When ready to eat, thaw it overnight in the fridge. You can then warm it up for the best taste. Enjoy this delightful treat anytime! Nutella-stuffed banana bread is simple and fun to make. We looked at key ingredients and how to mix them well. I shared tips for avoiding common mistakes and ways to make this treat even better. You can try different flavors or ways to store it. In the end, this recipe warms hearts and homes. Enjoy your baking adventure with creativity and fun!

Nutella-Stuffed Banana Bread Simply Delightful Treat

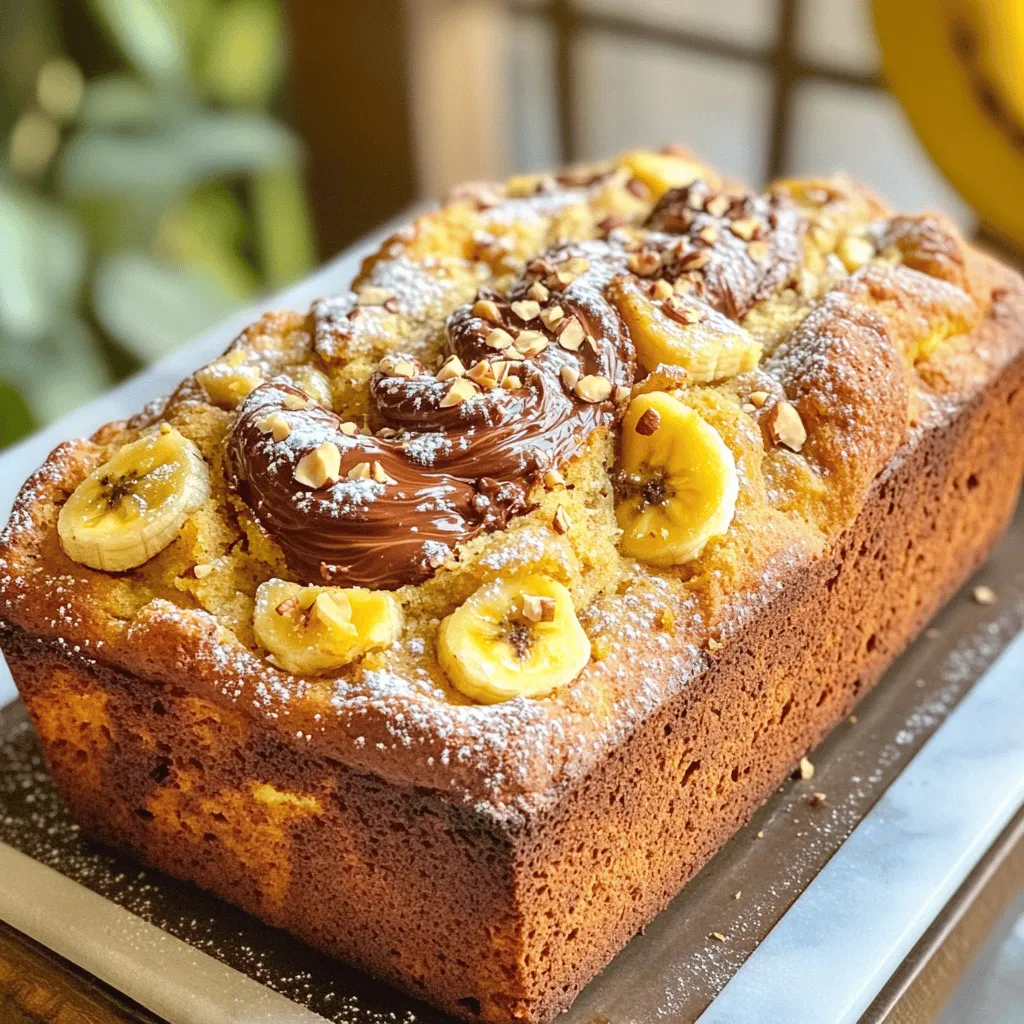
Are you ready to elevate your banana bread game? This Nutella-Stuffed Banana Bread is an easy and delicious twist that

For this dish, you need: - 1 pound large shrimp, deveined and peeled - 4 cloves garlic, finely minced - 2 tablespoons high-quality olive oil - 1 tablespoon unsalted butter - Zest of 1 large lemon - Juice of 2 medium-sized lemons These main ingredients give the dish its fresh and bright flavor. The shrimp should be large for a juicy bite. Fresh garlic adds depth, while lemon brings a zesty kick. Along with the main ingredients, you must add: - 1 teaspoon red pepper flakes (adjust for spice) - Salt and freshly ground black pepper to taste These seasonings enhance the taste. The red pepper flakes add warmth, while salt and pepper balance the flavors. Adjust the spice level to your liking for the perfect kick. To make the dish even better, consider these garnishes: - 2 tablespoons fresh parsley, finely chopped - Lemon wedges for serving Fresh parsley adds color and a burst of flavor. Lemon wedges let you squeeze more zest on top, making each bite even more delightful. Serve the shrimp hot with these garnishes to impress your guests. For the full recipe, check the details above. To start, grab a large mixing bowl. This is where the magic begins. You need 1 pound of large shrimp that is deveined and peeled. Add this to the bowl. Next, finely mince 4 cloves of garlic and toss them in too. Now, get the zest of 1 large lemon. You can use a grater to do this. Add the zest to the shrimp. Squeeze the juice from 2 medium-sized lemons into the bowl. This gives your dish a bright flavor. Now, sprinkle in 1 teaspoon of red pepper flakes. You can adjust this if you want more or less spice. Season with salt and freshly ground black pepper. Mix everything gently. You want the shrimp to be well coated. Let this sit for about 15 minutes. This helps the flavors blend together nicely. Now, it’s time to cook! Heat a large skillet over medium heat. Add 2 tablespoons of high-quality olive oil and 1 tablespoon of unsalted butter. Swirl the pan gently. You want the butter to melt and bubble. This creates a tasty base. Once the butter is ready, carefully add the marinated shrimp. Make sure they are in a single layer. Let them cook undisturbed for 2 to 3 minutes. You’ll know they are ready when they turn a bright pink color. After that, flip the shrimp over. Cook for another 2 to 3 minutes. They should be opaque and tender. After cooking, remove the skillet from heat. Stir in 2 tablespoons of finely chopped fresh parsley. This adds a fresh taste and a nice green color. Serve the shrimp right away. They taste best warm. For a nice touch, plate the shrimp with lemon wedges on the side. This way, anyone can add more lemon flavor if they like. For a pretty presentation, serve the shrimp in a shallow dish. Arrange the lemon wedges around the edge. You might want to sprinkle extra parsley on top. Pair this dish with crusty bread. It’s perfect for soaking up the delicious garlic-lemon sauce. Enjoy your meal! For the full recipe, check out the Zesty Lemon Garlic Shrimp Delight! To marinate shrimp well, start with fresh shrimp. Use a bowl and mix the shrimp with minced garlic, lemon zest, and lemon juice. Add red pepper flakes, salt, and pepper for taste. Mix lightly to coat the shrimp evenly. Let them sit for about 15 minutes. This short time helps the flavors blend without overcooking the shrimp. When cooking shrimp, use a large skillet. Heat olive oil and butter over medium heat until hot. This step adds richness and flavor. Lay the shrimp in a single layer in the skillet. Cook them for 2-3 minutes undisturbed. This allows a nice sear. Flip and cook for another 2-3 minutes until they turn pink and opaque. Overcooking can make them tough, so watch them closely. For a stunning presentation, use a shallow dish. Arrange the shrimp neatly and place lemon wedges around the edge. This adds color and makes it look fresh. Sprinkle chopped parsley on top for a bright touch. Pair the dish with crusty bread to soak up the lemon-garlic sauce. Your guests will love not just the taste but also the look of this dish. For the complete preparation details, check the Full Recipe. {{image_4}} You can add more heat to your shrimp. Use more red pepper flakes for a kick. If you like it really spicy, try adding cayenne pepper. Just a pinch can transform your dish. Remember to taste as you go. You want the flavor to shine, not burn. Adding veggies makes this meal even better. You can use bell peppers, zucchini, or asparagus. Just chop them into bite-sized pieces. Sauté them with the shrimp for a colorful dish. Not only does it taste good, but it also looks great! Grilling gives your shrimp a smoky flavor. Simply marinate them as usual, then place them on a hot grill. Cook for about 2-3 minutes on each side. Baking is another easy method. Place the shrimp on a baking sheet and pop them in the oven at 400°F. Bake for 8-10 minutes or until they are pink. Both methods add unique flavors to your shrimp dish. You can find the full recipe in the article to try all these tasty ideas! After enjoying your zesty lemon garlic shrimp, store any leftovers in an airtight container. This keeps the shrimp fresh and tasty. Make sure the shrimp cool down to room temperature before sealing the container. You can safely refrigerate them for up to three days. When you're ready to enjoy them again, check for any off smells or changes in texture. If you want to save your shrimp for later, freezing is a great option. Place the cooled shrimp in a freezer-safe bag. Remove as much air as possible to prevent freezer burn. You can freeze the shrimp for up to three months. When you're ready to use them, thaw them overnight in the fridge. This keeps the shrimp tender and flavorful. Reheating shrimp can be tricky, but I have some tips. First, use a skillet on low heat. Add a splash of olive oil or a bit of butter to keep them moist. Heat them for just a few minutes until they are warm. Avoid microwaving, as it can make the shrimp rubbery. If you want to add a pop of flavor, squeeze fresh lemon juice over the shrimp while reheating. Enjoy your meal just like the first time! For the full recipe, check out the complete guide to zesty lemon garlic shrimp. You can pair Zesty Lemon Garlic Shrimp with many sides. Here are my favorites: - Rice: White or brown rice soaks up the sauce well. - Pasta: A light pasta tossed in olive oil is a great choice. - Salad: A fresh green salad adds crunch and balance. - Bread: Crusty bread is perfect for dipping in the garlic sauce. - Vegetables: Grilled or steamed veggies complement the dish nicely. Feel free to mix and match these sides to create a meal you love! Yes, you can use frozen shrimp. Just remember to thaw them first. Place the shrimp in a bowl of cold water for about 15-20 minutes. This will help them thaw evenly. After thawing, pat them dry with a paper towel. This helps the shrimp sear better and prevents excess water in your dish. Marinating the shrimp takes about 15 minutes. This short time allows the shrimp to soak up the flavors from the garlic, lemon, and spices. Make sure to mix them gently in the bowl. This way, every piece gets coated well and tastes amazing. For best results, do not marinate for too long. Over-marinating can make the shrimp tough. If you want a stronger flavor, consider adding more zest or lemon juice instead. For the complete recipe, check out the [Full Recipe]. In this blog post, we explored how to make Zesty Lemon Garlic Shrimp. We covered the main ingredients, essential seasonings, and garnishes. Next, we provided step-by-step cooking instructions and tips for great presentation. Variations like spicy options and veggie additions bring creativity to your dish. Finally, we discussed how to store leftovers and answered common questions. Enjoy making this dish and impressing your guests!

Zesty Lemon Garlic Shrimp Recipe Easy and Flavorful Dish

If you crave a quick, tasty meal, you’ll love this Zesty Lemon Garlic Shrimp recipe. This easy dish bursts with

- 2 cups all-purpose flour - 1/2 cup warm milk (around 110°F/43°C) - 1/4 cup granulated sugar - 2 1/4 teaspoons active dry yeast (1 packet) - 1/4 cup unsalted butter, melted and slightly cooled - 1 large egg - 1/2 teaspoon salt - 1/2 cup Biscoff cookie butter - 1/4 cup brown sugar, packed - 1 tablespoon ground cinnamon - 1/4 cup chopped walnuts or pecans (optional) - 1/2 cup powdered sugar (for icing) - 2 tablespoons milk (for icing) These ingredients come together to create a sweet treat. Each one adds a specific flavor and texture. The all-purpose flour forms the base, giving the rolls their structure. Warm milk helps activate the yeast, making the rolls rise. Granulated sugar adds sweetness, while brown sugar enhances the caramel flavor. Biscoff cookie butter gives the rolls their signature taste, creating a rich and yummy filling. Using fresh ingredients can change the outcome of your rolls. For example, using warm milk helps with yeast activation. If your milk is too hot, it can kill the yeast. If it’s too cold, the yeast won’t activate. Always check the temperature for the best results. Chopped nuts can add a nice crunch to your rolls. However, feel free to skip the nuts if you prefer a smoother texture. The icing is the cherry on top. It adds sweetness and makes the rolls look pretty. For the icing, you can adjust the thickness by adding more or less milk. This flexibility allows you to personalize your rolls to your taste. For the complete process, check out the Full Recipe. Enjoy baking these delightful Biscoff Cookie Butter Cinnamon Rolls! Activating the yeast Start by warming the milk. It should be just warm, not hot. Pour it into a small bowl. Add the granulated sugar and sprinkle the yeast on top. Let it sit for about 5 to 10 minutes. The mixture will get frothy. This means the yeast is ready to work. Mixing the dough In a large bowl, mix the all-purpose flour and salt. Make a well in the center. Pour in the melted butter, egg, and the frothy yeast mixture. Use your hands or a wooden spoon to mix everything. You want a soft dough that comes together well. Kneading process Lightly flour a clean surface. Place the dough on it and knead for about 5 to 7 minutes. Press down and fold the dough. This builds gluten, making the dough strong. If it feels sticky, add a bit more flour. Aim for a smooth and elastic texture. Rolling out the dough Once your dough rises, punch it down gently. Move it back to a floured surface. Roll it out into a large rectangle, about 1/4 inch thick. Keep the edges even. This shape helps with even filling. Spreading Biscoff cookie butter Now, grab your Biscoff cookie butter. Spread it evenly on the rolled dough. Leave a little space around the edges. This prevents spillover when you roll it up. The more cookie butter, the better! Adding cinnamon and nuts In a small bowl, mix the brown sugar and ground cinnamon. Sprinkle this mixture over the Biscoff layer. If you like, add chopped walnuts or pecans on top. They add a nice crunch and flavor. Final rising Starting from one long edge, roll the dough tightly into a log. Slice it into 12 equal pieces. Place them in a greased baking dish. Cover with a cloth and let them rise for about 30 minutes. This second rise makes them fluffy. Preheating the oven While the rolls rise, preheat your oven to 350°F (175°C). This step is key for even baking. It gets the oven hot and ready for your rolls. Baking the rolls Once the rolls have puffed up, place them in the oven. Bake for 20 to 25 minutes. You want them golden brown on top. The smell will fill your kitchen with warmth and sweetness. For the complete guide, refer to the Full Recipe. To make great cinnamon rolls, start with the right dough. Here are my tips: - Use fresh yeast. If it bubbles after adding to warm milk, it’s active. - The dough should feel soft but not sticky. Add flour slowly if needed. - Knead the dough well. This builds gluten, which makes it rise nicely. Want to make your rolls even better? Here are some ideas: - Mix in a pinch of nutmeg or ginger for warmth. - Try adding chocolate chips for a sweet twist. - For icing, blend in some Biscoff cookie butter for extra flavor. Serving your rolls well makes them more fun to eat. Here’s how: - Serve warm, right out of the oven. They taste best fresh! - Drizzle icing over the top for a sweet touch. - Add crushed Biscoff cookies on top for crunch and flair. For the complete step-by-step guide, check out the Full Recipe. {{image_4}} You can switch things up with fun flavors. Try chocolate Biscoff cookie butter rolls. Just add chocolate chips to the filling. The mix of Biscoff and chocolate is pure bliss. Another great option is pumpkin spice cinnamon rolls. Mix in pumpkin puree and pumpkin spice. This twist makes a warm, cozy treat for fall. If you need gluten-free options, use gluten-free flour. Make sure it is a one-to-one baking blend. For vegan options, swap the egg for flaxseed meal. You can also use almond milk instead of regular milk. This way, you can enjoy the rolls without worries. Get festive with holiday variations. Add cranberries or nuts for a holiday vibe. You can also use eggnog instead of milk for a rich flavor. Adding seasonal spices like nutmeg or ginger can enhance the taste. These spices bring warmth and cheer to your rolls. For the complete recipe, check out the [Full Recipe]. To keep your Biscoff cookie butter cinnamon rolls fresh, store them in an airtight container. This will prevent them from drying out. They stay fresh for about 2-3 days at room temperature. If you want to keep them longer, consider freezing them. Wrap each roll tightly in plastic wrap, then place them in a freezer bag. This will help protect them from freezer burn. You can freeze them for up to 2 months. To reheat your rolls, the best method is to use the oven. Preheat your oven to 350°F (175°C). Place the rolls on a baking sheet and cover them with foil. Bake for about 10-15 minutes until warm. If you're in a hurry, you can use the microwave. Heat them for about 15-30 seconds. Just be careful not to overheat them, or they might get tough. Enjoy your leftovers with a drizzle of more Biscoff cookie butter or icing! What can I use instead of Biscoff cookie butter? You can use any cookie butter brand. Nut butters like almond or peanut butter work too. Try different flavors for fun. Just keep in mind that the taste will change. How long can I store cinnamon rolls? You can store them for 2-3 days at room temperature. Make sure to keep them in an airtight container. For longer storage, put them in the fridge, where they last up to a week. Why did my rolls not rise? Your yeast might be old or not activated. Always check yeast freshness by testing it in warm water. If it doesn't foam, it’s time to get new yeast. How do I know when the rolls are done baking? Look for a golden brown color on top. You can also tap the top lightly; if it sounds hollow, they are done. Using a toothpick to check the center is a good idea too. Can I use whole wheat flour? Yes, you can use whole wheat flour. The rolls may be denser, but they will still taste great. You might need to adjust the liquid in the recipe to keep them soft. Can I replace the milk with a non-dairy option? Absolutely! Almond milk, soy milk, or oat milk works well. Just use the same amount as regular milk. This change makes the recipe great for those with dairy allergies. For the full recipe, check out the details above. To make Biscoff cookie butter cinnamon rolls, follow these steps closely. 1. Activate the yeast: In a small bowl, mix warm milk and sugar. Sprinkle yeast on top. Let it sit for 5-10 minutes until frothy. 2. Mix the dough: In a large bowl, combine flour and salt. Make a well in the center. Add melted butter, egg, and the frothy yeast mixture. 3. Knead the dough: Mix until the dough forms. Knead on a floured surface for 5-7 minutes. If sticky, add a bit more flour. 4. Let it rise: Grease a bowl with oil or butter. Place the dough in it and cover with a damp cloth. Let it rise in a warm place for about 1 hour. 5. Prepare the dough: After rising, punch the dough down gently. Roll it out on a floured surface into a rectangle, about 1/4 inch thick. 6. Spread the cookie butter: Evenly spread Biscoff cookie butter on the rolled dough. Leave a small border around the edges. 7. Add cinnamon: In a small bowl, mix brown sugar and cinnamon. Sprinkle this over the cookie butter. Add chopped nuts if you like. 8. Roll it up: Starting from one long edge, tightly roll up the dough. Slice the log into 12 equal pieces. 9. Final rise: Place the rolls in a greased baking dish. Cover and let them rise for 30 minutes. 10. Preheat the oven: While the rolls rise, preheat your oven to 350°F (175°C). 11. Bake the rolls: Bake in the oven for 20-25 minutes until golden brown. 12. Make the icing: In a bowl, whisk powdered sugar and 2 tablespoons of milk until smooth. Adjust with more milk if needed. 13. Finish the rolls: After baking, let the rolls cool for a few minutes. Drizzle the icing over the warm rolls. Enjoy your Biscoff cookie butter cinnamon rolls warm, with extra cookie butter on the side! In today’s post, I shared a simple recipe for Biscoff cookie butter cinnamon rolls. We covered ingredients, step-by-step instructions, and tips for great results. You learned how to activate yeast, shape dough, and bake fluffy rolls. I also shared ways to personalize and store your rolls for later. Remember, experimenting with flavors can lead to tasty twists. Enjoy your baking journey, and don't be afraid to try new ideas! Your perfect rolls await.

Biscoff Cookie Butter Cinnamon Rolls Savory Delight

If you love a sweet breakfast treat, these Biscoff Cookie Butter Cinnamon Rolls are your answer. Imagine soft, warm rolls

- 1 medium head of cauliflower - 1 cup all-purpose flour - 1 cup buffalo sauce To make Buffalo Cauliflower Bites, start with a medium head of cauliflower. Cut it into bite-sized florets. This shape helps the bites cook evenly. Next, you'll need one cup of all-purpose flour. This flour creates a nice, crispy coating. Lastly, grab one cup of buffalo sauce. It gives the bites that spicy kick. - 1 teaspoon garlic powder - 1 teaspoon onion powder - 1 teaspoon smoked paprika - ½ teaspoon cayenne pepper - ½ teaspoon salt For flavor, we mix in spices. Use one teaspoon of garlic powder. This adds depth. Then add one teaspoon of onion powder for a savory taste. Smoked paprika brings a subtle smokiness with one teaspoon. If you like heat, add half a teaspoon of cayenne pepper. Finally, use half a teaspoon of salt to enhance all the flavors. - 2 tablespoons unsalted butter or vegan butter - Garnishes: chopped green onions and celery sticks For added richness, you can use two tablespoons of unsalted butter or vegan butter. This makes the sauce silkier. As a garnish, I suggest chopped green onions and crunchy celery sticks. They add freshness and color to your dish. Check out the Full Recipe for more tips and steps. - Set oven temperature to 450°F (230°C). - Line a baking sheet with parchment paper. This helps with easy cleanup. - Combine flour, water, and spices in a bowl. - Whisk until smooth. The batter should not be too thick or too runny. - Dip florets in the batter. - Arrange on the baking sheet and bake for 25 minutes. Flip them halfway to ensure even cooking. - Melt butter in a saucepan over low heat. - Mix with buffalo sauce until well combined. This sauce adds a great kick! - Coat baked cauliflower with buffalo sauce. - Bake again for 10 minutes. This makes them extra crispy and flavorful. - Let cool before serving. This prevents burns from the hot sauce. - For a fun touch, garnish with chopped green onions and serve with celery sticks. Enjoy this delicious snack! To get that perfect crunch, you may want to bake your bites a bit longer. This extra time helps them become even crispier. Also, flipping them halfway through baking ensures both sides get golden brown. You can check them at 15 minutes and decide if they need more time. If you like it hot, adjust the cayenne pepper in the recipe. Just add more or less to fit your taste. You can also try different brands of buffalo sauce. Each one has a unique flavor, so taste as you go. This way, you make the bites just right for you. If you need a gluten-free option, it's easy to swap out the all-purpose flour. Use gluten-free flour instead. This simple change keeps the flavor and texture without the gluten. You won’t lose any of the deliciousness! For the full recipe, check out the details above. {{image_4}} You can change up the flavors of your Buffalo cauliflower bites with different sauces. - BBQ Sauce Alternative: Swap buffalo sauce for your favorite BBQ sauce. This gives a sweet and smoky flavor. - Honey Mustard Option: For a tangy twist, try honey mustard. It adds a nice sweetness to the bites. Serving your Buffalo cauliflower bites with dips can take them to the next level. - Serve With Different Dips: Try ranch, blue cheese, or even a spicy sriracha dip. These will enhance flavors and add fun to your meal. - Add Toppings Like Vegan Ranch: Top your bites with vegan ranch or a sprinkle of fresh herbs. This adds freshness and makes the dish pop. You can easily adjust the spice level based on your taste. - Adjust Ingredients Based on Spice Preference: If you like it hot, add more cayenne pepper. For a milder bite, reduce the cayenne or skip it. - Mix Sauces for Unique Flavors: Blend different sauces together for new taste combinations. You could mix buffalo sauce with BBQ sauce for a sweet and spicy flavor. These variations let you customize your Buffalo cauliflower bites to suit any mood or crowd. For the complete recipe, check the Full Recipe section. To keep your Buffalo Cauliflower Bites fresh, place them in an airtight container. This method helps maintain their flavor and texture. You can refrigerate them for up to 3 days. Just remember, the sooner you eat them, the better they taste! If you want to store them longer, you can freeze the bites. Freeze them for up to a month. When you're ready to eat, just reheat them. This will help regain some of that crispy goodness. To reheat your cauliflower bites, the best methods include using an oven or an air fryer. These methods keep them crispy. Avoid using a microwave, as it can make them soggy. Heat them at 350°F (175°C) for about 10 minutes. Enjoy your tasty snack again! Yes, you can make Buffalo Cauliflower Bites ahead of time. A great method is to prepare the batter and cauliflower florets. Coat the florets in the batter, then place them on a baking sheet. Cover the sheet with plastic wrap and store it in the fridge. You can keep them for up to a day. When you're ready to cook, just bake them as usual. This method saves time and keeps the flavors fresh. Yes, Buffalo Cauliflower Bites can be vegan! To ensure this, use vegan butter and check the buffalo sauce ingredients. Many store-bought buffalo sauces are vegan, but it’s best to read the label. The main ingredients, cauliflower and flour, are naturally vegan. So, you can enjoy these bites without any animal products. Buffalo Cauliflower Bites pair well with many sides. You can serve them with crunchy celery sticks and carrot sticks. They also go great with dips like ranch or blue cheese dressing. For a full meal, add a simple salad or some rice. These sides balance the heat and make the meal more filling. Making homemade buffalo sauce is easy! Here’s a simple recipe: - Ingredients: - 1 cup hot sauce (like Frank's RedHot) - ½ cup unsalted butter (or vegan butter) - 1 tablespoon vinegar (optional for tang) 1. Melt the butter in a small saucepan over low heat. 2. Add in the hot sauce and stir until well combined. 3. If you want more tang, mix in the vinegar. 4. Adjust the heat by adding more hot sauce or butter. This sauce is perfect for drizzling on your Buffalo Cauliflower Bites. Yes, you can air fry Buffalo Cauliflower Bites! Here’s how to do it: 1. Preheat the air fryer to 400°F (200°C). 2. Coat the cauliflower florets in the batter, just like in the oven method. 3. Place the coated florets in the air fryer basket. Make sure they aren't crowded. 4. Cook for about 15-20 minutes, shaking the basket halfway through. 5. When they are golden and crispy, toss them in buffalo sauce. Air frying gives you a crispy texture with less oil. Enjoy your tasty snack! In this guide, I covered how to make Buffalo Cauliflower Bites. We discussed the main ingredients, spices, and optional add-ins. You now know how to prepare, coat, and bake cauliflower to perfection. Plus, I shared tips for a crispier bite and ways to customize the heat. Whether you choose to bake or air fry, these bites are sure to please. Enjoy your spicy, savory snack that fits any diet or occasion!

Buffalo Cauliflower Bites Crispy and Flavorful Snack

Get ready for a snack that packs a punch! Buffalo Cauliflower Bites are crispy, flavorful, and perfect for any occasion.

- 1 whole chicken (approximately 4-5 pounds) - 4 tablespoons extra virgin olive oil - 2 teaspoons fine sea salt - 1 teaspoon freshly ground black pepper - 1 tablespoon garlic powder - 1 tablespoon onion powder - 1 tablespoon dried thyme - 1 tablespoon dried rosemary - 1 tablespoon dried oregano - 1 juicy lemon, halved - 1 head of garlic, halved horizontally - Fresh herbs for garnish (like parsley or extra thyme) Each ingredient adds its own magic to this dish. The whole chicken is the star, providing a juicy base. Olive oil helps keep the chicken moist and adds richness. Salt and pepper enhance flavors, making each bite savory. Garlic and onion powders give depth, while thyme, rosemary, and oregano bring herbal notes. The lemon and garlic in the cavity infuse the meat with zest and aroma. Fresh herbs at the end make the dish look nice and fresh. Use the best quality chicken you can find. Organic or free-range chicken often tastes better. Choose extra virgin olive oil for its rich flavor. Fresh herbs are vital for the best taste. Look for bright, vibrant herbs that smell strong. Use fresh spices if possible, but dried ones work well too. Always pick ripe lemons; they will add the most flavor. Good quality ingredients make all the difference in your meal. If you want to know more about the cooking method, check out the Full Recipe. First, preheat your oven to 425°F (220°C). This high heat helps create a crispy skin. While the oven heats, pat the chicken dry with paper towels. Drying the chicken is key for that perfect crunch. Make sure to get into all the nooks and crannies. In a small bowl, mix together the following: - 4 tablespoons extra virgin olive oil - 2 teaspoons fine sea salt - 1 teaspoon freshly ground black pepper - 1 tablespoon garlic powder - 1 tablespoon onion powder - 1 tablespoon dried thyme - 1 tablespoon dried rosemary - 1 tablespoon dried oregano Stir until you form a smooth herb paste. This mixture adds a lot of flavor to the chicken. Now it’s time to season the chicken. Rub the herb mixture all over the chicken. Get under the skin for extra flavor. Don’t forget to coat the inner cavity too. Next, stuff the chicken with the halved lemon and garlic. These will make the meat juicy and fragrant. Place the chicken, breast side up, in a roasting pan. Roast it in the oven for about 1 hour and 15 minutes. Use a meat thermometer to check that the internal temperature reaches 165°F (75°C). The juices should run clear when you test it with a skewer. Once done, take the chicken out and let it rest for 10-15 minutes. This step helps lock in the juices. For the Full Recipe, refer to the details above. Finally, carve the chicken and serve it on a platter. Garnish with fresh herbs and lemon wedges for a beautiful touch. Enjoy your savory herb roasted chicken! To get juicy chicken, start with a good quality bird. A fresh, organic chicken often tastes best. Before cooking, let the chicken sit at room temperature for about 30 minutes. This helps it cook evenly. Use paper towels to dry the chicken well. A dry surface helps create a nice crust. Make sure to use enough seasoning. Rub the herb mixture generously under the skin. This method allows the flavors to seep in. Adding lemon and garlic inside the cavity also boosts flavor. Letting the chicken rest after cooking is a must. This step keeps the juices locked in, making each bite tender. For crispy skin, the oven temperature matters. Preheat your oven to 425°F (220°C) before roasting. This high heat helps the skin crisp up quickly. Using a roasting pan is a great choice. It allows hot air to circulate all around the chicken. Remember to avoid covering the chicken while it cooks. Covering traps steam, which makes the skin soggy. If you want extra crunch, baste the chicken with its own juices halfway through cooking. This adds flavor and helps with crispiness. Having the right tools makes roasting easier. A sturdy roasting pan is essential. It should have high sides to catch juices. Use a meat thermometer to check the chicken's doneness. This tool ensures it reaches the safe temperature of 165°F (75°C). A good pair of kitchen tongs helps with handling the hot chicken. You can also use a carving knife for serving. Finally, a basting brush is handy for applying juices. With these tools, you can roast like a pro! {{image_4}} You can change the herbs for different flavors. If you like a fresh taste, try dill or basil. For a warm flavor, use sage or tarragon. Mix and match to find what you love. Each herb adds its own twist to the chicken. While lemon and garlic are great, you can stuff the chicken with other tasty things. Try onions and apples for a sweet flavor. You can also use mushrooms and spinach for a savory mix. Stuffing with herbs like parsley or cilantro can also add freshness. Experiment with different combos to surprise your taste buds. Both air frying and oven roasting can make delicious chicken. Air fryers cook faster and can create crisp skin with less oil. They use hot air to cook evenly. Oven roasting gives a deep, rich flavor, perfect for gatherings. Choose the method that fits your time and taste. Each way can yield juicy and flavorful results. For the full recipe, check out the earlier section. After cooking your Savory Herb Roasted Chicken, allow it to cool. Wrap the chicken tightly in plastic wrap or aluminum foil. You can also place it in an airtight container. This keeps the chicken fresh and prevents it from drying out. To reheat, preheat your oven to 350°F (175°C). Place the chicken in a baking dish. Cover it with foil to keep moisture in. Heat for about 20-25 minutes or until warm. If you prefer, you can also use a microwave. Just slice the chicken into pieces and heat for 1-2 minutes, checking often. Leftover Savory Herb Roasted Chicken will last up to four days in the fridge. For longer storage, you can freeze it. When frozen, it will stay good for up to three months. Be sure to label your containers with the date. This way, you know how long they have been stored. Enjoy your delicious leftovers in salads, sandwiches, or simply reheated! You should cook the chicken to an internal temperature of 165°F (75°C). This ensures the chicken is safe to eat and juicy. Use a meat thermometer for accuracy. Insert it into the thickest part of the thigh without touching the bone. The juices should run clear when the chicken is done. If it’s below 165°F, continue roasting it and check again. Yes, you can use different types of chicken. You can roast chicken parts, like thighs or breasts, if you prefer. Just adjust the cooking time. Bone-in cuts will need more time, while boneless cuts will cook faster. Whole chickens are great for flavor and presentation, but feel free to experiment. Just ensure they reach the same safe temperature of 165°F (75°C). Savory Herb Roasted Chicken pairs well with many sides. I suggest roasted vegetables, like carrots, potatoes, or Brussels sprouts. A fresh green salad adds a nice crunch. Creamy mashed potatoes are also a great choice. You could serve rice or quinoa for a healthy option. Bread rolls make a lovely addition too. These sides complement the chicken's rich flavors perfectly. In this article, we explored how to make Savory Herb Roasted Chicken. We covered the key ingredients and their quality. Then, we walked through easy steps to prepare and cook the chicken. I shared helpful tips for juicy meat and crispy skin. You also learned about fun variations and proper storage. Follow these ideas, and you will enjoy making this delicious dish. It's simple, rewarding, and sure to impress anyone at your table.

Savory Herb Roasted Chicken Juicy and Flavorful Meal

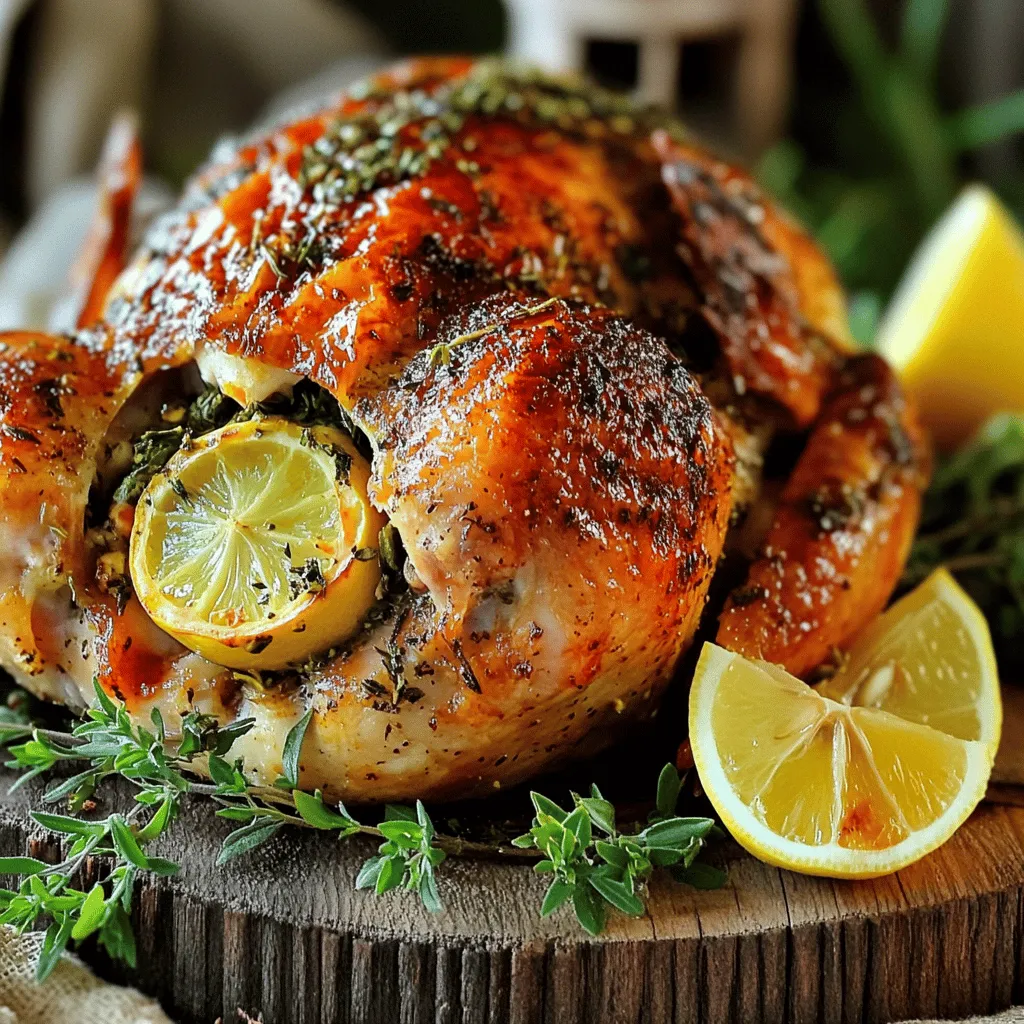
Are you ready to impress your family with a mouth-watering meal? This Savory Herb Roasted Chicken is juicy, flavorful, and

To make this delicious dip, gather these simple ingredients: - 1 cup all-purpose flour (heat-treated for safety) - 1/2 cup unsalted butter, softened to room temperature - 3/4 cup packed brown sugar - 1/4 cup granulated sugar - 1 teaspoon pure vanilla extract - 1/2 teaspoon sea salt - 1 cup mini chocolate chips - 8 ounces cream cheese, softened - 1/4 cup powdered sugar - 1/4 cup milk (adjust as needed for desired consistency) - Extra mini chocolate chips for garnish You can change a few ingredients if needed: - Use coconut oil instead of butter for a dairy-free option. - Swap granulated sugar with coconut sugar for a healthier choice. - Greek yogurt can replace cream cheese for a lighter dip. - Maple syrup can substitute for brown sugar in a pinch. Before mixing, prepare your ingredients: - Heat-treat the flour by baking it at 350°F for 5 minutes. This step kills any germs. - Soften your butter and cream cheese by leaving them out for about 30 minutes. This helps them mix better. - Measure all ingredients ahead of time. This makes mixing faster and easier. - If you want a thicker dip, use less milk. For a thinner dip, add more milk slowly. Following these tips will ensure your Chocolate Chip Cookie Dough Dip turns out amazing! Enjoy the process and have fun mixing! Start by gathering all your ingredients. In a medium bowl, mix the softened butter, brown sugar, and granulated sugar. Use an electric mixer to beat them together until creamy. This should take about 2 to 3 minutes. The mixture needs to be smooth for the best dip. Next, add the softened cream cheese and pure vanilla extract. Mix again until the blend is smooth and fluffy. Scrape down the sides of the bowl to ensure everything mixes well. Gradually add the heat-treated flour and sea salt. Mix on low speed until just combined. Slowly add milk, one tablespoon at a time, until you reach your desired dip consistency. Now, gently fold in the mini chocolate chips with a spatula. Make sure they are evenly mixed in. Transfer your dip into a nice serving bowl. For a fun touch, sprinkle extra mini chocolate chips on top. You can serve the dip right away with graham crackers, pretzels, or fresh fruit. If you prefer, chill the dip for up to 30 minutes to let the flavors meld. It will be even more delicious! To get that perfect dip, start with soft butter and cream cheese. Mix them well until creamy. If the dip is too thick, add milk a little at a time. Keep stirring until you find the right smoothness. If it gets too runny, you can mix in some more flour. One common mistake is using regular flour without heat-treating it. This can make the dip unsafe to eat. Another mistake is not mixing the butter and sugar enough. If you don’t mix well, the dip can be grainy. Also, be careful not to overmix after adding the flour. This can make the dip tough. For a fun look, serve the dip in a colorful bowl. Surround it with tasty dippers like graham crackers, pretzels, or fruit. You can even layer the dip in a glass jar for a nice view. For a final touch, sprinkle extra mini chocolate chips on top. This makes it look as good as it tastes. Try these ideas to impress your guests! {{image_4}} You can make this dip healthier by using Greek yogurt. Greek yogurt adds creaminess and protein. It also cuts some fat from the recipe. Replace half of the cream cheese with Greek yogurt. This swap keeps the flavor rich while making it lighter. You still get that creamy texture without the guilt. Want to mix things up? Try adding peanut butter for a nutty twist. Just a half cup of peanut butter gives a rich taste. You can also add crushed Oreos for a fun cookie crunch. If you love mint, toss in some mint extract. This simple change gives a fresh kick to your dip. Feel free to play with other mix-ins like butterscotch chips or coconut flakes. If you need gluten-free options, substitute the all-purpose flour with gluten-free flour. Make sure to check that your chocolate chips are also gluten-free. This way, everyone can enjoy the dip without worry. You can also make it vegan by using dairy-free cream cheese and butter. These swaps keep the taste delicious while fitting different diets. After you enjoy your Chocolate Chip Cookie Dough Dip, store any leftovers in an airtight container. This keeps it fresh and tasty. Place the container in the fridge. Make sure to use it within a few days for the best flavor. You can serve this dip cold or at room temperature. If you prefer it warm, gently heat it in the microwave. Start with 10 seconds, then stir. Keep heating in short bursts until it warms to your liking. Be careful not to overheat, as it may change the texture. The dip lasts about 3-5 days in the fridge. If you want to store it longer, freeze it! Place the dip in a freezer-safe container. It can last up to 2 months in the freezer. When you’re ready to enjoy it, thaw it in the fridge overnight. Stir well before serving. This dip is a treat that stays delightful, even after storage. Yes, you can eat raw cookie dough in this dip! However, the flour in cookie dough can carry germs. To make it safe, I heat-treat the flour. This step kills harmful bacteria. Just spread the flour on a baking sheet and bake it at 350°F for about 5 minutes. Let it cool before mixing it into the dip. This way, you enjoy that cookie dough taste without worry! If you find the dip too sweet, it's easy to fix! You can reduce the brown sugar or granulated sugar. Start by cutting back by a tablespoon or two. Taste as you go to find the right balance. Adding a pinch of sea salt can help too. Salt brings out flavors and makes the dip taste less sweet. You can also add more cream cheese or yogurt for a creamier texture and less sweetness. This dip is fun to share! I love serving it with: - Graham crackers - Pretzels - Fresh fruit slices like apples or strawberries - Chocolate-covered pretzels - Mini cookies These snacks pair well and add a nice crunch. You can even serve it with ice cream for a sweet treat. Feel free to get creative with your choices! We covered the key ingredients needed for the dip and how to prepare them. I shared tips for perfecting the dip's consistency and showcased tasty variations and substitutions. You can store leftovers easily and even freeze them for later. Remember, you can enjoy this delicious dip in various ways. Keep experimenting with flavors that excite you. Have fun making this treat!

Chocolate Chip Cookie Dough Dip Irresistible Treat

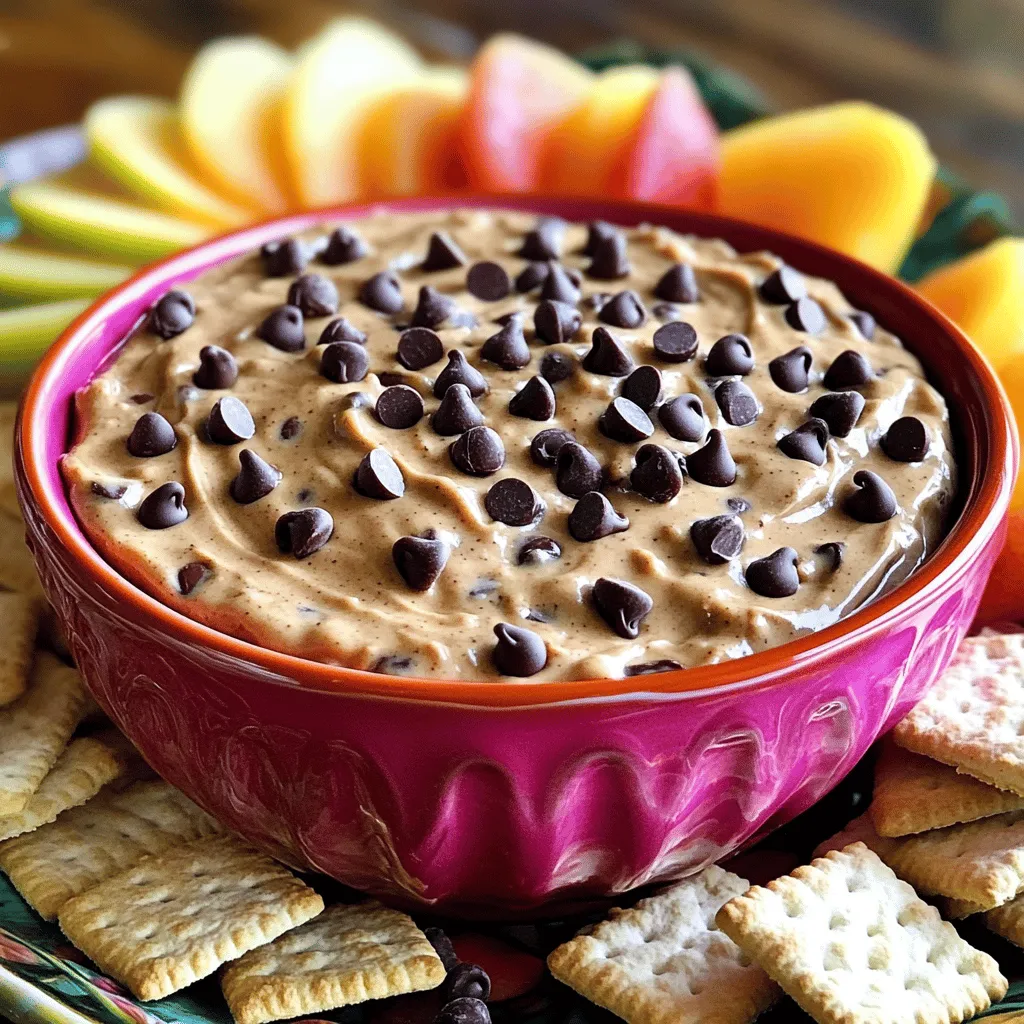
Craving a sweet treat that’s easy to make and hard to resist? Chocolate Chip Cookie Dough Dip is the answer!

Older posts
Newer posts
← Previous Page1 … Page59 Page60 Page61 … Page76 Next →

dsad

© 2025 dailydishcraft • Built with GeneratePress

Our Policies

  • Copyright Policy
  • Cookie Policy
  • GDPR Policy
  • Privacy Policy
  • Disclaimer
  • Terms Of Use

More Information

  • Home
  • About
  • Contact
  • Appetizers
  • Dessert
  • Dinner
  • Drinks
©2025, dailydishcraft About Back To Top