
Cranberry Orange Scones Delightful and Easy Recipe
Get ready for a burst of flavor with my easy Cranberry Orange Scones! These delightful treats combine the tartness of
Get ready for a burst of flavor with my easy Cranberry Orange Scones! These delightful treats combine the tartness of
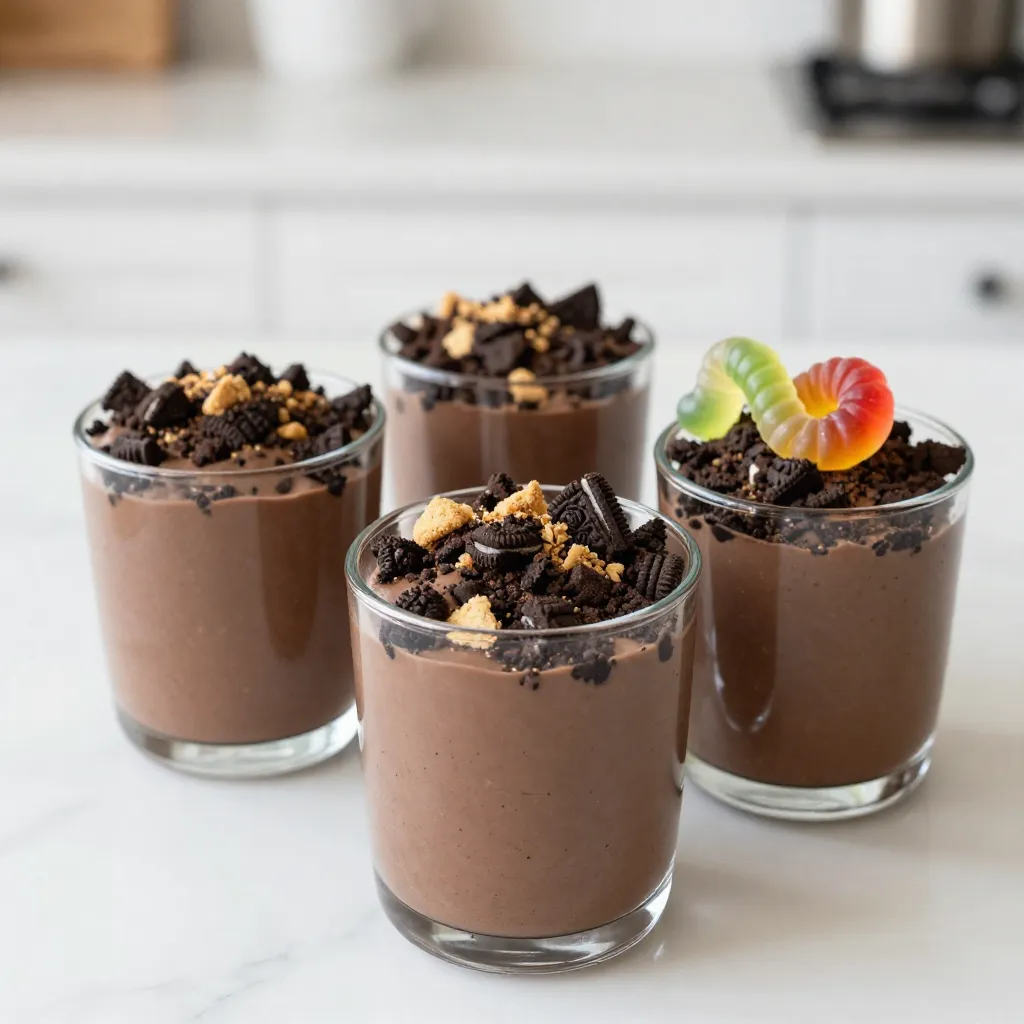
If you’re looking for a fun and easy dessert, Oreo Dirt Pudding Cups are the answer! This tasty treat mixes
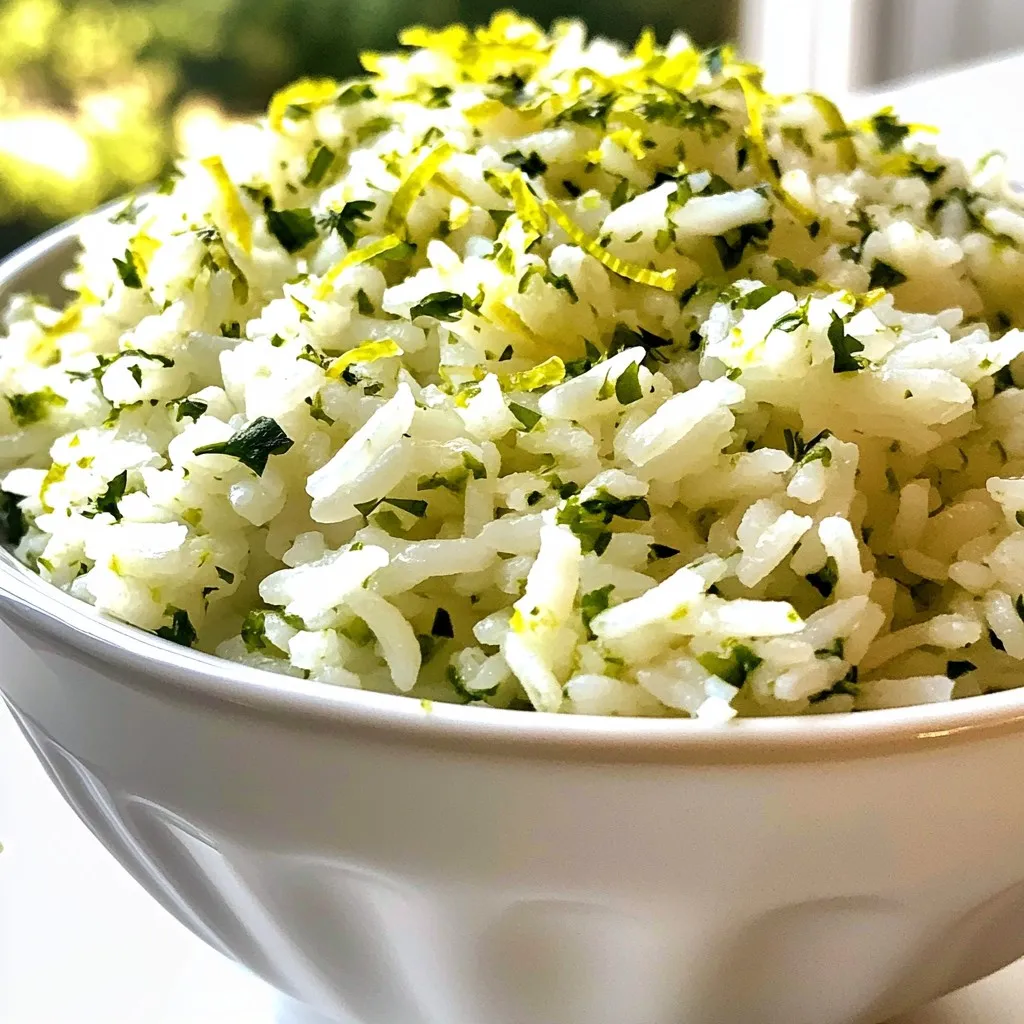
Discover the bright and zesty world of Cilantro Lime Rice! This dish is a burst of flavor that pairs well

Are you ready to transform your dinner table with a burst of flavor? My Instant Pot Beef Barbacoa recipe is
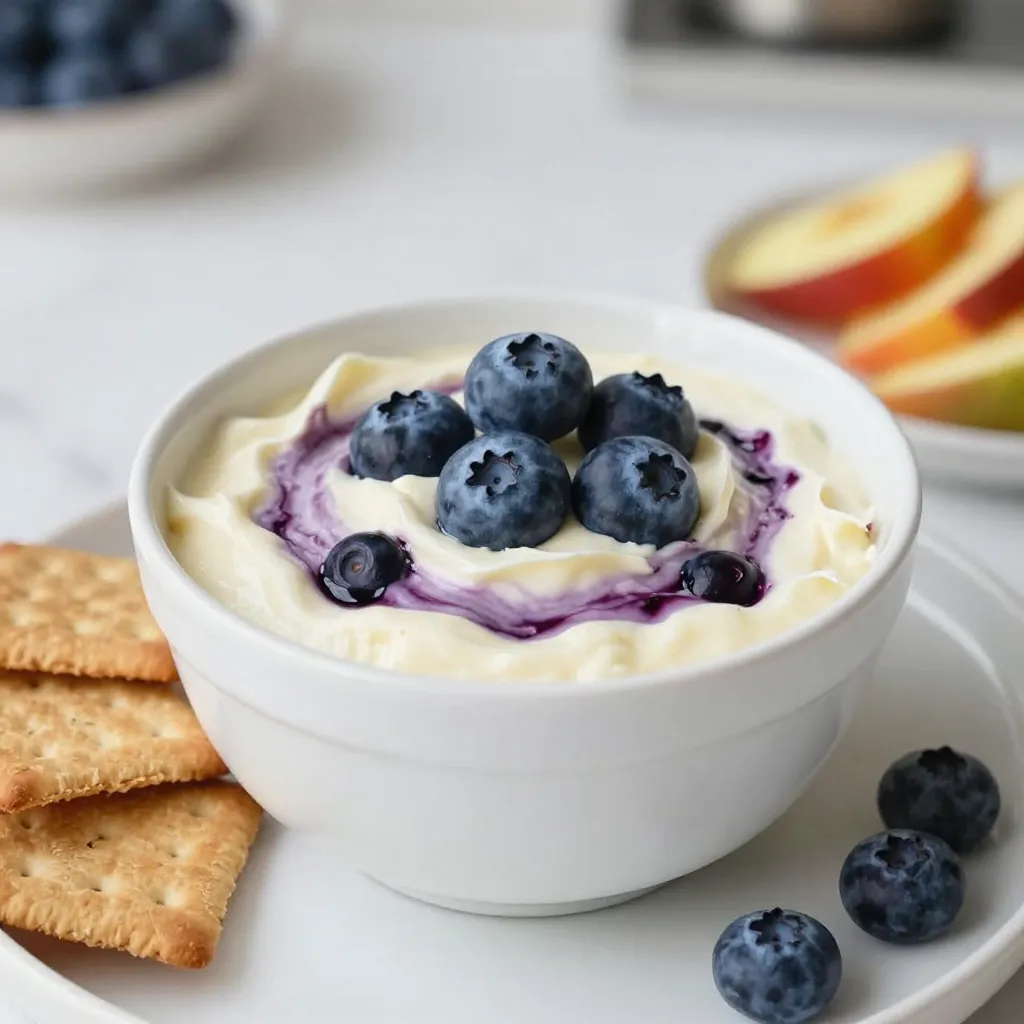
Looking for a sweet treat that’s easy to make and packed with flavor? You’ll love this Blueberry Cheesecake Dip! With
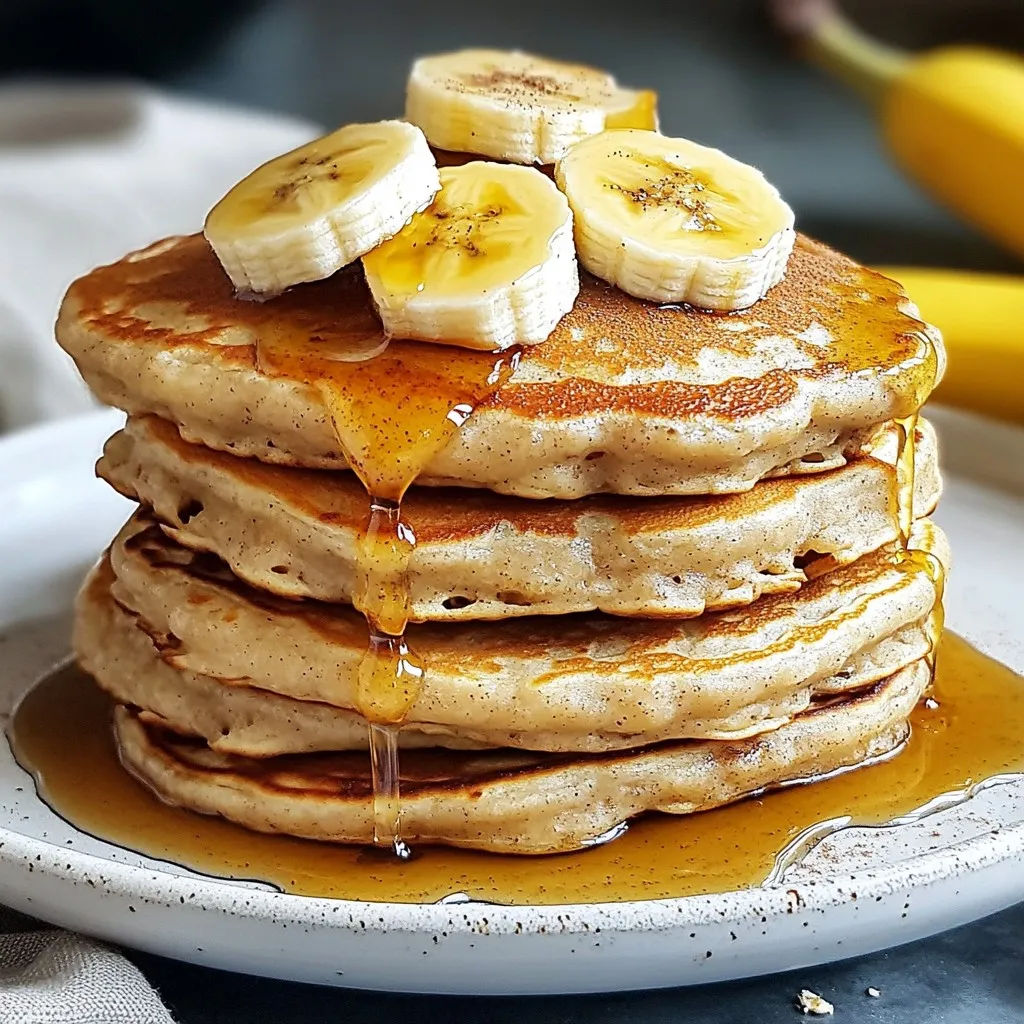
If you love a quick and healthy breakfast, these One-Bowl Banana Oat Pancakes are for you! They combine simple ingredients
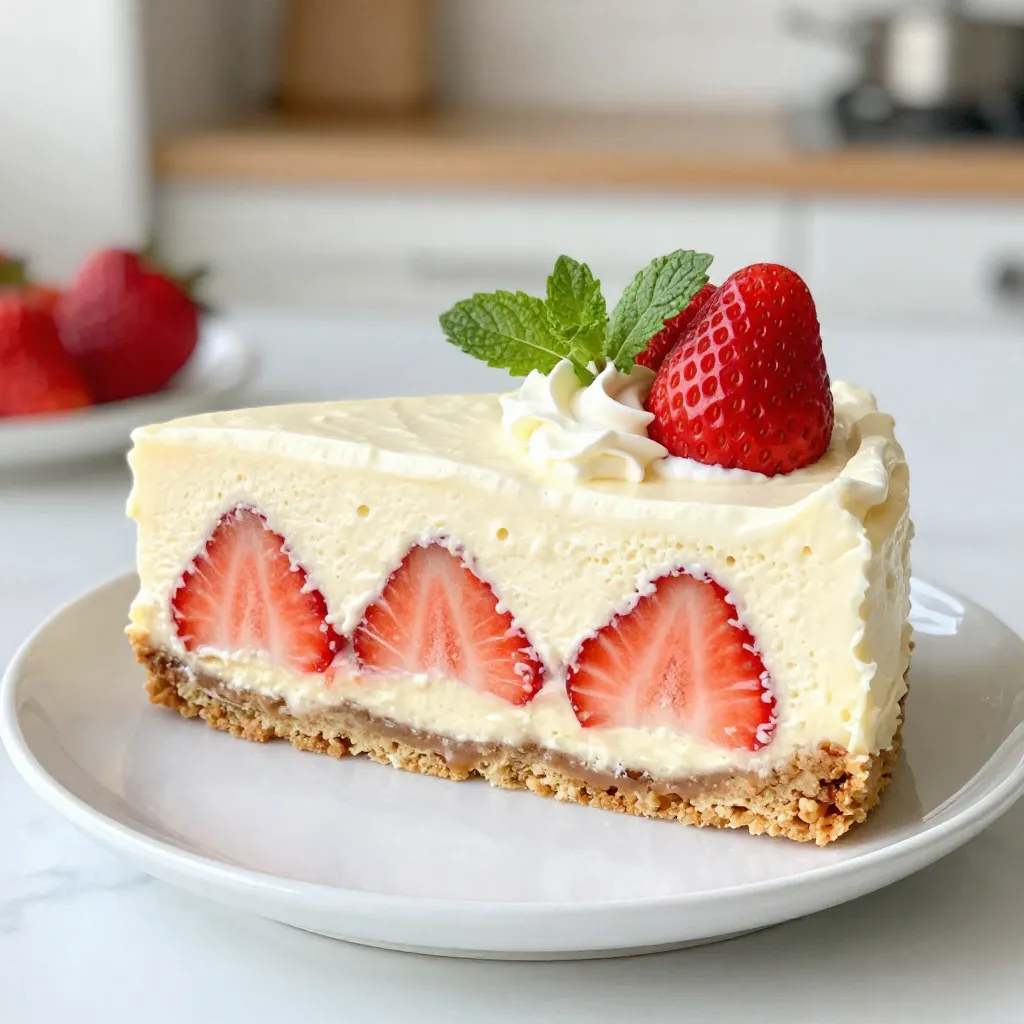
Looking for a simple yet delicious dessert? You’ve found it! This Strawberry Cheesecake Icebox Cake is a fresh, tasty treat
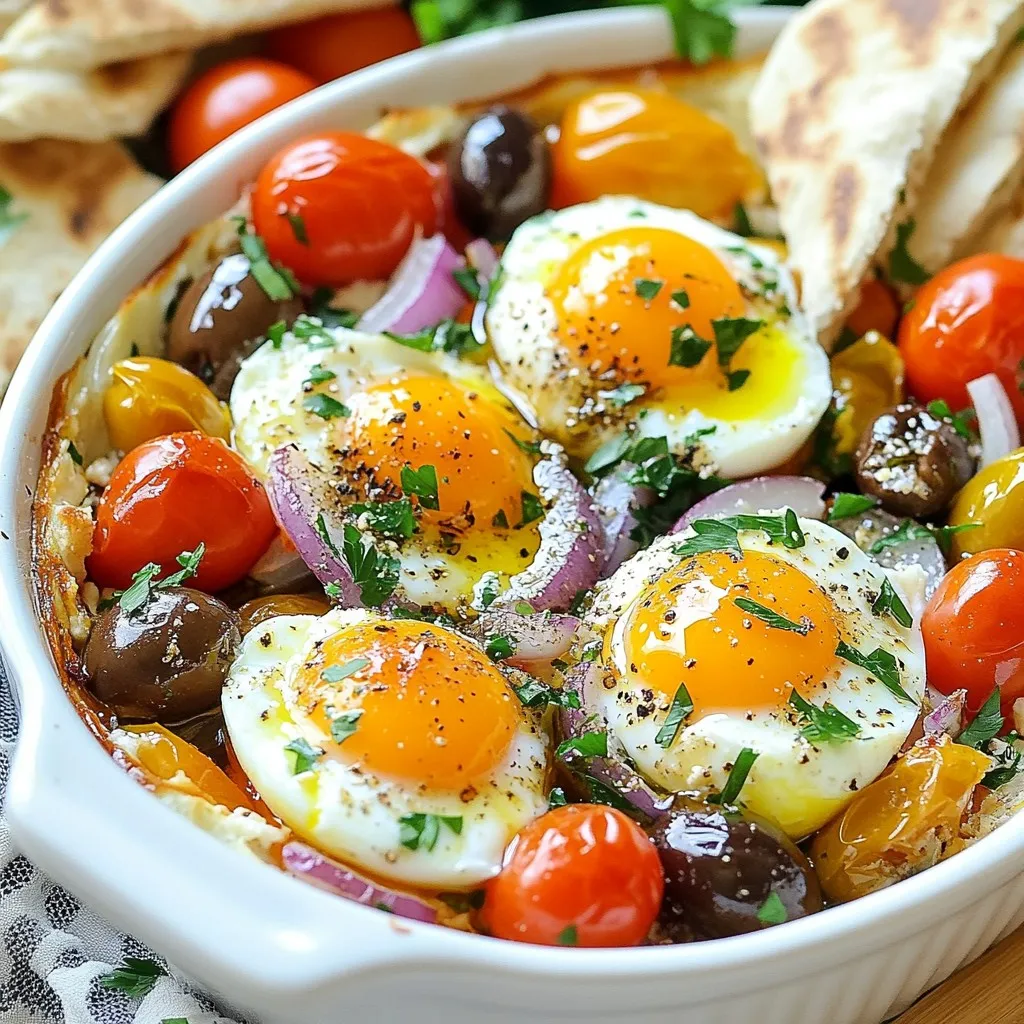
Are you ready to try a dish that’s easy, flavorful, and sure to impress? Mediterranean Baked Feta Eggs combines creamy
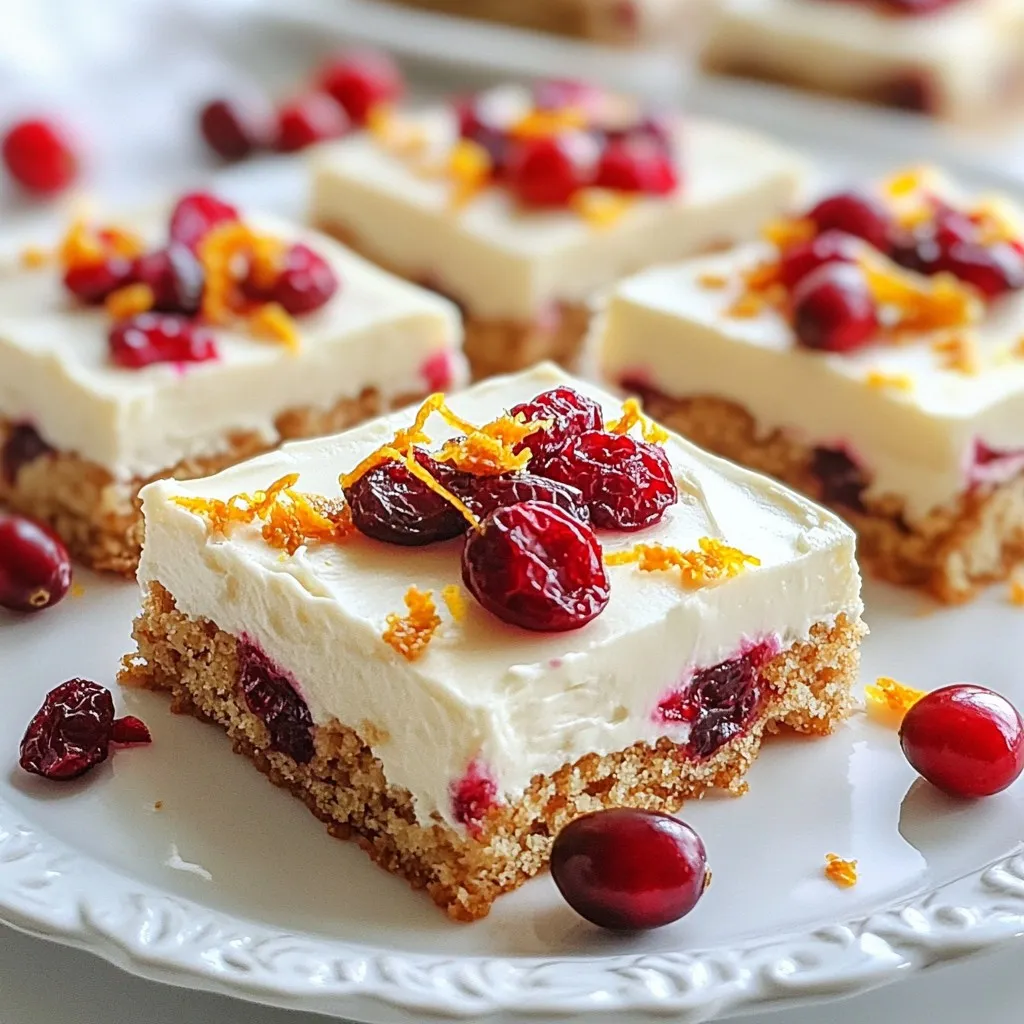
Get ready to spread some holiday cheer with my easy and delicious Cranberry Bliss Bars! This festive treat mixes sweet
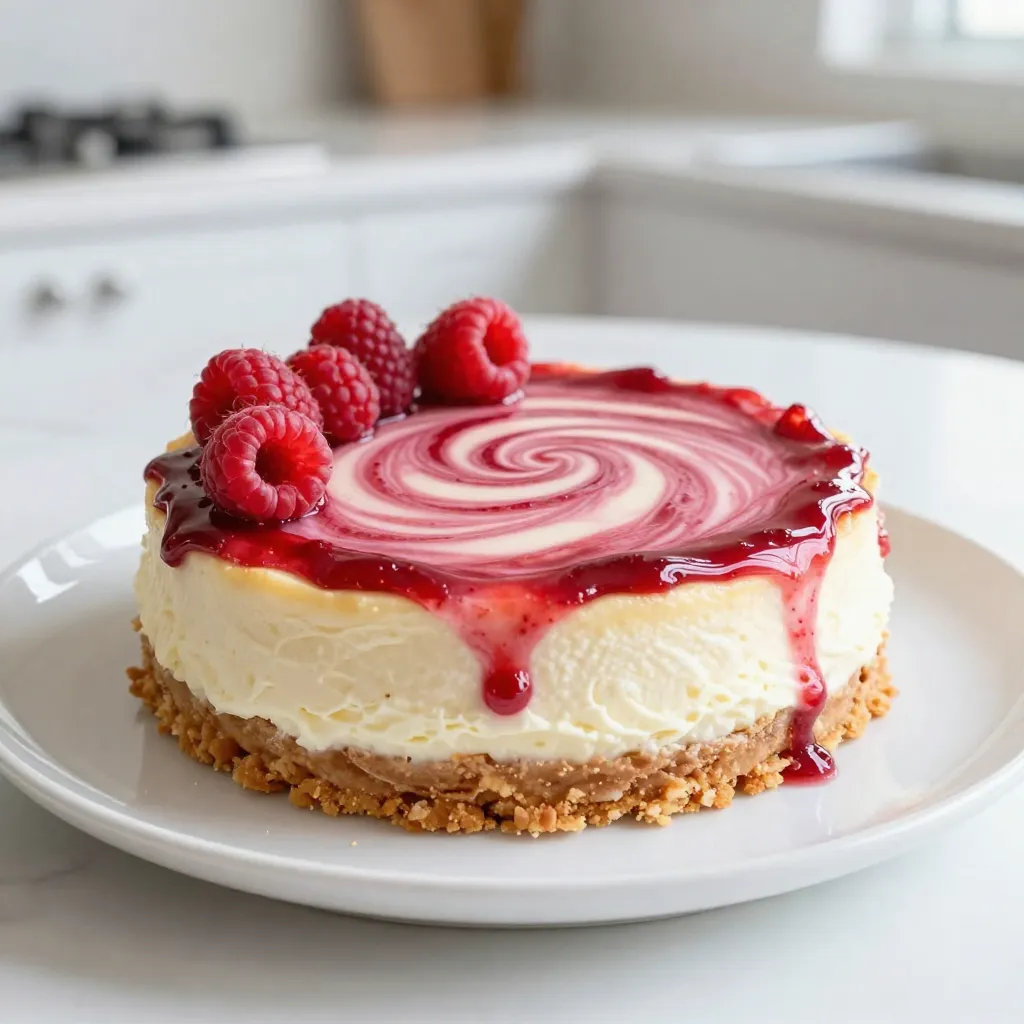
Indulge in a dessert that brings joy with every bite—Raspberry Swirl Cheesecake! This creamy treat features a luscious swirl of
