Skip to content
DisclaimerTerms Of UseGDPR PolicyCookie Policy

dailydishcraft

  • Home
  • Drinks
  • Appetizers
  • Dinner
  • Dessert
  • About
  • Contact
  • Privacy Policy
DisclaimerTerms Of UseGDPR PolicyCookie Policy

Jessica

- 4 medium-sized Yukon Gold potatoes - 4 tablespoons unsalted butter, melted - 4 cloves garlic, finely minced - 1 teaspoon dried Italian herbs (a blend of oregano, thyme, and basil) - ½ cup freshly grated Parmesan cheese - Salt and freshly cracked black pepper, to taste - Fresh parsley, finely chopped (for garnish) - Extra virgin olive oil, for drizzling - Optional: a pinch of crushed red pepper flakes for added heat When making Garlic Parmesan Hasselback Potatoes, use fresh, high-quality ingredients. Select Yukon Gold potatoes for their creamy texture and rich flavor. Choose unsalted butter to control the saltiness in your dish. Freshly grated Parmesan cheese melts beautifully and enhances taste. For garlic, use whole cloves and mince them yourself. Fresh herbs deliver the best flavor, so opt for dried Italian herbs from a trusted source. You can swap Yukon Gold potatoes for other types, like Russet or red potatoes. If you need a dairy-free option, try vegan butter and nutritional yeast instead of Parmesan. For a stronger garlic flavor, use garlic powder in addition to minced garlic. If you want more heat, feel free to add more crushed red pepper flakes. Explore different herbs like rosemary or thyme for a unique twist on flavor. Start by gathering your ingredients. You will need Yukon Gold potatoes, butter, garlic, and herbs. Rinse the potatoes under cold water to clean off any dirt. Pat them dry with a kitchen towel. This step is key for a great texture. Next, to slice the potatoes, use two wooden spoon handles or chopsticks. Place each potato between them. This will help you cut evenly without slicing all the way through. Carefully cut each potato into thin slices, about 1/4 inch apart. Make sure to stop when you reach the spoons. In a bowl, mix melted butter, minced garlic, herbs, salt, and pepper. This garlic butter is the secret to rich flavor. Brush the mixture over each potato, letting it seep into the slices. Finally, sprinkle freshly grated Parmesan cheese over the potatoes. Make sure some cheese falls into the cuts. This will give you cheesy bites when you eat them. Preheat your oven to 425°F (220°C). This temperature is perfect for getting crispy skin. Place the prepared potatoes on a baking sheet lined with parchment paper. This helps with cleanup and prevents sticking. Bake the potatoes for 45 to 50 minutes. They should be tender inside and crispy outside. Halfway through, baste the potatoes with more garlic butter for extra flavor. To make sure the skin gets really crispy, keep a few tips in mind. First, make sure to dry the potatoes well after rinsing. Moisture can make the skin soft. When applying the garlic butter, be generous. This helps crisp the skin and adds flavor. Also, don’t skip the baking step. If you take them out too soon, they won’t be crispy. For an extra touch, drizzle a bit of olive oil on top before baking. This adds richness and helps with that perfect crunch. Enjoy your tasty, crispy garlic Parmesan Hasselback potatoes! To elevate your Garlic Parmesan Hasselback Potatoes, focus on seasonings. Use fresh garlic for a bright flavor. I also love adding fresh herbs like rosemary or thyme. They enhance every bite. If you like heat, sprinkle crushed red pepper flakes. This adds a nice kick without overpowering the dish. Always season the butter mixture well with salt and pepper. This ensures each layer of potato gets flavor. For perfect texture, keep an eye on the baking time. The outer skin should crisp up nicely while the inside becomes soft. To help with this, baste the potatoes with butter halfway through cooking. This keeps them moist and adds more flavor. Let them rest for a few minutes after baking. This helps the cheese settle and prevents burns. One common mistake is cutting the potatoes too deep. The wooden spoon trick helps prevent this. Make sure your slices are about 1/4 inch apart. Another mistake is not using enough garlic butter. Generously coat the potato slices to ensure great taste. Lastly, don’t skip the garnish. Fresh parsley adds color and brightness, making your dish pop. {{image_4}} You can switch up the cheese to create new tastes. For a sharp bite, try aged cheddar. It melts well and adds a nice flavor. If you love blue cheese, sprinkle some on top after baking. It gives a strong taste that pairs well with garlic. For a creamier option, use mozzarella. It adds a great stretch and mild flavor. To make this dish vegetarian, simply keep the Parmesan. It adds a nice flavor and richness. For a vegan twist, use vegan butter and nutritional yeast instead of cheese. Nutritional yeast gives a cheesy flavor without dairy. You can also try vegan cheese shreds for a similar texture. Get creative with toppings! Add crispy bacon bits for a savory crunch. Or, try fresh chives or green onions for a pop of color and mild onion flavor. A drizzle of balsamic glaze can add a sweet touch. If you like heat, sprinkle on crushed red pepper flakes. These toppings enhance the dish and make it more exciting. Once you have enjoyed your Garlic Parmesan Hasselback Potatoes, you might have some left. To keep them fresh, let them cool completely. Then, place them in an airtight container. This keeps moisture out and prevents them from getting soggy. Store them in the fridge for up to three days. If you want to keep them longer, consider freezing. Reheating is easy. Preheat your oven to 350°F (175°C). Place the potatoes on a baking sheet. Cover them lightly with foil to avoid drying out. Heat them for about 15-20 minutes or until warm. This method keeps the skin crispy and the inside soft. You can also use a microwave, but the texture won’t be the same. If you use a microwave, heat in short bursts, checking often. If you want to save your Hasselback Potatoes for later, freezing works well. First, let the potatoes cool completely. Wrap each potato in plastic wrap, then place them in a freezer-safe bag. This protects them from freezer burn. They can stay frozen for up to three months. When you're ready to eat, thaw in the fridge overnight. Then, reheat as mentioned above for best results. Hasselback potatoes are a fun way to prepare potatoes. They have thin slices cut into them. This style helps the potato cook evenly. The slices create space for toppings and flavor. The name comes from a restaurant in Sweden. They serve these potatoes baked and crispy. To boost flavor, use fresh garlic instead of jarred. Fresh herbs add a nice touch too. Try adding rosemary or thyme for extra depth. You can also mix in some cheese inside the slices. A sprinkle of lemon zest adds a fresh note. For heat, add crushed red pepper flakes. Basting with garlic butter halfway through baking enhances flavor too. Yes! You can use any potato that bakes well. Yukon Golds are great, but try Russets or red potatoes. Just keep them similar in size for even cooking. Each type adds a unique taste and texture. Experiment and find your favorite! Garlic Parmesan Hasselback Potatoes are simple and tasty. We covered key ingredients and their quality. You learned about cooking steps, timing, and getting crispy skin. We also shared tips to boost flavor and avoid mistakes. Plus, you found variations to suit your taste and storage tips for leftovers. In the end, these potatoes can shine in any meal. Enjoy making them your own!

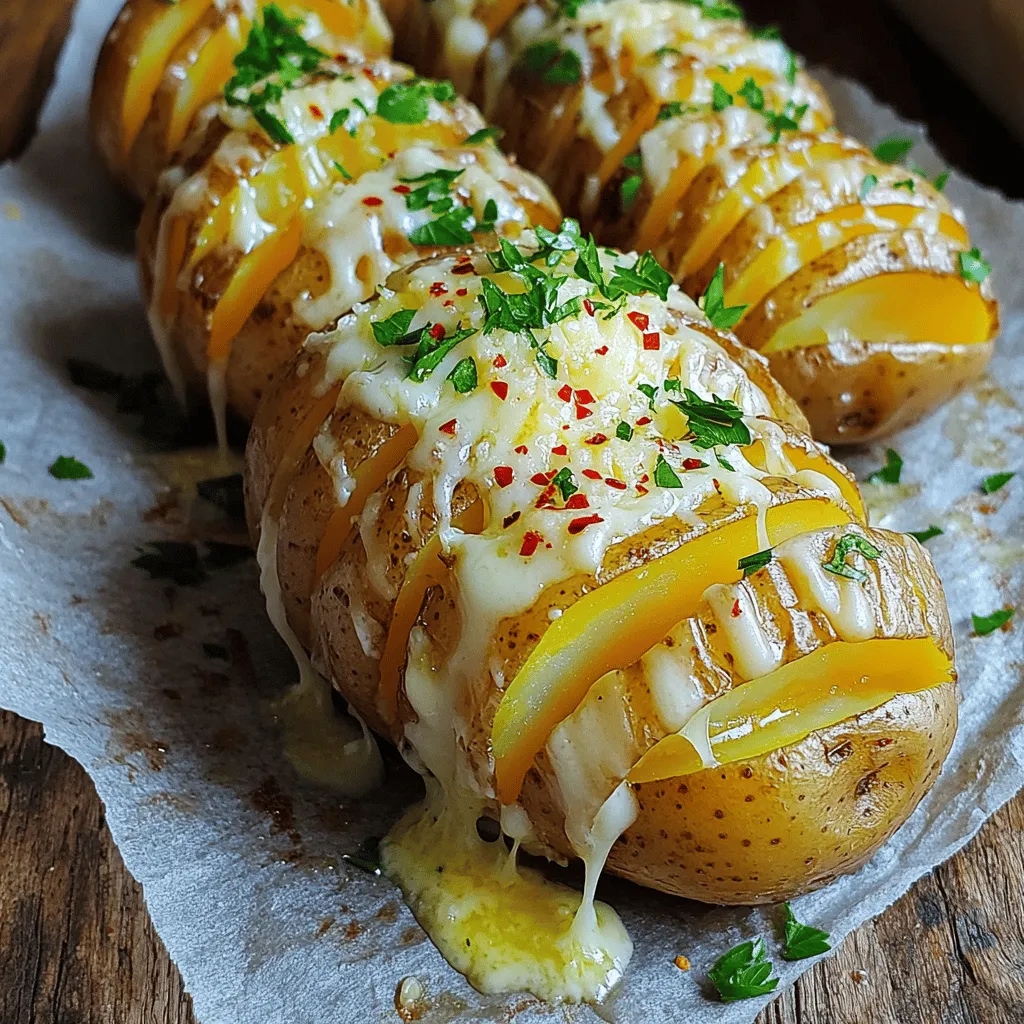
Garlic Parmesan Hasselback Potatoes Flavorful Delight

If you’re craving a dish that’s crispy, creamy, and oh-so-flavorful, you’ve hit the jackpot! Garlic Parmesan Hasselback Potatoes are an

- For the Crust and Crumble: - 1 ½ cups all-purpose flour - ¾ cup rolled oats - ½ cup brown sugar, packed - ½ teaspoon baking powder - ½ teaspoon salt - 1 teaspoon vanilla extract - ½ cup unsalted butter, melted - For the Filling: - 2 cups fresh blueberries (can substitute with frozen if necessary) - 2 tablespoons fresh lemon juice - Zest of 1 medium lemon - ¼ cup granulated sugar - 1 tablespoon cornstarch - ½ teaspoon ground cinnamon You can swap fresh blueberries for frozen ones. They work well too. If you lack fresh lemon, use bottled lemon juice. Just use a little less, about 1 tablespoon. For the butter, coconut oil is a nice choice. It adds a tropical flavor. If you want a sweeter crust, try using coconut sugar instead of brown sugar. You will need a few simple tools to make these bars: - A large mixing bowl - An 8x8-inch baking dish - Parchment paper for easy removal - A fork or your hands for mixing the crust - A cutting board for slicing the bars - A measuring cup and spoons for accuracy These tools help you create the best blueberry lemon crumble bars. They make the process smooth and fun! First, set your oven to 350°F (175°C). While it heats, grab an 8x8-inch baking dish. Line it with parchment paper. Make sure to leave some paper hanging over the sides. This helps you lift the bars out later. In a big bowl, mix together the flour, oats, brown sugar, baking powder, and salt. Stir it well until everything blends nicely. Now, pour in the melted butter and add the vanilla extract. Use a fork or your hands to mix until it looks like coarse crumbs. Take about two-thirds of this mixture and press it firmly into the bottom of your baking dish. This creates a nice crust. Set aside the rest of the crumble for later. In another bowl, toss together the fresh blueberries, lemon juice, lemon zest, granulated sugar, cornstarch, and ground cinnamon. Be gentle as you mix. You want the blueberries to stay whole and not get squished. Now, pour the blueberry filling over the crust you made. Spread it out evenly. Next, sprinkle the remaining crumble mixture on top. Cover the blueberries well. Carefully place the baking dish in the oven. Bake for 35 to 40 minutes. Look for a golden brown topping and bubbling blueberries around the edges. When the bars are done, take the dish out of the oven. Let it cool in the pan for at least 30 minutes. Use the parchment paper to lift the whole block of bars out. Place it on a cutting board and slice it into squares. You can serve these bars chilled or at room temperature. They make a tasty treat for any occasion! To get the best texture for your blueberry lemon crumble bars, use cold butter. Cold butter helps create a flaky crust. Mix until the dough looks like crumbs. Don’t overmix; you want some larger bits. This gives a nice crunch to the topping. Bake your bars at 350°F (175°C) for 35-40 minutes. Watch for golden brown topping. The blueberries should bubble a bit around the edges. If you see this, they are done. Letting them cool for at least 30 minutes is key. This helps them set properly. For a great look, serve the bars on a colorful plate. Add fresh blueberries on top. A sprinkle of powdered sugar makes them pop. You can also slice them into fun shapes. This makes them fun for kids and guests alike. {{image_4}} You can switch up the blueberries for other fruits. Try using strawberries, raspberries, or blackberries. Each fruit brings its own taste. For a twist, mix different berries together. The filling will be colorful and tasty! To make these bars gluten-free, use almond flour or gluten-free oat flour. Replace the butter with coconut oil or a vegan butter alternative. For a vegan option, use flax eggs or applesauce instead of regular eggs. This way, everyone can enjoy these yummy bars! You can add more flavors to the filling. Try a pinch of nutmeg or ginger for warmth. A splash of vanilla or almond extract can enhance the taste. If you love citrus, add more lemon zest or orange zest. These small changes can make your bars extra special! To keep your blueberry lemon crumble bars fresh, store them in an airtight container. This will help maintain their taste and texture. Place parchment paper between layers if stacking to avoid sticking. If you want to keep them longer, refrigerate them. This helps prevent spoilage. When you want to enjoy these bars again, preheat your oven to 350°F (175°C). Place the bars on a baking sheet. Heat them for about 10 minutes. This warms them without making them soggy. You can also use a microwave for a quick fix. Heat for 15-20 seconds for each bar. In the fridge, your bars will stay fresh for about 4-5 days. If you freeze them, they can last for up to 3 months. Just wrap them tightly in plastic wrap and foil. Label the date, so you know when to enjoy them! Yes, you can use frozen blueberries. They work well in this recipe. Just make sure to thaw and drain them first. This step helps avoid extra moisture in your bars. You want them juicy but not soggy. You can use coconut oil or applesauce. Both options give a nice flavor. If you choose coconut oil, melt it first. Applesauce will make the bars moist and sweet. Adjust the sugar if you use applesauce, as it adds natural sweetness. The bars are done when the top turns golden brown. You will also see the blueberries bubbling at the edges. A toothpick should come out clean when you test the center. Let them cool for at least 30 minutes before cutting. In this article, we covered the key steps to make delicious blueberry bars. You learned about the important ingredients, substitutions, and tools. I shared detailed instructions for making the crust, filling, and baking the bars. We talked about tips for texture and presentation, as well as tasty variations. Finally, we discussed storage and answered common questions. I hope these insights help you create your own tasty treats. Enjoy baking your blueberry bars!

Blueberry Lemon Crumble Bars Delightful Easy Treat

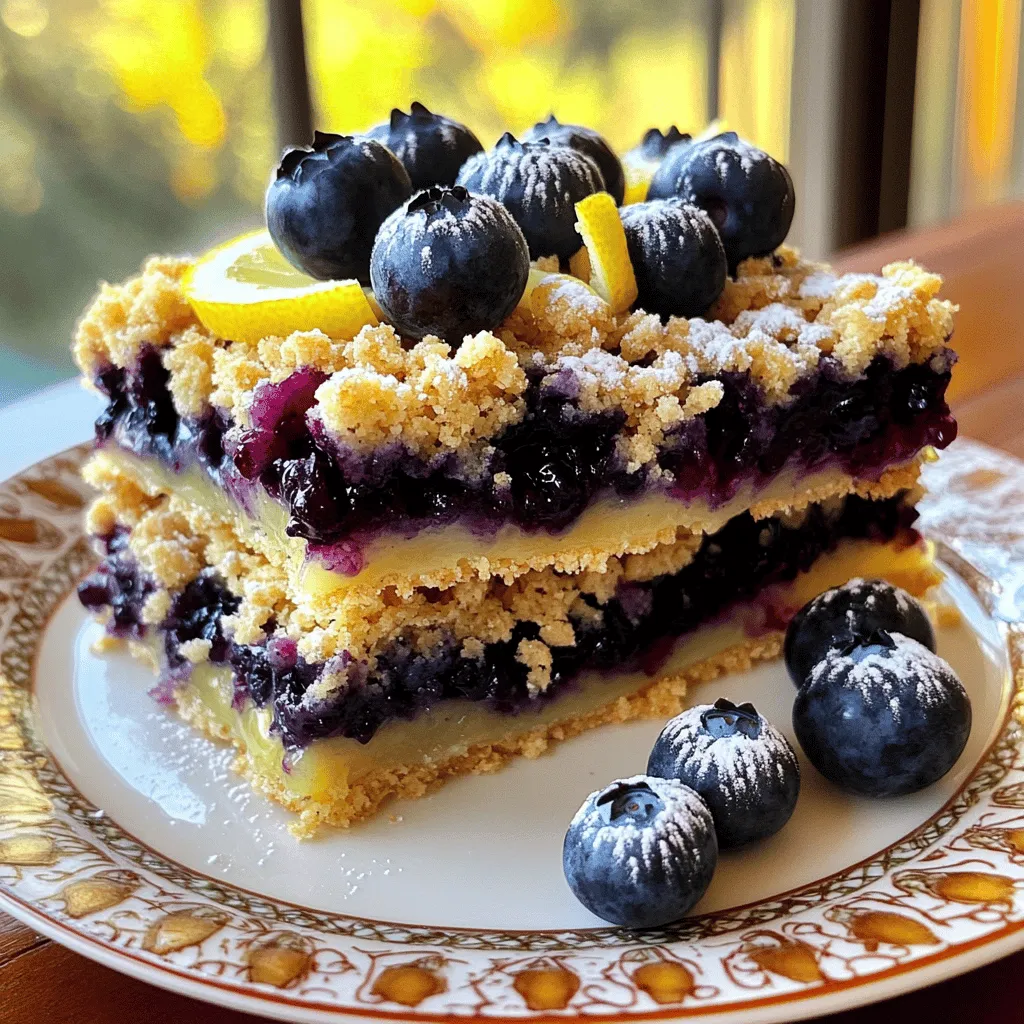
If you’re craving a sweet, zesty treat, you’re in for a delight! These Blueberry Lemon Crumble Bars are easy to

For these Blueberry Lemon Scones, we need a few simple ingredients. Gather the following: - 2 cups all-purpose flour - 1/4 cup granulated sugar - 1 tablespoon baking powder - 1/2 teaspoon baking soda - 1/4 teaspoon salt - 1/2 cup cold unsalted butter, cut into small cubes - 1 cup fresh blueberries (or frozen, thawed and drained) - Zest of 1 medium lemon - 1/2 cup buttermilk, at room temperature - 1 large egg, beaten - 1 teaspoon pure vanilla extract - 1 tablespoon fresh lemon juice These ingredients create a delightful mix of flavors. The blueberries add sweetness, while the lemon zest brightens each bite. The cold butter helps make the scones flaky. If you want a richer taste, try using fresh blueberries. They give the best flavor and texture. Each ingredient brings a special touch to the scones. Enjoy gathering these fresh items! Set your oven to 400°F (200°C). Line a baking sheet with parchment paper. This helps with easy cleanup. In a big bowl, whisk together the flour, sugar, baking powder, baking soda, and salt. This ensures everything mixes well. Add the cold, cubed butter to the flour mix. Use your fingers or a pastry cutter to break up the butter. You want it to look like coarse crumbs, with small bits of butter still in it. Gently fold in the blueberries and lemon zest using a spatula. Be careful not to crush the berries. This keeps them whole and juicy. In another bowl, whisk the buttermilk, beaten egg, vanilla extract, and lemon juice until mixed well. This will bring moisture to the scones. Pour the wet mix into the dry ingredients. Stir with a wooden spoon until just combined. Avoid overmixing to keep the scones light. Turn the dough onto a floured surface. Shape it into a circle about 1 inch thick. Cut the dough into 8 wedges, like a pizza. Place them on the baking sheet, leaving space between each piece. Bake for 15-20 minutes. The tops should be golden and a toothpick should come out clean. To get the best texture in your scones, avoid overmixing the dough. When you mix too much, the scones can turn tough. It’s key to mix until just combined. Small lumps are okay! You want some butter pieces to stay intact. They help create that flaky, tender bite we love in scones. Want to boost the flavor? Add more citrus! Consider extra lemon zest or a splash of orange juice. You can also sprinkle in some spices. A pinch of cinnamon or nutmeg adds warmth. These little tweaks can make your scones pop with flavor. Serving is just as fun! Drizzle your scones with a lemon glaze. Mix powdered sugar with lemon juice until smooth. This adds a nice shine and sweetness. Garnish each plate with fresh blueberries and a mint sprig. It makes for a beautiful presentation and a tasty treat! {{image_4}} You can swap blueberries for other fruits. Raspberries, blackberries, or strawberries work well. Each fruit brings a unique flavor. You might enjoy a mix of berries for a burst of taste. Try diced peaches or cherries for a summer twist. Remember to adjust the sugar if your fruit is very sweet. To make gluten-free scones, use a gluten-free flour blend. Almond flour or coconut flour can also work. You may need to add extra binding agents like xanthan gum. Substitute buttermilk with almond milk mixed with vinegar. This will help keep the scones tender and moist. Want something different? Try adding cheese, like sharp cheddar. You can also mix in herbs like chives or rosemary. For a spicy kick, add jalapeños or red pepper flakes. These savory scones are perfect for breakfast or brunch. Serve them warm with butter for a delightful treat. To keep your blueberry lemon scones fresh, store them in an airtight container. Place parchment paper between the scones to avoid sticking. This method keeps them soft and tasty for longer. Store them at room temperature for the best results. Freezing scones is easy! First, let them cool completely. Then, wrap each scone in plastic wrap. After wrapping, place the scones in a freezer bag or container. Make sure to remove as much air as possible. To enjoy, just reheat them in the oven at 350°F (175°C) for about 10-15 minutes. At room temperature, your scones will stay fresh for about 2-3 days. If you want to keep them longer, freezing is the way to go. This way, they can last up to 3 months, keeping that wonderful flavor intact. Enjoy your scones whenever you like! Yes, you can use frozen blueberries. First, thaw them in a bowl. Drain excess liquid to avoid soggy scones. Gently fold the thawed blueberries into the dough. This keeps your scones light and fluffy while adding tasty bursts of blueberry flavor. If you don’t have buttermilk, you can make your own. Mix 1/2 cup of milk with 1/2 tablespoon of lemon juice or vinegar. Let it sit for about 5 minutes. This will create a similar tangy flavor. You can also use plain yogurt or sour cream thinned with a bit of milk. To check if the scones are done, look for a golden top. Insert a toothpick into the center. If it comes out clean, they are ready. Keep an eye on them during the last few minutes to avoid overbaking. Yes, you can prepare the dough ahead. Wrap it tightly in plastic wrap and refrigerate. Use it within 24 hours for best results. When ready, just shape and bake. This makes it easy to enjoy fresh scones any morning! You now have a clear guide to make delicious Blueberry Lemon Scones. From gathering ingredients to baking, each step is easy to follow. Remember not to overmix the dough for the best texture. You can change the recipe by trying different fruits or adding spices. Store your scones carefully to keep them fresh. Enjoy your baking adventure and share your scones with others. There's nothing like homemade treats to brighten the day!

Blueberry Lemon Scones Tasty Morning Delight

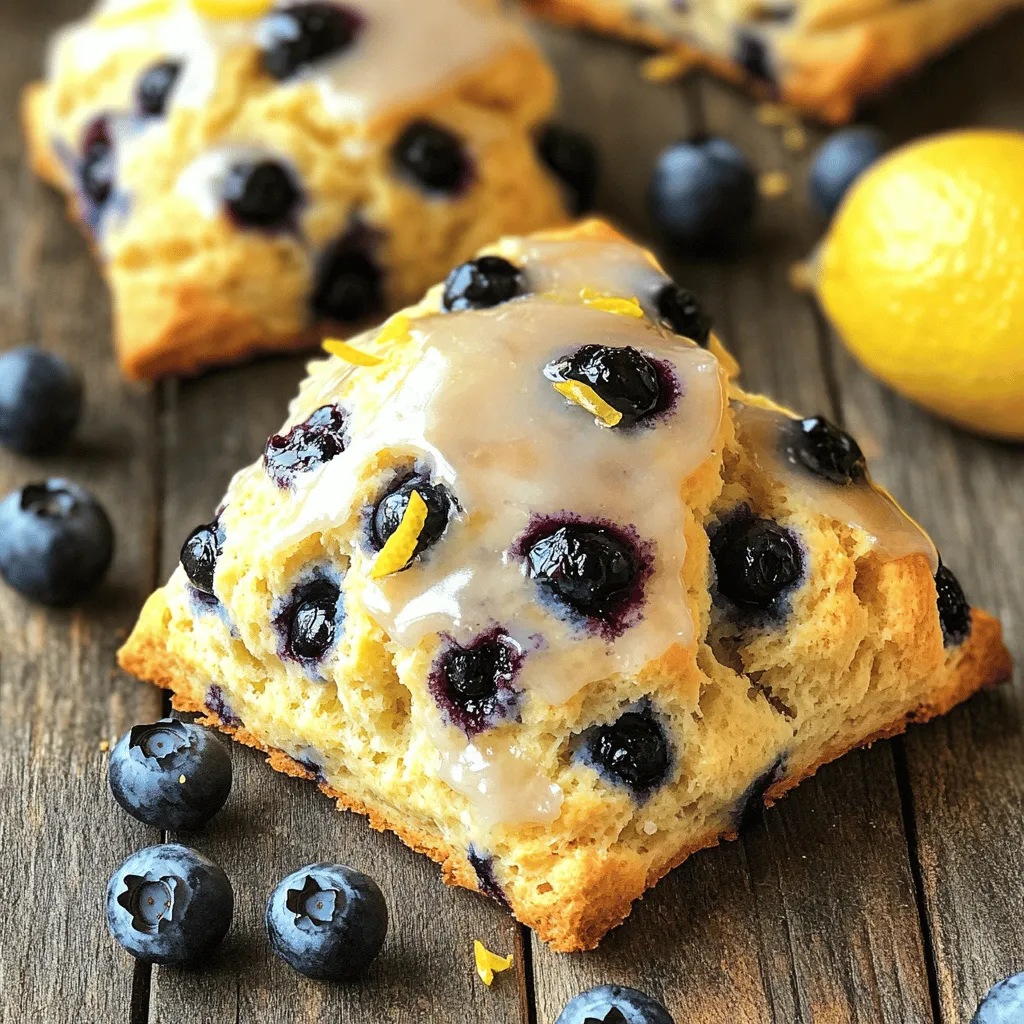
Start your day deliciously with blueberry lemon scones! These tasty treats combine sweet blueberries and zesty lemon for a bright

- 2 ripe avocados - 12 oz pasta (spaghetti or fettuccine) - 1/2 cup fresh basil leaves - 2 tablespoons freshly squeezed lemon juice - 1/4 cup grated Parmesan cheese or nutritional yeast - Salt and freshly ground black pepper - 1 cup cherry tomatoes for garnish When making creamy avocado pasta, you need fresh and ripe avocados. They add a smooth texture and rich flavor. You can use either spaghetti or fettuccine for this dish; both work well. Fresh basil gives the pasta a nice herbal aroma and taste. The lemon juice adds brightness and balances the creaminess. For extra flavor, you can add grated Parmesan cheese. If you prefer a vegan option, use nutritional yeast instead. Season the pasta with salt and black pepper to taste. Cherry tomatoes make a colorful garnish that enhances the dish's visual appeal. They also add a fresh burst of flavor. Gather these ingredients, and you are ready for a quick and tasty meal. Start by filling a large pot with water. Add a generous amount of salt. Bring this salted water to a rolling boil. Once boiling, add your pasta. Cook according to the package instructions until it is al dente, which means it should still have a slight bite. Remember to save about 1 cup of the cooking water before draining the pasta. Set the drained pasta aside in a large bowl. In a food processor, add the ripe avocados, peeled garlic cloves, and fresh basil leaves. Pour in the freshly squeezed lemon juice and extra virgin olive oil. Add the grated Parmesan cheese for that rich flavor. Blend everything on high speed until smooth and creamy. If the sauce is too thick, slowly mix in some of the reserved pasta water. Keep adding until you reach your desired creamy consistency. Now, take the large bowl with the cooked pasta. Pour the creamy avocado sauce over the pasta. Gently toss everything together. Make sure every strand of pasta is coated with that delicious sauce. If it looks a bit dry, add more reserved pasta water until it has a silky texture. Taste the pasta and adjust the seasoning. You can add more salt, freshly ground black pepper, or extra lemon juice to brighten the dish. To make creamy avocado pasta, use reserved pasta water wisely. This starchy water helps to thin the sauce without losing flavor. Start by reserving about 1 cup of the pasta water before draining. When mixing the sauce, add a bit at a time until you reach your desired creaminess. Blending is key for a smooth sauce. Use a food processor to mix avocados, garlic, basil, lemon juice, and olive oil. Blend on high speed until everything is creamy. If the sauce clumps, blend longer. This step ensures a silky texture that clings well to your pasta. Seasoning is vital to elevate your dish. After mixing, taste your pasta. Add salt, pepper, or more lemon juice to brighten the flavors. You can also add a pinch of red pepper flakes for some heat. For serving, pair your pasta with fresh ingredients. Cherry tomatoes add sweetness, while basil brings freshness. A sprinkle of Parmesan cheese adds a savory touch. Garnishing makes your dish pop. Use halved cherry tomatoes and extra basil leaves to decorate your pasta. This adds color and freshness to the plate. A drizzle of extra virgin olive oil enhances flavor. Just a little goes a long way. This final touch makes your creamy avocado pasta look and taste gourmet. Enjoy your beautiful dish! {{image_4}} If you want a vegan spin on creamy avocado pasta, substitute the Parmesan cheese with nutritional yeast. This swap keeps the dish rich and cheesy without using dairy. Nutritional yeast adds a great umami flavor. You can also add extra garnishes like toasted pine nuts or pumpkin seeds for crunch. Fresh arugula or spinach can add a peppery kick, too. For a gluten-free version, choose pasta made from brown rice or chickpeas. These options provide a nice texture and flavor. When cooking gluten-free pasta, follow the package directions closely. They may have different cooking times. Remember to check for doneness, as gluten-free pasta can become mushy if overcooked. To make your dish exciting, add spices or herbs that you love. A pinch of red pepper flakes can bring heat. Fresh herbs like oregano or thyme can also enhance the taste. You can also mix in proteins, like grilled chicken or shrimp. This adds a hearty element and makes the meal more filling. To keep your creamy avocado pasta fresh, follow these tips: - Use airtight containers. Glass or plastic containers work well. - Let the pasta cool down first. This helps prevent condensation. - Store in the fridge right away. Aim to eat leftovers within 2 days. When it’s time to enjoy leftovers, here’s how to reheat: - Use the stovetop for best results. Heat gently in a pan. - Add a splash of water or olive oil. This helps with the sauce. - Stir often to keep the texture smooth. Avoid high heat to prevent separation. Your creamy avocado pasta can stay fresh for: - Up to 2 days in the fridge. - Look for signs of spoilage like a sour smell or change in color. - If it looks off or smells strange, it’s best to toss it. Yes, you can prepare parts of this dish in advance. Cook the pasta and store it in a container. Keep it in the fridge for up to three days. You can also make the creamy avocado sauce a day ahead. Just blend the sauce and store it in an airtight container. To keep it fresh, press plastic wrap directly onto the sauce surface to limit air exposure. This recipe is great for meal prep! You can portion the pasta into individual containers. Store the creamy sauce separately to keep it fresh. When you’re ready to eat, simply combine them. This method keeps the pasta from getting soggy and helps maintain the sauce's creamy texture. Freezing this dish is not ideal. The creamy sauce may change in texture when thawed. If you choose to freeze it, store the pasta and sauce separately. Use an airtight container to avoid freezer burn. When you thaw it, the sauce may look a bit different. You can blend it again to restore some creaminess. This dish pairs well with various sides. A simple green salad adds freshness. You can also serve garlic bread for a nice crunch. For drinks, try a light white wine or sparkling water. Both complement the creamy flavors beautifully. Don't forget to garnish with extra cherry tomatoes and basil for color! In this post, you learned how to make creamy avocado pasta. We covered the main ingredients like ripe avocados and pasta. You discovered step-by-step cooking and sauce preparation. Tips for the perfect texture and flavor make every bite enjoyable. I also shared storage info and meal prep advice. Enjoy making this dish with variations that suit your taste. With simple steps, you’ll impress anyone at your table.

Creamy Avocado Pasta Healthy and Quick Recipe

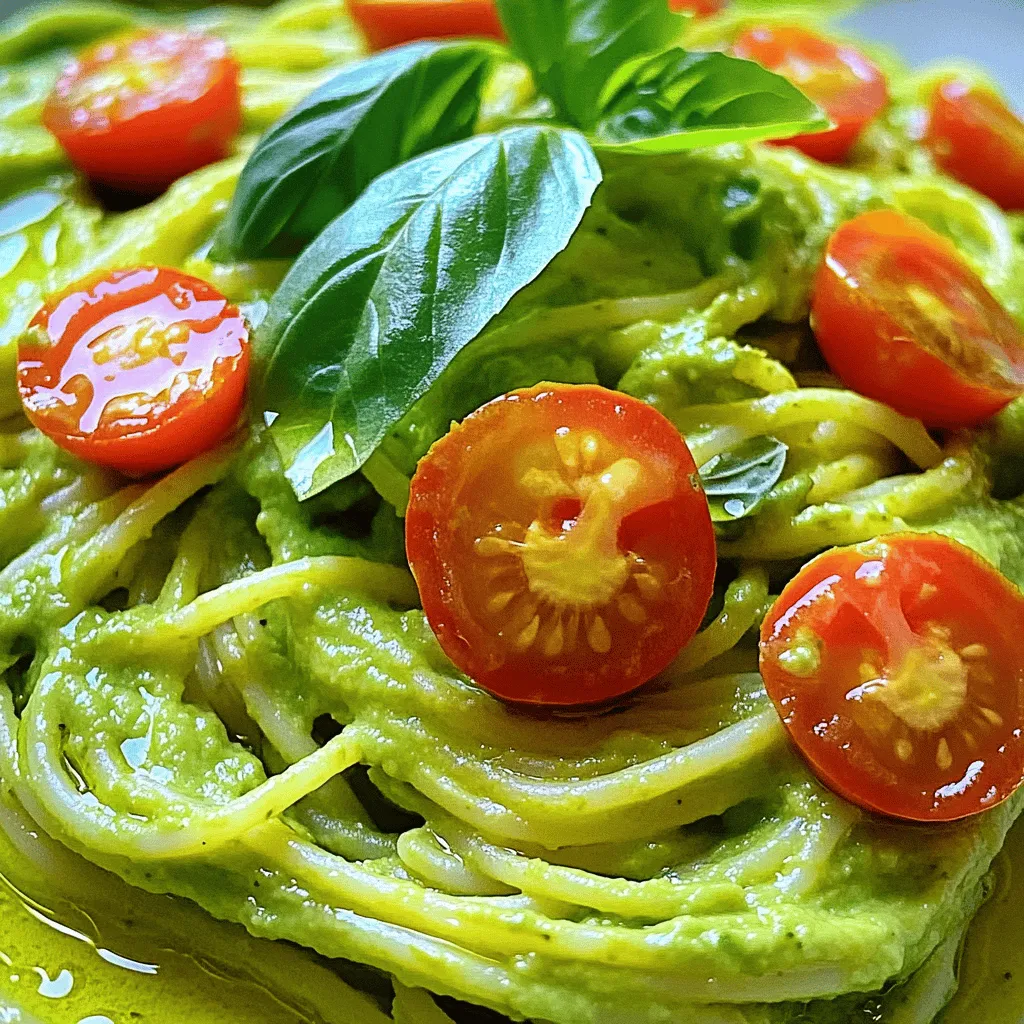
Looking for a quick, healthy meal that’s full of flavor? Try my Creamy Avocado Pasta! This dish combines ripe avocados,

- 1 cup canned pumpkin puree - 1/2 cup vegetable oil - 2 large eggs - 1 cup packed brown sugar - 1/2 cup granulated sugar - 1 teaspoon vanilla extract - 1 ½ cups all-purpose flour - 1 teaspoon baking soda - 1/2 teaspoon baking powder - 1 teaspoon ground cinnamon - 1/2 teaspoon ground nutmeg - 1/4 teaspoon ground ginger - 1/4 teaspoon salt - 1/2 cup Nutella In this recipe, you will need some tasty ingredients. First, get a cup of canned pumpkin puree. This adds flavor and moisture. Next, grab half a cup of vegetable oil for richness. You will need two large eggs to bind everything together. For sweetness, you will use a cup of packed brown sugar and half a cup of granulated sugar. Don't forget one teaspoon of vanilla extract for a lovely aroma. You will need one and a half cups of all-purpose flour for the base. For leavening, include a teaspoon of baking soda and half a teaspoon of baking powder. The spices make it special: one teaspoon of ground cinnamon, half a teaspoon of ground nutmeg, a quarter teaspoon of ground ginger, and a quarter teaspoon of salt. Finally, you will need half a cup of Nutella. This is what makes the swirl and adds that rich chocolate flavor. Each ingredient plays an important role in making this bread an irresistible fall treat. With these ingredients, you can create a warm, comforting loaf that fills your kitchen with delightful scents. - Set your oven temperature to 350°F (175°C) - Prepare the loaf pan with cooking spray or butter - Combine pumpkin puree, vegetable oil, eggs, brown sugar, granulated sugar, and vanilla extract - Whisk until smooth - In a separate bowl, mix all-purpose flour, baking soda, baking powder, spices, and salt - Whisk to distribute evenly - Gradually add dry ingredients to wet mixture, stirring gently - Ensure not to over-mix - Pour half of the batter into the loaf pan - Add and swirl Nutella - Bake for 55-65 minutes - Check doneness with a toothpick - Make sure all your ingredients are at room temperature. This helps the batter mix well. - Use a toothpick to check if the bread is done. Insert it into the center. It should come out clean or with a few moist crumbs. - Slice the bread and arrange it on a rustic wooden board for a nice look. - Drizzle some extra Nutella over the slices. Dust them with powdered sugar for added sweetness. - If your bread is dense, you may have over-mixed the batter. Mix just enough to combine the wet and dry ingredients. - If the bread is too sweet, try reducing the sugar in the next batch. You can also add a pinch of salt to balance the flavors. {{image_4}} You can make this bread gluten-free! Just swap all-purpose flour with a gluten-free blend. Many brands offer great mixes that work well in baking. Look for blends that include xanthan gum for better texture. This change keeps the bread moist and tasty while being safe for gluten-free diets. Want to customize your Nutella swirl pumpkin bread? You can add nuts like walnuts or pecans for crunch. Chocolate chips make it sweeter and more decadent. You can also mix in spices like cloves or allspice for a warm flavor. Each mix-in adds a fun twist to your bread. Fall is a great time to try new spices. You can add pumpkin pie spice for extra fall flavor. A sprinkle of maple sugar on top gives a sweet touch. For a fun twist, try using caramel sauce instead of Nutella. It creates a different taste but is still delicious! To keep your Nutella swirl pumpkin bread fresh, store it in an airtight container. Place it at room temperature. This helps keep the bread soft and moist. If you live in a humid area, the bread may last a bit less time. If you want to freeze your pumpkin bread, slice it first. Wrap each slice tightly in plastic wrap. Then, place the wrapped slices in a freezer bag. This way, you can enjoy a piece anytime you want. When ready to eat, just thaw the slice at room temperature. To reheat your bread, use a microwave or oven. For the microwave, heat one slice for about 10-15 seconds. In the oven, place it at 350°F for about 5-10 minutes. This keeps the bread moist and tasty. Avoid high heat to prevent drying it out. Yes, you can use fresh pumpkin. Fresh pumpkin has a bright flavor and adds nutrition. To prepare fresh pumpkin, cut it in half, remove seeds, and roast it until soft. Then, scoop out the flesh and mash it until smooth. This will give your bread a lovely texture and taste. Aim for about one cup of fresh pumpkin, similar to the canned version. Just make sure it is well-drained to avoid excess moisture in your bread. To boost the chocolate flavor, add more Nutella. You can swirl in extra dollops before baking. Another option is to mix in chocolate chips. Use semi-sweet or dark chocolate chips for a richer taste. You can also sprinkle cocoa powder into the dry mix for an extra chocolate kick. Just be careful not to overdo it, as too much chocolate can change the bread’s texture. If your bread sinks, it might be due to underbaking. Always check doneness with a toothpick. Insert it into the center; it should come out clean or with a few moist crumbs. Another reason for sinking could be overmixing. When combining wet and dry ingredients, mix gently. Overmixing can add air, which may cause the bread to rise and then fall. Lastly, ensure your oven is at the right temperature. An oven thermometer can help with accuracy. This blog post covered how to make delicious pumpkin bread with Nutella. You learned the ingredients needed and the simple steps to follow. I shared tips for baking and storage options to keep your bread fresh. You can even explore fun variations, like gluten-free options or mix-ins. Remember, the key to great pumpkin bread is in the mixing and the right oven temperature. Enjoy baking, and don’t be afraid to get creative with your flavors!

Nutella Swirl Pumpkin Bread Irresistible Fall Treat

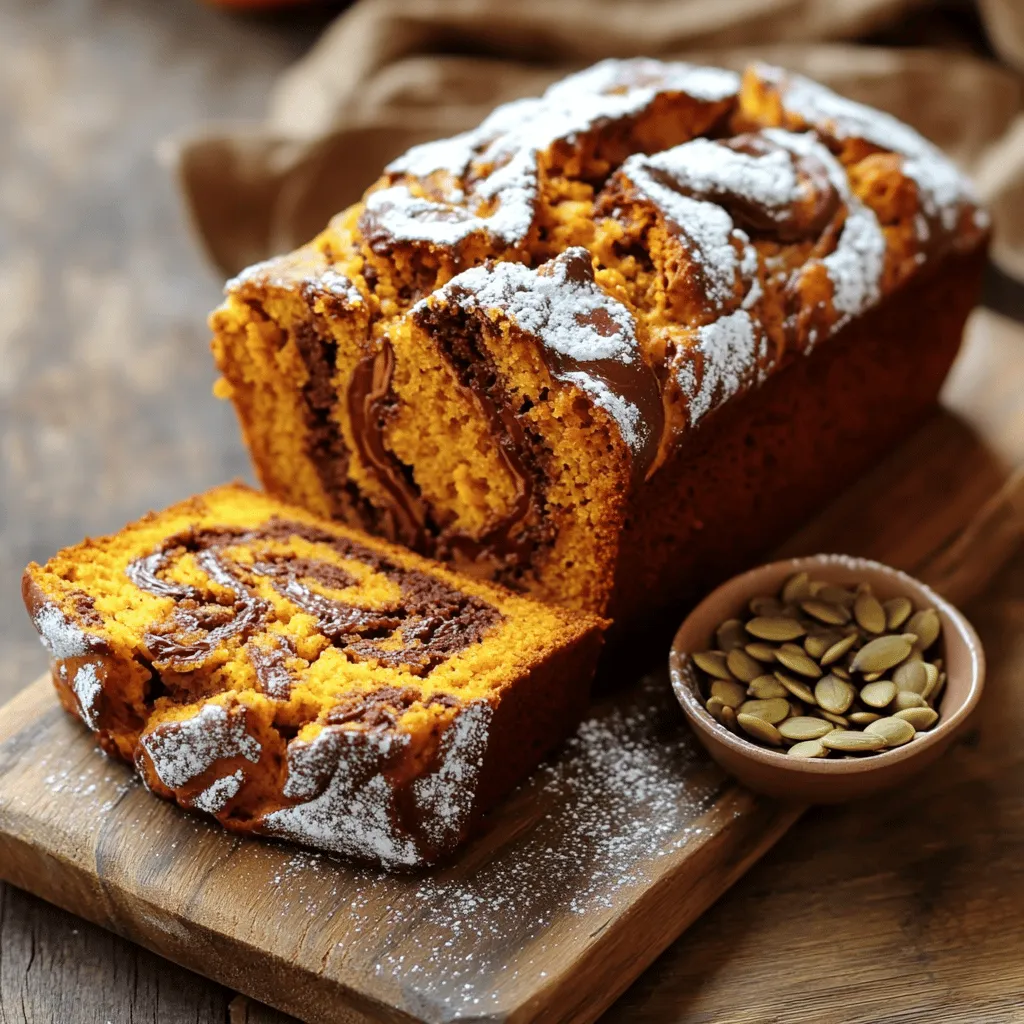
Fall is here, and that means it’s time to bake! This Nutella Swirl Pumpkin Bread is the perfect mix of

To make avocado deviled eggs, you will need a few fresh ingredients. Here’s a list: - 6 large eggs - 1 ripe avocado - 2 tablespoons Greek yogurt (or sour cream) - 1 tablespoon Dijon mustard - 1 tablespoon fresh lime juice - 1/2 teaspoon garlic powder - Salt and pepper, to taste - 1 tablespoon fresh cilantro, finely chopped (optional) - Red pepper flakes, for garnish (optional) Each of these ingredients adds a special touch. The ripe avocado gives a creamy texture. The Greek yogurt or sour cream adds tanginess. Dijon mustard brings a little zip, while lime juice adds freshness. Garlic powder enhances the flavor, and cilantro can add a lovely pop of color. Adjust salt and pepper to suit your taste. Using fresh ingredients makes all the difference. Choose ripe avocados for the best flavor. Fresh lime juice brightens the dish. Enjoy the process as you gather your ingredients! - First, place the eggs in a saucepan. - Cover them with cold water, making sure the water is at least an inch above the eggs. - Heat the saucepan over medium-high heat and bring the water to a rolling boil. - Once it boils, cover the pot and take it off the heat. Let the eggs sit, covered, for 12-14 minutes. - Next, transfer the eggs to an ice bath. - Fill a bowl with ice and cold water, then add the eggs. - Let them sit in the ice bath for at least 5 minutes to cool. - After cooling, gently tap each egg to crack the shell. Peel them under running water for easier removal. - Slice each egg in half lengthwise and scoop out the yolks into a bowl. - In the bowl with the yolks, add the ripe avocado, Greek yogurt (or sour cream), Dijon mustard, fresh lime juice, and garlic powder. - Sprinkle in salt and pepper to taste. - Use a fork to mash everything together until it's creamy and smooth. - Taste the mixture and adjust the seasoning if needed. - Fill each egg white half with the avocado-yolk mixture using a spoon or a piping bag. - For a nice touch, sprinkle red pepper flakes on top and add cilantro if you like. - Serve right away for a fresh taste, or chill in the fridge for about 30 minutes for more flavor. To make perfect hard-boiled eggs, time is key. I recommend boiling the eggs for 12-14 minutes. This timing gives you a firm yolk without a green ring. After boiling, use an ice bath. Fill a bowl with ice and cold water. Transfer the eggs directly into the ice bath. This cools them quickly. It also stops the cooking, making them easier to peel. For a creamy filling, mash the yolks with a ripe avocado. The avocado adds richness and a smooth texture. If you want to impress your guests, use a piping bag. This creates a neat and fancy look. Just fill the bag with your avocado mixture and pipe it into the egg whites. To boost flavor, try adding spices and herbs. Garlic powder adds a nice kick. Fresh cilantro brightens the taste. You can also sprinkle red pepper flakes for a spicy touch. Don’t be afraid to experiment with different ingredients. Adding jalapeños gives a nice heat. You can also try feta cheese or olives for a Mediterranean twist. {{image_4}} When it comes to avocado deviled eggs, you can have fun with many variations. Here are three tasty ideas to switch things up. To add some heat, try mixing in jalapeños or hot sauce. Chop fresh jalapeños and fold them into the avocado-yolk mix. You can adjust the amount based on your heat level. For a zesty kick, drizzle your favorite hot sauce on top before serving. This spice lifts the creamy filling and makes it exciting. For a Mediterranean twist, consider adding feta cheese and olives. Crumble some feta cheese into the avocado-yolk mix for a tangy flavor. Chop black or green olives finely and mix them in too. This blend brings a briny taste that pairs well with the creaminess of the avocado. You can even finish with a sprinkle of oregano for a fresh touch. If you want a vegan option, swap out Greek yogurt for a plant-based yogurt. You can also add nut-based ingredients like cashew cream or tahini. These ingredients keep the filling creamy and rich. Blend them well with the avocado and spices for a delightful vegan treat that everyone can enjoy. To keep your avocado deviled eggs fresh, store them in the fridge. Place them in an airtight container. This helps prevent them from drying out or absorbing other flavors. They stay good for up to three days. After that, they may lose their taste and texture. You can make these deviled eggs ahead of time. Prepare the filling and store it separately from the egg whites. This keeps the mixture fresh and prevents soggy eggs. When you’re ready to serve, just fill the egg whites. You can also keep the filled eggs chilled before serving for a quick snack or appetizer. To make peeling easier, use these tips: - Start with older eggs: Fresh eggs are harder to peel. Use eggs that are a week or two old. - Ice bath: After boiling, place the eggs in an ice bath for at least 5 minutes. This cools them down and helps separate the shell from the egg. - Rolling method: Gently tap and roll the egg on a hard surface to crack the shell before peeling. These steps really help. You will notice the difference! Yes, you can use other options if you don't have Greek yogurt. Here are some good substitutes: - Sour cream: A great option, it adds a creamy texture. - Mashed avocado: If you want a richer taste, add more avocado. - Cottage cheese: Blend it for a smooth mix. Feel free to experiment with what you have on hand. You can make your deviled eggs healthier with these suggestions: - Use plain yogurt: It has less fat than Greek yogurt. - Skip the salt: Try using herbs for flavor instead. - Add veggies: Finely chop bell peppers or spinach for added nutrients. These small changes can boost the health of your dish! You now have all the tools to make delicious avocado deviled eggs. Start by perfecting your hard-boiled eggs and follow the steps to create a tasty filling. Don’t forget to explore the variations and tips for a personal touch. Remember, experimentation leads to exciting flavors. Enjoy your tasty creation, whether for a snack or a party platter. Simple and fun, these deviled eggs are a hit! Happy cooking!

Avocado Deviled Eggs Tasty and Simple Recipe

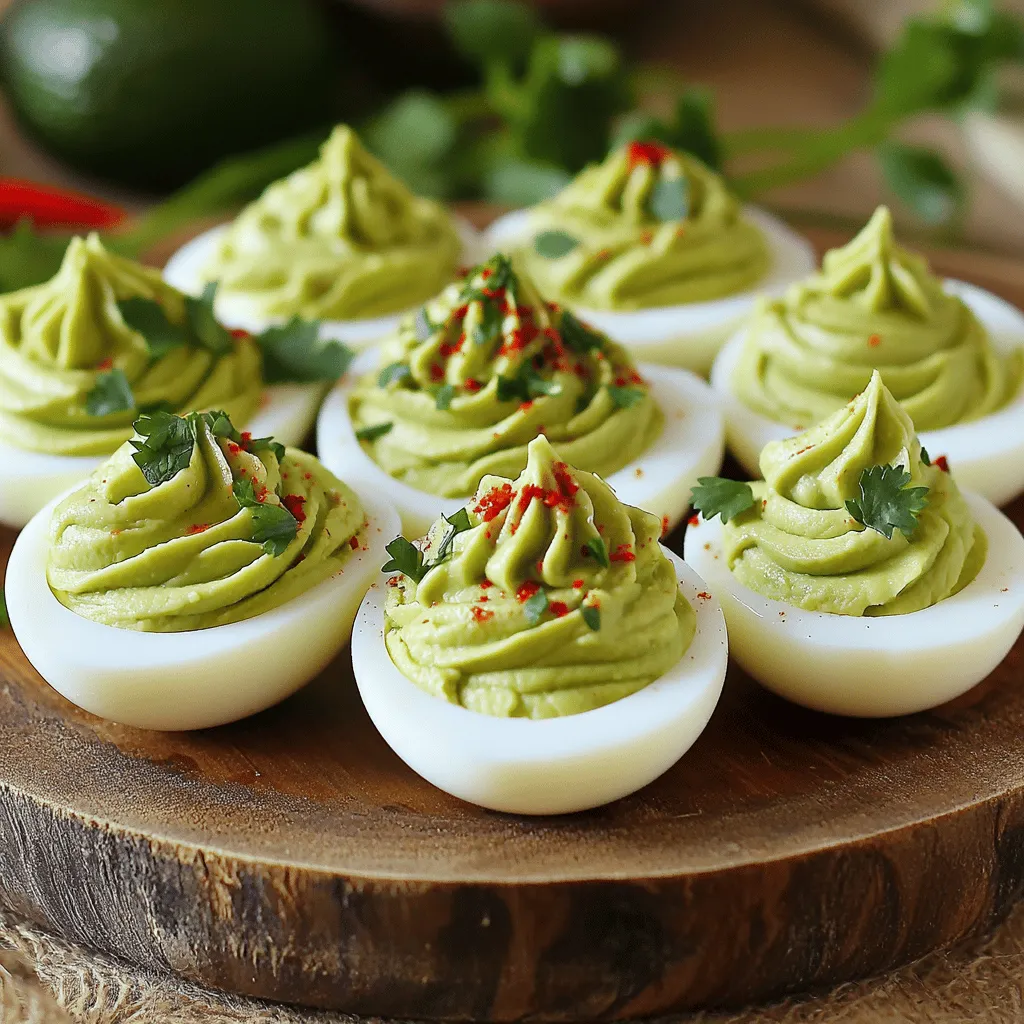
Looking for a fresh twist on a classic dish? Avocado deviled eggs combine creamy avocado with traditional flavors, creating a

- 8 oz elbow macaroni - 2 tablespoons unsalted butter - 2 tablespoons all-purpose flour - 2 cups whole milk - 1 cup smoked Gouda cheese, finely shredded - 1 cup sharp cheddar cheese, finely shredded - 1 teaspoon garlic powder - 1 teaspoon onion powder - Salt and black pepper to taste - 1/2 cup panko breadcrumbs - 2 tablespoons fresh parsley, finely chopped The main ingredients create a creamy and rich flavor. The smoked Gouda adds a unique taste. You can use sharp cheddar for a nice balance. - Bacon bits - Hot sauce - Truffle oil Adding bacon bits gives a crunchy texture. Hot sauce can bring heat, while truffle oil adds a touch of luxury. Feel free to mix in what you love. - Recommended side dishes - Best wines to serve with mac and cheese Pair your mac and cheese with a fresh salad. A crisp green salad complements the richness well. For wine, a light white like Sauvignon Blanc works nicely. Enjoy these pairings to enhance your meal. Start by bringing a large pot of salted water to a boil. This step is key. Once the water bubbles, add 8 oz of elbow macaroni. Cook it according to the package directions until it is al dente. This usually takes about 7-8 minutes. Drain the pasta and set it aside while you focus on the cheese sauce. Next, it's time to prepare the roux. In the same pot, lower the heat to medium and add 2 tablespoons of unsalted butter. Let the butter melt completely. Then, sprinkle in 2 tablespoons of all-purpose flour. Whisk this mix continuously for about 1-2 minutes. You want it to turn a light golden color. Now, gradually pour in 2 cups of whole milk while whisking. Keep whisking to avoid lumps. This should take about 5 minutes until the mixture thickens. Lower the heat to a gentle simmer. Add 1 cup each of finely shredded smoked Gouda and sharp cheddar cheese. Stir until the cheeses melt into a creamy sauce. Don’t forget to add 1 teaspoon of garlic powder, 1 teaspoon of onion powder, and season it with salt and black pepper to taste. Now, mix the cooked elbow macaroni into the cheese sauce. Stir well to coat every piece of pasta with that rich sauce. Preheat your oven to 350°F (175°C). Lightly grease a baking dish with butter or cooking spray. Pour the macaroni and cheese mixture into the dish, spreading it evenly. For that extra crunch, prepare the topping. In a small bowl, mix 1/2 cup of panko breadcrumbs with a drizzle of olive oil. This will give it flavor and texture. Evenly sprinkle this mixture over the mac and cheese. Finally, place the baking dish in your preheated oven. Bake for about 20-25 minutes or until the top is golden-brown and the cheese is bubbling. Enjoy the process; soon, you will have a delicious dish ready to serve! To make the best cheese sauce, start with a smooth mix. When you add milk, pour it in slowly. Keep whisking as you go. This helps avoid lumps. A good sauce should be creamy, not too thick or too runny. If it seems too thick, add a bit more milk. If it’s too thin, cook it a bit longer. Look for a golden-brown top for perfect baking. You want the cheese to bubble and the crumbs to crisp up. If you want more crunch, try adding more panko breadcrumbs or some grated cheese on top before baking. You can also mix in spices for extra flavor. For a fun twist, serve mac and cheese in small ramekins. It adds charm and makes it easy to enjoy. You can also top each serving with fresh parsley and a dash of smoked paprika. For sides, serve a fresh salad or some roasted veggies. They pair nicely with the rich flavors of the dish. {{image_4}} You can swap out smoked Gouda for other tasty cheeses. Here are some fun options: - Gruyère: This cheese adds a nutty flavor. - Fontina: It's creamy and melts well. - Havarti: This cheese is buttery and smooth. Mixing cheeses makes your mac and cheese unique. Try combining smoked Gouda with sharp cheddar. This mix gives a rich taste. You can also blend it with pepper jack for a spicy kick. The options are endless! Want a gluten-free version? Use gluten-free pasta. You can find many brands that taste great. For the sauce, swap all-purpose flour for cornstarch. This will thicken your cheese sauce without gluten. If you're vegan, use a plant-based milk like almond or soy. For cheese, try vegan cheeses made from nuts or soy. They melt nicely and taste good too. You can even add nutritional yeast for a cheesy flavor! Adding seasonal veggies can boost flavor and nutrition. In spring, try fresh peas or asparagus. In fall, roasted butternut squash works well. These ingredients add color and taste to your dish. For holiday meals, think about toppings. Add crispy fried onions for a Thanksgiving twist. During winter, sprinkle some crushed rosemary or sage on top. These herbs add warmth to your mac and cheese. Enjoy exploring all these delicious variations! To keep your smoked Gouda mac and cheese fresh, place it in an airtight container. This helps prevent moisture loss. You can store it in the fridge for up to 3 days. I find it best to let it cool before sealing. When reheating, you want to keep that creamy texture. The best method is to use the oven. Preheat it to 350°F (175°C). Place the mac and cheese in a baking dish, cover with foil, and heat for about 20 minutes. If you use the microwave, warm it in short bursts. Stir it often to avoid dry spots. You can freeze leftover mac and cheese for up to 3 months. First, let it cool completely. Then, transfer it to a freezer-safe container. When you're ready to eat, thaw it in the fridge overnight. Reheat it in the oven as mentioned above for the best results. Yes, you can make this dish ahead. Cook the pasta and cheese sauce separately. Combine them before baking. Store in the fridge for up to two days. When ready, bake it straight from the fridge. Add a few extra minutes to the baking time. Smoked Gouda has a distinct smoky flavor. It adds depth to dishes. Regular Gouda is milder and creamier. Use smoked Gouda when you want a richer taste. Regular Gouda works well in classic cheese recipes. Absolutely! You can use any pasta you like. Shells, penne, or rotini work great. Choose a shape that holds cheese well. This ensures every bite is cheesy and delicious. Add crushed red pepper flakes for a kick. Mix in some diced jalapeños for freshness. You could also use a spicy cheese blend. Just remember to balance the heat with the creamy sauce. Reheat in the oven for the best results. Cover with foil to keep it moist. If using a microwave, add a splash of milk. This helps keep the sauce creamy. Enjoy your warm and cheesy dish! This post covered all you need to craft creamy mac and cheese. You learned about key ingredients, easy steps, and tips for a perfect bake. I emphasized the joy of personalizing your dish with add-ins and seasonal flavors. Remember to store your leftovers properly to enjoy them later. With these skills, you can impress friends and family. Dive in and make your own tasty version today!

Smoked Gouda Mac and Cheese Creamy Comfort Dish

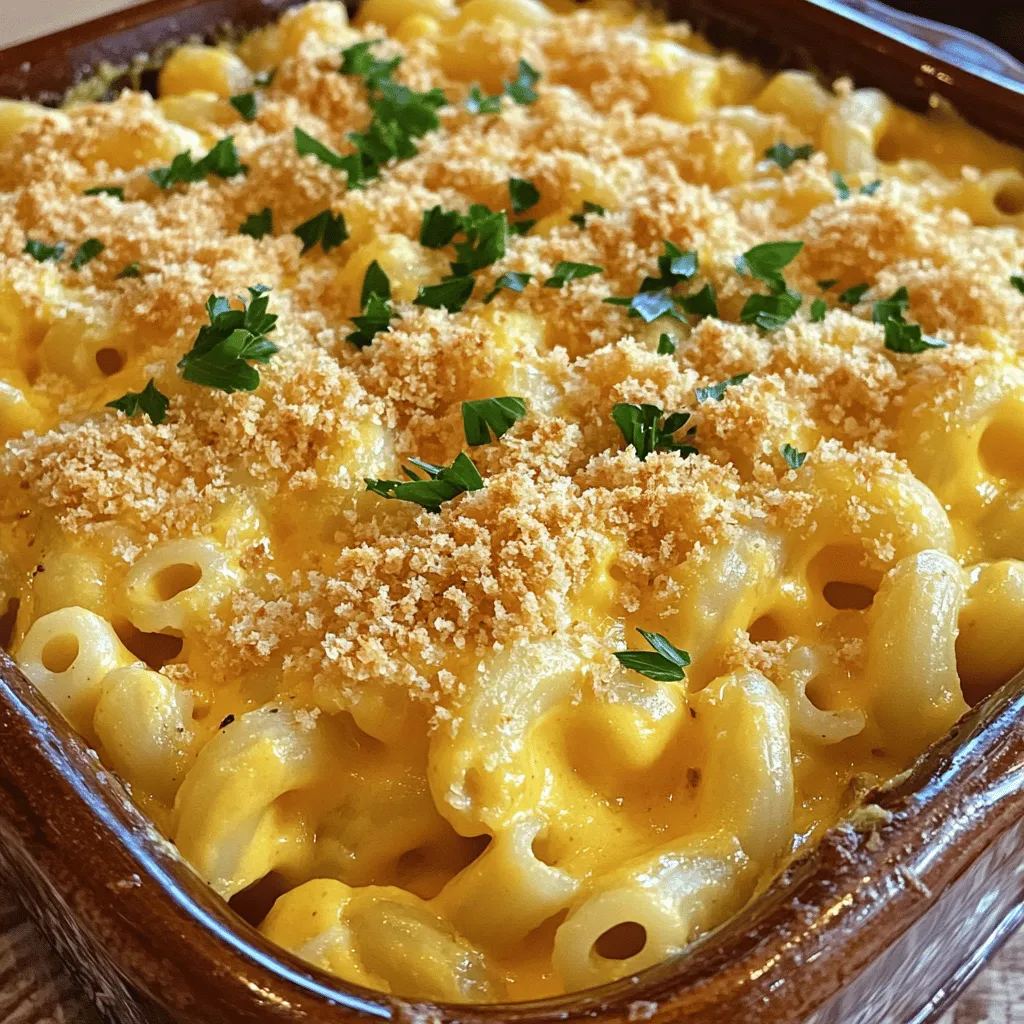
Looking for a dish that wraps you in creamy comfort? Smoked Gouda Mac and Cheese is just that! With rich

- 4 cups of apple cider - 2 cups of cranberry juice - 1 cup of sparkling water or lemon-lime soda - 1/2 cup of freshly squeezed orange juice - 1/4 teaspoon of ground cinnamon - 1/4 teaspoon of ground nutmeg - 1 orange, thinly sliced - 1 apple, thinly sliced - 1 cup of fresh cranberries (optional) - Ice cubes This punch is a great mix of flavors. Apple cider gives it a sweet base. Cranberry juice adds a tangy kick. The orange juice brightens it up. Ground cinnamon and nutmeg bring warmth. Fresh fruits add color and texture. You can also use cranberries for a nice touch. Each ingredient plays a role in the final taste. Apple cider is the star. The juices balance sweetness and tartness. Spices add depth. The sparkling water or soda makes it lively. You can serve it any time, but it shines in fall. Make sure to use fresh ingredients. They will give you the best flavor. Thinly sliced fruits look great and add zest. You can adjust the spice amounts to your taste. Enjoy this drink at gatherings or quiet nights at home. - Combine apple cider and cranberry juice. Pour 4 cups of apple cider into a large pitcher. Add 2 cups of cranberry juice. This mix gives a sweet and tart base. - Add spices and orange juice. Next, squeeze 1/2 cup of fresh orange juice into the mix. Sprinkle in 1/4 teaspoon of ground cinnamon and 1/4 teaspoon of ground nutmeg. These spices add warmth and depth. - Stir in sliced fruits and cranberries. Slice 1 orange and 1 apple thinly. Carefully add them to the pitcher. If you want extra texture, toss in 1 cup of fresh cranberries. - Chill the punch. Cover the pitcher and place it in the fridge. Chill for at least 1 hour. This helps the flavors blend well. - Serve with sparkling water. Just before serving, stir in 1 cup of sparkling water or lemon-lime soda. This will give your punch a nice fizz. Pour over ice cubes in glasses. Enjoy the fresh and fruity taste! To boost the taste of your Apple Cider Harvest Punch, try adding fresh herbs. Rosemary or thyme can add a nice touch. For spice lovers, a hint of ginger or cardamom can bring warmth. You can adjust the sweetness of your punch easily. If you want it sweeter, add more cranberry juice or honey. For a tarter flavor, use less juice and more apple cider. For garnishes, consider using pomegranate seeds or star anise. These not only add flavor but also look pretty. Serve your punch in clear glass pitchers. This way, everyone can see the colorful fruit slices. Each glass will look inviting and festive. Garnish each drink with fresh mint or a cinnamon stick. This adds a lovely aroma and enhances the flavor. Plus, it makes your punch look even more appealing. Enjoy serving this delightful drink! {{image_4}} You can change this punch with different juices. Instead of cranberry juice, try pomegranate juice or grape juice. These juices add sweetness and a new taste. You can also mix in some sparkling apple juice for extra fizz. If you want a kick, add a splash of alcohol. Rum or vodka works well. Just remember to mix in the alcohol after chilling the punch. This way, you keep that refreshing taste. Seasonal fruits can make this punch even better. In fall, add pear slices or fresh figs. For winter, think about using pomegranate seeds or citrus fruits. They bring a festive flair. Adjust the punch for holidays too. For Thanksgiving, use spices like cloves or allspice for a warm flavor. For Christmas, red and green fruits add holiday cheer. You can also use candy canes as a fun garnish. These variations keep the punch fresh and exciting. Each season brings new tastes to explore. Enjoy experimenting with flavors that reflect the time of year! When you have leftover punch, store it in the fridge. Use a clean, airtight container. This helps keep it fresh and tasty. The punch stays good for about 3 days. After that, the flavors may change. You can use leftover punch ingredients in fun ways. Here are some ideas: - Apple and Orange Slices: Add them to salads for a fruity twist. - Cranberry Juice: Mix it with sparkling water for a refreshing drink. - Spices: Use cinnamon and nutmeg in baked goods, like muffins or pies. - Cider: Heat it up with spices for a warm drink. These ideas help reduce waste and add flavor to your meals! You can use white grape juice or pear juice. These drinks give a similar sweet taste. They also add a fun twist to your punch. Yes! You can prepare the punch up to a day in advance. Just mix the juices and spices, then chill. Add the sparkling water right before serving. This keeps the fizz fresh! Absolutely! This punch is a hit with both kids and adults. It has no alcohol, so everyone can enjoy it. You can even add a splash of rum for adults if you wish. To serve more people, simply double or triple the recipe. Use a larger pitcher or bowl. Make sure to have enough ice and fruit slices for all your guests. Enjoy the fun! You can find the full recipe for Apple Cider Harvest Punch [here](#). This punch is a perfect blend of sweet and tart flavors. It combines apple cider, cranberry juice, and sparkling water. I love how the spices like cinnamon and nutmeg add warmth. When you prepare this drink, you can adjust it to your taste. For example, if you want it sweeter, add more orange juice. If you prefer it more tart, use more cranberry juice. This flexibility makes it fun to create your perfect punch. You can also add fresh cranberries for a festive touch. They not only look great but also add a nice texture. The thin slices of orange and apple elevate the drink’s look and flavor. Chilling the punch for an hour lets the flavors blend well. Right before serving, add sparkling water for a fizzy finish. Pour it over ice for a refreshing drink. Serve it in clear pitchers to show off its bright colors. Garnish with mint or a cinnamon stick for extra flair. Enjoy this drink at your next gathering, and watch your guests love it. This blog post covered how to make a tasty apple cider harvest punch. We discussed the ingredients, step-by-step preparation, and tips to enhance flavor. You can customize the drink for holidays and try different juices, too. Remember to store leftovers properly and explore using extra ingredients in other recipes. Enjoy creating this festive drink that delights everyone. It's easy, fun, and perfect for gatherings!

Apple Cider Harvest Punch Fresh and Flavorful Drink

Looking for a refreshing drink that captures the essence of fall? Let me introduce you to my Apple Cider Harvest

- 4 large bell peppers (any bright color) - 1 cup cooked quinoa or rice (white or brown) - 1 cup marinara sauce (homemade or store-bought) The main ingredients are key to making this dish tasty. The bell peppers serve as the perfect, colorful vessel. They add sweetness and crunch. I love using cooked quinoa or rice as the base. It gives a nice texture and fills you up. Marinara sauce brings rich flavor and moisture to the mix. - 1 cup shredded mozzarella cheese (plus more for topping if desired) - 1 teaspoon Italian seasoning blend - 1/4 cup grated Parmesan cheese Cheese is essential for this dish. Mozzarella melts beautifully and adds creaminess. The Italian seasoning blend gives that classic pizza flavor. Parmesan cheese adds a nice salty touch and depth of flavor. - 1/2 cup sliced pepperoni (mini or regular) - 1/4 cup chopped black olives (optional but recommended) - Fresh basil leaves for garnish (optional) For extra fun, you can add sliced pepperoni. It brings that meaty, savory taste. Black olives offer a salty bite that pairs well with the other flavors. Finally, fresh basil adds a pop of color and freshness right before serving. It makes each bite feel special. - Preheat the oven to 375°F (190°C). This helps the peppers cook evenly. - Wash the bell peppers under cold water. Cut off the tops and remove seeds. Discard the tops or save them for later. - In a large bowl, mix cooked quinoa or rice with marinara sauce. Add Italian seasoning to the mix. - Fold in half of the mozzarella cheese, sliced pepperoni, and black olives. Season with salt and black pepper. Mix well. - Take each bell pepper and spoon the filling inside. Press down gently to pack it tight. - Ensure each pepper is full, so every bite is tasty. This helps the flavors blend well. - Place the stuffed peppers in a baking dish. Optionally, add a little water at the bottom to steam them. - Cover the dish with aluminum foil and bake for 25 minutes. This softens the peppers nicely. - After 25 minutes, remove the foil. Sprinkle the remaining mozzarella and grated Parmesan on top. - Bake uncovered for another 10-15 minutes. Look for melted, bubbly cheese that is golden brown. - Once done, take them out and let them rest for 5-10 minutes. This makes them easier to serve. - For a nice touch, add fresh basil leaves on top before serving. Enjoy your flavorful dish! - How to prevent peppers from getting too soft To keep your peppers firm, avoid overcooking them. Bake them covered for the first part. This helps them soften without losing their shape. Adding a little water to the baking dish also creates steam and helps maintain their firmness. - Best oven temperature for baking Set your oven to 375°F (190°C). This temperature lets the peppers cook evenly while the filling heats through. It also helps the cheese get bubbly and golden without burning. - Using homemade marinara sauce vs. store-bought Homemade marinara adds a fresh taste. You control the spices and flavors, making it special. Store-bought options are fine too, especially if you pick a high-quality brand. Look for ones with simple, whole ingredients. - Adding herbs for extra flavor Fresh herbs can elevate your dish. Try adding basil or oregano to the filling. These herbs give it a bright flavor that pairs well with the cheese and pepperoni. A sprinkle of fresh herbs on top before serving adds a nice touch. - Ideal side dishes to pair with the stuffed peppers A simple green salad goes well with stuffed peppers. You can also serve garlic bread for a nice crunch. These sides balance the meal and add freshness. - Presentation ideas for serving Serve the stuffed peppers on a bright platter. Drizzle extra marinara sauce around the edges for color. A few fresh basil leaves on top make it look inviting and tasty. This adds to the fun of the dish. {{image_4}} You can swap quinoa or rice for other grains. Try couscous or farro for fun textures. These grains add a unique touch and keep it interesting. For cheese, mozzarella is great, but feel free to get creative. Cheddar gives a sharp bite. Feta can add a tangy flavor. Mix and match to find your favorite combo. If you want to switch things up, try different meats. Salami or cooked sausage can add a tasty twist. Ground turkey or chicken works well too. For a vegetarian option, use mushrooms or zucchini. They add a lot of flavor and keep it hearty. Beans are another great choice for protein and texture. You can adapt this recipe for various cuisines. For a Mexican flair, add taco seasoning and black beans. Top with avocado for a fresh taste. Adding spices from around the world can also change the game. Try curry powder for an Indian twist or cumin for a Middle Eastern vibe. Experimenting with spices makes cooking fun and exciting! To store leftover stuffed peppers, let them cool first. Place them in airtight containers. You can also wrap them in plastic wrap. This keeps them fresh and tasty. I recommend using glass or sturdy plastic containers. They help maintain flavor and texture. To freeze stuffed peppers, make sure they are cool. Wrap each pepper tightly in plastic wrap. Then, place them in freezer bags. Remove as much air as possible to prevent freezer burn. When ready to eat, defrost in the fridge overnight. For reheating, place them in an oven at 350°F (175°C) until hot. Stuffed peppers last about 3 to 5 days in the fridge. In the freezer, they can last up to 3 months. Look for signs of spoilage, like a strange smell or discoloration. If they appear mushy or dry, it's best to toss them out. Keeping an eye on freshness ensures you enjoy every bite! How long to cook stuffed peppers? I recommend cooking stuffed peppers for about 35 to 40 minutes. First, cover them for 25 minutes. Then, uncover and bake for 10-15 more minutes. This helps soften the peppers and melt the cheese. Can I make stuffed peppers ahead of time? Yes, you can prepare stuffed peppers ahead of time. Just assemble them and store in the fridge. Bake them when you are ready to eat. This saves time on busy nights. What is the best way to reheat stuffed peppers? The best way to reheat stuffed peppers is in the oven. Preheat to 350°F (175°C) and bake for about 15 to 20 minutes. This keeps them warm and tasty without drying out. Can I use frozen peppers for this recipe? Yes, you can use frozen peppers! Thaw them first and follow the same steps. Just make sure they are well-drained to avoid excess water in your filling. How many calories are in pepperoni pizza stuffed peppers? Each stuffed pepper has around 300 to 350 calories. This can vary based on the ingredients you use. Always check your specific ingredients for exact numbers. Are these stuffed peppers gluten-free? Yes, these stuffed peppers can be gluten-free. Just use gluten-free marinara sauce and check your cheese. Most cheeses are gluten-free, but it’s always best to verify the label for safety. In this blog post, we covered how to make pepperoni pizza stuffed peppers. You learned about key ingredients like bell peppers, quinoa, and marinara sauce. We explored baking steps and shared tips for perfect texture and flavor. You gained insights on variations and storage options to keep them fresh. These stuffed peppers are fun, tasty, and flexible. Enjoy creating your own twist on this dish!

Pepperoni Pizza Stuffed Peppers Flavorful and Fun Dish

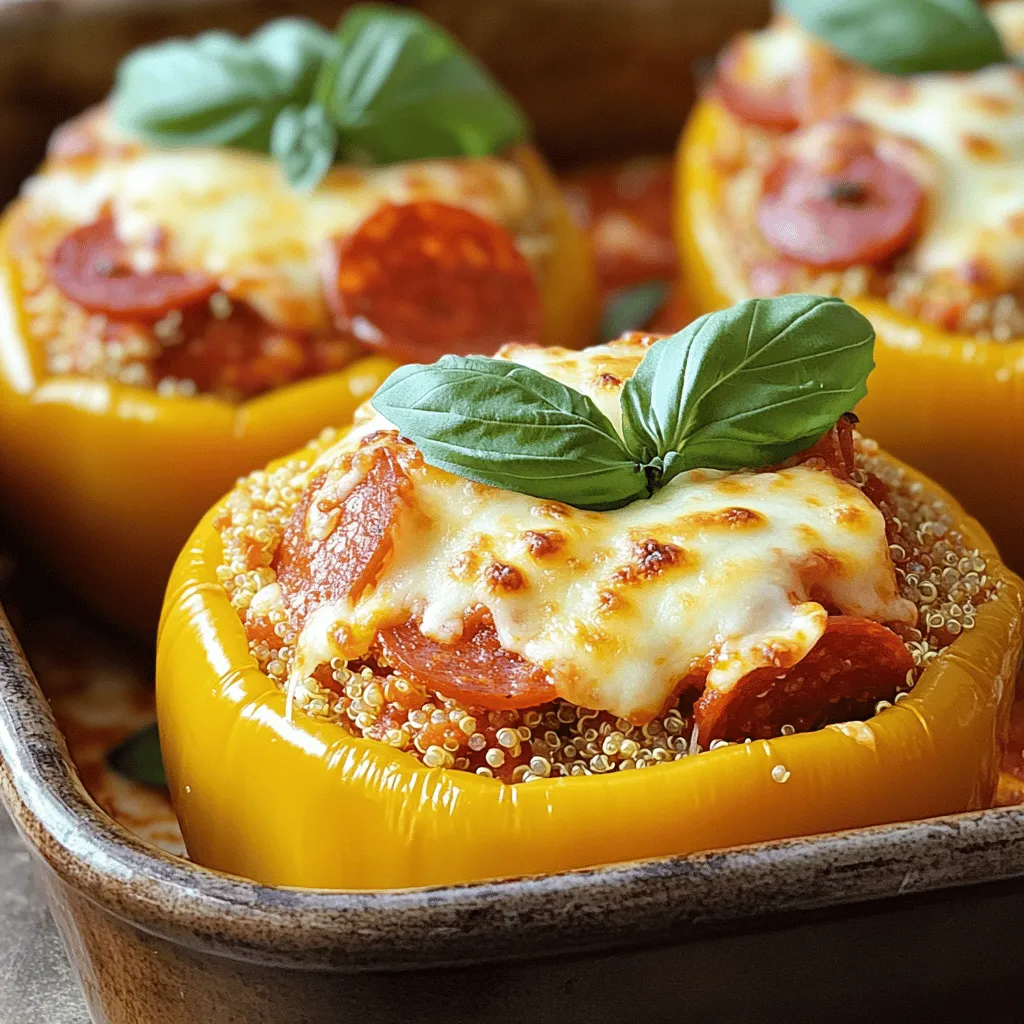
Looking for a fun twist on pizza night? Try making Pepperoni Pizza Stuffed Peppers! This colorful dish is packed with

To make a great Chocolate Hazelnut Babka, you need some key ingredients. Each one plays an important role in the flavor and texture. - 4 cups all-purpose flour: This is the base of your dough. It gives structure and chewiness. - 2 tablespoons granulated sugar: This adds sweetness and helps with browning. - 1 teaspoon salt: Salt enhances flavor and balances the sweetness. - 2 teaspoons instant dry yeast: This helps the dough rise, making it light and fluffy. - 1 cup whole milk, warmed to 110°F (43°C): Warm milk activates the yeast and adds richness. - 2 large eggs, plus 1 egg for the wash: Eggs bind the dough and add moisture. - 1/4 cup unsalted butter, melted and slightly cooled: Butter adds flavor and tenderness. - 1 cup chocolate hazelnut spread: This is the star filling that makes the babka so delightful. - 1/2 cup hazelnuts, finely chopped: Nuts add crunch and nutty flavor. - 1 tablespoon water (for egg wash): This helps create a shiny crust. - Optional: powdered sugar for dusting: A sweet touch for presentation. You can swap some ingredients if needed. For example, use almond milk instead of whole milk or try a different nut spread if you like. Accurate measurements are key to baking success. Here are some tips to measure correctly: - Use dry measuring cups for flour and sugar. Fill the cup and level it off with a knife. - Use liquid measuring cups for milk and melted butter. Check the measurement at eye level. - For small amounts, use teaspoons and tablespoons. Make sure to scrape the spoon to get the right amount. If you need conversions: - 1 cup = 16 tablespoons - 1 tablespoon = 3 teaspoons When picking ingredients, quality matters. Here are some tips: - Chocolate hazelnut spread: Nutella is a popular choice, but look for artisanal brands for richer flavors. - Flour: King Arthur Flour is a trusted brand. It has a consistent quality. - Butter: Use a good-quality unsalted butter for the best taste. Choosing fresh ingredients makes your babka taste so much better. Always read labels and select options with natural ingredients. To start, you need to mix wet and dry ingredients. In a large bowl, whisk together 4 cups of all-purpose flour, 2 tablespoons of granulated sugar, 1 teaspoon of salt, and 2 teaspoons of instant dry yeast. This mix creates the base of your dough. Next, in another bowl, combine 1 cup of warmed milk (110°F or 43°C), 2 large eggs, and 1/4 cup of melted butter. Pour this wet mix into the dry ingredients. Stir with a wooden spoon until you create a sticky dough. The dough’s consistency is key. It should be soft and a bit tacky but not overly wet. If it is too dry, add a splash of milk. Now, it’s time to knead the dough. Transfer it onto a lightly floured surface. Use the heel of your hands to push the dough away from you, then fold it back. Repeat this for about 8-10 minutes. The dough should become smooth and elastic. Once you knead it well, place the dough in a greased bowl. Cover it with a damp cloth and let it rise in a warm spot. It should double in size in 1-2 hours. The warmth helps the yeast grow, making the dough fluffy. After the first rise, gently press down on the dough to deflate it. Roll it out on a floured surface into a large rectangle, about 16x24 inches. Now comes the fun part: adding the filling. Spread 1 cup of chocolate hazelnut spread evenly on the dough, leaving a 1-inch border. Sprinkle 1/2 cup of finely chopped hazelnuts over the spread. Next, carefully roll the dough from one long edge to the other, creating a log shape. Pinch the seams to seal them well. Slice the log in half lengthwise to reveal those beautiful swirls. Twist the two halves together, making a spiral. Place the twisted dough in a greased loaf pan. Cover the loaf pan again with a cloth. Let it rise for another 30-45 minutes until it puffs up. This second rise gives the babka its light texture. While it rises, preheat your oven to 350°F (175°C). Before baking, prepare an egg wash. In a small bowl, whisk together the remaining egg and 1 tablespoon of water. Brush this mixture over the top of the risen babka for a golden crust. Bake the babka for 30-35 minutes. It should be golden brown, and a toothpick should come out clean when inserted in the center. Now you have a delicious chocolate hazelnut babka to enjoy! To get the right texture, watch the dough closely. The dough should feel smooth and elastic after kneading. It usually takes about 8-10 minutes of kneading. If the dough sticks to your hands, add a little flour. If it’s too dry, dampen it with a tiny bit of water. Look for these signs to know your dough is ready: - Puffiness: The dough should double in size during the first rise. - Touch test: When you poke it, the dough should spring back. Common mistakes can ruin your babka. Make sure your yeast is fresh. If it’s old, the dough won’t rise well. Also, avoid over-kneading. This can make the dough tough instead of light and fluffy. Serving your babka can be fun! Here are some creative ideas: - Slice it neatly and arrange on a rustic wooden board. - Drizzle extra chocolate hazelnut spread over the top. - Garnish with whole hazelnuts or a sprinkle of powdered sugar. For a visual treat, try stacking the slices at an angle. This showcases the beautiful swirls inside. You can also serve it warm with a side of whipped cream for extra flair. Babka pairs great with drinks. Here are some ideas: - Coffee: The rich flavors of coffee enhance the chocolate. - Tea: A warm cup of tea balances the sweetness. Enjoy babka at special times. It’s perfect for breakfast, brunch, or dessert. Share it at family gatherings or celebrations. Your friends and family will love it! {{image_4}} You can change the filling in your babka for fun. Try using different spreads like fruit jam or cream cheese. Each option gives a unique taste. If you want, mix it up! Use a blend of chocolate hazelnut spread and almond butter for a nutty twist. Also, consider adding dried fruits like cherries or apricots for sweetness. Adding spices to your babka dough can make it special. A hint of cinnamon or a drop of vanilla can change everything. Citrus zest also brings a fresh taste. For example, lemon zest adds brightness. Just a little can make a big difference in flavor. A simple glaze can take your babka to the next level. Mix powdered sugar with milk for a sweet finish. Brush it on right after baking. For a crunch, try adding toppings like chopped nuts or toasted coconut. These add texture and visual appeal. You can even sprinkle powdered sugar on top for that elegant look. To keep your babka fresh, store it at room temperature. Wrap it tightly in plastic wrap. This helps maintain moisture and flavor. Avoid putting it in the fridge, as it can dry out. If you want to enjoy it later, follow these steps to keep it tasty. Freezing your babka is a smart way to save it. First, let the babka cool completely. Then, wrap it in plastic wrap and place it in a freezer bag. Be sure to remove as much air as you can. This will help prevent freezer burn. It stays fresh for about two to three months. When you want to eat it, move it to the fridge overnight to thaw slowly. For best quality, use it within a month after thawing. To reheat your babka, the oven works best. Preheat it to 350°F (175°C). Place the babka in the oven for about 10-15 minutes. This warms it up without drying it out. You can also wrap it in foil to keep it soft. Avoid using the microwave, as it can make the babka chewy. Enjoy your warm, fresh-tasting babka! Yes, you can make your babka ahead of time. Prepare the dough and let it rise. After the first rise, you can wrap the dough tightly in plastic wrap and store it in the fridge for up to 24 hours. Just remember to let it come to room temperature before rolling it out. You can also shape it and let it rise in the fridge. Bake it the next day for that fresh-baked taste. If you don’t have whole milk, you can use several substitutes. Almond milk, oat milk, or soy milk work well. These options will change the flavor slightly but still yield a tasty babka. If you have it, you can also mix water with heavy cream to make a similar milk texture. To check if your babka is done, look for a golden brown top. You can also use a toothpick to test it. Insert it into the center. If it comes out clean, your babka is ready. Another sign is that the babka should sound hollow when you tap the bottom. Absolutely! You can mix in chopped fruits like bananas or berries to enhance the flavor. You can also add spices like cinnamon or even orange zest for a fresh twist. Just keep in mind that adding too much moisture could affect the texture of the babka. You now have a complete guide to making the perfect chocolate hazelnut babka. We covered important ingredients, precise measuring techniques, and tips for success throughout the baking process. I shared ways to get creative with fillings, flavors, and presentation. Remember, practice makes perfect, so don’t be afraid to experiment. Your babka can bring joy to any occasion when stored and served with care. Enjoy your baking adventure and savor every delicious bite!

Chocolate Hazelnut Babka Irresistible Homemade Delight

Get ready to bake a Chocolate Hazelnut Babka that will make your taste buds dance! This homemade delight combines rich

Older posts
Newer posts
← Previous Page1 … Page11 Page12 Page13 … Page91 Next →

dsad

© 2025 dailydishcraft • Built with GeneratePress

Our Policies

  • Copyright Policy
  • Cookie Policy
  • GDPR Policy
  • Privacy Policy
  • Disclaimer
  • Terms Of Use

More Information

  • Home
  • About
  • Contact
  • Appetizers
  • Dessert
  • Dinner
  • Drinks
©2025, dailydishcraft About Back To Top