Skip to content
DisclaimerTerms Of UseGDPR PolicyCookie Policy

dailydishcraft

  • Home
  • Drinks
  • Appetizers
  • Dinner
  • Dessert
  • About
  • Contact
  • Privacy Policy
DisclaimerTerms Of UseGDPR PolicyCookie Policy

Jessica

To make delicious avocado chocolate chip cookies, you need the following ingredients: - 1 ripe avocado, mashed until smooth - 1 cup packed brown sugar - 1/2 cup granulated white sugar - 1/4 cup coconut oil, melted and slightly cooled - 1 large egg - 1 teaspoon pure vanilla extract - 1 1/2 cups all-purpose flour - 1 teaspoon baking soda - 1/2 teaspoon fine salt - 1 cup chocolate chips (dark or semi-sweet) - 1/2 cup chopped walnuts (optional) Each ingredient plays a key role. The ripe avocado adds creaminess and healthy fats. Brown and white sugars give sweetness and a rich taste. Coconut oil keeps the cookies soft and moist. The egg binds everything together, while vanilla adds flavor. The dry ingredients help form the cookie structure. Chocolate chips provide bursts of sweetness. Walnuts add crunch but are optional. Using fresh and quality ingredients ensures the best flavor. So, gather these items and get ready to bake! {{ingredient_image_2}} First, set your oven to 350°F (175°C). While it heats, grab a baking sheet. Line it with parchment paper. This is key! Parchment paper stops cookies from sticking. It also makes cleanup easy. In a big bowl, mash one ripe avocado until smooth. Add both brown and white sugar. Use a fork or hand mixer to mix until creamy. Next, pour in melted coconut oil, one egg, and a teaspoon of vanilla extract. Mix well until it all combines into a creamy blend. In another bowl, whisk together 1 ½ cups of all-purpose flour, one teaspoon of baking soda, and half a teaspoon of salt. This step helps mix the dry items evenly. Slowly add the dry mix to the wet mix. Stir gently. Do not overmix! This keeps your cookies soft and tender. Scoop rounded spoonfuls of dough onto the baking sheet. Leave about 2 inches between each scoop. This space helps cookies spread as they bake. Bake for 10-12 minutes. Watch for edges turning golden brown. The centers should look soft, not hard. Take the cookies from the oven. Let them cool on the baking sheet for about 5 minutes. This step helps them set. After that, move them to a wire rack to cool completely. Enjoy the aroma as they cool! To make your cookies soft and chewy, do not overmix the dough. When you add dry ingredients, mix until just combined. This keeps the cookies tender. Balancing the temperature of your ingredients helps too. Make sure your coconut oil is melted but not hot. If it is too hot, it can cook the egg and change the dough. For a richer taste, consider using dark chocolate chips or semi-sweet ones. Dark chocolate adds a deep flavor that pairs well with avocado. You can also add spices like cinnamon or a pinch of sea salt. These spices brighten the flavor. Just a little can take your cookies to the next level. Once cooled, serve your cookies on a decorative platter or a tiered cake stand. For a fun twist, pair them with a scoop of creamy vanilla ice cream. A drizzle of caramel sauce on top adds sweetness and charm. Enjoying them with a glass of cold milk is always a classic choice! Pro Tips Use Ripe Avocado: Make sure your avocado is perfectly ripe for the smoothest texture and best flavor in your cookies. Don’t Overmix: When combining wet and dry ingredients, mix just until incorporated to keep your cookies tender and chewy. Chill the Dough: For thicker cookies, consider chilling the dough for about 30 minutes before baking to prevent excessive spreading. Experiment with Add-ins: Feel free to mix in dried fruits, coconut flakes, or different nuts to customize your cookie experience! {{image_4}} If you want to make these cookies vegan, you have easy swaps. You can replace the egg with 1 tablespoon of ground flaxseed mixed with 2.5 tablespoons of water. Let it sit until it becomes gel-like. Instead of coconut oil, use a plant-based butter or even more avocado. These swaps keep the cookies tasty and moist. For a gluten-free treat, you can use almond flour or oat flour. Both options work well and keep the cookies soft. Make sure to check that the flour is certified gluten-free. This way, you can enjoy cookies without worry. You can customize your cookies with fun add-ins. Consider adding: - Nuts: Chopped walnuts or pecans add a nice crunch. - Dried fruit: Raisins or cranberries bring sweet and chewy bites. - Flavoring: A hint of cinnamon or a splash of almond extract can elevate the taste. Feel free to mix and match these ideas! This way, each batch can surprise you with new flavors. Store your cookies at room temperature for up to three days. Use an airtight container to keep them fresh. If you want to store them longer, refrigerate them. This keeps them soft and tasty for up to a week. Here are some tips to maintain freshness: - Separate layers with parchment paper: This prevents sticking. - Avoid humidity: Keep them in a cool, dry spot. Humidity can make cookies soggy. - Check for odors: Keep the container away from strong-smelling foods. Cookies can absorb unwanted scents. You can freeze both cookie dough and baked cookies. Freezing dough is simple. Scoop the dough into balls and place them on a baking sheet. Freeze until solid, then transfer to a zip-top bag. This way, you can bake fresh cookies anytime! To freeze baked cookies, let them cool completely. Place them in an airtight container with parchment paper between layers. They will stay good for up to three months. When you want to enjoy them, here are thawing and reheating tips: - For dough: Thaw in the fridge overnight before baking. - For baked cookies: Reheat in the oven at 350°F (175°C) for about five minutes. This brings back their soft texture. Enjoy your delicious treat! Yes, you can swap coconut oil for other fats. Butter is a great choice. It adds a rich flavor. You can also use vegetable oil or applesauce. Each fat changes the texture a bit. Butter makes cookies softer and chewier. Vegetable oil keeps them moist. Applesauce can make them lighter and fluffier. Look for the edges. They should turn golden brown. The centers will look soft and puffy. If they look shiny, they need more time. You can also touch the top. If it feels set but soft, they are done. Let them cool a bit to firm up. Each cookie has about 120 calories. They contain 6 grams of fat. The sugars are around 8 grams. These cookies also give you some fiber from the avocado. They are a tasty treat without too much guilt. Yes, you can use sugar substitutes. Try using honey or maple syrup. You can also use stevia or monk fruit. These options may change the texture a little. Cookies might be softer or chewier. Adjust the amount based on the sweetness you like. These avocado cookies are a fun and healthy treat. We covered ingredients, steps, and tips for baking the perfect cookies. I also shared vegan and gluten-free options for more variety. Remember to store them correctly to keep them fresh. With these recipes, you can enjoy tasty cookies that can fit various diets. Try different flavors and enjoy creating your own unique version. Bake with joy and share your delicious results!

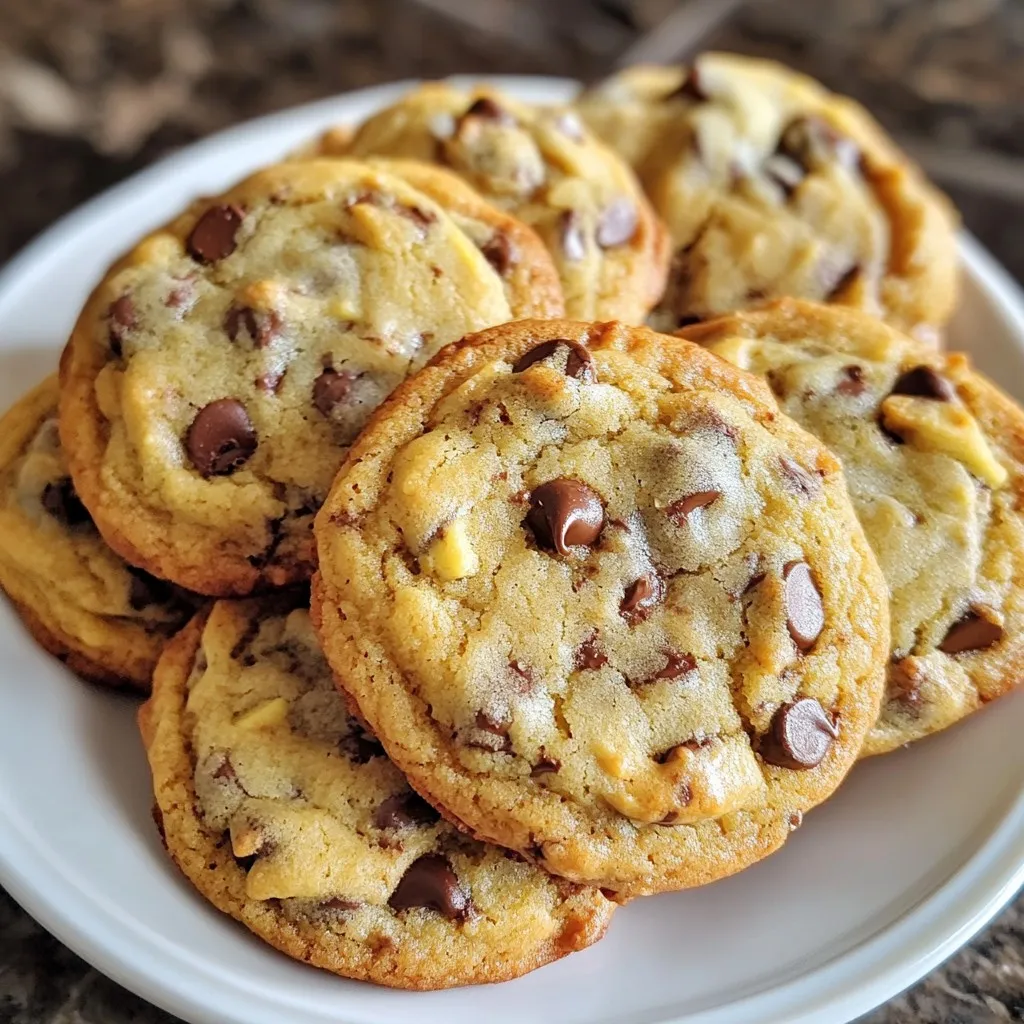
Avocado Chocolate Chip Cookies Delightful and Easy Snack

Are you craving a delicious snack that combines health and sweetness? Look no further! These Avocado Chocolate Chip Cookies are

- 8 oz bowtie pasta - 1 lb ground beef - 1 tablespoon extra virgin olive oil - 4 cloves garlic, finely minced - 1 teaspoon dried Italian seasoning - 1/2 teaspoon red pepper flakes (optional for heat) - 1 cup beef broth (preferably low sodium) - 1 cup heavy cream - 1 cup freshly grated Parmesan cheese - Salt and black pepper to taste - Fresh parsley, finely chopped (for garnish) To make Parmesan Garlic Beef Bowtie Pasta, you need some key ingredients. First, grab 8 ounces of bowtie pasta. This shape holds the sauce well, making each bite tasty. Next, get 1 pound of ground beef. This will give your dish a hearty base. You will also need 1 tablespoon of extra virgin olive oil. This oil adds good flavor and helps cook the beef. For seasoning, have 4 cloves of finely minced garlic. Garlic brings out rich flavors in this dish. To add depth, use 1 teaspoon of dried Italian seasoning. If you want a kick, include 1/2 teaspoon of red pepper flakes. For the sauce, you will need 1 cup of beef broth. Low sodium broth is best; it adds flavor without too much salt. Now, for the creaminess, grab 1 cup of heavy cream and 1 cup of freshly grated Parmesan cheese. These ingredients make the sauce rich and smooth. Don’t forget to season with salt and black pepper to taste! Lastly, get fresh parsley for garnish. It adds color and freshness to your dish. With these ingredients, you are ready to create a delicious and creamy pasta dish that everyone will love! {{ingredient_image_2}} 1. Start by boiling a large pot of salted water. 2. Add 8 oz of bowtie pasta. Cook it for 8-10 minutes, or until al dente. 3. Once done, drain the pasta. Be sure to reserve a cup of the pasta cooking water. 1. In a large skillet, heat 1 tablespoon of extra virgin olive oil over medium heat. 2. Add 1 lb of ground beef to the skillet. Cook it for about 5-7 minutes, breaking it apart with a spatula. 3. If there's extra fat, drain it off to keep the dish light and tasty. 1. Next, add 4 cloves of finely minced garlic to the beef, stirring it for 1-2 minutes. 2. Sprinkle in 1 teaspoon of dried Italian seasoning and 1/2 teaspoon of red pepper flakes if you like heat. Mix well. 3. Pour in 1 cup of beef broth. Let it simmer gently for about 5 minutes to blend the flavors. 4. Lower the heat, then stir in 1 cup of heavy cream. Bring it back to a gentle simmer. 5. Gradually add 1 cup of freshly grated Parmesan cheese. Keep stirring until the cheese melts into the sauce. Taste and add salt and black pepper as needed. 1. Now, add the drained bowtie pasta to the skillet. Toss it gently to coat the pasta in the creamy sauce. 2. If the sauce feels too thick, add a splash of the reserved pasta water to reach your desired consistency. This dish is now ready to serve. The creamy sauce and tender pasta create a perfect harmony that is sure to impress! To cook pasta al dente, follow these steps: - Use a large pot with salted water. - Bring the water to a rolling boil. - Add the bowtie pasta and cook for 8-10 minutes. - Test the pasta at the low end of the time. It should be firm but not hard. For a creamy sauce, do not rush the cheese melting process. - Lower the heat before adding the cream. - Stir in the Parmesan cheese slowly for a smooth finish. - If the sauce is thick, add a splash of reserved pasta water. You can boost flavor with simple spices: - Consider adding a pinch of garlic powder for more depth. - A dash of smoked paprika can add warmth without heat. Using quality Parmesan cheese is key. Always choose freshly grated cheese over the pre-grated kind. It melts better and tastes richer. When serving, think about the look of the dish: - Plate the pasta in a large bowl for family style. - For individual servings, stack the bowtie pasta high on the plate. Garnishing can elevate the meal: - Sprinkle extra Parmesan on top for a cheesy finish. - Add a sprig of fresh parsley for a pop of color. - A light drizzle of olive oil adds shine and flavor. Pro Tips Perfect Pasta Texture: To achieve the best texture, ensure your pasta is cooked al dente, as it will continue to cook slightly when mixed with the sauce. Enhance Flavor: For a deeper flavor, consider adding a splash of white wine after browning the beef, allowing it to reduce before adding the broth. Cheese Choices: While Parmesan is classic, feel free to mix in other cheeses like Pecorino Romano for a different flavor profile. Garnish Wisely: Fresh herbs like basil or chives can also be used as a garnish for added flavor and a pop of color, enhancing the dish's presentation. {{image_4}} You can switch out the ground beef in this dish. Try ground turkey or chicken for a lighter option. Both meats work well with the creamy sauce. If you want a bolder taste, use Italian sausage. This adds more flavor, especially if you choose spicy sausage. For a vegetarian meal, use lentils or mushrooms. They give a hearty texture and soak up flavors nicely. If you need a gluten-free dish, choose gluten-free pasta. Many brands offer bowtie shapes made from rice, corn, or quinoa. These options taste great and work well with the sauce. Just cook them according to package directions. Make sure to check the ingredients for any hidden gluten. You can add more flavors to your dish by using vegetables or herbs. Spinach, bell peppers, or zucchini mix well with pasta. Add them when you cook the garlic for a fresh taste. For herbs, try fresh basil or oregano. They bring a nice aroma to the sauce. Experimenting with cheese types can also change the dish. While Parmesan is classic, you can try pecorino or asiago. Both add unique flavors. Mixing cheeses can create a richer taste. Just remember to adjust the amount to keep the dish creamy. To keep your Parmesan Garlic Beef Bowtie Pasta fresh, start with refrigeration. Place the pasta in an airtight container. Make sure to store it in the fridge within two hours of cooking. It can last up to three days this way. For long-term storage, consider freezing it. Divide the pasta into single servings. Use freezer-safe bags or containers. Remove as much air as possible to prevent freezer burn. You can store it for up to three months. When you're ready to eat, just thaw it overnight in the fridge. When it comes to reheating, you have two main options: microwaving or stovetop reheating. For microwaving, place a serving in a microwave-safe bowl. Add a splash of water or cream to keep it moist. Cover it and heat on medium power for one to two minutes. Stir halfway through for even heating. Stovetop reheating gives you creamy results. Put the pasta in a skillet over low heat. Add a bit of broth or cream. Stir until heated through, which usually takes about five minutes. This method helps to revive the creamy sauce and keeps the pasta tasty. You can swap out ground beef for ground turkey or chicken. This cuts fat while keeping flavor. Use whole wheat bowtie pasta for more fiber. Reduce the heavy cream and add more broth instead. You can also add spinach or broccoli for extra nutrients. These small changes keep it tasty and healthy. Yes, you can prepare this dish ahead of time. Cook the pasta and beef separately. Store them in the fridge. When you’re ready to eat, combine them with the sauce and heat gently. This method keeps everything fresh and tasty. Just remember, the pasta may soak up some sauce, so add a bit of water to loosen it up. This dish pairs well with a light salad or garlic bread. A simple Caesar or mixed greens salad adds a nice crunch. For bread, go for a nice crusty loaf or buttery garlic bread. Both options make the meal feel complete and balanced. To store cooked bowtie pasta, let it cool first. Place it in an airtight container. You can keep it in the fridge for up to three days. If you want to freeze it, add a bit of olive oil to prevent sticking. Use it within a month for the best taste. The best way to reheat creamy pasta is on the stove. Add a splash of broth or water to a pan. Heat on low, stirring gently until warmed through. This helps keep the sauce creamy. If you microwave it, use a lower power setting. Stir every minute to avoid hot spots. This post covered making delicious Parmesan Garlic Beef Bowtie Pasta. We discussed the key ingredients, clear cooking steps, and helpful tips. You can enhance flavor and choose different proteins as you like. Remember to store your leftovers properly and know how to reheat them well. This dish is versatile and perfect for any meal. You now have the tools to create a tasty, satisfying dish that everyone will enjoy. Happy cooking!

Parmesan Garlic Beef Bowtie Pasta Delicious and Creamy

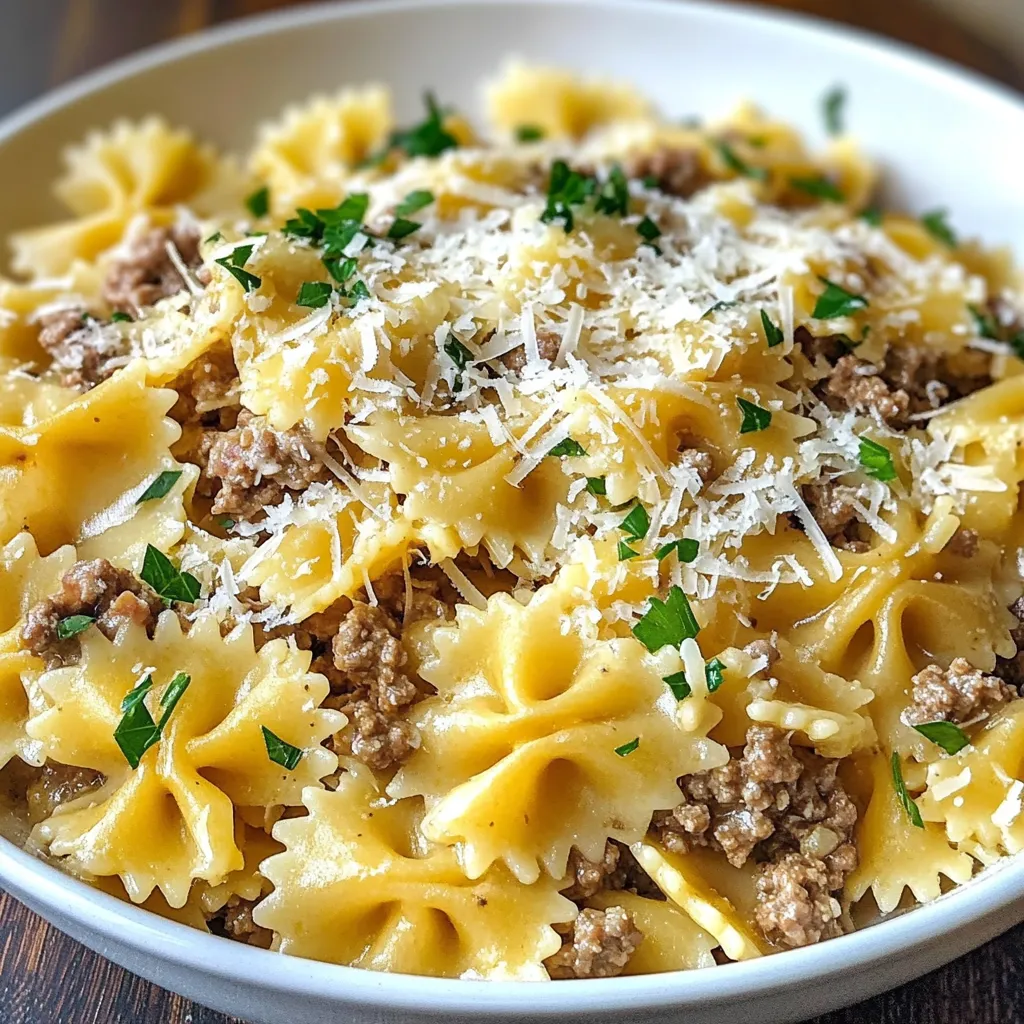
Get ready to dig into a delightful dish that your family will love! This Parmesan Garlic Beef Bowtie Pasta is

To make this tasty treat, you will need: - 2 cups all-purpose flour - 1 cup granulated sugar - 1/2 cup unsalted butter, softened - 1 cup sour cream - 2 large eggs - 1 teaspoon vanilla extract - 1 teaspoon baking powder - 1 teaspoon baking soda - 1/2 teaspoon salt - For the streusel topping: - 1/2 cup all-purpose flour - 1/3 cup brown sugar, packed - 1 tablespoon ground cinnamon - 1/4 cup unsalted butter, melted - 1/2 cup chopped pecans or walnuts (optional) You might want to add some extras to boost flavor: - A pinch of nutmeg for warmth - A splash of almond extract for depth - Chocolate chips for a sweet twist If you need alternatives, here are some swaps: - Use Greek yogurt instead of sour cream for a tangy taste. - Swap granulated sugar with coconut sugar for a lower glycemic index. - Replace all-purpose flour with almond flour for a gluten-free option. {{ingredient_image_2}} To start, preheat your oven to 350°F (175°C). Grease a 9x13-inch baking pan well. This step keeps your cake from sticking. In a large bowl, mix 1/2 cup of softened butter and 1 cup of granulated sugar. Use a hand mixer to blend them until light and fluffy, which takes about 3-4 minutes. Next, add 2 large eggs one by one. Mix well after each egg. This makes the batter smooth. Now, stir in 1 cup of sour cream and 1 teaspoon of vanilla extract. Blend until smooth. In another bowl, whisk together 2 cups of flour, 1 teaspoon of baking powder, 1 teaspoon of baking soda, and 1/2 teaspoon of salt. Gradually add this dry mix to the wet mixture. Stir gently until just combined. Be careful not to overmix. For the streusel, take another bowl and mix 1/2 cup of flour, 1/3 cup of brown sugar, and 1 tablespoon of ground cinnamon. Add in 1/4 cup of melted butter and mix until crumbly. If you want, you can fold in 1/2 cup of chopped pecans or walnuts for a nutty crunch. Now, pour half of your batter into the greased pan. Use a spatula to smooth it out evenly. Sprinkle half of the streusel topping over this layer. Next, pour the rest of the batter on top. Then, add the remaining streusel on top of that. Spread it out evenly. Bake in your preheated oven for 30-35 minutes. Check if it's done by inserting a toothpick in the center. If it comes out clean, the cake is ready. Once baked, let it cool in the pan for about 10 minutes. Then, gently take it out and place it on a wire rack to cool completely. This cake is best served warm or at room temperature. To get a light and fluffy coffee cake, cream the butter and sugar well. Mix them for about 3-4 minutes until they look pale and fluffy. Use room temperature butter for the best results. Make sure to add the eggs one by one. This helps the batter stay smooth. When mixing the dry and wet ingredients, fold gently. Overmixing can make the cake tough. One common mistake is using cold ingredients. Always use room temperature butter and eggs. This helps the batter mix well. Another mistake is overbaking. Keep an eye on the cake after 30 minutes. A toothpick should come out clean but not dry. Lastly, don’t skip the streusel layer. It adds flavor and texture, making the cake special. Serve the coffee cake warm or at room temperature. For a sweet touch, dust the top with powdered sugar. This makes it look pretty and adds a nice taste. Pair it with coffee or tea for a perfect treat. You can also add a scoop of vanilla ice cream for an extra indulgence. Enjoying it fresh is the best way to taste all the flavors! Pro Tips Use Room Temperature Ingredients: Ensure that your butter, eggs, and sour cream are at room temperature. This helps create a smooth batter and improves the cake's texture. Don’t Overmix the Batter: Mix the wet and dry ingredients until just combined to prevent a dense cake. Overmixing can develop gluten in the flour, leading to a tougher texture. Customize Your Nuts: Feel free to substitute pecans or walnuts with your favorite nuts or omit them entirely for a nut-free version. This allows for personalized flavor and texture. Check for Doneness: Use a toothpick to check if the cake is done. If it comes out clean or with a few crumbs, it’s ready. Be careful not to open the oven door too early, as it can cause the cake to fall. {{image_4}} You can switch up the nuts in the streusel to match your taste. I love using chopped pecans or walnuts. They add a nice crunch and flavor. If you're not a fan of nuts, just leave them out. You can still enjoy a tasty streusel topping without them. To make your coffee cake stand out, try adding mix-ins. You can fold in some chocolate chips or dried fruit, like raisins or cranberries. These additions can give new flavors and textures. For a fun twist, try adding lemon zest for a fresh kick. If you need a gluten-free version, use a gluten-free flour blend. Make sure it has xantham gum for the right texture. For a dairy-free option, replace sour cream with a dairy-free yogurt. You can also use coconut oil instead of butter. These swaps keep the cake moist and tasty. To keep your Cinnamon Streusel Coffee Cake fresh, store it in an airtight container. This helps prevent it from drying out. Place it at room temperature for up to three days. If you want to keep it longer, refrigerate it. Just make sure to let it cool completely before wrapping it. Reheating your coffee cake is easy. Preheat your oven to 350°F (175°C). Place a slice on a baking sheet and warm it for about 10 minutes. This helps restore its soft texture. You can also use the microwave. Heat a slice for about 15-20 seconds. Be careful not to overheat, as it can become tough. Freezing your coffee cake is a great way to save it for later. Wrap individual slices tightly in plastic wrap. Then, place them in a freezer-safe bag. It can last up to three months in the freezer. When you’re ready to enjoy it, thaw it in the refrigerator overnight. Then, reheat as needed. Yes, you can use brown sugar instead of white sugar. Brown sugar adds a rich flavor. It gives the cake a deeper taste and can make it moister. You can mix white and brown sugar for a nice balance. Just keep the same amount as the recipe states. Cinnamon Streusel Coffee Cake lasts about 3 to 4 days when stored properly. Keep it in an airtight container at room temperature. If you want it to last longer, store it in the fridge. It stays fresh for about a week in the fridge. You can also freeze it for up to three months. Yes, you can make the batter ahead of time. Prepare it and store it in the fridge for up to 24 hours. You can also make the streusel topping ahead. Just keep it in the fridge until you are ready to bake. This way, you save time on baking day. Cinnamon Streusel Coffee Cake is simple and fun to make. We covered ingredients, steps, and tips to help you succeed. Remember to consider variations for flavor and diet needs. Storing leftovers correctly keeps it fresh for longer. Enjoy this cake with friends or family, and don’t hesitate to tweak it to your taste. Baking should be creative and joyful, so experiment and have fun!

Cinnamon Streusel Coffee Cake Simple and Tasty Recipe

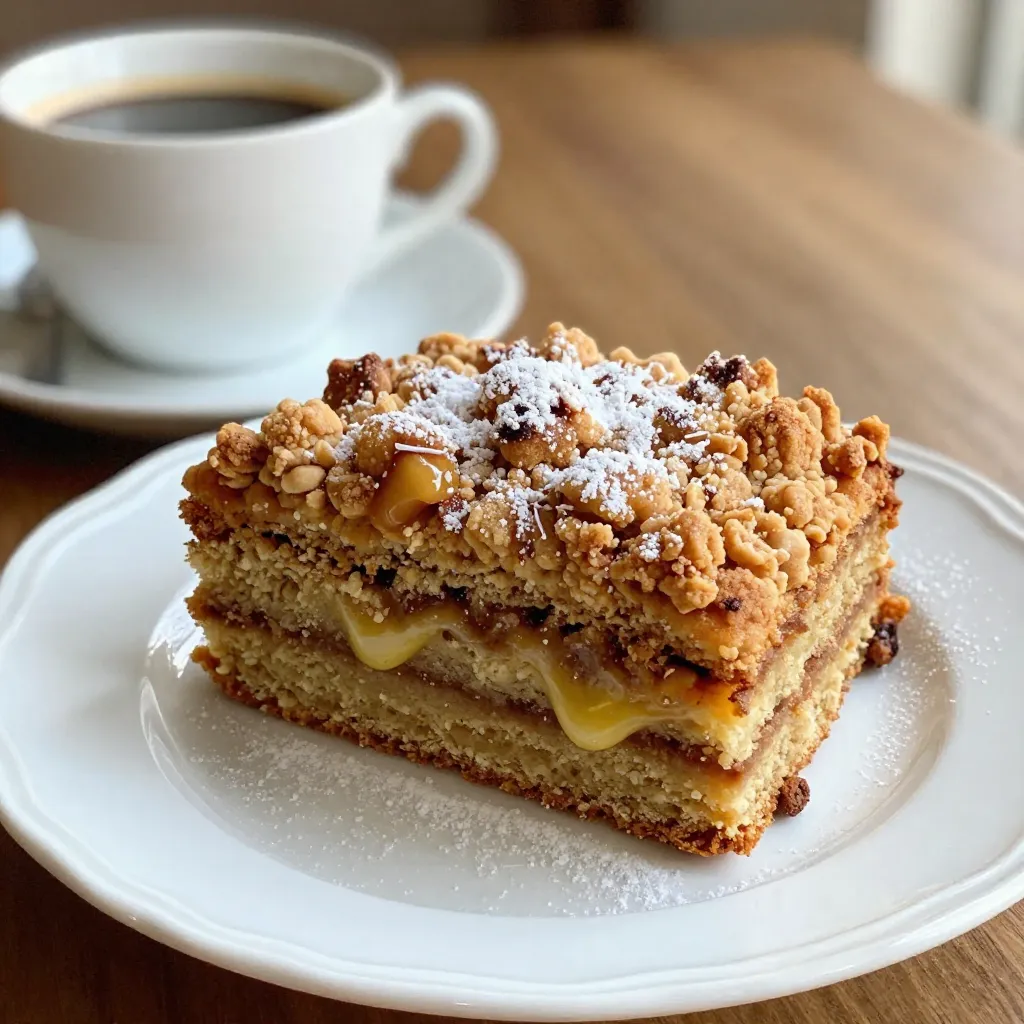
Looking for a simple and tasty treat that pairs perfectly with your morning coffee? You’ve found it! This Cinnamon Streusel

- 4 cups all-purpose flour - 1 packet (2 ¼ teaspoons) active dry yeast - ½ cup granulated sugar - 1 teaspoon salt - ½ cup whole milk, warmed to around 110°F - ½ cup unsalted butter, melted and slightly cooled - 3 large eggs, room temperature - 1 cup chocolate hazelnut spread (such as Nutella) - ½ cup hazelnuts, chopped and toasted - 1 egg (for egg wash) - Powdered sugar for dusting (optional) Every ingredient plays a key role in making the babka. - All-purpose flour gives structure and texture. It helps the dough rise and hold its shape. - Active dry yeast acts as the leavening agent. It makes the dough rise by creating bubbles of gas. - Granulated sugar not only sweetens the dough but also feeds the yeast. - Salt enhances flavor and controls yeast activity, preventing over-proofing. - Whole milk adds moisture and richness. It also helps activate the yeast. - Unsalted butter gives a soft texture and rich flavor. It adds moisture to the dough. - Eggs help bind the dough and add richness. They also aid in rising. - Chocolate hazelnut spread is the star of the filling. It adds sweetness and chocolate flavor. - Chopped hazelnuts give a nice crunch and deepen the flavor. - Egg wash creates a shiny golden crust when baked. - Powdered sugar is optional but adds a lovely touch when dusted on top. You can make changes if you need. - Flour: Use bread flour for a chewier texture. - Yeast: Instant yeast can replace active dry yeast. No need to proof it first. - Sugar: Brown sugar adds extra flavor and moistness. - Milk: Almond or oat milk can replace whole milk for a dairy-free option. - Butter: Use coconut oil or a vegan butter substitute for a dairy-free option. - Eggs: Replace each egg with 1/4 cup of applesauce or a flax egg for vegan options. - Chocolate hazelnut spread: Try almond butter or peanut butter for a different flavor. - Hazelnuts: Walnuts or pecans can be used for a nutty crunch. {{ingredient_image_2}} To start, mix warm milk, sugar, and yeast in a large bowl. Stir gently. Let it sit for 5-10 minutes. You want to see bubbles forming. This means your yeast is awake and ready to help your dough rise. In another bowl, whisk flour and salt together. Make a well in the center. Pour in the frothy yeast mix, melted butter, and eggs. Stir everything together until the dough starts to form. Now, move the dough to a floured surface. Knead it for 8-10 minutes. You want it smooth and elastic. After kneading, place it in a greased bowl. Cover it with a towel and let it rise for 1-2 hours. It should double in size. Once your dough has risen, punch it down gently. Roll it out into a rectangle, about ¼ inch thick. Spread chocolate hazelnut spread evenly over the dough. Make sure it reaches all the edges. Sprinkle chopped hazelnuts on top. Now, roll the dough tightly from one long edge. Pinch the seams to seal it. Cut the log in half lengthwise with a sharp knife. Twist the two halves together, cut sides up, to create a beautiful braid. Next, place it into a greased loaf pan. Cover it loosely with a towel. Let it rise again for 30-45 minutes. It should puff up a bit. While the dough rises, preheat your oven to 350°F (175°C). Once the dough has puffed, whisk the remaining egg and brush it on top. This gives a nice golden color when baking. Now, place your loaf pan in the oven. Bake for 30-35 minutes. The babka should be golden brown. A toothpick inserted in the center should come out clean. After baking, let it cool for 15 minutes in the pan. Then, transfer it to a wire rack to cool completely. To get the perfect dough, remember these key steps: - Use room temperature eggs. They mix in better. - Knead until smooth and elastic. This takes about 8-10 minutes. - A well-floured surface helps keep the dough from sticking. If the dough feels too sticky, add a little flour. If it feels dry, a splash of warm milk can help. A good rise makes your babka light and fluffy. Here are my tips: - Find a warm spot for the dough. This helps yeast grow. - Cover the bowl with a clean towel. This keeps warmth in. - Let it rise until it doubles in size. This usually takes 1-2 hours. If your kitchen is cold, you can preheat the oven to 200°F for a few minutes. Turn it off and let the dough rise inside. An egg wash gives your babka a shiny, golden crust. Here’s how to do it: - Whisk the egg until yolk and white blend. - Brush it over the dough before baking. This makes it look beautiful. The egg wash also helps toppings stick, like powdered sugar or nuts. This adds flavor and charm. Pro Tips Use Fresh Yeast: Ensuring your yeast is fresh can greatly affect the rise of your babka. Always check the expiration date and store it properly to maintain its potency. Room Temperature Ingredients: Make sure your eggs and butter are at room temperature before mixing. This helps to create a smoother dough and better texture in the final product. Chill the Dough: If the dough is too sticky to handle, consider chilling it in the refrigerator for about 30 minutes. This can make rolling it out and shaping it easier. Check for Doneness: Instead of relying solely on time, check your babka by inserting a toothpick into the center. It should come out clean when baked properly. {{image_4}} You can change the filling for your babka. Try using almond paste instead of chocolate hazelnut spread. You can also use fruit preserves, like raspberry or apricot. Cinnamon and sugar is another great option. Just spread your chosen filling evenly on the dough, like you did with the chocolate hazelnut spread. Hazelnuts are delicious, but you can mix it up! Walnuts work well with chocolate too. Pecans add a sweet crunch. If you prefer, leave out the nuts for a smooth texture. For a nut-free option, try adding seeds like sunflower or pumpkin seeds instead. This adds a nice crunch without the nuts. After baking, you can glaze your babka for extra sweetness. A simple mix of powdered sugar and milk creates a nice glaze. Drizzle it over the warm babka for a pretty finish. You can also sprinkle more chopped nuts on top for a fun look. For an added touch, use chocolate shavings or a dusting of cocoa powder. These toppings make your babka even more irresistible! To keep your chocolate hazelnut babka fresh, wrap it tightly in plastic wrap. This helps seal in moisture and flavor. You can also use an airtight container for longer storage. Place it at room temperature for up to three days. If you want it to last longer, consider freezing it. Freezing babka is simple. First, let the babka cool completely. Then, slice it if you want easy portions later. Wrap each slice tightly in plastic wrap, and then place them in a freezer bag. Be sure to label the bag with the date. You can freeze it for up to three months. When you’re ready to enjoy your babka again, preheat your oven to 350°F (175°C). Unwrap the babka and place it on a baking sheet. Heat it for about 10-15 minutes, or until warmed through. If you want to keep it soft, cover it with foil while reheating. Enjoy the fresh taste as if it was just baked! Homemade babka stays fresh for about 3 to 5 days. Store it in an airtight container at room temperature. If you want it to last longer, consider freezing it. Properly wrapped, it can last for up to 3 months in the freezer. Yes, you can make babka ahead. You can prepare the dough and let it rise. Then, shape it and place it in the pan. Cover it and chill in the fridge overnight. The next day, let it warm up and rise before baking. This method saves time for special occasions. Avoid these common mistakes: - Not letting the yeast activate properly. - Using cold eggs or milk. - Overworking the dough, which makes it tough. - Not allowing enough rise time, leading to dense bread. Pay attention to each step for the best results. Absolutely! You can use other spreads like peanut butter, almond butter, or fruit preserves. Each spread will give a different flavor. Just make sure to keep the amount similar. This way, your babka remains delicious and fun to try! We covered the key parts of making babka: ingredients, step-by-step instructions, and helpful tips. Knowing how each ingredient works boosts your baking skills. Remember, practice leads to better dough texture and rise. Add your twist with unique fillings and toppings. Don’t forget to store your leftovers well or freeze for later. Follow these steps, and you will make a great babka! Enjoy baking it, and share it with friends and family!

Chocolate Hazelnut Babka Irresistible Recipe Guide

Get ready to delight your taste buds with my Chocolate Hazelnut Babka Irresistible Recipe Guide! This sweet, twisted bread combines

- Refrigerated crescent roll dough - Brie cheese - Cranberry sauce - Optional nuts for crunch - Fresh rosemary or dried rosemary - Egg for egg wash - Salt and pepper You need a few simple ingredients to make these bites. First, grab a package of refrigerated crescent roll dough. This dough is light and flaky, perfect for our bites. Next, use 8 ounces of Brie cheese. Cut it into small, bite-sized pieces. The creamy Brie melts beautifully and adds richness. You’ll also need 1 cup of cranberry sauce. You can use homemade or store-bought, so pick your favorite. If you want some crunch, add 1/4 cup of chopped walnuts or pecans. They give a nice texture. Fresh rosemary is a great herb to use, about 1 tablespoon finely chopped. If you don’t have fresh, dried rosemary works too. For a shiny finish, use 1 beaten egg for the egg wash. Finally, season with salt and pepper to taste. These ingredients come together to create a tasty treat that everyone will enjoy. {{ingredient_image_2}} 1. Preheat your oven to 375°F (190°C). This helps the bites bake evenly. 2. Unroll the crescent roll dough on a clean surface. Separate it into triangles as shown on the package. 1. Take a small piece of Brie cheese. Place it at the wide end of each triangle. 2. Spoon about 1 tablespoon of cranberry sauce over the Brie. Spread it gently. 3. If you like, add chopped walnuts or pecans on top of the cranberry. You can also sprinkle fresh rosemary for extra flavor. 1. Start at the wide end where your filling is. Carefully roll the dough towards the pointed end. Make sure the Brie and filling stay inside. 2. Arrange the rolled bites on a parchment-lined baking sheet. Leave space between each bite for them to expand. 3. Brush the tops of each bite with the beaten egg. This gives them a nice golden brown color. 1. Bake the bites in the preheated oven for 12-15 minutes. They should puff up and turn golden brown. 2. After baking, let the bites cool for a few moments. This helps the filling settle before you serve them. - Ensuring a tight roll: Make sure to roll the crescent dough tightly around the filling. This helps keep everything inside. Start with the wide end and gently roll towards the point. Press the edges to seal. - Achieving a golden brown color: Apply a thin layer of beaten egg on top before baking. This gives the bites a nice shine and color. Keep an eye on them. They should be golden in about 12 to 15 minutes. - How to store leftover ingredients: If you have extra Brie or cranberry sauce, wrap them well. Store leftover Brie in the fridge for up to a week. Keep the cranberry sauce covered in the fridge for about 1 to 2 weeks. - Suggestions for using leftover fillings: Use extra cranberry sauce on toast or as a dip. You can also mix it with yogurt for a tasty snack. If you have leftover nuts, add them to salads or snack mixes for a crunch. - Presentation tips: Serve the bites on a rustic wooden board. This adds charm. You can place fresh rosemary sprigs around the bites. It looks appealing and smells great. - Additional garnishes suggestions: Drizzle a little honey on top for sweetness. You can also sprinkle some extra chopped nuts for a nice texture. Consider adding a few slices of apple for color and crunch. Pro Tips Use Cold Brie: Ensure your Brie cheese is cold before cutting to maintain its shape and make it easier to handle. Experiment with Flavors: Try adding different jams or chutneys alongside the cranberry sauce for a unique twist. Perfect Egg Wash: For an even shinier finish, mix a little water or milk into the beaten egg before brushing. Watch the Baking Time: Keep an eye on the bites as they bake; ovens vary, and they can go from golden to burnt quickly! {{image_4}} You can switch up the cheese to make these bites even better. Try using goat cheese for a tangy twist. Cream cheese works well too if you prefer something milder. For the fruit sauce, cranberry isn’t your only option. Raspberry or apple sauce can add a fun flavor. Consider using a mix of fruits for a unique taste. If you need a gluten-free option, look for gluten-free crescent dough in stores. This way, everyone can enjoy these tasty bites. For those avoiding nuts, just leave out the walnuts or pecans. These bites still taste great without them. You can add extra herbs instead for more flavor. During the holidays, try adding a dash of cinnamon to the cranberry sauce. It gives a warm and festive touch. You can also use pumpkin puree in fall for a seasonal flavor. In spring, consider adding fresh berries along with the cheese. This adds a nice burst of color and flavor. Each season brings a chance to create something new! To keep your leftover bites fresh, place them in an airtight container. Refrigerate them right away. They taste best within three days. For reheating, preheat your oven to 350°F (175°C). Place the bites on a baking sheet. Heat for about 10 minutes until warm. This helps keep the crust crispy. You can freeze uncooked bites. After assembling them, place them on a baking sheet. Make sure they don’t touch. Freeze them for about 1-2 hours, then transfer to a freezer bag. For cooked bites, let them cool completely. Place them in an airtight container or freezer bag. They can stay frozen for up to three months. To reheat, bake from frozen at 350°F (175°C) for about 15-20 minutes. Enjoy them anytime! Yes, you can prepare these bites in advance. To do this, follow these steps: - Assemble the bites as usual, but do not bake them yet. - Place the uncooked bites on a parchment-lined baking sheet. - Cover them tightly with plastic wrap or foil. - Store them in the fridge for up to 24 hours. When you are ready to bake, just preheat the oven and bake them straight from the fridge. This saves time and helps you enjoy more time with guests. You can use either store-bought or homemade cranberry sauce. - Store-bought: It saves time and is often tasty. - Homemade: It allows for more control over sweetness and flavor. If you want to make it at home, combine fresh cranberries, sugar, and water. Cook until the cranberries burst and thicken the sauce. Both options work well in these bites. Absolutely! If you want to try different flavors, consider these alternatives: - Camembert: It has a similar creamy texture and taste. - Goat cheese: This adds a tangy kick. - Cream cheese: It works well if you want a milder flavor. Each cheese will change the taste, making it fun to experiment. Cooked bites last about 3-4 days in the fridge. - Store them in an airtight container to keep them fresh. - If you notice the cheese or dough getting dry, they may not taste as good. For the best quality, enjoy them within the first few days after baking. You now have all the steps to make delicious crescent bites with Brie and cranberry. We covered the key ingredients, cooking steps, and clever tips to ensure your bites shine. You can even try different flavors and dietary adaptations to suit your taste. Remember, these bites are great for parties or cozy nights in. They stay fresh when stored properly, so enjoy them later as well. Don't hesitate to experiment and find your favorite version of this tasty treat!

Cranberry Brie Crescent Bites Easy and Tasty Treat

Looking for an easy and tasty treat that wows every crowd? Say hello to Cranberry Brie Crescent Bites! With just

To make this delightful treat, gather these key ingredients: - 2 cups fresh strawberries, hulled and quartered - 3/4 cup granulated sugar, divided - 1 tablespoon fresh lemon juice - 1 cup cream cheese, softened to room temperature - 1 cup heavy whipping cream - 1/2 cup whole milk - 1 teaspoon pure vanilla extract - 1/2 cup graham cracker crumbs - A pinch of salt Careful measuring helps get the best flavor. Here are some tips: - Use fresh strawberries for the best taste. They should be ripe and sweet. - Soften cream cheese to mix easily. Set it out for about 30 minutes before using. - Measure sugar in two parts for even sweetness. This helps with the strawberry and cream cheese mixes. Want to mix it up? Try these add-ins: - Swirl in a fruit puree, like raspberry or blueberry, for a fun twist. - Add crushed cookies for extra crunch. This can boost the texture and flavor. - Consider a splash of liqueur for an adult treat. Just use a small amount to keep it creamy. These choices let you customize your ice cream and make it special! {{ingredient_image_2}} Start by washing and hulling 2 cups of fresh strawberries. Cut them into quarters. In a medium bowl, mix the strawberries with 1/4 cup of sugar and 1 tablespoon of fresh lemon juice. Toss them gently. Let them sit for about 15 minutes. This step helps the berries become soft and juicy. After 15 minutes, use a fork to mash the strawberries gently. Aim for a chunky puree. Set this mixture aside. You will mix it with the ice cream base later. In a large bowl, beat 1 cup of softened cream cheese with 1/2 cup of sugar. Use a whisk or an electric mixer. Mix until it becomes smooth and creamy. This texture is key for your ice cream. Now add 1 cup of heavy whipping cream and 1/2 cup of whole milk to the cream cheese mixture. Also, add 1 teaspoon of pure vanilla extract. Mix everything well until it is smooth. Gently fold in the strawberry puree and any juices. Also add 1/2 cup of graham cracker crumbs. Be careful not to overmix. You want to keep some texture from the strawberries and crumbs. Pour your mixture into an ice cream maker. Follow the maker's instructions. Churn for about 20-25 minutes. Stop when you achieve a soft-serve consistency. Scoop the churned ice cream into an airtight container. Smooth out the top with a spatula. Then seal it and place it in the freezer. Let it freeze for at least 4 hours, or until firm enough to scoop. Before serving, let the ice cream sit at room temperature for about 5-10 minutes. This makes scooping easier. Serve in chilled bowls. You can add fresh strawberry slices on top and a sprinkle of graham cracker crumbs for extra flair. To get the best texture for your ice cream, focus on the cream cheese mixture. Make sure your cream cheese is soft. This helps it mix smoothly with sugar. If it's too hard, you will get lumps. When you add the heavy cream and milk, mix until smooth. This gives you that creamy base you want. One mistake is overmixing the strawberry puree. If you mix too much, you lose the chunks. You want bites of strawberries in every scoop. Another mistake is not letting the ice cream churn long enough. If it's too soft, it won't set well in the freezer. Always follow the churn time. To make your ice cream creamy, keep everything cold. Chill your mixing bowls and ingredients before you start. This helps the ice cream freeze evenly. Use heavy whipping cream for a richer taste. It's thicker and adds creaminess. Finally, let it sit at room temp for a few minutes before serving. This makes scooping easier and keeps it from being too hard. Pro Tips Choose Ripe Strawberries: For the best flavor, select strawberries that are fully ripe and sweet. Look for bright red berries with a fragrant aroma. Chill Your Equipment: To achieve a creamier texture, chill your ice cream maker bowl and any mixing bowls before starting the process. Experiment with Flavors: Feel free to add other fruits or flavorings to customize your ice cream. Blueberries or a hint of almond extract can provide a delightful twist. Proper Storage: Store your ice cream in a shallow container to make scooping easier, and press a piece of parchment paper directly onto the surface to prevent ice crystals from forming. {{image_4}} You can make a lighter version of this ice cream. Use low-fat cream cheese and substitute the sugar with a sugar-free sweetener. This change helps cut calories while still tasting great. You might also use skim milk instead of whole milk. This will keep your ice cream creamy without all the fat. Strawberry cheesecake ice cream is wonderful, but you can mix in other fruits. Try adding raspberries or blueberries for a twist. You can also use mango or peach to create a fruity delight. Just make sure to mash or puree these fruits, like you did with the strawberries, to keep the texture right. You can swap cream cheese with coconut cream for a dairy-free option. This will give your ice cream a tropical flavor. You could also use almond milk instead of whole milk for a nutty taste. If you want a crunch, add crushed nuts instead of graham cracker crumbs. Each swap adds something new to your dish. To keep your strawberry cheesecake ice cream fresh, store it in an airtight container. Make sure the container is freezer-safe. Press a piece of plastic wrap against the surface of the ice cream before sealing. This helps keep air out and prevents ice crystals from forming. Homemade ice cream lasts about two weeks in the freezer. After that, it may lose quality. For the best taste and texture, try to eat it within this time frame. If you notice any changes in color or texture, it may be time to let it go. Ice crystals can ruin the smoothness of your ice cream. To avoid this, follow these tips: - Store the ice cream in the coldest part of the freezer. - Avoid opening the freezer door too often. - Use a container that fits your ice cream tightly. - If possible, make smaller batches that you can finish quickly. These steps will help keep your treat creamy and delicious! You can make strawberry cheesecake ice cream without an ice cream maker. First, mix all your ingredients in a bowl. Pour the mixture into a shallow dish. Place the dish in the freezer. Every 30 minutes, stir the mixture with a fork for about 3 hours. This helps break up ice crystals. Keep stirring until it's creamy and smooth. Yes, frozen strawberries work well in this recipe. Just thaw them first. Drain any excess liquid before mashing them. This will help keep your ice cream from becoming too watery. The flavor will still be delicious and sweet. To soften ice cream for serving, leave it out at room temperature. About 5 to 10 minutes will do. You can also scoop it directly into bowls and let it sit. This will make it easier to scoop and enjoy. Freezer-burned ice cream has icy spots or a dry texture. It may also look grayish or have a strange taste. If you notice these signs, it’s best to discard it. Always store ice cream in an airtight container to prevent freezer burn. Absolutely! You can add chocolate chips, nuts, or other fruits. Swirl in some fudge or caramel for extra flavor. Just remember to fold them in gently to keep the texture nice. Get creative and make it your own! In this blog post, we explored how to make delicious strawberry cheesecake ice cream. We discussed key ingredients, step-by-step instructions, tips for the best texture, and great variations. You can customize your ice cream with different fruits or healthier swaps. Storing your homemade treat properly keeps it fresh and creamy. With what you’ve learned, you can create a tasty dessert for any occasion. Enjoy the fun of making your own ice cream!

Strawberry Cheesecake Ice Cream Easy Homemade Delight

Craving a sweet treat that combines the best of both worlds? Strawberry Cheesecake Ice Cream is your answer! You can

To make jalapeño cheddar cornbread muffins, you need a mix of key ingredients. Each one plays a part in building flavor and texture. Here’s what you will need: - 1 cup cornmeal - 1 cup all-purpose flour - 1 tablespoon baking powder - 1/2 teaspoon baking soda - 1/2 teaspoon salt - 1 cup buttermilk - 2 large eggs - 1/4 cup honey - 1/4 cup vegetable oil - 1 cup shredded sharp cheddar cheese - 2-3 fresh jalapeños, finely chopped - 1/4 cup corn kernels - Optional: 1 tablespoon fresh cilantro, chopped Each ingredient adds its own magic. The cornmeal gives a great texture. The buttermilk keeps the muffins moist. Honey adds a touch of sweetness, balancing the heat from the jalapeños. You can adjust how spicy your muffins are by changing the number of jalapeños. For the best taste, use fresh ingredients. Fresh corn and jalapeños will enhance the flavor. These muffins are not just easy to make; they are also packed with taste. I love these muffins for breakfast or as a side with chili. Enjoy making them! {{ingredient_image_2}} - Preheat your oven to 400°F (200°C). This ensures even baking. - Prepare a muffin tin by greasing it with non-stick spray or lining it with paper liners. This helps the muffins release easily. - In a large mixing bowl, combine 1 cup of cornmeal, 1 cup of all-purpose flour, 1 tablespoon of baking powder, 1/2 teaspoon of baking soda, and 1/2 teaspoon of salt. Stir well with a whisk for a smooth mix. - In a separate bowl, whisk together 1 cup of buttermilk, 2 large eggs, 1/4 cup of honey, and 1/4 cup of vegetable oil until smooth. This mixture adds moisture and flavor. - Carefully pour the wet mixture into the dry ingredients. Stir gently with a spatula until just combined. Overmixing can make the muffins tough. - Now, fold in 1 cup of shredded sharp cheddar cheese, 2-3 finely chopped jalapeños, and 1/4 cup of corn kernels. Mix until they are evenly distributed. - Spoon the batter into the muffin tin, filling each cup about two-thirds full. This allows room for rising. - Bake in the preheated oven for 15-18 minutes. Check for doneness with a toothpick; it should come out clean. - After baking, let the muffins cool in the tin for about 5 minutes. This makes them easier to handle. Then, move them to a wire rack to cool completely. How to avoid overmixing To keep your muffins light, mix gently. Once you combine the wet and dry ingredients, stop stirring as soon as they come together. Overmixing makes the muffins tough. Achieving the perfect texture The right texture is key. Use a spatula to fold in the cheese, jalapeños, and corn. This helps keep the batter airy and fluffy. Adjusting jalapeño heat level Want it spicier? Add more chopped jalapeños. If you prefer less heat, remove the seeds and ribs before chopping. This makes a big difference in spice level. Suggested spices to add Try adding smoked paprika or cumin for a flavor boost. A pinch of garlic powder can also enhance the taste without overpowering the cornbread. Ideal pairings with soups and stews These muffins pair well with chili, chicken soup, or a hearty vegetable stew. Their spice complements rich, savory dishes nicely. Storage and reheating tips Store leftovers in an airtight container at room temperature for up to three days. To reheat, place them in a warm oven for a few minutes. This helps restore their texture. Pro Tips Use Fresh Jalapeños: For the best flavor and heat, opt for fresh jalapeños. If you prefer milder muffins, remove the seeds and membranes before chopping. Experiment with Cheese: While sharp cheddar is delicious, try mixing in pepper jack or a smoked cheese for an extra flavor twist. Serve Warm: These muffins are best enjoyed warm right out of the oven. Reheat any leftovers for a few minutes in the oven to bring back their fresh-baked taste. Pair with Dips: Enhance your muffins by serving them with a side of spicy salsa or a creamy dip to complement the flavors. {{image_4}} If you want to make these muffins gluten-free, swap all-purpose flour for gluten-free flour. This mix works well and gives a nice texture. For a dairy-free option, you can use almond milk or oat milk instead of buttermilk. Just add a splash of vinegar to make it sour. You can also use a dairy-free cheese that melts well. To make your muffins even richer, add cooked bacon bits. This gives a smoky flavor that pairs nicely with jalapeños and cheddar. If you want more veggies, add in some corn, bell peppers, or even spinach. These add color and nutrients. They also make the muffins more fun to eat. In spring, try adding zucchini or fresh herbs like basil. This keeps your muffins bright and fresh. During fall, consider adding pumpkin or butternut squash. These ingredients add a warm, sweet flavor that’s perfect for the season. For special holidays, try adding cranberries or nuts. This gives a festive touch that everyone will love. To store your leftover jalapeño cheddar cornbread muffins, place them in an airtight container. Keep them at room temperature for up to two days. If you like them warm, you can reheat them in the oven for a few minutes. This keeps the texture nice and fluffy. For long-term storage, you can freeze the muffins. Wrap each muffin tightly in plastic wrap. Place them in a freezer bag or airtight container. They can last up to three months in the freezer. When you want to eat them, just take them out and let them thaw at room temperature. To reheat frozen muffins, use the oven. Preheat it to 350°F (175°C). Place the muffins on a baking sheet and heat for about 10-15 minutes. This method helps restore their soft texture. You can also microwave them for about 30 seconds, but the oven is best for keeping them fluffy. Enjoy your tasty muffins! Store your muffins in an airtight container. This keeps them fresh. You can keep them at room temperature for up to three days. For longer storage, place them in the fridge. Just remember to let them cool completely first. Yes, you can make these muffins ahead of time. Bake and cool them fully. After that, store them in an airtight container. They stay fresh for a few days. You can also freeze them for up to three months. Just thaw them before serving. To make more servings, simply multiply the ingredients by the number you need. For example, if you want 24 muffins, double all the ingredients. Just remember to adjust your baking time. Check for doneness by inserting a toothpick. These muffins pair well with soups and stews. Try them with chili for a spicy kick. They also taste great with salads or grilled meats. Enjoy them as a snack or a side! You learned how to make jalapeño cheddar cornbread muffins step by step. We covered the key ingredients, baking tips, and variations. Now you can enjoy these tasty muffins with soup or stew. Remember to store leftovers properly so they stay fresh. Experiment with different flavors or spices to make it your own. With these simple steps, you'll impress family and friends with your baking skills. Enjoy your cooking journey!

Jalapeño Cheddar Cornbread Muffins Flavorful and Easy

Jalapeño Cheddar Cornbread Muffins are a tasty treat that everyone will love. They blend sweet corn with spicy jalapeños and

To make a Pineapple Coconut Smoothie, gather these fresh and tasty ingredients: - 1 cup fresh pineapple chunks, frozen for a refreshing chill - 1 ripe banana, peeled - 1/2 cup creamy coconut milk - 1/2 cup plain Greek yogurt for a protein boost - 1 tablespoon honey (or maple syrup for a vegan version) - 1 tablespoon chia seeds for added nutrition - 1/2 teaspoon pure vanilla extract to enhance flavor - A sprinkle of toasted coconut flakes for garnish - Ice cubes (optional, for a super-thick texture) These ingredients work together to create a creamy, tropical delight. The frozen pineapple and banana make it cold and smooth. Coconut milk adds richness, while Greek yogurt gives it a protein punch. Chia seeds bring a health boost, and honey or maple syrup adds sweet notes. Don't forget the toasted coconut flakes on top for a nice crunch! {{ingredient_image_2}} - First, gather all your ingredients. You need fresh pineapple chunks, a ripe banana, coconut milk, Greek yogurt, honey, chia seeds, and vanilla extract. - Next, place the frozen pineapple chunks, banana, coconut milk, Greek yogurt, honey, chia seeds, and vanilla extract into a high-speed blender. - Blend the mixture on high speed. Stop to scrape down the sides if needed. Blend until it is smooth and creamy. - If you want a thicker smoothie, add some ice cubes. Blend again until smooth. - Taste your smoothie. If you want it sweeter, add more honey or maple syrup. Blend again briefly. - Once blended, pour the smoothie into chilled glasses. This keeps it extra refreshing. - To finish, sprinkle toasted coconut flakes on top. This adds a nice crunch and tropical touch. - Enjoy your smoothie right away for the best flavor and texture! To get a creamy texture, start with frozen pineapple chunks. Frozen fruit gives your smoothie a nice chill. Use ripe bananas, as they blend smoothly and add creaminess. If your smoothie is too thin, add ice cubes. Ice makes it super thick and refreshing. You can also add more Greek yogurt for extra body. Blend well until it’s smooth. Remember to scrape the blender sides to mix everything. You can customize the sweetness to your liking. Start with one tablespoon of honey or maple syrup. Blend, then taste. If you want it sweeter, add more. For those on a different diet, try using agave syrup or stevia. These options are lower in calories and still sweeten your drink. Adjust the sweetness until it’s just right for you! Pro Tips Use Frozen Fruit: Using frozen pineapple not only chills your smoothie but also creates a creamy texture without the need for too much ice. Ripeness Matters: Ensure your banana is perfectly ripe for the best natural sweetness and creaminess in your smoothie. Customize Your Sweetness: Taste your smoothie before serving and adjust the sweetness to your liking; different fruits may vary in sweetness. Garnish for Presentation: Don't skip the toasted coconut flakes; they add a delightful crunch and make your smoothie look more appealing! {{image_4}} You can make your pineapple coconut smoothie even better! Adding greens like spinach or kale gives it a healthy twist. These greens add nutrients without changing the sweet taste. You can also mix in other fruits. Try mango for a tropical vibe or kiwi for a fun tang. Each fruit brings a unique flavor to your drink. If you want to switch things up, use almond or oat milk. These milk options add a nutty flavor. They also make your smoothie dairy-free. You can replace Greek yogurt with dairy-free yogurt to keep it creamy. This way, everyone can enjoy the smoothie, no matter their diet. You can easily freeze some ingredients for your Pineapple Coconut Smoothie. Start by chopping fresh pineapple into chunks. Spread them out on a baking sheet and freeze for a few hours. Once frozen, transfer the chunks into a zip-top bag. This way, you get a chilled smoothie anytime! For bananas, peel and slice them. Place the slices on a baking sheet and freeze. When frozen, move them to a bag. This will keep them fresh and ready for your smoothies. If you have leftover smoothie, it’s best to store it in the fridge. Use a covered jar or container. Drink it within one day for the best taste. The shelf life of your smoothie leftovers is short. I recommend consuming them within 24 hours. After that, the flavors and texture may change. If you notice separation, just give it a good shake before enjoying. A Pineapple Coconut Smoothie is packed with nutrition. It has vitamins, minerals, and protein. One serving gives you: - Calories: About 300 - Protein: 10 grams from Greek yogurt - Fiber: 4 grams from chia seeds and banana - Healthy fats: From coconut milk and chia seeds This smoothie is a great snack or meal replacement. Yes, you can easily make this smoothie vegan. Just swap Greek yogurt for a plant-based yogurt. Use maple syrup instead of honey. This way, you keep all the yummy flavors while making it vegan-friendly. If you want a thicker smoothie, add ice cubes. You can also use frozen banana instead of a fresh one. This will create a nice, creamy texture. Just blend well until it’s smooth. Many fruits mix well with pineapple and coconut. Here are some tasty options: - Mango for a tropical twist - Kiwi for a tangy kick - Strawberries for sweetness - Spinach for added nutrients, without changing the taste Mix and match to find your favorite flavor combo! This article covered how to make a tasty Pineapple Coconut Smoothie. We discussed the best ingredients, like fresh pineapple, creamy coconut milk, and Greek yogurt. I shared steps for blending your smoothie just right and offered tips on achieving the perfect thickness. You can also add your favorite greens or try different fruits for variety. Lastly, we explored how to store leftovers for later. Enjoy your smoothie and get creative with flavors!

Pineapple Coconut Smoothie Refreshing Summer Treat

Craving a tropical escape this summer? A Pineapple Coconut Smoothie is your perfect treat! With just a few fresh ingredients,

To make the best apple pie overnight oats, you need the following items: - 1 cup rolled oats - 1 ½ cups almond milk (or any milk of your choice) - 1 medium apple, peeled and diced - 1 tablespoon maple syrup - 1 teaspoon vanilla extract - 1 teaspoon ground cinnamon - ½ teaspoon ground nutmeg - 2 tablespoons chia seeds - Pinch of salt These ingredients blend to create a creamy and tasty dish. The oats soak up the milk, making them soft and delicious. The apple adds a nice crunch, while the spices give it that warm, pie-like flavor. You can add some fun twists to your overnight oats with these optional items: - ¼ cup walnuts or pecans, chopped (optional) - Sweetener of choice, like honey or agave syrup Feel free to swap almond milk for any milk you like. You can also choose different nuts or even add dried fruits for extra flavor. Each serving of apple pie overnight oats packs a nutritious punch. Here’s a quick look at what you get per serving: - Calories: Approximately 300 - Protein: About 8 grams - Fiber: Roughly 6 grams - Sugar: Around 10 grams (natural sugars from apple and maple syrup) These oats are a great way to start your day. They give you energy and keep you full. Enjoy the health benefits while savoring every bite! {{ingredient_image_2}} First, take a large mixing bowl. Add 1 cup of rolled oats. Then, toss in 2 tablespoons of chia seeds. Next, sprinkle in 1 teaspoon of ground cinnamon and ½ teaspoon of ground nutmeg. Finally, add a pinch of salt. Stir everything together until it's well mixed. This step is key for a balanced flavor. In another bowl, measure 1 ½ cups of almond milk. Then, add 1 tablespoon of maple syrup and 1 teaspoon of vanilla extract. Whisk these three ingredients together until they blend smoothly. This mixture brings sweetness and creaminess to your oats. Now, slowly pour the wet mixture into the bowl with the dry ingredients. Gently stir to coat all the oats. Make sure there are no dry spots left. After that, fold in your diced apple. If you like, you can also add chopped walnuts or pecans at this stage. Be careful not to crush the apple pieces while folding. Once combined, divide the mixture into jars or airtight containers. Seal them tightly to avoid spills. Place the jars in the fridge overnight, or at least for 4-6 hours. This helps the oats soak up the milk and become soft. In the morning, stir the oats well. If you want them creamier, add a splash of milk. For a tasty finish, top with extra apple slices, a sprinkle of cinnamon, and a drizzle of maple syrup. This makes your dish look and taste amazing! To get the best texture, use rolled oats. They soak up liquid well. Avoid instant oats; they can get mushy. Mix the oats with chia seeds and spices first. This helps them blend well. Let the oats soak overnight in the fridge. This softens them just right. If you want a creamier texture, add more milk in the morning. Stir well before serving. You can boost flavor in many ways. Try adding a pinch of salt to enhance sweetness. Maple syrup brings in a nice touch of sweetness, too. For a nutty taste, add chopped walnuts or pecans. If you want a fruity twist, toss in some raisins or dried cranberries. You can also use different spices like ginger or allspice. These changes make each bite exciting. Preparation can be quick and easy. Measure all your dry ingredients ahead of time. You can mix them in a bowl the night before. Just add the wet ingredients in the morning. If you're in a rush, use single-serving jars. This way, you get a grab-and-go breakfast. They are perfect for busy mornings. You can even make a batch for the whole week. Just store them in the fridge for easy access. Pro Tips Use Old Apples: Older apples tend to be softer and sweeter, which can enhance the flavor and texture of your overnight oats. Customize Your Milk: Experiment with different types of milk like oat milk or coconut milk for unique flavors that complement the apple pie theme. Chill Time is Key: Allow the oats to soak overnight for the best texture; the longer they soak, the creamier they become. Top with Fresh Ingredients: Add fresh fruit or nuts just before serving for an extra crunch and to maintain the freshness of the toppings. {{image_4}} If you want to make your apple pie overnight oats vegan, it's very easy. Simply use almond milk or any plant-based milk. Nut milk, oat milk, or soy milk all work well. Maple syrup is a great sweetener that fits perfectly. You can skip the nuts if you're allergic or prefer a nut-free option. These changes keep the recipe tasty and plant-based. To make your oats gluten-free, choose rolled oats that are certified gluten-free. Regular oats can have gluten due to cross-contamination. All other ingredients, like almond milk and spices, are naturally gluten-free. Always check labels to be sure. You can enjoy this dish without any worries. You can mix up the flavors in your apple pie overnight oats. Try adding other fruits like berries or peaches for a twist. You can also swap out spices. Instead of cinnamon, you can use ginger or cardamom. For a nutty touch, add sunflower seeds or almonds. These changes add fun and keep breakfast exciting! Store your apple pie overnight oats in airtight containers. This keeps them fresh and prevents odors from the fridge. Glass jars work well, as you can see the layers. Always make sure the lids are tightly sealed. Since the oats absorb liquid, they can get thick. If you prefer a creamier texture, add a splash of milk when you serve them. Apple pie overnight oats last about 3 to 5 days in the fridge. After this time, the oats may lose their freshness. Check for any off smells or changes in texture before eating. If they seem dry, add more milk to refresh them. For best flavor, try to eat them within the first few days. You can freeze apple pie overnight oats for later use. To do this, store them in freezer-safe containers. Leave some space at the top, as they will expand. When you're ready to eat, thaw them in the fridge overnight. After thawing, give them a good mix. You might need to add a bit of milk to regain the creamy texture. You can keep apple pie overnight oats in the fridge for up to five days. This makes them a great meal prep option. Just make sure they are in a sealed container. If you notice any change in smell or texture, it's best to toss them out. Yes, you can use instant oats, but the texture will change. Instant oats will soak up the liquid faster, making the oats softer. If you prefer a firmer texture, stick with rolled oats. They take longer to absorb liquid and hold their shape better. You can easily customize this recipe in many ways. Here are some ideas: - Fruits: Add berries, bananas, or dried fruits for different flavors. - Nuts: Swap walnuts or pecans for almonds or sunflower seeds. - Sweeteners: Use honey or agave instead of maple syrup for sweetness. - Spices: Experiment with ginger or allspice for a unique twist. - Dairy Alternatives: Try coconut milk for a creamier texture. - Toppings: Add yogurt, granola, or nut butter on top before serving. Feel free to mix and match ingredients. This recipe is all about making it your own! You’ve learned how to make delicious Apple Pie Overnight Oats. We covered essential ingredients, mixing methods, and storage tips. Each step helps you create a tasty breakfast that anyone can enjoy. Feel free to try the variations and tips to make this dish your own. Remember, you can customize it to fit your taste. I hope you feel excited to enjoy these treats, share with friends, and make mornings better!

Irresistible Apple Pie Overnight Oats Easy Recipe

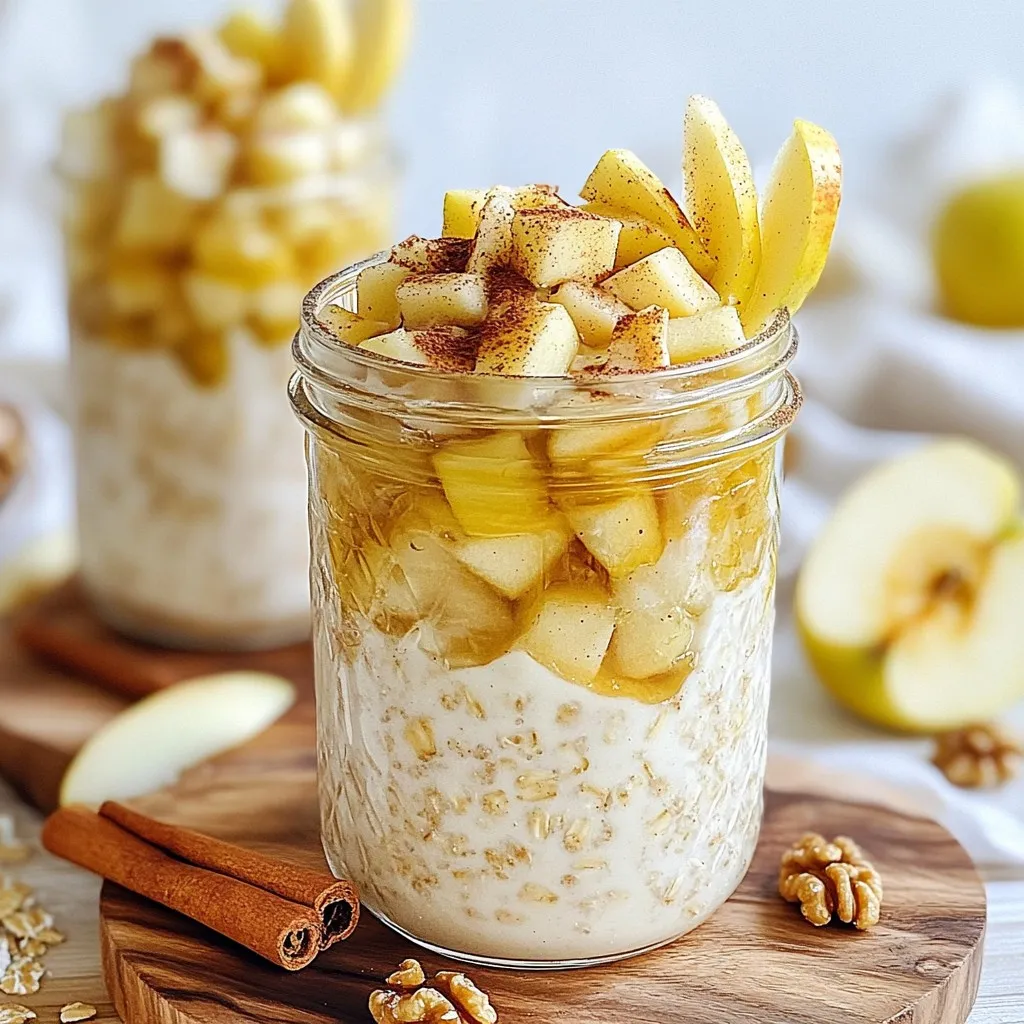
If you love the cozy taste of apple pie, you’ll adore these Apple Pie Overnight Oats! This easy recipe combines

The main players in this dish create the perfect balance of flavor. You will need: - 1 block of extra-firm tofu, pressed and cubed - 2 tablespoons vegetable oil - 4 cloves garlic, minced - 1/4 cup sweet chili sauce - 2 tablespoons soy sauce - 1 tablespoon brown sugar - 1 tablespoon rice vinegar - 1 teaspoon cornstarch mixed with 2 tablespoons water To give your tofu a spicy kick, consider adding: - 1/2 teaspoon red pepper flakes This optional ingredient enhances the flavor and adds heat to the dish. Adjust the amount based on your spice tolerance. A few simple garnishes can elevate your dish. I suggest: - 1 green onion, sliced - Sesame seeds These garnishes add a fresh touch and a lovely crunch. You can also consider adding fresh herbs or a squeeze of lime for extra brightness. {{ingredient_image_2}} Start with a block of extra-firm tofu. Press it for 15-20 minutes to remove water. Use a tofu press or wrap it in a towel. Place a heavy pan on top to help. Once pressed, cut it into uniform cubes. This ensures even cooking later. Heat 2 tablespoons of vegetable oil in a large skillet over medium heat. Add the tofu cubes in a single layer. Don’t crowd them; it helps them crisp up. Cook each side for 4-5 minutes. Look for a golden brown color and a crispy texture. Once done, set the tofu aside on a plate. In the same skillet, lower the heat and add 4 cloves of minced garlic. Sauté for about 30 seconds until it smells great. Be careful not to let the garlic burn. In a bowl, mix 1/4 cup sweet chili sauce, 2 tablespoons soy sauce, 1 tablespoon brown sugar, 1 tablespoon rice vinegar, and optional red pepper flakes. Pour this mix into the skillet and let it simmer. When your sauce bubbles, add 1 teaspoon cornstarch mixed with 2 tablespoons water. Stir for 2-3 minutes until it thickens. Now, fold in the crispy tofu. Make sure every piece gets coated in that tasty sauce. Cook for another 2-3 minutes to let the flavors blend. Finish by garnishing with sliced green onions and sesame seeds. Enjoy your dish! To get crispy tofu, start by pressing it well. This step helps remove extra water. After pressing, cube the tofu evenly. When cooking, make sure you don’t crowd the pan. Each piece needs space to brown. Heat your oil until shimmering, then add the tofu. Cook it until golden on each side for about 4-5 minutes. Remove the tofu and let it rest on a plate. This helps keep it crispy later. If you like heat, add red pepper flakes. Start with a half teaspoon. You can always add more later. If you prefer a milder taste, skip the flakes. Sweet chili sauce already brings some spice. Taste the sauce as you cook. Adjust it by adding more soy sauce or brown sugar. This way, you can find your perfect balance of flavors. Avoid using soft or silken tofu. It won’t hold its shape. Always press your tofu for the best texture. Don’t rush cooking; patience is key for crispiness. If the tofu sticks to the pan, it’s not ready. Wait for it to release before flipping. Lastly, don’t skip garnishing; it adds a nice touch. Green onions and sesame seeds make your dish pop. Pro Tips Pressing Tofu: Make sure to press the tofu well to remove excess moisture, which helps achieve a crispy texture when frying. Uniform Cubes: Cut the tofu into uniform cubes to ensure even cooking and consistent crispiness throughout the dish. Watch the Garlic: Keep a close eye on the garlic while sautéing; it can burn quickly and turn bitter, ruining the flavor of your dish. Customizing Heat: Adjust the amount of red pepper flakes according to your spice preference, or omit them for a milder dish. {{image_4}} Sweet Chili Garlic Tofu is already a great vegan dish. It uses tofu as the main protein source. You do not need to change any ingredients to make it vegan. Just make sure your sweet chili sauce is vegan-friendly. Some brands add fish sauce, so check the label. You can easily adapt this recipe for different diets. If you are gluten-free, switch soy sauce for tamari. If you need a low-sugar option, use a sugar substitute in place of brown sugar. You can even leave out the sweet chili sauce and use a homemade version with less sugar. There are many ways to serve Sweet Chili Garlic Tofu. Here are some ideas: - Serve it over jasmine rice for a filling meal. - Pair it with steamed broccoli or other veggies for a healthy plate. - Use it in a wrap with fresh greens for a fun lunch. - Top a salad with the tofu for a tasty twist. You can also drizzle extra sweet chili sauce on top for more flavor. After you enjoy your Sweet Chili Garlic Tofu, let it cool down. Place it in an airtight container. This keeps the tofu fresh. You can store it in the fridge for up to 3 days. Make sure to keep the sauce with it to keep the flavor strong. When you are ready to eat leftovers, you can reheat them in a pan. Heat a small amount of oil over medium heat. Add the tofu and sauce, stirring gently. Cook until warm, about 5-7 minutes. You can also use a microwave. Place the tofu in a bowl, cover it, and heat for 1-2 minutes. Stir halfway through to warm evenly. Freezing tofu is a great option if you want to save some for later. Let the tofu cool completely. Place it in a freezer-safe container. You can freeze it for up to 2 months. When you are ready to use it, thaw in the fridge overnight. Reheat as described above. Note that freezing may change the texture slightly, but it will still taste great! Use extra-firm tofu for this recipe. It holds its shape well when cooked. Firm tofu can work too, but it may not crisp up as nicely. Pressing the tofu removes moisture and helps it become crispy. Yes, you can make it gluten-free! Simply use gluten-free soy sauce or tamari instead of regular soy sauce. Most sweet chili sauces are gluten-free, but check the label to be sure. To make it sweeter, add more sweet chili sauce. You can also increase the brown sugar or add a splash of honey or maple syrup. Remember to taste as you go to find the right balance for you. Serve this dish over fluffy jasmine rice or quinoa. Steamed vegetables, like broccoli or snap peas, pair well too. You can also add a fresh salad for a crunchy contrast. This blog post covered the essential steps for making sweet chili garlic tofu. We discussed key ingredients that give the dish its unique flavor. You learned how to prepare and cook tofu to achieve the perfect crispiness. Tips were provided to avoid common mistakes and adjust spice levels easily. Remember, you can adapt this dish to fit any diet, and leftovers are easy to store or freeze. With these steps, you can create a tasty meal that delights your taste buds. Enjoy making this dish your own!

Sweet Chili Garlic Tofu Flavorful and Easy Recipe

Are you ready to take your tofu game to the next level? My Sweet Chili Garlic Tofu recipe is super

Older posts
Newer posts
← Previous Page1 … Page118 Page119 Page120 … Page122 Next →

dsad

© 2026 dailydishcraft • Built with GeneratePress

Our Policies

  • Copyright Policy
  • Cookie Policy
  • GDPR Policy
  • Privacy Policy
  • Disclaimer
  • Terms Of Use

More Information

  • Home
  • About
  • Contact
  • Appetizers
  • Dessert
  • Dinner
  • Drinks
©2026, dailydishcraft About Back To Top