Skip to content
DisclaimerTerms Of UseGDPR PolicyCookie Policy

dailydishcraft

  • Home
  • Drinks
  • Appetizers
  • Dinner
  • Dessert
  • About
  • Contact
  • Privacy Policy
DisclaimerTerms Of UseGDPR PolicyCookie Policy

Jessica

- 2 cups fresh strawberries, hulled and sliced - 1 package (8 oz) cream cheese, softened to room temperature - 1 cup powdered sugar - 1 teaspoon pure vanilla extract - 2 cups heavy whipping cream - 1 package (14 oz) graham crackers - 1 tablespoon freshly squeezed lemon juice - Fresh mint leaves for garnish (optional) Using fresh strawberries makes a big difference. Look for bright red berries with no soft spots. They should smell sweet and fragrant. For the cream cheese, choose full-fat versions for a rich taste. Softening it to room temperature helps it mix well. Heavy whipping cream must be fresh, too. It whips up better and gives a fluffy texture. If you don’t have fresh strawberries, you can use frozen ones. Just thaw and drain them well. Cream cheese can be swapped with mascarpone cheese for a different flavor. For a lighter option, use Greek yogurt instead of cream cheese. If you want a gluten-free cake, look for gluten-free graham crackers. {{ingredient_image_2}} First, gather your ingredients. You need fresh strawberries, cream cheese, powdered sugar, and vanilla extract. You also need heavy whipping cream, graham crackers, and lemon juice. 1. In a medium mixing bowl, combine the cream cheese, powdered sugar, and vanilla extract. Beat these on medium speed until smooth. Make sure there are no lumps. 2. In another bowl, pour in the heavy whipping cream. Use a mixer to whip it until stiff peaks form. This means the peaks will hold their shape. 3. Gently fold the whipped cream into the cream cheese mixture. Use a spatula to combine them. Be careful not to deflate the whipped cream. 4. Add the lemon juice to the mixture and fold it in. This gives the cheesecake a bright flavor. 5. Choose a rectangular or square dish for the cake. Lay down a layer of graham crackers at the bottom. To ensure a smooth mixture, always start with room temperature cream cheese. Cold cream cheese is harder to blend. Make sure to blend well after adding each ingredient. This helps break up any lumps early. When folding the whipped cream, use a gentle motion. This keeps the air in the mixture and makes the cake light. If you mix too hard, the whipped cream will lose its fluffiness. Layering is key for a great icebox cake. Start with graham crackers. Spread a layer of cream cheese mixture on top, then add sliced strawberries. Repeat these layers until you reach the top. The last layer should be the cream cheese mixture. This creates a beautiful finish. Make sure the layers are even, so each bite has a mix of flavors. After layering, cover the dish tightly with plastic wrap. Chill it for at least 4 hours or overnight. This helps the flavors blend and the cake set. To make perfect whipped cream, start with cold cream. Use heavy whipping cream for best results. Pour it into a clean bowl. Beat on medium speed until stiff peaks form. This means the cream should hold its shape well. Be careful not to overbeat it. Overbeating makes the cream grainy. You want it smooth and fluffy. One common mistake is not chilling your tools. Cold bowls and beaters help the cream whip better. Another mistake is using warm cream. Always start with cold cream straight from the fridge. Also, avoid overmixing the cream cheese. If you beat it too long, it can become too soft and lose texture. Lastly, don’t skip the lemon juice. It adds a nice zing and balances the sweetness. You can make this dessert even better with a few extras. Try adding a splash of almond extract for a unique twist. A tablespoon of cocoa powder can turn it into a chocolate delight. You might also mix in some crushed cookies for texture. Fresh mint leaves aren’t just for garnish; they add a refreshing taste. Feel free to experiment with flavors you love! Pro Tips Use Fresh Strawberries: Opt for ripe, fresh strawberries for the best flavor and texture. They will add a burst of sweetness to your icebox cake. Chill Overnight: For optimal flavor and texture, allow the cake to chill overnight. This helps the layers meld together beautifully. Whip Cream to Stiff Peaks: Ensure the heavy cream is whipped to stiff peaks before folding it into the cream cheese mixture. This will give your dessert a light and airy texture. Garnish Creatively: Enhance presentation by garnishing with sliced strawberries and fresh mint leaves just before serving. It adds a pop of color and freshness! {{image_4}} You can switch up the fruits in this icebox cake. Instead of strawberries, try blueberries, raspberries, or peaches. Each fruit brings a new taste and color. For a tropical twist, use diced mango or pineapple. Just make sure the fruit is ripe and sweet for the best flavor. If you need a gluten-free option, use gluten-free graham crackers. Many brands make tasty options that work well in this recipe. You could also use crushed nuts or gluten-free cookies as a base. This keeps the layers intact while making the cake safe for those with gluten issues. For a chocolatey delight, add cocoa powder to the cream cheese mixture. Use about ¼ cup of unsweetened cocoa for a rich flavor. You can also sprinkle in some chocolate chips between layers. If you love nuts, add chopped walnuts or pecans. They add a nice crunch and depth to the cake. You can mix in nuts with the cream cheese layer or sprinkle them on top for garnish. To keep your Strawberry Cheesecake Icebox Cake fresh, store it in the fridge. First, cover your dish tightly with plastic wrap. This helps to keep the cake moist and prevents it from absorbing other smells in the fridge. Ideally, you want to eat it within 3 to 5 days. The longer it sits, the softer the graham crackers become. You can freeze your icebox cake for later enjoyment. First, slice the cake into pieces. Then, wrap each piece tightly in plastic wrap. After that, place them in an airtight container or a freezer bag. This helps to keep the cake fresh for up to 2 months. When you want to enjoy a piece, just thaw it in the fridge overnight. Serving the cake fresh is the best way to enjoy its textures and flavors. The graham crackers stay crisp and the filling is creamy. If you serve it after a couple of days, the texture changes. The crackers soften and the flavors blend more. Some people enjoy this change, while others prefer it fresh. Try both ways to see what you like best! Yes, you can make this cheesecake icebox cake ahead of time. It actually tastes better when it sits for a while. I suggest making it the day before you plan to serve it. This allows the flavors to blend well. It also helps the cake set up nicely. Just cover it tightly with plastic wrap to keep it fresh. The icebox cake lasts about 3 to 5 days in the fridge. Store it in an airtight container or cover it well. Keep an eye on the strawberries, as they may start to soften. If you notice any changes in texture or smell, it’s best to toss it. You can use low-fat cream cheese in this recipe. It will still taste good, but the texture might be less creamy. Full-fat cream cheese gives a richer flavor and a smoother feel. If you want to reduce fat, low-fat cream cheese is a good choice. Just remember, it may change the final taste a bit. This article shared the key parts of making a great icebox cake. We discussed ingredients, prepping steps, and tips for success. You learned how to avoid common mistakes and even explored tasty variations. Remember to focus on ingredient quality and follow the layering steps carefully. Proper storage can keep your cake fresh for longer. I hope these tips inspire you to create your own delicious icebox cake! Happy baking!

Strawberry Cheesecake Icebox Cake Fresh and Tasty Treat

Looking for a simple yet delicious dessert? You’ve found it! This Strawberry Cheesecake Icebox Cake is a fresh, tasty treat

For a tasty chicken noodle soup, you need these foods: - 2 boneless, skinless chicken breasts - 8 cups rich chicken broth - 2 medium carrots, freshly sliced - 2 celery stalks, finely diced - 1 medium onion, coarsely chopped - 3 cloves garlic, finely minced - 1 teaspoon dried thyme - 1 teaspoon dried oregano - 1 bay leaf - 2 cups egg noodles - Salt and black pepper to taste - 2 tablespoons extra virgin olive oil - Fresh parsley or dill, chopped for garnish These ingredients work together to create a warm and comforting dish. The chicken provides protein, while the broth adds rich flavor. Carrots and celery add crunch, and herbs give a fresh taste. To make this soup, gather these tools: - Large pot - Cutting board - Chef’s knife - Measuring spoons - Wooden spoon - Ladle Using the right tools helps you cook with ease. A large pot is key for simmering all the flavors together. A sharp knife ensures safe and quick chopping. Each serving of chicken noodle soup has about: - Calories: 250 - Protein: 20g - Fat: 7g - Carbohydrates: 30g - Fiber: 2g - Sodium: 800mg This soup is not only comforting but also nourishing. It offers a balance of protein, carbs, and healthy fats. You can enjoy this meal without guilt while getting essential nutrients. {{ingredient_image_2}} To start, gather your fresh vegetables. You will need two medium carrots, two celery stalks, and one medium onion. Slice the carrots into rounds, dice the celery finely, and chop the onion coarsely. This mix adds flavor and color to your soup. Take three cloves of garlic and mince them finely. The garlic will give your soup a nice aroma. In a large pot, heat two tablespoons of extra virgin olive oil over medium heat. Add the chopped onion, sliced carrots, and diced celery. Sauté these for about five minutes. Stir occasionally until the veggies soften and the onion turns translucent. Next, incorporate the minced garlic, one teaspoon of dried thyme, and one teaspoon of dried oregano. Cook for another two minutes to blend the flavors. Now, it's time for the chicken! Add two boneless, skinless chicken breasts, followed by eight cups of rich chicken broth. Toss in a bay leaf and a pinch of salt and pepper. Bring this mix to a rolling boil. Once boiling, reduce the heat to low and let it simmer for 20 to 25 minutes until the chicken is cooked through and tender. Carefully remove the chicken breasts from the pot and place them on a cutting board. Use two forks to shred the chicken into bite-sized pieces. Return the shredded chicken back to the pot. Stir in two cups of egg noodles and let the soup simmer for another ten minutes. This will cook the noodles until they are tender. Before serving, taste your soup. Adjust the seasoning with more salt and pepper if needed. Don't forget to remove the bay leaf! Ladle the hot soup into bowls and garnish with freshly chopped parsley or dill. This adds a lovely touch and brightens up the dish. Enjoy your warm and comforting chicken noodle soup! To boost your broth's taste, use homemade chicken broth. It adds deep flavor. If you can't make it, buy a good quality one. Adding a splash of lemon juice brightens the flavors. A few sprigs of fresh herbs, like thyme or parsley, can also enhance the taste. Simmer the broth longer to let the flavors mix well. For perfectly cooked egg noodles, follow the package instructions. Start with boiling salted water. Add the noodles and stir them gently. Cook until they are just al dente. This keeps them from getting mushy in the soup. Drain the noodles and add them to the soup at the end. This way, they soak up the broth without losing their bite. You can make this soup healthier by using less oil. Swap out the chicken breasts for lean chicken thighs. You can also add more veggies like spinach or kale. Use whole grain or veggie noodles for added fiber. If you want to cut sodium, choose low-sodium broth. These small changes keep the soup tasty while making it better for you. Pro Tips Use Homemade Broth: For the best flavor, consider using homemade chicken broth. It adds depth and richness to your soup. Customize Your Vegetables: Feel free to add or substitute other vegetables like peas or corn for extra nutrition and flavor. Perfect Noodle Texture: To avoid mushy noodles, cook them separately and add them to each bowl just before serving. Garnish for Freshness: A sprinkle of fresh herbs just before serving brightens the flavors and adds a pop of color to your dish. {{image_4}} You can easily boost the nutrition of your chicken noodle soup. Try adding veggies like green beans, peas, or corn. These add color and taste. You can also use bell peppers or zucchini for a fresh twist. Just chop them small and add them with the carrots and celery. They will cook nicely and mix well with the broth. If you want to change the protein, use turkey instead of chicken. Turkey gives a nice flavor, and it works well in soup. You can also try cooked beans or lentils for a plant-based option. These add protein and fiber, making the dish heartier. Just remember to add them toward the end of cooking so they heat through. For a gluten-free soup, use rice noodles or gluten-free pasta. These options cook quickly and absorb the broth well. Make sure to follow the package instructions for cooking times. You can also skip the noodles and serve the soup with rice for a different texture. This way, you can enjoy your classic soup without the gluten. To store your chicken noodle soup, let it cool first. Use an airtight container for best results. Place the soup in the fridge if you plan to eat it within 3 to 4 days. Make sure to leave some space in the container. This helps the soup expand as it cools. For longer storage, freezing works well. Use freezer-safe containers or bags. Leave some room for expansion again. Your soup can last up to 3 months in the freezer. When you are ready to eat it, take it out and thaw it overnight in the fridge. Reheating is simple. For the best taste, use a pot on the stove. Heat it over medium heat, stirring often. This helps the soup warm evenly. If the soup is too thick, add a splash of broth or water. You can also use a microwave, but watch it closely to avoid hot spots. Enjoy your comforting soup warm and fresh! Chicken noodle soup lasts about 3 to 4 days in the fridge. Make sure to store it in an airtight container. This keeps the soup fresh and safe to eat. Always check for any off smells or changes in color before enjoying leftovers. Yes, using rotisserie chicken is a great shortcut. It saves time and adds flavor. Just shred or chop the chicken and add it to the pot after cooking the veggies. This will cut down on your cooking time and still give you a tasty soup. Egg noodles are the best choice for chicken noodle soup. They cook quickly and soak up the broth well. Other options include wide noodles or even whole wheat noodles. Whatever you choose, make sure they are fresh for the best texture. You now know how to make a great chicken noodle soup. We covered essential ingredients, utensils, and nutritional info. I shared step-by-step cooking instructions and tips for better flavor. You also learned about recipe variations and how to store leftovers properly. With these insights, you can enjoy this classic dish in many ways. Whether you like it traditional or with a twist, it’s all about your tastes. Happy cooking!

Classic Chicken Noodle Soup Hearty and Comforting Dish

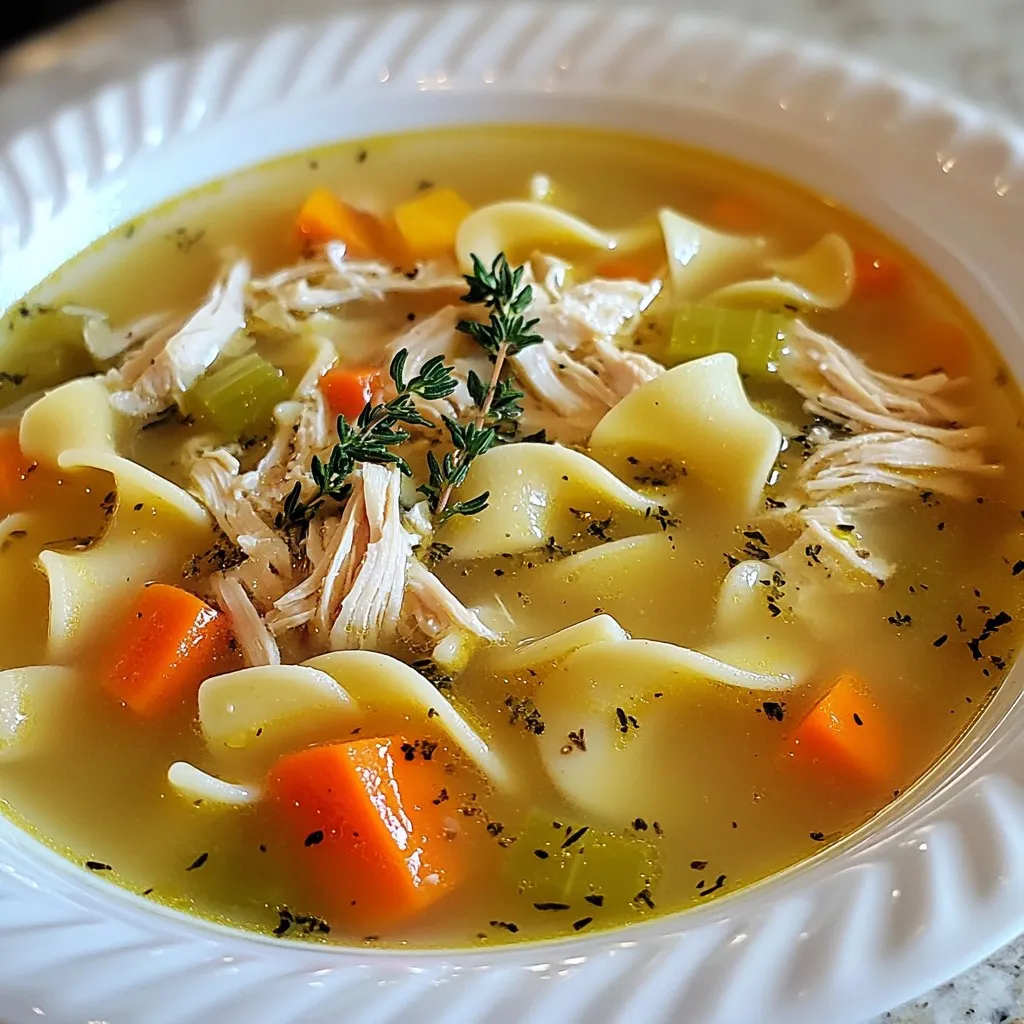
Are you ready to warm your heart and satisfy your cravings? This Classic Chicken Noodle Soup is the perfect comfort

- 4 cod fillets (approximately 6 oz each) - 4 tablespoons unsalted butter, melted - 4 cloves garlic, finely minced - 1 teaspoon fresh lemon zest - 1 tablespoon fresh parsley, finely chopped - 1 teaspoon smoked paprika (or sweet paprika for a milder flavor) - Salt and freshly cracked black pepper, to taste - Lemon wedges, for serving If you need to swap some ingredients, here are great options: - Use olive oil instead of butter for a lighter option. - Any white fish can replace cod if you prefer. - Dried herbs can work if you lack fresh parsley. For extra flavor, consider these seasonings: - A pinch of cayenne pepper for heat. - Lemon pepper for a zesty twist. - Fresh dill or thyme for a fresh herb taste. These simple swaps can elevate your dish, making it uniquely yours. {{ingredient_image_2}} Start by patting the cod fillets dry with a paper towel. This step is key for getting a nice, crispy outside. If the fillets are wet, they won’t crisp up well. Make sure each fillet is about 6 ounces. This size cooks perfectly in the air fryer. In a small bowl, mix together the melted butter and minced garlic. Add the lemon zest, chopped parsley, smoked paprika, salt, and pepper. Stir until everything is well combined. This mixture will give your cod a rich flavor. Keep some of this mixture aside for later drizzling. Preheat your air fryer to 400°F (200°C) for about 5 minutes. This helps the cod cook evenly. Brush both sides of the fillets with the garlic butter mixture. Then, place the fillets in the air fryer basket. Make sure they are not touching. Cook for 10 to 12 minutes. Check the cod around 8 minutes. It should flake easily with a fork when done. Once the cod is cooked, take it out of the air fryer. Drizzle the reserved garlic butter on top of each fillet. Serve the cod right away with lemon wedges on the side. The lemon adds a bright flavor that pairs well with the fish. For a nice touch, place the fillets on a serving platter. You can sprinkle more chopped parsley on top for color. To make your cod crispy, start by drying each fillet well. Use a paper towel to remove moisture. This step helps the fish crisp up in the air fryer. Next, brush the cod generously with the garlic butter mixture. Ensure even coating on both sides. This adds flavor and promotes that golden crust. Cook the cod at 400°F (200°C) for 10 to 12 minutes. Check the fish at 8 minutes to avoid overcooking. When done, it should flake easily and look opaque. One mistake is overcrowding the air fryer basket. If the fillets are too close, they won’t cook evenly. Always leave space for air to flow around each piece. Another mistake is skipping the drying step. Wet fish will steam instead of crisping up. Lastly, don’t rush the cooking time. Keep an eye on the fish and trust your senses. Use a fork to check for flakiness, which is key to perfect cod. Set your air fryer to preheat before cooking. This helps the fish start cooking right away. Use a light spray of oil if you prefer extra crispiness. Make sure to brush on enough garlic butter for flavor. Don’t forget to save some butter for drizzling after cooking! Always serve the cod hot with fresh lemon wedges. This adds brightness and a zesty kick to each bite. Pro Tips Pat the Fish Dry: Ensuring the cod fillets are dry before seasoning helps achieve a crispy exterior when cooked in the air fryer. Use Fresh Ingredients: Fresh garlic, parsley, and lemon zest will enhance the overall flavor of the dish significantly compared to dried or pre-packaged alternatives. Check for Doneness: Start checking the cod's doneness at the 8-minute mark to ensure it remains moist and doesn't overcook. Extra Garlic Butter: Drizzling additional garlic butter on the cooked cod before serving adds a rich flavor and makes the dish even more indulgent. {{image_4}} You can change the flavor of your cod by using different herbs and spices. Try fresh dill for a bright taste. You can also use thyme or basil for a more aromatic dish. If you love heat, add some crushed red pepper flakes. Experiment with flavors to find what you like best! While cod is delicious, you can use other fish too. Try halibut or tilapia for a similar texture. Salmon works well too, but it has a richer taste. Just keep an eye on the cooking time, as different fish can cook faster or slower than cod. Pair your cod with tasty side dishes to make a complete meal. Steamed veggies like broccoli or green beans add color and nutrients. You can also serve it with a light salad for freshness. For a heartier option, try serving it with quinoa or rice. These sides complement the garlic butter flavor perfectly and make your dish more filling. After enjoying your air fryer cod, let it cool down. Place the cod in an airtight container. Store it in the fridge. It will stay fresh for up to three days. This method keeps the fish moist and tasty. Avoid leaving it out for too long, as it can spoil quickly. To reheat your leftover cod, use the air fryer again. Preheat it to 350°F (175°C). Place the cod in the basket for about 5 to 7 minutes. This method will keep the cod crispy. Check it often to ensure it doesn't overcook. You can also use a microwave if you're in a hurry, but it may not be as crispy. If you want to save cod for later, freezing is a great option. Wrap each fillet tightly in plastic wrap. Then place them in a freezer bag. Remove as much air as possible before sealing. You can freeze the cod for up to three months. When you're ready to enjoy it, thaw it in the fridge overnight before reheating. You should cook cod in an air fryer for about 10 to 12 minutes. Start checking at 8 minutes. The cod is done when it flakes easily with a fork. Cooking time may vary based on your air fryer model and the thickness of the fillets. Always cook until the fish looks opaque throughout. Yes, you can use frozen cod fillets. However, they will need extra cooking time. I recommend adding about 5 to 6 minutes to the cooking time. Remember to check for doneness as you cook. If the fillets are very thick, you may need to adjust the time more. Air fryer cod pairs well with many sides. Here are some ideas: - Steamed vegetables like broccoli or green beans - A fresh salad with lemon vinaigrette - Rice or quinoa for a hearty meal - Mashed potatoes for comfort food These sides not only complement the cod but also enhance the meal's overall appeal. Yes, air fryer cod is a healthy choice! It uses less oil than traditional frying methods. Cod is also low in calories and high in protein. The garlic butter adds flavor without overwhelming the dish. Just be mindful of the butter amount to keep it healthy. Enjoy your meal guilt-free! You now know how to make delicious air fryer cod. We covered the right ingredients, cooking steps, and tips for perfect results. Remember to try different spices and herbs for variety. Don’t forget about storage options to enjoy leftovers later. Air frying makes this dish quick, easy, and tasty. Your meals can be healthy and fun. Experiment with side dishes to complete your plate. Enjoy your tasty air fryer cod and happy cooking!

Air Fryer Cod with Garlic Butter Delightful Recipe

If you crave a quick and tasty meal, this Air Fryer Cod with Garlic Butter recipe is for you. It

- 1 cup jasmine rice - 1 cup coconut milk - 1/2 cup water - Zest of 1 lime - 2 tablespoons freshly squeezed lime juice - 1 tablespoon light brown sugar - 1/2 teaspoon sea salt - Fresh cilantro - Lime wedges Using fresh and simple ingredients makes your coconut lime rice shine. I love jasmine rice for its fragrant aroma and fluffy texture. Coconut milk gives the dish a rich, creamy feel. Fresh lime adds a zesty kick. Light brown sugar balances the flavors with a hint of sweetness. Sea salt enhances the taste and brings everything together. For garnishes, I always recommend fresh cilantro. It adds a bright green touch and fresh flavor. Lime wedges on the side let you add more zing to your rice if you wish. This dish is all about fresh, vibrant flavors that transport you to a tropical paradise. Enjoy the simple joy of these ingredients as they come together for a delightful meal. {{ingredient_image_2}} Start by rinsing the jasmine rice thoroughly under cold running water. Rinsing helps remove excess starch. This step is key to avoid sticky rice. Keep rinsing until the water runs clear. After rinsing, drain the rice well to remove any excess moisture. Next, grab a medium saucepan. Pour in 1 cup of coconut milk and 1/2 cup of water. Add the zest of 1 lime, 2 tablespoons of lime juice, 1 tablespoon of light brown sugar, and 1/2 teaspoon of sea salt. Stir the mixture gently over medium heat. Keep stirring until it just begins to warm up and reaches a gentle boil. Once boiling, carefully stir in the rinsed jasmine rice. Lower the heat to low and cover the saucepan tightly. Allow the rice to simmer for about 15 to 18 minutes. Check that the rice grains are tender and the liquid has fully absorbed. After cooking, take the saucepan off the heat but leave the lid on. Let the rice sit for 5 minutes. This resting time helps the rice become fluffy. Once rested, gently fluff the rice using a fork. Be careful not to mash the grains. Taste the rice; if you wish, adjust the flavor with a pinch more salt or an extra squeeze of lime juice. Transfer the coconut lime rice to a serving dish or individual bowls. Garnish with fresh cilantro leaves for a pop of color. Serve lime wedges on the side for an extra burst of citrus. Enjoy your delicious coconut lime rice! Rinsing rice is key to great texture. It removes extra starch, so the rice doesn’t clump. Rinse it under cold water until the water runs clear. This step keeps the rice fluffy. For cooking time, aim for 15 to 18 minutes on low heat. This allows the rice to absorb all the flavors. Adjust the lime juice and salt to your taste. Start with what the recipe says, then add more if needed. Using organic lime gives a zestier flavor. The zest adds brightness, while the juice balances sweetness from the brown sugar. Coconut lime rice pairs well with many proteins. Try it alongside grilled chicken, shrimp, or tofu. For a fun twist, serve it with fish tacos or as a bed for stir-fried veggies. You can also use it as a base for a tropical bowl with fresh fruit. Enjoy experimenting with how you serve this dish! Pro Tips Rinse the Rice: Thoroughly rinsing the jasmine rice helps to remove excess starch, resulting in a fluffier texture that won’t clump together. Use Fresh Ingredients: For the best flavor, opt for fresh lime juice and organic limes. Fresh ingredients enhance the overall taste of the dish. Let it Rest: After cooking, allow the rice to sit covered for a few minutes. This steaming process ensures a light and fluffy texture. Adjust Flavors: Taste the rice before serving and feel free to adjust with more lime juice or salt to suit your personal preference. {{image_4}} You can easily add ingredients to coconut lime rice for more flavor. - Incorporating vegetables: Try adding diced bell peppers, carrots, or peas. These add color and crunch. Cook them with the rice or steam them lightly before mixing. - Mixing in nuts or seeds: Chopped cashews or toasted sesame seeds can add a delightful crunch. Stir them in after cooking for a tasty twist. Switching the type of rice can change the dish's texture and flavor. - Using brown rice: Brown rice gives a nuttier flavor and is more nutritious. Just remember, it takes longer to cook, about 40-45 minutes. - Alternative grains like quinoa: Quinoa is a great gluten-free option. It cooks faster than brown rice and adds a fluffy texture. Use a 2:1 water ratio for best results. You can play with flavors to make coconut lime rice your own. - Experimenting with different citrus zest: Try orange or lemon zest for a different citrus kick. Each brings a unique flavor profile to the dish. - Adding spices like cumin or ginger: A pinch of cumin adds warmth, while fresh ginger gives a bright, spicy note. Mix these in during the cooking phase for the best flavor fusion. To keep your coconut lime rice fresh, use proper storage containers. I recommend airtight glass containers. They prevent moisture loss and keep flavors intact. Let the rice cool down to room temperature before storing. This helps avoid condensation inside the container. After cooling, seal the container and place it in the fridge. Coconut lime rice stays good for up to four days in the refrigerator. When it's time to enjoy your leftovers, reheating properly is key. Use a microwave or stovetop for the best results. If using a microwave, place the rice in a bowl. Add a splash of water to keep it moist. Cover the bowl with a damp paper towel. Heat it in short bursts, stirring in between. If you use the stovetop, warm the rice over low heat. Stir in a little water to avoid stickiness. This method helps keep the rice fluffy and delicious. Yes, you can use other rice types. Here are some alternative rice options: - Basmati rice: This rice adds a nice aroma. - Brown rice: It offers a nuttier flavor and more fiber. - Wild rice: This gives a chewy texture and earthy taste. - Quinoa: A gluten-free option packed with protein. Each option may change the cooking time and texture. Adjust the water ratios as needed for best results. To make coconut lime rice vegan, ensure all ingredients are plant-based. Here’s how: - Use coconut milk: It’s naturally vegan. - Choose light brown sugar or a vegan alternative. - Ensure no animal-based products are in any added flavors. This way, you can enjoy a creamy and zesty dish without animal products. Coconut lime rice pairs well with many dishes. Here are some suggested pairings: - Grilled chicken: The rice complements the smoky flavor. - Fish tacos: The zesty rice balances the spices. - Stir-fried vegetables: Adds color and nutrition. - Black beans: A hearty, protein-rich option. Try these pairings to create a delicious meal that shines! In this article, I covered how to make delicious coconut lime rice. I discussed key ingredients like jasmine rice, coconut milk, and fresh lime. You learned easy steps for preparation and cooking, plus tips to enhance flavor. I shared fun variations, storage tips, and answers to common questions. Coconut lime rice is not just tasty; it's also flexible. You can customize it to fit any meal. Enjoy your cooking journey, and have fun trying new flavors!

Coconut Lime Rice Flavorful and Simple Recipe Guide

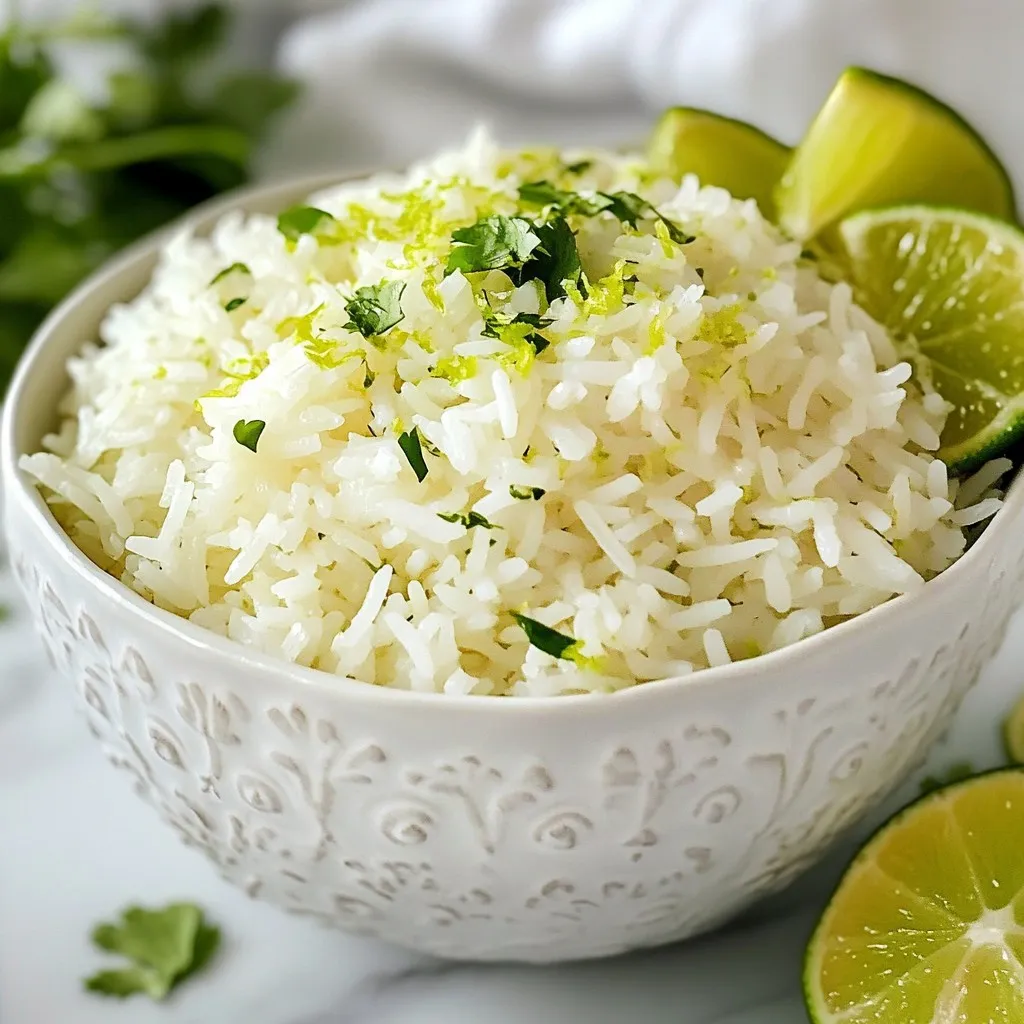
If your taste buds crave something fresh and exciting, you’ll love this Coconut Lime Rice recipe. It’s not just simple

To make Chocolate Chip Banana Protein Muffins, you will need the following ingredients: - Ripe bananas (2) - Rolled oats or oat flour (1 cup) - Vanilla-flavored protein powder (1/2 cup) - Almond milk or preferred milk variety (1/2 cup) - Honey or maple syrup (1/4 cup) - Unsweetened cocoa powder (1/4 cup) - Baking powder (1 teaspoon) - Baking soda (1/2 teaspoon) - Ground cinnamon (1/2 teaspoon) - Dark chocolate chips (1/2 cup, optional) - Salt (1/4 teaspoon) These ingredients come together to create a delicious, nutritious muffin. The ripe bananas add natural sweetness and moisture. I love using rolled oats or oat flour, as they bring a hearty texture. The vanilla protein powder boosts the protein content, making these muffins a great post-workout snack. Almond milk gives a nice creaminess, while honey or maple syrup sweetens the mix naturally. Cocoa powder adds a rich chocolate flavor that pairs perfectly with bananas. Baking powder and baking soda help the muffins rise nicely, and ground cinnamon adds warmth. If you want extra indulgence, I highly recommend adding dark chocolate chips. Each ingredient plays a role, making these muffins not only tasty but also healthy. Let’s gather these ingredients and get ready to bake! {{ingredient_image_2}} - Preheat the oven to 350°F (175°C). - Prepare the muffin tin with liners or cooking spray. Start by getting your oven nice and warm. This step is key to making sure your muffins rise well. While the oven heats up, grab your muffin tin. You can use paper liners or spray it with cooking spray. This will help your muffins come out easily. - Mash bananas and combine with almond milk and honey. Next, take your ripe bananas and mash them well in a bowl. You want them smooth so they mix nicely. Then, add the almond milk and honey. Stir it all together until it looks blended. This mix will give your muffins great flavor and sweetness. - Whisk together oats, protein powder, cocoa powder, and leavening agents. In another bowl, take your rolled oats or oat flour. Add the protein powder, cocoa powder, baking powder, baking soda, ground cinnamon, and salt. Whisk these dry ingredients together. This mix adds texture and helps your muffins rise. - Gradually incorporate dry ingredients into wet. Now, take your dry mix and slowly add it to the wet banana mixture. Stir gently. You want to mix just until they come together. If you mix too much, your muffins might get dense. - Gently fold in dark chocolate chips. Time for the fun part! Take your dark chocolate chips and fold them into the batter. Be gentle so the chips stay whole and spread throughout the muffins. This will add a nice chocolatey surprise in every bite. - Portion batter into muffin cups and bake. Now, scoop the batter into your muffin cups. Fill each cup about three-quarters full. This gives them space to rise as they bake. Place the muffin tin in the oven and bake for 15 to 20 minutes. Check them by inserting a toothpick. If it comes out clean or with a few crumbs, they're done. - Allow muffins to cool and transfer to a wire rack. Once baked, take the muffins out of the oven. Let them cool in the tin for about five minutes. Then, carefully transfer them to a wire rack. This helps them cool evenly. Enjoy the amazing smell while they cool down! To make the best muffins, avoid over-mixing your batter. Stir gently until just combined. This keeps your muffins light and fluffy. Use ripe bananas for optimal sweetness. The brown spots on the bananas mean they are perfect for baking. You can add spices for extra flavor. Try a pinch of nutmeg or vanilla extract. A splash of almond extract can bring a nice twist, too. These small additions elevate the taste of your muffins. For a great look, garnish your muffins before serving. Dust them lightly with cocoa powder for a touch of elegance. You can also sprinkle a few chocolate chips on top. Serving with Greek yogurt adds creaminess and makes it special. Pro Tips Choose Ripe Bananas: The riper the bananas, the sweeter and more flavorful your muffins will be. Look for bananas with lots of brown spots for the best results. Oat Flour Alternative: If you prefer a smoother texture, consider using oat flour instead of rolled oats. It will give your muffins a finer crumb. Monitor Baking Time: Keep an eye on your muffins during the last few minutes of baking. Ovens can vary, and you want to avoid overbaking for a moist texture. Store Properly: To keep your muffins fresh, store them in an airtight container at room temperature for up to 3 days or freeze them for longer storage. {{image_4}} If you want to make these muffins nut-free, you have easy choices. Just swap the almond milk for oat milk or soy milk. For the flour, use sunflower seed flour or just stick to rolled oats. These swaps still keep the muffins tasty and moist. Going vegan? It's simple! Replace honey with maple syrup. This keeps the sweetness but makes it plant-based. You should also use plant-based protein powder instead of the regular kind. This way, you can enjoy a delicious muffin without any animal products. Want to add more flavor? You can customize these muffins with mix-ins. Consider adding nuts like walnuts or pecans for crunch. Seeds like chia or flax can add extra nutrients. Dried fruits, like cranberries or raisins, work well too. Choose what you love to make each batch unique! To keep your Chocolate Chip Banana Protein Muffins fresh for a few days, store them in an airtight container. This method helps keep moisture in while preventing them from drying out. You can also place a piece of bread inside the container. The bread will help maintain softness. If you prefer, wrap each muffin in plastic wrap. This choice works well too. Store the container at room temperature for up to three days. If you want them to last longer, consider the fridge. They can stay fresh for up to a week there. If you want to keep muffins for later, try freezing them. First, let the muffins cool completely. Then, wrap each muffin tightly in plastic wrap. After wrapping, place them in a freezer-safe bag or container. Label the bag with the date to track freshness. These muffins can stay in the freezer for up to three months. When you are ready to eat, simply take out a muffin. Let it thaw overnight in the fridge or at room temperature for a few hours. You can also heat them directly from the freezer if you prefer a warm muffin. To warm your muffins, you have a few options. The oven method is great for keeping them soft. Preheat the oven to 350°F (175°C). Place the muffins on a baking sheet and heat for about 10 minutes. This method will revive their fresh-baked taste. You can also use a microwave for a quick option. Place a muffin on a microwave-safe plate. Heat for about 15-20 seconds. Check if it's warm enough; if not, heat for a few more seconds. Enjoy your muffins warm for the best flavor! To make these muffins gluten-free, you can use gluten-free flour. Here are some great options: - Almond flour: Adds moisture and a slight nuttiness. - Coconut flour: Absorbs more liquid, so use less than regular flour. - Gluten-free all-purpose flour: A simple 1:1 swap for regular flour. - Oat flour: If you use rolled oats, blend them into a fine flour. Make sure to check the labels to ensure they are gluten-free. You can use fresh bananas, but overripe ones are best. Overripe bananas are sweeter and softer. They give the muffins a moist texture. Fresh bananas may not mash as easily, leading to a denser muffin. Using ripe bananas will also enhance the flavor. If you don't have protein powder, here are some good substitutes: - Greek yogurt: Adds protein and moisture. Use about half a cup. - Cottage cheese: Blend it for a smooth texture. Use the same amount. - Nut butter: Adds protein and flavor. Use 1/4 cup for best results. - Chia seeds: Mix with water to form a gel, adding protein and nutrition. These options can change the texture and taste slightly, but they work well. These muffins can stay fresh for about 3 to 5 days at room temperature. Store them in an airtight container to keep them moist. You can also freeze them for up to 3 months. Wrap each muffin tightly in plastic wrap. When ready to eat, thaw them at room temperature or warm them in the microwave. Look for signs of mold or an off smell to check freshness. You learned about making tasty banana chocolate muffins. We covered key ingredients, step-by-step instructions, and helpful tips. Remember to use ripe bananas for the best flavor. You can customize these muffins with your favorite mix-ins. Store extra muffins well to enjoy later. Cooking should be fun and creative. I hope you try this recipe and share it with others. These muffins are easy to make and taste great! Enjoy your baking adventure!

Chocolate Chip Banana Protein Muffins Easy Recipe

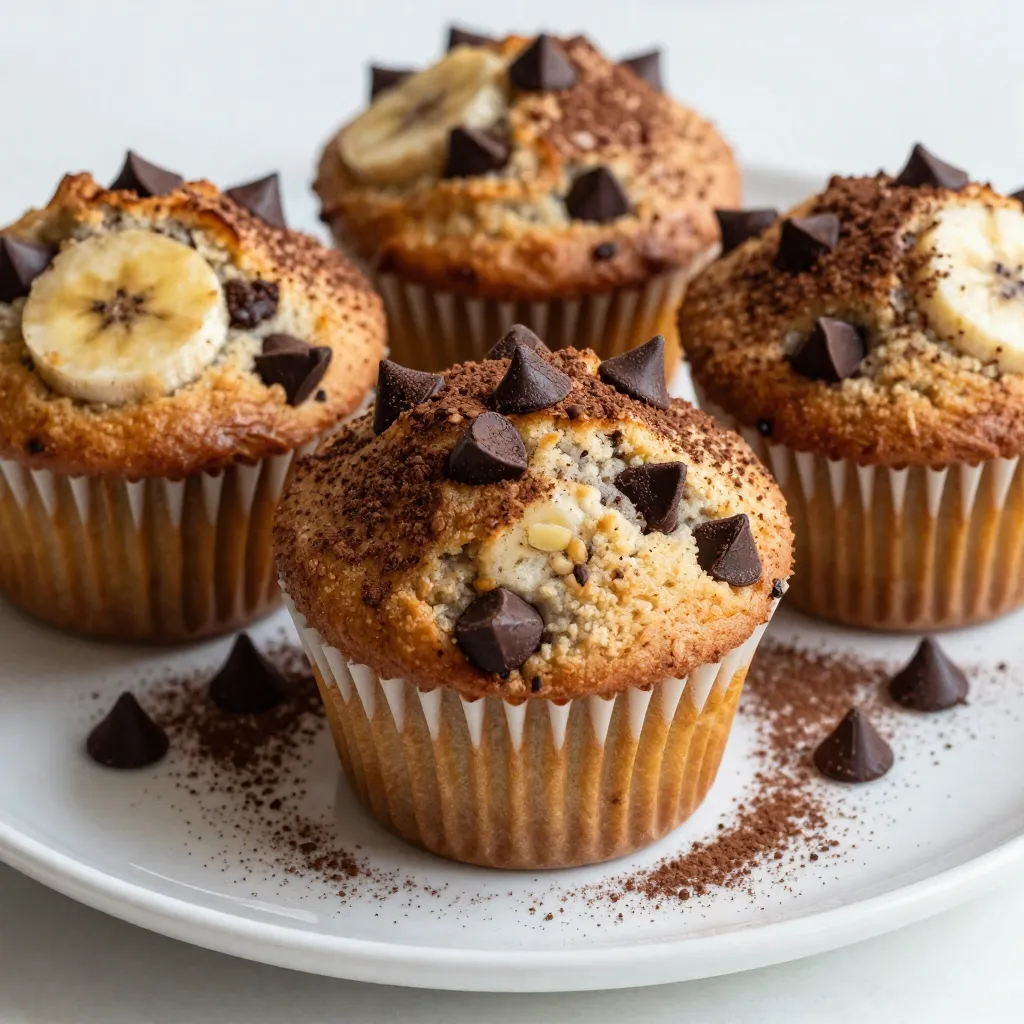
Looking for a tasty and healthy snack? These Chocolate Chip Banana Protein Muffins are perfect! Made with ripe bananas and

To make a tasty Chicken Caesar Salad Pizza, you'll need some simple ingredients. Here’s the list to get you started: - Pre-made or homemade pizza crust - 1 cup cooked chicken breast, shredded - 1 cup romaine lettuce, chopped - 1/2 cup Caesar dressing - 1/2 cup cherry tomatoes, halved - 1/4 cup Parmesan cheese, grated - 1/4 cup croutons, crushed - 1 teaspoon garlic powder - 1 teaspoon olive oil - Salt and pepper to taste Each ingredient plays a key role in creating that fresh and flavorful taste. The chicken adds protein and heartiness. The romaine lettuce gives a crunchy texture, while the Caesar dressing brings a creamy, tangy flavor. The cherry tomatoes add a sweet burst, and the Parmesan cheese provides a salty kick. Croutons finish the dish with extra crunch. Using a pre-made crust saves time, but making your own can add a personal touch. Don’t forget to season the chicken well; garlic powder, salt, and pepper elevate the flavor. Enjoy crafting this dish! {{ingredient_image_2}} First, set your oven to 425°F (220°C). This step is key. A hot oven helps make the crust crispy. Next, take your pizza crust. If you bought one, place it on a baking sheet. If you made your own, roll it into a circle and lay it on your pan. In a bowl, add the shredded chicken. Sprinkle in garlic powder, olive oil, salt, and pepper. Mix it well. Each piece of chicken should be covered in flavor. Spread half of the Caesar dressing on the pizza crust. Leave a small edge around the sides. This helps keep the crust strong. Now, add the seasoned chicken over the dressing. Then, place the halved cherry tomatoes on top. Finally, sprinkle grated Parmesan cheese all over. Put the pizza in your hot oven. Bake it for 10-12 minutes. Look for a golden brown crust. It should be crispy when done. While the pizza bakes, grab another bowl. Toss the chopped romaine with the rest of the Caesar dressing. Make sure all the lettuce is covered. Once the pizza is out of the oven, let it cool for about one minute. Top it with the dressed romaine lettuce. Then, add crushed croutons over everything. Cut the pizza into slices. Serve it right away. If you want, add more grated Parmesan cheese on top. Enjoy your tasty creation! A good crust is key. Start with a quality pre-made crust or make your own. If you use store-bought, choose one that is thick and sturdy. For homemade, use a simple dough recipe. Roll it out evenly. A uniform thickness helps the crust cook well. To get a crispy crust, preheat your oven to 425°F. Place your pizza directly on a hot pizza stone or a baking sheet. This method helps the bottom crisp up. Brush a little olive oil on the crust before baking. It adds flavor and color. Making your own Caesar dressing is easy. Combine 1/2 cup mayonnaise, 1 tablespoon lemon juice, 1 teaspoon Dijon mustard, and 1 clove of minced garlic. Whisk until smooth. Add salt and pepper to taste. This fresh dressing makes your pizza taste even better. Presentation matters. Serve your pizza on a wooden cutting board for a nice touch. Add fresh herbs, like parsley, for color. Offer extra Caesar dressing and grated Parmesan on the side. This lets everyone customize their slices for more fun. Pro Tips Use Fresh Ingredients: Opt for fresh romaine lettuce and high-quality chicken for the best flavor and texture in your pizza. Customize Your Crust: Experiment with different pizza crusts, such as whole wheat or gluten-free, to cater to dietary preferences. Adjust the Dressing: Feel free to add more or less Caesar dressing based on your personal taste; a light drizzle can enhance the flavor without overwhelming the pizza. Make it Extra Crunchy: For added texture, toast your croutons in the oven for a few minutes before topping your pizza. {{image_4}} You can make a great vegetarian Chicken Caesar Salad Pizza. Start by swapping the chicken for grilled veggies. Use bell peppers, zucchini, and mushrooms for flavor. You can also add some chickpeas for extra protein. Keep the Caesar dressing and all other toppings the same. This gives you a fresh twist on the classic. For a gluten-free Chicken Caesar Salad Pizza, use a gluten-free pizza crust. Many stores sell these now. Check the labels to find the best option. You can also make your own crust using almond flour or cauliflower. This way, you can enjoy the flavors without the gluten. Want to mix it up? Here are some tasty ideas: - Add sliced olives for a briny kick. - Try avocado slices for creaminess. - Toss on some artichoke hearts for extra texture. - Use different cheeses like feta or mozzarella. These toppings can make your pizza even more exciting! To keep your Chicken Caesar Salad Pizza fresh, store it in the fridge. First, let the pizza cool completely. Then, place it in an airtight container. You can also wrap it tightly with plastic wrap. This way, it stays fresh for up to three days. When you're ready to eat the leftover pizza, reheating is key. Preheat your oven to 350°F (175°C). Place the pizza on a baking sheet. Heat it for about 10 minutes. This method keeps the crust crispy. You can also use a microwave. If you do, heat it for 30 seconds at a time. This way, you avoid a soggy crust. If you want to save pizza for later, freezing works well. Slice the pizza first, then wrap each slice in plastic wrap. Place the wrapped slices in a freezer-safe bag. Squeeze out as much air as possible. This helps prevent freezer burn. Your pizza can last about two months in the freezer. When you’re ready to enjoy it, thaw in the fridge overnight before reheating. You can use ranch dressing, blue cheese dressing, or a vinaigrette. Each option adds a unique flavor. If you want a lighter choice, try Greek yogurt mixed with lemon juice and garlic. This gives a fresh twist while keeping it creamy. Yes, rotisserie chicken works great! It saves time and adds flavor. Just shred the chicken and mix it with seasonings. Using rotisserie chicken makes this dish faster and still tasty. Chicken Caesar Salad Pizza lasts about 3 to 4 days in the fridge. Store it in an airtight container. To keep it fresh, eat it within this time frame. Yes, you can make this pizza for meal prep. Prepare the pizza and store it uncooked in the fridge. When ready, bake it fresh. You can also store slices for quick meals. This article covered how to make Chicken Caesar Salad Pizza, featuring easy ingredients and steps. You learned to prepare the crust, season the chicken, and layer toppings. I shared tips for a crispy crust and options for variations, including vegetarian and gluten-free. Don't forget how to store leftovers and reheat them. Making this pizza is fun and tasty. Try it out! Your taste buds will thank you. Enjoy your cooking!

Chicken Caesar Salad Pizza Flavorful and Fresh Dish

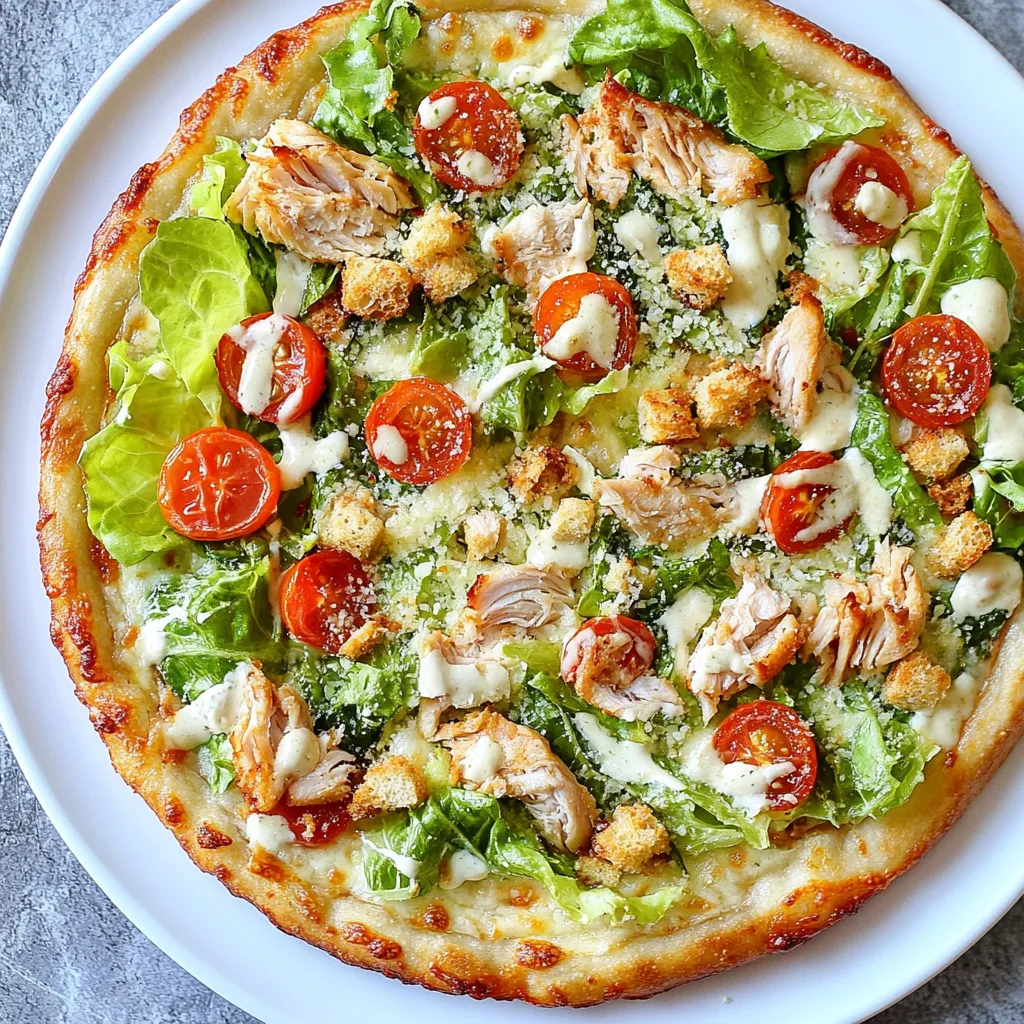
Are you ready to take your pizza game to new heights? Introducing Chicken Caesar Salad Pizza—a fresh twist on two

- 1 cup quinoa, thoroughly rinsed - 1 cup black beans, rinsed and drained - 1 cup corn, either fresh off the cob or frozen - 1 red bell pepper, diced into bite-sized pieces - 1 jalapeño, finely chopped (seeds removed for a milder flavor) - 1/2 red onion, finely chopped - 1 avocado, diced into cubes - 1/4 cup fresh cilantro, roughly chopped The main ingredients in this salad bring bright colors and bold flavors. Quinoa serves as the base, giving you protein and fiber. Black beans add heartiness and a nice texture. Corn brings sweetness, while the red bell pepper and jalapeño provide crunch and heat. The onion adds a sharp note, and avocado gives a creamy touch. Finally, cilantro adds freshness that ties everything together. - Juice of 2 limes (about 1/4 cup) - 2 tablespoons extra virgin olive oil - 1 teaspoon ground cumin - 1/2 teaspoon smoked paprika - Salt and freshly cracked black pepper, to taste The dressing is simple yet packs a punch. Lime juice brightens the flavors while olive oil adds richness. Ground cumin and smoked paprika give warmth and depth. A sprinkle of salt and black pepper balances everything perfectly. - Crumbled feta cheese for a savory topping Feta is a great optional ingredient. It adds a salty bite and a creamy texture that enhances the salad. You can add it if you like a bit more flavor or richness. This salad is a fun mix of tastes and textures. You can easily customize it to your liking with different ingredients or toppings. Enjoy experimenting! {{ingredient_image_2}} - First, rinse 1 cup of quinoa under cold water. This removes the bitter coating called saponin. - In a medium saucepan, add the rinsed quinoa and 2 cups of vegetable broth or water. - Bring the mixture to a rolling boil over medium heat. - Once it boils, reduce the heat to low. Cover it tightly and let it simmer for about 15 minutes. - After the time is up, remove it from heat and let it sit, covered, for 10 minutes. - Use a fork to fluff the quinoa gently. This makes the grains light and airy. - In a large mixing bowl, add 1 cup of black beans, rinsed and drained. - Next, mix in 1 cup of corn, fresh or frozen. - Add 1 diced red bell pepper, 1 finely chopped jalapeño, and 1/2 finely chopped red onion. - Toss in 1/4 cup of fresh cilantro, roughly chopped. Mix all these ingredients well. - After the quinoa cools, fold it into the vegetable mixture. Be gentle to keep the quinoa fluffy. - In a small bowl, whisk together the juice of 2 limes, about 1/4 cup, with 2 tablespoons of extra virgin olive oil. - Add 1 teaspoon of ground cumin and 1/2 teaspoon of smoked paprika. - Season with salt and freshly cracked black pepper. Whisk until combined. - Drizzle the dressing over the salad and toss gently to coat all the ingredients. - Carefully fold in the diced avocado without mashing it. - You can sprinkle crumbled feta cheese on top if you like. This adds a savory touch before serving. - Serve the salad in a large bowl or in single servings. - For a colorful look, add lime wedges and extra cilantro on top. - Add spices like cayenne for heat and oregano for depth. - Top with crumbled feta cheese for a creamy touch. - Rinse quinoa well to remove bitter saponins. This helps make it taste good. - Chop vegetables into small, even pieces for a nice mix and bite. Pro Tips Rinse the Quinoa: Always rinse quinoa under cold water before cooking to remove its natural coating, called saponin, which can make it taste bitter. Cool the Quinoa: Let the cooked quinoa cool down before mixing it with other ingredients to maintain their freshness and prevent mushiness. Customize Your Veggies: Feel free to swap in your favorite vegetables or whatever you have on hand, such as cherry tomatoes, cucumber, or zucchini for added flavor and texture. Make It Ahead: This salad can be made a day in advance; just store it in an airtight container in the fridge. The flavors will meld beautifully overnight! {{image_4}} You can make this salad even heartier. Try adding grilled chicken. It adds a nice smoky flavor. Shrimp is another great choice. Cook it until pink and tender. If you want a plant-based option, use tofu. Just grill or sauté the tofu until golden brown. Each protein brings new taste to the salad. Feel free to switch up the veggies. You can use cherry tomatoes instead of bell pepper. Zucchini or cucumber also works well. If you want a different bean, try chickpeas or kidney beans. Each swap adds a new twist. This salad is all about your taste. Dressing makes a big difference in flavor. For a creamy touch, try adding avocado dressing. It gives a nice richness. You can also use different vinaigrettes. A balsamic vinaigrette can add sweetness. A lemon vinaigrette brings a bright zing. Adjust the dressing to match your mood! To keep your Southwest Quinoa Salad fresh, store it in the fridge. Place it in an airtight container. This helps to prevent moisture loss and keeps flavors intact. I recommend using glass containers. They are easy to clean and do not stain or smell. You can freeze the salad if you want to save it for later. First, separate the components. Freeze the quinoa and beans together. You can freeze the vegetables in a different bag. Avoid freezing the avocado, as it does not freeze well. When you want to eat it, thaw everything in the fridge overnight. Reheat the quinoa gently in the microwave before serving. In the fridge, the salad lasts about three to four days. Check for signs of spoilage before eating. Look for a sour smell, slimy texture, or discoloration. If you notice any of these signs, do not eat it. Enjoy your meal while it is fresh! To make quinoa fluffy, rinsing is key. Rinse the quinoa under cold water. This removes the bitter coating called saponin. It helps the grains taste better. Next, use the right water ratio. I like two cups of broth or water for one cup of quinoa. Bring the mixture to a boil. Then reduce the heat and cover it. Let it simmer for about 15 minutes. After cooking, let it sit for 10 minutes. This resting period helps the grains finish cooking. Finally, fluff the quinoa gently with a fork. This lightens the grains and makes them airy. Yes, you can make this salad ahead of time. I recommend storing it in the fridge for up to three days. To keep the flavors fresh, store the dressing separately. Add it right before you serve. This way, the veggies stay crisp, and the flavors shine. Southwest Quinoa Salad is very healthy. Quinoa is a complete protein. It has all nine essential amino acids. Black beans add fiber and protein, making this dish filling. Fresh veggies like bell peppers and corn offer vitamins and minerals. Avocado provides healthy fats that are great for your heart. This salad is not only tasty but also full of good nutrients. This blog covered how to make a tasty Southwest Quinoa Salad. We explored the main ingredients like quinoa, black beans, and fresh veggies. I shared step-by-step instructions on cooking and mixing for a delicious result. We also discussed tips for serving and adding flavor. You can try different proteins and dressings to personalize it. Storing and freezing your salad is easy, too. Enjoy this nutritious meal that’s packed with flavor! It’s a great way to get healthy foods into your diet.

Southwest Quinoa Salad Fresh and Flavorful Dish

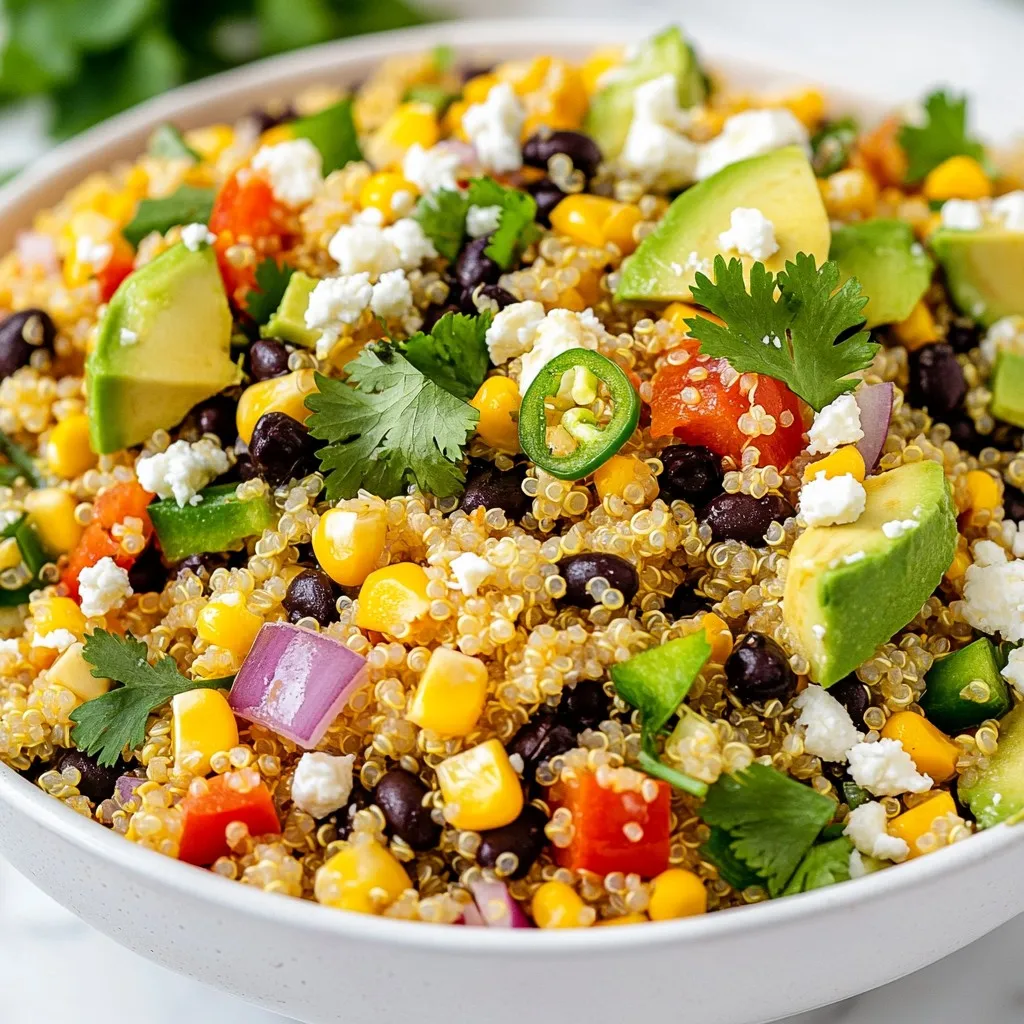
Looking for a fresh and flavorful dish? Let me introduce you to the Southwest Quinoa Salad! This vibrant salad bursts

To make Trail Mix Breakfast Cookies, gather these main ingredients: - 1 cup rolled oats - 1/2 cup almond flour - 1/4 cup honey or maple syrup - 1/2 cup nut butter (choose peanut, almond, or cashew) - 1/2 cup mixed nuts (like walnuts, almonds, or pecans) - 1/2 cup dried fruit (cranberries, raisins, or chopped apricots) - 1/4 cup dark chocolate chips (optional) - 1 teaspoon vanilla extract - 1/2 teaspoon baking powder - 1/4 teaspoon salt - 1/2 teaspoon ground cinnamon These ingredients create a tasty mix that will keep you full. The oats provide fiber, while nut butter adds healthy fats. Feel free to customize your cookies. You can swap almond flour for whole wheat flour. Instead of honey, use agave syrup for a vegan version. Want more crunch? Add seeds like pumpkin or sunflower. You can also mix in coconut flakes or spices like nutmeg for a unique twist. - Rolled oats: Great for heart health and provide lasting energy. - Almond flour: Low in carbs and high in protein and vitamins. - Honey or maple syrup: Natural sweeteners with antioxidants. - Nut butter: Packed with protein and healthy fats for fullness. - Mixed nuts: Offer fiber, protein, and healthy fats. - Dried fruit: Adds natural sweetness and vitamins. - Dark chocolate chips: A treat with antioxidants when used in moderation. - Vanilla extract: Enhances flavor without added sugar. - Baking powder: Helps cookies rise and stay soft. - Salt: Balances sweetness and enhances flavors. - Ground cinnamon: Adds warmth and may help regulate blood sugar. Every ingredient contributes to a wholesome snack, making these cookies not just tasty, but also good for you. {{ingredient_image_2}} 1. Preheat your oven to 350°F (175°C). Line a baking sheet with parchment paper. 2. In a large bowl, mix 1 cup of rolled oats, 1/2 cup of almond flour, 1/2 teaspoon of baking powder, 1/4 teaspoon of salt, and 1/2 teaspoon of ground cinnamon. Use a whisk to blend well. 3. In a second bowl, combine 1/2 cup of nut butter, 1/4 cup of honey or maple syrup, and 1 teaspoon of vanilla extract. Stir until smooth. 4. Pour the wet mix into the dry mix. Fold them together until a thick dough forms. 5. Add 1/2 cup of chopped mixed nuts, 1/2 cup of dried fruit, and 1/4 cup of dark chocolate chips, if using. Mix until evenly spread. 6. Use a cookie scoop or tablespoon to drop dough onto the baking sheet. Leave about 2 inches between each cookie. 7. Slightly dampen your fingers and flatten each dough mound into a disc. This helps them bake evenly. 8. Bake for 12-15 minutes. The edges should be golden brown. The centers should feel set. 9. Let cookies cool on the baking sheet for 5 minutes before moving them to a wire rack. - Ensure your oven is preheated. This helps cookies bake evenly. - Use room temperature nut butter for easier mixing. - Check cookies around the 12-minute mark to avoid overbaking. - Letting them cool on the pan helps them firm up without breaking. - Mixing dry ingredients well prevents clumps. - Be careful not to overmix the dough. It should be thick but not dry. - Flatten the dough lightly. It helps cookies spread and bake uniformly. - Cooling on a wire rack is key. It ensures cookies stay soft and chewy. When making Trail Mix Breakfast Cookies, proper mixing is key. Start with your dry ingredients. Use a whisk to blend the oats, almond flour, baking powder, salt, and cinnamon. Make sure there are no lumps. This ensures even flavor and texture in each bite. Next, mix your wet ingredients separately. Whip together the nut butter, honey or maple syrup, and vanilla until smooth. Slowly add this mix to the dry ingredients. Fold gently to keep the mixture fluffy. This method avoids over-mixing, which can make cookies tough. To get the perfect cookie texture, pay attention to the dough's thickness. It should be thick, not runny. If it feels too dry, add a splash of water or more nut butter. If it's too wet, sprinkle in a bit more almond flour. Make sure to flatten the dough slightly on the baking sheet. This helps them bake evenly and gives a nice shape. Bake them until the edges are golden brown but the center is still soft. They will firm up as they cool. One common mistake is not measuring ingredients correctly. Use measuring cups and spoons for accuracy. Another mistake is skipping the preheat step. Always preheat your oven to ensure even baking. Avoid over-baking too. Check the cookies around 12 minutes. If you let them bake too long, they may turn hard. Lastly, don’t forget to let them cool on a wire rack. This helps keep the cookies chewy. Pro Tips Customize Your Mix: Feel free to personalize your trail mix by adding your favorite nuts, seeds, or even spices like nutmeg for an extra kick. Storage Tips: Store your cookies in an airtight container at room temperature for up to one week, or freeze them for longer shelf life. Make It Vegan: Substitute the honey with maple syrup and ensure your nut butter is free from animal products to keep these cookies vegan-friendly. Experiment with Add-Ins: Try adding coconut flakes, chia seeds, or protein powder to boost the nutritional value and flavor of your cookies. {{image_4}} You can change the nuts and fruits in your trail mix breakfast cookies. Use what you like! For nuts, try cashews, pistachios, or hazelnuts. You can also add seeds like pumpkin or sunflower seeds for extra crunch. For dried fruits, consider using mango, figs, or cherries. These swaps can give your cookies a unique taste. Mixing different ingredients keeps breakfast fun and exciting! If you want a different sweet taste, use other sweeteners. Instead of honey, try agave syrup or coconut sugar. Each option offers a different flavor. Maple syrup is great too; it adds a rich, earthy note. Just remember to adjust the amount. Different sweeteners may change how wet or dry your dough becomes. Taste as you mix and find what makes you smile! You can easily make these cookies gluten-free or vegan. To go gluten-free, use oat flour instead of almond flour. Just make sure your oats are certified gluten-free. For a vegan option, replace honey with maple syrup or agave. Nut butter is usually vegan, but double-check the brand. These changes let everyone enjoy a tasty breakfast cookie! To keep your Trail Mix Breakfast Cookies fresh, store them in an airtight container. Place a piece of parchment paper between layers to prevent sticking. Keep the container in a cool, dry place away from sunlight. This method helps maintain their chewy texture and flavor. Freezing cookies is easy! First, let them cool completely. Then, place cookies in a single layer on a baking sheet. Freeze for about an hour. Once firm, transfer them to a freezer-safe bag or container. Label with the date for easy tracking. You can enjoy these cookies for up to three months! Trail Mix Breakfast Cookies last about a week at room temperature. They stay fresh longer if stored in the fridge. If you freeze them, they can last for months. Just remember to thaw them overnight in the fridge before eating. This keeps them tasty and enjoyable! Yes, you can use different flours. Almond flour is great for a nutty flavor. You can also try oat flour or whole wheat flour. Each flour changes the texture a bit. Almond flour makes cookies soft and moist. Whole wheat flour gives a denser bite. Just remember to check baking times. Different flours may need slight adjustments. To make these cookies healthier, you can reduce the sweetener. Try using less honey or maple syrup. You can also add more dried fruits or seeds. Adding chia seeds or flaxseeds boosts fiber. Swap some of the nut butter with applesauce for less fat. These small changes keep the taste but cut extra calories. You can substitute nut butter with sunflower seed butter. This option is nut-free and still creamy. If you want a low-fat choice, use Greek yogurt. It adds protein and moisture. Each substitute brings a different flavor. Just ensure it matches your taste preferences. Yes, several egg alternatives work well. You can use a flaxseed meal mixed with water. One tablespoon of flaxseed meal mixed with three tablespoons of water equals one egg. Mashed banana or applesauce also works. Each option keeps cookies moist and tender. Just remember, it might change the flavor slightly. You learned about making tasty trail mix breakfast cookies. We covered key ingredients, how to prepare them, and tips for baking. You can mix and match ingredients to fit your taste. Remember to store cookies well to keep them fresh. Enjoy the cookies you create and share them with others. These treats can fit many diets and preferences. Now you have all you need to bake your own trail mix breakfast cookies. Enjoy the process and the delicious results!

Trail Mix Breakfast Cookies Tasty and Nutritious Treat

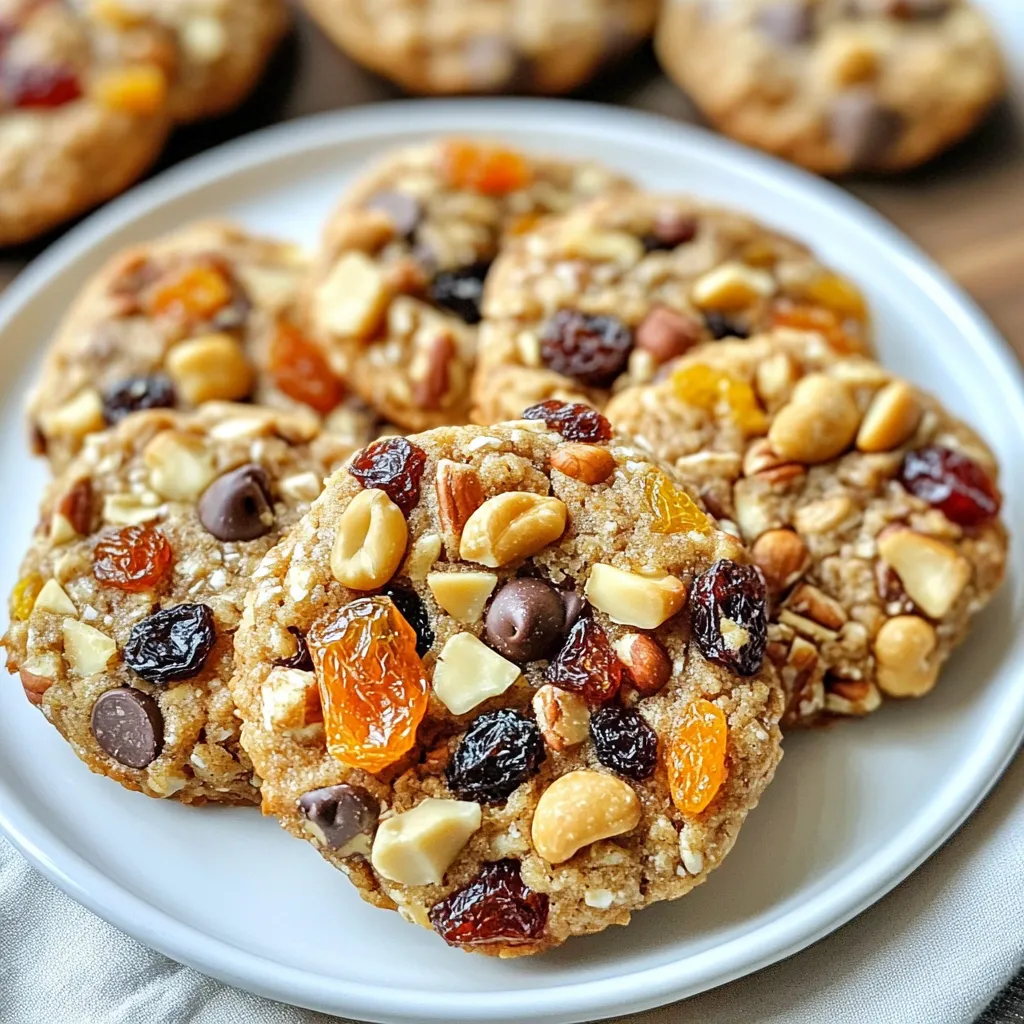
Looking for a quick and tasty breakfast? These Trail Mix Breakfast Cookies are the perfect answer! Packed with nutrients, they

- 1 lb ground beef (or substitute with ground turkey) - 1/2 cup panko breadcrumbs - 1/4 cup green onions, finely chopped - 2 cloves garlic, minced - 1 teaspoon fresh ginger, grated - 1 large egg, beaten - 1/3 cup teriyaki sauce (store-bought or homemade) - Salt and pepper to taste For the teriyaki meatballs, I like to use ground beef or turkey. Both work great! Panko breadcrumbs help make the meatballs tender and light. Green onions add a fresh taste. Garlic and ginger bring strong flavors. A beaten egg holds everything together. Teriyaki sauce gives a sweet and savory finish, while salt and pepper add flavor. - 2 cups jasmine rice, cooked according to package instructions - 1 cup broccoli florets, steamed until bright green - 1/2 cup carrots, shredded - Sesame seeds for garnishing For the base, I always use jasmine rice. It complements the meatballs perfectly. Steamed broccoli gives a nice crunch and bright color. Shredded carrots add sweetness and texture. Finally, sesame seeds add a lovely crunch and nutty flavor to the dish. - Salt and pepper to taste - Additional spices for customization You can adjust the salt and pepper to your taste. If you want to change things up, try adding other spices. A dash of chili flakes can add heat. Or, mix in some herbs like cilantro for freshness. This recipe is easy to customize based on what you enjoy. {{ingredient_image_2}} 1. Preheat your oven to 400°F (200°C). Line a baking sheet with parchment paper. This makes cleanup easy. 2. In a large bowl, mix your ground beef or turkey with panko breadcrumbs. Add finely chopped green onions, beaten egg, minced garlic, and grated ginger. 3. Season the mixture with a pinch of salt and pepper. Use your hands to mix everything together. Be careful not to overmix. 1. Shape the mixture into 1-inch meatballs. Make sure they are all the same size. This helps them cook evenly. 2. Place the meatballs on the baking sheet, leaving space between each one. This allows air to circulate. 3. Bake the meatballs for 20-25 minutes. They should be golden brown and reach an internal temperature of 165°F. 1. Cook your jasmine rice according to the package instructions. 2. Steam the broccoli until it turns bright green. Shred the carrots for a fresh touch. 3. Warm your teriyaki sauce in a small saucepan over low heat. Stir it gently to avoid sticking. 4. Once the meatballs are done, put them in a bowl. Pour the warm teriyaki sauce over them and toss lightly. 5. To build your bowls, add a scoop of rice at the bottom. 6. Place the teriyaki meatballs on top of the rice. Surround them with steamed broccoli and shredded carrots. 7. Drizzle extra teriyaki sauce over the top and sprinkle sesame seeds for crunch. To get the best meatball texture, avoid overmixing. When you mix the ground beef or turkey with the other ingredients, do it gently. Overmixing can make the meatballs tough. Instead, just mix until everything is combined. For even cooking, shape your meatballs into the same size. Aim for about 1-inch balls. This helps them cook at the same rate. Space them out on the baking sheet so hot air can circulate around them. Choosing between homemade and store-bought teriyaki sauce is key. Store-bought is quick, but homemade tastes fresh. If you want to make it from scratch, combine soy sauce, honey, garlic, and ginger. You can also add herbs or spices for extra flavor. Consider fresh cilantro, sesame oil, or even a pinch of red pepper flakes. These additions can create a unique twist on the classic dish. To make your bowls visually appealing, layer the ingredients well. Start with jasmine rice at the bottom. Then, add the teriyaki meatballs and arrange the broccoli and carrots around them. For serving, chopsticks add an authentic touch. You can also use regular forks. Don't forget to sprinkle sesame seeds on top for crunch and flavor. A colorful display makes your meal more inviting! Pro Tips Use Fresh Ingredients: Fresh garlic and ginger enhance the flavor of the meatballs significantly. Avoid using pre-minced versions for the best taste. Control the Bake: Make sure to check the meatballs a few minutes before the time is up to prevent overcooking. They should be golden brown and firm to the touch. Customize the Sauce: Feel free to mix in some chili sauce or honey to the teriyaki sauce for an extra kick or sweetness, depending on your preference. Experiment with Vegetables: While broccoli and carrots are classic choices, consider adding bell peppers, snap peas, or bok choy for a colorful and nutritious twist. {{image_4}} You can switch up the protein in your teriyaki meatball bowls. Ground turkey works well if you want a leaner option. Chicken is another great choice for a lighter taste. For a plant-based meal, try using a meat substitute like lentils or chickpeas. Each option brings a unique flavor and texture. While jasmine rice is a classic choice, you can get creative with your base. Brown rice adds a nutty flavor and more fiber. If you’re looking to cut carbs, cauliflower rice is a smart substitute. Quinoa is also a great option, giving you a boost of protein and a chewy texture. Feel free to add or swap out vegetables in your bowls. Snap peas add a nice crunch. Bell peppers bring vibrant colors and sweetness. You can also try zucchini or bok choy for a fresh twist. Mix and match to suit your taste and make the dish your own. To keep your teriyaki meatball bowls fresh, store them properly. Place the meatballs, rice, and veggies in separate containers. This helps maintain their texture. Use airtight containers to prevent moisture loss. Refrigerate them within two hours of cooking. They will last for three to four days in the fridge. When it's time to enjoy your leftovers, reheating is key. You can use the microwave or stovetop. For the microwave, place the meatballs and rice in a bowl. Add a splash of water to keep them moist. Heat for one to two minutes. Stir halfway through. If using the stovetop, add a little oil in a pan. Heat on low until warm. This way, you keep the meatballs juicy. Freezing is a great way to save leftovers for later. First, let your meatballs and rice cool completely. Then, place them in freezer-safe bags or containers. Be sure to remove as much air as possible. Label the bags with the date. They can last for up to three months in the freezer. When ready to eat, thaw in the fridge overnight. Reheat as mentioned above for a tasty meal. To make homemade teriyaki sauce, you need just a few ingredients. Here’s a simple recipe: - 1/2 cup soy sauce - 1/4 cup brown sugar - 2 tablespoons rice vinegar - 1 tablespoon sesame oil - 1 teaspoon grated ginger - 1 teaspoon minced garlic Mix these in a small pot over low heat. Stir until the sugar dissolves. Simmer for a few minutes. You can also add cornstarch mixed with water if you want a thicker sauce. This sauce tastes fresh and bright. Yes, you can prep teriyaki meatball bowls in advance! Here are some tips: - Meatballs: Make meatballs and bake them. Let them cool, then store them in the fridge. They last for up to three days. - Rice: Cook jasmine rice ahead of time. Store it in a sealed container in the fridge. - Vegetables: Steam broccoli and shred carrots. Keep them in the fridge until you are ready to serve. When you are ready, just warm everything up and assemble your bowls. This makes for a quick meal any day. To complement teriyaki meatball bowls, consider these side dishes: - Edamame: Steamed and lightly salted, for a fresh taste. - Cucumber Salad: Thinly sliced cucumbers with rice vinegar dressing. - Seaweed Salad: Adds a different texture and flavor. - Asian Slaw: Shredded cabbage and carrots with sesame dressing. These sides bring nice flavors and textures to your meal. They make your teriyaki bowls more exciting! Teriyaki meatball bowls combine tasty ingredients like meat, rice, and veggies. You can customize them easily with different proteins and sides. Following the steps, from mixing the meat to serving, ensures success. Use my tips to enhance flavor and presentation. Whether you cook for yourself or others, these bowls impress. Enjoy making and sharing this delicious meal.

Teriyaki Meatball Bowls Flavorful and Easy Recipe

Are you ready to elevate your weeknight dinner? My Teriyaki Meatball Bowls are packed with flavor and super easy to

Chicken and Broth Components - 1 lb boneless, skinless chicken breasts - 8 cups of high-quality chicken broth Vegetables Used - 1 medium onion, finely chopped - 3 cloves of garlic, minced - 2 large carrots, diced into small pieces - 1 cup celery, diced - 1 cup orzo pasta Seasoning and Garnish - 3 large eggs - 1/2 cup freshly squeezed lemon juice (about 3 lemons) - 1 teaspoon of dried oregano - Salt and freshly ground black pepper, to taste - Fresh dill or parsley, chopped for garnish Greek Lemon Chicken Soup is hearty and full of flavor. The chicken gives it a rich base. The broth is key; I always use high-quality chicken broth for best results. Fresh vegetables add crunch and nutrition. The orzo pasta makes it filling and fun to eat. Lemon juice brightens the soup. It gives a refreshing twist you will love. The eggs add creaminess without heavy cream. Herbs like dill or parsley finish it off neatly. They add color and a fresh taste. Using these fresh ingredients makes a big difference. {{ingredient_image_2}} 1. Initial Heating and Sautéing Start by heating a large pot over medium heat. Add the finely chopped onion and minced garlic. Sauté for about 3-4 minutes. Stir occasionally until the onion turns soft and clear. 2. Cooking the Chicken and Vegetables Next, add the diced carrots and celery to the pot. Stir often and cook for 5 minutes. This helps the vegetables soften and blend their flavors. Carefully pour in the chicken broth, bringing it to a gentle boil. Once it boils, add the chicken breasts. Lower the heat to keep a steady simmer. Cover the pot and cook for about 20 minutes. The chicken should be cooked through and no longer pink. After cooking, take the chicken out and place it on a cutting board. Shred the chicken with two forks into bite-sized pieces and set aside. 3. Adding Orzo and Tempering Eggs While the broth simmers, add the orzo pasta to the pot. Cook it according to package instructions, which usually takes around 8-10 minutes. The orzo should be al dente. In a mixing bowl, whisk the eggs and freshly squeezed lemon juice together until smooth. Once the orzo is ready, take a small ladleful of the hot broth and pour it into the egg mix, whisking all the time. This process, called tempering, keeps the eggs from curdling. Gradually pour this tempered egg mix back into the pot, stirring continuously. This creates a creamy soup. Gently fold in the shredded chicken and dried oregano. Season with salt and freshly ground black pepper to taste. Let the soup warm through for a couple of minutes. Serve hot, garnished with fresh dill or parsley for added flavor. Choosing the Right Broth Start with high-quality chicken broth. The broth is the base of your soup. It adds warmth and depth. If you use homemade broth, the flavor will be even better. Store-bought options can work too, just check the label for quality ingredients. Importance of Fresh Ingredients Fresh ingredients make a big difference. Use fresh chicken, vegetables, and herbs. Fresh lemon juice gives the soup its zesty kick. Avoid dried herbs when possible. Fresh dill or parsley will add color and taste. Proper Tempering Technique Tempering eggs is key for a smooth soup. Mix the eggs with lemon juice in a bowl. Slowly add hot broth while whisking. This keeps the eggs from cooking too fast. Then, add the egg mix back into the soup. Stir constantly to create a creamy texture. This simple step makes your soup rich and silky. Pro Tips Use Quality Broth: The flavor of your soup largely depends on the quality of the chicken broth. Opt for homemade or high-quality store-bought broth for a rich taste. Fresh Ingredients: Using fresh herbs like dill or parsley not only enhances the flavor but also adds a vibrant color to your soup. Always opt for fresh over dried when possible. Tempering Eggs: When adding the egg and lemon mixture to the soup, remember to temper the eggs by slowly mixing in hot broth. This prevents the eggs from curdling and helps achieve a creamy consistency. Customize Seasoning: Feel free to adjust the seasoning according to your taste. Adding a pinch of cayenne pepper can give your soup an extra kick if you enjoy spice! {{image_4}} Alternate Proteins You can swap chicken for turkey. It gives a similar taste and texture. If you want, use cooked shrimp for a seafood twist. Tofu is another great choice for a lighter option. Gluten-Free Options To make this soup gluten-free, skip the orzo. Instead, use rice or quinoa. Both options work well and keep the soup hearty. Make sure any broth you use is gluten-free too. Vegetarian Alternatives You can make this soup vegetarian by using vegetable broth. Instead of chicken, add chickpeas or lentils for protein. These beans make the soup filling and rich in flavor. You can also add more veggies like spinach or zucchini for extra nutrition. Refrigeration Tips Store leftover Greek Lemon Chicken Soup in an airtight container. Make sure it cools down first. It will last in the fridge for about three to four days. When ready to eat, check for any off smells or flavors. Freezing Guidelines If you want to keep it longer, freezing is a great option. Use freezer-safe containers or bags. Leave some space at the top, as the soup will expand when frozen. It can last for up to three months in the freezer. Remember to label the container with the date. Reheating Instructions To reheat, thaw the soup in the fridge overnight if frozen. Heat it on the stove over medium heat, stirring often. If it seems too thick, add a splash of broth or water to thin it. You can also use a microwave, heating in short bursts and stirring in between. Enjoy your warm soup! Can I use leftover chicken? Yes, you can use leftover chicken. Shredded rotisserie chicken works great. Just add it when you mix in the orzo pasta. This saves cooking time and adds flavor. How do I make it creamier? You can make it creamier by adding more eggs. Whisk in an extra egg with the lemon juice. This gives the soup a richer texture. You can also stir in a splash of cream for added smoothness. Is it possible to make it in advance? Yes, you can make it in advance! Cook the soup and let it cool. Store it in the fridge for up to three days. Just remember to add the orzo when you reheat it. This keeps the pasta from getting mushy. To make a great Greek lemon chicken soup, start with fresh ingredients and a good broth. Follow the steps carefully to ensure rich flavor. Don’t forget to try the variations to make it your own. Proper storage keeps leftovers tasty for later. Enjoy this comforting dish any day. With these tips, your soup will shine. You can impress yourself and others with your cooking. Now, gather your ingredients and start cooking!

Greek Lemon Chicken Soup Hearty and Flavorful Recipe

Want to warm your soul with a delicious bowl of Greek Lemon Chicken Soup? This hearty and flavorful recipe combines

Older posts
Newer posts
← Previous Page1 … Page117 Page118 Page119 … Page122 Next →

dsad

© 2026 dailydishcraft • Built with GeneratePress

Our Policies

  • Copyright Policy
  • Cookie Policy
  • GDPR Policy
  • Privacy Policy
  • Disclaimer
  • Terms Of Use

More Information

  • Home
  • About
  • Contact
  • Appetizers
  • Dessert
  • Dinner
  • Drinks
©2026, dailydishcraft About Back To Top