Skip to content
DisclaimerTerms Of UseGDPR PolicyCookie Policy

dailydishcraft

  • Home
  • Drinks
  • Appetizers
  • Dinner
  • Dessert
  • About
  • Contact
  • Privacy Policy
DisclaimerTerms Of UseGDPR PolicyCookie Policy

Jessica

- 2 cups canned white beans (like cannellini or great northern), thoroughly rinsed and drained - 1 medium onion, finely chopped - 2 cloves garlic, minced - 2 medium carrots, diced into small cubes - 2 celery stalks, diced - 4 cups vegetable broth (preferably low-sodium) - 1 cup coconut milk (for a rich, creamy texture) - 1 teaspoon dried thyme (or fresh if available) - 1 teaspoon smoked paprika (for a hint of smokiness) - Salt and black pepper to taste - 2 tablespoons olive oil (for sautéing) - Fresh parsley, finely chopped (for a burst of color and flavor, to garnish) This soup has a base that is simple yet full of flavor. The canned white beans form the heart of the dish. They add creaminess and protein. Choosing cannellini or great northern beans works best. Next, fresh vegetables bring life to the soup. Onion, garlic, carrots, and celery add depth and sweetness. Sautéing them enhances their flavors. The vegetable broth adds a rich base. I prefer low-sodium broth to control the salt level. Coconut milk gives the soup a smooth, creamy finish. You can enhance the flavor with dried herbs and spices. Thyme adds an earthy note. Smoked paprika gives a subtle warmth. Don’t forget salt and black pepper to taste. Fresh parsley not only brightens the soup but also adds a pop of color. It’s a simple way to make your dish look more inviting. These ingredients come together to create a comforting and satisfying white bean soup. {{ingredient_image_2}} Start by heating 2 tablespoons of olive oil in a large pot over medium heat. Let the oil warm for about a minute. Once hot, add 1 medium chopped onion, 2 diced medium carrots, and 2 diced celery stalks. Sauté these veggies for 5 to 7 minutes. Stir them often until the onion is soft and turns translucent. This step builds a solid base for your soup. Next, add 2 minced garlic cloves to the pot. Cook for another 1 to 2 minutes. Stir constantly to keep the garlic from burning. You want to release that rich garlic aroma without overcooking it. Now it's time to build your soup. Add 2 cups of rinsed canned white beans to the pot. Then pour in 4 cups of vegetable broth. Sprinkle in 1 teaspoon of dried thyme and 1 teaspoon of smoked paprika. Stir everything well. Raise the heat to bring the mixture to a gentle boil. When it starts boiling, reduce the heat. Let the soup simmer uncovered for about 15 to 20 minutes. This allows all the flavors to meld together nicely. After simmering, grab your immersion blender. Puree the soup until it’s creamy but still has some texture. If you don’t have an immersion blender, carefully transfer 2 cups of the soup to a regular blender. Blend it until smooth, then return it to the pot. Stir in 1 cup of coconut milk. This adds a rich, creamy texture. Adjust the soup's seasoning by adding salt and black pepper to taste. Simmer it for another 5 minutes to heat through. When ready to serve, ladle the creamy white bean soup into bowls. Finish with a sprinkle of freshly chopped parsley for a burst of color and flavor. Enjoy your warm, comforting bowl of white bean soup! To ensure a creamy consistency, blend the soup well. An immersion blender works best for this. It lets you puree the soup right in the pot. If you use a standard blender, be careful. Blend in small batches and cover the top with a towel. This prevents hot soup from splattering. To enhance the soup's flavors, try adding a squeeze of lemon juice. It brightens the taste. You can also add a hint of chili flakes for heat. For toppings, fresh parsley adds color and flavor. A drizzle of olive oil gives it richness. You could even sprinkle some crispy bacon or croutons for crunch. These small touches make your soup even better! Pro Tips Use Fresh Herbs: Fresh thyme can elevate the flavor of the soup significantly, providing a bright and aromatic touch compared to dried herbs. Adjust Creaminess: For an even creamier soup, add more coconut milk or a splash of heavy cream if you're not strictly plant-based. Enhance the Flavor: A splash of lemon juice just before serving can brighten up the soup and enhance its overall flavor profile. Store Properly: This soup can be stored in the refrigerator for up to 4 days. Reheat gently on the stove to maintain its creamy texture. {{image_4}} You can easily adapt this white bean soup to fit your diet. For a vegan option, simply use vegetable broth and coconut milk. Both are plant-based and add great flavor. This soup is also gluten-free. Make sure to check the broth label to confirm it is gluten-free. If you want to lower the sodium, look for low-sodium vegetable broth. You can skip the salt or use salt-free seasonings. This way, you still enjoy a tasty soup without the extra sodium. Feel free to switch up the beans in this recipe. You can use navy beans, pinto beans, or even black beans. Each type brings its own flavor and texture. You can also swap the carrots and celery for other veggies. Try zucchini, bell peppers, or even spinach. They add color and nutrients. For herbs, thyme is great, but you can also use rosemary or oregano for a different taste. If you want a kick, add cumin or chili powder. Each change can give your soup a whole new vibe! To store leftover white bean soup, follow these steps: - Let the soup cool to room temperature. - Transfer it to an airtight container. - Place the container in the fridge. This soup will stay fresh for about 3 to 5 days. For longer storage, consider freezing it. For freezing: - Use freezer-safe containers or heavy-duty freezer bags. - Leave some space for the soup to expand. - Label with the date before freezing. The soup can last up to 3 months in the freezer. Reheating your white bean soup is easy. Here are some methods to keep the texture nice: - Stovetop: Pour the soup into a pot. Heat over medium heat, stirring often. This keeps it creamy and prevents sticking. - Microwave: Use a microwave-safe bowl. Cover loosely to avoid splatter. Heat in 1-minute intervals, stirring between each. If you want a creamier texture when reheating, add a splash of coconut milk or broth. This helps refresh the soup's creamy quality. You can serve white bean soup with many tasty sides. Here are some great ideas: - Crusty whole-grain bread for dipping - A fresh green salad with lemon vinaigrette - Grated cheese, like Parmesan or feta, on top - A sprinkle of chili flakes for heat - Fresh herbs, like basil or cilantro, to enhance flavor These options will make your meal more exciting and complete. Yes, you can use dried beans! Here’s how to prepare them: 1. Soak the beans: Place 1 cup of dried white beans in a bowl. Cover them with water and let them soak overnight. 2. Cook the beans: Drain and rinse the beans. In a pot, add the soaked beans and cover them with fresh water. Bring to a boil, then lower the heat. Simmer for about 1 to 1.5 hours until the beans are soft. 3. Use in the recipe: Once cooked, drain the beans and add them to your white bean soup as you would with canned beans. This method gives you fresh beans that are full of flavor. White bean soup stays good in the fridge for about 3 to 5 days. Follow these tips for safe storage: - Cool the soup: Let it cool to room temperature before storing. - Use airtight containers: Transfer the soup to airtight containers to keep it fresh. - Label and date: Write the date on the container, so you know when you made it. If you want to keep it longer, consider freezing it. White bean soup can last for up to 3 months in the freezer. This blog post laid out how to make a delicious white bean soup. We covered all the essential ingredients, like canned white beans and fresh veggies. I shared step-by-step instructions, tips for perfect texture, and ideas for variations to fit your diet. Remember to store leftovers properly to keep them fresh. With these guidelines, you can make a tasty soup that warms your soul. Enjoy your cooking journey and the meals you create!

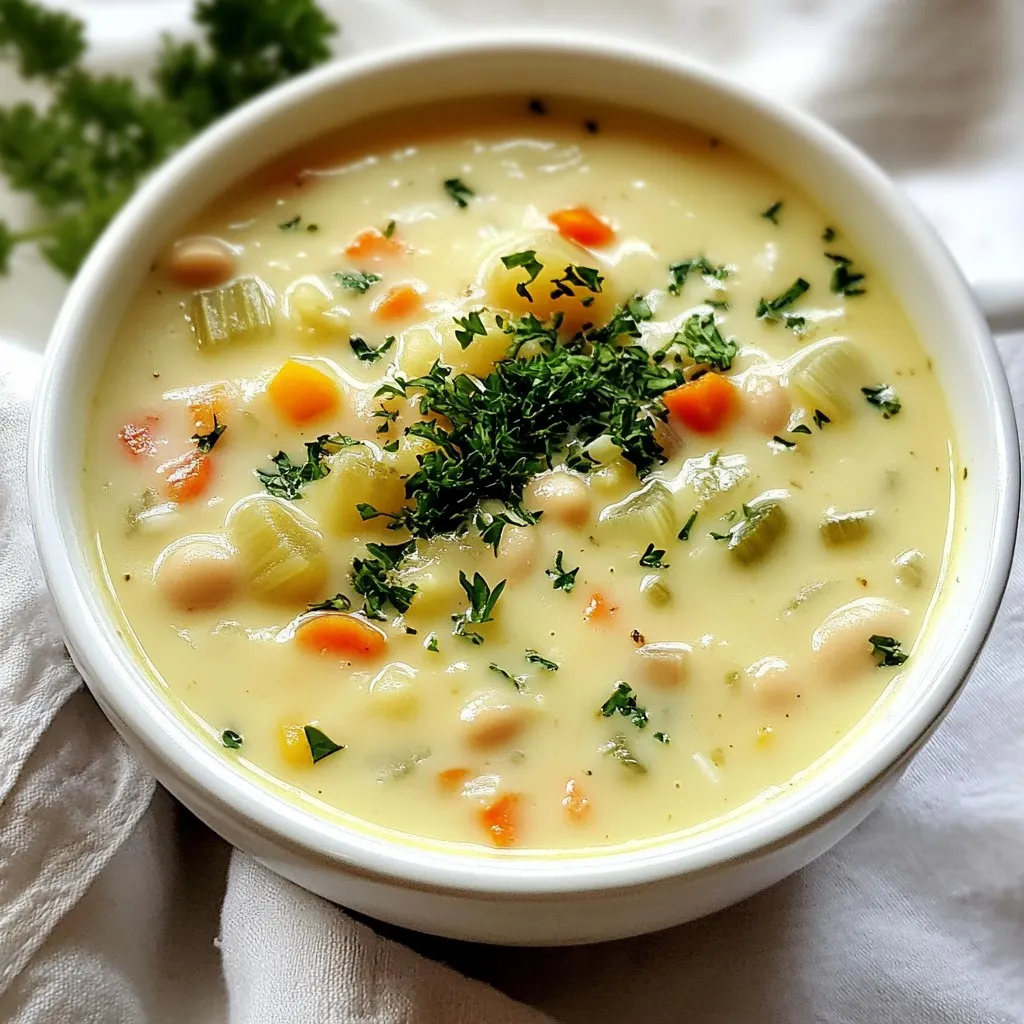
White Bean Soup Flavorful and Comforting Recipe

Are you ready to warm up with a bowl of the most comforting white bean soup? This flavorful recipe is

For this treat, you need: - 2 cups pretzel twists These pretzels are crunchy and salty. They give great texture to the bark. The twists hold up well against the gooey caramel and smooth chocolate. You can choose any brand you like, but I prefer the classic shapes for their perfect crunch. You will also need: - 1 cup semi-sweet chocolate chips - 1 cup caramel bits - 2 tablespoons heavy cream The chocolate chips melt nicely. They create a rich layer on top. The caramel bits mix with heavy cream to form a smooth sauce. This mixture is sweet and sticky, coating the pretzels perfectly. Use good quality chocolate for the best taste. Finally, grab some sea salt for sprinkling. A pinch of sea salt balances the sweetness. It enhances the flavor of the bark. Don’t skip this step! It adds a nice finish and makes each bite special. {{ingredient_image_2}} Start by preheating your oven to 350°F (175°C). This step ensures that everything cooks evenly. Next, line a baking sheet with parchment paper. This helps the pretzel bark come off easily after baking. Take your 2 cups of pretzel twists and spread them out on the baking sheet. Make sure they form a single layer. This way, every pretzel gets that yummy caramel and chocolate coating. Avoid overcrowding to keep them crispy. In a microwave-safe bowl, combine 1 cup of caramel bits with 2 tablespoons of heavy cream. Heat this mixture in the microwave. Do it in 30-second bursts, stirring well each time. Keep going until the caramel is melted and smooth. This gooey mixture will be the star of your bark. Pour the warm caramel over the pretzels. Use a spatula to make sure each pretzel gets a good coating. Next, place the baking sheet in the oven for 5-7 minutes. Look for bubbling caramel to know it’s ready. After removing it, sprinkle 1 cup of semi-sweet chocolate chips on top. Let them sit for 2-3 minutes to soften. Once the chocolate chips are soft, spread them gently over the caramel and pretzels. Add a light sprinkle of sea salt on top. This enhances the sweet and salty taste. Let your pretzel bark cool at room temperature for about 30 minutes. Then, place it in the fridge for 1 hour until firm. Finally, break it into fun shapes and enjoy your delicious treat! To get the best texture in your salted caramel pretzel bark, start with fresh pretzels. Stale pretzels can ruin the crunch you want. Bake the pretzels just long enough to heat them. This helps the caramel stick better. When you add the chocolate, spread it quickly. The heat from the caramel helps it melt smoothly. Using quality ingredients makes a big difference. Choose semi-sweet chocolate chips that you love. They should melt well and taste great. For the caramel, look for high-quality caramel bits. They should melt easily when mixed with heavy cream. This ensures a rich, creamy taste in every bite. Fresh sea salt adds a perfect touch, balancing the sweetness. Feel free to customize your bark to suit your taste. Add nuts like pecans or almonds for extra crunch. You can also mix in dried fruit for a chewy texture. If you love spice, try a pinch of cayenne pepper in the chocolate. This adds a fun kick that surprises your taste buds. Remember, the options are endless! Pro Tips Use Fresh Ingredients: Always opt for fresh pretzels and high-quality chocolate chips and caramel bits to enhance the flavor of your bark. Experiment with Toppings: Feel free to add nuts, sprinkles, or even a drizzle of white chocolate on top for extra flair and flavor. Store Properly: Store the pretzel bark in an airtight container at room temperature to keep it fresh and crunchy for longer. Customize the Sweetness: Adjust the amount of sea salt to your preference; more salt will enhance the sweet-salty contrast that makes this treat irresistible. {{image_4}} You can make your salted caramel pretzel bark even more special by adding nuts. Chopped pecans, walnuts, or almonds bring a nice crunch. Just sprinkle them on top before the chocolate sets. You can also mix in mini marshmallows or crushed candies for fun flavors. Each addition adds a unique taste and texture. While semi-sweet chocolate is great, feel free to switch it up. Dark chocolate gives a bolder flavor. Milk chocolate offers a creamier touch. You can even try white chocolate for a sweeter bite. Each type of chocolate can change the bark's taste and mood. Just remember to melt it the same way for a smooth finish. You can also play with seasonal flavors to wow your guests. For fall, add a dash of cinnamon or nutmeg to the caramel. In winter, consider peppermint extract for a fresh twist. For spring, try a hint of orange zest to brighten things up. These flavors can make your bark a festive treat for any occasion. To keep your salted caramel pretzel bark fresh, store it in an airtight container. This helps to lock in the flavor and texture. You can keep it at room temperature or in the fridge. If you choose to refrigerate it, make sure the container is sealed tightly. This way, your bark stays crunchy and delicious. When stored properly, your pretzel bark lasts about a week. If you keep it in the fridge, it can last up to two weeks. Check for any changes in smell or texture before enjoying. If it seems off, it's best to toss it. Always better safe than sorry! If you want to enjoy your bark warm, you can reheat it. Place pieces in the microwave for a few seconds. Be careful not to melt it too much. You want it warm but still solid. For best results, eat it fresh, but if you have leftovers, storing them right will keep them tasty. Yes, you can use any pretzel type. Choose thin pretzel sticks or even pretzel crisps. Just keep in mind that the size and shape might change the texture. The crunch is key, so select one you enjoy! To make this treat gluten-free, use gluten-free pretzels. Many brands offer great options. Always check labels to ensure they meet gluten-free standards. This way, everyone can enjoy the sweet and salty goodness. Yes, you can freeze it! Wrap the bark in plastic wrap and place it in an airtight container. It will stay fresh for up to three months. Just thaw it at room temperature before enjoying. You can add many toppings! Chopped nuts like pecans or almonds add crunch. Crushed candy bars or sprinkles can give it extra flair. Feel free to experiment with flavors and textures to find your favorite mix! This blog post covered making salted caramel pretzel bark. You learned about the key ingredients like pretzels, chocolate, and toppings. We also shared step-by-step instructions for baking this treat. Tips helped you achieve the best texture and use quality ingredients. Variations let you adapt flavors, adding nuts or different chocolates. In the end, this treat is fun to make and share. Enjoy the process and get creative with your bark. You’ll impress friends and family with your tasty creation.

Salted Caramel Pretzel Bark Irresistible Sweet Treat

If you’re craving a sweet and salty treat that’s hard to resist, you’ve hit the jackpot! Salted caramel pretzel bark

To make these delightful White Chocolate Peppermint Macarons, gather the following ingredients: - 1 cup almond flour - 1 ¾ cups powdered sugar - 3 large egg whites, at room temperature - 1/4 cup granulated sugar - 1/4 teaspoon cream of tartar - 1 teaspoon peppermint extract - A few drops of green food coloring (optional) - 4 oz. white chocolate, finely chopped - 1/2 cup heavy cream - Crushed peppermint candies for garnish If you need to make swaps, here are some options: - Almond flour can be replaced with hazelnut flour for a nutty twist. - Use coconut sugar instead of granulated sugar for a richer flavor. - Instead of peppermint extract, try vanilla extract for a different taste. - Dark chocolate can stand in for white chocolate if you prefer a bolder flavor. Almond flour gives macarons a unique taste and texture. It’s finer than regular flour. This helps create a smooth macaron shell. Make sure to sift it to remove lumps. Powdered sugar should be extra fine. It blends well and helps create a soft filling. Regular granulated sugar can be used, but it may not dissolve as easily in the egg whites. Choosing the right sugars and flours is key to making successful macarons. Each ingredient plays a role in flavor and texture. Using high-quality ingredients will enhance your macarons. {{ingredient_image_2}} To start, gather your almond flour and powdered sugar. Place them in a food processor. Pulse this mix a few times until it's smooth. Then, sift the mixture through a fine mesh sieve into a large bowl. This step helps remove any lumps. It is key for smooth shells. Next, take three egg whites at room temperature. In a clean bowl, beat them with an electric mixer on medium speed. When they look frothy, add 1/4 teaspoon of cream of tartar. Gradually mix in 1/4 cup of granulated sugar, one spoon at a time. Continue beating until stiff peaks form. This means they hold their shape well. Gently mix in 1 teaspoon of peppermint extract and a few drops of green food coloring if you want. Now, it's time to combine the mixtures. Use a rubber spatula to fold the almond flour mix into the egg whites. Be gentle to keep the air in the mixture. Stop when it looks smooth, like flowing lava. Fit a piping bag with a round tip and fill it with the batter. Line a baking sheet with parchment paper. Pipe 1.5-inch circles on the sheet, leaving space between each. Let them rest for 30-45 minutes. This helps them form a dry skin. Preheat your oven to 300°F (150°C). Bake the macarons for 15-20 minutes. Rotate the baking sheet halfway through. They should be crisp outside and soft inside. Let them cool completely before moving. Enjoy the process! Making macarons can be tricky. Here are some common mistakes to watch out for: - Not sifting the dry ingredients: This can cause lumps. Always sift for a smooth batter. - Overmixing the batter: Mix gently and stop when the batter flows smoothly. - Skipping the resting step: Skipping this makes macarons crack. Let them rest to form a skin. - Incorrect oven temperature: Use an oven thermometer. Too hot can burn, too cool can underbake. Ageing egg whites is key. Fresh egg whites can be too moist. Here’s why you should age them: - Better volume: Older egg whites whip up fluffier, which helps your macarons rise. - Stability: They hold their shape better, making for a sturdy shell. - Flavor: Aging also helps mellow the taste. Just separate the egg whites and let them sit at room temp for at least 24 hours. Texture is everything in macarons. You want a crisp shell and a chewy center. Here’s how to nail it: - Proper folding: Fold the batter gently until it flows like lava. - Baking time: Bake until the outside is firm but the inside is soft. - Cooling: Let them cool completely. This helps set the shell and keeps it from sticking. - Filling: Use white chocolate ganache for a creamy inside that pairs well with the shell. With these tips, you'll create perfect white chocolate peppermint macarons every time! Pro Tips Don’t Skip the Resting Time: Allowing the piped macarons to rest before baking forms a protective skin, which is essential for achieving that characteristic macaron "foot." Check Your Oven Temperature: Every oven can vary, so use an oven thermometer to ensure your macaron shells are baked at the correct temperature for perfect results. Use a Kitchen Scale: For the best accuracy, measure your ingredients by weight rather than volume, especially when it comes to almond flour and powdered sugar. Experiment with Flavors: While peppermint is festive, feel free to try other extracts like vanilla or almond for a different twist on these delightful treats! {{image_4}} You can change the flavor of these macarons easily. For chocolate, add cocoa powder to the almond flour. Use about 2 tablespoons for a rich taste. To make vanilla macarons, just swap the peppermint extract for vanilla extract. For a fruity twist, add raspberry puree. This gives a sweet and tart note. Each flavor offers a new way to enjoy these treats. Decorating your macarons is fun and easy. You can use colorful sprinkles for a festive look. Just sprinkle them on the ganache before it sets. If you like drizzles, melt some additional white chocolate. Use a fork to drizzle it over the top. This adds a lovely touch and makes them eye-catching. Try different fillings for your macarons. A cream cheese filling adds a tangy flavor that balances the sweetness. Mix softened cream cheese with powdered sugar and peppermint extract. For another option, use flavored ganaches. You can make them with dark chocolate, milk chocolate, or even fruit flavors. Each filling brings a unique taste to the macarons. To keep your macarons fresh, store them in an airtight container. Place parchment paper between layers to prevent sticking. Store them in the fridge for up to a week. If you want to enjoy them later, freezing is a great option. For long-term storage, freeze your macarons. First, let them cool completely. Then, place them in a single layer on a baking sheet. Freeze for one hour before transferring them to a freezer bag. This way, they won’t stick together. They can last up to three months in the freezer. When you’re ready to enjoy your frozen macarons, take them out of the freezer. Place them in the fridge for a few hours. This allows them to thaw slowly and keep their texture. After thawing, let them sit at room temperature for about 30 minutes before eating. This will help restore their delightful taste. You can tell if macarons are undercooked by checking their feet. The feet should be smooth and not sticky. If the macarons feel soft and wobble when touched, they need more time. Look for a shiny shell that is firm to the touch. If they crack easily, they are likely undercooked. Always trust your oven's temperature. Ovens can vary, so adjust baking time as needed. Yes, you can make these macarons gluten-free. The main ingredient, almond flour, is naturally gluten-free. Just ensure that your powdered sugar is also gluten-free. Read labels to avoid any hidden gluten sources. This makes the recipe perfect for gluten-sensitive friends or family. Leftover egg yolks are a great ingredient. You can use them to make rich custards or creamy sauces. They can also enhance your baking. Add yolks to cookie dough for a soft texture. You can even make homemade mayonnaise or aioli. Store yolks in the fridge for 2-3 days or freeze them for later use. Just remember to cover them with water or oil before freezing. In this blog post, we covered key ingredients for white chocolate peppermint macarons and how to make them step-by-step. I shared tips to help you avoid common mistakes and achieve the perfect texture. We explored fun flavor variations and ways to decorate your treats. Lastly, I gave storage tips to keep your macarons fresh. Take these insights and enjoy making delicious macarons at home. Happy baking!

White Chocolate Peppermint Macarons Delightful Treat

If you’re searching for a festive treat, White Chocolate Peppermint Macarons are a must-try. These delicate, sweet bites burst with

- 2 cups cooked chicken breast, shredded - 1/2 cup dried cranberries - 1/2 cup pecans, coarsely chopped - 1/2 cup celery, finely diced - 1/4 cup red onion, finely diced - 1/2 cup Greek yogurt (plain) These main ingredients create a lovely mix of flavors. The shredded chicken gives protein and texture. Dried cranberries add sweetness, while pecans give a nice crunch. Celery and red onion add freshness and a bit of bite. The Greek yogurt brings creaminess and tanginess, tying everything together. - 1 tablespoon Dijon mustard - 1 tablespoon honey - 4 large lettuce leaves (such as romaine or butter) or whole wheat tortillas - Fresh spinach or mixed greens for garnish You can add Dijon mustard and honey for extra flavor. Lettuce leaves or whole wheat tortillas serve as the wrap. Fresh spinach or mixed greens make a pretty garnish and add a pop of color. - Mixing bowls - Whisk - Serving platter Using mixing bowls helps to combine all your ingredients well. A whisk is great for mixing the yogurt dressing until smooth. A serving platter makes your wraps look nice when serving. {{ingredient_image_2}} - In a large bowl, combine 2 cups of shredded chicken, 1/2 cup of dried cranberries, 1/2 cup of coarsely chopped pecans, 1/2 cup of finely diced celery, and 1/4 cup of finely diced red onion. - Mix these ingredients gently until they are well combined. You want everything to be evenly distributed for the best flavor in each bite. - In a smaller bowl, whisk together 1/2 cup of plain Greek yogurt, 1 tablespoon of Dijon mustard, 1 tablespoon of honey, and a pinch of salt and black pepper. - Make sure the dressing is smooth and creamy. This dressing will bring all the flavors together. - Lay out 4 large lettuce leaves or warm whole wheat tortillas on a clean surface. If you use tortillas, warming them in a pan for a minute makes them easier to wrap. - Scoop a generous amount of the chicken salad mixture onto the center of each lettuce leaf or tortilla. - Roll or fold the wraps securely. For lettuce wraps, tuck in the sides and roll from the bottom. For tortillas, roll tightly and cut them in half for serving. - Serve these wraps right away for the best taste. If you need to, refrigerate them for up to one hour to let the flavors blend. To make your platter pop, arrange the wraps nicely on a large plate. Nestle them in fresh spinach or mixed greens for a lovely green touch. For a sweet finish, drizzle a little honey over the top. This adds taste and looks great. You can pair your wraps with a light soup or fresh fruit. A glass of iced tea or lemonade works well too. Make sure your chicken is shredded well. Use two forks or your hands to get nice, small pieces. This helps mix everything evenly in the salad. If you choose tortillas, warm them in a dry skillet for one to two minutes. This makes them soft and easy to roll without breaking. Want more flavor? You can add chopped herbs like parsley or dill. A sprinkle of black pepper or a dash of cayenne can give it a kick. If you want a different dressing, try adding a squeeze of lemon juice or a splash of apple cider vinegar. These changes can make your chicken salad even tastier. Pro Tips Use Rotisserie Chicken: For a quicker prep, consider using store-bought rotisserie chicken. It's flavorful and saves time on cooking. Customize Your Nuts: If you prefer a different nut, feel free to substitute pecans with walnuts or almonds for a unique twist. Flavor Enhancements: Add a sprinkle of garlic powder or a dash of cayenne pepper to the yogurt dressing for an extra kick of flavor. Chill for Best Results: Allow the chicken salad to chill in the refrigerator for about 30 minutes before serving. This helps the flavors meld beautifully. {{image_4}} You can switch out the chicken in this recipe for turkey or tofu. Turkey gives a similar taste and works well in wraps. If you prefer a plant-based option, tofu is a great choice. Just make sure to press the tofu to remove excess water before using it. Another quick fix is to use canned chicken for ease. It saves time and still makes a tasty salad. If you need gluten-free options, choose gluten-free wraps instead of regular tortillas. There are many brands that offer great alternatives. For a vegan option, you can swap Greek yogurt with a plant-based yogurt. Look for one that has a creamy texture and mild flavor. This keeps the wrap tasty without any animal products. You can change the nuts in this recipe. Try walnuts or almonds for a different crunch. Adding fruits like diced apples or grapes can bring a nice sweetness. You can also adjust the sweetness of the salad. Use maple syrup or agave nectar instead of honey. These small changes can make your wraps feel fresh and new each time! To keep your Cranberry Pecan Chicken Salad Wraps fresh, store them in the fridge. Wrap each one tightly in plastic wrap or place them in an airtight container. This helps prevent them from drying out. If you're using whole wheat tortillas, consider wrapping them in foil for extra protection. Use parchment paper between layers if you stack them in a container. These wraps last about three days in the fridge. Always check for signs of spoilage before eating. If you see any mold or if the wraps smell off, it’s best to discard them. Fresh ingredients ensure the best taste, so use them quickly! You can freeze the chicken salad mix but not the wraps. To freeze, place the chicken salad in a freezer-safe container. Leave space for expansion as it freezes. When you're ready to eat, thaw it in the fridge overnight. Once thawed, serve it fresh in new wraps. Yes, you can make these wraps ahead of time. The chicken salad stays fresh for about one hour in the fridge. If you want to keep the wraps crisp, store the filling and wraps separately. This way, you can enjoy them fresh when you are ready to eat. If you don’t have Greek yogurt, you can use sour cream or plain yogurt. Both options give a creamy texture. If you want a dairy-free choice, try using mashed avocado or a plant-based yogurt. To lower the calories, use less Greek yogurt or opt for a low-fat version. You can also reduce the amount of pecans and honey. Using lettuce wraps instead of tortillas cuts calories, too. Romaine and butter lettuce work best for wraps. They are strong and hold the filling well. You can also use collard greens for a different flavor and texture. Using fresh chicken is possible, but it needs to be cooked first. You can poach, grill, or bake the chicken before shredding it for the salad. Make sure the chicken is fully cooked to a safe temperature of 165°F. In this blog post, we explored how to make delicious Cranberry Pecan Chicken Salad Wraps. We covered the key ingredients, prepared the chicken salad, and whipped up a tasty yogurt dressing. We also shared tips for serving and storing your wraps, plus creative variations and FAQs. These wraps are simple to make and are sure to impress. With a few adjustments, you can make them your own. Enjoy experimenting with flavors while keeping your meals fresh and healthy.

Cranberry Pecan Chicken Salad Wraps Simple and Tasty

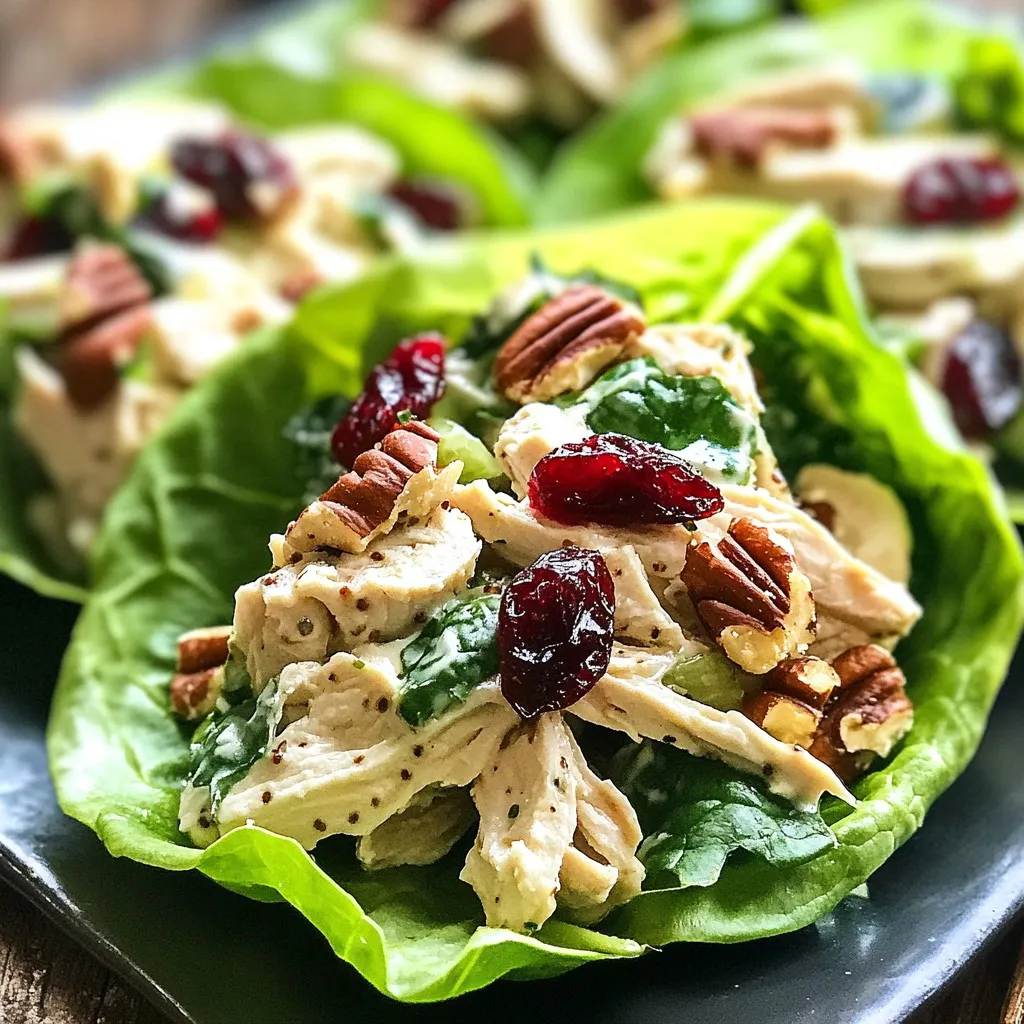
Looking for a fun and easy recipe that packs flavor? Try my Cranberry Pecan Chicken Salad Wraps! This dish combines

To make these tasty apple fries, you need the following: - 2 large apples (preferably Granny Smith or Honeycrisp), cored and sliced into fry-shaped pieces - 1 cup all-purpose flour - 2 large eggs, beaten until smooth - 1 cup panko breadcrumbs - 1 teaspoon ground cinnamon - 1 teaspoon granulated sugar - ½ teaspoon sea salt - Cooking spray to ensure crispiness I love using Granny Smith and Honeycrisp apples for this recipe. They have a nice tartness and hold their shape well when cooked. Other great options include Fuji and Gala apples. These varieties add a sweet touch and a crisp bite, which makes every fry taste amazing. You can switch things up with different coatings. Try crushed cornflakes for a crunchier texture. If you want a healthier option, use whole wheat flour instead of all-purpose flour. For a fun twist, add cocoa powder or chopped nuts to the panko crumbs. This way, you can create unique flavors while keeping it fun! {{ingredient_image_2}} First, set your air fryer to 375°F (190°C). Preheating is key. It ensures even cooking and helps the fries get crispy. Allow it to heat for about 5 minutes. Now, gather three shallow bowls. Fill the first bowl with 1 cup of all-purpose flour. In the second, place 2 beaten eggs. Finally, mix 1 cup of panko breadcrumbs with 1 teaspoon of cinnamon, 1 teaspoon of sugar, and ½ teaspoon of sea salt in the third bowl. This setup is simple and makes coating easy. Take your apple slices and dip each one into the flour. Make sure to coat it well. Shake off the extra flour to avoid clumps. Next, dip the floured apple into the egg mixture. Let any extra egg drip back into the bowl. Finally, roll the apple in the panko mix. Press down a bit to help the crumbs stick. This coating gives the fries a nice crunch. Place the coated apple fries in a single layer in the air fryer basket. Lightly spray the tops with cooking spray. This helps them get even crispier. Cook the apple fries for 12-15 minutes. Flip them halfway through to ensure even browning. When they turn golden brown, they are ready. Carefully take them out and let them cool for a moment before serving. To make your apple fries crispy, use panko breadcrumbs. They create a light and crunchy texture. Always spray the tops with cooking spray before cooking. This helps the fries brown nicely. Preheating the air fryer to 375°F (190°C) is key. It ensures even cooking and great crunch. Flipping the apple fries halfway through cooking helps them cook evenly. Use tongs to turn them gently. This way, you avoid breaking the fries. Aim for a golden color on all sides. Keep an eye on them; cooking times can vary. Serve your apple fries warm for the best taste. Place them on a colorful plate to make them pop. A light dusting of powdered sugar adds a nice touch. Pair them with caramel or chocolate sauce for dipping. For extra flavor, sprinkle cinnamon on top. These tips make the snack even more fun! Pro Tips Choose the Right Apples: Opt for tart apples like Granny Smith for a balanced flavor or sweet varieties like Honeycrisp for a sweeter treat. Ensure Even Cooking: Flip the apple fries halfway through cooking to achieve a uniform golden brown and crispiness on all sides. Experiment with Flavors: Add different spices, such as nutmeg or ginger, to the breadcrumb mixture for unique flavor profiles. Serve Immediately: For the best texture and flavor, serve the apple fries right after cooking while they are still warm and crispy. {{image_4}} To add a fun twist, try a cinnamon sugar mix. Before you coat the apple fries in panko, mix one tablespoon of cinnamon with two tablespoons of sugar. This blend gives the fries a sweet, warm flavor. It’s perfect for those cozy days when you want a bit of comfort food. Just sprinkle the mix over the apple fries after they come out of the air fryer for a tasty finish. For a crunchy bite, consider nuts or coconut. You can add chopped nuts like almonds or walnuts to the panko mix. This adds texture and flavor. If you love coconut, feel free to include shredded coconut too. Just mix it into the breadcrumbs before coating. This creates a tropical flair that makes your apple fries unique. You can pair your apple fries with healthy dips. A yogurt dip is a great choice. Mix plain yogurt with a little honey and a pinch of cinnamon for a creamy treat. You can also try a peanut butter dip. Just blend peanut butter with a splash of almond milk until smooth. Both options enhance the flavor without adding too much sugar. To store leftover apple fries, wait until they cool. Place them in an airtight container. Make sure to layer them between paper towels to absorb moisture. This helps keep them crisp. Store in the fridge for up to three days. To reheat your apple fries, use the air fryer for best results. Preheat the air fryer to 350°F (175°C). Place the fries in a single layer. Heat for about 5-7 minutes until they are warm and crispy. You can also use an oven if preferred. Simply bake them at 350°F (175°C) for 10-15 minutes. You can freeze apple fries for later. After coating them, arrange the fries in a single layer on a baking sheet. Place the sheet in the freezer for about an hour. Once frozen, transfer them to a freezer bag. Remove as much air as possible. They can stay in the freezer for up to three months. When ready to cook, air fry them straight from the freezer. Just add a few extra minutes to the cooking time. Yes, you can use different apples. I suggest trying Fuji or Gala apples. They provide a sweet taste and hold their shape well. Avoid apples that are too soft, as they may turn mushy when cooked. You want your apple fries to stay crispy. Each type of apple changes the flavor and sweetness, so feel free to experiment! To make these apple fries gluten-free, simply swap the all-purpose flour with a gluten-free flour blend. Many brands offer good options that work well. You can also use gluten-free panko breadcrumbs to keep the crunch. Just check the labels to ensure the products are truly gluten-free. I love serving apple fries warm on a colorful plate. Dust them lightly with powdered sugar for a sweet touch. Pair them with a small bowl of caramel or chocolate sauce for dipping. You can also sprinkle a bit of cinnamon on top. This adds flavor and makes them look fancy. Get creative and enjoy! You learned how to make tasty apple fries step by step. We covered the best ingredients, coating options, and alternatives. I shared tips for crispiness and flipping, plus fun serving ideas. Variations, like adding cinnamon or nuts, can make it exciting. Lastly, I explained how to store and reheat your fries. Try making apple fries your way and enjoy them with friends!

Air Fryer Apple Fries Tasty and Simple Snack Recipe

Craving something sweet and crunchy? You’re in the right place! Today, I’m sharing my simple and tasty recipe for Air

- 4 cups all-purpose flour - 1 packet (2 ¼ teaspoons) instant yeast - ½ cup granulated sugar - 1 teaspoon salt - ½ cup whole milk, warmed to about 110°F (43°C) - ½ cup unsalted butter, melted and cooled slightly - 2 large eggs, at room temperature - 1 teaspoon pure vanilla extract - 1 cup packed brown sugar (light or dark) - ½ cup unsalted butter, softened (for caramel topping) - 1 cup pecans, coarsely chopped - 1 teaspoon ground cinnamon The right ingredients make a big difference. For flour, I suggest using all-purpose flour. It gives the rolls the best texture. You want a nice balance between fluffiness and chewiness. When it comes to sugar, use both granulated and brown sugar. Granulated sugar is perfect for the dough. Brown sugar adds deep flavor to the caramel. For pecans, choose coarsely chopped roasted pecans. Roasting brings out their rich flavor. Raw pecans do not have that same nutty taste. You want every bite to burst with flavor. {{ingredient_image_2}} To start, gather your dry ingredients. In a large mixing bowl, combine 2 cups of all-purpose flour, instant yeast, granulated sugar, and salt. Use a whisk to blend these well. In another bowl, mix the warmed milk, slightly cooled melted butter, eggs, and vanilla extract. Whisk until all is smooth. Pour this wet mixture into the dry ingredients. Stir gently until you form a shaggy dough. This dough should not be too sticky. Next, it's time to knead the dough. Gradually add the rest of the flour, about ½ cup at a time. Knead the dough on a lightly floured surface for about 5 to 7 minutes. You want the dough to be smooth and elastic. You can tell it is ready when it springs back after you poke it. Once done, place the dough in a greased bowl. Cover it with a kitchen towel and let it rise in a warm spot for about 1 hour. The dough should double in size. Now, let's make the caramel topping. In a medium saucepan over medium heat, combine softened butter and brown sugar. Stir this mixture continuously until it melts and begins to bubble. Remove it from the heat. Carefully pour the hot caramel evenly into the bottom of a greased 9x13 inch pan. Sprinkle the chopped pecans over the caramel evenly. After the dough has risen, gently punch it down to release the air. Roll the dough out on a floured surface into a large rectangle measuring about 16x12 inches. Spread a thin layer of softened butter over the surface of the dough. Next, sprinkle the ground cinnamon and an optional extra touch of sugar on top. Begin rolling the dough tightly, starting from the long edge. Cut the log into 12 equal pieces using a sharp knife. Place the rolls, spiral side down, into the pan on top of the caramel and pecans. Cover the pan again with a towel and let the rolls rise for another 30 to 45 minutes until they puff up. While they rise, preheat your oven to 350°F (175°C). When the rolls are puffy, bake them for 25 to 30 minutes. They should turn a rich golden brown, and you will see the caramel bubbling. Over-kneading vs. under-kneading the dough: Kneading is key for good texture. If you knead too much, your rolls become tough. If you don’t knead enough, they can be dense. Aim for 5-7 minutes until the dough feels smooth and elastic. Importance of precise measuring: Baking is a science. Use measuring cups and spoons for accuracy. Too much flour can make your dough dry. Too little sugar can affect the caramel. Always level off your measurements for best results. Adjusting the recipe for thicker or thinner caramel: If you want thicker caramel, add more brown sugar. For thinner caramel, use less. Stir it well until it bubbles for a smooth texture. How to prevent burnt caramel: Watch the heat closely. Stir often to avoid burning. If you see dark spots, lower the heat. Remove it from the stove as soon as it melts and bubbles to keep it golden. Garnishing options for an appealing look: For a beautiful finish, sprinkle whole pecans on top before serving. You can also dust with powdered sugar for extra charm. Both options make your rolls look fancy. Serving suggestions for best enjoyment: Serve the sticky rolls warm on a colorful platter. Drizzle any extra caramel over the top. Pair them with coffee or tea for a delightful treat. Enjoying them fresh adds to the joy! Pro Tips Use Fresh Yeast: Always check the expiration date on your yeast packet. Fresh yeast ensures your rolls rise properly for a fluffy texture. Room Temperature Ingredients: Make sure your eggs and milk are at room temperature. This helps create a smoother dough and better rise. Don’t Skip the Second Rise: Allowing the rolls to rise a second time is crucial for achieving that light, airy texture. Be patient! Invert While Warm: Inverting the pan while the caramel is warm makes it easier to release the rolls and prevents them from sticking. {{image_4}} You can make these caramel pecan sticky rolls even better. Try adding spices like nutmeg, ginger, or cardamom. These spices add warmth and depth to the rolls. A little bit can change the whole flavor. You can also mix in chocolate or fruits. Chopped chocolate gives a rich twist, while fruits like apples or berries add freshness. Just make sure to balance sweetness. If you need gluten-free options, use almond flour or a gluten-free blend. These can work well without losing taste. Look for brands that fit your needs. For vegan substitutions, replace eggs with flax eggs or applesauce. Use plant-based milk and vegan butter. These changes keep the rolls tasty and fluffy. Pair these sticky rolls with coffee or tea. The warm drinks enhance the sweet flavors. They also go well with dessert wines for a special treat. For creative serving ideas, try stacking them on a cake stand. Garnish with whole pecans or a sprinkle of powdered sugar. This makes them look fancy for any occasion. Store your caramel pecan sticky rolls in a cool, dry place. If you plan to eat them within a day or two, leave them at room temperature. Use an airtight container to keep them fresh and soft. This helps prevent them from drying out. If you want to keep them longer, refrigeration is an option. However, it may change the texture. If you refrigerate, make sure they are in a tight container. To reheat sticky rolls, the oven works best. Preheat your oven to 350°F (175°C). Place the rolls on a baking sheet and cover them with foil. Heat for about 10-15 minutes. This keeps the rolls soft and warm. You can also use a microwave. Heat them for 15-20 seconds. But be careful, as microwaving too long may make them tough. You can freeze sticky rolls for later. Freeze them before baking for the best results. After shaping the rolls, place them in a single layer on a baking sheet. Once they are frozen, transfer them to a freezer bag. Make sure to remove as much air as possible. If frozen after baking, wait until they cool completely. Thaw them overnight in the fridge before reheating. This helps keep them soft and tasty. Yes, you can use active dry yeast. The main difference is that active dry yeast needs to be activated in warm water first. To substitute, use the same amount of active dry yeast. Mix it with warm water (about 110°F) and let it sit for 5-10 minutes until it bubbles. Then, add it to your dry ingredients as you would with instant yeast. You can prepare the dough the night before. After kneading, place the dough in a greased bowl and cover it. Refrigerate the dough overnight. In the morning, let it sit at room temperature for about 30 minutes before shaping. Then, follow the steps to roll and bake. This makes it easy for brunch or a special breakfast. If the dough doesn't rise, check the yeast. It may be old or inactive. Ensure your liquid is warm but not hot, as high heat can kill yeast. If the dough is too cold, find a warmer spot for it. If it still doesn't rise, you may need to start over with fresh yeast. Yes, you can use a bread machine. Add the wet ingredients first, followed by the dry ones. Use the dough setting on your machine. Once the dough is ready, shape it and continue with the caramel topping and baking steps as normal. Just remember to check your machine for specific instructions, as they can vary. In this guide, we covered the basics of making sticky rolls, including essential ingredients and careful techniques. We explored tips on dough preparation, caramel topping, and presentation to ensure great results. Remember, small changes can lead to big flavor improvements. Whether you try flavor variations or adjust for dietary needs, have fun with the recipe. With practice and care, your sticky rolls can be a tasty treat. Don't forget to store and reheat them properly for lasting enjoyment!

Caramel Pecan Sticky Rolls Rich and Flavorful Delight

Looking for a sweet delight that’s perfect for any occasion? Caramel Pecan Sticky Rolls will leave you craving more! This

- 2 cups chow mein noodles - 1 cup butterscotch chips - 1/2 cup creamy peanut butter - 1/2 cup unsweetened shredded coconut - 1/2 cup mini marshmallows - 1/2 teaspoon vanilla extract - Pinch of sea salt To make Butterscotch Haystack Cookies, you need simple ingredients. Each item plays a key role in flavor and texture. Chow mein noodles give a crunchy base. Butterscotch chips add sweetness and richness. Creamy peanut butter brings a smooth, nutty taste. Unsweetened shredded coconut adds a chewy element. Mini marshmallows offer bursts of sweetness. Vanilla extract enhances the overall flavor. A pinch of sea salt balances everything perfectly. These ingredients are easy to find. Most grocery stores carry them. You can also substitute some if you like. For instance, use chocolate chips instead of butterscotch. Or, mix in nuts for a crunchy twist. The fun part is experimenting and making this recipe your own! {{ingredient_image_2}} First, grab a medium microwave-safe bowl. Add the butterscotch chips and creamy peanut butter. Heat them in the microwave at 30-second intervals. After each interval, take the bowl out and stir. This helps the mixture melt evenly. You should continue until it is smooth. This takes about 1 to 1.5 minutes. Once the mixture is melted, carefully take the bowl out of the microwave. Stir in the vanilla extract and a pinch of sea salt next. Mix it well to combine all the flavors. Then, add the chow mein noodles, shredded coconut, and mini marshmallows. Use a spatula or wooden spoon to fold them gently. Make sure every noodle and marshmallow gets coated with the butterscotch mix. Now it’s time to shape the cookies. Use a spoon or cookie scoop to drop heaping tablespoons of the mixture onto a baking sheet lined with parchment paper. Form each scoop into little haystack shapes. Make sure to space them a few inches apart. This allows them to spread slightly as they set. To get a smooth mixture, start by melting the butterscotch chips and peanut butter. Use a medium microwave-safe bowl for this. Heat in 30-second intervals. After each interval, stir well. This step is key. It prevents burning and helps blend the flavors. You want a creamy and uniform mix. If you skip stirring, you may end up with lumps. Once you shape the cookies, you have two cooling options. Let them cool at room temperature for about 30 minutes. This is a simple way to let them set. If you want to speed things up, place the baking sheet in the fridge. Chill for 10 to 15 minutes. This method works well if you're in a hurry. Make your cookies stand out with fun decorations. One easy option is to sprinkle extra shredded coconut on top. It adds texture and looks great. For a sweet twist, drizzle melted chocolate over the cookies. This adds a rich flavor and makes them even more tempting. Present them on a nice platter to impress your guests. Pro Tips Storage Tip: Keep your cookies in an airtight container to maintain their freshness for up to a week. Substitution Tip: You can substitute almond butter for peanut butter for a nut-free option. Flavor Enhancement Tip: Add a sprinkle of cinnamon or nutmeg to the butterscotch mixture for an extra layer of flavor. Serving Tip: Serve these cookies chilled for a refreshing treat, especially on warm days! {{image_4}} You can easily make a chocolate version of these cookies. Just swap the butterscotch chips for chocolate chips. This change gives the cookies a rich and dark flavor. Melt the chocolate chips with peanut butter just like in the original recipe. You'll get a tasty treat that chocolate lovers will adore. If you want to add some crunch, try mixing in nuts. Pecans or walnuts work great in these cookies. Just chop them up and fold them into the mixture. This adds a delightful texture and flavor. Plus, it makes your cookies a bit more filling. Want to change the taste a little? You can add spices or extracts. A dash of cinnamon adds warmth. If you like almond, a bit of almond extract can enhance the flavor. These small tweaks can make your cookies unique and fun to eat. To keep your butterscotch haystack cookies fresh, use an airtight container. This helps prevent moisture and keeps them chewy. You can stack the cookies in layers, placing parchment paper between them. This will stop them from sticking together. These cookies stay fresh at room temperature for about one week. If you store them properly in an airtight container, they remain tasty and enjoyable. Check them for any signs of moisture or changes in texture before eating. You can freeze butterscotch haystack cookies for later. To do this, let them cool completely first. Then, place them in a single layer on a baking sheet. Once they are frozen solid, transfer them to a freezer-safe bag. They can last in the freezer for up to three months. When you're ready to enjoy, just thaw them at room temperature. Yes, you can! If you want a twist, try using dark chocolate chips or milk chocolate chips. Each type brings its own flavor. You can also mix in white chocolate chips for a fun look. Just remember, the sweetness may change based on your choice. The cookies will feel firm to the touch. They should not stick to your fingers. If you lightly press one, it should hold its shape. If they are too soft, give them more time to cool. You can also place them in the fridge for a quick set. If your mixture feels too thick, add a bit more peanut butter. This will help loosen it up. You can also microwave it for a few seconds to warm it slightly. Stir well after adding more ingredients. This will help everything mix together nicely. This blog post shared a simple recipe for yummy haystack cookies. You learned about the key ingredients, like chow mein noodles and butterscotch chips. I explained how to melt, mix, and shape the cookies. You also got useful tips for smooth mixtures and cool storage options. Now, you can make these cookies with ease and add fun twists. Enjoy experimenting with flavors and sharing them with friends. Happy baking!

Butterscotch Haystack Cookies Simple and Fun Treat

Are you ready to whip up a fun and tasty treat? Butterscotch Haystack Cookies are simple to make and super

When making Vegan Chocolate Avocado Mousse, you will need a few simple items. Here’s the list of ingredients to gather: - 2 ripe avocados - 1/2 cup unsweetened cocoa powder - 1/3 cup maple syrup - 1/2 cup almond milk - 1 teaspoon pure vanilla extract - 1/4 teaspoon fine sea salt - 1-2 tablespoons melted coconut oil (optional) - Fresh berries and mint leaves for garnish (optional) Each ingredient plays a key role in creating that rich, creamy texture. The ripe avocados add a smooth base, while cocoa powder gives it that deep chocolate flavor. Maple syrup adds sweetness, and almond milk helps blend it all into a creamy delight. The vanilla extract enhances the taste, and a pinch of salt balances the flavors. Coconut oil is optional, but it can add a nice richness. Don’t forget the berries and mint leaves! They make a lovely garnish and add freshness to your dish. Gather these items, and you’re ready to create a delicious dessert that impresses! {{ingredient_image_2}} To start, I choose two ripe avocados. Their skin should be dark and slightly soft. I cut them in half, remove the pit, and scoop the green flesh into my food processor. This step is crucial. The avocado gives the mousse its creamy texture. Next, I add the cocoa powder, maple syrup, almond milk, vanilla extract, and sea salt into the processor with the avocados. If I want extra creaminess, I pour in melted coconut oil. I blend everything on high speed. I pause to scrape down the sides. This ensures all the flavors mix well. When it looks silky smooth, I taste it. If I want it sweeter, I add more maple syrup and blend again. After blending, I spoon the mousse into small bowls. I cover them and chill in the fridge for at least 30 minutes. Chilling helps the mousse firm up and develop flavors. When ready to serve, I take it out and garnish with fresh berries and mint leaves. This adds a nice touch and bright flavor. To get that silky smooth texture, start with ripe avocados. They should feel soft but not mushy. Use a food processor or a strong blender for the best results. Blend the ingredients until they are very smooth. Don’t forget to scrape the sides of the bowl. This step ensures that everything mixes well. If the mousse is too thick, add a splash more almond milk. This will help it blend smoothly. Maple syrup gives a nice sweetness to the mousse. Start with 1/3 cup, then taste it. If you want it sweeter, add more syrup by the tablespoon. Blend again after each addition. This way, you can find the right level of sweetness for your taste. Remember, everyone's preference is different. Don’t rush this part; take your time to get it just right. Serve the mousse chilled for the best flavor. Spoon it into small bowls or elegant glasses for a nice touch. Top it with fresh berries and mint leaves for color and flavor. You can also drizzle a bit of extra maple syrup on top. This adds a nice shine and sweetness. Sharing with friends? You can easily double the recipe for a larger crowd. Enjoy this rich and creamy delight! Pro Tips Choose Ripe Avocados: Ensure your avocados are perfectly ripe for the best creaminess and flavor. They should yield slightly to gentle pressure. Adjust Sweetness: Taste the mousse after blending and adjust the maple syrup according to your sweetness preference for a custom dessert. Chill for Best Results: Allow the mousse to chill in the refrigerator for at least 30 minutes to enhance the flavors and improve the texture. Garnish Creatively: Add fresh berries and mint leaves not only for a pop of color but also to complement the rich chocolate flavor. {{image_4}} You can easily change the taste of your mousse. Add one teaspoon of mint extract for a fresh kick. If you want a coffee twist, try one tablespoon of espresso powder. Both flavors pair well with chocolate. You can also add a pinch of cinnamon for warmth. Experiment with what you love! Maple syrup is great, but you can try other sweeteners too. Agave nectar or date syrup works well if you prefer. For a low-calorie option, use stevia or monk fruit. Adjust the amount based on your taste. Start with a small amount, then blend and taste. You can always add more! Toppings make your mousse extra special. Fresh berries add color and flavor. Try strawberries, raspberries, or blueberries. You can also sprinkle some chopped nuts for crunch. If you like a creamy touch, add a dollop of coconut whipped cream. Garnish with mint leaves for a fresh look. Get creative! To keep your vegan chocolate avocado mousse fresh, place it in an airtight container. This helps avoid any strange smells or flavors from your fridge. Cover the mousse with plastic wrap or a lid. Store it in the refrigerator. You can freeze leftover mousse if you want to save it for later. Use a freezer-safe container. Make sure to leave some space at the top, as the mousse may expand when frozen. When you are ready to eat it, let it thaw in the fridge overnight. The mousse will last about 3 to 5 days in the fridge. Over time, it may change in texture or flavor. If you see any browning on the surface, just stir it in. It’s still safe to eat. Enjoy your mousse while it's fresh for the best taste! Yes, avocado mousse is very healthy. It uses ripe avocados, which are full of good fats. These fats can help your heart stay strong. The cocoa powder gives you antioxidants, which are great for your body. Maple syrup adds sweetness without refined sugar. This mousse has fiber, vitamins, and minerals too. It’s a dessert that feels rich but is packed with nutrients. Yes, you can make this mousse nut-free. Instead of almond milk, use a nut-free plant milk. Options like soy milk, oat milk, or rice milk work well. They blend nicely and keep the mousse creamy. Just make sure to check labels for any hidden nuts in store-bought options. This way, everyone can enjoy the mousse without worry. To sweeten your mousse without adding more sugar, try blending in ripe bananas. They add natural sweetness and keep the mousse creamy. You can also add a touch of vanilla or a splash of orange juice for flavor. If you want, add a bit of maple syrup in small amounts and taste as you go. This way, you can find the perfect sweetness for your taste buds. This blog post shared a tasty recipe for avocado mousse. You learned about the main ingredients, step-by-step instructions, and helpful tips. You can enjoy this treat in many ways with various flavors. Store leftovers easily for a fresh dessert later. Remember, this mousse is healthy and fun to make. You can adjust sweetness, flavors, and toppings to fit your taste. Have fun experimenting and enjoy each bite!

Vegan Chocolate Avocado Mousse Rich and Creamy Delight

Craving a dessert that’s both rich and healthy? Look no further! This Vegan Chocolate Avocado Mousse is a creamy delight

- 8 oz cream cheese, softened - 1 cup sharp cheddar cheese, shredded - 1/2 cup dried cranberries, finely chopped - 1/4 cup fresh orange zest, grated - 1/4 cup green onions, minced - 1/4 cup walnuts or pecans, chopped (optional) - 1 tablespoon honey - 1/2 teaspoon garlic powder - 1/2 teaspoon salt - Assorted crackers and fresh fruit (like apple slices or grapes) for serving Each ingredient adds its own flavor. Cream cheese gives a smooth base. Sharp cheddar adds a rich taste. Dried cranberries bring sweetness and chewiness. Fresh orange zest gives a bright, citrus note. Green onions add a mild bite. Nuts, like walnuts or pecans, add crunch if you choose to use them. Honey adds a hint of sweetness, while garlic powder and salt balance the flavors. You can swap cream cheese for a vegan option, like cashew cheese. If sharp cheddar is too strong, use mild cheddar. For a nut-free version, skip the walnuts or pecans. You can replace dried cranberries with raisins or chopped figs for a different twist. If fresh orange zest is not available, lemon zest works too. {{ingredient_image_2}} To start, gather your ingredients. You need cream cheese, sharp cheddar, cranberries, orange zest, green onions, nuts, honey, garlic powder, and salt. First, take 8 oz of cream cheese and let it soften at room temperature. This helps it mix well. In a big mixing bowl, add the cream cheese and 1 cup of shredded sharp cheddar cheese. Use a hand mixer or spatula to blend these until the mix is creamy and smooth. Next, fold in 1/2 cup of finely chopped dried cranberries. Then add 1/4 cup of fresh orange zest, 1/4 cup of minced green onions, and 1/4 cup of chopped walnuts or pecans, if you want. Don’t forget to mix in 1 tablespoon of honey, 1/2 teaspoon of garlic powder, and 1/2 teaspoon of salt. Stir until everything is well combined. Once mixed, it’s time to shape the cheese ball. Wet your hands with a little water if the mix feels sticky. Form it into a large ball. Wrap the shaped cheese ball tightly in plastic wrap. Put it in the fridge for at least 2 hours. Chilling helps the flavors blend and makes the cheese ball firm. When you’re ready to serve, take the cheese ball out of the fridge. Unwrap it carefully. For a fun touch, roll the cheese ball in extra chopped cranberries, nuts, or some orange zest. This adds color and flavor. Present the cheese ball on a festive platter. Surround it with assorted crackers and fresh fruit like apple slices or grapes. It will look beautiful and inviting! To boost the taste of your cranberry orange cheese ball, try these ideas: - Add a pinch of cayenne for heat. - Include fresh herbs like thyme or rosemary for depth. - Use a mix of cheeses, such as goat cheese or blue cheese, for richness. - Swap honey for maple syrup for a unique sweetness. These small changes can make a big difference. Watch out for these common errors: - Don’t skip chilling the cheese ball; it helps flavors blend. - Avoid over-mixing; this can make the cheese ball too soft. - Ensure your cream cheese is soft enough to mix easily. - Don’t overlook the presentation; a well-presented cheese ball is more inviting. By avoiding these mistakes, your cheese ball will shine. When serving your cheese ball, consider these fun ideas: - Arrange assorted crackers around the cheese ball for a colorful display. - Pair with fresh fruit, like apple slices or grapes, for balance. - Serve with a drizzle of honey on top for extra flavor. - Use toothpicks for easy serving at parties. These tips make your cheese ball a festive centerpiece. Pro Tips Chill for Flavor: Allow the cheese ball to chill for at least 2 hours, or even overnight, to let the flavors meld together for a richer taste. Creative Coatings: Roll the cheese ball in various toppings like chopped herbs, nuts, or seeds to enhance flavor and presentation. Make Ahead: Prepare the cheese ball a day in advance for convenience, making your hosting stress-free and allowing for more time with guests. Serving Suggestions: Pair with a variety of crackers, fresh fruit, and even vegetables for an appealing and versatile appetizer spread. {{image_4}} You can change the flavor of your cheese ball easily. Add herbs like rosemary or thyme for a savory touch. For sweetness, mix in finely chopped dried apricots or figs. If you like spice, try adding a pinch of cayenne or chili powder. Each change gives a new taste that excites the palate. The cheese ball can shine with different cheese mixes. Swap sharp cheddar for creamy goat cheese or tangy blue cheese. Use a mix of cream cheese and feta for a Mediterranean twist. You can even try adding a splash of your favorite cheese spread. Each combo offers a unique flavor and texture. Seasonal flavors can make your cheese ball special. In spring, add fresh herbs like chives or basil. In fall, mix in pumpkin puree and spices like cinnamon or nutmeg. For winter, consider adding cranberry sauce or even a hint of peppermint extract. These twists can make your cheese ball perfect for any holiday party. To keep your cranberry orange cheese ball fresh, wrap it tightly in plastic wrap. This helps prevent it from drying out. Place it in an airtight container in the fridge. This way, it stays moist and tasty. Always ensure your fridge is at 40°F or below to keep food safe. You can freeze the cheese ball, but it may change texture. Wrap it tightly in plastic wrap, then place it in a freezer bag. Write the date on the bag. It can stay in the freezer for up to two months. When ready to eat, thaw it in the fridge overnight. In the fridge, your cheese ball lasts about five days. If you see mold or an off smell, toss it. For the best taste, eat it fresh. If frozen, plan to use it within two months for optimal flavor. Yes, you can make a cheese ball ahead of time. I often prepare it a day in advance. Just wrap it well in plastic wrap. This allows the flavors to blend. You can store it in the fridge until you are ready to serve. The best crackers for this cheese ball are light and crispy. I recommend using: - Water crackers - Toasted baguette slices - Whole grain crackers - Pita chips These options are great for balancing the creamy cheese and tart cranberries. You can use fresh cranberries, but they are very different. Fresh cranberries are tart and juicy. Dried cranberries add sweetness and chewiness. If you choose fresh, chop them finely and adjust the honey. You may also want to add a bit more sugar to balance the tartness. In this article, we explored how to make a great cheese ball. We covered the key ingredients, step-by-step instructions, and tips to avoid common mistakes. You learned how to store your cheese ball and variations to try. Remember, the right cheese and flavors can make your cheese ball shine. Use the tips shared here to impress friends and family. Enjoy making this tasty treat!

Cranberry Orange Cheese Ball Delightful Party Treat

Looking for a crowd-pleasing party treat? Dive into the world of flavor with my Cranberry Orange Cheese Ball! This delightful

- 2 large chicken breasts - 1 cup fresh mozzarella cheese, shredded or cut into small cubes - 1/2 cup basil pesto (store-bought or homemade) - 1/2 cup sun-dried tomatoes, finely chopped - 1 teaspoon garlic powder - 1 teaspoon Italian seasoning - 2 tablespoons olive oil - Salt and pepper, to taste - Fresh basil leaves, for garnish (optional) Gathering these ingredients is key to making your pesto mozzarella stuffed chicken juicy and flavorful. The chicken breasts form a nice pocket for the stuffing. Fresh mozzarella gives a creamy texture that melts beautifully. Basil pesto adds a rich, herbal taste that makes each bite special. Sun-dried tomatoes bring a sweet and tangy kick to the dish. Using the right seasonings helps enhance the flavors. Garlic powder and Italian seasoning provide a lovely base. Olive oil is vital for cooking the chicken and adding richness. Don't forget salt and pepper; they balance the flavors and elevate the meal. For garnish, fresh basil leaves add color and a burst of freshness. They also make the dish look stunning when served. With these ingredients, you’re set to create a delightful dish that impresses. {{ingredient_image_2}} Preheating the Oven Start by preheating your oven to 375°F (190°C). This step is vital for even cooking. Preparing the Chicken Breasts Lay each chicken breast flat on a cutting board. Use a sharp knife to slice each breast horizontally. Create a pocket but do not cut all the way through. This keeps the filling inside. Combining Cheese, Pesto, and Tomatoes In a mixing bowl, combine 1 cup of shredded mozzarella, 1/2 cup of basil pesto, and 1/2 cup of finely chopped sun-dried tomatoes. Mix well until the filling looks uniform and tasty. Seasoning the Chicken Take each chicken pocket and season the inside with 1 teaspoon of garlic powder, 1 teaspoon of Italian seasoning, and a pinch of salt and pepper. This adds flavor to every bite. Stuffing the Chicken Breasts Carefully stuff each chicken breast with the pesto mixture. Make sure to divide it evenly. Each bite should be full of flavor. Searing and Baking In a large oven-safe skillet, heat 2 tablespoons of olive oil over medium heat. Once hot, place the stuffed chicken breasts in the skillet, smooth side down. Sear for 4-5 minutes on each side until golden brown. This step locks in the juices. After searing, transfer the skillet to your preheated oven. Bake for 15-20 minutes. Check that the chicken reaches an internal temperature of 165°F (75°C). After baking, let the chicken rest for 5 minutes before slicing. This keeps it moist and tasty. How to Achieve the Best Texture To get the best texture, sear the chicken well. Searing locks in juices and helps form a golden crust. Heat the oil until it shimmers before adding the chicken. This step is key to a crispy outside. When baking, do not cover the skillet. This keeps the crust nice and crunchy. Tips for Juicy Chicken For juicy chicken, don’t overcook it. Use a meat thermometer to check the temperature. Cook until the chicken reaches 165°F (75°C). Let the chicken rest for 5 minutes after baking. Resting keeps the juices inside, ensuring every bite is moist. Pairing Options This dish goes well with many sides. Try serving it with a fresh salad or roasted vegetables. A light pasta with olive oil also complements the flavors. You can add some crusty bread for a filling meal. Presentation Ideas For a beautiful presentation, slice the chicken diagonally. Arrange the slices on a platter. Drizzle extra pesto over the chicken for color. Add fresh basil leaves on top for a pop of green. Recommended Skillets Use an oven-safe skillet for this recipe. Cast iron skillets work great for even heat. If you don’t have one, use a heavy stainless-steel pan. The even heat helps with perfect cooking. Importance of a Meat Thermometer A meat thermometer is a must-have tool. It ensures your chicken is cooked safely. Checking the internal temperature prevents dry chicken. Using it makes cooking easier and more precise. Pro Tips Use Fresh Ingredients: Fresh basil and high-quality mozzarella will elevate the flavor of your stuffed chicken. Try to avoid using pre-shredded cheese, as it often contains anti-caking agents that can affect texture. Perfectly Seasoned Pockets: Don't skimp on seasoning the chicken pockets before stuffing. A well-seasoned pocket enhances the overall taste and ensures a flavorful bite every time. Let It Rest: Allowing the chicken to rest for a few minutes after baking is crucial. This step lets the juices redistribute, ensuring that every slice is moist and juicy. Experiment with Fillings: Feel free to customize the stuffing based on your preferences. Adding ingredients like spinach, artichokes, or different cheeses can create exciting variations of this dish. {{image_4}} Cheese Alternatives If you want a different flavor, try using provolone or gouda cheese. These cheeses melt well and add a unique taste. You can also use ricotta for a creamier filling. Pesto Variations You can swap basil pesto for other types. Sun-dried tomato pesto or arugula pesto work great too. Each gives a new twist to the dish. If you want a nut-free option, look for pesto made without pine nuts. Low-Carb Alternatives For a low-carb meal, use chicken thighs instead of breasts. Thighs have more flavor and stay juicy. You can also skip the sun-dried tomatoes or use fewer. Vegetarian Options To make this dish vegetarian, use large portobello mushrooms instead of chicken. Stuff them with the same cheese and pesto mix. Bake until the mushrooms are tender and juicy. Adding Spices Feel free to add spices for extra flavor. A pinch of red pepper flakes can bring heat. You can also try smoked paprika for a smoky twist. Flavorful Add-ins Consider adding spinach or artichoke hearts to the filling. These add taste and nutrition. You can also include olives for a briny kick. Refrigeration Tips Store leftover pesto mozzarella stuffed chicken in an airtight container. Place it in the fridge within two hours of cooking. It will stay fresh for up to three days. Make sure to avoid exposing the chicken to air as this can dry it out. Freezing Guidelines You can freeze this dish if you want to keep it longer. Wrap each stuffed chicken breast tightly in plastic wrap. Then, place the wrapped chicken in a freezer-safe bag. It can last in the freezer for up to three months. When you're ready to eat it, just thaw it in the fridge overnight. Best Methods to Reheat The best way to reheat your chicken is in the oven. Preheat your oven to 350°F (175°C). Place the chicken in a baking dish and cover it with foil. Heat for about 20-25 minutes or until it is warmed through. You can also use a microwave, but it may not keep the texture as nice. If using a microwave, heat on medium power for 2-3 minutes, checking frequently. How Long Does It Last? When stored properly, pesto mozzarella stuffed chicken lasts about three days in the fridge. In the freezer, it can last up to three months. Always check for signs of spoilage, such as an off smell or change in color, before eating. Enjoy every bite of this delicious meal! To check if your chicken is done, use a meat thermometer. The chicken should reach an internal temperature of 165°F (75°C). This ensures it's safe to eat and perfectly cooked. You can also look for visual cues. The chicken should be golden brown and the juices should run clear. If you see any pink, it needs more time. Letting the chicken rest for a few minutes helps it stay juicy too. Yes, you can prepare this dish ahead of time! To store it, wrap the stuffed chicken in plastic wrap or place it in an airtight container. Keep it in the fridge for up to 2 days before cooking. If you want to freeze it, wrap the chicken well and place it in the freezer. It can last for up to 3 months. When you're ready to cook, let it thaw in the fridge overnight for best results. For a great meal, serve your chicken with simple sides. A fresh green salad adds color and crunch. Roasted vegetables like broccoli or asparagus also pair well. You can also serve it with pasta tossed in olive oil. This makes a complete meal that's satisfying. Don't forget to add some crusty bread to soak up any sauce! This blog post covered how to make pesto mozzarella stuffed chicken. We talked about key ingredients like chicken, mozzarella, and sun-dried tomatoes. I shared step-by-step instructions to prepare and cook the dish. You learned tips to get juicy chicken and how to present your meal well. We explored variations to customize the recipe and discussed storage options for leftovers. With these guidelines, you can create a tasty dish with ease. Enjoy your cooking journey!

Pesto Mozzarella Stuffed Chicken Juicy and Flavorful

Are you ready to elevate your dinner game? Pesto Mozzarella Stuffed Chicken is the dish you’ve been waiting for. Juicy

Older posts
Newer posts
← Previous Page1 … Page113 Page114 Page115 … Page122 Next →

dsad

© 2026 dailydishcraft • Built with GeneratePress

Our Policies

  • Copyright Policy
  • Cookie Policy
  • GDPR Policy
  • Privacy Policy
  • Disclaimer
  • Terms Of Use

More Information

  • Home
  • About
  • Contact
  • Appetizers
  • Dessert
  • Dinner
  • Drinks
©2026, dailydishcraft About Back To Top