Skip to content
DisclaimerTerms Of UseGDPR PolicyCookie Policy

dailydishcraft

  • Home
  • Drinks
  • Appetizers
  • Dinner
  • Dessert
  • About
  • Contact
  • Privacy Policy
DisclaimerTerms Of UseGDPR PolicyCookie Policy

Jessica

- 1 lb ground beef (or turkey for a lighter option) - 1 teaspoon garlic powder - 1 teaspoon onion powder - 1 teaspoon smoked paprika - Salt and pepper to taste - 4 large flour tortillas - 1 cup shredded sharp cheddar cheese - 1 cup fresh lettuce, finely shredded - 1 large juicy tomato, diced - 1/2 cup dill pickles, sliced - 1/2 cup mayonnaise - 1 tablespoon ketchup - 1 tablespoon yellow mustard These are the main items you'll need to create your cheeseburger wraps. The ground beef gives it that classic flavor. The spices add depth, while the veggies add crunch. You can switch things up based on your taste. Here are some ideas: - Add avocado slices for creaminess. - Include jalapeños for a spicy kick. - Use different cheese like pepper jack or mozzarella. - Try adding onions or bell peppers for extra veggies. Customizing your wraps lets you make them your own. Mix and match to find your favorite combo! Feel free to experiment with spices. Here are a few suggestions: - Use chili powder for heat. - Add cumin for a smoky flavor. - Try Italian herbs for a different twist. - A dash of hot sauce can amp up the flavor. Using different spices can change the whole taste of your wraps. Don’t be afraid to play around! {{ingredient_image_2}} Start by heating a large skillet over medium heat. Add 1 lb of ground beef or turkey to the skillet. Break it apart with a spatula as it cooks. As the meat begins to brown, season it with 1 teaspoon each of garlic powder, onion powder, and smoked paprika. Don't forget to add salt and pepper to taste. Cook until the meat is fully browned. Drain any extra grease before setting the meat aside. Grab a small bowl and mix 1/2 cup of mayonnaise, 1 tablespoon of ketchup, and 1 tablespoon of yellow mustard. Stir until the sauce is smooth and well-blended. This zesty sauce adds a great kick to your wraps. Warm 4 large flour tortillas in a dry skillet for about 30 seconds on each side. You can also microwave them for a few seconds. Soft tortillas are easier to roll. Once warmed, lay each tortilla flat on a clean surface. Spread a generous spoonful of the special sauce in the center of each tortilla. Spoon some of the cooked ground beef on top of the sauce. Then, add 1 cup of shredded cheddar cheese, followed by shredded lettuce, diced tomato, and sliced pickles. To roll, fold in the sides of the tortilla. Then, start rolling from the bottom to secure your filling. Place the wraps seam-side down in the skillet. Cook for 2-3 minutes on each side until golden brown and crispy. Once done, let them cool for a minute. Cut each wrap in half to show off the melted cheese and vibrant fillings. When you make your cheeseburger wraps, keep the fillings balanced. Start with a layer of sauce. Then, add the meat, cheese, and veggies. This order helps keep everything together. Use a clean surface to lay out your tortilla. Make sure to fold in the sides before rolling. This step keeps the filling from spilling out. Hold the wrap tightly as you roll it up. To get your wraps crispy, use medium heat. Cook them seam-side down first. This helps seal the wrap. Flip them gently after 2-3 minutes. If you want extra crispiness, brush the outside with a little oil before cooking. You can also use a grill pan for those lovely grill marks. Let them cool for a minute before cutting. This helps the cheese set and keeps everything inside. For this recipe, you will need a few key tools: - Large skillet for cooking the meat - Mixing bowl for the sauce - Spatula for breaking up the meat - Dry skillet or microwave for warming tortillas - Sharp knife for cutting the wraps Having these tools ready will make the process smooth and fun. Enjoy your cooking! Pro Tips Use Lean Meat: Opt for lean ground beef or turkey to reduce fat content while still enjoying the rich flavors of a cheeseburger. Customize Your Fillings: Feel free to add other favorite toppings such as jalapeños, avocado, or even bacon bits for a personal twist! Perfectly Warm Tortillas: Warming your tortillas enhances their flexibility, making it easier to roll without tearing. Crispy Exterior: For an extra crispy wrap, consider brushing the outside of the tortillas with a little olive oil before grilling. {{image_4}} You can easily make a vegetarian or vegan version of the cheeseburger wrap. Swap the ground beef for lentils, black beans, or mushrooms. These options give a hearty texture. For a vegan choice, replace the cheese with avocado or a nut-based cheese. You can also use tofu crumbles seasoned with garlic and onion powder. This ensures you still get that rich flavor without meat. If you want to change up the cheese, try mozzarella or pepper jack for a kick. You can also use dairy-free cheese for a vegan option. Adding extras like sliced jalapeños, sautéed onions, or roasted red peppers can elevate your wrap. Try mixing in some nutritional yeast for a cheesy flavor boost without dairy. The special sauce is just the start. You can explore other sauces, too. Try barbecue sauce for a smoky twist or ranch dressing for a creamy touch. A spicy sriracha mayo adds heat if you like it hot. For a tangy kick, use a balsamic glaze or a zesty vinaigrette. Each sauce gives a new flavor to your wraps. To keep leftover cheeseburger wraps fresh, first let them cool. Wrap each one tightly in plastic wrap or foil. You can also place them in an airtight container. Store them in the fridge for up to three days. This way, they stay tasty and safe to eat. When you're ready to eat the leftovers, reheating is easy. Heat a skillet on medium. Place the wrap in the skillet for about 2-3 minutes on each side. This will help restore the crispy texture. You can also use a microwave, but it might make the wrap a bit soft. If you choose the microwave, heat for 30 seconds, check, and heat in 15-second bursts until warm. If you want to save wraps for later, freezing works well. First, let the wraps cool completely. Wrap each one in plastic wrap, then place them in a freezer bag. Remove as much air as possible to prevent freezer burn. They can last up to three months. When you want one, thaw it in the fridge overnight. Then, reheat as mentioned above. Enjoy your easy meal anytime! You can use lettuce leaves, pita bread, or rice paper instead of tortillas. Lettuce gives a fresh crunch. Pita adds a soft texture. Rice paper wraps are fun and light. These options are great for low-carb or gluten-free meals. Yes, you can make the fillings ahead of time. Cooked meat and sauce can last in the fridge for three days. Store them in separate containers to keep them fresh. This saves time on busy days. Just warm the fillings before wrapping them up. To spice up your wraps, add jalapeños or hot sauce. You can also mix chili powder into the meat while cooking. Another option is to use pepper jack cheese for a kick. Adjust the spice level to suit your taste. Cheeseburger wraps are fun and easy to make. We covered the main ingredients, how to prep the meat, and tips for the perfect wrap. You can customize with different spices, sauces, and even make a vegetarian version. Remember, storing leftovers properly helps them stay tasty. I hope you enjoy making these wraps as much as I do. Try your own twists and share your favorites!

Cheeseburger Wrap Hack Tasty and Easy Meal Idea

Looking for a quick meal that packs big flavor? The Cheeseburger Wrap Hack is your answer! This tasty and simple

- 4 large flour tortillas - 1 cup pizza sauce - 2 cups shredded mozzarella cheese - 1 cup pepperoni slices - Italian seasoning and garlic powder - Olive oil for brushing - Optional toppings Gathering the right ingredients is key for your tortilla pizza rolls. Start with four large flour tortillas. These will be the base of your snack. Next, you need one cup of pizza sauce. This adds flavor and moisture. For the cheesy goodness, grab two cups of shredded mozzarella cheese. It melts perfectly and gives that classic pizza taste. For meat lovers, add one cup of pepperoni slices. You can swap this for your favorite toppings if you prefer. Don't forget the Italian seasoning and garlic powder. They add a nice kick to your rolls. Lastly, have olive oil on hand. You will brush this on top to get that golden, crunchy finish. Feel free to get creative with optional toppings, like bell peppers or olives. This recipe is all about making it your own. {{ingredient_image_2}} 1. Preheat your oven to 400°F (200°C). This step warms the oven for perfect cooking. 2. Place the large flour tortillas flat on a clean surface. 3. Take a spoon and spread about ¼ cup of pizza sauce on each tortilla. Leave a half-inch border around the edges. This helps keep the sauce inside when you roll them. 4. Sprinkle ½ cup of shredded mozzarella cheese over the sauce on each tortilla. Ensure the cheese covers the sauce evenly. 5. Add your choice of toppings. I love pepperoni, but you can use bell peppers, olives, or mushrooms. 6. Finish with a sprinkle of Italian seasoning and garlic powder for extra flavor. 1. Start at one edge of the tortilla and roll it tightly. Form a log shape as you go. 2. Do this for all tortillas. This keeps your pizza rolls neat and ready to bake. 3. Use a sharp knife to slice each rolled tortilla into 1-inch thick pieces. These will be your tasty pizza rolls. 1. Arrange the pizza rolls upright on a baking sheet lined with parchment paper. This helps them cook evenly. 2. Lightly brush the tops with olive oil. This gives them a nice golden color. 3. Bake in the preheated oven for about 15 minutes. Keep an eye on them until the cheese bubbles and the tortillas turn golden brown. 4. After baking, let the pizza rolls cool for a few minutes. This step prevents burns. Enjoy these crunchy and cheesy snacks! They are fun to make and taste amazing. To make great tortilla pizza rolls, avoid sauce overflow. Spread the sauce evenly, but leave a half-inch border. This stops the sauce from leaking out when you roll. Next, keep your rolls tight. Start rolling from one edge, making sure it’s snug. This helps hold the filling inside. If they are loose, the filling may spill out while baking. When baking, check for doneness by looking at the cheese. It should be bubbly and slightly golden. The tortillas should also look crisp and golden brown. Adjust your baking time based on your oven. Some ovens bake hotter or cooler. If your rolls are not done, add a few more minutes. Just keep an eye on them to avoid burning. For plating, arrange the pizza rolls neatly on a large platter. This makes them look fun and inviting. Adding fresh basil leaves on top gives a nice touch of color. For dipping, serve extra pizza sauce on the side. You can also include ranch dressing or a spicy dip for variety. Kids love to dip, and it makes the snack even more fun! Pro Tips Choose the Right Tortilla: Opt for large flour tortillas for better rolling and a delightful chewy texture. Experiment with Toppings: Feel free to mix and match your favorite toppings, such as different cheeses, vegetables, or meats, to create unique flavors. Don’t Overfill: To prevent the rolls from bursting during baking, avoid overfilling them with sauce and toppings. Serve with Dipping Sauces: Enhance the enjoyment by serving these rolls with a variety of dipping sauces, like ranch, marinara, or garlic butter. {{image_4}} You can switch up toppings to suit your taste. For a vegetarian twist, try adding bell peppers, olives, or mushrooms. They add great flavor and color. If you prefer meat, consider using sausage or ham. Both add a savory kick that pairs well with cheese. Mix and match to create your dream rolls! Cheese is key in Tortilla Pizza Rolls. While mozzarella is classic, you can explore other types. Try cheddar for a sharp taste or pepper jack for some heat. Both options melt well and enhance the flavor. Feel free to combine different cheeses for a unique experience. Want to spice things up? Add hot sauce or red pepper flakes to your filling. This adds a nice heat that many enjoy. You can also experiment with other seasonings like oregano or thyme. They can enhance the taste and make your rolls stand out. Remember, the right spice makes a big difference! To keep your tortilla pizza rolls fresh, let them cool completely. This step prevents moisture buildup. Once cool, place the rolls in an airtight container. You can use glass or plastic containers. Make sure to line them with paper towels to absorb extra moisture. This helps maintain their crunchiness. When reheating, use the oven for best results. Preheat your oven to 350°F (175°C). Arrange the pizza rolls on a baking sheet. Heat them for about 10 minutes. This method keeps them crispy. Avoid using the microwave, as it can make the rolls soggy. If you must use the microwave, heat in short bursts. This way, you can check for moisture. Always aim for a hot, crunchy treat! Tortilla pizza rolls stay fresh for about 3 to 4 days when stored properly. Keep them in an airtight container in the fridge. This way, they stay tasty and safe to eat. If you notice any change in smell or color, it’s best to throw them out. Yes, you can freeze tortilla pizza rolls. After baking, let them cool completely. Then, place them in a freezer-safe bag or container. They will keep well for up to 2 months. When you want to eat them, thaw overnight in the fridge and reheat in the oven. Kids love fun and simple food! You can swap pepperoni for turkey slices or veggies like bell peppers. Try adding pineapple for a sweet twist. Cheese sticks or even cooked chicken can be great too. Let kids choose their favorite toppings for a fun activity. Yes, you can make tortilla pizza rolls in an air fryer! Preheat the air fryer to 375°F (190°C). Arrange the rolls in a single layer, ensuring they don’t touch. Cook for about 8 to 10 minutes. Check them halfway through for even cooking. This method gives a nice crispy finish! In this post, we explored how to make tasty tortilla pizza rolls. We covered ingredients, step-by-step instructions, helpful tips, and fun variations. Remember, you can customize your rolls with different toppings and cheeses to suit your taste. Proper storage and reheating will keep your leftovers fresh and yummy. Enjoy making these easy snacks, whether for yourself or sharing with friends and family. Tortilla pizza rolls are quick to prepare and sure to please everyone!

Tortilla Pizza Rolls Crunchy and Cheesy Snack Delight

Are you ready to spice up snack time? Tortilla Pizza Rolls are the perfect blend of crunchy and cheesy goodness.

For this tasty dish, you will need: - 1 lb (450g) ground turkey - 8 oz (225g) whole wheat or regular pasta (penne or fusilli work well) - 1 cup shredded mozzarella cheese - 1 cup cottage cheese - 1 cup marinara sauce - 1 small onion, finely chopped - 2 cloves garlic, minced - 1 teaspoon dried Italian herbs (a blend of basil and oregano) - Salt and pepper to taste - 1 tablespoon olive oil You can make this dish your own by adding: - Fresh basil leaves for garnish - Toasted breadcrumbs for crunch - Cooked vegetables like spinach or bell peppers Feel free to play with flavors! Add your favorite herbs or spices to make it special. This dish serves four people. Here’s what you can expect per serving: - Calories: 350 - Protein: 28g - Fat: 14g - Carbohydrates: 30g - Fiber: 5g This meal is not only tasty but also nutritious. It gives a good mix of protein and carbs to keep you energized. Enjoy this creamy, cheesy delight with family and friends! {{ingredient_image_2}} Start by bringing a large pot of salted water to a boil. Add 8 ounces of pasta, like penne or fusilli. Cook the pasta according to the package instructions. This usually takes about 8 to 10 minutes. You want the pasta to be al dente, which means it should be firm but not hard. Once cooked, drain the pasta in a colander. Set it aside for later. In a large skillet, heat 1 tablespoon of olive oil over medium heat. Once hot, add 1 finely chopped onion. Sauté it for about 3 to 4 minutes. You want the onion to be soft and a bit see-through. Next, add 2 minced garlic cloves. Cook this mixture for another minute, stirring often. The goal is to make the garlic smell great without letting it brown. Now, increase the heat to medium-high. Add 1 pound of ground turkey to the skillet. Cook it for about 6 to 8 minutes. Use a wooden spoon to break the turkey apart. Cook until it turns brown and is no longer pink. Once the turkey is cooked, pour in 1 cup of marinara sauce. Sprinkle in 1 teaspoon of dried Italian herbs along with salt and pepper to taste. Stir everything together. Let it simmer for about 5 minutes, allowing the flavors to mix well. Now, lower the heat. Gently fold in the cooked pasta. Make sure it is well mixed with the turkey and sauce. In a separate bowl, combine 1 cup of shredded mozzarella cheese and 1 cup of cottage cheese. Mix until well blended. Pour this cheese mixture over the pasta and turkey. Fold everything together gently. You want the cheeses to mix in and start melting into the warm pasta. Remove the skillet from the heat and let it sit for a couple of minutes. This helps the cheese firm up a bit for better texture. Using herbs brings out great flavors in your dish. I love using dried Italian herbs for this recipe. These herbs mix well with the turkey and sauce. You can also add fresh herbs like basil. Fresh herbs can enhance taste and aroma. Don’t forget to add salt and pepper to balance the flavors. A pinch can go a long way in making your dish pop. To get the best melt, mix your cheeses before adding them to the pasta. I use mozzarella and cottage cheese because they create a creamy texture. Make sure your pasta is warm when you add the cheese mix. This helps the cheese melt evenly. Stir gently to coat every piece of pasta. Avoid overcooking the cheese; it should be gooey, not tough. Serving your dish well makes it more appealing. Use individual bowls for each serving. This adds a nice touch. Garnish with fresh basil leaves for color and aroma. A light sprinkle of toasted breadcrumbs can add crunch. Serve it warm to keep the cheese melty. These small details will impress your family and friends. Enjoy the delightful look of your cheesy ground turkey pasta! Pro Tips Perfect Pasta: Always cook pasta until it's al dente to maintain its texture and prevent it from becoming mushy when mixed with the sauce. Flavor Boost: For an extra depth of flavor, consider adding a splash of red wine to the skillet after browning the turkey before adding the marinara sauce. Cheese Variations: Feel free to experiment with different types of cheese such as parmesan or cheddar for a unique flavor twist. Make Ahead: This dish can be prepared in advance and stored in the fridge. Just reheat it gently on the stove or in the oven before serving. {{image_4}} You can easily swap ground turkey for other meats. Ground chicken, beef, or pork all work well. Each protein adds its unique flavor. For a lean option, ground chicken is a great choice. Beef adds a richer taste, while pork can be a bit sweeter. Just remember to cook each type thoroughly. Adjust cooking times based on the protein you choose. If you want a vegetarian version, skip the meat entirely. Focus on the cheese for a creamy dish. You can use extra mozzarella or cottage cheese for richness. Add vegetables like spinach, mushrooms, or bell peppers. This not only boosts flavor but adds nutrition too. Sauté vegetables with the onions for a tasty mix. This way, you still get a hearty meal without meat. Don't feel limited to just one pasta type. Whole wheat, penne, or fusilli are great choices. You can also try gluten-free pasta if needed. Zucchini noodles or spaghetti squash can work for a low-carb option. Just keep an eye on cooking times, as they vary. Choose the pasta that suits your taste and diet. The secret is to mix the pasta well with the sauce and cheese for the best flavor. To store your cheesy ground turkey pasta, let it cool first. Use an airtight container for the best results. This helps keep the pasta fresh. Place it in the fridge if you plan to eat it within three days. Otherwise, use a freezer-safe container for longer storage. When you're ready to enjoy your leftovers, reheat them gently. Use a microwave or a skillet on low heat. If using the microwave, add a splash of water to keep it moist. For the skillet, stir often until heated through. This keeps the pasta creamy and tasty, not dry. To freeze, divide the pasta into portions. Wrap each portion tightly in plastic wrap before placing it in a freezer-safe bag. Squeeze out as much air as possible. This helps prevent freezer burn. You can freeze it for up to three months. When you're ready to eat, thaw it in the fridge overnight before reheating. Yes, you can use different cheese types in this recipe. I like cheddar or gouda for a twist. You can also mix in some parmesan for extra flavor. Just keep in mind that different cheeses melt differently. Some cheeses may not get as creamy. Experiment to find your favorite combo! You can store cheesy ground turkey pasta in the fridge for about three to four days. Make sure to place it in an airtight container. This keeps it fresh and tasty. If you want to keep it longer, consider freezing it instead. To reheat leftover pasta, I recommend using the stovetop. Place the pasta in a skillet over medium heat. Add a splash of water or sauce to keep it moist. Stir it often until heated through. You can also use the microwave if you're in a hurry. Just cover it and heat it in short bursts, stirring in between. This helps to avoid drying it out. This blog post covered an easy and tasty cheesy ground turkey pasta recipe. We explored key ingredients and how to cook pasta just right. I shared tips for enhancing flavors and ways to customize your dish. You learned how to store, reheat, and even adapt this meal to fit your needs. In the end, cooking should be fun and flexible. Enjoy making this dish in your unique way!

Cheesy Ground Turkey Pasta Flavors That Delight

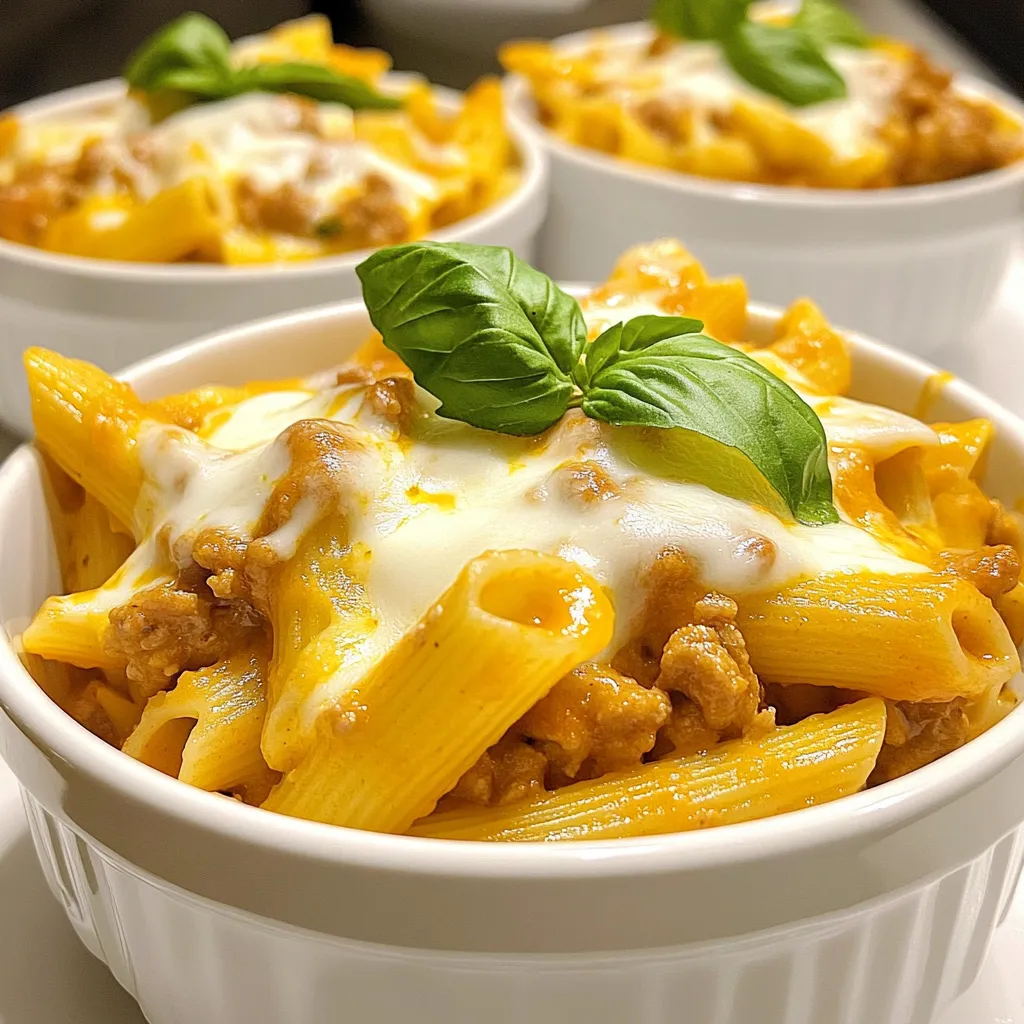
Get ready for a meal that’s simple, tasty, and packed with flavor! In Cheesy Ground Turkey Pasta Flavors That Delight,

- 2 cups cooked jasmine rice - 1 cup fresh pineapple, diced - 1/2 cup red bell pepper, diced - 1/2 cup green peas - 1/4 cup red onion, chopped - 2 cloves garlic, minced - 2 tablespoons soy sauce or tamari - 1 tablespoon sesame oil - 1 tablespoon olive oil - 1/4 cup scallions, sliced - 1/4 teaspoon cayenne pepper (optional) - Salt and black pepper to taste - 1/4 cup chopped cashews Using the right ingredients makes a big difference in flavor. I love using jasmine rice for this dish. It adds a nice fragrance and texture. Fresh pineapple gives a sweet burst that brightens up the meal. Red bell pepper adds color and sweetness. Green peas bring a lovely pop of green and texture. Garlic and red onion provide a strong base of flavor. The soy sauce or tamari adds saltiness. I recommend tamari for a gluten-free option. Sesame oil offers a lovely nutty taste. Olive oil is great for sautéing. Cayenne pepper gives a spicy kick if you like heat. Lastly, cashews add a satisfying crunch. These ingredients all come together to create a dish that is not only tasty but also fun to eat. - Use gluten-free soy sauce like tamari if needed. - You can swap in other veggies like carrots or peas. - Canola or avocado oil work well if you don’t have olive oil. Feel free to mix and match! Cooking is all about creativity. Use what you have, and you’ll still end up with a delicious dish. {{ingredient_image_2}} Getting the rice ready Use 2 cups of cooked jasmine rice. Leftover rice works best. Make sure it is chilled. This helps keep the rice from clumping. If you don’t have leftover rice, cook it and let it cool. Chopping vegetables and fruit Chop your vegetables and fruit. Dice 1 cup of fresh pineapple into small pieces. Finely chop 1/2 cup of red bell pepper. Get 1/4 cup of red onion and chop it small. Mince 2 cloves of garlic. You can also measure 1/2 cup of green peas. Sautéing onions and garlic In a large skillet, heat 1 tablespoon of olive oil over medium-high heat. Add the red onion and minced garlic. Sauté them for 2-3 minutes. The onion should turn soft and fragrant. Incorporating vegetables and pineapple Add the diced red bell pepper to the pan. Cook for another 2-3 minutes. Push the veggies to one side of the skillet. Pour in 1 tablespoon of sesame oil. Then, add the chilled jasmine rice. Break up any clumps and stir-fry for a few minutes. Mixing in sauces and final ingredients Now, add the diced pineapple to the skillet. Let it caramelize for about 2 minutes. Next, pour in 2 tablespoons of soy sauce. Mix everything well. Stir in the green peas and optional cayenne pepper. Season with salt and black pepper to taste. Cook for 2 more minutes. How to plate the dish For a fun twist, serve your fried rice in hollowed-out pineapple halves. This adds a tropical flair. If not, use a bright bowl for a colorful presentation. Garnishes for added flavor Finish the dish with 1/4 cup of chopped cashews and sliced scallions on top. This adds crunch and freshness. You can also add a lime wedge for a zesty touch. Choosing the right rice is key. I love using jasmine rice. It has a soft texture and great flavor. For the best results, use chilled, leftover rice. This helps keep the grains separate. Freshly cooked rice can be too sticky. To adjust flavors, use seasonings wisely. Start with soy sauce. It adds umami and depth. You can also add salt and pepper to taste. If you want a kick, try cayenne pepper. Just a pinch makes a big difference. High heat is vital for stir-frying. It cooks the rice fast and keeps it from being mushy. Use a large skillet or wok to get the best results. Heat the oil until it shimmers. This step makes a big difference. To prevent sticking, keep stirring. Move the rice around the pan. Don’t let it sit too long. If rice sticks, it can ruin the texture. Serving in pineapple halves is a fun idea. It gives a tropical look and taste. Just hollow out the pineapple and fill it with fried rice. To make your dish pop, use garnishes. Scallions add color and freshness. A wedge of lime gives brightness. You can also sprinkle chopped cashews on top for crunch. These small touches make a big impact on your plate. Pro Tips Use Day-Old Rice: For the best texture, use leftover jasmine rice that's been chilled in the fridge. It helps prevent the rice from becoming mushy during cooking. Fresh Pineapple Flavor: If possible, opt for fresh pineapple over canned to enhance the tropical flavor and sweetness of the dish. Customize Your Veggies: Feel free to add or substitute vegetables based on what you have on hand, like carrots, peas, or corn for added color and nutrition. Garnish for Presentation: Enhance your dish's presentation by garnishing with sliced scallions, chopped cilantro, or even a few lime wedges for a fresh citrus kick. {{image_4}} To make Tropical Pineapple Fried Rice vegetarian or vegan, simply remove any meat. Use plant-based ingredients instead. You can add tofu or tempeh for protein. These options absorb flavors well and keep the dish hearty. Want to boost those tropical vibes? Add other fruits like mango or coconut. They bring sweetness and a fresh twist. You can also try spices like ginger or turmeric for a more vibrant taste. These additions enhance the dish and make it exciting. If you love heat, add different peppers, like jalapeños or serranos. They give a nice kick. You can also use chili sauces for added zing. Just drizzle some over the rice before serving. Adjust the spice level to fit your taste. To keep your Tropical Pineapple Fried Rice fresh, follow these simple steps: - Cool the rice: Let it sit until it reaches room temperature. - Use airtight containers: Place the rice in a container with a tight seal. - Label and date: Write the date on the container to track freshness. In the fridge, this dish lasts about 3 to 4 days. Make sure to check for any off smells before eating. If you want to store it for longer, freezing is a great option. Here’s how to do it: - Divide into portions: Break the rice into smaller servings for easy use. - Wrap well: Use plastic wrap or freezer bags to prevent freezer burn. - Label each bag: Write the date and contents on each bag. To reheat, follow these tips for the best results: - Thaw in the fridge: Move it to the fridge a day before you plan to eat. - Use a skillet: Heat in a skillet over medium heat, stirring often. - Add a splash of water: If it seems dry, add a bit of water or oil as needed. This way, you can enjoy your Tropical Pineapple Fried Rice even after a few days! The best rice for fried rice is jasmine rice. It has a light, fluffy texture. Other types, like basmati, can work but may be too fragrant. Jasmine rice holds flavors well and gets a nice, slightly sticky texture when cooked. This rice is perfect for stir-frying. It keeps its shape and soaks up sauces nicely. Yes, you can use canned pineapple. Canned pineapple is convenient and sweet. However, it may have a softer texture and more syrup. If you want a fresh taste, use fresh pineapple. Fresh pineapple adds a nice crunch and bright flavor. If you choose canned, drain it well to avoid excess moisture. To make fried rice without gluten, use gluten-free soy sauce, like tamari. This option has a similar taste. Check the label to ensure it is gluten-free. Other alternatives include coconut aminos, which give a sweet, salty flavor. Both options work well in fried rice and keep it tasty. This blog post covered how to make delicious fried rice. We discussed the best ingredients, helpful tips, and various options to customize your dish. You learned about ingredient swaps, cooking steps, and storage methods to keep your fried rice fresh. Now you can impress friends and family with your cooking skills. Enjoy experimenting with flavors and share your creations! Cooking can be fun, easy, and filled with surprises. Dive in and make your own special version!

Tropical Pineapple Fried Rice Flavorful and Simple Dish

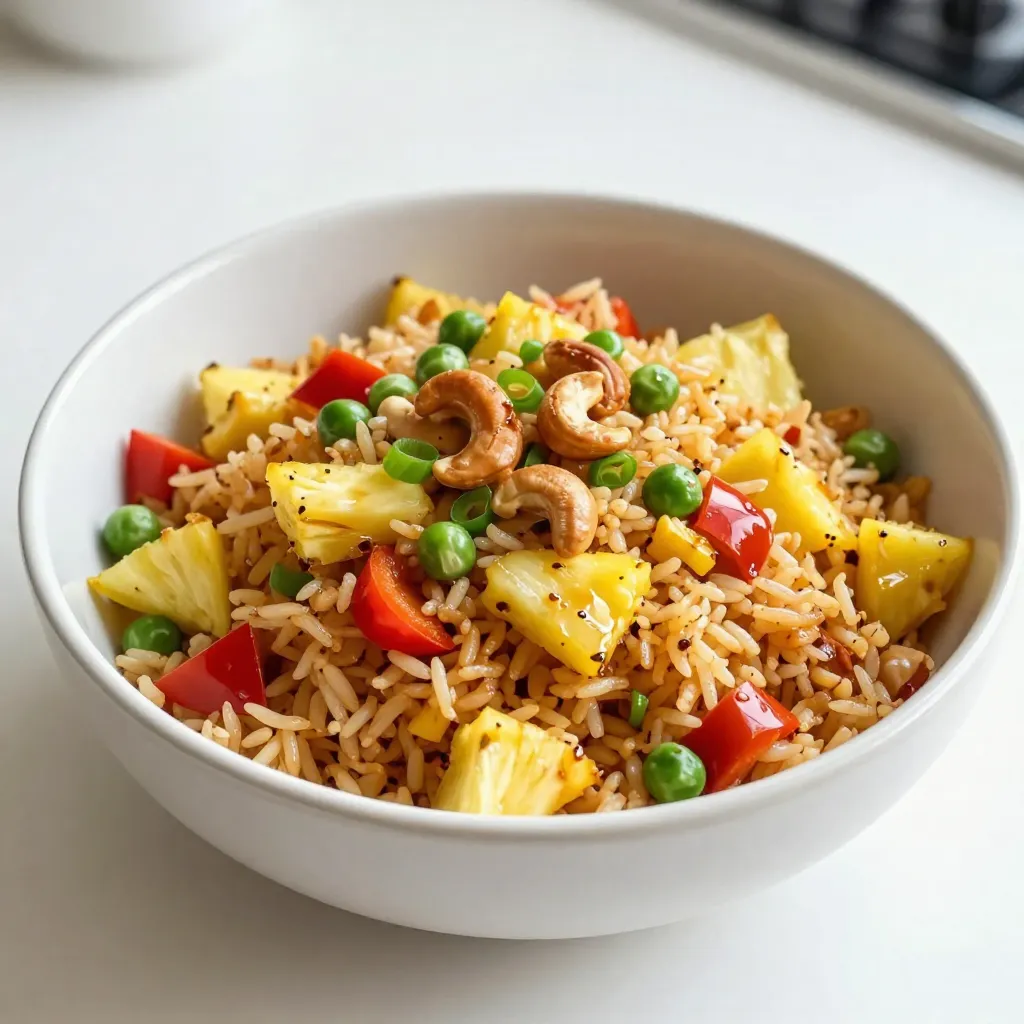
If you love vibrant flavors and simple recipes, you’ll enjoy this Tropical Pineapple Fried Rice. Imagine fluffy jasmine rice mingling

- 1.5 lbs boneless, skinless chicken thighs, cut into bite-sized pieces - 1 tablespoon garam masala - 1 teaspoon turmeric - 1 teaspoon ground cumin - 1 teaspoon ground coriander - 1 teaspoon paprika - 1 teaspoon chili powder (adjust according to your spice preference) - 1 tablespoon fresh ginger, minced - 1 tablespoon garlic, minced - 1 large onion, finely chopped - 1 can (14 oz) crushed tomatoes - 1 cup coconut milk (or heavy cream) - 2 tablespoons vegetable oil - Salt, to taste - Fresh cilantro, chopped (for garnish) To make Instant Pot Chicken Tikka Masala, gather these ingredients. I love using chicken thighs for this dish. They stay juicy and tender. The spices bring warmth and depth to the flavor. Garam masala is key. It adds a rich, aromatic taste. The turmeric gives a beautiful color, while cumin and coriander add earthiness. Paprika and chili powder bring heat, but you can adjust these to your liking. Don't forget the fresh ginger and garlic. They add brightness and zest. The onion forms a sweet base when sautéed. For liquids, crushed tomatoes create a thick sauce, and coconut milk or heavy cream makes it creamy. Use vegetable oil for sautéing, and season with salt for balance. Finally, fresh cilantro adds a pop of color and freshness as a garnish. Now you’re ready to create a dish that will impress everyone! {{ingredient_image_2}} To start, you need to marinate the chicken. In a medium bowl, combine 1.5 lbs of chicken thighs with spices. Use 1 tablespoon of garam masala, 1 teaspoon of turmeric, cumin, coriander, paprika, and chili powder. Add 1 tablespoon each of minced ginger and garlic. Mix everything well until the chicken is coated. Cover it and let it marinate for at least 30 minutes. For deeper flavor, you can refrigerate it overnight. Next, set your Instant Pot to Sauté mode. Add 2 tablespoons of vegetable oil. Once hot, add 1 large, finely chopped onion. Cook for about 5-7 minutes. Stir often until the onion turns translucent and golden. Now, add the marinated chicken to the pot. Spread it evenly. Sauté for another 5 minutes, allowing the chicken to brown slightly on the outside. This step builds great flavor. Stir in 1 can (14 oz) of crushed tomatoes. Make sure they mix well with the chicken and spices. Scrape the pot’s bottom to release any bits stuck there. This helps prevent a burn notice later. Secure the lid on the Instant Pot. Ensure the valve is set to Sealing. Select the Manual or Pressure Cook function and set the timer for 10 minutes. This will cook the chicken perfectly. After cooking, let the pressure release naturally for 5 minutes. Then, carefully switch the valve to Venting to release any remaining pressure. Be cautious of the steam! Remove the lid and stir in 1 cup of coconut milk. Alternatively, you can use heavy cream. Set the Instant Pot back to Sauté mode and let it simmer for 5 minutes. This thickens the sauce. Taste it and add salt as needed. Spoon the chicken tikka masala into bowls. Garnish with fresh chopped cilantro. This dish pairs wonderfully with fluffy basmati rice or warm naan bread. Enjoy your meal! To get the best flavor, you should marinate your chicken well. Use a bowl to mix the spices with the chicken. Make sure every piece is coated. Let it sit for at least 30 minutes. For even more flavor, marinate it overnight in the fridge. This step really makes a difference in taste. Burn notices can happen if food sticks to the pot. To prevent this, always scrape the bottom of the pot. When you add tomatoes, mix them well with the chicken. This helps to release any stuck bits. If you see a burn notice, don’t panic! Add a little water or broth to the pot, stir, and try again. You can change the spice level to fit your taste. If you like it mild, use less chili powder. For more heat, add extra chili or even fresh peppers. Remember: you can always add more spice, but you can’t take it out once it’s in. Start small and taste as you go. To make your dish creamier, use coconut milk or heavy cream. Coconut milk gives a nice tropical flavor. If you want it richer, add a bit more cream. Stir it in after cooking and let it simmer. This will make the sauce thick and smooth, perfect for soaking up with rice or naan. Pro Tips Marination Matters: Letting the chicken marinate for at least 30 minutes enhances the flavor significantly. For an even richer taste, marinate overnight in the refrigerator. Scrape the Pot: Always scrape the bottom of the pot after adding tomatoes to prevent burning. This ensures a smooth cooking process and prevents the dreaded burn notice. Adjust Spice Levels: Feel free to adjust the chili powder according to your heat preference. Start with a smaller amount and increase gradually to achieve your desired spice level. Creamy Texture: For a richer and creamier sauce, use full-fat coconut milk or heavy cream. This will give your tikka masala a luxurious texture that complements the spices beautifully. {{image_4}} You can make a tasty vegetarian version of chicken tikka masala. Try using firm tofu or chickpeas instead of chicken. Both options soak up the spices well. For tofu, press it to remove excess water before cutting it into cubes. This helps it absorb flavors better. If you choose chickpeas, use canned ones for quick prep. They add protein and texture to your dish. Remember to marinate them just like you would with chicken to enhance the taste. If you want something other than chicken, consider lamb or shrimp. Lamb adds a rich flavor that pairs well with the spices. Cut the lamb into bite-sized pieces and cook it the same way as chicken. For shrimp, use them towards the end of cooking. They cook quickly and will stay tender. Just add them after the tomatoes and pressure cooking step. This makes your meal diverse and delicious. While coconut milk is a classic choice, you can switch it up. Use heavy cream for a richer sauce. If you’re looking for a lighter option, try Greek yogurt. Stir it in after cooking to give the dish a creamy texture without added fat. You can also use cashew cream for a vegan-friendly twist. Soak cashews in water, blend them, and mix them into the sauce for a smooth, rich flavor. These options add variety to your dish while keeping it creamy and satisfying. You can keep leftover chicken tikka masala in the fridge. Place it in an airtight container. It stays fresh for up to 3 days. Make sure it cools down before sealing. This helps prevent moisture buildup. If you want to save it for later, freezing works great. Use a freezer-safe container or heavy-duty freezer bag. This dish can last up to 3 months in the freezer. Be sure to label the bag with the date. When ready to eat, thaw it in the fridge overnight. To reheat, warm it on the stove over medium heat. Stir occasionally to ensure even heating. You can also use a microwave. Heat in short intervals, stirring in between. If it seems too thick, add a splash of water or coconut milk. Enjoy it warm with rice or naan! Yes, you can use chicken breast. Chicken breast is leaner and cooks differently. It may dry out if overcooked. If you choose breast, cut it into smaller pieces. This will help it cook evenly. Cooking chicken tikka masala takes about 10 minutes in the Instant Pot. First, you sauté the onions and chicken for about 10 minutes. Then, pressure cook for another 10 minutes. Don't forget to let the pressure release naturally for 5 minutes. Yes, you can make this recipe dairy-free. Use coconut milk instead of heavy cream. The coconut milk adds a nice creaminess and flavor. Some prefer almond milk as an alternative, but it will change the taste. Chicken tikka masala pairs well with fluffy basmati rice or warm naan bread. You can also add a side of steamed vegetables for a healthy touch. If you enjoy heat, try serving with spicy pickles or chutney. This post covered the basics of making Chicken Tikka Masala, from key ingredients to step-by-step cooking. You learned about marinading, cooking, and finishing with coconut milk. We explored tips to enhance flavor and provided variations for different diets. Lastly, we included storage and reheating tips for leftovers. Now, you can enjoy a tasty, homemade Chicken Tikka Masala. Experiment with the recipe and make it your own. Cooking should be fun, and this dish offers many ways to personalize it. Your kitchen adventures await!

Instant Pot Chicken Tikka Masala Simple and Savory

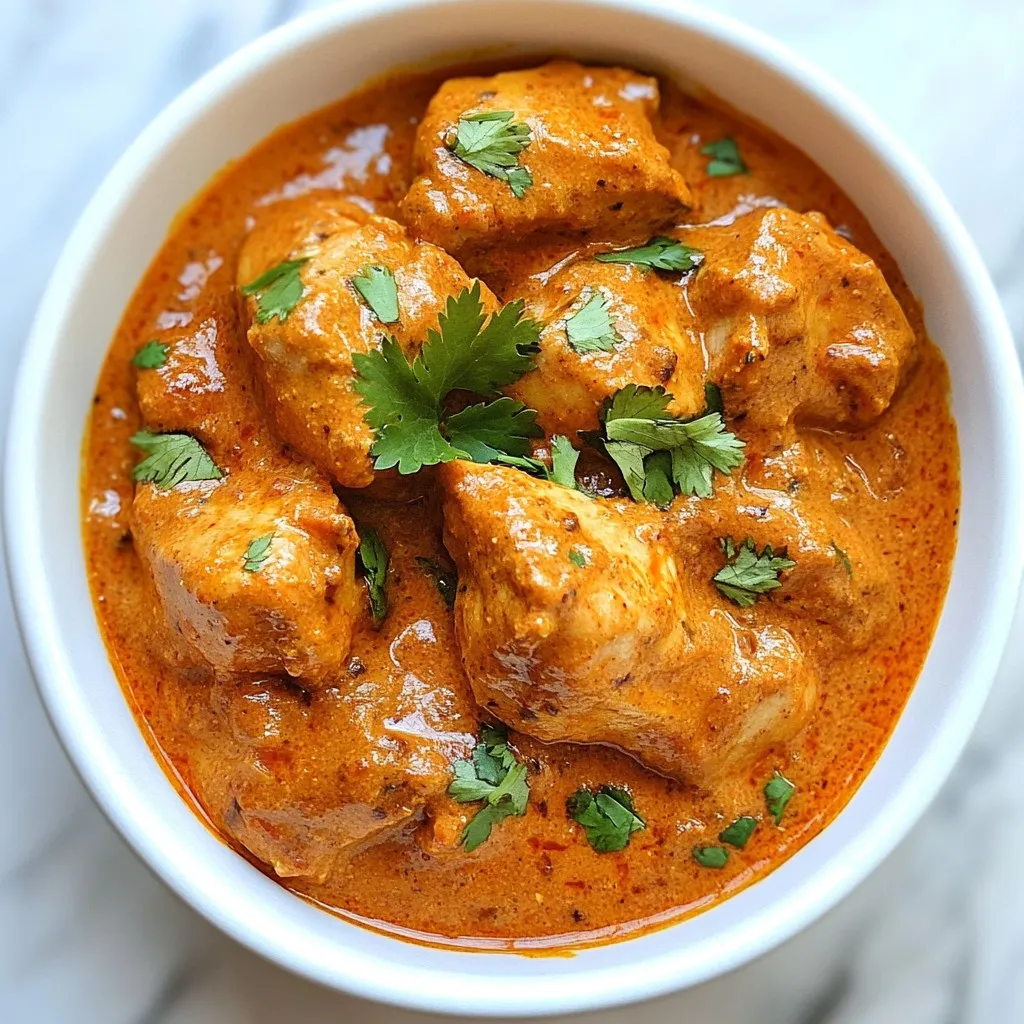
Welcome to a culinary adventure with Instant Pot Chicken Tikka Masala Simple and Savory. This dish blends tender chicken, rich

- Beef and Aromatics For this dish, I use 2 pounds of beef chuck roast. Cut it into large chunks. This cut gives great flavor and tenderness. I also add 1 medium onion, finely chopped, and 4 cloves of garlic, minced. These aromatics build a strong base for the sauce. A jalapeño, seeded and finely chopped, adds a nice kick without overwhelming the flavor. - Seasonings and Liquids The seasonings are key to authentic barbacoa. I use 2 teaspoons of ground cumin, 2 teaspoons of dried oregano, 1 teaspoon of smoked paprika, and 1 teaspoon of ground coriander. Each spice adds depth to the dish. For liquids, I need 1 cup of beef broth, 3 tablespoons of apple cider vinegar, and 2 tablespoons of fresh lime juice. These ingredients create a rich, tangy sauce that complements the beef well. - Garnishes and Serving Suggestions For garnishing, fresh cilantro is a must. I chop it roughly and sprinkle it on top before serving. Lime wedges are perfect for squeezing on the tacos. I also suggest serving the beef barbacoa inside warm, soft tortillas. You can add diced onions, creamy avocado, or shredded cheese for extra flavor. This makes the meal not only tasty but also visually appealing. {{ingredient_image_2}} - Searing the Beef: Set your Instant Pot to the sauté function. Add 2 tablespoons of olive oil. Let the oil heat until it shimmers. Add 2 pounds of beef chuck roast, cut into large chunks. Sprinkle salt and freshly ground black pepper on the beef. Sear the beef for 4-5 minutes, turning occasionally. The beef should be browned on all sides. Once done, remove the beef and set it on a plate. - Sautéing the Aromatics: In the same pot, add 1 medium onion, finely chopped. Sauté the onion for about 3 minutes until it softens. Next, add 4 cloves of minced garlic and 1 jalapeño, seeded and finely chopped. Sauté for 1 more minute until fragrant. - Deglazing the Pot: Pour in 1 cup of beef broth. Use a wooden spoon to scrape up any brown bits from the bottom of the pot. These bits add great flavor to your dish. - Adding Flavors: Stir in 3 tablespoons of apple cider vinegar, 2 tablespoons of fresh lime juice, 2 teaspoons of ground cumin, 2 teaspoons of dried oregano, 1 teaspoon of smoked paprika, and 1 teaspoon of ground coriander. Mix everything well. - Pressure Cooking Steps: Place the seared beef back into the pot. Make sure the beef is submerged in the sauce. Close the lid tightly and set your Instant Pot to high pressure. Cook for 60 minutes. When done, let the pressure release naturally for 10-15 minutes. Then do a manual release to let out any remaining steam. - Shredding the Beef: Carefully open the lid. Use two forks to take out the beef. Shred the beef gently by pulling it apart. Return the shredded beef to the pot and mix it with the sauce for more flavor. - Plating the Dish: Serve your beef barbacoa hot. It looks great in warm, soft tortillas. - Topping Ideas: Top each taco with diced onions, fresh cilantro, and a splash of lime juice. You can also add creamy avocado slices or shredded cheese for extra flavor. Encourage everyone to customize their own tacos! - Achieving the Perfect Sear Searing your beef is key. Start with hot oil in the pot. This gives the meat a nice brown color. Only add a few pieces at a time. This helps keep the heat up. Don't overcrowd the pot. It makes a big difference in flavor. - Adjusting Cooking Times Cooking time can vary based on meat size. For larger chunks, add a few extra minutes. If your beef is smaller, you might reduce the time a bit. Always check for tenderness. It should shred easily with a fork. - Flavor Enhancement Techniques To boost flavor, use fresh herbs like cilantro. Adding lime juice brightens up the dish. Don't forget to scrape the bottom of the pot. Those browned bits add depth to your sauce. - Serving in Tortillas Warm soft tortillas make the best serving option. Fill them with the shredded beef. Top with chopped onions and cilantro. A squeeze of lime juice adds a fresh touch. - Customization Options Let guests personalize their tacos. Offer toppings like creamy avocado, shredded cheese, or pickled onions. This makes each taco unique and fun to eat. Everyone can create their perfect bite! Pro Tips Choose the Right Cut: For the best flavor and tenderness, always use a well-marbled cut like beef chuck roast. The fat will render during cooking, keeping the meat moist and flavorful. Don't Skip the Searing: Searing the beef before pressure cooking adds depth to the flavor. It creates a rich crust that enhances the overall taste of your barbacoa. Let it Rest: After shredding the beef, let it sit in the sauce for a few minutes. This allows the meat to absorb more flavor, making every bite deliciously intense. Customize Your Tacos: Encourage guests to personalize their tacos with toppings like pickled onions, fresh avocado, or spicy salsa to elevate the dining experience! {{image_4}} Alternative Types of Meat You can change the meat for beef barbacoa. Try pork shoulder or chicken thighs. These cuts cook well and stay juicy. If you use pork, adjust the cook time to 50 minutes. For chicken, 25 minutes is enough. Each meat gives a unique taste to the dish. Vegetarian or Vegan Versions To make a plant-based barbacoa, use jackfruit or mushrooms. Jackfruit mimics the texture of meat. Use young green jackfruit packed in water or brine. For mushrooms, try shiitake or portobello. Cook them with the same spices to keep the flavor strong. Add extra broth to help with moisture. Different Spices to Use You can switch up the spices for a new twist. Try adding chipotle peppers for smokiness. Or, use adobo sauce for a rich flavor. If you want a fresh taste, add fresh herbs like cilantro or epazote. Each spice change can make your barbacoa unique. Serving Barbacoa in Other Dishes Barbacoa isn't just for tacos. You can serve it over rice or in burritos. Use it in nachos for a tasty snack. Make a barbacoa bowl with beans and veggies. The possibilities are endless. Each dish lets you enjoy barbacoa in a new way. How to Store Leftovers After enjoying your beef barbacoa, let it cool first. Place leftovers in an airtight container. Ensure it’s sealed well to keep it fresh. You can also use plastic wrap or foil if needed. Duration for Storing Store your beef barbacoa in the fridge for up to 3 days. This keeps the flavors intact and safe to eat. If you want to enjoy it longer, consider freezing it. Freezing Instructions To freeze your barbacoa, first let it cool completely. Then, divide it into portions. Use freezer-safe bags or containers. Remove as much air as possible to prevent freezer burn. Label each container with the date. Thawing and Reheating Tips When ready to eat, thaw the barbacoa overnight in the fridge. You can also use the microwave or Instant Pot on the sauté setting for quick reheating. Heat until warm, stirring occasionally, to keep it juicy and flavorful. What is Beef Barbacoa? Beef barbacoa is a flavorful Mexican dish. It uses beef, spices, and cooking in a pot. The beef cooks low and slow, making it tender and juicy. You can serve it in tacos or with rice. It’s a crowd-pleaser at any meal! How can I make it spicier? To spice up your barbacoa, add more jalapeños. You can also include chipotle peppers for heat. Try extra cayenne pepper or hot sauce in the cooking mix. Taste as you go to find your perfect heat level. Can I use a different cut of beef? Yes, you can! While beef chuck is great, other cuts work too. Try brisket for rich flavor or flank steak for a leaner option. Just remember, tougher cuts need longer cooking to get tender. Why is my beef tough? If your beef is tough, it may not have cooked long enough. Make sure to use the right cooking time and pressure. Tough cuts need time to break down. If needed, you can always try cooking it more. How to thicken the sauce? To thicken the sauce, you can add cornstarch mixed with water. Stir it in and cook for a few minutes. Another option is to reduce the sauce by cooking it longer without the lid. This helps concentrate the flavors and thicken it up. This blog post covered the key ingredients for barbacoa, from beef and aromatics to garnishes. I shared step-by-step instructions for preparation and cooking. You learned tips for perfect searing and presentation. Variations allow for creative choices with meat and spices. Finally, knowing how to store leftovers helps you enjoy your barbacoa more. I hope you feel confident to try making this dish. Enjoy your cooking!

Instant Pot Beef Barbacoa Flavorful and Easy Meal

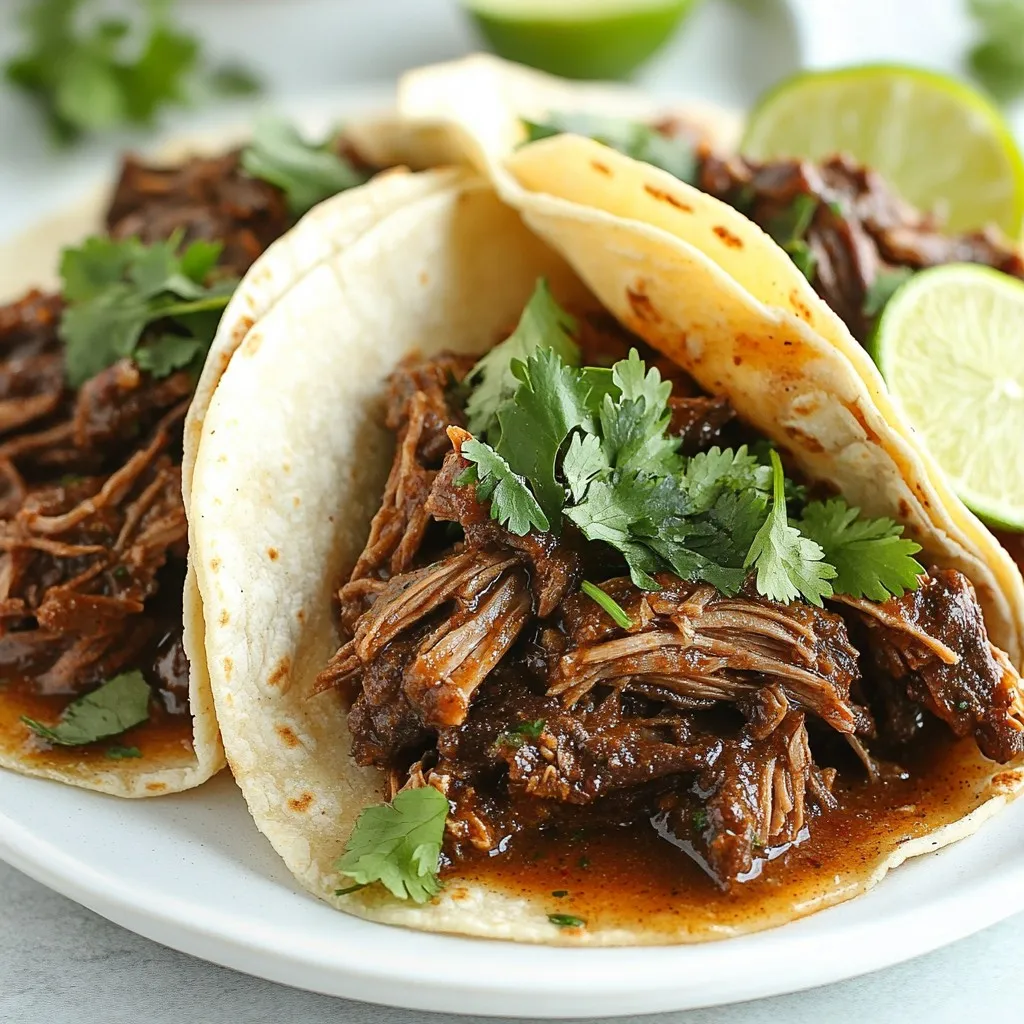
Looking for a meal that’s packed with flavor yet easy to make? Instant Pot Beef Barbacoa is your answer! I’ll

- 4 boneless, skinless chicken breasts - 1/4 cup extra virgin olive oil - Juice of 2 large juicy lemons - Zest of 1 lemon - 4 cloves garlic, finely minced - 2 teaspoons dried oregano - 1 teaspoon sea salt - 1/2 teaspoon freshly cracked black pepper - 1/4 teaspoon red pepper flakes (optional) - Fresh parsley, finely chopped (for garnish) Using fresh ingredients makes a big difference. Fresh chicken tastes better and is juicier. Fresh lemons give a bright, zesty flavor. Garlic, herbs, and spices should be fresh too. They add more aroma and taste. When you use fresh items, your dish will shine. It elevates the meal and impresses everyone at the table. For olive oil, I recommend brands like Colavita or Pompeian. They have great flavor and quality. When it comes to spices, look for McCormick or Simply Organic. These brands ensure you get fresh and tasty spices. Quality ingredients lead to the best flavors in your Greek lemon chicken. {{ingredient_image_2}} To make the marinade, start with a big bowl. Combine these ingredients: - 1/4 cup extra virgin olive oil - Juice of 2 large lemons - Zest of 1 lemon - 4 minced garlic cloves - 2 teaspoons dried oregano - 1 teaspoon sea salt - 1/2 teaspoon black pepper - 1/4 teaspoon red pepper flakes (optional) Whisk everything together until mixed well. The smell should be fresh and zesty. Next, add the chicken breasts to the marinade. Make sure each piece gets coated. Cover the bowl tightly with plastic wrap. Place it in the fridge. Let it sit for at least 30 minutes. For the best taste, two hours is better. This step is key for flavor. When marinating is done, preheat your grill or grill pan to medium-high. Take the chicken out of the marinade. Allow excess marinade to drip off. Discard the leftover marinade to keep things safe. Place the chicken on the hot grill. Cook for 6-8 minutes on one side. Flip the chicken and grill for another 6-8 minutes. Use a meat thermometer to check that it reaches 165°F (75°C). The chicken should look golden brown. Once done, move the chicken to a plate. Let it rest for about 5 minutes. This helps keep the juices in. Before serving, sprinkle with fresh parsley for a touch of color and taste. Enjoy your Greek lemon chicken! Marinating chicken is key to great flavor. Use a large bowl for mixing. Combine olive oil, lemon juice, zest, garlic, oregano, salt, and pepper. Whisk until blended. Make sure you coat the chicken well. Cover the bowl and chill it in the fridge. Marinate for at least 30 minutes, but two hours gives the best taste. This helps the chicken soak up the lemon and garlic flavors. To get those perfect grill marks, preheat your grill to medium-high. Make sure the grill grates are clean and oiled. Place the marinated chicken directly onto the grill. Do not move the chicken for the first 6-8 minutes. This allows those nice grill lines to form. After that time, flip the chicken and grill for another 6-8 minutes. Check the temperature to ensure it reaches 165°F (75°C). Resting your chicken is essential for juiciness. Once grilled, place the chicken on a plate. Let it sit for about 5 minutes. This helps the juices redistribute throughout the meat. Cutting too soon can lead to dry chicken. Enjoy the flavor and tenderness that comes from this simple step. Pro Tips Marinate Longer for Flavor: For the best taste, marinate the chicken for at least 2 hours or overnight. This allows the flavors to penetrate deeply into the meat. Use a Meat Thermometer: To ensure perfectly cooked chicken, use a meat thermometer to check the internal temperature. It should reach 165°F (75°C) for safe consumption. Let it Rest: After grilling, allow the chicken to rest for about 5 minutes. This helps the juices redistribute, keeping the chicken moist and flavorful. Garnish for a Pop of Color: Finish your dish with freshly chopped parsley for an appealing presentation and a fresh flavor boost that complements the lemony chicken. {{image_4}} You can cook Greek lemon chicken in the oven if you prefer. Preheat your oven to 400°F (200°C). Place marinated chicken breasts in a baking dish. Bake for 25-30 minutes or until the chicken reaches 165°F (75°C). This method keeps the chicken juicy and tender. Cover the dish with foil for the first 15 minutes to lock in moisture. Feel free to get creative with flavors. You can add fresh herbs like thyme or rosemary for a different taste. A pinch of cumin or paprika adds warmth. If you love spice, add more red pepper flakes. You can also try lemon pepper seasoning for an extra citrus kick. Each change brings a unique twist to the dish. Pair your Greek lemon chicken with a refreshing Greek salad. A side of roasted vegetables or rice works well too. You can also serve it with warm pita bread and tzatziki sauce. For a drink, a chilled glass of white wine or lemonade complements the meal nicely. These pairings enhance the meal, making it a true Mediterranean delight. To keep your leftover Greek lemon chicken fresh, let it cool completely. Place it in an airtight container. Make sure to store it in the fridge. It will stay good for about three to four days. If you’re not going to eat it soon, freezing is a great option. When you want to eat the leftover chicken, take it out of the fridge. You can reheat it in the oven or a skillet. For the oven, preheat to 350°F (175°C). Place the chicken in a baking dish and cover it with foil. Heat for about 15-20 minutes until warm. If using a skillet, add a bit of oil and warm it on medium heat for about five minutes. If you choose to freeze the chicken, wrap each piece tightly in plastic wrap. Then, place them in a freezer bag. Remove as much air as possible. The chicken can stay frozen for up to three months. When ready to eat, thaw it in the fridge overnight before reheating. This keeps the chicken juicy and tasty. You can serve Greek Lemon Chicken with many tasty sides. A vibrant Greek salad makes a great choice. It adds fresh flavors with cucumbers, tomatoes, feta cheese, and olives. Grilled vegetables also work well; try zucchini, bell peppers, or asparagus. For something heartier, serve it with rice or quinoa. You can also pair the chicken with warm pita bread for a fun texture. Greek Lemon Chicken lasts about 3 to 4 days in the fridge. Make sure to store it in an airtight container. This keeps the chicken fresh and tasty. If you want it to last longer, consider freezing it. When storing, let it cool first. This helps keep the chicken juicy when you heat it later. Marinating for at least 30 minutes is good. It lets the flavors soak into the chicken. However, marinating for up to 2 hours gives the best taste. The longer you let it sit, the more intense the flavor becomes. Just avoid marinating for too long, as it can make the chicken mushy. Greek Lemon Chicken comes from the rich culinary traditions of Greece. It features bright flavors that highlight the use of lemon and olive oil. These ingredients are staples in Greek cooking. The dish reflects the Mediterranean lifestyle, focusing on fresh, healthy foods. It is often served at family meals and special occasions, celebrating the joy of sharing good food. You learned how fresh ingredients make a big difference in flavor. I shared step-by-step tips for marinating and grilling chicken to perfection. Proper techniques create juicy, flavorful results. You also discovered various cooking methods and tasty variations to try. Storing and reheating leftovers is easy with my tips. In conclusion, use these insights to enhance your meals. Enjoy experimenting in the kitchen, and have fun with Greek Lemon Chicken. It's a dish that is sure to impress!

Greek Lemon Chicken Flavorful Grilled Delight Recipe

Are you ready to elevate your dinner game with a burst of Mediterranean flavor? This Greek Lemon Chicken recipe combines

For a delicious Thai basil chicken stir fry, gather these items: - 1 lb (450g) chicken breast, thinly sliced into bite-sized pieces - 1 cup fresh Thai basil leaves, packed - 2 tablespoons vegetable oil - 4 cloves garlic, finely minced - 2 Thai bird's eye chilies, thinly sliced (adjust for desired spiciness) - 1 red bell pepper, cut into strips - 1 cup snap peas, trimmed - 3 tablespoons soy sauce - 1 tablespoon oyster sauce - 1 teaspoon sugar - Salt and pepper, to taste - Cooked jasmine rice, for serving If you are missing an ingredient, here are some options: - Chicken breast can be swapped for chicken thighs for extra flavor. - Use regular basil if you can’t find Thai basil, but it will change the taste. - For a gluten-free option, replace soy sauce with tamari. - Snap peas can be replaced with green beans or broccoli florets. - You can use any color bell pepper if red is unavailable. Choosing fresh ingredients makes a big difference. Here are my tips: - Chicken: Look for chicken that is pink and has no bad smell. - Basil: Choose bright green leaves without any brown spots or wilting. - Garlic: Pick firm bulbs with tight skin, avoiding any that are sprouting. - Chilies: Select firm, vibrant chilies for the best flavor and heat. - Vegetables: Choose crisp snap peas and bell peppers. They should feel firm and look shiny. Using fresh ingredients will make your Thai basil chicken stir fry truly shine! {{ingredient_image_2}} Start by gathering all your ingredients. This makes cooking smooth and fun. Slice the chicken breast into small pieces. Cut the red bell pepper into strips. Trim the snap peas and set them aside. Mince the garlic finely. The better your prep, the easier the cooking! Heat a large wok or skillet over medium-high heat. Add the vegetable oil until it shimmers. Carefully add your sliced chicken to the hot oil. Stir-fry it for about 4 to 5 minutes. Cook until the chicken turns golden brown and is no longer pink. Once done, remove the chicken and place it on a plate. In the same wok, add the minced garlic and sliced bird’s eye chilies. Stir-fry for about 30 seconds. You want to smell the garlic and chilies. This step adds great flavor. Be careful not to burn them; that can ruin the dish! Next, toss in the sliced red bell pepper and snap peas. Stir-fry for 2 to 3 minutes. You want the veggies to stay colorful and crisp. Then, return the cooked chicken to the wok. Add the soy sauce, oyster sauce, and sugar. Mix everything for about 2 minutes. This helps the flavors blend well. Finally, take the wok off the heat. Gently fold in the fresh Thai basil leaves. The heat will make them wilt a bit, releasing their lovely scent. Taste your stir-fry and add salt and pepper as needed. Serve it hot over fluffy jasmine rice. Enjoy every bite! Stir-frying is quick and fun! Here are some tips to make it even better: - Use a hot wok: Heat your wok until it shimmers. This helps cook the chicken fast. - Don’t crowd the pan: If you add too much at once, food will steam instead of fry. Cook in batches if needed. - Keep it moving: Stir constantly to cook evenly and prevent burning. Do you like it spicy or mild? Here’s how to adjust the heat: - Start small: Use one bird's eye chili for a mild touch. You can always add more later. - Remove seeds: If you want less heat, take out the seeds from the chilies. - Add sauces: Soy sauce and oyster sauce can balance heat with flavor. Taste as you go! Leftovers can be tasty too! Here’s how to store them right: - Cool before storing: Let the stir fry cool down before putting it in the fridge. - Use airtight containers: This keeps your food fresh and prevents odors. - Eat within three days: Enjoy your leftovers within three days for the best taste. Pro Tips Use Fresh Basil: For the best flavor, always use fresh Thai basil. Its aromatic oils are crucial for authentic taste and aroma. Control the Heat: Adjust the number of bird's eye chilies based on your spice tolerance. Start with one and add more if you prefer extra heat. High Heat Cooking: Stir-frying is best done on high heat to achieve that signature char and to keep the vegetables crisp. Don’t overcrowd the pan. Serve Immediately: For the best texture and flavor, serve the stir-fry right after cooking. It’s best enjoyed fresh and hot over jasmine rice. {{image_4}} You can easily make this dish vegetarian or vegan. Swap the chicken for firm tofu. Use the same method to cook the tofu. Just make sure to press it first to remove excess water. This will help it absorb flavors well. For a vegan sauce, use soy sauce and skip the oyster sauce. Try adding a bit of hoisin sauce for sweetness. If you want to change the protein, consider using shrimp or beef. For shrimp, cook them just until they turn pink. For beef, thinly slice it against the grain for tenderness. You can also use seitan, which mimics meat texture. Each of these options will bring unique flavors to your dish. Feel free to get creative with your veggies! Broccoli, carrots, or baby corn work well. You can also try adding mushrooms for an earthy taste. Use what you have on hand. Just remember to keep the cooking time in mind. Some veggies may cook faster than others. Always aim for a mix of colors for a vibrant plate. After enjoying your Thai basil chicken stir fry, let it cool. Place the leftovers in an airtight container. This helps keep your dish fresh. Store it in the fridge for up to three days. Make sure to keep it away from strong-smelling foods. This keeps the flavors intact and prevents any unwanted odors. When you’re ready to eat your leftovers, you can reheat them easily. Use a skillet over medium heat. Add a splash of water or oil to help steam the chicken. Stir often to heat it evenly. You can also use a microwave. Place the stir fry in a microwave-safe bowl. Cover it with a damp paper towel. Heat for one to two minutes, stirring halfway. You can freeze the stir fry if you want to save it longer. First, let it cool completely. Then, transfer it to a freezer-safe bag or container. Squeeze out any air to prevent freezer burn. This dish can last in the freezer for up to three months. When ready to eat, thaw it overnight in the fridge. Reheat it using the instructions above for the best taste. Thai basil has a unique taste. It is spicier and has a hint of anise flavor. Regular basil is sweeter and milder. You can spot Thai basil by its purple stems and pointed leaves. It works great in stir-fries, adding depth to each bite. Yes, you can prep some parts ahead. Slice the chicken and chop the veggies in advance. Store them in the fridge until you’re ready to cook. However, it’s best to add the basil fresh at the end. This keeps its flavor vibrant. Serve this dish with jasmine rice for a perfect match. The rice soaks up the flavorful sauce. You can also add a side of steamed vegetables or a fresh salad. This adds more color and crunch to your meal. Enjoy your cooking! In this post, I covered the key ingredients for your Thai Basil Chicken Stir Fry. I shared tips for selecting fresh items and offered substitutes. We went through a step-by-step guide on preparing and cooking the dish. I included best practices, variations, and storage tips for leftovers. Remember, cooking should be fun and flexible. Use this information to make the dish your own. Enjoy experimenting with new flavors and ingredients!

Thai Basil Chicken Stir Fry Quick and Flavorful Meal

Are you craving a quick and tasty meal? Thai Basil Chicken Stir Fry is the answer! This vibrant dish bursts

- 1 cup pitted dates - 1 cup unsweetened shredded coconut - 1/2 cup creamy almond butter - 1/2 cup almond flour - 1/2 cup dark chocolate chips (dairy-free if desired) - 1/4 cup chopped almonds - 1 teaspoon pure vanilla extract - A pinch of sea salt Using pitted dates gives these bites a natural sweetness. They also add fiber and energy. Unsweetened shredded coconut brings a rich flavor and texture. It also adds healthy fats. Almond butter is creamy and smooth, providing a good source of protein. Almond flour keeps these bites gluten-free while adding more nutrients. Dark chocolate chips are the perfect treat, and you can use dairy-free options. Chopped almonds add crunch and extra protein. Pure vanilla extract enhances all the flavors, making them pop. A pinch of sea salt balances the sweetness and enhances the taste. Each energy bite offers great nutrition. Here’s a breakdown of the key nutrients: - Calories: About 100 per bite - Protein: Around 3 grams - Fat: Roughly 5 grams, mostly healthy fats - Carbohydrates: About 12 grams - Fiber: Approximately 2 grams These bites are a great snack choice. They are full of energy and help you feel full. Plus, they contain no refined sugars, making them a smart pick for health. Enjoy these bites when you need a quick energy boost or a sweet treat! {{ingredient_image_2}} To make your Coconut Almond Joy Energy Bites, start with the right tools. You need a food processor and a baking sheet lined with parchment paper. - First, place the pitted dates, shredded coconut, creamy almond butter, almond flour, vanilla extract, and a pinch of sea salt into the food processor. - Pulse this mix until it blends well and turns sticky. Make sure there are no big pieces of dates left. This blend gives you a great base, packed with natural sweetness and healthy fats. Dates bring energy, while almond butter adds creaminess and protein. Now, it’s time to form the bites. - Use a tablespoon to scoop out the mixture. - Roll each scoop into a ball using your hands. Make sure they are about the size of a golf ball. This size is perfect for a quick snack. Once you finish rolling, place each ball on your prepared baking sheet. Space them out so they don’t touch. To get the right texture, chill the energy bites. - Put the baking sheet in the refrigerator for at least 30 minutes. This helps them firm up and makes them easier to eat. When you’re ready to serve, consider a decorative bowl. You can add a sprinkle of shredded coconut on top for a fun look. These bites make a great snack, full of flavor and energy. Enjoy them anytime you need a boost! You can easily change flavors in your energy bites. For a tropical twist, add pineapple or mango bits. Want more crunch? Toss in chia seeds or sunflower seeds. Different nut butters work well too. Use cashew or peanut butter if you prefer. You can also switch up the chocolate. Try white chocolate or even carob chips for a fun surprise. Store your energy bites in an airtight container. Keep them in the fridge to stay fresh. This helps maintain their texture and flavor. If you want them to last longer, freeze them. Just place them in a freezer-safe bag. They stay good for up to three months in the freezer. Need to swap some ingredients? No problem! If you don’t have almond butter, use sunflower seed butter. If you want a nut-free version, use pumpkin seed butter. For a different sweetener, try maple syrup or agave nectar. Just remember to adjust the amount of dry ingredients if you do. This keeps the right texture for your bites. Pro Tips Use Fresh Dates: For the best flavor and texture, opt for fresh, soft pitted dates to ensure your energy bites are sweet and sticky. Customize Your Nuts: Feel free to mix in different nuts or seeds according to your taste preferences—walnuts, pecans, or sunflower seeds work great! Experiment with Flavors: Add spices like cinnamon or nutmeg to the mixture for a unique flavor boost that complements the coconut and chocolate. Storage Tips: Store the energy bites in an airtight container in the fridge for up to a week, or freeze them for longer-lasting snacks. {{image_4}} You can easily add different flavors to your Coconut Almond Joy Energy Bites. Consider adding a pinch of cinnamon for warmth. A few drops of almond extract can boost the almond taste. You might also try adding dried fruits, like cranberries or apricots, for a chewy twist. If you love spices, a dash of nutmeg can add depth. If you want to change the sweetness level, you have options. Maple syrup or agave can replace pitted dates. Just use less, as they are sweeter. Honey is another great choice for sweetness. Remember, if you use liquid sweeteners, balance it with a little extra almond flour to keep the texture. These energy bites are already vegan and gluten-free, but you can tweak them further. Use coconut flour instead of almond flour for a nut-free option. For sweeteners, choose maple syrup or agave to keep it vegan. Make sure your chocolate chips are dairy-free to keep them vegan-friendly. Always check labels for gluten-free certification if needed. To keep your Coconut Almond Joy Energy Bites fresh, store them in an airtight container. This helps keep moisture out. Place the container in the fridge. The cool temperature helps maintain the bites' flavor and texture. You can also layer parchment paper between the bites to prevent sticking. If you want to save some bites for later, freezing is a great option. Place the energy bites in a single layer on a baking sheet. Freeze them for about an hour. Once firm, transfer them to a freezer-safe bag or container. Label the bag with the date. They can last up to three months in the freezer. Just thaw them in the fridge before enjoying. When stored properly in the fridge, these energy bites last about one week. If you freeze them, you can enjoy them for several months. This makes them a perfect snack for busy days or meal prep. Keeping track of the dates helps ensure you enjoy them at their best! Yes, you can use other nut butters in these energy bites. Almond butter gives a rich flavor. Peanut butter works well too, but it changes the taste. Cashew butter offers a creamy texture with a mild taste. Always choose a nut butter you enjoy. This keeps the energy bites tasty and fun! To make these energy bites healthier, consider these tips: - Use unsweetened cocoa powder instead of chocolate chips. - Add extra nuts or seeds for more fiber. - Swap out some almond flour for ground oats. - Reduce the amount of sweetener if you can. These changes keep the bites nutritious while still delicious. If you don't have pitted dates, try dried figs or prunes as substitutes. Both provide natural sweetness and a sticky texture. You can also use applesauce for moisture, but it may change the texture a bit. Adjust the amount to keep your energy bites firm. This way, you can still enjoy them! In this article, we explored the key ingredients and step-by-step instructions for making energy bites. You learned how to customize your recipes, store them properly, and enjoy tasty variations. Keep in mind that you can easily adapt these bites to fit your needs. Making these treats can be fun, healthy, and fulfilling. With a few simple steps, you can create quick snacks anytime. I hope you feel inspired to try making your own energy bites today!

Coconut Almond Joy Energy Bites Nutritional Power

Are you ready to power up your snack game? These Coconut Almond Joy Energy Bites pack a serious nutritional punch.

- 8 rice paper wrappers - 1 cup red cabbage, finely shredded - 1 cup carrots, julienned - 1 cup cucumber, julienned - 1 cup bell peppers (mixed colors), julienned - 1 ripe avocado, sliced - 1/2 cup fresh mint leaves, gently torn - 1/2 cup fresh cilantro leaves, gently torn To make rainbow veggie spring rolls, you need fresh and colorful ingredients. Rice paper wrappers are the base. Next, use a mix of vegetables that are bright and crisp. I love using red cabbage for color and crunch. Carrots and cucumber add sweetness and freshness. Don’t forget the bell peppers for a burst of flavor. Lastly, avocado gives a creamy texture. Fresh herbs like mint and cilantro bring a lovely aroma. - 1/4 cup hoisin sauce - 1 tablespoon peanut butter - 1 tablespoon freshly squeezed lime juice - 1 teaspoon chili sauce (optional, for a kick) The dipping sauce is key to enhancing the rolls. Hoisin sauce adds a sweet taste. Peanut butter gives a rich flavor. Fresh lime juice brightens the sauce. If you like some heat, add chili sauce for an extra kick. - 1/4 cup sesame seeds (optional, for added crunch) - 1/4 cup crushed peanuts (for garnish) For added texture, sprinkle sesame seeds over the veggies. Crushed peanuts make a great garnish. They add crunch and make the dish look appealing. These extras can elevate your spring rolls and make them even more delightful to eat. {{ingredient_image_2}} Start by washing all your vegetables. Rinse them under cold water to remove dirt. Next, cut them into thin strips or julienne style. This method enhances texture and makes the rolls pretty. Place each vegetable type in its own bowl. This helps you grab what you need when you start assembling. To soften rice paper, fill a large shallow dish with warm water. The water should be warm but not boiling. Submerge one rice paper wrapper in the water for 10 to 15 seconds. You want it to be soft but still slightly firm. This allows for easy handling later. Once the rice paper is soft, lift it out and place it on a clean, flat surface. In the lower third of the wrapper, add a small handful of each vegetable. Top this with a few slices of avocado. Then, add some torn mint and cilantro leaves. If you like crunch, sprinkle a few sesame seeds on top. To roll the spring roll, fold the bottom edge over the filling. Tuck in the sides to keep everything inside. Now, carefully roll it up tightly like a burrito. Repeat this with the other rice paper wrappers and fillings until you have a colorful plate of spring rolls. To make great spring rolls, avoid tearing the rice paper. Soak it in warm water for just 10-15 seconds. If it feels too soft, it might tear. When you lift it out, let the excess water drip off. Place the wrapper on a clean, flat surface. For a tight roll, start folding from the bottom. Tuck in the sides as you roll. Hold the filling gently but firmly. This keeps everything secure. Practice makes perfect, so don’t worry if the first few aren’t perfect! Want to boost flavor? Add fresh herbs like basil or dill. They bring a new taste. You can also try adding a pinch of red pepper flakes for heat. For your dipping sauce, mix in some soy sauce or sesame oil. This adds depth to the hoisin sauce. If you like it spicy, add more chili sauce. Adjust these flavors to fit your taste. Garnish your spring rolls for extra visual appeal. Sprinkle crushed peanuts on top for crunch. You can also add more fresh herbs around the rolls. When serving, arrange them neatly on a platter. Pair them with lime wedges for a pop of color. This adds a fresh look and taste to your dish. Pro Tips Soften Rice Papers Properly: Make sure the water is warm, not boiling, to avoid tearing the rice paper while softening. Organize Ingredients: Having all your vegetables prepped and organized in bowls will make the assembly process much faster and more enjoyable. Experiment with Fillings: Feel free to add other colorful veggies or proteins like shrimp or tofu to customize your spring rolls. Chill Before Serving: For an extra refreshing bite, chill the assembled spring rolls in the refrigerator for 15-20 minutes before serving. {{image_4}} You can swap veggies based on what's in season. Think about using zucchini, radishes, or snap peas. They add flavor and crunch. You can also mix in some cooked proteins. Shrimp, chicken, or tofu work great. These options will make your rolls heartier and even more delicious. While hoisin sauce is tasty, you can try other sauces too. Sweet chili sauce or soy sauce are great choices. For a twist, mix yogurt with herbs for a creamy dip. You can also create your own sauce. Try combining peanut butter with soy sauce and a splash of lime. Experimenting is fun and adds a personal touch. If you need vegan or gluten-free options, adjust your ingredients. Use tamari instead of soy sauce for gluten-free. You can also skip the peanut butter or use a nut-free spread. Check rice paper brands for vegan options, as some may contain egg. These simple swaps keep the rolls delicious and suitable for all diets. To keep your spring rolls fresh, place them in an airtight container. This prevents moisture loss and keeps them crunchy. If you have leftover dipping sauce, store it in a separate container. Keep both in the fridge and enjoy them within three days. If you stack the rolls, use parchment paper between layers. This avoids sticking and keeps the rolls intact. You can freeze spring rolls before or after assembly. If you freeze them before, lay them flat on a baking sheet. Once they're frozen, transfer them to a freezer bag. If freezing after assembly, wrap each roll in plastic wrap first. To thaw, place them in the fridge overnight. Reheat by steaming them for a few minutes, or microwave them for about 30 seconds. This keeps the texture nice and soft. Rainbow veggie spring rolls last about three days in the fridge. They will start to lose their crispness after this time. Signs of spoilage include a wilted appearance or an off smell. If you notice these changes, it's best to toss them. Always trust your senses when checking food freshness! Yes, you can make spring rolls ahead of time. To keep them fresh: - Prepare the veggies and keep them in separate containers. - Wrap the spring rolls and store them in a damp cloth. - Place the rolls in an airtight container in the fridge. This way, you can enjoy them later without losing flavor or texture. Serving spring rolls is all about presentation. Here are some tips: - Use a large platter to display the rolls. - Arrange them in a circle or in rows for a colorful look. - Serve with a small bowl of dipping sauce in the center. - For a fun touch, add lime wedges and fresh herbs around the rolls. This makes the dish look inviting and vibrant. To check if rice paper is ready: - Dip it in warm water for about 10-15 seconds. - It should feel soft but still have a bit of firmness. - If it’s too soft, it may tear easily when you roll. Perfectly softened rice paper makes a big difference in your spring rolls! In this article, I shared how to make fresh spring rolls. I covered key ingredients, like rice paper, colorful veggies, and tasty herbs. I provided step-by-step instructions on preparing veggies and rolling techniques. You learned tips for enhancing flavor and perfect presentation. I explored variations and how to store leftovers effectively. By trying these ideas, you can create fun and healthy snacks. Enjoy experimenting with flavors and sharing them with others!

Rainbow Veggie Spring Rolls Fresh and Colorful Treat

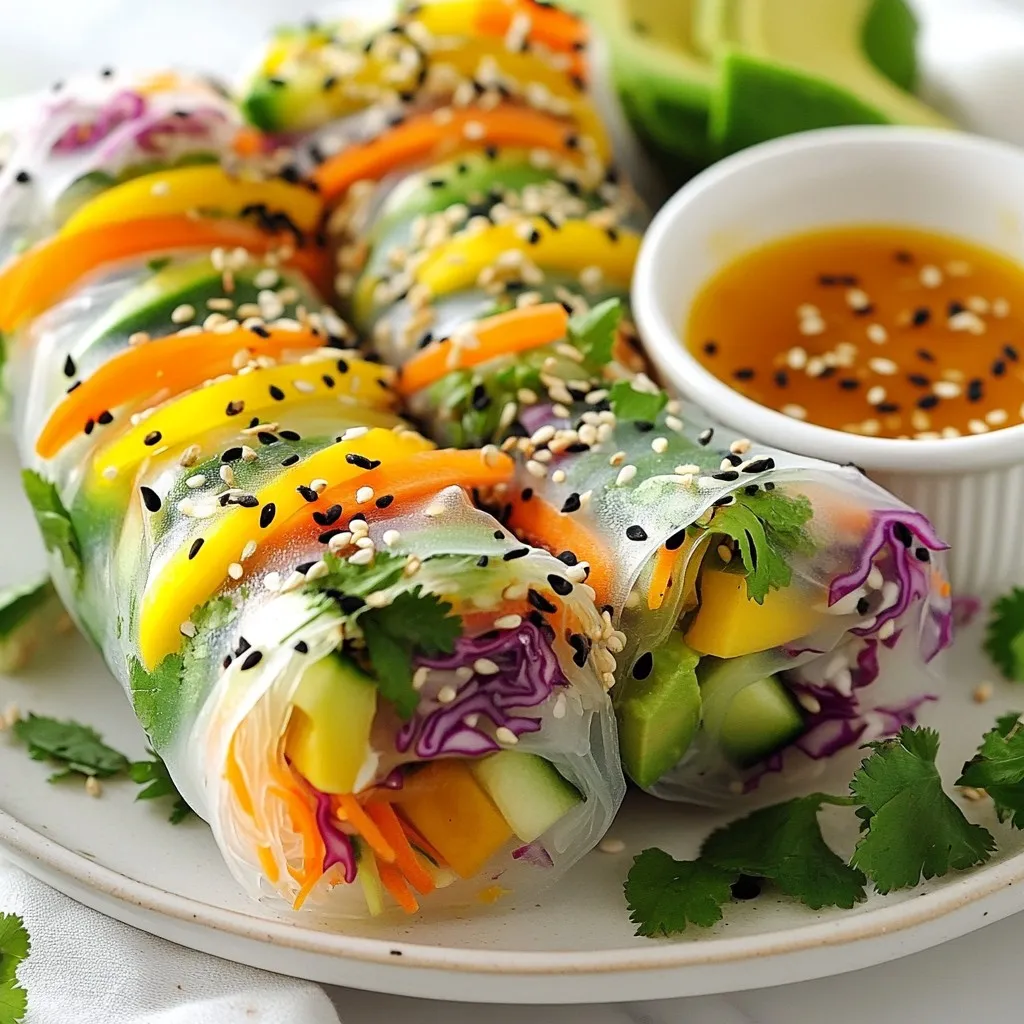
Looking for a fresh and colorful treat? Rainbow Veggie Spring Rolls are here to brighten your table! Packed with vibrant

Older posts
Newer posts
← Previous Page1 … Page107 Page108 Page109 … Page122 Next →

dsad

© 2026 dailydishcraft • Built with GeneratePress

Our Policies

  • Copyright Policy
  • Cookie Policy
  • GDPR Policy
  • Privacy Policy
  • Disclaimer
  • Terms Of Use

More Information

  • Home
  • About
  • Contact
  • Appetizers
  • Dessert
  • Dinner
  • Drinks
©2026, dailydishcraft About Back To Top