Skip to content
DisclaimerTerms Of UseGDPR PolicyCookie Policy

dailydishcraft

  • Home
  • Drinks
  • Appetizers
  • Dinner
  • Dessert
  • About
  • Contact
  • Privacy Policy
DisclaimerTerms Of UseGDPR PolicyCookie Policy

Jessica

To make Chocolate Peanut Butter Energy Balls, gather these simple ingredients. They are easy to find and pack a big flavor punch. - 1 cup rolled oats - 1/2 cup creamy peanut butter - 1/3 cup honey or maple syrup - 1/4 cup unsweetened cocoa powder - 1/2 cup mini chocolate chips - 1/4 cup chia seeds - 1/2 teaspoon vanilla extract - A pinch of salt These ingredients work together to create a tasty treat. The oats give a nice chew, while the peanut butter adds creaminess and protein. Honey or maple syrup brings sweetness, and cocoa powder gives a rich chocolate flavor. Mini chocolate chips add fun bursts of chocolate in every bite. Chia seeds are great for texture and nutrition. Vanilla extract enhances the flavors, and salt balances the sweetness. You can easily adjust the ingredients to fit your taste. Want it sweeter? Add more honey or chips. Prefer a nutty flavor? Use almond butter instead. The choice is yours! Remember, this recipe is all about making a delicious snack that fuels your day. {{ingredient_image_2}} Start by mixing the rolled oats, cocoa powder, chia seeds, and a pinch of salt in a large bowl. Use a spoon to stir well. This step ensures the dry ingredients blend evenly. You want each bite to have the same great taste. Next, take another bowl and combine the creamy peanut butter, honey or maple syrup, and vanilla extract. Whisk these ingredients together. You need a smooth consistency for the best results. Make sure there are no lumps in the mixture. Now, it’s time to combine the wet and dry mixes. Gradually pour the wet mixture into the dry bowl. Stir continuously as you add it. Keep mixing until everything is fully combined. You should have a cohesive dough at this point. Once your dough is ready, use your hands to scoop small portions. Roll the dough into balls about 1 inch in size. Place the rolled balls on a tray lined with parchment paper. This helps to keep them from sticking to the tray. To get the best texture, chill the energy balls in the fridge. Let them sit for at least 30 minutes. This cooling time helps them firm up. Once chilled, they are easier to handle and ready to enjoy! Mixing the ingredients for Chocolate Peanut Butter Energy Balls can be fun! Use a non-stick spatula to make it easier. This tool helps you scrape every bit from the bowl. When mixing, keep the dough texture smooth. If it feels too dry, add a bit more peanut butter or honey. This helps bind everything together. When rolling the energy balls, use damp hands. This step helps prevent the dough from sticking to your fingers. Roll the dough into one-inch balls for even sizes. Uniform balls look nice and are easy to grab for a snack. You can even use a small cookie scoop to help with this. To adjust sweetness, try using honey or maple syrup. Both add a nice touch and can change the flavor. You can also add extra mix-ins like nuts or seeds for more crunch. Almonds or sunflower seeds work great! Mixing in these ingredients can make your energy balls even more delightful. Pro Tips Chill for Better Texture: Refrigerating the energy balls for at least 30 minutes helps them firm up, making them easier to handle and giving them a better texture. Customize with Add-ins: Feel free to get creative! You can add nuts, dried fruits, or even seeds to enhance flavor and texture according to your preferences. Sweetness Adjustment: Adjust the sweetness by varying the amount of honey or maple syrup according to your taste; you can even omit it for a less sweet version. Keep Them Fresh: Store the energy balls in an airtight container in the refrigerator for up to a week, or freeze them for longer storage; they make a great on-the-go snack! {{image_4}} You can easily swap flavors in your energy balls. Adding protein powder gives a big boost. Just mix in a scoop when you blend the dry ingredients. This makes them perfect for post-workout snacks. If you want a different taste, try almond butter instead of peanut butter. Almond butter has a rich flavor that pairs well with chocolate. It also brings a nice creaminess to the mix. For a vegan version, switch honey for maple syrup. Use dairy-free chocolate chips to keep it vegan too. This way, everyone can enjoy these tasty treats. If you need gluten-free options, use certified oats. This ensures you avoid any gluten. You can still enjoy the same great flavor without any worries. Get creative with seasonal spices! Adding cinnamon or nutmeg gives warmth to your energy balls. They make a great treat during the colder months. For a fall twist, mix in pumpkin puree. This adds moisture and a hint of sweetness. Plus, it makes your energy balls even more fun and festive! To keep your Chocolate Peanut Butter Energy Balls fresh, store them in the refrigerator. This helps maintain their texture and taste. These tasty snacks last up to one week when stored properly in the fridge. For longer storage, you can freeze the energy balls. Place them in a single layer on a tray and freeze them for about an hour. After they harden, transfer them to a zip-lock bag or airtight container. When you want to enjoy them, take out the amount you need and let them thaw at room temperature for about 10-15 minutes. Use airtight containers to keep the energy balls fresh. They prevent air from getting in and causing freezer burn. Zip-lock bags work well too, but make sure to squeeze out any air before sealing. Label your containers with the date so you can track how long they’ve been stored. This way, you’ll always know when to enjoy your delicious snacks! These energy balls last about one week in the fridge. Store them in an airtight container to keep them fresh. If you want them to last longer, you can freeze them. They will stay good in the freezer for up to three months. Just make sure to thaw them in the fridge before eating. Yes, you can use natural peanut butter. It will change the texture a bit. Natural peanut butter can make the energy balls a bit crumbly. This happens because it has less fat and sugar than creamy peanut butter. If you use natural peanut butter, you might want to add a little more honey or syrup to help bind everything together. Yes, these energy balls are healthy! They have rolled oats, which are great for energy. Peanut butter gives you healthy fats and protein. Chia seeds add fiber and omega-3 fatty acids. The cocoa powder has antioxidants, too. Overall, these energy balls make a good snack without much added sugar. You can skip the chia seeds, but they do help with binding. If you don’t have chia seeds, try using flax seeds. They work in a similar way. You could also add more oats to help hold everything together. Another option is to include nut butter or more peanut butter to maintain the dough's texture. In this article, we explored how to make Chocolate Peanut Butter Energy Balls. We covered the key ingredients you’ll need, including oats, peanut butter, and cocoa powder. I shared step-by-step instructions and helpful tips for mixing, shaping, and storing your energy balls. You can also customize the recipe with variations to suit your taste. With these easy steps and variations, you can whip up tasty snacks that fit your lifestyle. Enjoy making these energy balls, and tailor them to your liking!

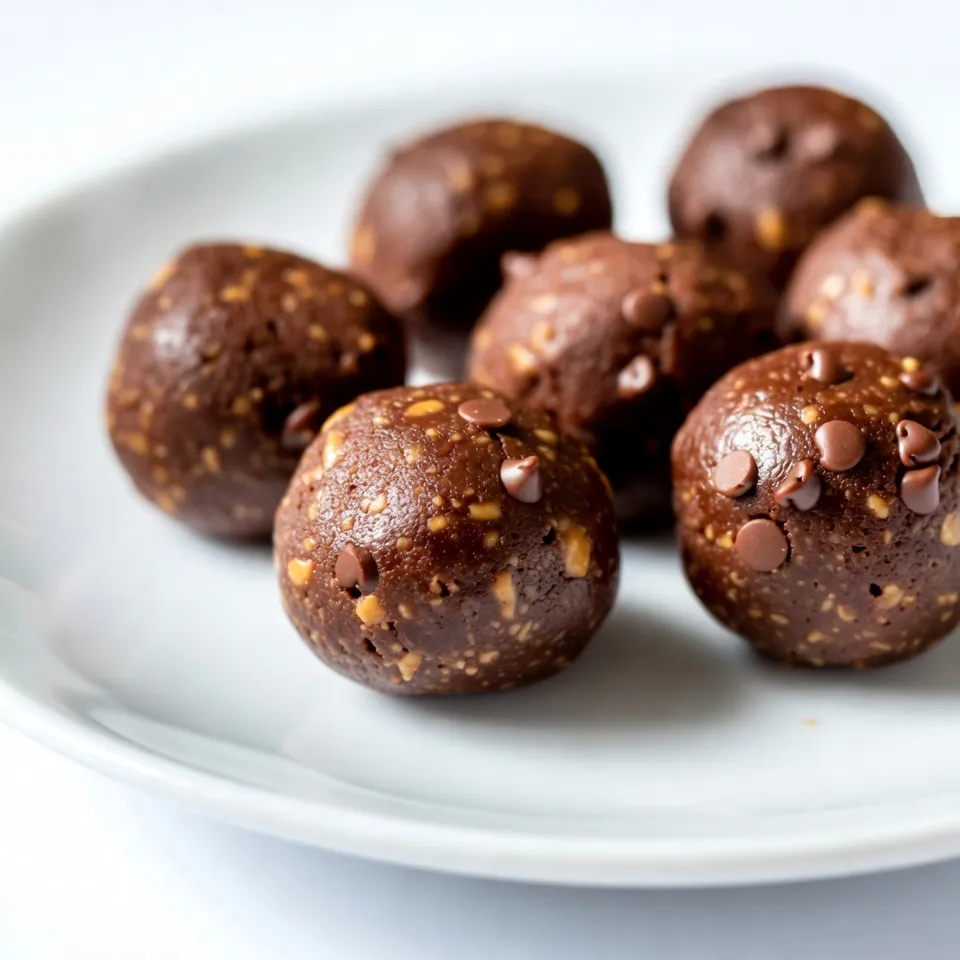
Chocolate Peanut Butter Energy Balls Easy and Quick Snack

Looking for a quick and easy snack that packs a delicious punch? Try these Chocolate Peanut Butter Energy Balls! They’re

- 1 cup sushi rice - 1 1/4 cups water - 4 sheets nori (seaweed) - 1 medium cucumber, julienned - 1 medium carrot, julienned - 1/2 red bell pepper, sliced into thin strips - 1/2 yellow bell pepper, sliced into thin strips - 1 medium avocado, thinly sliced The main ingredients create a colorful and tasty sushi roll. Sushi rice is sticky and holds the roll together. Nori sheets wrap the fillings and add flavor. Fresh veggies bring crunch and color. You can use many different vegetables, but these are perfect choices. - 1/4 cup pickled ginger (for serving) - Soy sauce (for dipping) - Wasabi (optional, for serving) Using optional ingredients is fun! Pickled ginger refreshes your palate. Soy sauce adds a salty kick. If you like heat, add wasabi for a spicy touch. These flavors enhance the sushi experience. - Sesame seeds Garnishing with sesame seeds adds a nutty crunch. It also makes your rolls look appealing. A sprinkle of sesame seeds can turn a simple dish into a work of art. Enjoy the colors, textures, and tastes! {{ingredient_image_2}} To make sushi rolls, start with the rice. Rinse 1 cup of sushi rice under cold water. Keep rinsing until the water runs clear. This helps remove excess starch. Then, add the rice and 1 1/4 cups of water to a pot. Bring it to a boil. Once boiling, reduce the heat and cover the pot. Let it simmer for 20 minutes. After that, turn off the heat and let it rest for 10 minutes. Next, season the rice. Transfer it to a large bowl. Add a splash of rice vinegar, a pinch of salt, and a little sugar if you like. Stir gently to mix the seasoning. Let the rice cool to room temperature before using it. While the rice cools, prepare your veggies. Start with a medium cucumber. Cut it into thin strips, known as julienne. Do the same with a medium carrot. For the bell peppers, take half of a red and half of a yellow bell pepper. Slice them into thin strips as well. Lastly, cut a medium avocado into thin slices. Arrange all these colorful veggies in separate bowls. This makes it easy to grab them later when you roll. Now comes the fun part: assembling the rolls! First, lay a bamboo sushi mat on a clean, flat surface. Place a sheet of nori, shiny side down, on the mat. Wet your hands lightly to prevent the rice from sticking. Take a handful of sushi rice and spread it evenly over the nori. Leave about 1 inch of nori at the top. In the center of the rice, layer your colorful fillings. You can use cucumber, carrot, bell peppers, and avocado. Be careful not to overfill, as this can make rolling difficult. Now, lift the edge of the sushi mat closest to you. Begin rolling it away from you, pressing gently to keep the fillings in place. Continue to roll while pulling the mat to shape the roll tightly. Once you reach the edge of the nori, wet it with a bit of water to seal the roll. Finally, use a sharp knife to slice the roll into bite-sized pieces. Clean the knife with a damp cloth after each cut to keep the edges neat. Enjoy your beautiful rainbow veggie sushi rolls! How to prevent sticking When making sushi, sticking can be a big issue. To prevent this, wet your hands lightly before handling the rice. This keeps the rice from sticking to your fingers. Also, make sure to use a bamboo sushi mat to help with rolling. Avoid pressing too hard on the rice; gentle pressure works best. Ensuring tight rolls A tight roll makes sushi easy to slice. Start rolling from the edge closest to you. Use the mat to lift the roll as you go. Tuck the filling in tightly but not too tight. When you reach the end, wet the edge of the nori to seal it. This helps keep the roll intact. Best knife for cutting sushi A sharp knife is key for slicing sushi rolls. I recommend using a sushi knife or a very sharp chef's knife. The sharp blade helps you cut cleanly through the rice and veggies. A dull knife can squish the roll, ruining its shape. Cleaning the knife between cuts To keep slices clean, wipe the knife with a damp cloth after each cut. This removes rice and prevents sticking. A clean knife allows for beautiful, neat pieces. Adjust your grip to keep the knife steady while cutting. Creative serving ideas For serving, arrange the rolls on a beautiful platter. You can create a rainbow effect by mixing different colors of veggies. Add some pickled ginger and a small bowl of soy sauce for dipping. This adds flavor and enhances the look of your dish. Pairing with sauces Besides soy sauce, you can offer other dips like spicy mayo or ponzu sauce. This gives your guests more options. If you like heat, try adding wasabi on the side. It adds a fun kick to each bite. Pro Tips Rinse the Rice Well: Thoroughly rinsing the sushi rice before cooking removes excess starch, preventing it from becoming gummy and ensuring a perfect texture. Use a Sharp Knife: A sharp knife is essential for cutting sushi rolls cleanly. This prevents squishing the rolls and maintains their beautiful presentation. Keep Ingredients Fresh: Use fresh vegetables and ripe avocados for the best flavor and texture in your sushi rolls. Avoid overripe or mushy ingredients. Experiment with Fillings: Don’t hesitate to get creative with your fillings! Try adding cooked shrimp, spicy tuna, or even mango for a unique twist on traditional sushi. {{image_4}} You can choose many vegetables for your sushi rolls. I love using what’s fresh and in season. Here are some great options: - Zucchini - Radishes - Asparagus - Sweet potatoes - Spinach These veggies add great taste and color. You can also add protein to your rolls. Some tasty choices include: - Tofu - Shrimp - Crab meat - Cooked chicken These proteins will make your sushi more filling and fun. Creating colorful rolls is part of the fun! You can mix and match colors for a stunning look. Here are some ideas: - Red (bell pepper) and green (cucumber) - Yellow (bell pepper) and purple (cabbage) - Orange (carrot) and green (avocado) Try making themed rainbow rolls too! For example, a sunset roll with shades of red and orange. You can also create a garden roll with lots of green veggies. The more colors, the better! You can easily adjust these rolls to fit your diet. For vegan options, skip any fish or meat. Use extra veggies or even fruits like mango. If you need gluten-free sushi, use gluten-free soy sauce. For a low-carb option, skip the rice and use thin slices of cucumber instead. This makes a fresh and crunchy base for your fillings. Enjoy making your sushi rolls fit your needs! To keep your sushi rolls fresh, store them in the fridge. Wrap each roll in plastic wrap. This stops them from drying out. Place the wrapped rolls in an airtight container. This adds another layer of protection. Try to eat them within one day for the best taste. You should avoid leaving sushi out at room temperature. Sushi rice can spoil quickly. Keep it cool and safe for the best flavor. If you have extra sushi rice, store it in a separate container. Can sushi be reheated? No, it's best to eat sushi cold. Reheating can change the texture and taste. If you have leftover ingredients, use them in salads or wraps. You can also make a veggie stir-fry. Just sauté your leftover veggies in a pan. Another idea is to make sushi rice balls. Just mix the rice with some seasonings and shape them. This way, you can enjoy your leftovers in a new way! To make sushi rolls stick, you need the right amount of moisture. Here are some key tips: - Rinse the sushi rice well until the water runs clear. - Use just enough water when cooking. Too much water makes it soggy. - Let the rice cool to room temperature before using. - Wet your hands lightly before handling the rice. This helps it stick to the nori. I find that using the right sushi rice helps too. The stickiness of the rice is key to a good roll. If you follow these steps, your rolls will hold together nicely. Yes, you can make sushi rolls ahead of time. However, keep these tips in mind: - Prepare the rolls no more than a few hours before serving. - Wrap the rolls in plastic wrap to keep them fresh. - Store them in the fridge but not for too long. Cold sushi can lose its texture. If you make sushi rolls ahead of time, serve them with soy sauce and pickled ginger. This will keep them tasty and fresh. The best rice for sushi is short-grain rice. Here’s why: - Short-grain rice is sticky and holds together well. - It absorbs water easily, making it perfect for sushi. - Varieties like Japonica are popular for sushi rolls. When selecting rice, look for sushi rice at your local store. This will give you the best results for your rainbow veggie sushi rolls. You learned how to make sushi at home using simple ingredients. We covered choosing sushi rice, nori, and fresh veggies. You know how to prepare fillings and assemble rolls like a pro. Remember, practice your rolling and cutting skills for the best results. Don't be afraid to experiment with flavors and colors. Enjoy making unique sushi creations that impress your friends and family. Happy sushi making!

Rainbow Veggie Sushi Rolls Colorful and Healthy Treat

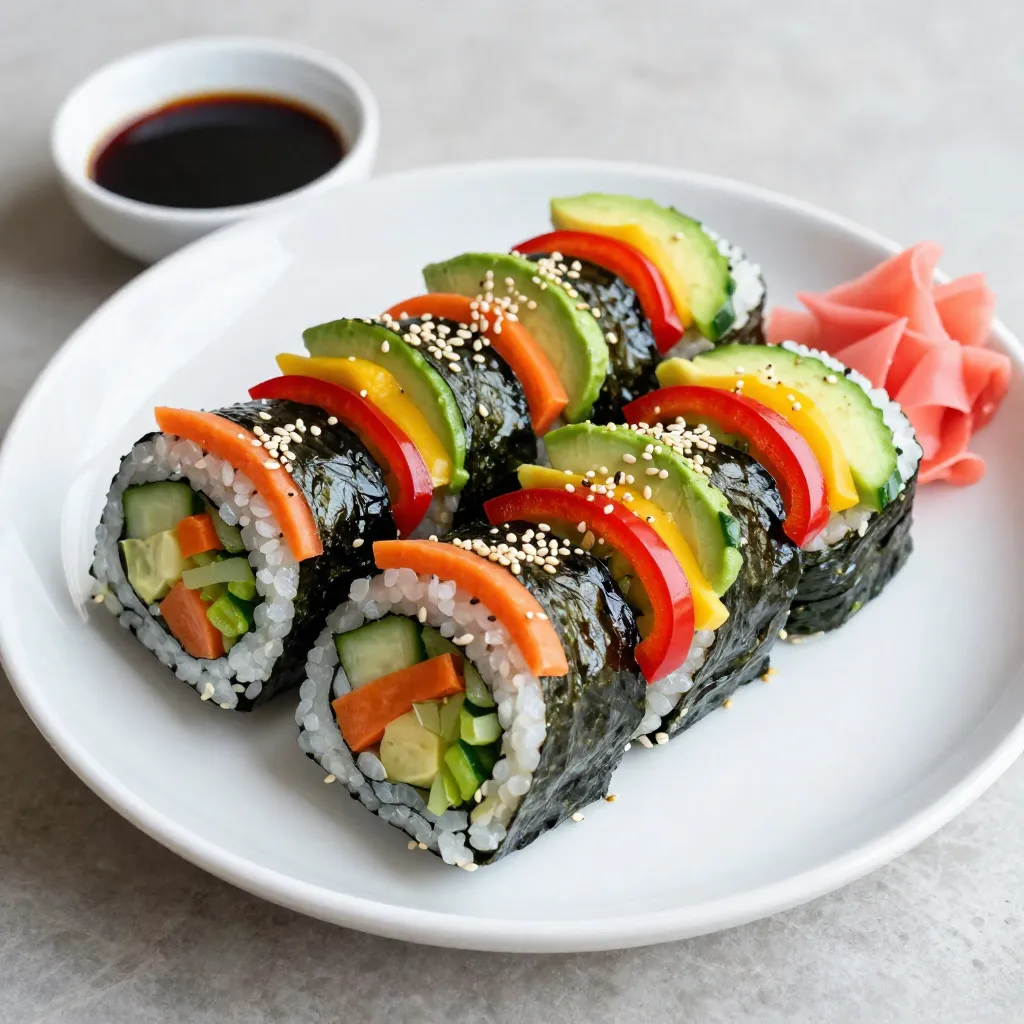
Are you ready to create a fun and healthy treat? Rainbow Veggie Sushi Rolls are the perfect blend of color

- 2 pounds baby potatoes, halved - 4 cloves garlic, minced - 1/4 cup extra virgin olive oil - 2 tablespoons freshly squeezed lemon juice - Zest of 1 large lemon - 1 teaspoon dried oregano - 1 teaspoon smoked paprika - 2 tablespoons fresh parsley, finely chopped - Salt and freshly cracked black pepper Gather these ingredients for a simple, yet tasty dish. Baby potatoes are small and tender, making them perfect for roasting. Garlic adds a rich flavor that pairs well with the potatoes. Use extra virgin olive oil to add a smooth texture and depth. Lemon juice and zest brighten the dish. They add a fresh, zesty taste that lifts the potatoes. Dried oregano brings a hint of earthiness, while smoked paprika adds a warm, smoky touch. Finally, don’t forget salt and pepper to enhance all these flavors. Fresh parsley is a lovely garnish. It adds a pop of green and freshness to your dish. Enjoy crafting this flavorful side! {{ingredient_image_2}} Preheat your oven to 425°F (220°C). This heat helps the potatoes cook evenly. While the oven warms, prepare the baby potatoes. Cut them in half to help them cook faster and soak in flavor. In a large bowl, combine the halved baby potatoes with the minced garlic. Add the extra virgin olive oil, freshly squeezed lemon juice, and lemon zest. Sprinkle in the dried oregano, smoked paprika, salt, and black pepper. Mix everything well. Use your hands or a spatula to coat each potato with the seasoning. This step ensures every bite is packed with flavor. Next, arrange the seasoned potatoes on a baking sheet lined with parchment paper. Make sure they are in a single layer. This helps them roast evenly. Roast the potatoes for 25-30 minutes. Halfway through, stir them to promote even browning. When they turn golden brown and crispy, they are ready. After roasting, let them sit for a few minutes. This resting time helps keep them crispy. Finally, sprinkle fresh parsley on top just before serving. This adds color and freshness. To get that perfect crunch, try a few methods. First, make sure your oven is hot. Set it to 425°F (220°C). This heat helps the potatoes crisp up nicely. You can also use a convection setting if your oven has one. This cooks the potatoes faster and gives them a great texture. For more flavor, let the potatoes marinate. A good marinating time is about 30 minutes. This allows the garlic and lemon to soak in. You can also mix in herbs like thyme or rosemary. A pinch of cayenne pepper can add a nice kick, too. Lemon garlic roasted potatoes pair well with many meals. They are great with grilled chicken or fish. You can also serve them with a fresh salad. For a complete meal, try them alongside roasted vegetables or a creamy dip. Pro Tips Choose the Right Potatoes: For the best texture and flavor, opt for waxy baby potatoes, as they hold their shape well during roasting. Don’t Skip the Zest: Using lemon zest enhances the citrus flavor, making the potatoes taste even more vibrant and fresh. Get Crispy Skin: Ensure the potatoes are spread out evenly on the baking sheet without overcrowding; this allows for proper airflow and crispiness. Rest Before Serving: Allow the potatoes to rest for a few minutes after roasting; this helps maintain their crispiness and allows flavors to meld. {{image_4}} You can change the herbs and spices for lemon garlic roasted potatoes. Here are some ideas: - Herbs: Try thyme, rosemary, or basil. Each will add a unique taste. - Spices: Swap smoked paprika with cayenne pepper or cumin for a kick. These changes keep the dish fresh and exciting. Experiment with what you have on hand. Different potatoes can change the texture and flavor of your dish. Here are some options: - Yukon Gold: These have a creamy texture and rich taste. - Russet: They become fluffy and crispy, perfect for roasting. - Red Potatoes: They hold their shape well and add a nice color. Using various potato types can create a fun twist on the classic recipe. You can easily adapt this recipe for special diets. Here’s how: - Gluten-free: This dish is already gluten-free. No need to change anything. - Dairy-free: This recipe is dairy-free. You can enjoy it as is. For added flavor, you might use nutritional yeast for a cheesy taste. These options make the dish friendly for everyone. To keep your leftover lemon garlic roasted potatoes fresh, use airtight containers. Glass containers work well because they do not stain or hold odors. Plastic containers can also work. Just make sure they seal tightly. Store them in the fridge for up to four days. When ready to eat, check for any off smells or changes in texture. Reheat your potatoes in the oven for the best results. Set the oven to 350°F (175°C) and place the potatoes on a baking sheet. Heat them for about 10 to 15 minutes. This method helps keep them crispy. You can also use a skillet on the stove. Just add a little olive oil and cook on medium heat until they are warm and crispy again. You can freeze roasted potatoes, but they may lose some texture. If you want to freeze them, let them cool first. Place them in a single layer on a baking sheet and freeze for a few hours. Once frozen, transfer them to freezer bags. They can last up to three months. When ready to use, thaw them in the fridge overnight before reheating. Roasted potatoes take about 25 to 30 minutes to cook at 425°F (220°C). You will know they're done when they turn golden brown and crispy. Use a fork to check their softness. If the fork goes in easily, they are ready! Yes, you can make lemon garlic roasted potatoes ahead of time. Prepare them as usual and let them cool. Store them in an airtight container in the fridge for up to three days. When you are ready to eat, reheat them in the oven for the best taste. Lemon garlic roasted potatoes go well with many dishes. Try them with grilled chicken, steak, or fish. You can also serve them alongside a fresh salad or roasted vegetables for a complete meal. The bright flavors complement rich main dishes nicely! Lemon garlic roasted potatoes are a tasty and easy dish. We covered the main ingredients, like baby potatoes, garlic, and olive oil, along with key seasonings. The roasting process ensures crispy, flavorful results. With tips for variations and storage, you can adapt this dish to fit your needs. Remember, these potatoes can enhance many meals. Try new herbs or other potato types to make it your own. Enjoy experimenting with this versatile recipe and make it part of your cooking routine!

Lemon Garlic Roasted Potatoes Flavorful Side Dish

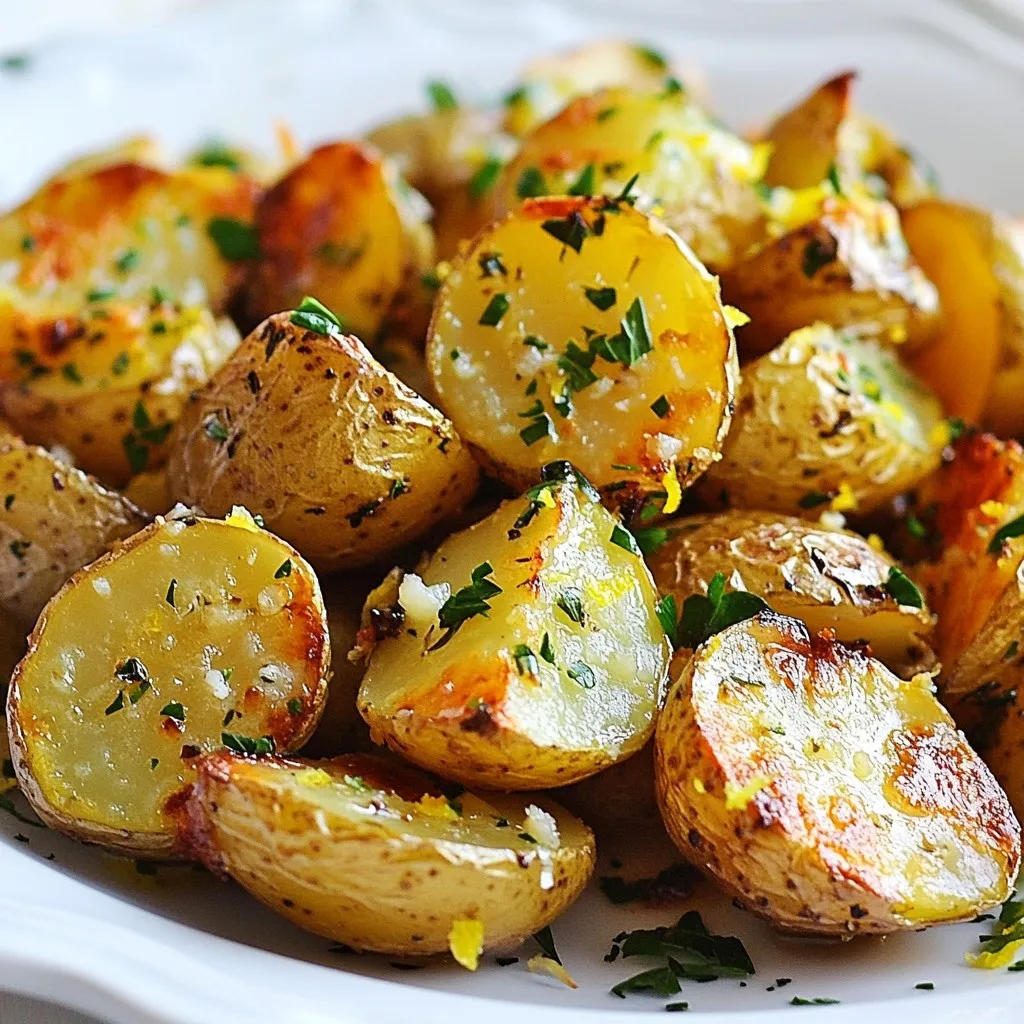
Looking for a side dish that bursts with flavor? You’ve come to the right place! These Lemon Garlic Roasted Potatoes

- 4 boneless, skinless chicken thighs - 2 cups broccoli florets - 1 bell pepper (red or yellow), sliced into thin strips - 1 cup snap peas - 1 large carrot, peeled and thinly sliced For the main dish, I love using chicken thighs. They stay juicy and tender. Fresh veggies add color and crunch. I choose broccoli, bell pepper, snap peas, and carrot for variety. This mix brings a nice balance of flavors and textures. - 1/4 cup low-sodium soy sauce - 1/4 cup honey - 2 tablespoons rice vinegar - 1 tablespoon freshly grated ginger - 2 cloves garlic, minced - 1 tablespoon cornstarch mixed with 1 tablespoon water (slurry) The teriyaki sauce is key for flavor. I use low-sodium soy sauce to keep it healthier. Honey adds sweetness, while rice vinegar gives a nice tang. Fresh ginger and garlic bring warmth and depth. The cornstarch slurry helps thicken the sauce. - Sesame seeds - 2 green onions, finely chopped for garnish For a final touch, I like to sprinkle sesame seeds. They add crunch and a nutty flavor. Fresh green onions give a pop of color and freshness. These garnishes make the dish look and taste even better! {{ingredient_image_2}} First, set your oven to 400°F (200°C). This hot temperature helps cook the chicken and veggies well. Next, line a large baking sheet with parchment paper. This makes cleanup easy and keeps your food from sticking. In a small saucepan, mix together the low-sodium soy sauce, honey, rice vinegar, grated ginger, and minced garlic. Stir these ingredients well. Heat this mixture over medium heat until it simmers gently. This step helps the flavors blend perfectly. To thicken the sauce, slowly whisk in the cornstarch slurry. Keep cooking for 1-2 minutes until it becomes thick. Once thickened, remove the saucepan from the heat and set it aside. Take your chicken thighs and place them in a large mixing bowl. Drizzle olive oil over the chicken and season it with salt and pepper. Toss the chicken to coat it well. Now, add the broccoli, bell pepper, snap peas, and sliced carrot into the bowl. Pour half of the teriyaki sauce over this mix. Gently toss everything to ensure it is evenly covered. Transfer the chicken and vegetable mixture onto your lined baking sheet. Spread them out so they cook evenly. Place the baking sheet in the oven and bake for 25-30 minutes. The chicken should reach an internal temperature of 165°F (75°C), and the veggies should be tender but still crisp. In the last 5 minutes of baking, drizzle the remaining teriyaki sauce over the chicken and veggies. This adds a flavorful glaze that makes the dish shine. After baking, carefully take the sheet pan out of the oven. Let it cool for a couple of minutes. Before serving, sprinkle sesame seeds and finely chopped green onions on top. This adds a fresh touch and makes your dish look appealing! To get the best results, ensure even cooking. Spread the chicken and veggies in a single layer on the sheet. This helps them cook uniformly. If they are too close together, they can steam instead of roast. Seasoning is key to flavor. Always use salt and pepper on the chicken and veggies. Don't skip this step. A little seasoning makes a big difference in taste. Want to boost the taste? Try adding garlic powder or red pepper flakes. These spices add depth and a little heat. You can also toss in a splash of lime juice for a zesty kick. If you want alternatives for teriyaki sauce, consider using hoisin sauce. It offers a sweet and savory flavor too. You can also mix soy sauce with brown sugar for a quick fix. Using the right tools helps a lot. A large mixing bowl makes it easy to toss the chicken and veggies together. A good baking sheet is also important; it helps with even cooking. A sharp knife is essential for cutting veggies. It makes prep quick and safe. Dull knives can slow you down and lead to accidents. Always keep your knife sharp to make cooking easy. Pro Tips Marinate for More Flavor: For an even richer flavor, consider marinating the chicken thighs in the teriyaki sauce for at least 30 minutes before cooking. This will enhance the savory notes of the dish. Use Fresh Vegetables: Fresh vegetables not only taste better but also retain their nutrients. Opt for seasonal produce for the best results. Don’t Overcrowd the Pan: Ensure there's enough space between the chicken and vegetables on the baking sheet. Overcrowding can lead to steaming instead of roasting, resulting in less crispy vegetables. Customize Your Veggies: Feel free to swap in your favorite vegetables. Zucchini, bell peppers, or onions can be great additions to this dish! {{image_4}} You can switch up the protein in this dish. Here are some easy options: - Chicken options: You can use chicken breast or drumsticks instead of thighs. Both will work well! Just ensure they cook to 165°F for safety. - Vegetarian alternatives: If you prefer a plant-based meal, try tofu or tempeh. Both soak up the teriyaki sauce nicely. Press tofu to remove water for the best texture. The great thing about this recipe is its flexibility with veggies. You can use: - Other vegetables: Zucchini, asparagus, or bell peppers work great too. Feel free to mix and match! - Seasonal vegetable ideas: Use squash in fall or green beans in summer. Fresh veggies add color and taste to your meal. You can also play around with the teriyaki sauce. Here are two main paths: - Homemade vs. store-bought: Making your sauce is quick and fun! But if you're short on time, store-bought sauces can be a good shortcut. Just check for low sodium options! - Flavor variations for sauce: Add pineapple juice for sweetness or sesame oil for a nutty flavor. You can even spice it up with chili flakes for heat. To keep your sheet pan teriyaki chicken and veggies fresh, place leftovers in an airtight container. Make sure to cool the dish to room temperature first. Store it in the fridge for up to three days. This method helps maintain flavor and texture. To reheat chicken and veggies, you have a few options: - Microwave: Place the dish in a microwave-safe container. Heat for 1-2 minutes, stirring halfway through. - Oven: Preheat your oven to 350°F (175°C). Spread the leftovers on a baking sheet and heat for about 10-15 minutes. - Stovetop: Heat a non-stick pan over low heat. Add a splash of water and stir the dish until warmed through. If you want to save some for later, freezing is a great option. Here’s how: - Allow the dish to cool completely. - Transfer it to a freezer-safe container or bag. - Label the container with the date. The meal can be frozen for up to three months. - To thaw, place it in the fridge overnight before reheating. You can serve many sides with this dish. Here are some great options: - Steamed rice: White or brown rice works well. - Quinoa: This adds a nutty flavor and is full of protein. - Noodles: Try soba or udon for a fun twist. - Salad: A light salad with sesame dressing complements the meal. - Edamame: These young soybeans are healthy and tasty. Yes, you can use frozen vegetables. They save time and still taste great. Just remember to thaw them first. This way, they will cook evenly. Fresh veggies have a little more crunch, though. If you love that texture, go for fresh. To make this dish gluten-free, use tamari instead of soy sauce. Tamari has the same taste without gluten. You can also find gluten-free soy sauce at many stores. Always check the label to be sure. Teriyaki sauce is very versatile. Here are some ideas: - Stir-fry: Add it to your favorite meats or veggies. - Grilled meats: Brush it on chicken, pork, or beef before grilling. - Marinade: Use it to marinate tofu for extra flavor. - Glaze: Drizzle over roasted vegetables for a sweet finish. - Rice bowls: Use it to dress up rice bowls with various toppings. Leftovers will last for about 3 to 4 days in the fridge. Store them in an airtight container. If you want them to last longer, freeze them. Just make sure to thaw before reheating. Always check for signs of spoilage before eating. You learned how to make tasty Teriyaki Chicken with fresh veggies. We covered key ingredients, like chicken thighs and a simple sauce. I shared tips for perfecting the dish and variations to suit your taste. In the end, this recipe is quick and fun. Enjoy experimenting with flavors and ingredients. Remember, cooking should be enjoyable, so have fun in the kitchen!

Sheet Pan Teriyaki Chicken and Veggies Delight

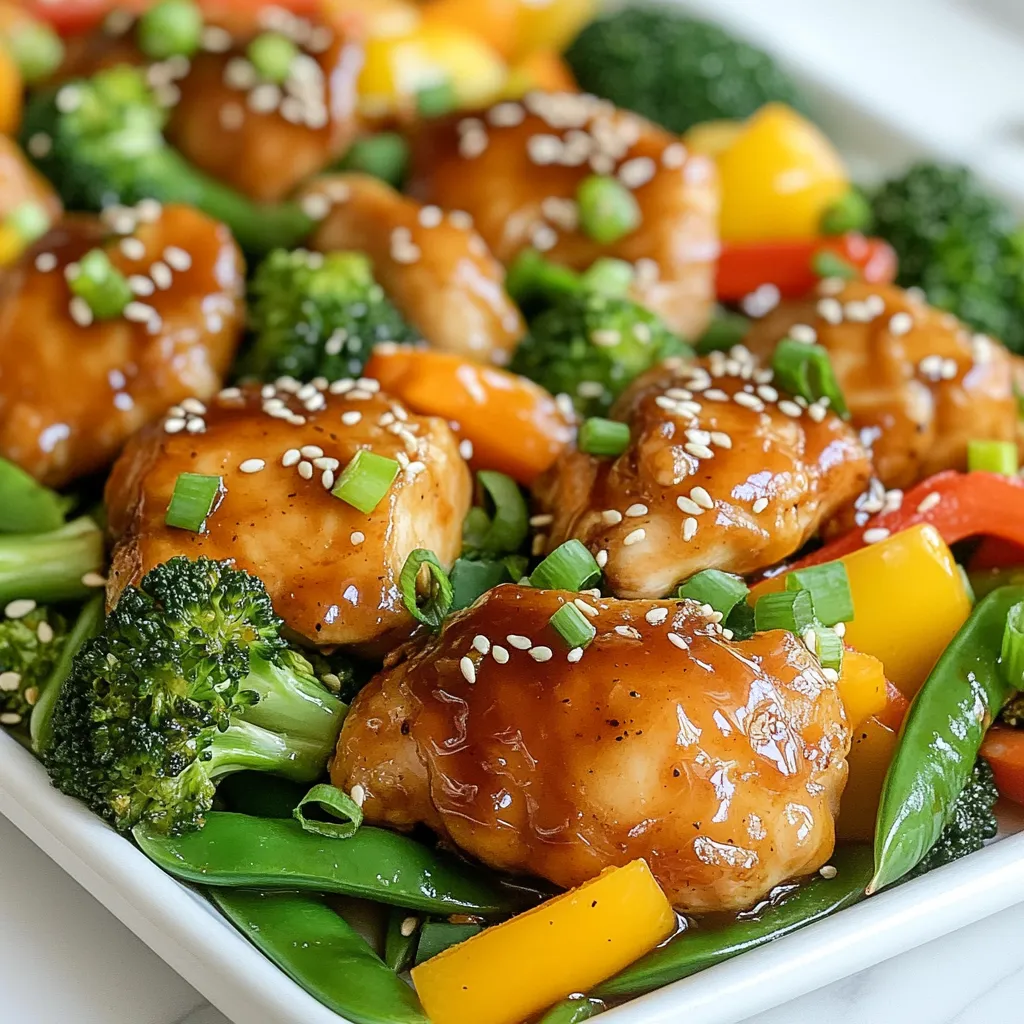
Looking for a quick, tasty meal that’s easy to make? You’re in the right place! My Sheet Pan Teriyaki Chicken

sdfsa

dasdas

- 1.5 pounds small or baby potatoes (Yukon Gold or Red) - 4 tablespoons unsalted butter, softened - 4 cloves garlic, finely minced - 1 tablespoon fresh parsley, finely chopped - 1 tablespoon fresh chives, finely chopped - 1 tablespoon fresh rosemary, finely chopped - 1 teaspoon salt, plus more for boiling - ½ teaspoon freshly ground black pepper - Olive oil for drizzling For this recipe, I love using small Yukon Gold or Red potatoes. They cook well and have a nice, creamy texture. Using fresh herbs gives the garlic butter a vibrant taste. You can mix parsley, chives, and rosemary to create a lovely flavor blend. You will need unsalted butter for richness. Make sure it's softened to mix easily with the garlic and herbs. Minced garlic adds a strong and fragrant kick. Seasoning is key, so don't forget salt and black pepper to enhance the flavors. Finally, a drizzle of olive oil helps crisp up those potatoes in the oven. Now that you have your ingredients, you are ready to start cooking! {{ingredient_image_2}} Start by grabbing a large pot. Fill it with cold water. Add a teaspoon of salt to the water. Place the small potatoes in the pot. Make sure they are fully covered with water. Heat the pot on medium-high until the water boils. Once boiling, lower the heat to a gentle boil. Cook the potatoes for about 15 to 20 minutes. They should be fork-tender when done. While the potatoes boil, turn on your oven to 425°F (220°C). Preheating is key for roasting. It helps the potatoes get crispy and golden. In a medium-sized bowl, mix together the softened butter and minced garlic. Add the finely chopped parsley, chives, and rosemary. Sprinkle in a bit of salt and black pepper. Stir until everything is well combined. This mixture will add great flavor to the potatoes. After boiling, drain the potatoes using a colander. Let them cool for a few minutes. This makes them easier to handle. Line a baking sheet with parchment paper. Place the cooled potatoes on the sheet. With the bottom of a cup or a fork, gently smash each potato. They should be slightly flattened but still hold their shape. Drizzle a light coat of olive oil over the smashed potatoes. Make sure they are evenly coated. Next, take your garlic herb butter and dollop it generously on each potato. Cover them well for maximum flavor. Put the baking sheet in the preheated oven. Bake the potatoes for 20 to 25 minutes. Keep an eye on them. You want them crispy and golden brown. Check for that perfect crunch before taking them out. For smashed potatoes, I recommend using small or baby potatoes like Yukon Gold or Red. These types are creamy and hold their shape well when smashed. Aim for potatoes that are about the same size. This helps them cook evenly. If you have potatoes that vary in size, cut the larger ones to match. To achieve that perfect crispy texture, preheat your oven to 425°F (220°C). This high heat helps to create a crisp outer layer. Bake the potatoes for 20-25 minutes. Keep an eye on them to ensure they turn golden brown. If you want extra crispiness, broil them for a minute or two at the end. Feel free to enhance the flavor of your smashed potatoes. Try adding different herbs or spices to the garlic herb butter. For a kick, consider adding red pepper flakes. You could also use fresh thyme or even some smoked paprika. Each herb brings a unique taste that elevates the dish. Experimenting can lead to your new favorite flavor! Pro Tips Choose the Right Potatoes: For the best texture and flavor, use small, waxy potatoes like Yukon Gold or Red. These varieties hold their shape well when cooked and smashed. Perfectly Smash with Care: When smashing the potatoes, apply gentle pressure to avoid turning them into mashed potatoes. You want them to be flattened but still chunky! Customize Your Herb Butter: Feel free to mix and match herbs according to your preference. Fresh thyme or oregano can add a delightful twist to the garlic herb butter. Get Crispy Edges: Ensure the smashed potatoes are well-coated with olive oil before baking to achieve that desired crispy texture. A hot oven also helps in getting them golden brown! {{image_4}} You can make these potatoes even more delicious by adding cheese. After smashing the potatoes, create a small well in the center of each one. Then, fill it with your favorite cheese. Cheddar, mozzarella, or even goat cheese work great. Bake them until the cheese melts and bubbles up, making a gooey center. This adds a nice twist and extra flavor to the dish. If you like heat, spice things up with chili flakes or your favorite spice blend. When making the garlic herb butter, add about a teaspoon of chili flakes. You could also use spicy paprika or cayenne pepper. This will give your smashed potatoes a nice kick. Pair this spicy butter with fresh herbs for a bold flavor that will impress. For a vegan option, switch out the butter for plant-based alternatives. Use coconut oil or a vegan butter substitute. You can also enhance flavor by adding nutritional yeast to the garlic herb mixture. This will give your potatoes a cheesy taste without any dairy. Enjoy the same rich flavors while keeping it plant-based. To keep your smashed potatoes fresh, store them in an airtight container. Place a layer of parchment paper between the potatoes and the lid. This helps absorb moisture and keeps them crisp. Refrigerate them for up to three days. Before serving, check for any signs of spoilage. To reheat smashed potatoes, the oven works best. Preheat your oven to 400°F (200°C). Spread the potatoes on a baking sheet. Drizzle a little olive oil over them to help regain crispiness. Bake for about 10-15 minutes or until heated through. You want them hot and crispy, just like the first time. If you want to store smashed potatoes for longer, freezing is a great option. Allow the potatoes to cool completely before freezing. Place them in a single layer on a baking sheet and freeze for 1-2 hours. Once frozen, transfer them to a freezer bag. Label the bag and store for up to three months. When ready to eat, thaw them in the fridge overnight before reheating. Boil the potatoes for 15-20 minutes. They should be fork-tender when done. Test doneness by sticking a fork into a potato. If it goes in easily, they are ready. Don't overcook them; you want them soft but not falling apart. Yes, you can make garlic herb butter ahead of time. Mix the butter, garlic, and herbs, then store it in the fridge. It will stay fresh for about a week. Just let it sit out for a bit before using it. This will make it easier to spread on your potatoes. Smashed potatoes pair well with many dishes. Try serving them with grilled chicken, steak, or roasted vegetables. They also taste great with a side of salad. The creamy and crispy texture complements many meals. Absolutely! You can swap out herbs for your favorites. Try thyme, basil, or dill for a twist. Just use the same amount as the recipe calls for. This lets you customize the flavor to your taste. In this blog post, we explored how to make delicious smashed potatoes. We covered every step, from choosing the right potatoes to preparing garlic herb butter. You learned tips for perfect crispiness and creative variations like cheese-stuffed versions. Remember, storing your leftovers well keeps them tasty. Smashed potatoes are simple and fun to make. Enjoy your cooking and feel free to experiment with flavors. A little twist can transform the dish into something new!

Smashed Potatoes with Garlic Herb Butter Delight

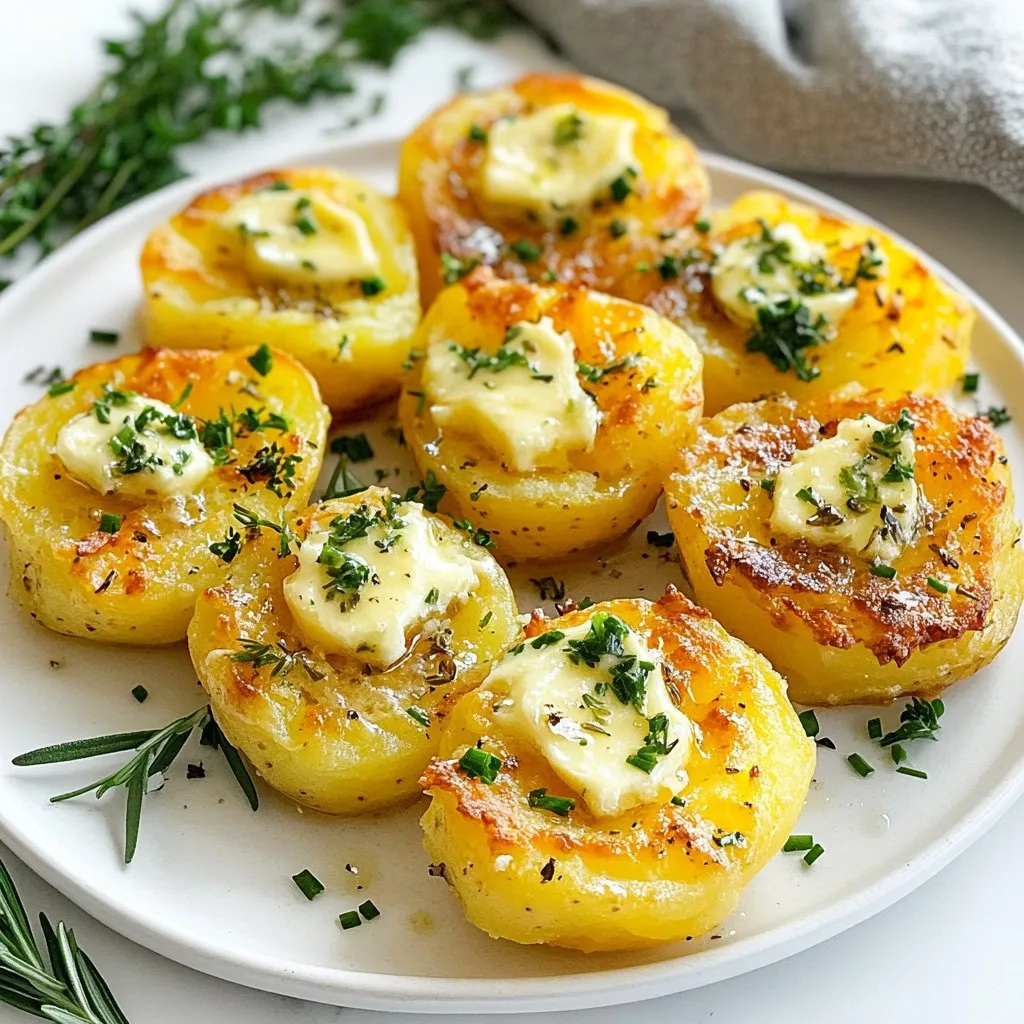
Get ready to elevate your side dish game with my Smashed Potatoes with Garlic Herb Butter Delight! These crispy, buttery

- 2 cups cooked jasmine rice - 1 cup fresh pineapple, diced - 1/2 cup red bell pepper, diced - 1/2 cup green peas - 1/4 cup red onion, chopped - 2 cloves garlic, minced - 2 tablespoons soy sauce or tamari - 1 tablespoon sesame oil - 1 tablespoon olive oil - 1/4 cup scallions, sliced - 1/4 teaspoon cayenne pepper (optional) - Salt and black pepper to taste - 1/4 cup chopped cashews Using the right ingredients makes a big difference in flavor. I love using jasmine rice for this dish. It adds a nice fragrance and texture. Fresh pineapple gives a sweet burst that brightens up the meal. Red bell pepper adds color and sweetness. Green peas bring a lovely pop of green and texture. Garlic and red onion provide a strong base of flavor. The soy sauce or tamari adds saltiness. I recommend tamari for a gluten-free option. Sesame oil offers a lovely nutty taste. Olive oil is great for sautéing. Cayenne pepper gives a spicy kick if you like heat. Lastly, cashews add a satisfying crunch. These ingredients all come together to create a dish that is not only tasty but also fun to eat. - Use gluten-free soy sauce like tamari if needed. - You can swap in other veggies like carrots or peas. - Canola or avocado oil work well if you don’t have olive oil. Feel free to mix and match! Cooking is all about creativity. Use what you have, and you’ll still end up with a delicious dish. {{ingredient_image_2}} Getting the rice ready Use 2 cups of cooked jasmine rice. Leftover rice works best. Make sure it is chilled. This helps keep the rice from clumping. If you don’t have leftover rice, cook it and let it cool. Chopping vegetables and fruit Chop your vegetables and fruit. Dice 1 cup of fresh pineapple into small pieces. Finely chop 1/2 cup of red bell pepper. Get 1/4 cup of red onion and chop it small. Mince 2 cloves of garlic. You can also measure 1/2 cup of green peas. Sautéing onions and garlic In a large skillet, heat 1 tablespoon of olive oil over medium-high heat. Add the red onion and minced garlic. Sauté them for 2-3 minutes. The onion should turn soft and fragrant. Incorporating vegetables and pineapple Add the diced red bell pepper to the pan. Cook for another 2-3 minutes. Push the veggies to one side of the skillet. Pour in 1 tablespoon of sesame oil. Then, add the chilled jasmine rice. Break up any clumps and stir-fry for a few minutes. Mixing in sauces and final ingredients Now, add the diced pineapple to the skillet. Let it caramelize for about 2 minutes. Next, pour in 2 tablespoons of soy sauce. Mix everything well. Stir in the green peas and optional cayenne pepper. Season with salt and black pepper to taste. Cook for 2 more minutes. How to plate the dish For a fun twist, serve your fried rice in hollowed-out pineapple halves. This adds a tropical flair. If not, use a bright bowl for a colorful presentation. Garnishes for added flavor Finish the dish with 1/4 cup of chopped cashews and sliced scallions on top. This adds crunch and freshness. You can also add a lime wedge for a zesty touch. Choosing the right rice is key. I love using jasmine rice. It has a soft texture and great flavor. For the best results, use chilled, leftover rice. This helps keep the grains separate. Freshly cooked rice can be too sticky. To adjust flavors, use seasonings wisely. Start with soy sauce. It adds umami and depth. You can also add salt and pepper to taste. If you want a kick, try cayenne pepper. Just a pinch makes a big difference. High heat is vital for stir-frying. It cooks the rice fast and keeps it from being mushy. Use a large skillet or wok to get the best results. Heat the oil until it shimmers. This step makes a big difference. To prevent sticking, keep stirring. Move the rice around the pan. Don’t let it sit too long. If rice sticks, it can ruin the texture. Serving in pineapple halves is a fun idea. It gives a tropical look and taste. Just hollow out the pineapple and fill it with fried rice. To make your dish pop, use garnishes. Scallions add color and freshness. A wedge of lime gives brightness. You can also sprinkle chopped cashews on top for crunch. These small touches make a big impact on your plate. Pro Tips Use Day-Old Rice: For the best texture, use leftover jasmine rice that's been chilled in the fridge. It helps prevent the rice from becoming mushy during cooking. Fresh Pineapple Flavor: If possible, opt for fresh pineapple over canned to enhance the tropical flavor and sweetness of the dish. Customize Your Veggies: Feel free to add or substitute vegetables based on what you have on hand, like carrots, peas, or corn for added color and nutrition. Garnish for Presentation: Enhance your dish's presentation by garnishing with sliced scallions, chopped cilantro, or even a few lime wedges for a fresh citrus kick. {{image_4}} To make Tropical Pineapple Fried Rice vegetarian or vegan, simply remove any meat. Use plant-based ingredients instead. You can add tofu or tempeh for protein. These options absorb flavors well and keep the dish hearty. Want to boost those tropical vibes? Add other fruits like mango or coconut. They bring sweetness and a fresh twist. You can also try spices like ginger or turmeric for a more vibrant taste. These additions enhance the dish and make it exciting. If you love heat, add different peppers, like jalapeños or serranos. They give a nice kick. You can also use chili sauces for added zing. Just drizzle some over the rice before serving. Adjust the spice level to fit your taste. To keep your Tropical Pineapple Fried Rice fresh, follow these simple steps: - Cool the rice: Let it sit until it reaches room temperature. - Use airtight containers: Place the rice in a container with a tight seal. - Label and date: Write the date on the container to track freshness. In the fridge, this dish lasts about 3 to 4 days. Make sure to check for any off smells before eating. If you want to store it for longer, freezing is a great option. Here’s how to do it: - Divide into portions: Break the rice into smaller servings for easy use. - Wrap well: Use plastic wrap or freezer bags to prevent freezer burn. - Label each bag: Write the date and contents on each bag. To reheat, follow these tips for the best results: - Thaw in the fridge: Move it to the fridge a day before you plan to eat. - Use a skillet: Heat in a skillet over medium heat, stirring often. - Add a splash of water: If it seems dry, add a bit of water or oil as needed. This way, you can enjoy your Tropical Pineapple Fried Rice even after a few days! The best rice for fried rice is jasmine rice. It has a light, fluffy texture. Other types, like basmati, can work but may be too fragrant. Jasmine rice holds flavors well and gets a nice, slightly sticky texture when cooked. This rice is perfect for stir-frying. It keeps its shape and soaks up sauces nicely. Yes, you can use canned pineapple. Canned pineapple is convenient and sweet. However, it may have a softer texture and more syrup. If you want a fresh taste, use fresh pineapple. Fresh pineapple adds a nice crunch and bright flavor. If you choose canned, drain it well to avoid excess moisture. To make fried rice without gluten, use gluten-free soy sauce, like tamari. This option has a similar taste. Check the label to ensure it is gluten-free. Other alternatives include coconut aminos, which give a sweet, salty flavor. Both options work well in fried rice and keep it tasty. This blog post covered how to make delicious fried rice. We discussed the best ingredients, helpful tips, and various options to customize your dish. You learned about ingredient swaps, cooking steps, and storage methods to keep your fried rice fresh. Now you can impress friends and family with your cooking skills. Enjoy experimenting with flavors and share your creations! Cooking can be fun, easy, and filled with surprises. Dive in and make your own special version!

Tropical Pineapple Fried Rice Flavorful and Simple Dish

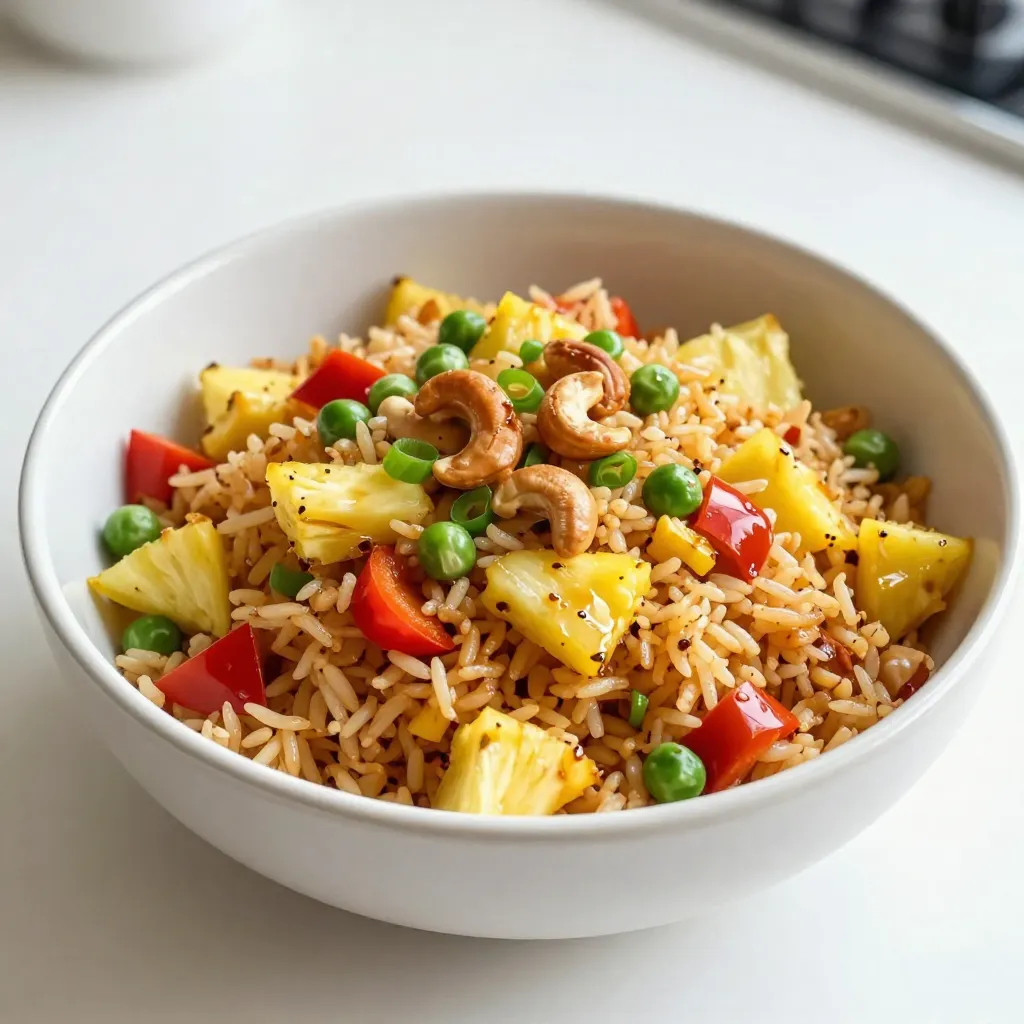
If you love vibrant flavors and simple recipes, you’ll enjoy this Tropical Pineapple Fried Rice. Imagine fluffy jasmine rice mingling

- 1 lb sirloin steak, cut into 1-inch cubes - 4 tablespoons unsalted butter, divided - 4 cloves garlic, minced - 1 tablespoon fresh rosemary, finely chopped - 1 teaspoon smoked paprika - Salt and freshly ground black pepper to taste - Fresh parsley, chopped (for garnish) The best steak for garlic butter steak bites is sirloin. It has a nice balance of flavor and tenderness. You can also use ribeye or tenderloin for a richer taste. If you want a budget-friendly option, flank steak works too. Just remember, the cut you choose affects the taste and texture. Fresh herbs and spices make a big difference in your dish. Use bright green rosemary for the best flavor. When it comes to butter, always choose unsalted. This lets you control the salt in your dish better. Always check the color and smell of your butter. Fresh butter should smell sweet and creamy. {{ingredient_image_2}} To season steak well, you need salt, black pepper, and smoked paprika. Start by placing the steak cubes in a bowl. Sprinkle a good amount of salt and pepper over them. Then, add smoked paprika for a nice kick. Toss everything together, so each piece gets coated. This step is key for maximum flavor. It helps the steak taste great when cooked. For a perfect sear, use a hot skillet. Heat it over medium-high heat. Add two tablespoons of unsalted butter. Wait for the butter to melt and bubble. When the butter is ready, carefully place the seasoned steak cubes in the skillet. Do not crowd the pan. If needed, cook in batches. Cook the steak bites for about 2-3 minutes on one side. Avoid moving them during this time; this helps create a nice crust. After 2-3 minutes, flip them over. Cook for another 2-3 minutes. Check for your desired doneness. For medium-rare, aim for an internal temperature of 135°F. Making garlic butter sauce is easy. After removing the steak bites, keep the skillet on the heat. Add the remaining two tablespoons of butter. Let it melt. Next, add minced garlic and chopped rosemary. Stir gently for 1-2 minutes. Be careful not to burn the garlic. If it turns brown, it will taste bitter. The goal is to make it fragrant. Once the garlic is ready, return the cooked steak bites to the skillet. Toss them in the garlic butter sauce for a minute. This coats the steak with rich flavors. Now you have a delicious garlic butter steak bite ready to serve! To cook steak perfectly, you need to know the right temperatures. - Rare: 125°F - Medium-rare: 135°F - Medium: 145°F - Medium-well: 150°F - Well-done: 160°F Common mistakes include overcrowding the pan, which leads to steaming instead of searing. Always use high heat to get a nice crust. Let the steak rest for a few minutes after cooking. This helps the juices redistribute. To boost the flavor, consider adding more herbs. Thyme and oregano work well with garlic butter. You can also try mixing in crushed red pepper for a bit of heat. For deeper garlic butter flavor, use brown butter. Simply cook the butter until it turns a light brown before adding garlic. This adds a nutty taste that pairs well with steak. Pair your steak bites with sides like roasted vegetables or a fresh salad. Garlic bread is also a great choice. For plating, stack the steak bites on top of each other. Drizzle the garlic butter sauce over them. Add a sprinkle of parsley for a pop of color. This makes your dish look as good as it tastes! Pro Tips Choose the Right Cut: For the best flavor and tenderness, use sirloin or ribeye steak, as these cuts sear beautifully and remain juicy. Let the Steak Rest: After cooking, allow the steak bites to rest for a few minutes before serving. This helps the juices redistribute, making each bite more flavorful. Customize Your Herbs: Feel free to experiment with different herbs like thyme or oregano for varied flavors. Fresh herbs can elevate the dish in unexpected ways! Monitor Heat Levels: Keep an eye on the skillet’s heat. Too high can burn the butter and garlic, while too low can lead to a lackluster sear on the steak. {{image_4}} You can cook garlic butter steak bites in many ways. An air fryer works great for quick and easy bites. Simply season the steak as you would. Place it in the air fryer basket in a single layer. Cook at 400°F for about 8-10 minutes. Shake the basket halfway through for even cooking. Grilling adds a nice smoky flavor to the steak bites. Preheat your grill to medium-high heat. Use skewers to hold the steak cubes if you like. Grill the bites for about 2-3 minutes on each side. This method gives a nice char and taste you will love. If you are looking for gluten-free options, this recipe fits the bill. All the ingredients are naturally gluten-free. Just check any sauces you might add. For low-carb variations, skip any bread or starchy sides. Serve the steak bites with a fresh salad instead for a great meal. You can easily add different sauces or marinades to change the flavor. Try teriyaki or barbecue sauce for a sweet twist. For spice, consider adding some chili powder or cumin to the mix. These additions can give your steak a whole new taste. You can also mix in different herbs like thyme or cilantro. Each option can create a unique and tasty bite! To keep your garlic butter steak bites fresh, place them in an airtight container. Make sure they cool down first. Store them in the fridge for up to three days. This helps maintain their flavor and texture. When you want to enjoy your leftover steak bites, reheat them gently. The best method is to use a skillet. Heat it on low and add a touch of butter. This keeps the steak moist. Cook until warm, stirring often to avoid burning. You can also use a microwave, but cover the dish to keep moisture in. If you want to save steak bites for later, freezing is a great option. First, let them cool completely. Then, place them in a freezer-safe bag. Squeeze out the air before sealing. They can last up to three months in the freezer. When ready to eat, thaw in the fridge overnight and reheat as mentioned above. For steak bites, sirloin is my top choice. It has great flavor and tenderness. You can also use ribeye for a richer taste. If you want something leaner, filet mignon works well too. Each cut has its unique taste, so pick what you like best. Yes, you can use frozen steak, but fresh is better. Frozen steak may lose some juices. If using frozen, let it thaw in the fridge overnight. Pat it dry to remove excess moisture. This helps you get a good sear. To check doneness, use a meat thermometer. For medium-rare, aim for 130°F (54°C). Medium steak should be about 145°F (63°C). If you don't have a thermometer, cut one open to see if it's pink inside. Cook longer if you prefer it well done. This blog post covered the best ingredients, cooking methods, and tips for delicious steak bites. Choosing quality steak and fresh herbs is key to great flavor. I shared step-by-step instructions for perfect cooking. Remember to avoid common mistakes and try different methods to enhance your meals. With these insights, you can prepare mouth-watering steak bites every time. Enjoy experimenting with flavors and methods, and happy cooking!

Garlic Butter Steak Bites Quick and Savory Treat

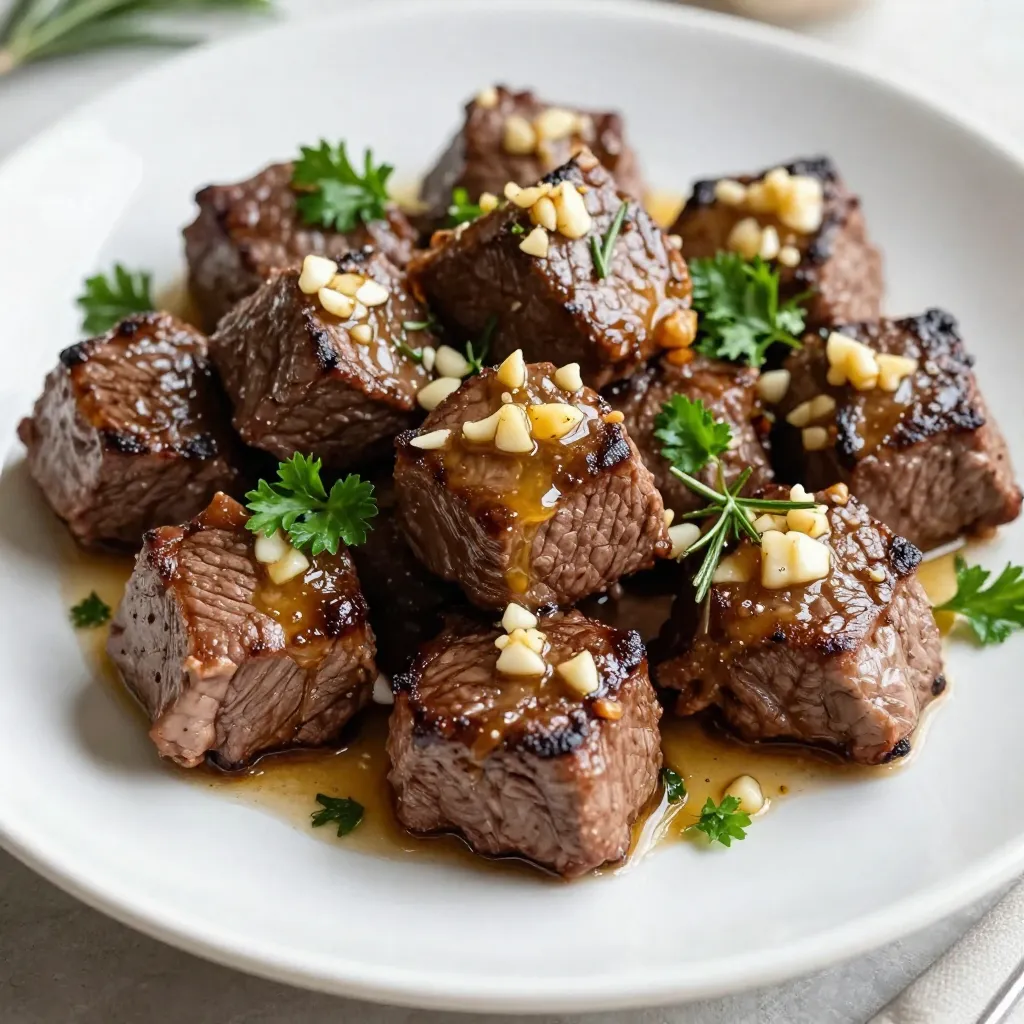
If you’re craving a quick and tasty meal, Garlic Butter Steak Bites are the answer! These juicy bites are packed

To make a delicious Cherry Almond Coffee Cake, you'll need the following ingredients: - 2 cups all-purpose flour - 1 cup granulated sugar - 1/2 cup unsalted butter, softened - 3/4 cup whole milk - 2 large eggs - 1 tablespoon baking powder - 1 teaspoon vanilla extract - 1/2 teaspoon almond extract - 1 cup cherries, pitted and halved - 1/2 cup sliced almonds - 1/4 teaspoon salt - Optional: powdered sugar for dusting Each ingredient plays a key role in creating this delightful cake. The flour gives the cake structure, while the sugar adds sweetness. Softened butter helps achieve a rich, tender crumb. Whole milk keeps the cake moist, and eggs provide binding. Baking powder acts as a leavening agent, making the cake rise. Vanilla and almond extracts infuse the batter with sweet, nutty flavors. Cherries add a burst of juicy sweetness, while sliced almonds add a crunchy texture. The salt balances the flavors, enhancing the overall taste. You can dust the finished cake with powdered sugar for a beautiful finish. This cake is not just tasty; it’s a feast for the eyes too! Each bite is a mix of sweet cherries and nutty almonds, making it a memorable treat for any occasion. {{ingredient_image_2}} - Preheat the oven to 350°F (175°C). - Grease or line a 9-inch round cake pan. - First, cream the butter and sugar until fluffy. Use a mixer and mix for 3 to 4 minutes. - Next, add eggs one at a time. Mix well after each egg. Then stir in the vanilla and almond extracts. - In a separate bowl, combine the flour, baking powder, and salt. Whisk these dry ingredients well. - Slowly add the dry ingredients to the wet mix, alternating with milk. Start and end with dry ingredients. Mix on low speed until just combined. - Gently fold in the halved cherries using a spatula. Ensure they are evenly spread throughout. - Pour the batter into the prepared pan. Smooth the top with a spatula for an even layer. - Sprinkle the sliced almonds on top for a crunchy finish. - Bake in the preheated oven for 30-35 minutes. Check with a toothpick. If it comes out clean, the cake is ready. - Allow the cake to cool in the pan for about 10 minutes. Then, transfer it to a wire rack to cool completely. This process makes a cherry almond coffee cake that is moist and full of flavor. You can also dust it with powdered sugar for a sweet finish. Enjoy the delightful taste! To get the best texture in your coffee cake, avoid overmixing. Overmixing can lead to a tough cake. Mix just until the dry and wet ingredients blend. This keeps the cake soft and light. Also, pay attention to how you soften the butter. I recommend letting it sit at room temperature. It should be soft but not melted. This helps create that fluffy batter we want. To boost the flavor, you can add a pinch of cinnamon or nutmeg. These spices pair well with cherries and almonds. They add warmth and depth. Using quality extracts is also key. Always choose pure vanilla and almond extracts. They will give your cake a rich and true flavor. A simple dusting of powdered sugar can make your cake look fancy. Just sprinkle it on top before serving. It adds a nice touch and sweetness. Consider garnishing with fresh mint leaves. They add color and a fresh taste. Place a few leaves next to your cake slices for a beautiful look. Pro Tips Use Fresh Cherries: Fresh cherries will provide the best flavor and texture for this coffee cake. If using frozen, ensure they are thoroughly thawed and drained to avoid excess moisture. Room Temperature Ingredients: Make sure your butter and eggs are at room temperature before starting. This helps in achieving a light and fluffy batter when creaming the butter and sugar. Don’t Overmix: When combining the wet and dry ingredients, mix just until combined. Overmixing can lead to a dense cake, so be gentle! Cool on a Wire Rack: Allowing the cake to cool on a wire rack prevents moisture from building up at the bottom, ensuring a perfectly textured cake. {{image_4}} You can switch cherries for other fruits. Blueberries and raspberries work great. These berries add a pop of color and flavor. They keep the cake moist and tasty. Try mixing different fruits for a fun twist. You can even use peaches or plums. Each fruit brings its own unique taste to the cake. Adding chocolate or coconut can change the game. Chocolate chips give a rich, sweet taste. You can mix in about half a cup for a nice surprise. Shredded coconut adds a chewy texture and a tropical vibe. Just use about a third of a cup. This combo makes the cake even more delicious. Feel free to experiment with other flavors you love! If you need a gluten-free cake, don't worry. You can use gluten-free flour blends. These blends often work well in recipes. Just swap the all-purpose flour for the gluten-free mix. Follow the package instructions for the best results. Your cake will still be moist and tasty. This way, everyone can enjoy the cake! To keep your Cherry Almond Coffee Cake moist, wrap it well. Use plastic wrap or aluminum foil. Place the cake in an airtight container to prevent drying out. Store it at room temperature for up to three days. If you want it to last longer, place it in the fridge. Just remember, cold air can dry it out, so wrap it tightly. To freeze the cake, start by letting it cool completely. Then, slice it into pieces. Wrap each slice in plastic wrap, then place them in a freezer bag. This helps keep the cake fresh and easy to grab. When you want to enjoy a piece, take it out and let it thaw. Place it in the fridge overnight or at room temperature for a few hours. Enjoy the delicious taste as if it were just baked! If you want to replace almonds, you can try walnuts or pecans. Both add a nice crunch. You can also skip nuts for a nut-free cake. Just remember, the flavor will change slightly. Yes, you can make this cake ahead of time! Bake it and let it cool. Wrap it well in plastic wrap. Store it at room temperature for up to two days. You can also keep it in the fridge for a few more days. To check if the cake is done, insert a toothpick into the center. If it comes out clean, the cake is ready. If it has batter on it, bake for a few more minutes. Yes, you can use frozen cherries! Just thaw and drain them first. This helps keep the cake from getting too watery. They will taste great in the cake. The cake will last about five days in the fridge. Make sure to store it in an airtight container. This keeps it fresh and moist for longer. This cake recipe brings together simple ingredients for a delightful treat. You learned how to make a cherry almond cake from start to finish. I shared tips to enhance flavor and achieve the perfect texture. You also saw fun variations to try, along with storage tips to enjoy leftovers. Baking is an adventure, so embrace your creativity and enjoy every bite! Your new dessert is sure to impress.

Cherry Almond Coffee Cake Delightful Flavor Combination

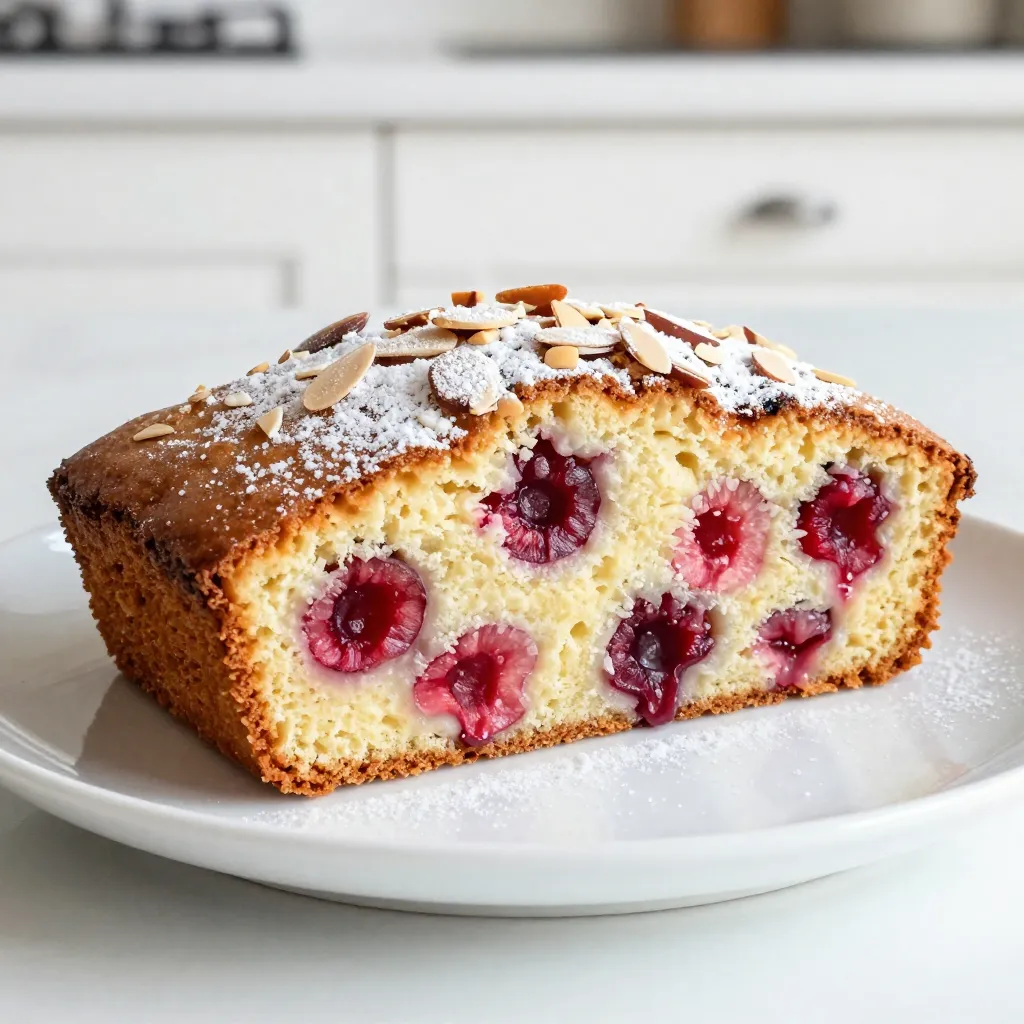
Are you ready to elevate your baking game? This Cherry Almond Coffee Cake combines the sweet, tart taste of cherries

- 1 cup graham cracker crumbs - 1/2 cup unsalted butter, melted - 1/4 cup packed brown sugar - 1/2 teaspoon vanilla extract - 1 cup all-purpose flour - 1/2 teaspoon baking powder - 1/4 teaspoon salt - 1 cup semi-sweet chocolate chips - 1 cup mini marshmallows - 1/2 cup sweetened shredded coconut (optional) You can make these bars even better by swapping some ingredients. Here are a few ideas: - Alternative sweeteners: If you want less sugar, use maple syrup or honey. Just adjust the amount to keep the texture right. - Gluten-free options: Use gluten-free graham cracker crumbs and flour. This way, everyone can enjoy them. - Dairy-free alternatives: Replace butter with coconut oil or a dairy-free spread. Use dairy-free chocolate chips too. These swaps help you cater to different diets while keeping the bars delicious. Feel free to mix and match based on your needs! {{ingredient_image_2}} - Preheat your oven to 350°F. - Grease an 8x8 inch baking pan and line it with parchment paper. - In a mixing bowl, combine 1 cup of graham cracker crumbs, 1/2 cup melted unsalted butter, and 1/4 cup brown sugar. - Stir until you reach a wet crumbly texture. - Press this mixture firmly into the bottom of the prepared pan. - Bake the crust for 10 minutes until it is lightly golden. - While the crust bakes, mix 1 cup of all-purpose flour, 1/2 teaspoon baking powder, and 1/4 teaspoon salt in a separate bowl. - After baking, scatter 1 cup of semi-sweet chocolate chips evenly over the warm crust. - Next, sprinkle 1 cup of mini marshmallows on top. If you like, add 1/2 cup of sweetened shredded coconut for a fun twist. - Gently pour the flour mixture over the chocolate and marshmallow layers. - Return the pan to the oven and bake for another 15-20 minutes. - Check for golden brown color on top and puffed marshmallows. - Once baked, let the bars cool in the pan for at least 10 minutes. - Lift the bars out using the parchment paper and cut them into squares. For the crust, aim for a wet, crumbly mix. Combine graham cracker crumbs, melted butter, and brown sugar well. Press this mixture into the pan firmly. This helps create a solid base. Bake it until it's lightly golden. Layer distribution is key. When you add chocolate chips, scatter them evenly. This ensures every bite has that sweet, rich flavor. After that, sprinkle the mini marshmallows evenly. If you use coconut, add it now for a unique twist. Lastly, pour the flour mixture gently over everything. Spread it out without mixing, so each layer stays distinct. Using the right tools makes baking easier. A sturdy 8x8 inch baking pan is perfect for these bars. Use parchment paper for easy removal later. A medium mixing bowl helps in mixing the crust. A whisk is great for blending the flour mixture. For mixing, a simple spatula is handy. You can also use a hand mixer for the crust if you prefer. Don't forget measuring cups and spoons for accuracy. These tools will help you achieve the best results. To prevent burning, keep an eye on your bars. Ovens can vary in heat. If the edges brown too fast, cover them with foil. This shields them while the center cooks. If your crust crumbles, it may be too dry. Try adding a bit more melted butter next time. Press it down more firmly into the pan. This creates a better bond. A well-compressed crust holds together nicely when baked. Pro Tips Use Fresh Ingredients: Ensure your chocolate chips and marshmallows are fresh for the best flavor and texture. Stale ingredients can lead to a less satisfying result. Don't Overbake: Keep a close eye on the bars while they’re baking. Overbaking can result in a dry texture, so look for a golden brown top and puffed marshmallows. Cool Before Cutting: Allow the bars to cool for at least 10 minutes in the pan before cutting. This helps them set and makes it easier to achieve clean, even squares. Add a Twist: For a unique flavor, try adding a pinch of cinnamon or a splash of almond extract to the graham cracker mixture for an extra depth of flavor. {{image_4}} You can easily change up the flavors in your s’mores bars. Adding nuts like walnuts or pecans gives a nice crunch. You can also add fruits, like banana slices or dried cherries, for a sweet twist. Using different types of chocolate can make your bars unique. Dark chocolate brings a rich taste. White chocolate adds a creamy touch. You can mix and match these chocolates for a layered flavor experience. Seasonal twists can make your s’mores bars fun all year. In autumn, add pumpkin spice to the mix. For winter, a bit of peppermint extract can make them festive. You can even top with crushed candy canes for a holiday treat. Try adding seasonal ingredients too. Fresh berries in summer or caramel sauce during fall can change the game. Think about the season when making your bars. You can still enjoy s’mores bars if you have dietary needs. For a vegan version, use coconut oil instead of butter. Choose dairy-free chocolate and skip the marshmallows or use vegan ones. If you need a gluten-free option, substitute the all-purpose flour with almond or gluten-free flour. Just make sure to check the labels on your chocolate and graham cracker crumbs. This way, everyone can enjoy this delicious treat! To keep your s'mores bars fresh, use an airtight container. A glass or plastic container works best. Place parchment paper between layers to prevent sticking. Store them in the fridge for up to a week. This keeps them from drying out and helps maintain their flavor. You can freeze s'mores bars for later enjoyment. First, let them cool completely. Then, cut them into squares. Wrap each piece in plastic wrap. Place the wrapped bars in a freezer-safe bag. They can stay in the freezer for about three months. When you want to enjoy them, thaw them in the fridge overnight for best quality. For optimal freshness, eat your s'mores bars within a week if stored in the fridge. If you freeze them, they last up to three months. Look for signs of spoilage, like an off smell or dry texture. If they seem hard or stale, it is best to toss them. Enjoy your treats while they are fresh! Chocolate chip s'mores bars are a delicious dessert that combines classic s'mores flavors. They have a graham cracker crust, rich chocolate, and fluffy marshmallows. This treat is like a campfire s'more but baked in a pan. You can enjoy them warm or at room temperature. This recipe blends sweet and salty, making it a fun twist on the original s'mores treat. Yes, you can use many types of chocolate. Semi-sweet chocolate chips work best, but you can mix it up. Try dark chocolate for a richer taste. For a sweeter option, use milk chocolate. You can even use white chocolate for a unique spin. Feel free to experiment with chocolate varieties to find your favorite mix! To make vegan chocolate chip s'mores bars, swap a few ingredients. Use vegan butter instead of unsalted butter. Replace the chocolate chips with dairy-free chocolate chips. For the marshmallows, choose vegan marshmallows, which are now widely available. These simple swaps keep the flavor while making it plant-based. You still get that gooey, sweet goodness! These bars pair well with many treats. Serve them with a scoop of vanilla ice cream for extra creaminess. A drizzle of chocolate syrup adds a nice touch. You can also enjoy them with fresh fruit like strawberries or bananas. A glass of cold milk is perfect, too! These pairings enhance the flavors and make your dessert special. Yes, you can prepare these bars ahead of time. You can make the crust and layer the ingredients, then store them in the fridge. Just bake them when you're ready to serve. Or, bake them completely and let them cool. Store in an airtight container. They stay fresh for a few days. This makes them a great choice for parties or gatherings! These Chocolate Chip S'mores Bars combine simple ingredients into a tasty treat. We covered how to create a perfect crust, layer flavors, and avoid common pitfalls. You can even customize them with nuts, fruits, or seasonal flavors. Remember to store leftovers properly for freshness. Whether you enjoy them now or later, these bars are sure to please. Happy baking!

Chocolate Chip S’mores Bars Delightful and Simple Treat

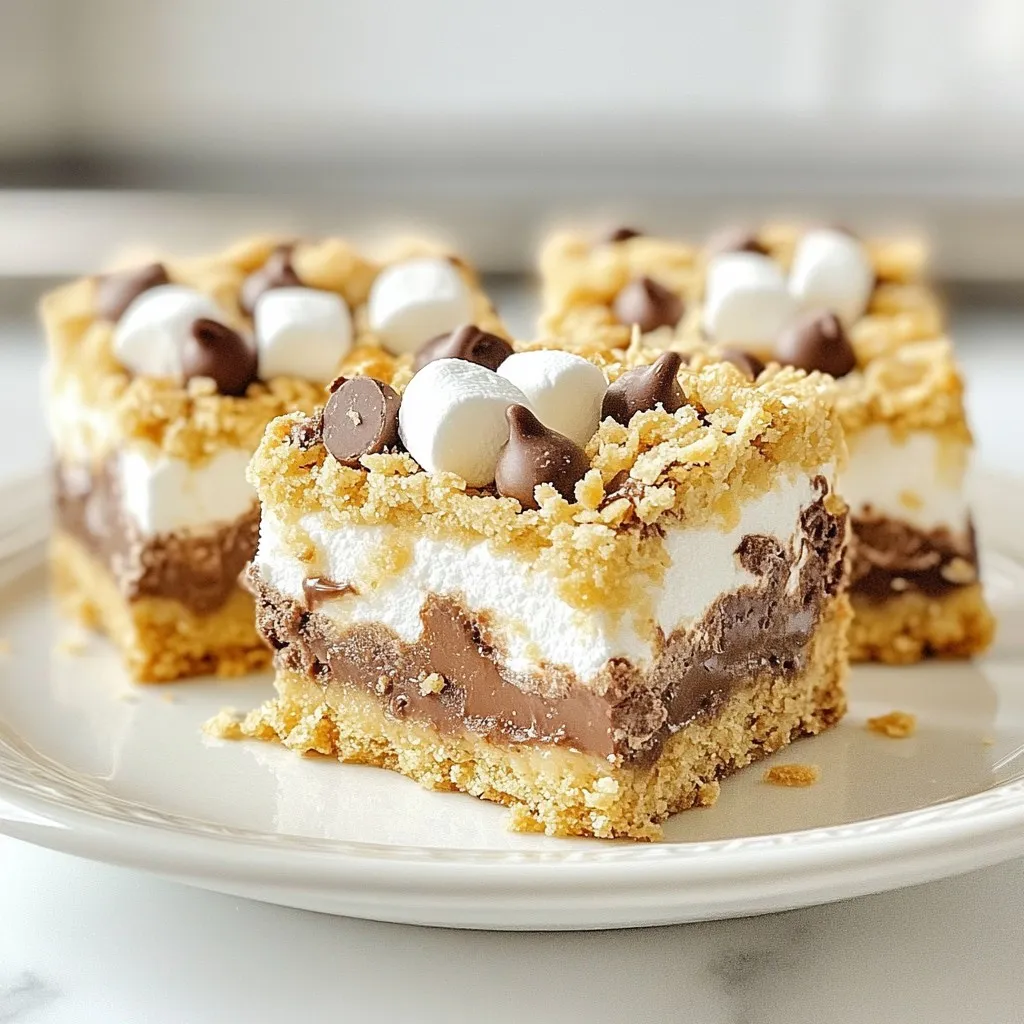
Are you ready to indulge in the perfect treat? Chocolate Chip S’mores Bars are here to satisfy your sweet tooth!

Older posts
Newer posts
← Previous Page1 … Page106 Page107 Page108 … Page122 Next →

dsad

© 2026 dailydishcraft • Built with GeneratePress

Our Policies

  • Copyright Policy
  • Cookie Policy
  • GDPR Policy
  • Privacy Policy
  • Disclaimer
  • Terms Of Use

More Information

  • Home
  • About
  • Contact
  • Appetizers
  • Dessert
  • Dinner
  • Drinks
©2026, dailydishcraft About Back To Top