![To make a delicious chocolate peanut butter mug cake, you need a few simple ingredients. Here’s what you’ll need: - 4 tablespoons all-purpose flour - 4 tablespoons granulated sugar - 2 tablespoons unsweetened cocoa powder - 1/8 teaspoon baking powder - 1/8 teaspoon salt - 3 tablespoons milk (dairy or plant-based) - 2 tablespoons peanut butter (creamy or chunky) - 1 tablespoon vegetable oil - 1/4 teaspoon vanilla extract - Optional: a handful of chocolate chips for extra indulgence These ingredients create a rich and moist cake that you can make in minutes. If you want to take your mug cake to the next level, consider these optional add-ins or toppings: - A dollop of whipped cream on top - A drizzle of chocolate syrup - A sprinkle of crushed peanuts Feel free to get creative and personalize your cake. The choice is yours! For the complete recipe, check the [Full Recipe]. First, gather your ingredients. In a microwave-safe mug, add: - 4 tablespoons all-purpose flour - 4 tablespoons granulated sugar - 2 tablespoons unsweetened cocoa powder - 1/8 teaspoon baking powder - 1/8 teaspoon salt Mix these dry ingredients well. Use a fork to stir until no lumps remain. This step is key for a smooth cake. Next, add the wet ingredients to the same mug: - 3 tablespoons milk - 2 tablespoons peanut butter - 1 tablespoon vegetable oil - 1/4 teaspoon vanilla extract Now, mix these together with your fork. Make sure everything blends into a smooth batter. If you want extra chocolate goodness, fold in a handful of chocolate chips. Place your mug in the microwave. Cook it on high for 1 minute and 15 seconds. Keep an eye on it, as the cooking time can change based on your microwave's power. To check if it’s done, look for the cake to rise and set around the edges. The center should still be slightly moist. This means your cake is just perfect! Once your cake is done, carefully take it out of the microwave. It will be hot! Let it cool for about a minute. For a fun twist, top it with: - A dollop of whipped cream - A drizzle of chocolate syrup - A sprinkle of crushed peanuts You can serve it right in the mug for a cozy vibe. If you prefer a fancier look, move it to a plate and dust it with powdered sugar or cocoa. Enjoy your delicious creation! - Overmixing the batter: Mixing too much creates a tough cake. Stir just until the ingredients blend. - Not measuring ingredients properly: Use precise measurements. Too much flour or sugar can ruin the texture. - Adding variations or extras: You can mix in chocolate chips or nuts for a fun twist. Try adding a pinch of espresso powder for depth. - Suggestions for adjusting cook time: If your microwave is strong, reduce cooking time. Start with one minute, then check for doneness. - Recommended mug types: Use a wide mug for even cooking. A ceramic or glass mug works best. - Cooking tools for best results: A fork or small whisk is perfect for mixing. Keep a toothpick handy to check if the cake is done. For more tips, check out the Full Recipe for Chocolate Peanut Butter Mug Cake! {{image_4}} You can switch peanut butter for other nut butters. Almond butter adds a nutty twist. Cashew butter makes it creamy and smooth. Sunflower seed butter is a great choice for nut-free diets. Each nut butter brings a new flavor. Experiment with what you like best! To make your mug cake even better, add extras. You can mix in chopped bananas or berries for freshness. Try white chocolate chips for a sweet surprise. You can even sprinkle in some crushed nuts for crunch. These add-ins create a richer dessert. Each bite will be full of flavor! If you need a gluten-free mug cake, use almond flour instead of regular flour. Coconut flour is another great option, but use less. For every 1 tablespoon of coconut flour, use 3 tablespoons of liquid. This keeps the cake moist. You can still enjoy this treat without gluten! To store leftover mug cake, let it cool first. Place it in an airtight container. This keeps it fresh. Store it in the fridge for up to two days. When you want to enjoy it again, simply reheat it. Microwave it for about 15-30 seconds. Check if it’s warm throughout before eating. To freeze your mug cake, first, let it cool completely. Wrap it tightly in plastic wrap. Then place it in a freezer-safe container. This prevents freezer burn. When you are ready to eat it, take it out and let it thaw in the fridge overnight. You can also microwave it from frozen. Start with 30 seconds and add more time if needed. The mug cake stays fresh for about two days in the fridge. If you freeze it, it can last up to three months. Watch for signs of spoilage. If you see any mold or an off smell, throw it away. Enjoy your Chocolate Peanut Butter Mug Cake while it’s fresh for the best taste! Check out the Full Recipe for more tips on making this treat. You can tell when the mug cake is done by a few signs. First, look at the edges. They should be set and look firm. Next, check the top. It should have risen and look dry. If you poke it with a toothpick, it should come out clean or with a few moist crumbs. Remember, the center can stay slightly soft. This is what makes it so tasty! Yes, you can double the recipe! Just use two mugs instead of one. Mix the dry and wet ingredients in separate bowls first. Then, divide the batter evenly between the mugs. Cook each mug cake in the microwave for the same time. If you use a bigger mug, you might need to add a few extra seconds to the cook time. If you don’t have a microwave, you can make the mug cake in an oven. Preheat the oven to 350°F (175°C). Pour the batter into an oven-safe mug or ramekin. Bake for about 15 to 20 minutes. Check for doneness like you would in a microwave. Just use a toothpick to see if it comes out clean. Yes! You can make this mug cake vegan. Just swap the milk for a plant-based milk, like almond or oat milk. For the peanut butter, ensure it is dairy-free. You can also use a vegan oil, like coconut oil, in place of vegetable oil. With these swaps, you’ll have a delicious vegan treat. Enjoy this easy recipe by checking the Full Recipe for more details! We covered all you need to make a delicious mug cake. You learned about the ingredients, how to prepare the batter, and tips for perfecting your microwave timing. We also explored flavor variations, storage methods, and answered common questions. Enjoy making this quick treat and share it with friends! With some practice, you'll master this easy recipe. Remember, the best part is making it your own with toppings and add-ins. Now, grab your mug and start baking!](https://dailydishcraft.com/wp-content/uploads/2025/07/a73b63bf-a85c-42dc-97ae-e65bc5b57c03-768x768.webp)
Craving a quick and tasty treat? Look no further than this Chocolate Peanut Butter Mug Cake! In just minutes, you can enjoy a warm, gooey dessert that’s filled with rich flavors. I’ll guide you through easy steps and show you how to avoid common mistakes. Whether you’re a beginner or a pro, this recipe is perfect for satisfying your sweet tooth effortlessly. Let’s dive in and get baking!
Ingredients
Complete List of Ingredients
To make a delicious chocolate peanut butter mug cake, you need a few simple ingredients. Here’s what you’ll need:
– 4 tablespoons all-purpose flour
– 4 tablespoons granulated sugar
– 2 tablespoons unsweetened cocoa powder
– 1/8 teaspoon baking powder
– 1/8 teaspoon salt
– 3 tablespoons milk (dairy or plant-based)
– 2 tablespoons peanut butter (creamy or chunky)
– 1 tablespoon vegetable oil
– 1/4 teaspoon vanilla extract
– Optional: a handful of chocolate chips for extra indulgence
These ingredients create a rich and moist cake that you can make in minutes.
If you want to take your mug cake to the next level, consider these optional add-ins or toppings:
– A dollop of whipped cream on top
– A drizzle of chocolate syrup
– A sprinkle of crushed peanuts
Feel free to get creative and personalize your cake. The choice is yours!
Step-by-Step Instructions
Preparing the Batter
First, gather your ingredients. In a microwave-safe mug, add:
– 4 tablespoons all-purpose flour
– 4 tablespoons granulated sugar
– 2 tablespoons unsweetened cocoa powder
– 1/8 teaspoon baking powder
– 1/8 teaspoon salt
Mix these dry ingredients well. Use a fork to stir until no lumps remain. This step is key for a smooth cake.
Next, add the wet ingredients to the same mug:
– 3 tablespoons milk
– 2 tablespoons peanut butter
– 1 tablespoon vegetable oil
– 1/4 teaspoon vanilla extract
Now, mix these together with your fork. Make sure everything blends into a smooth batter. If you want extra chocolate goodness, fold in a handful of chocolate chips.
Microwaving the Cake
Place your mug in the microwave. Cook it on high for 1 minute and 15 seconds. Keep an eye on it, as the cooking time can change based on your microwave’s power.
To check if it’s done, look for the cake to rise and set around the edges. The center should still be slightly moist. This means your cake is just perfect!
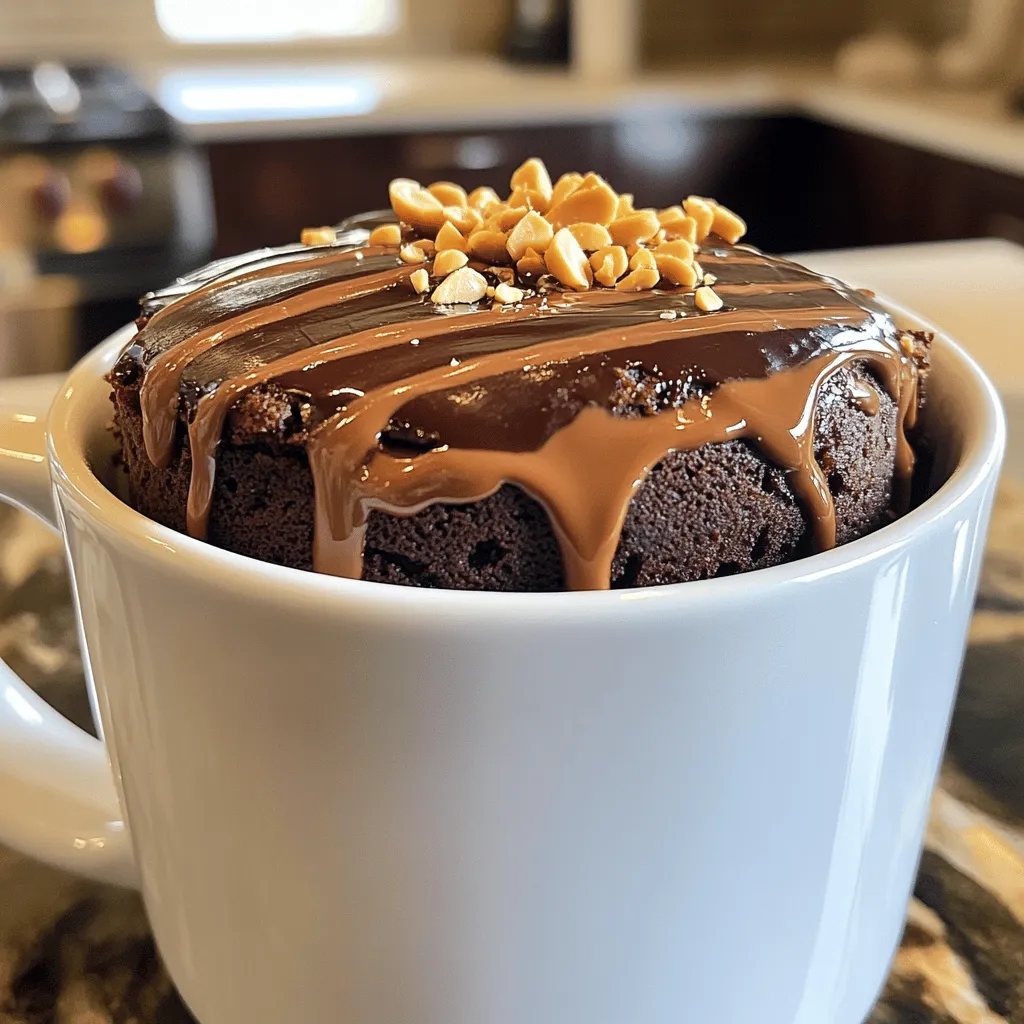
Serving Suggestions
Once your cake is done, carefully take it out of the microwave. It will be hot! Let it cool for about a minute.
For a fun twist, top it with:
– A dollop of whipped cream
– A drizzle of chocolate syrup
– A sprinkle of crushed peanuts
You can serve it right in the mug for a cozy vibe. If you prefer a fancier look, move it to a plate and dust it with powdered sugar or cocoa. Enjoy your delicious creation!
Tips & Tricks
Common Mistakes to Avoid
– Overmixing the batter: Mixing too much creates a tough cake. Stir just until the ingredients blend.
– Not measuring ingredients properly: Use precise measurements. Too much flour or sugar can ruin the texture.
Enhancing Flavor and Texture
– Adding variations or extras: You can mix in chocolate chips or nuts for a fun twist. Try adding a pinch of espresso powder for depth.
– Suggestions for adjusting cook time: If your microwave is strong, reduce cooking time. Start with one minute, then check for doneness.
Tools and Equipment
– Recommended mug types: Use a wide mug for even cooking. A ceramic or glass mug works best.
– Cooking tools for best results: A fork or small whisk is perfect for mixing. Keep a toothpick handy to check if the cake is done.
Variations
Different Nut Butters
You can switch peanut butter for other nut butters. Almond butter adds a nutty twist. Cashew butter makes it creamy and smooth. Sunflower seed butter is a great choice for nut-free diets. Each nut butter brings a new flavor. Experiment with what you like best!
Add-ins for Extra Flavor
To make your mug cake even better, add extras. You can mix in chopped bananas or berries for freshness. Try white chocolate chips for a sweet surprise. You can even sprinkle in some crushed nuts for crunch. These add-ins create a richer dessert. Each bite will be full of flavor!
Gluten-Free Options
If you need a gluten-free mug cake, use almond flour instead of regular flour. Coconut flour is another great option, but use less. For every 1 tablespoon of coconut flour, use 3 tablespoons of liquid. This keeps the cake moist. You can still enjoy this treat without gluten!
Storage Info
How to Store Leftovers
To store leftover mug cake, let it cool first. Place it in an airtight container. This keeps it fresh. Store it in the fridge for up to two days. When you want to enjoy it again, simply reheat it. Microwave it for about 15-30 seconds. Check if it’s warm throughout before eating.
Freezing the Cake
To freeze your mug cake, first, let it cool completely. Wrap it tightly in plastic wrap. Then place it in a freezer-safe container. This prevents freezer burn. When you are ready to eat it, take it out and let it thaw in the fridge overnight. You can also microwave it from frozen. Start with 30 seconds and add more time if needed.
Shelf Life
The mug cake stays fresh for about two days in the fridge. If you freeze it, it can last up to three months. Watch for signs of spoilage. If you see any mold or an off smell, throw it away. Enjoy your Chocolate Peanut Butter Mug Cake while it’s fresh for the best taste!
FAQs
How do I know when the mug cake is done?
You can tell when the mug cake is done by a few signs. First, look at the edges. They should be set and look firm. Next, check the top. It should have risen and look dry. If you poke it with a toothpick, it should come out clean or with a few moist crumbs. Remember, the center can stay slightly soft. This is what makes it so tasty!
Can I double the recipe?
Yes, you can double the recipe! Just use two mugs instead of one. Mix the dry and wet ingredients in separate bowls first. Then, divide the batter evenly between the mugs. Cook each mug cake in the microwave for the same time. If you use a bigger mug, you might need to add a few extra seconds to the cook time.
What if I don’t have a microwave?
If you don’t have a microwave, you can make the mug cake in an oven. Preheat the oven to 350°F (175°C). Pour the batter into an oven-safe mug or ramekin. Bake for about 15 to 20 minutes. Check for doneness like you would in a microwave. Just use a toothpick to see if it comes out clean.
Can I make this mug cake vegan?
Yes! You can make this mug cake vegan. Just swap the milk for a plant-based milk, like almond or oat milk. For the peanut butter, ensure it is dairy-free. You can also use a vegan oil, like coconut oil, in place of vegetable oil. With these swaps, you’ll have a delicious vegan treat.
We covered all you need to make a delicious mug cake. You learned about the ingredients, how to prepare the batter, and tips for perfecting your microwave timing. We also explored flavor variations, storage methods, and answered common questions.
Enjoy making this quick treat and share it with friends! With some practice, you’ll master this easy recipe. Remember, the best part is making it your own with toppings and add-ins. Now, grab your mug and start baking!
![To make a delicious chocolate peanut butter mug cake, you need a few simple ingredients. Here’s what you’ll need: - 4 tablespoons all-purpose flour - 4 tablespoons granulated sugar - 2 tablespoons unsweetened cocoa powder - 1/8 teaspoon baking powder - 1/8 teaspoon salt - 3 tablespoons milk (dairy or plant-based) - 2 tablespoons peanut butter (creamy or chunky) - 1 tablespoon vegetable oil - 1/4 teaspoon vanilla extract - Optional: a handful of chocolate chips for extra indulgence These ingredients create a rich and moist cake that you can make in minutes. If you want to take your mug cake to the next level, consider these optional add-ins or toppings: - A dollop of whipped cream on top - A drizzle of chocolate syrup - A sprinkle of crushed peanuts Feel free to get creative and personalize your cake. The choice is yours! For the complete recipe, check the [Full Recipe]. First, gather your ingredients. In a microwave-safe mug, add: - 4 tablespoons all-purpose flour - 4 tablespoons granulated sugar - 2 tablespoons unsweetened cocoa powder - 1/8 teaspoon baking powder - 1/8 teaspoon salt Mix these dry ingredients well. Use a fork to stir until no lumps remain. This step is key for a smooth cake. Next, add the wet ingredients to the same mug: - 3 tablespoons milk - 2 tablespoons peanut butter - 1 tablespoon vegetable oil - 1/4 teaspoon vanilla extract Now, mix these together with your fork. Make sure everything blends into a smooth batter. If you want extra chocolate goodness, fold in a handful of chocolate chips. Place your mug in the microwave. Cook it on high for 1 minute and 15 seconds. Keep an eye on it, as the cooking time can change based on your microwave's power. To check if it’s done, look for the cake to rise and set around the edges. The center should still be slightly moist. This means your cake is just perfect! Once your cake is done, carefully take it out of the microwave. It will be hot! Let it cool for about a minute. For a fun twist, top it with: - A dollop of whipped cream - A drizzle of chocolate syrup - A sprinkle of crushed peanuts You can serve it right in the mug for a cozy vibe. If you prefer a fancier look, move it to a plate and dust it with powdered sugar or cocoa. Enjoy your delicious creation! - Overmixing the batter: Mixing too much creates a tough cake. Stir just until the ingredients blend. - Not measuring ingredients properly: Use precise measurements. Too much flour or sugar can ruin the texture. - Adding variations or extras: You can mix in chocolate chips or nuts for a fun twist. Try adding a pinch of espresso powder for depth. - Suggestions for adjusting cook time: If your microwave is strong, reduce cooking time. Start with one minute, then check for doneness. - Recommended mug types: Use a wide mug for even cooking. A ceramic or glass mug works best. - Cooking tools for best results: A fork or small whisk is perfect for mixing. Keep a toothpick handy to check if the cake is done. For more tips, check out the Full Recipe for Chocolate Peanut Butter Mug Cake! {{image_4}} You can switch peanut butter for other nut butters. Almond butter adds a nutty twist. Cashew butter makes it creamy and smooth. Sunflower seed butter is a great choice for nut-free diets. Each nut butter brings a new flavor. Experiment with what you like best! To make your mug cake even better, add extras. You can mix in chopped bananas or berries for freshness. Try white chocolate chips for a sweet surprise. You can even sprinkle in some crushed nuts for crunch. These add-ins create a richer dessert. Each bite will be full of flavor! If you need a gluten-free mug cake, use almond flour instead of regular flour. Coconut flour is another great option, but use less. For every 1 tablespoon of coconut flour, use 3 tablespoons of liquid. This keeps the cake moist. You can still enjoy this treat without gluten! To store leftover mug cake, let it cool first. Place it in an airtight container. This keeps it fresh. Store it in the fridge for up to two days. When you want to enjoy it again, simply reheat it. Microwave it for about 15-30 seconds. Check if it’s warm throughout before eating. To freeze your mug cake, first, let it cool completely. Wrap it tightly in plastic wrap. Then place it in a freezer-safe container. This prevents freezer burn. When you are ready to eat it, take it out and let it thaw in the fridge overnight. You can also microwave it from frozen. Start with 30 seconds and add more time if needed. The mug cake stays fresh for about two days in the fridge. If you freeze it, it can last up to three months. Watch for signs of spoilage. If you see any mold or an off smell, throw it away. Enjoy your Chocolate Peanut Butter Mug Cake while it’s fresh for the best taste! Check out the Full Recipe for more tips on making this treat. You can tell when the mug cake is done by a few signs. First, look at the edges. They should be set and look firm. Next, check the top. It should have risen and look dry. If you poke it with a toothpick, it should come out clean or with a few moist crumbs. Remember, the center can stay slightly soft. This is what makes it so tasty! Yes, you can double the recipe! Just use two mugs instead of one. Mix the dry and wet ingredients in separate bowls first. Then, divide the batter evenly between the mugs. Cook each mug cake in the microwave for the same time. If you use a bigger mug, you might need to add a few extra seconds to the cook time. If you don’t have a microwave, you can make the mug cake in an oven. Preheat the oven to 350°F (175°C). Pour the batter into an oven-safe mug or ramekin. Bake for about 15 to 20 minutes. Check for doneness like you would in a microwave. Just use a toothpick to see if it comes out clean. Yes! You can make this mug cake vegan. Just swap the milk for a plant-based milk, like almond or oat milk. For the peanut butter, ensure it is dairy-free. You can also use a vegan oil, like coconut oil, in place of vegetable oil. With these swaps, you’ll have a delicious vegan treat. Enjoy this easy recipe by checking the Full Recipe for more details! We covered all you need to make a delicious mug cake. You learned about the ingredients, how to prepare the batter, and tips for perfecting your microwave timing. We also explored flavor variations, storage methods, and answered common questions. Enjoy making this quick treat and share it with friends! With some practice, you'll master this easy recipe. Remember, the best part is making it your own with toppings and add-ins. Now, grab your mug and start baking!](https://dailydishcraft.com/wp-content/uploads/2025/07/a73b63bf-a85c-42dc-97ae-e65bc5b57c03-250x250.webp)
