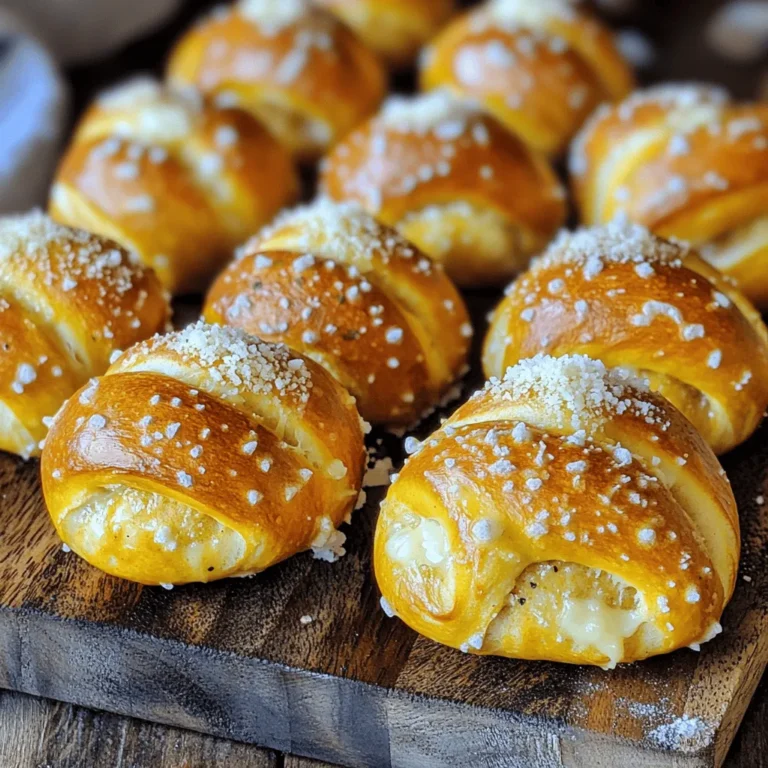
Looking for a fun and tasty snack? Try my Quick Garlic Parmesan Pretzel Bites! They are easy to make and packed with flavor. You’ll impress friends and family with these warm, cheesy bites in no time. Perfect for game days or movie nights, they are sure to satisfy your cravings. Let’s dive into the simple steps for making these delicious snacks!
Ingredients
List of Ingredients
To make those tasty garlic parmesan pretzel bites, gather these items:
– 1 cup warm water (110°F to 115°F)
– 2 tablespoons granulated sugar
– 1 packet (2 1/4 teaspoons) active dry yeast
– 3 cups all-purpose flour
– 1 teaspoon salt
– 1/4 cup baking soda
– 1/2 cup unsalted butter, melted
– 1/2 cup finely grated Parmesan cheese
– 3 garlic cloves, minced
– 1 teaspoon dried Italian herbs (optional)
– Coarse sea salt for sprinkling
Optional Ingredients for Extra Flavor
If you want to kick up the flavor, consider adding:
– 1 teaspoon smoked paprika for a subtle smokiness.
– 1/2 teaspoon red pepper flakes for a bit of heat.
– Fresh herbs like chopped parsley or basil for a fresh taste.
Substitutions and Recommendations
You can mix it up with these swaps:
– Use whole wheat flour instead of all-purpose for more fiber.
– Swap melted butter with olive oil for a lighter option.
– Try using a different cheese, like cheddar or mozzarella, for varied flavor.
– For a vegan version, replace butter with a plant-based alternative and yeast with a vegan-friendly option.
These ingredients help create a wonderful snack. They are easy to find and simple to use.
Step-by-Step Instructions
Preparation and Mixing
First, grab a small bowl. Mix warm water, sugar, and yeast in it. Wait about 5 minutes until it gets frothy. This means the yeast is ready to work. Next, take a large mixing bowl. Combine flour and salt in it. Make a well in the center. Pour your frothy yeast mixture into the well. Stir it until a rough dough forms. Then, move the dough to a floured surface. Knead it for about 5 minutes. You want the dough smooth and elastic.
Rising the Dough
Now, shape your kneaded dough into a ball. Place it in a greased bowl. Cover it with a clean towel. Find a warm spot for it to rise. Let it sit for about 30 minutes. This will help the dough double in size.
Shaping and Boiling Pretzels
While the dough rises, preheat your oven to 425°F. Line a baking sheet with parchment paper for easy cleanup. In a large pot, bring 8 cups of water to a boil. Add the baking soda to the water. This step is key for that classic pretzel texture. Once the dough has risen, punch it down gently. Divide it into small pieces, about the size of golf balls. Roll each piece into a rope and twist it into a pretzel shape. You can also keep them as small bites if you like.
Carefully dip each pretzel into the boiling water for about 30 seconds. Use a slotted spoon to remove them. Place them on the baking sheet.
Baking the Pretzel Bites
In a small bowl, mix melted butter, minced garlic, and dried herbs, if you want extra flavor. Brush this mixture over each pretzel. Then, sprinkle grated Parmesan cheese and coarse sea salt on top. Bake the pretzel bites in your preheated oven for 12-15 minutes. They should turn a beautiful golden brown. After baking, allow them to cool slightly on a wire rack. Enjoy your warm pretzel bites!
Tips & Tricks
Achieving the Perfect Texture
To get soft and chewy pretzel bites, the boiling step is key. Boil them for 30 seconds in the baking soda water. This gives them that classic pretzel flavor and texture. Make sure the water is at a full boil before adding the dough. If you want a crispier outside, bake them a minute longer. Play with the baking time based on your oven.
How to Store Leftovers
If you have leftover pretzel bites, let them cool completely. Place them in an airtight container. They stay fresh for up to two days at room temperature. For longer storage, freeze them. Wrap each bite in plastic wrap, then place them in a freezer bag. They can last up to three months in the freezer.
Best Dipping Sauces
Dipping sauces make these bites even better! I love pairing them with mustard or cheese sauce. Marinara also works great for a fun twist. For a unique flavor, try a garlic aioli. Choose your favorite sauce based on your mood. This way, you can switch things up each time you enjoy these pretzel bites.

Variations
Cheesy Garlic Pretzel Bites
You can easily add more cheese to your pretzel bites. Use a mix of mozzarella and cheddar for a gooey, melty treat. Just sprinkle the cheese on top right before baking. The cheese will melt and create a beautiful crust. This adds richness and makes your bites extra delicious.
Herb-Infused Pretzel Bites
Want to add some extra flavor? Try mixing in fresh herbs. Basil, rosemary, or thyme work great. Chop the herbs finely and add them to your dough when mixing. This will give a nice aroma and a fresh taste to your pretzel bites. You can also sprinkle dried herbs on top before baking for a beautiful look.
Sweet Versions: Cinnamon Sugar Pretzel Bites
Feeling like something sweet? You can turn these pretzel bites into a dessert! After baking, brush them with melted butter and toss them in a mix of cinnamon and sugar. This will create a sweet, crunchy crust. Serve them warm with a side of cream cheese frosting or chocolate sauce for dipping. They make a perfect snack for kids and adults alike!
Storage Info
How to Store Prepared Pretzel Bites
To keep your garlic Parmesan pretzel bites fresh, store them in an airtight container. Let them cool completely before sealing to prevent moisture buildup. They can last up to three days at room temperature. If you want to keep them longer, consider freezing.
Freezing Instructions
To freeze your pretzel bites, wait until they cool. Place them in a single layer on a baking sheet. Freeze them for about an hour until firm. Once frozen, transfer them to a zip-top bag. Remove as much air as possible before sealing. They can stay in the freezer for up to three months.
Reheating Tips
When you’re ready to enjoy your pretzel bites again, preheat your oven to 350°F (175°C). Place the bites on a baking sheet and cover them loosely with foil. Heat for about 10-15 minutes until they are warm and soft. You can also microwave them for about 20-30 seconds, but this may change their texture. For best results, oven reheating is the way to go.
FAQs
How do I ensure my pretzel bites are soft?
To make soft pretzel bites, focus on your dough. Use warm water to activate the yeast. Knead the dough until it is smooth and elastic. Boil the pretzels in a baking soda solution. This step gives them a soft texture. Bake them until golden brown but avoid overcooking.
Can I make these pretzel bites ahead of time?
You can prepare the dough ahead. After kneading, let it rise and then shape the bites. Cover and chill them for up to 24 hours. When ready to bake, let them sit at room temp for 30 minutes. Then, boil and bake as usual.
What is the best way to reheat pretzel bites?
To reheat your pretzel bites, use the oven. Preheat it to 350°F (175°C). Place the bites on a baking sheet and cover with foil. Heat for about 10 minutes until warm. This keeps them soft and tasty.
How can I adjust the recipe for a different cheese?
You can swap Parmesan for other cheeses. Try cheddar, mozzarella, or even gouda. Just be sure to use a finely grated cheese. This helps it melt well and blend with the garlic flavor.
Is there a gluten-free option for this recipe?
Yes, you can make gluten-free pretzel bites. Use a gluten-free flour blend instead of all-purpose flour. Make sure the baking soda is gluten-free as well. Follow the same steps for mixing and boiling. Enjoy your delicious gluten-free snack!
You’ve learned how to make delicious pretzel bites. We covered the essential ingredients, steps, and tips. You can add flavors and try fun variations. Storing and reheating your bites is easy too. Remember, these bites are fun to make and share. Enjoy every bite with your favorite dip or sauce. Now, it’s your turn to create your own tasty treats!