![To make cheesy cauliflower breadsticks, you need a few key items: - 1 medium head of cauliflower, riced - 1 cup shredded mozzarella cheese - 1/2 cup grated Parmesan cheese These ingredients hold everything together: - 2 large eggs - 1 teaspoon garlic powder - 1 teaspoon dried oregano - 1/2 teaspoon salt - 1/4 teaspoon black pepper - 1/4 teaspoon crushed red pepper flakes (optional for heat) For extra flavor, consider these: - 1/2 cup marinara sauce (for dipping) With these simple ingredients, you can create a tasty dish. Each item plays a vital role in the final flavor and texture. The riced cauliflower serves as a low-carb base, while the cheeses add creaminess and depth. The eggs help bind everything, ensuring your breadsticks hold together. Seasonings enhance the dish's flavor, making it an irresistible snack. When you serve it with marinara, you elevate the experience. For the full recipe, check out the details provided earlier. First, we need to rice the cauliflower. Chop a medium head into chunks. Use a food processor to pulse it until it looks like fine rice. Then, transfer the riced cauliflower to a microwave-safe bowl. Microwave it for about 8 minutes. This makes it tender and ready to use. Next, we must squeeze out the excess moisture. Let the cooked cauliflower cool for a few minutes. Then, place it in a clean kitchen towel. Gather the corners and twist to remove as much water as possible. This step is key for crunchy breadsticks. Now it's time to mix the ingredients. In a large bowl, combine the drained cauliflower, 1 cup of shredded mozzarella, and 1/2 cup of grated Parmesan cheese. Add 2 large eggs, 1 teaspoon of garlic powder, 1 teaspoon of dried oregano, 1/2 teaspoon of salt, and 1/4 teaspoon of black pepper. If you like heat, add 1/4 teaspoon of crushed red pepper flakes. Stir the mixture until everything is well combined. This forms a dough-like texture that will hold together well when baked. Next, we spread the mixture on the baking sheet. Line it with parchment paper for easy removal. Transfer the cauliflower mix to the sheet, spreading it out evenly. Aim for a rectangular shape about 1/4 inch thick. Now we bake! Preheat your oven to 425°F (220°C) and bake for 25-30 minutes. Look for golden-brown edges and a firm center. Once baked, let the breadsticks cool for a few minutes. This helps with slicing. Use a sharp knife or pizza cutter to cut them into sticks. Serve warm with marinara sauce for dipping. Enjoy these cheesy, crunchy delights! For the full recipe, check the entire guide. To get your cauliflower breadsticks crispy, you need to focus on two things: moisture and heat. First, squeeze out as much moisture from the riced cauliflower as you can. Use a clean kitchen towel to twist and press the cooked cauliflower. This step is key. Moisture will make your breadsticks soggy. Next, spread the cauliflower mixture evenly on the baking sheet. Thin layers bake better. Aim for about 1/4 inch thick. The more surface area, the crispier the edges will be. Bake at 425°F (220°C) for that perfect crunch. Want to kick up the taste? Try adding spices like smoked paprika or Italian seasoning. They add a nice twist. If you prefer a sharper flavor, swap mozzarella with cheddar cheese. You can also use feta for a tangy bite. Feel free to experiment with different herbs or spices. Fresh basil or thyme can elevate the taste. Make it your own! For a dairy-free option, use vegan cheese that melts well. Just remember, each cheese brings its own unique flavor profile. Enjoy exploring! For the full recipe, check out the [Full Recipe]. {{image_4}} You can change the cheese to fit your taste. Cheddar brings a sharp flavor. It melts well and adds color. Feta gives a crumbly texture and a tangy taste. It pairs nicely with herbs. For those avoiding dairy, try non-dairy cheese. Look for options made from nuts or soy. These can melt and taste great too. Before baking, you can add more flavor. Sprinkle some dried herbs like basil or thyme on top. Garlic powder or onion powder adds a nice kick too. You might also want to try spices like paprika or cumin for extra zest. For dipping, marinara sauce is classic, but ranch or garlic sauce works well too. Experiment and find your favorite combo! To store your cheesy cauliflower breadsticks, first let them cool completely. After cooling, place them in an airtight container. You can refrigerate them for up to three days. If you want to keep them longer, freeze the breadsticks. Wrap them tightly in plastic wrap and then in aluminum foil. They can last in the freezer for up to three months. When you want to enjoy your breadsticks again, reheating them correctly is key. The best way is to use an oven. Preheat your oven to 350°F (175°C). Place the breadsticks on a baking sheet and heat for about 10-15 minutes. This method keeps them crispy. You can also use a microwave, but it may make them a bit soggy. If you use the microwave, heat them for 30-second intervals until warm. Enjoy them with marinara sauce for that fresh taste! If you want to swap out cauliflower, you can try broccoli. Riced broccoli works well and gives a similar texture. Another option is zucchini. However, you must drain the excess moisture from zucchini. Other low-carb choices include mashed turnips or even eggplant. Just remember, these may change the taste a bit. Yes, you can make these breadsticks ahead. Prepare the mixture and form the dough. Then, press it onto the baking sheet. Wrap it well and store it in the fridge for up to two days. When you are ready, just bake them straight from the fridge. This saves time and effort on busy days. Yes, these breadsticks are gluten-free. All the ingredients used are naturally gluten-free. The cheese, eggs, and cauliflower do not contain gluten. Be sure to check the labels on your cheese to confirm. If you keep an eye on that, you can enjoy these breadsticks worry-free. To amp up the cheesy flavor, add more cheese to the mix. You can mix in extra mozzarella or even cheddar for a different taste. Sprinkling cheese on top before baking also helps. Try adding cream cheese to the dough for a creamy texture. This will make your breadsticks even more delicious! For the full recipe, check the detailed instructions above. These cheesy cauliflower breadsticks are easy to make and fun to eat. We covered how to prep, mix, and bake them for the best taste and texture. You can add your favorite herbs, cheeses, and dips for variety. Whether you store them or enjoy them fresh, they stay tasty. With a few simple steps, you can create a satisfying snack for any meal. Enjoy experimenting with flavors and sharing with friends! You’ll love how easy they are to make and customize.](https://dailydishcraft.com/wp-content/uploads/2025/07/bd5cbfac-b42e-438b-b497-a0f62f7b9c99-768x768.webp)
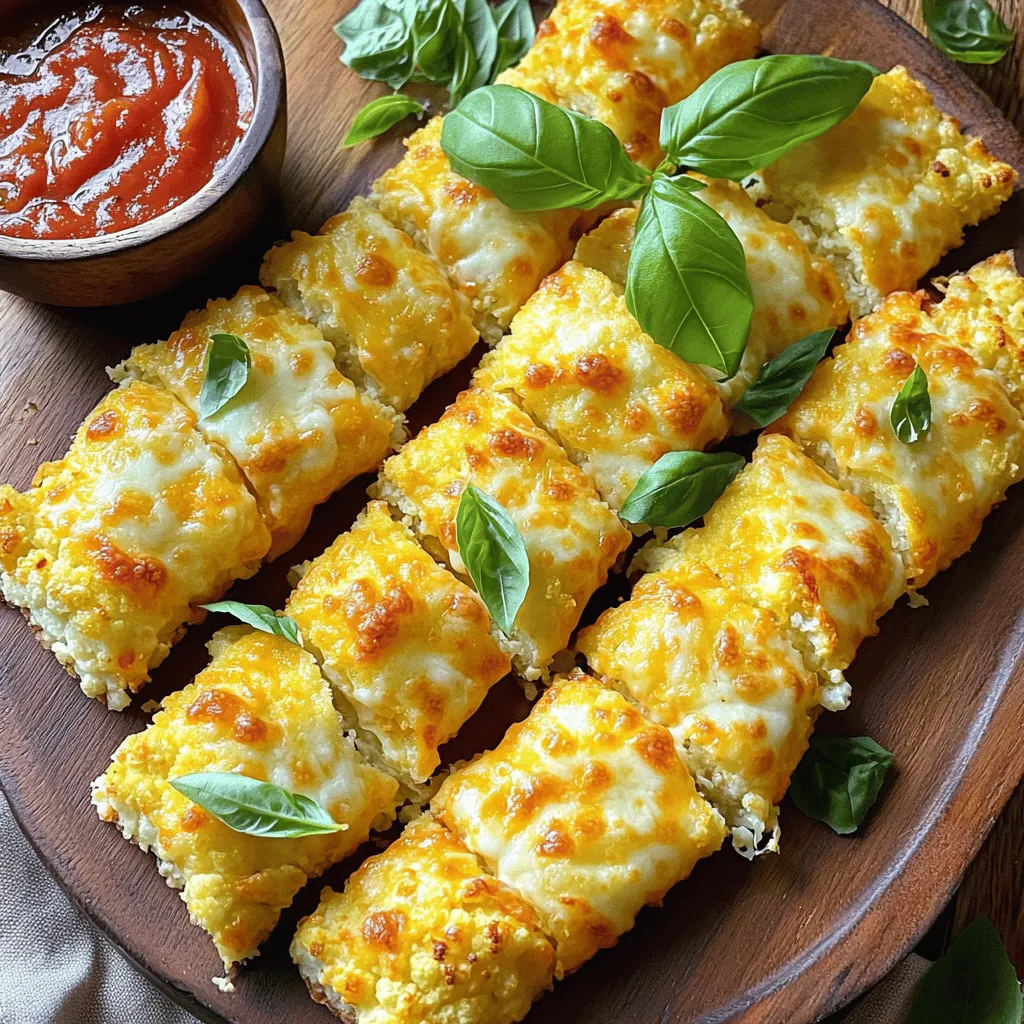
Are you ready to enjoy a tasty, guilt-free snack? My Cheesy Cauliflower Breadsticks are not only crunchy and delicious but also simple to make! With just a few key ingredients like riced cauliflower and cheese, you’ll whip up a treat that satisfies your cravings. Perfect for dipping in marinara sauce, these breadsticks will make your taste buds dance. Let’s dive into the easy steps to create this game-changing appetizer!
Ingredients
Main Ingredients
To make cheesy cauliflower breadsticks, you need a few key items:
– 1 medium head of cauliflower, riced
– 1 cup shredded mozzarella cheese
– 1/2 cup grated Parmesan cheese
Binding Ingredients
These ingredients hold everything together:
– 2 large eggs
– 1 teaspoon garlic powder
– 1 teaspoon dried oregano
– 1/2 teaspoon salt
– 1/4 teaspoon black pepper
– 1/4 teaspoon crushed red pepper flakes (optional for heat)
Optional Serving Ingredients
For extra flavor, consider these:
– 1/2 cup marinara sauce (for dipping)
With these simple ingredients, you can create a tasty dish. Each item plays a vital role in the final flavor and texture. The riced cauliflower serves as a low-carb base, while the cheeses add creaminess and depth. The eggs help bind everything, ensuring your breadsticks hold together. Seasonings enhance the dish’s flavor, making it an irresistible snack. When you serve it with marinara, you elevate the experience.
Step-by-Step Instructions
Prepping the Cauliflower
First, we need to rice the cauliflower. Chop a medium head into chunks. Use a food processor to pulse it until it looks like fine rice. Then, transfer the riced cauliflower to a microwave-safe bowl. Microwave it for about 8 minutes. This makes it tender and ready to use.
Next, we must squeeze out the excess moisture. Let the cooked cauliflower cool for a few minutes. Then, place it in a clean kitchen towel. Gather the corners and twist to remove as much water as possible. This step is key for crunchy breadsticks.
Mixing the Ingredients
Now it’s time to mix the ingredients. In a large bowl, combine the drained cauliflower, 1 cup of shredded mozzarella, and 1/2 cup of grated Parmesan cheese. Add 2 large eggs, 1 teaspoon of garlic powder, 1 teaspoon of dried oregano, 1/2 teaspoon of salt, and 1/4 teaspoon of black pepper. If you like heat, add 1/4 teaspoon of crushed red pepper flakes.
Stir the mixture until everything is well combined. This forms a dough-like texture that will hold together well when baked.
Baking the Breadsticks
Next, we spread the mixture on the baking sheet. Line it with parchment paper for easy removal. Transfer the cauliflower mix to the sheet, spreading it out evenly. Aim for a rectangular shape about 1/4 inch thick.
Now we bake! Preheat your oven to 425°F (220°C) and bake for 25-30 minutes. Look for golden-brown edges and a firm center. Once baked, let the breadsticks cool for a few minutes. This helps with slicing. Use a sharp knife or pizza cutter to cut them into sticks.
Serve warm with marinara sauce for dipping. Enjoy these cheesy, crunchy delights!
Tips & Tricks
Perfecting the Texture
To get your cauliflower breadsticks crispy, you need to focus on two things: moisture and heat. First, squeeze out as much moisture from the riced cauliflower as you can. Use a clean kitchen towel to twist and press the cooked cauliflower. This step is key. Moisture will make your breadsticks soggy.
Next, spread the cauliflower mixture evenly on the baking sheet. Thin layers bake better. Aim for about 1/4 inch thick. The more surface area, the crispier the edges will be. Bake at 425°F (220°C) for that perfect crunch.
Flavor Enhancements
Want to kick up the taste? Try adding spices like smoked paprika or Italian seasoning. They add a nice twist. If you prefer a sharper flavor, swap mozzarella with cheddar cheese. You can also use feta for a tangy bite.
Feel free to experiment with different herbs or spices. Fresh basil or thyme can elevate the taste. Make it your own! For a dairy-free option, use vegan cheese that melts well. Just remember, each cheese brings its own unique flavor profile. Enjoy exploring!
Variations
Different Cheese Options
You can change the cheese to fit your taste. Cheddar brings a sharp flavor. It melts well and adds color. Feta gives a crumbly texture and a tangy taste. It pairs nicely with herbs. For those avoiding dairy, try non-dairy cheese. Look for options made from nuts or soy. These can melt and taste great too.
Additional Toppings
Before baking, you can add more flavor. Sprinkle some dried herbs like basil or thyme on top. Garlic powder or onion powder adds a nice kick too. You might also want to try spices like paprika or cumin for extra zest. For dipping, marinara sauce is classic, but ranch or garlic sauce works well too. Experiment and find your favorite combo!
Storage Info
Refrigerating and Freezing
To store your cheesy cauliflower breadsticks, first let them cool completely. After cooling, place them in an airtight container. You can refrigerate them for up to three days. If you want to keep them longer, freeze the breadsticks. Wrap them tightly in plastic wrap and then in aluminum foil. They can last in the freezer for up to three months.
Reheating Instructions
When you want to enjoy your breadsticks again, reheating them correctly is key. The best way is to use an oven. Preheat your oven to 350°F (175°C). Place the breadsticks on a baking sheet and heat for about 10-15 minutes. This method keeps them crispy. You can also use a microwave, but it may make them a bit soggy. If you use the microwave, heat them for 30-second intervals until warm. Enjoy them with marinara sauce for that fresh taste!
FAQs
What can I use instead of cauliflower?
If you want to swap out cauliflower, you can try broccoli. Riced broccoli works well and gives a similar texture. Another option is zucchini. However, you must drain the excess moisture from zucchini. Other low-carb choices include mashed turnips or even eggplant. Just remember, these may change the taste a bit.
Can these breadsticks be made ahead of time?
Yes, you can make these breadsticks ahead. Prepare the mixture and form the dough. Then, press it onto the baking sheet. Wrap it well and store it in the fridge for up to two days. When you are ready, just bake them straight from the fridge. This saves time and effort on busy days.
Are Cheesy Cauliflower Breadsticks gluten-free?
Yes, these breadsticks are gluten-free. All the ingredients used are naturally gluten-free. The cheese, eggs, and cauliflower do not contain gluten. Be sure to check the labels on your cheese to confirm. If you keep an eye on that, you can enjoy these breadsticks worry-free.
How do I make these breadsticks extra cheesy?
To amp up the cheesy flavor, add more cheese to the mix. You can mix in extra mozzarella or even cheddar for a different taste. Sprinkling cheese on top before baking also helps. Try adding cream cheese to the dough for a creamy texture. This will make your breadsticks even more delicious!
These cheesy cauliflower breadsticks are easy to make and fun to eat. We covered how to prep, mix, and bake them for the best taste and texture. You can add your favorite herbs, cheeses, and dips for variety. Whether you store them or enjoy them fresh, they stay tasty. With a few simple steps, you can create a satisfying snack for any meal. Enjoy experimenting with flavors and sharing with friends! You’ll love how easy they are to make and customize.
![To make cheesy cauliflower breadsticks, you need a few key items: - 1 medium head of cauliflower, riced - 1 cup shredded mozzarella cheese - 1/2 cup grated Parmesan cheese These ingredients hold everything together: - 2 large eggs - 1 teaspoon garlic powder - 1 teaspoon dried oregano - 1/2 teaspoon salt - 1/4 teaspoon black pepper - 1/4 teaspoon crushed red pepper flakes (optional for heat) For extra flavor, consider these: - 1/2 cup marinara sauce (for dipping) With these simple ingredients, you can create a tasty dish. Each item plays a vital role in the final flavor and texture. The riced cauliflower serves as a low-carb base, while the cheeses add creaminess and depth. The eggs help bind everything, ensuring your breadsticks hold together. Seasonings enhance the dish's flavor, making it an irresistible snack. When you serve it with marinara, you elevate the experience. For the full recipe, check out the details provided earlier. First, we need to rice the cauliflower. Chop a medium head into chunks. Use a food processor to pulse it until it looks like fine rice. Then, transfer the riced cauliflower to a microwave-safe bowl. Microwave it for about 8 minutes. This makes it tender and ready to use. Next, we must squeeze out the excess moisture. Let the cooked cauliflower cool for a few minutes. Then, place it in a clean kitchen towel. Gather the corners and twist to remove as much water as possible. This step is key for crunchy breadsticks. Now it's time to mix the ingredients. In a large bowl, combine the drained cauliflower, 1 cup of shredded mozzarella, and 1/2 cup of grated Parmesan cheese. Add 2 large eggs, 1 teaspoon of garlic powder, 1 teaspoon of dried oregano, 1/2 teaspoon of salt, and 1/4 teaspoon of black pepper. If you like heat, add 1/4 teaspoon of crushed red pepper flakes. Stir the mixture until everything is well combined. This forms a dough-like texture that will hold together well when baked. Next, we spread the mixture on the baking sheet. Line it with parchment paper for easy removal. Transfer the cauliflower mix to the sheet, spreading it out evenly. Aim for a rectangular shape about 1/4 inch thick. Now we bake! Preheat your oven to 425°F (220°C) and bake for 25-30 minutes. Look for golden-brown edges and a firm center. Once baked, let the breadsticks cool for a few minutes. This helps with slicing. Use a sharp knife or pizza cutter to cut them into sticks. Serve warm with marinara sauce for dipping. Enjoy these cheesy, crunchy delights! For the full recipe, check the entire guide. To get your cauliflower breadsticks crispy, you need to focus on two things: moisture and heat. First, squeeze out as much moisture from the riced cauliflower as you can. Use a clean kitchen towel to twist and press the cooked cauliflower. This step is key. Moisture will make your breadsticks soggy. Next, spread the cauliflower mixture evenly on the baking sheet. Thin layers bake better. Aim for about 1/4 inch thick. The more surface area, the crispier the edges will be. Bake at 425°F (220°C) for that perfect crunch. Want to kick up the taste? Try adding spices like smoked paprika or Italian seasoning. They add a nice twist. If you prefer a sharper flavor, swap mozzarella with cheddar cheese. You can also use feta for a tangy bite. Feel free to experiment with different herbs or spices. Fresh basil or thyme can elevate the taste. Make it your own! For a dairy-free option, use vegan cheese that melts well. Just remember, each cheese brings its own unique flavor profile. Enjoy exploring! For the full recipe, check out the [Full Recipe]. {{image_4}} You can change the cheese to fit your taste. Cheddar brings a sharp flavor. It melts well and adds color. Feta gives a crumbly texture and a tangy taste. It pairs nicely with herbs. For those avoiding dairy, try non-dairy cheese. Look for options made from nuts or soy. These can melt and taste great too. Before baking, you can add more flavor. Sprinkle some dried herbs like basil or thyme on top. Garlic powder or onion powder adds a nice kick too. You might also want to try spices like paprika or cumin for extra zest. For dipping, marinara sauce is classic, but ranch or garlic sauce works well too. Experiment and find your favorite combo! To store your cheesy cauliflower breadsticks, first let them cool completely. After cooling, place them in an airtight container. You can refrigerate them for up to three days. If you want to keep them longer, freeze the breadsticks. Wrap them tightly in plastic wrap and then in aluminum foil. They can last in the freezer for up to three months. When you want to enjoy your breadsticks again, reheating them correctly is key. The best way is to use an oven. Preheat your oven to 350°F (175°C). Place the breadsticks on a baking sheet and heat for about 10-15 minutes. This method keeps them crispy. You can also use a microwave, but it may make them a bit soggy. If you use the microwave, heat them for 30-second intervals until warm. Enjoy them with marinara sauce for that fresh taste! If you want to swap out cauliflower, you can try broccoli. Riced broccoli works well and gives a similar texture. Another option is zucchini. However, you must drain the excess moisture from zucchini. Other low-carb choices include mashed turnips or even eggplant. Just remember, these may change the taste a bit. Yes, you can make these breadsticks ahead. Prepare the mixture and form the dough. Then, press it onto the baking sheet. Wrap it well and store it in the fridge for up to two days. When you are ready, just bake them straight from the fridge. This saves time and effort on busy days. Yes, these breadsticks are gluten-free. All the ingredients used are naturally gluten-free. The cheese, eggs, and cauliflower do not contain gluten. Be sure to check the labels on your cheese to confirm. If you keep an eye on that, you can enjoy these breadsticks worry-free. To amp up the cheesy flavor, add more cheese to the mix. You can mix in extra mozzarella or even cheddar for a different taste. Sprinkling cheese on top before baking also helps. Try adding cream cheese to the dough for a creamy texture. This will make your breadsticks even more delicious! For the full recipe, check the detailed instructions above. These cheesy cauliflower breadsticks are easy to make and fun to eat. We covered how to prep, mix, and bake them for the best taste and texture. You can add your favorite herbs, cheeses, and dips for variety. Whether you store them or enjoy them fresh, they stay tasty. With a few simple steps, you can create a satisfying snack for any meal. Enjoy experimenting with flavors and sharing with friends! You’ll love how easy they are to make and customize.](https://dailydishcraft.com/wp-content/uploads/2025/07/bd5cbfac-b42e-438b-b497-a0f62f7b9c99-250x250.webp)
