No-Bake Chocolate Oat Bars Simple and Delicious Treat

Looking for a simple and delicious treat? No-Bake Chocolate Oat Bars are here to save your snack time! With just a few easy ingredients like oats, peanut butter, and chocolate, you can whip up these tasty bars in no time. Plus, they’re customizable to fit your taste. Join me as I guide you through crafting these sweet, no-bake snacks that everyone will love!

Ingredients

List of Required Ingredients

– 2 cups rolled oats

– 1 cup creamy peanut butter

– 1/2 cup honey or maple syrup

– 1/2 cup unsweetened cocoa powder

– 1/2 cup chocolate chips (dark or semi-sweet)

– 1/4 cup unsweetened shredded coconut

– 1/4 teaspoon salt

– 1 teaspoon pure vanilla extract

These ingredients are simple but pack a lot of flavor. The oats give the bars texture and fiber, while the peanut butter adds creaminess and protein. Honey or maple syrup brings sweetness, and cocoa powder makes it chocolatey.

Optional Ingredients for Customization

– Nuts or seeds for added crunch

– Dried fruits for sweetness

– Protein powder for nutritional boost

Feel free to mix in your favorite nuts or seeds. They add a nice crunch. Dried fruits can add a touch of sweetness and chewiness. If you’re looking for extra protein, protein powder is a great choice.

Using these ingredients, you can create a treat that fits your taste. Whether you stick to the classic recipe or customize it, these no-bake chocolate oat bars will be a hit! For the full recipe, check out the details above.

Step-by-Step Instructions

Preparation Steps

First, grab a large mixing bowl. In this bowl, mix the dry ingredients. Combine 2 cups of rolled oats, 1/2 cup of cocoa powder, and 1/4 cup of shredded coconut. Stir well to ensure they mix evenly.

Next, take a microwave-safe bowl. Add 1 cup of creamy peanut butter and 1/2 cup of honey or maple syrup. Heat this mixture in the microwave for about 30 seconds. Make sure it warms up, but do not overheat.

Combining Ingredients

After heating, take the bowl out of the microwave. Stir the mixture until it is smooth. Now, add 1 teaspoon of pure vanilla extract and 1/4 teaspoon of salt. Mix well to blend all flavors.

Slowly pour the warm peanut butter mixture over the dry oat mixture. Use a spatula or a wooden spoon to stir everything together. Make sure all the dry ingredients get coated evenly.

Now, fold in 1/2 cup of chocolate chips. This adds a nice touch of sweetness and richness to the bars.

Setting the Bars

Prepare an 8×8-inch baking dish by lining it with parchment paper. Leave some overhang for easy removal later. Next, transfer the oat mixture into this dish. Use your spatula or hands to press it down firmly. Make sure it is even and compact.

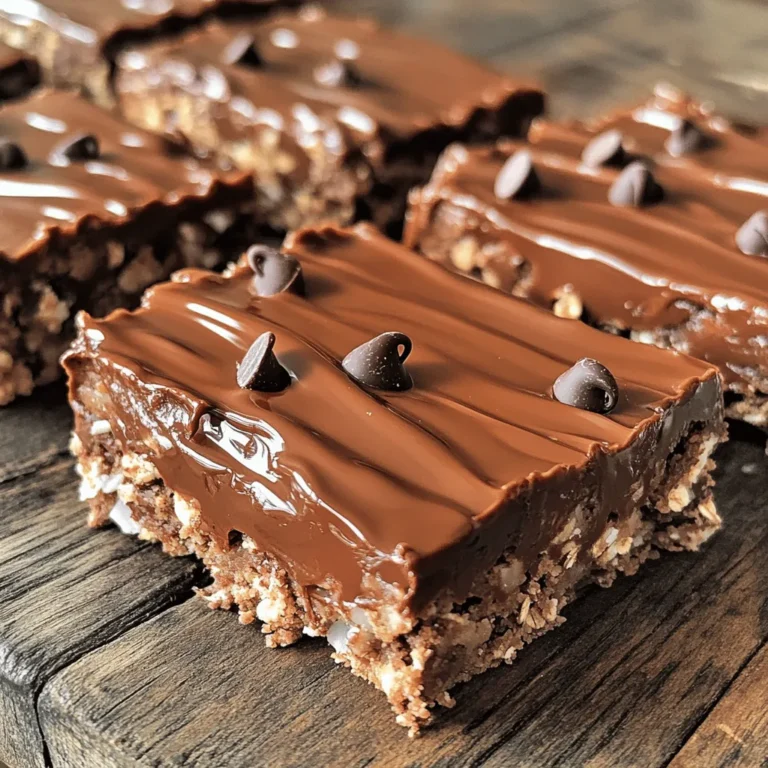
Finally, sprinkle the remaining chocolate chips on top of the mixture. Gently press them down so they stick. Place the dish in the refrigerator for at least 1 hour. This helps the bars firm up nicely.

You can find the complete recipe with all details and tips in the Full Recipe section. Enjoy making these tasty treats!

Tips & Tricks

Perfecting the Bars

To get the right texture for your bars, mix the dry ingredients well. Combine the oats, cocoa powder, and coconut evenly. This mix creates a nice base. When you stir in the warm peanut butter mixture, it should coat everything without leaving dry spots.

For best results, chill the bars for at least one hour. This time helps them firm up nicely. If you want firmer bars, you can chill them longer. Always cut them after they have set well in the fridge.

Serving Suggestions

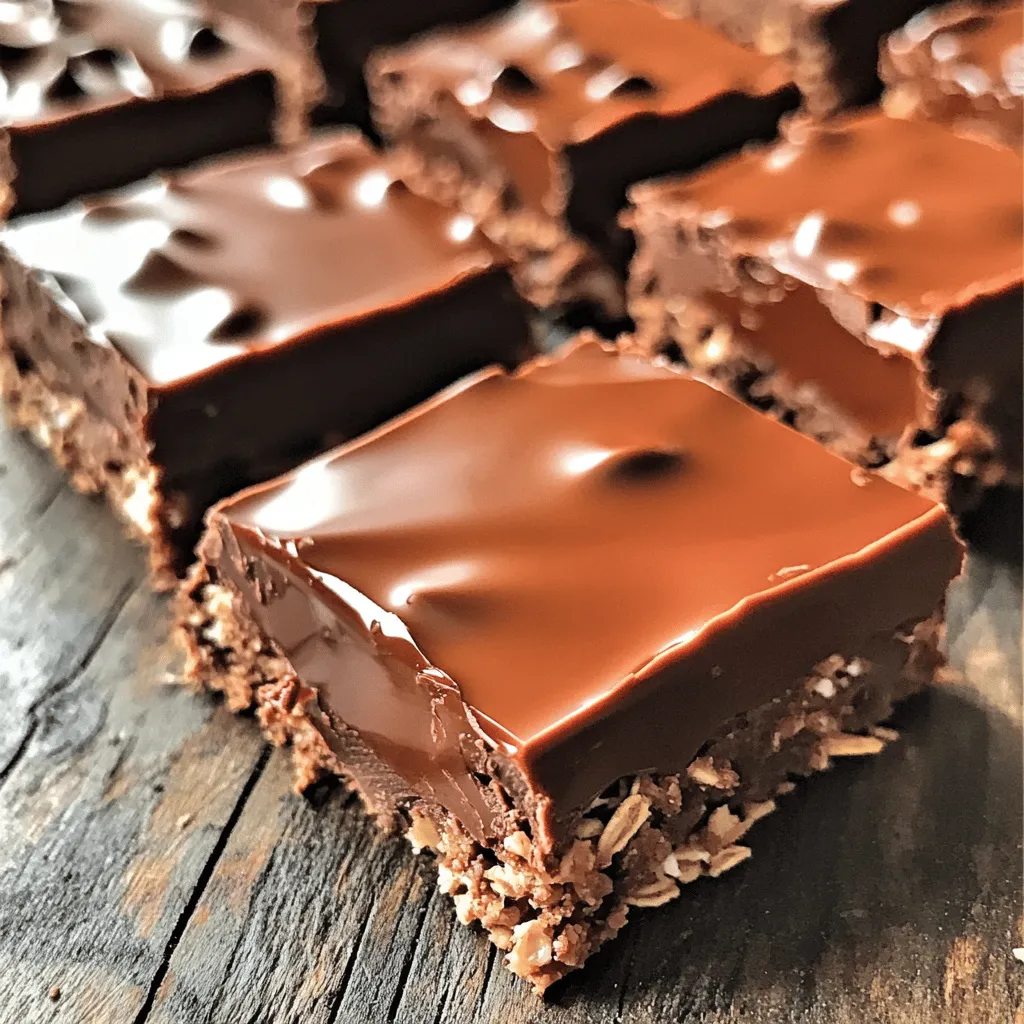
When serving these bars, cut them into neat squares or rectangles. For a fun twist, drizzle melted chocolate on top. You can also sprinkle some extra coconut for a nice touch. If you want to share, wrap them in clear cellophane and tie with ribbon. They make great gifts!

These bars pair well with milk or coffee. Try serving them with a scoop of ice cream for a sweet treat. You can even enjoy them with fresh fruit, like berries, for a fruity twist.

Common Mistakes to Avoid

One common mistake is overmixing the ingredients. Mixing should be gentle and just enough to combine everything. If you mix too much, the bars may turn out dense.

Another mistake is not pressing the mixture firmly enough in the baking dish. When you do not press it down, it can crumble when you cut it. Use your hands or a spatula to make sure it is even and compact. This helps the bars hold their shape better.
Variations

Flavor Variations

You can switch up the flavor by using different nut butters. Almond butter adds a nutty taste. Cashew butter gives a creamy richness. You might also try sun butter if you need a nut-free option.

Experimenting with sweeteners is another fun way to change the taste. You can use agave syrup for a milder flavor. Brown rice syrup will give a unique touch. Each sweetener changes the texture and taste, so feel free to play around!

Dietary Adaptations

If you need gluten-free options, choose certified gluten-free oats. These oats are safe for people with gluten sensitivities. They taste just as good and keep the bars chewy.

For vegan alternatives, swap honey for maple syrup. Use a nut butter that matches your diet. This way, you can enjoy a delicious treat without any animal products.

Seasonal Variations

Seasonal flavors can bring joy to your no-bake chocolate oat bars. Adding spices like cinnamon or nutmeg can give warmth for the holidays. A touch of ginger can also spice things up!

In summer, try adding fresh fruits. Chopped strawberries or bananas can add sweetness. Dried fruits like raisins or cranberries work well too. These fruity additions bring a fresh twist to the bars!

Remember, you can find the Full Recipe for these delightful bars earlier in the article. Enjoy creating your own versions!

Storage Info

How to Store

To keep your no-bake chocolate oat bars fresh, use an airtight container. This helps prevent them from drying out. Store the bars in the refrigerator for the best results. The cold helps them stay firm and tasty. If you want, you can also wrap them in plastic wrap before placing them in the container.

Shelf Life

At room temperature, these bars stay fresh for about 3 days. If you want to keep them longer, freezing is a great option. They can last up to 3 months in the freezer. Just wrap each bar tightly in plastic wrap and then place them in a freezer bag. This keeps them safe from freezer burn. When you’re ready to eat them, let them thaw in the fridge overnight. Enjoy your sweet treat!

For the full recipe, check the earlier section.

FAQs

How to Make No-Bake Chocolate Oat Bars?

To make these tasty bars, start by mixing dry ingredients. Combine rolled oats, cocoa powder, and shredded coconut in a large bowl. Then, heat peanut butter and honey in the microwave until warm. Stir them together until smooth. Add vanilla and salt to this mix. Now, pour it over the dry ingredients. Mix well until everything is coated. Fold in half of the chocolate chips. Press the mixture into a lined baking dish. Top with remaining chocolate chips. Refrigerate for at least one hour. After that, cut them into squares. You can find the detailed steps in the Full Recipe.

Can I make these bars without peanut butter?

Yes, you can! If you want to skip peanut butter, try almond butter or sunflower seed butter. These options still give a nice creamy texture. You can also use tahini for a nut-free choice. Each option will change the taste slightly, but it will still be delicious. Just make sure to choose a nut or seed butter that you love.

What is the best way to cut these bars?

To cut your bars, first let them chill in the fridge. After one hour, take them out. Use a sharp knife for clean cuts. Pull the bars out using the parchment paper overhang. This makes it easier. Cut them into squares or rectangles. If you want, drizzle melted chocolate on top after cutting for extra flair. Enjoy serving these sweet treats!

You now have all the tools to create delicious no-bake chocolate oat bars. We covered the key ingredients, simple steps, and tips for perfecting your bars. With optional ingredients and variations, you can customize these treats to fit your taste. Remember to store them properly for lasting freshness. Enjoy your baking journey and share these tasty bars with friends or family! Keep experimenting to find your favorite flavor twists.
- 2 cups rolled oats - 1 cup creamy peanut butter - 1/2 cup honey or maple syrup - 1/2 cup unsweetened cocoa powder - 1/2 cup chocolate chips (dark or semi-sweet) - 1/4 cup unsweetened shredded coconut - 1/4 teaspoon salt - 1 teaspoon pure vanilla extract These ingredients are simple but pack a lot of flavor. The oats give the bars texture and fiber, while the peanut butter adds creaminess and protein. Honey or maple syrup brings sweetness, and cocoa powder makes it chocolatey. - Nuts or seeds for added crunch - Dried fruits for sweetness - Protein powder for nutritional boost Feel free to mix in your favorite nuts or seeds. They add a nice crunch. Dried fruits can add a touch of sweetness and chewiness. If you're looking for extra protein, protein powder is a great choice. Using these ingredients, you can create a treat that fits your taste. Whether you stick to the classic recipe or customize it, these no-bake chocolate oat bars will be a hit! For the full recipe, check out the details above. First, grab a large mixing bowl. In this bowl, mix the dry ingredients. Combine 2 cups of rolled oats, 1/2 cup of cocoa powder, and 1/4 cup of shredded coconut. Stir well to ensure they mix evenly. Next, take a microwave-safe bowl. Add 1 cup of creamy peanut butter and 1/2 cup of honey or maple syrup. Heat this mixture in the microwave for about 30 seconds. Make sure it warms up, but do not overheat. After heating, take the bowl out of the microwave. Stir the mixture until it is smooth. Now, add 1 teaspoon of pure vanilla extract and 1/4 teaspoon of salt. Mix well to blend all flavors. Slowly pour the warm peanut butter mixture over the dry oat mixture. Use a spatula or a wooden spoon to stir everything together. Make sure all the dry ingredients get coated evenly. Now, fold in 1/2 cup of chocolate chips. This adds a nice touch of sweetness and richness to the bars. Prepare an 8x8-inch baking dish by lining it with parchment paper. Leave some overhang for easy removal later. Next, transfer the oat mixture into this dish. Use your spatula or hands to press it down firmly. Make sure it is even and compact. Finally, sprinkle the remaining chocolate chips on top of the mixture. Gently press them down so they stick. Place the dish in the refrigerator for at least 1 hour. This helps the bars firm up nicely. You can find the complete recipe with all details and tips in the Full Recipe section. Enjoy making these tasty treats! To get the right texture for your bars, mix the dry ingredients well. Combine the oats, cocoa powder, and coconut evenly. This mix creates a nice base. When you stir in the warm peanut butter mixture, it should coat everything without leaving dry spots. For best results, chill the bars for at least one hour. This time helps them firm up nicely. If you want firmer bars, you can chill them longer. Always cut them after they have set well in the fridge. When serving these bars, cut them into neat squares or rectangles. For a fun twist, drizzle melted chocolate on top. You can also sprinkle some extra coconut for a nice touch. If you want to share, wrap them in clear cellophane and tie with ribbon. They make great gifts! These bars pair well with milk or coffee. Try serving them with a scoop of ice cream for a sweet treat. You can even enjoy them with fresh fruit, like berries, for a fruity twist. One common mistake is overmixing the ingredients. Mixing should be gentle and just enough to combine everything. If you mix too much, the bars may turn out dense. Another mistake is not pressing the mixture firmly enough in the baking dish. When you do not press it down, it can crumble when you cut it. Use your hands or a spatula to make sure it is even and compact. This helps the bars hold their shape better. {{image_4}} You can switch up the flavor by using different nut butters. Almond butter adds a nutty taste. Cashew butter gives a creamy richness. You might also try sun butter if you need a nut-free option. Experimenting with sweeteners is another fun way to change the taste. You can use agave syrup for a milder flavor. Brown rice syrup will give a unique touch. Each sweetener changes the texture and taste, so feel free to play around! If you need gluten-free options, choose certified gluten-free oats. These oats are safe for people with gluten sensitivities. They taste just as good and keep the bars chewy. For vegan alternatives, swap honey for maple syrup. Use a nut butter that matches your diet. This way, you can enjoy a delicious treat without any animal products. Seasonal flavors can bring joy to your no-bake chocolate oat bars. Adding spices like cinnamon or nutmeg can give warmth for the holidays. A touch of ginger can also spice things up! In summer, try adding fresh fruits. Chopped strawberries or bananas can add sweetness. Dried fruits like raisins or cranberries work well too. These fruity additions bring a fresh twist to the bars! Remember, you can find the Full Recipe for these delightful bars earlier in the article. Enjoy creating your own versions! To keep your no-bake chocolate oat bars fresh, use an airtight container. This helps prevent them from drying out. Store the bars in the refrigerator for the best results. The cold helps them stay firm and tasty. If you want, you can also wrap them in plastic wrap before placing them in the container. At room temperature, these bars stay fresh for about 3 days. If you want to keep them longer, freezing is a great option. They can last up to 3 months in the freezer. Just wrap each bar tightly in plastic wrap and then place them in a freezer bag. This keeps them safe from freezer burn. When you’re ready to eat them, let them thaw in the fridge overnight. Enjoy your sweet treat! For the full recipe, check the earlier section. To make these tasty bars, start by mixing dry ingredients. Combine rolled oats, cocoa powder, and shredded coconut in a large bowl. Then, heat peanut butter and honey in the microwave until warm. Stir them together until smooth. Add vanilla and salt to this mix. Now, pour it over the dry ingredients. Mix well until everything is coated. Fold in half of the chocolate chips. Press the mixture into a lined baking dish. Top with remaining chocolate chips. Refrigerate for at least one hour. After that, cut them into squares. You can find the detailed steps in the Full Recipe. Yes, you can! If you want to skip peanut butter, try almond butter or sunflower seed butter. These options still give a nice creamy texture. You can also use tahini for a nut-free choice. Each option will change the taste slightly, but it will still be delicious. Just make sure to choose a nut or seed butter that you love. To cut your bars, first let them chill in the fridge. After one hour, take them out. Use a sharp knife for clean cuts. Pull the bars out using the parchment paper overhang. This makes it easier. Cut them into squares or rectangles. If you want, drizzle melted chocolate on top after cutting for extra flair. Enjoy serving these sweet treats! You now have all the tools to create delicious no-bake chocolate oat bars. We covered the key ingredients, simple steps, and tips for perfecting your bars. With optional ingredients and variations, you can customize these treats to fit your taste. Remember to store them properly for lasting freshness. Enjoy your baking journey and share these tasty bars with friends or family! Keep experimenting to find your favorite flavor twists.

No-Bake Chocolate Oat Bars

Indulge in these decadent no-bake chocolate oat bars that are as simple to make as they are delicious! With just a few ingredients like rolled oats, creamy peanut butter, and chocolate chips, you can whip up a treat that’s perfect for any occasion. Discover the easy step-by-step recipe that takes just 10 minutes to prep. Click to explore more and satisfy your sweet tooth with this delightful and healthy snack!

Ingredients
  

2 cups rolled oats

1 cup creamy peanut butter

1/2 cup honey or maple syrup

1/2 cup unsweetened cocoa powder

1/2 cup chocolate chips (dark or semi-sweet)

1/4 cup unsweetened shredded coconut

1/4 teaspoon salt

1 teaspoon pure vanilla extract

Instructions
 

In a large mixing bowl, combine the rolled oats, cocoa powder, and shredded coconut. Stir well to ensure even distribution of dry ingredients.

    In a microwave-safe bowl, combine the creamy peanut butter and honey (or maple syrup). Heat for about 30 seconds in the microwave, just until the mixture is warm and easily stirrable.

      After removing from the microwave, stir the mixture until smooth. Add in the vanilla extract and salt, mixing thoroughly to combine all flavors.

        Gradually pour the warm peanut butter combination over the dry oats and cocoa mixture in the mixing bowl.

          Use a spatula or wooden spoon to mix until all dry ingredients are evenly coated with the peanut butter mixture and everything is well combined.

            Gently fold in half of the chocolate chips, ensuring they're distributed throughout the mixture while reserving the remaining chips for topping.

              Line an 8x8-inch baking dish with parchment paper, allowing some overhang on the sides for easy removal later.

                Transfer the oat mixture into the prepared baking dish. Using a spatula or your hands, firmly press the mixture down into an even layer to ensure it compacts well.

                  Sprinkle the remaining chocolate chips on top and gently press them down into the mixture to ensure they stick.

                    Refrigerate the dish for at least 1 hour to allow the bars to set and firm up before cutting into squares or rectangles.

                      Prep Time: 10 minutes | Total Time: 1 hour 10 minutes | Servings: 12 bars

                        - Presentation Tips: For an enticing presentation, cut the bars into squares or rectangles. Drizzle with melted chocolate and add a sprinkle of shredded coconut on top for flair. Alternatively, package them in clear cellophane wrappers tied with colorful ribbons for a delightful homemade gift! Enjoy your sweet creation!

                          Leave a Comment

                          Recipe Rating