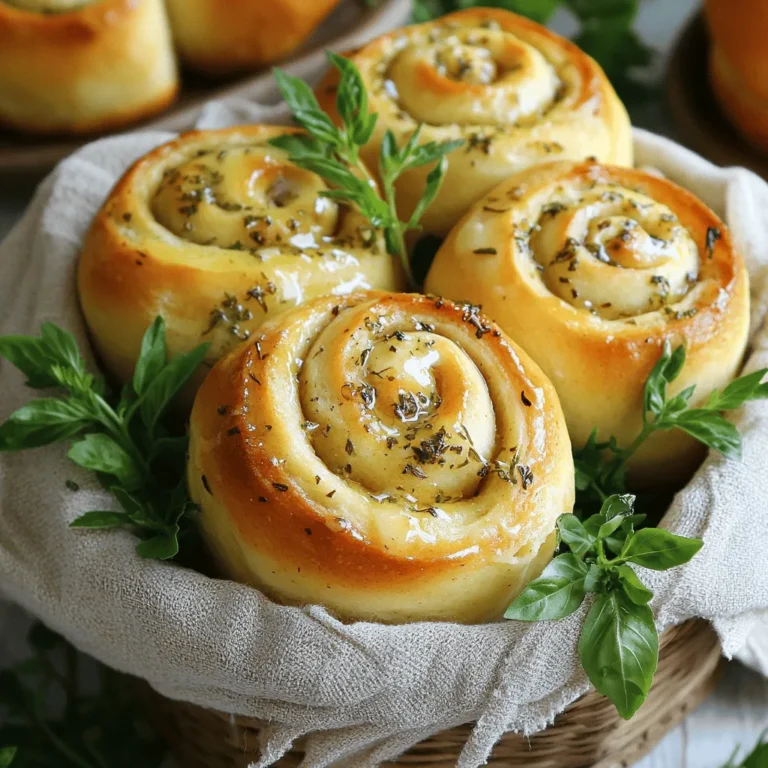
If you crave a warm, tasty treat, these Herb & Garlic Swirl Rolls are for you! With just a few basic ingredients, you can create soft, fluffy rolls that burst with flavor. I’ll walk you through simple steps to make these rolls from scratch. Perfect for any meal or snack, they’re sure to impress your family and friends. Let’s roll up our sleeves and get started!
Ingredients
Main Ingredients
– 3 cups all-purpose flour
– 1 packet (2 ¼ teaspoons) active dry yeast
– 1 teaspoon granulated sugar
– 1 teaspoon sea salt
– 1 cup warm water (approximately 110°F / 43°C)
Flavor Enhancers
– ¼ cup extra-virgin olive oil
– 4 cloves garlic, finely minced
– 2 tablespoons fresh parsley, finely chopped
– 2 tablespoons fresh basil, finely chopped
– 1 tablespoon fresh rosemary, finely chopped
– ½ teaspoon freshly ground black pepper
Finishing Touches
– 1 tablespoon melted butter (for brushing)
Gathering fresh ingredients is key to making Herb & Garlic Swirl Rolls. The main ingredients create the dough, while the flavor enhancers add depth. The melted butter gives a nice finish when the rolls bake.
You want to use high-quality olive oil for the best flavor. Fresh herbs bring life to these rolls. Use them straight from the garden if you can! Garlic, being the star ingredient, brings a rich taste that pairs perfectly with the herbs.
When mixing the dough, the warmth of the water helps the yeast activate. This step is very important for light and fluffy rolls. The dough needs to rise well, so make sure to use the right temperature.
Using these ingredients, you will create a beautiful dish.Enjoy making these delightful rolls!
Step-by-Step Instructions
Activation of Yeast
– Step 1: Combine warm water with sugar and dry yeast.
– Step 2: Allow it to sit until frothy.
To start, take one cup of warm water. It should be about 110°F (43°C). This warmth wakes up the yeast. Add one teaspoon of sugar and a packet of active dry yeast. Stir gently. Let it sit for 5 to 10 minutes. You want it to look foamy. This means the yeast is ready to work.
Preparing the Dough
– Step 3: Mix flour and salt, create a well, and add the yeast mixture and olive oil.
– Step 4: Stir until a shaggy dough forms.
In a large bowl, add three cups of all-purpose flour and one teaspoon of sea salt. Mix them well. Create a small well in the center. Pour in your yeast mix and one-fourth cup of extra-virgin olive oil. Mix with a spoon until you see a shaggy dough. It should look messy but come together.
Kneading and Rising
– Step 5: Knead the dough on a floured surface for 8-10 minutes.
– Step 6: Place in a greased bowl, cover, and let rise for 1 hour.
Now, turn the dough out onto a floured surface. Knead it with your hands for 8 to 10 minutes. You want it smooth and elastic. Form the dough into a ball. Put it in a greased bowl. Cover it with a kitchen cloth. Let it rise in a warm spot for about one hour. It should double in size.
Creating the Filling
– Step 7: Mix chopped herbs and minced garlic in a bowl.
While the dough rises, prepare the filling. Take four cloves of minced garlic and mix them with two tablespoons each of chopped parsley and basil. Add one tablespoon of chopped rosemary and half a teaspoon of black pepper. Stir it all together. The smell will be amazing!
Assembling the Rolls
– Step 8: Roll out the dough, add filling, and roll it tightly.
– Step 9: Cut the log into 12 equal pieces.
Once the dough rises, punch it down gently. Roll it out into a rectangle, about a quarter-inch thick. Spread your herb and garlic mixture evenly on top, leaving a small border. Roll the dough up tightly into a log. Use a sharp knife to cut it into 12 equal pieces.
Final Rise and Baking
– Step 10: Arrange in a greased dish, let rise for 30 minutes.
– Step 11: Bake at 375°F (190°C) for 25-30 minutes.
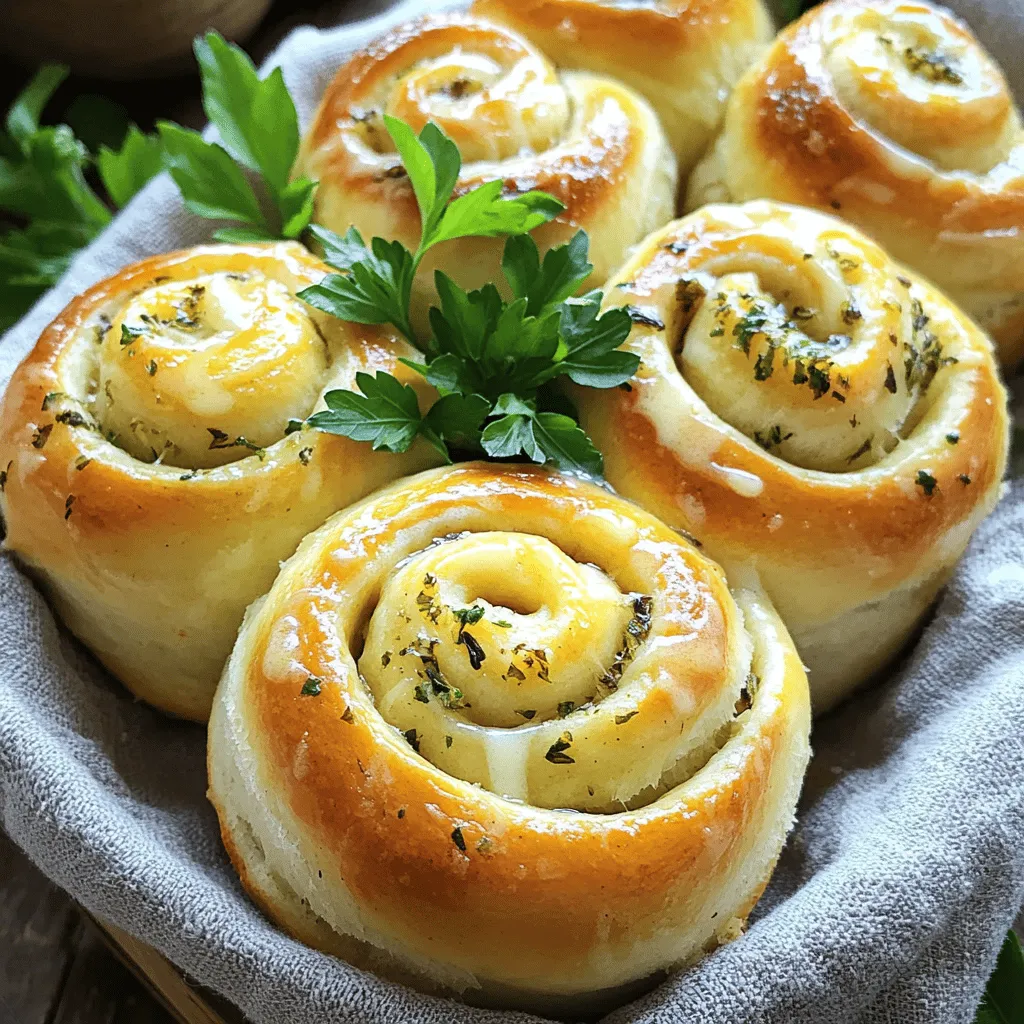
Place the rolls in a greased baking dish, cut side up. Cover them and let them rise for another 30 minutes. Preheat your oven to 375°F (190°C). Brush the tops of the rolls with melted butter for a nice finish. Bake for 25 to 30 minutes. They should be golden brown. Enjoy the warm, delicious smell of your Herb & Garlic Swirl Rolls!
Tips & Tricks
Perfecting the Dough
Kneading dough is key to good rolls. Use your palms to push the dough away. Fold it over and repeat. Knead for about 8-10 minutes until smooth. This builds gluten, which makes rolls fluffy.
To check if your dough has risen well, look for size. It should double in size. You can also use the finger test. Lightly poke the dough; if it springs back, it’s ready. If it stays indented, give it more time.
Enhancing Flavor
Want to add more flavor? Try other herbs like thyme or dill. You can also add some crushed red pepper for heat. Just be careful with the amounts. A little can go a long way.
For a richer garlic flavor, roast the garlic first. Roasting softens it and brings out sweetness. Mix it with your herbs for a deeper taste.
Baking Tips
Achieving a golden crust is easy. Brush the rolls with melted butter before baking. This adds color and flavor. You can also sprinkle some sea salt on top for extra crunch.
To know when your rolls are done, tap the bottom. If it sounds hollow, they are ready. You can also look for a golden brown color on top. Enjoy the warm smell that fills your kitchen!
Variations
Herb Combinations
You can change the flavor by using different herbs. Thyme or dill work well. Use about the same amount as parsley and basil. If you want a stronger taste, add more herbs. Fresh herbs give the best flavor, but dried herbs can work too. Just remember, use less dried, as it’s more potent.
Cheese Additions
Adding cheese makes these rolls even better. Try mozzarella or cheddar for a tasty twist. Spread a layer of cheese with the herb filling. This gives each roll a gooey center. When baking, cheese can melt and bubble over. Use parchment paper to catch any drips.
Gluten-Free Option
For a gluten-free version, switch all-purpose flour for gluten-free flour. Look for a blend that includes xanthan gum. This helps the rolls rise and gives them a nice texture. For yeast activation, use warm water like in the main recipe. Let it sit until bubbly, just like with regular flour. Adjust the baking time if needed; gluten-free rolls may bake faster.
Storage Info
Keeping Rolls Fresh
To keep your Herb & Garlic Swirl Rolls fresh, store them in a bread bag. This helps them stay soft. If you have warm rolls, let them cool before you store them. If you want to keep them longer, use the refrigerator or freezer. Wrap them well in plastic wrap. Then place them in a freezer bag. They’ll stay fresh for weeks.
Reheating Tips
When it’s time to eat your rolls again, reheating them is key. You can use a microwave or an oven. If you use the microwave, heat them in 10-second bursts. This keeps them soft. If you prefer the oven, wrap them in foil. Heat at 350°F for about 10 minutes. This gives a nice crust and warms them through.
Shelf Life
Herb & Garlic Swirl Rolls can last up to four days in the pantry. They are best when fresh but can stay tasty in the fridge for a week. Look for signs of spoilage like dryness or a hard crust. If they smell off or have mold, it’s time to toss them. Enjoy your rolls while they are at their best!
FAQs
How do I make sure my rolls are light and fluffy?
To get light and fluffy rolls, follow these tips:
– Use fresh yeast for the best rise.
– Knead the dough well to develop gluten.
– Let the dough rise in a warm, draft-free spot.
– Don’t rush the rising time; give it at least one hour.
– Ensure your oven is fully preheated before baking.
Can I make the dough ahead of time?
Yes, you can make the dough in advance. Here’s how:
– After kneading, place the dough in a greased bowl.
– Cover it tightly with plastic wrap.
– Refrigerate it for up to 24 hours.
– When ready, let it sit at room temperature for about 30 minutes before rolling.
What can I serve with Herb & Garlic Swirl Rolls?
These rolls pair well with many dishes:
– Serve them with a warm bowl of soup.
– They go great with a fresh salad.
– Try them with a cheese board for a fun snack.
– A small dish of olive oil and balsamic vinegar is perfect for dipping.
How do I know when the rolls are properly baked?
Check these signs to know your rolls are done:
– They should be golden brown on top.
– Tap the bottom; it should sound hollow.
– The rolls should feel light when lifted.
– Use an instant-read thermometer; they should reach 190°F (88°C).
Can I freeze baked rolls?
Yes, you can freeze baked rolls. Follow these steps:
– Allow them to cool completely after baking.
– Place the rolls in a single layer on a baking sheet.
– Freeze them for about an hour until solid.
– Transfer to a freezer bag or container and seal tightly.
– To thaw, leave them at room temperature or warm them in the oven.
You now have a clear guide to making delicious Herb & Garlic Swirl Rolls. We explored essential ingredients, step-by-step instructions, and tips for perfecting your rolls. You learned how to enhance flavor and try exciting variations.
Keep these tips in mind for the best results. Enjoy the process and the tasty reward! You’ll impress everyone with your homemade rolls. Happy baking!

